
By Edy Werder — IT Consultant & Tech Blogger
Synology Letsencrypt setup is straightforward once you know the steps. In this guide, I walk you through setting up a Let’s Encrypt SSL certificate on your Synology NAS. I cover the standard DSM method with HTTP validation, the DNS challenge for setups where you cannot open ports, wildcard certificates for multiple subdomains, and how automatic renewal works in DSM.
If you arrived here from my Synology series (like “WordPress on Synology” or “Optimize WordPress on Synology“), this is the natural next step. But even if you just want to get rid of that annoying browser warning on your Synology device, you are in the right place.
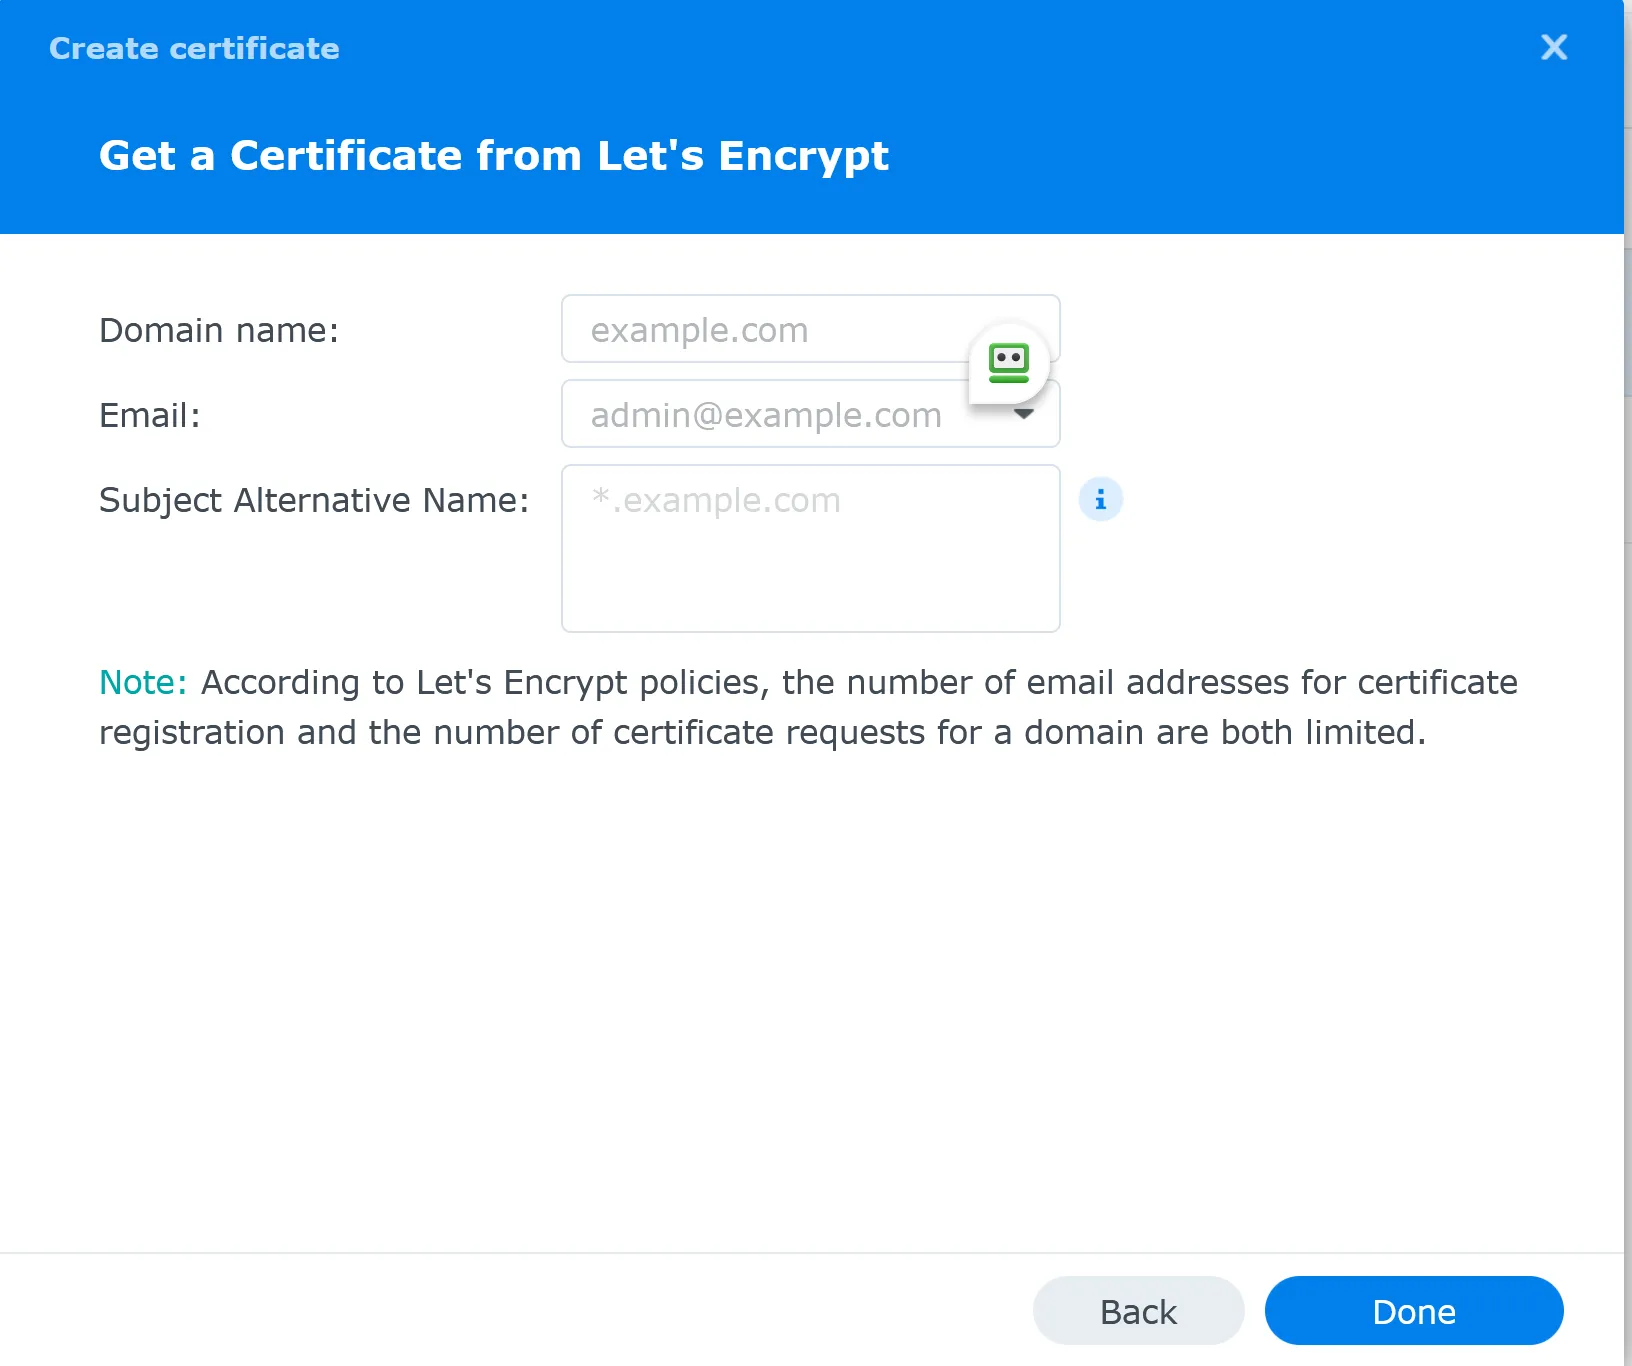
Go to Control Panel > Security > Certificate in Synology DSM. Click Add, select “Get a certificate from Let’s Encrypt,” enter your domain name and email, then click Apply. DSM validates your domain and automatically installs the certificate.
Port 80 must be forwarded to your NAS for HTTP validation. The certificate is valid for 90 days, and DSM automatically renews it before expiration.
Every Synology NAS ships with a self-signed certificate by default. It does encrypt your connection, but your browser does not trust it. That means you get the “Your connection is not private” warning every time you open DSM. Chrome flags it, Firefox flags it, Edge flags it.
A self-signed certificate is fine for a quick test on your local network. But if you access your Synology device remotely, or if other people in your household use DSM, those constant browser warnings become a real problem. Users start ignoring security warnings out of habit. That is the opposite of what a certificate should do.
Let’s Encrypt solves this. It is a free, publicly trusted certificate authority. Browsers recognize Let’s Encrypt certificates without any warnings. No padlock issues, no red bars, no clicking through error pages. The encrypt certificate you get from Let’s Encrypt is identical in security to paid certificates from providers like DigiCert or Sectigo.
A standout feature of Let’s Encrypt is the automated renewal of certificates. Your Synology NAS handles the renewals automatically, so you get uninterrupted secure access without constant manual updates.
The bottom line: replace the self-signed certificate on your Synology NAS with a Let’s Encrypt certificate. It is free, trusted, and DSM has built-in support for it.

Before installing an SSL certificate, having a custom domain name like werdernet.com for your Synology NAS is essential. Think of this domain name as your NAS’s unique online address. If you haven’t already got one, you can register a domain name through various third-party providers. I recommend Namecheap.
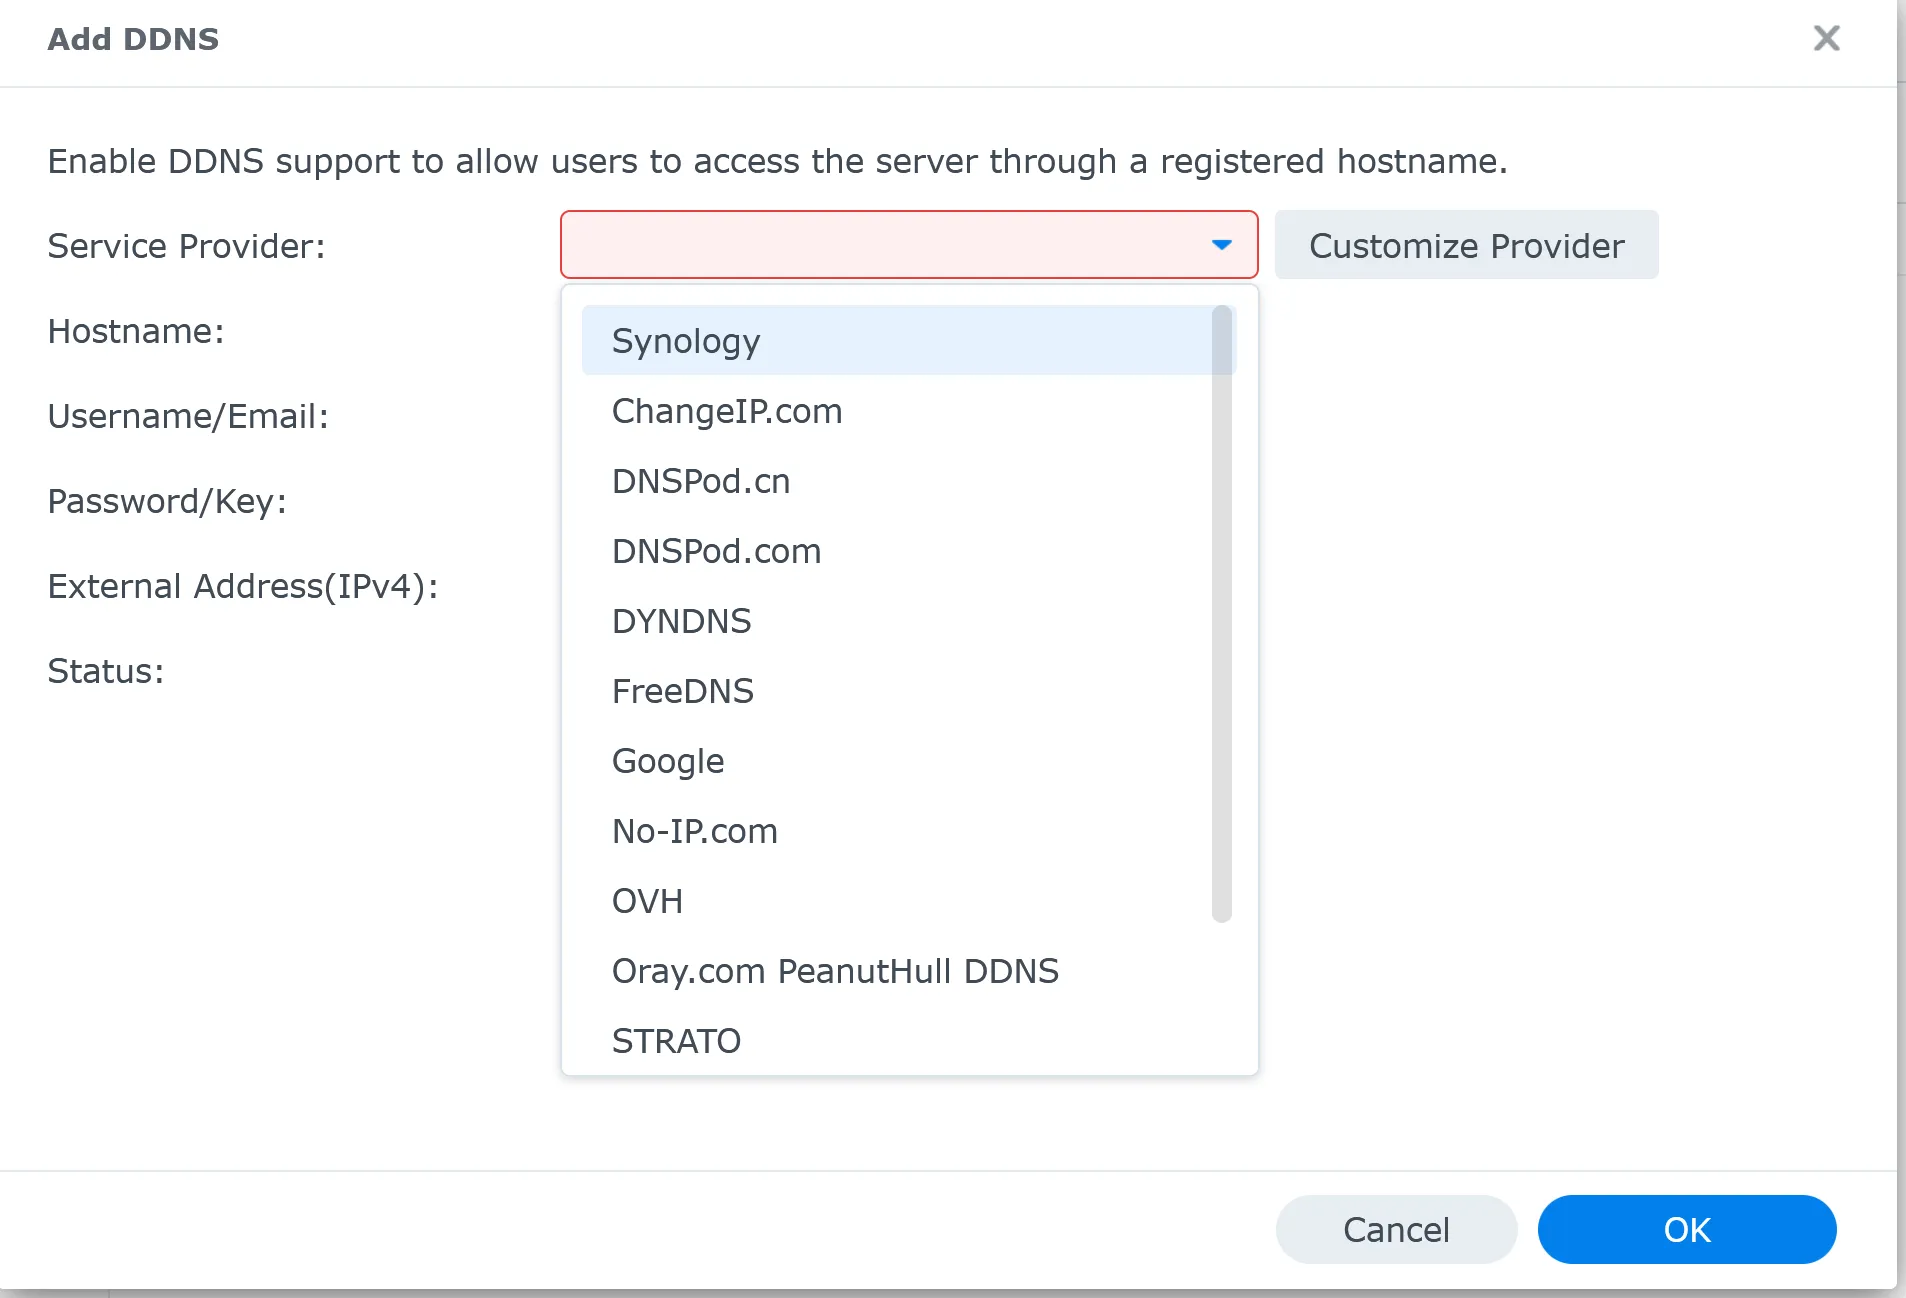
Synology simplifies remote access to your NAS with its Dynamic Domain Name System (DDNS) service. This service assigns a Synology-specific domain name, like “your name. Synology.me”, to your NAS. It’s particularly useful if your home internet has a dynamic IP address, which changes periodically.
Quickconnect is not required. With your custom domain (hostname) your Synology NAS will have the ability for external access as well. You would need the correct port forwarding in place.
Unlike traditional domain names that require frequent manual updating with changing IP addresses, Synology’s DDNS service automatically updates this for you. So, even if your IP address changes, your custom Synology domain will consistently point to your NAS. This automatic update feature makes Synology’s DDNS a good choice.
You find it in Synology DSM under External Access > DDNS.
After securing your domain name, the next crucial step is linking it to your Synology NAS. You must direct the domain to your NAS’s external or WAN IP address. This connection is essential for ensuring your NAS is accurately accessible via your chosen domain on the internet.
If your IP address is dynamic, which is very common with most home internet connections, you might consider using a service like Dynu.com. Dynu.com is highly regarded for efficiently mapping dynamic IP addresses to domain names. Even if your IP address changes, Dynu.com will keep your domain consistently pointing to your NAS.
This step is fundamental, especially when setting up your SSL certificate. The SSL certificate must be linked to your domain, which is connected to your NAS. This linkage enables secure and encrypted communication between your NAS and its users.
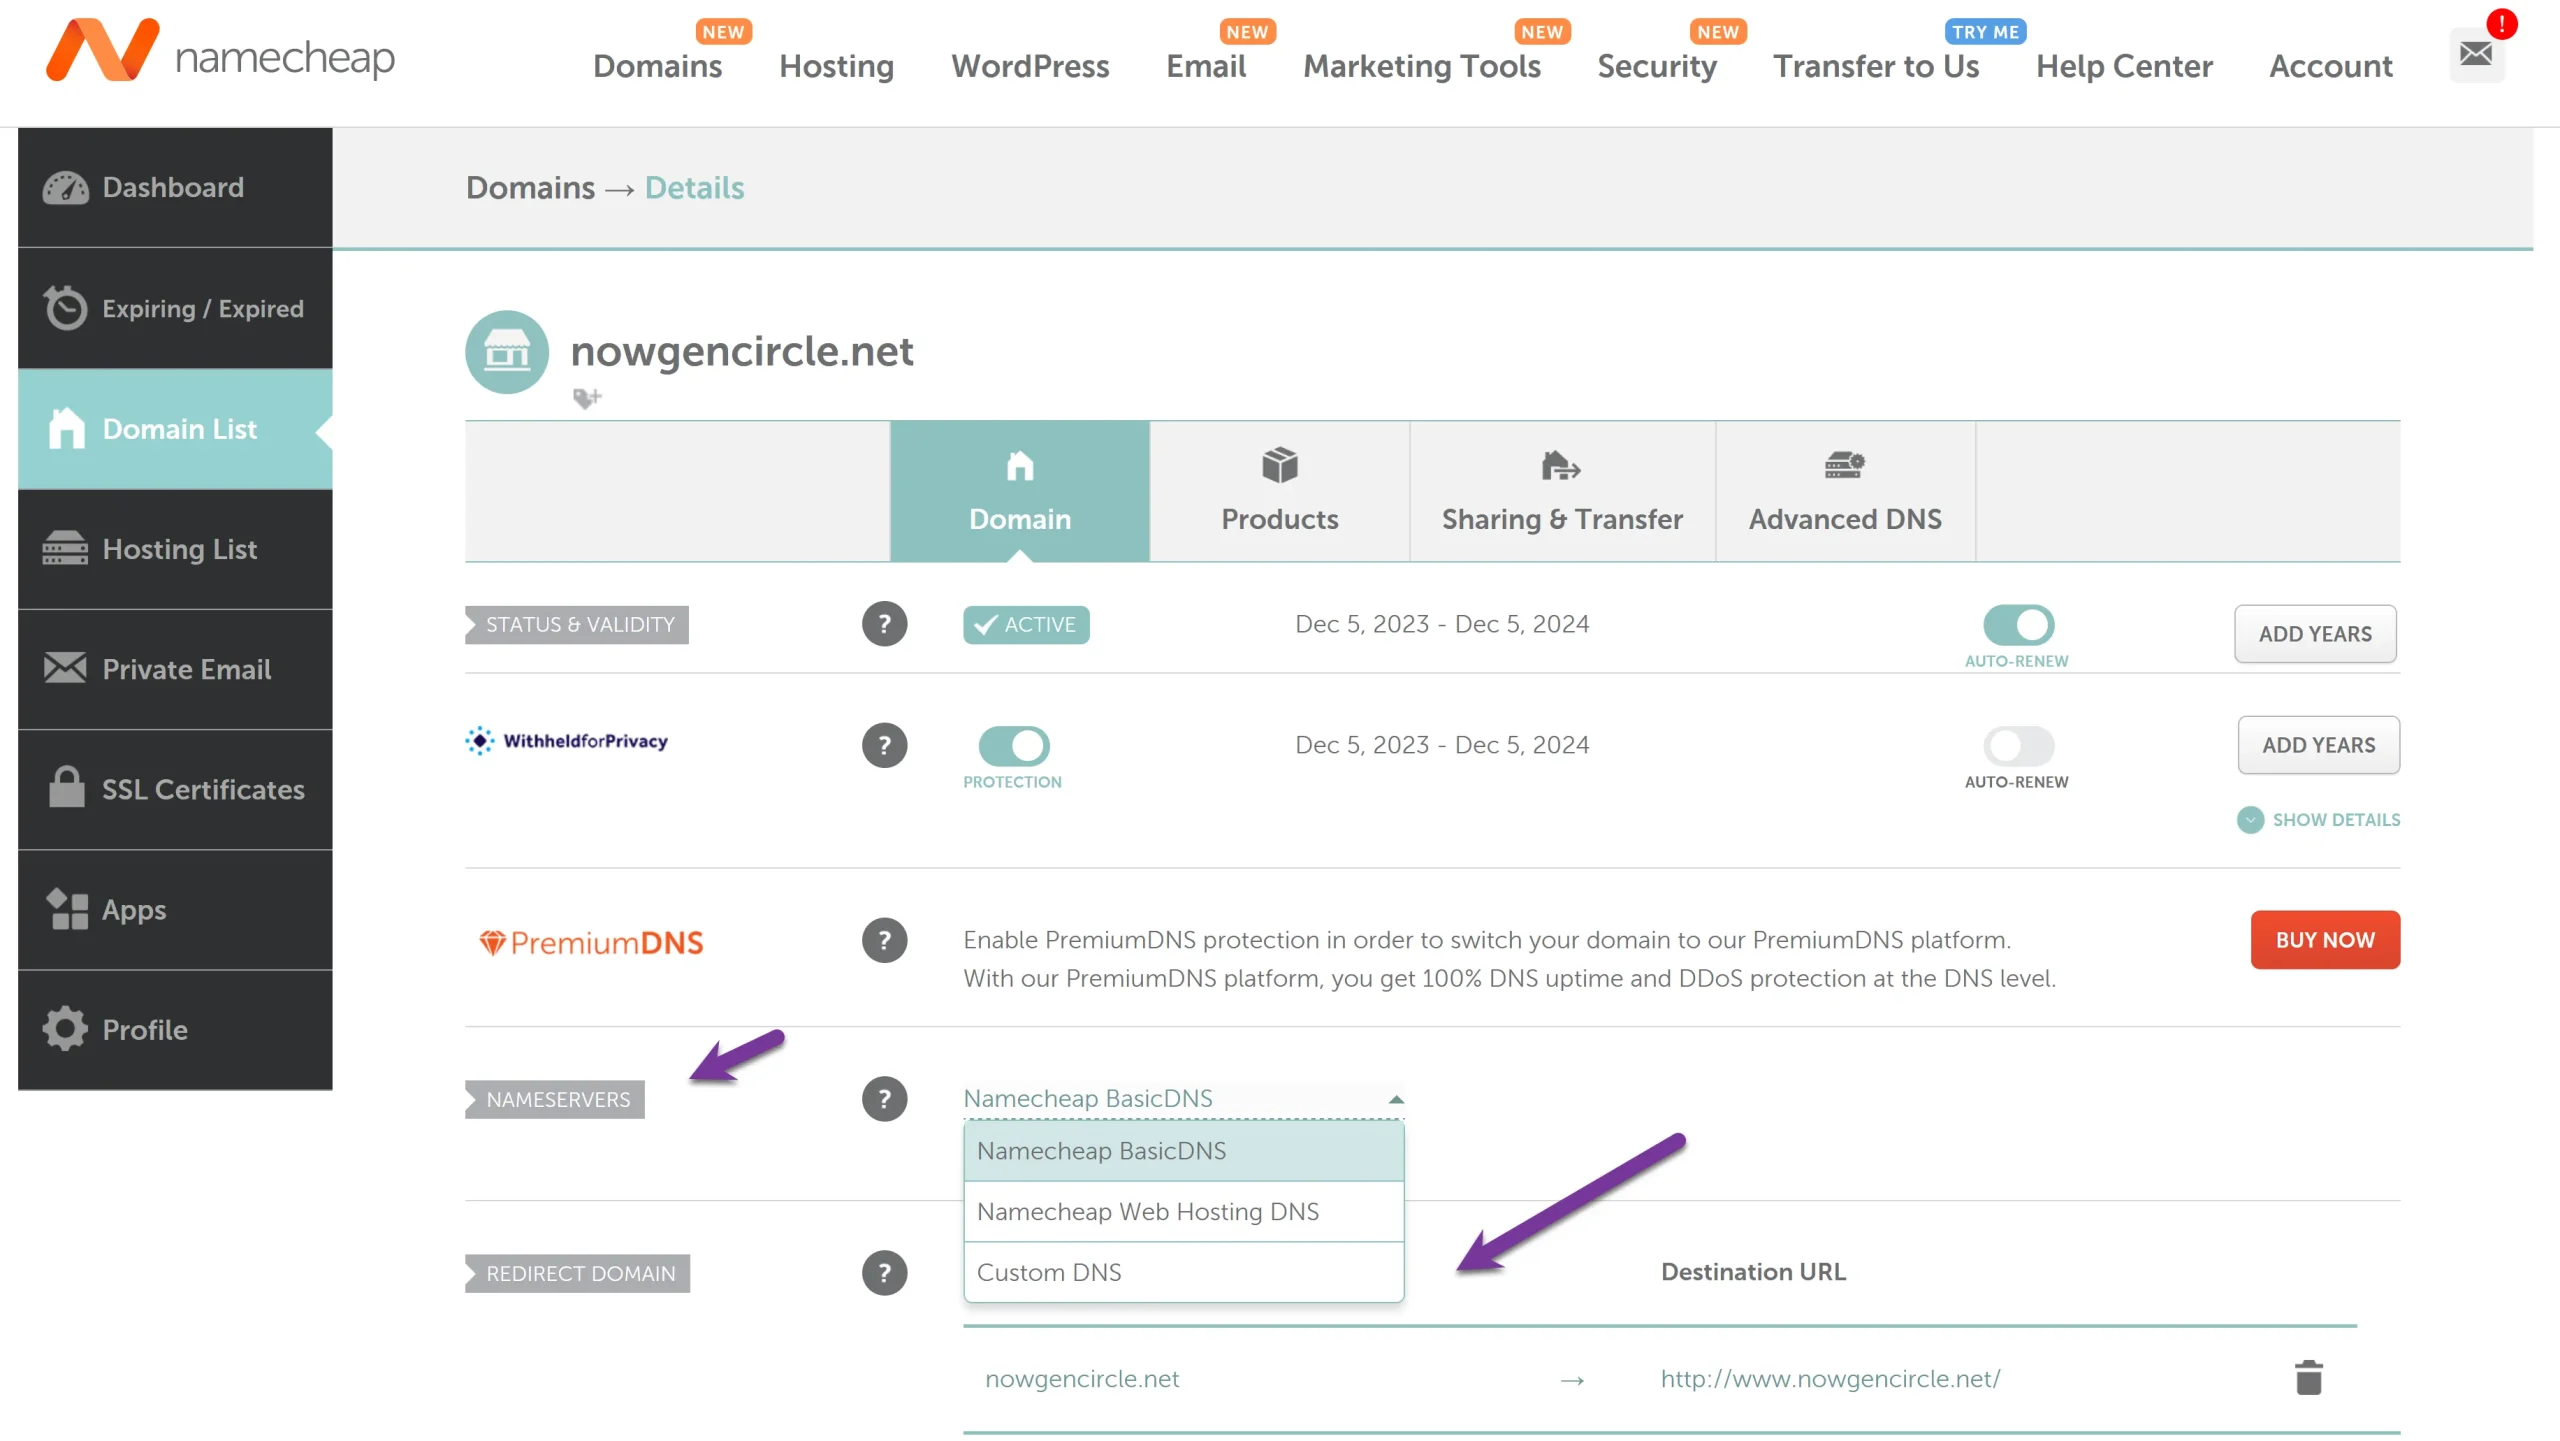
An important step is to point the DNS nameserver to the DDNS service. You perform this task at the provider where you bought your custom domain name.
Here is a screenshot from Namecheap on changing the DNS server to another provider.
Before installing your SSL certificate with Let’s Encrypt, you need to set up port forwarding on your Synology NAS. Forward ports 80 and 443. Port 80 handles HTTP connections, and port 443 handles HTTPS secured by SSL. Let’s Encrypt uses these ports to verify your domain ownership and issue the certificate. Without port forwarding in place, the validation fails and DSM cannot obtain the certificate.
Getting started with Let’s Encrypt on your Synology NAS is a straightforward process. This section will guide you through installing a Let’s Encrypt SSL certificate, enhancing your NAS security with minimal hassle. The Synology SSL services setup wizard makes it straightforward.
Follow along for a quick and easy setup:


Once your Let’s Encrypt SSL certificate is installed, it’s important to test it:

This test ensures that your SSL certificate works correctly and your NAS is securely accessible online.
Let’s Encrypt certificates are valid for 90 days. DSM automatically renews the certificate before it expires, typically around 30 days before the expiration date.
The certificate will automatically renew if port 80 is open to the NAS. This automatic renewal prevents service disruptions every 90 days by ensuring your Synology DSM maintains a valid, trusted certificate.
Here is what happens behind the scenes: DSM checks if the domain authenticates successfully using the same validation method you used during the initial setup. For HTTP validation, that means port 80 must still be forwarded to your NAS. For Synology DDNS domains, DSM handles it through Synology’s own infrastructure.
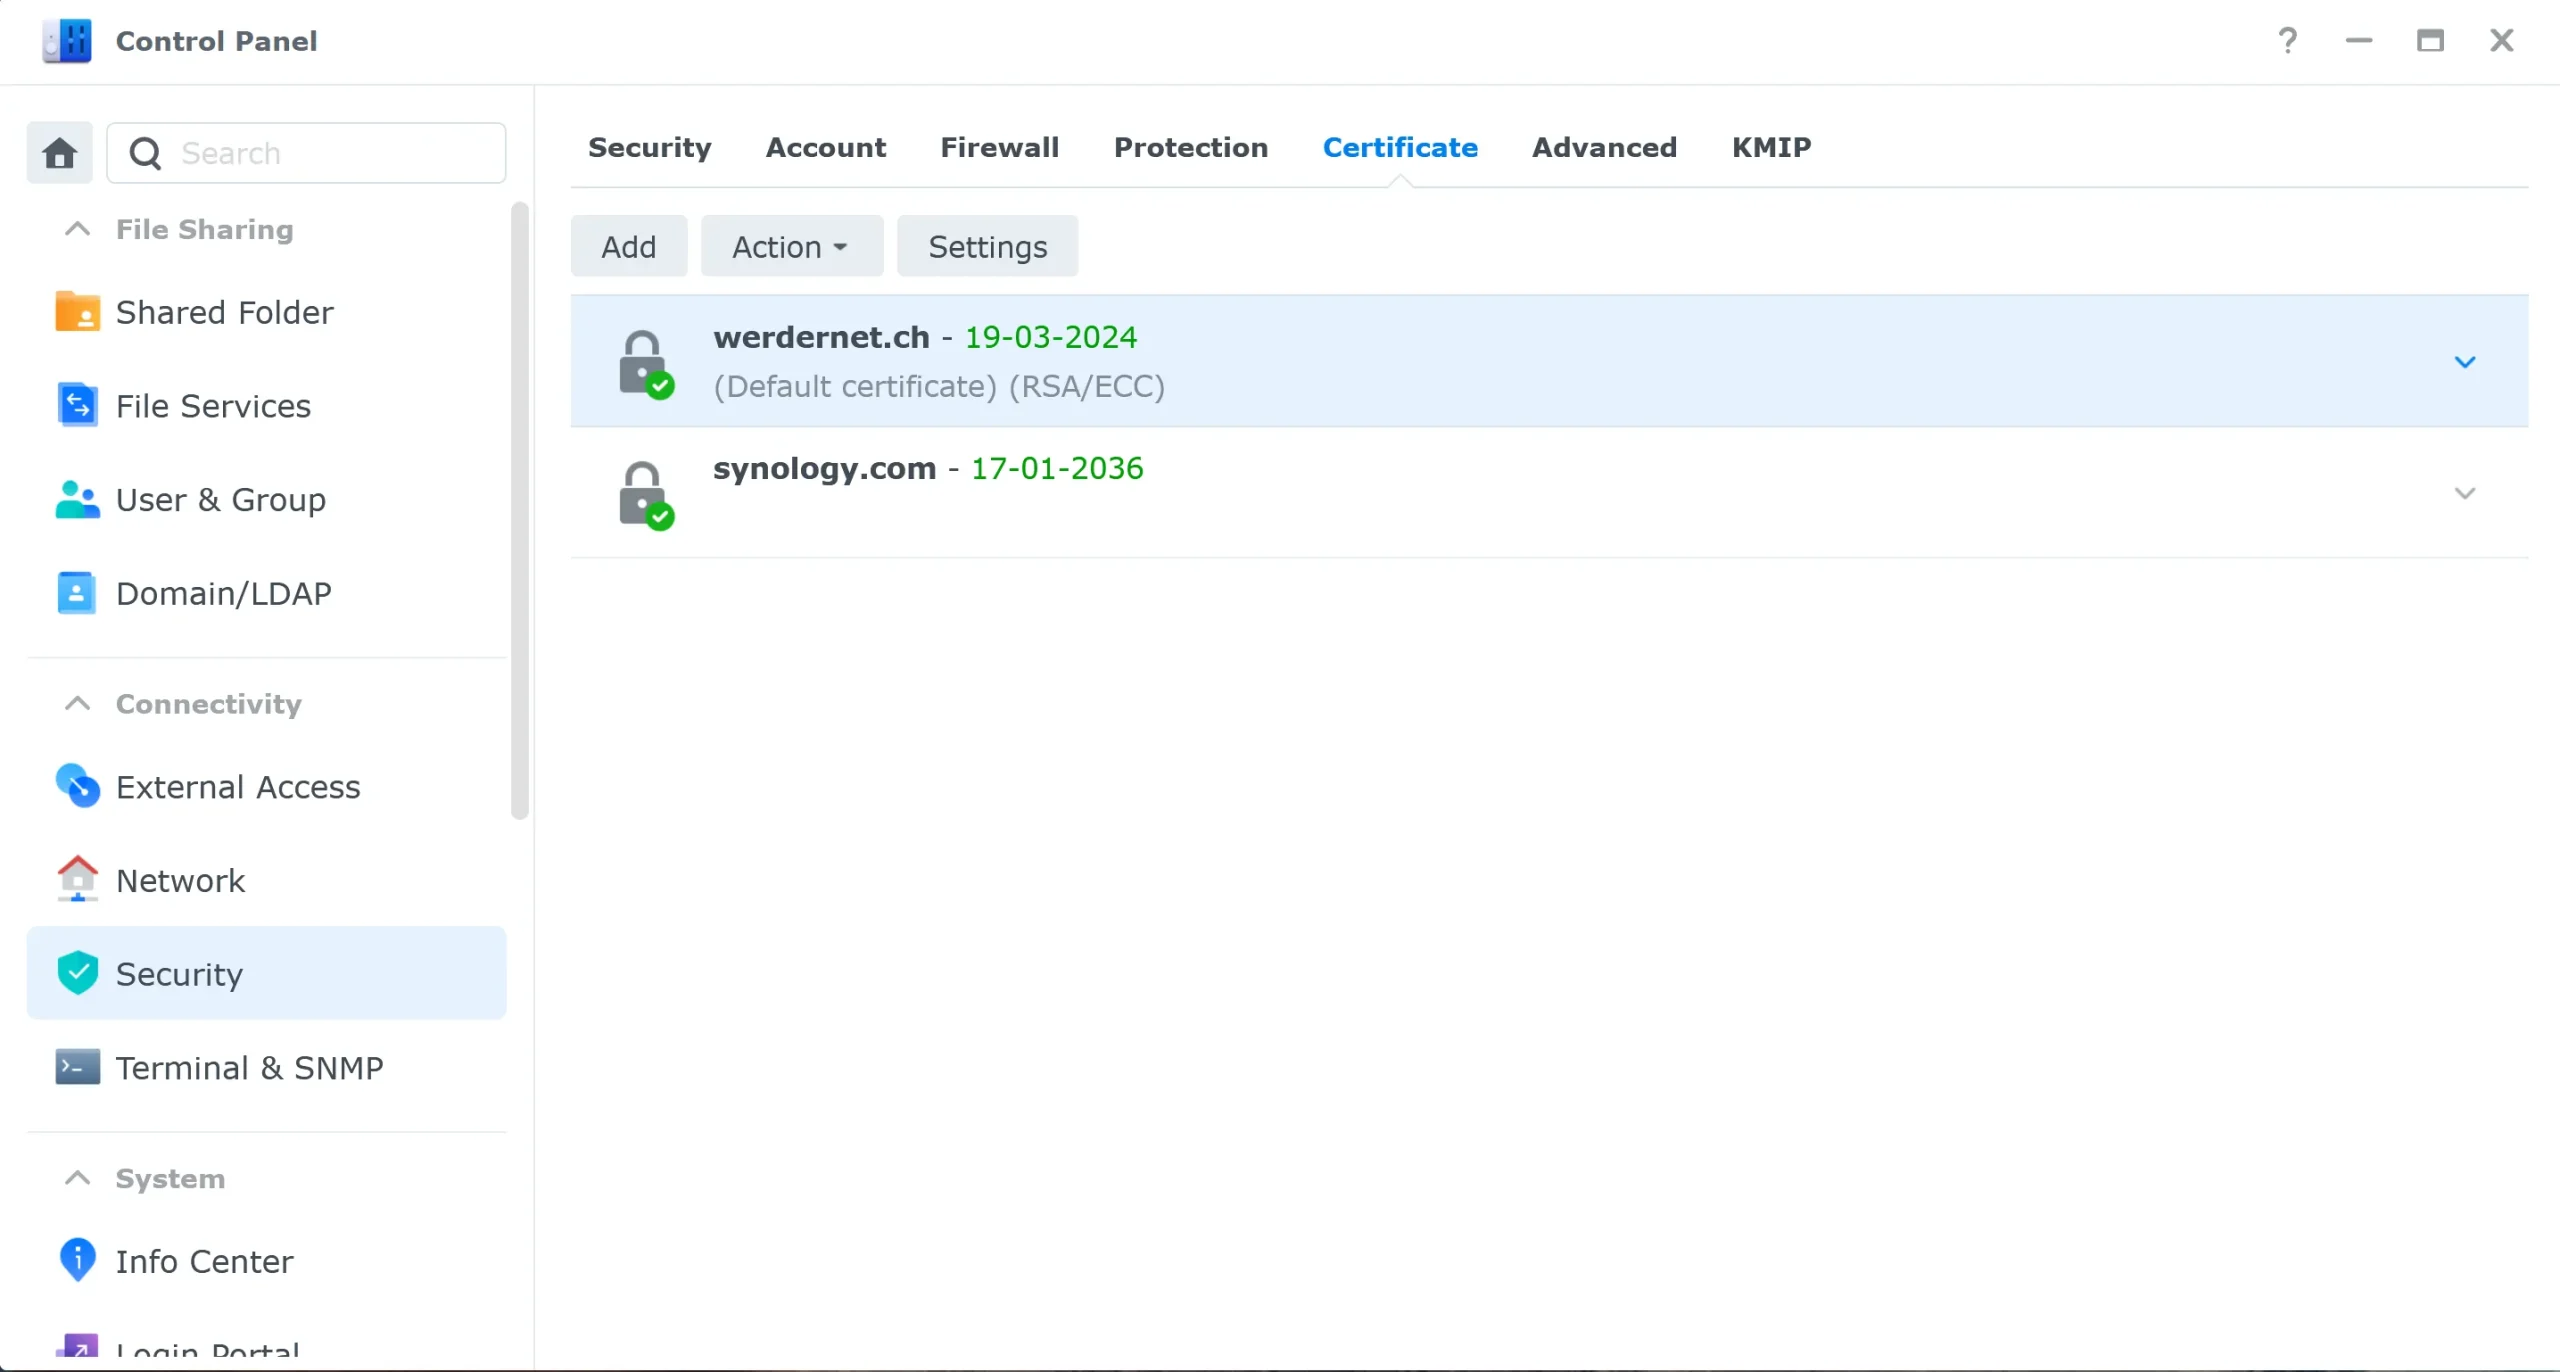
If the domain authenticates successfully, DSM automatically renews the certificate and restarts the web server. You do not need to do anything. You can verify the current certificate and its expiration date under Control Panel > Security > Certificate.

Auto renewal can fail silently. The most common reasons:
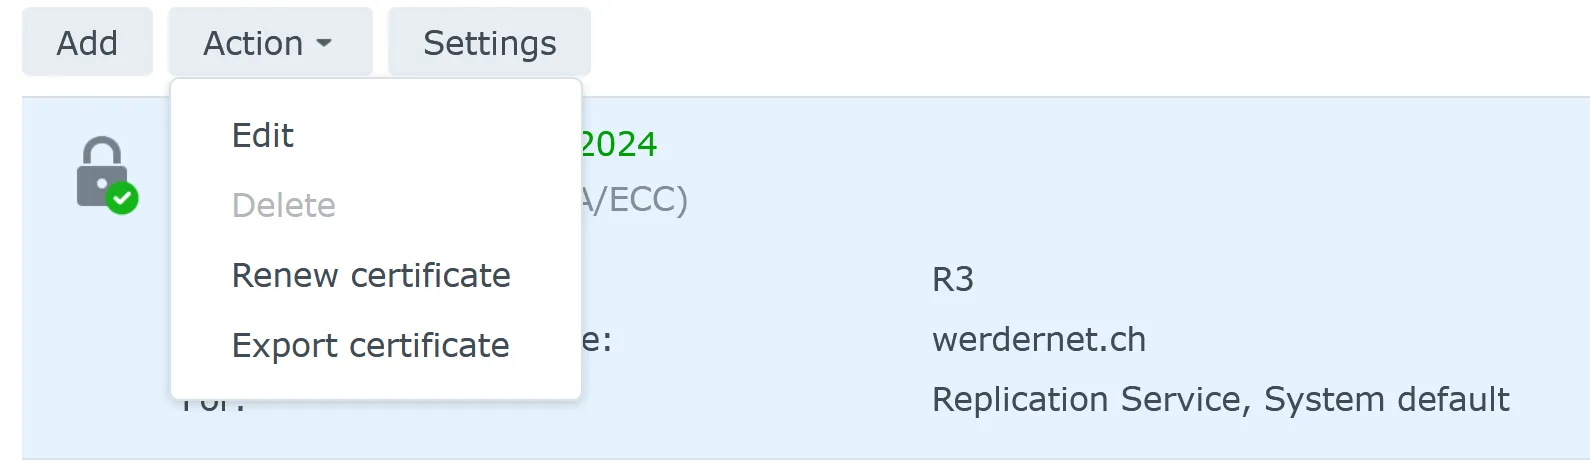
Check the renewal status in Control Panel > Security > Certificate. If the expiration date is getting close (under 30 days) and has not renewed, you can right-click the certificate and select Renew to trigger a manual renewal.
If auto-renewal is not working, you can always renew manually:
Make sure port 80 is forwarded before you trigger the manual renewal. Once the new cert is active, you can close port 80 again if you prefer.
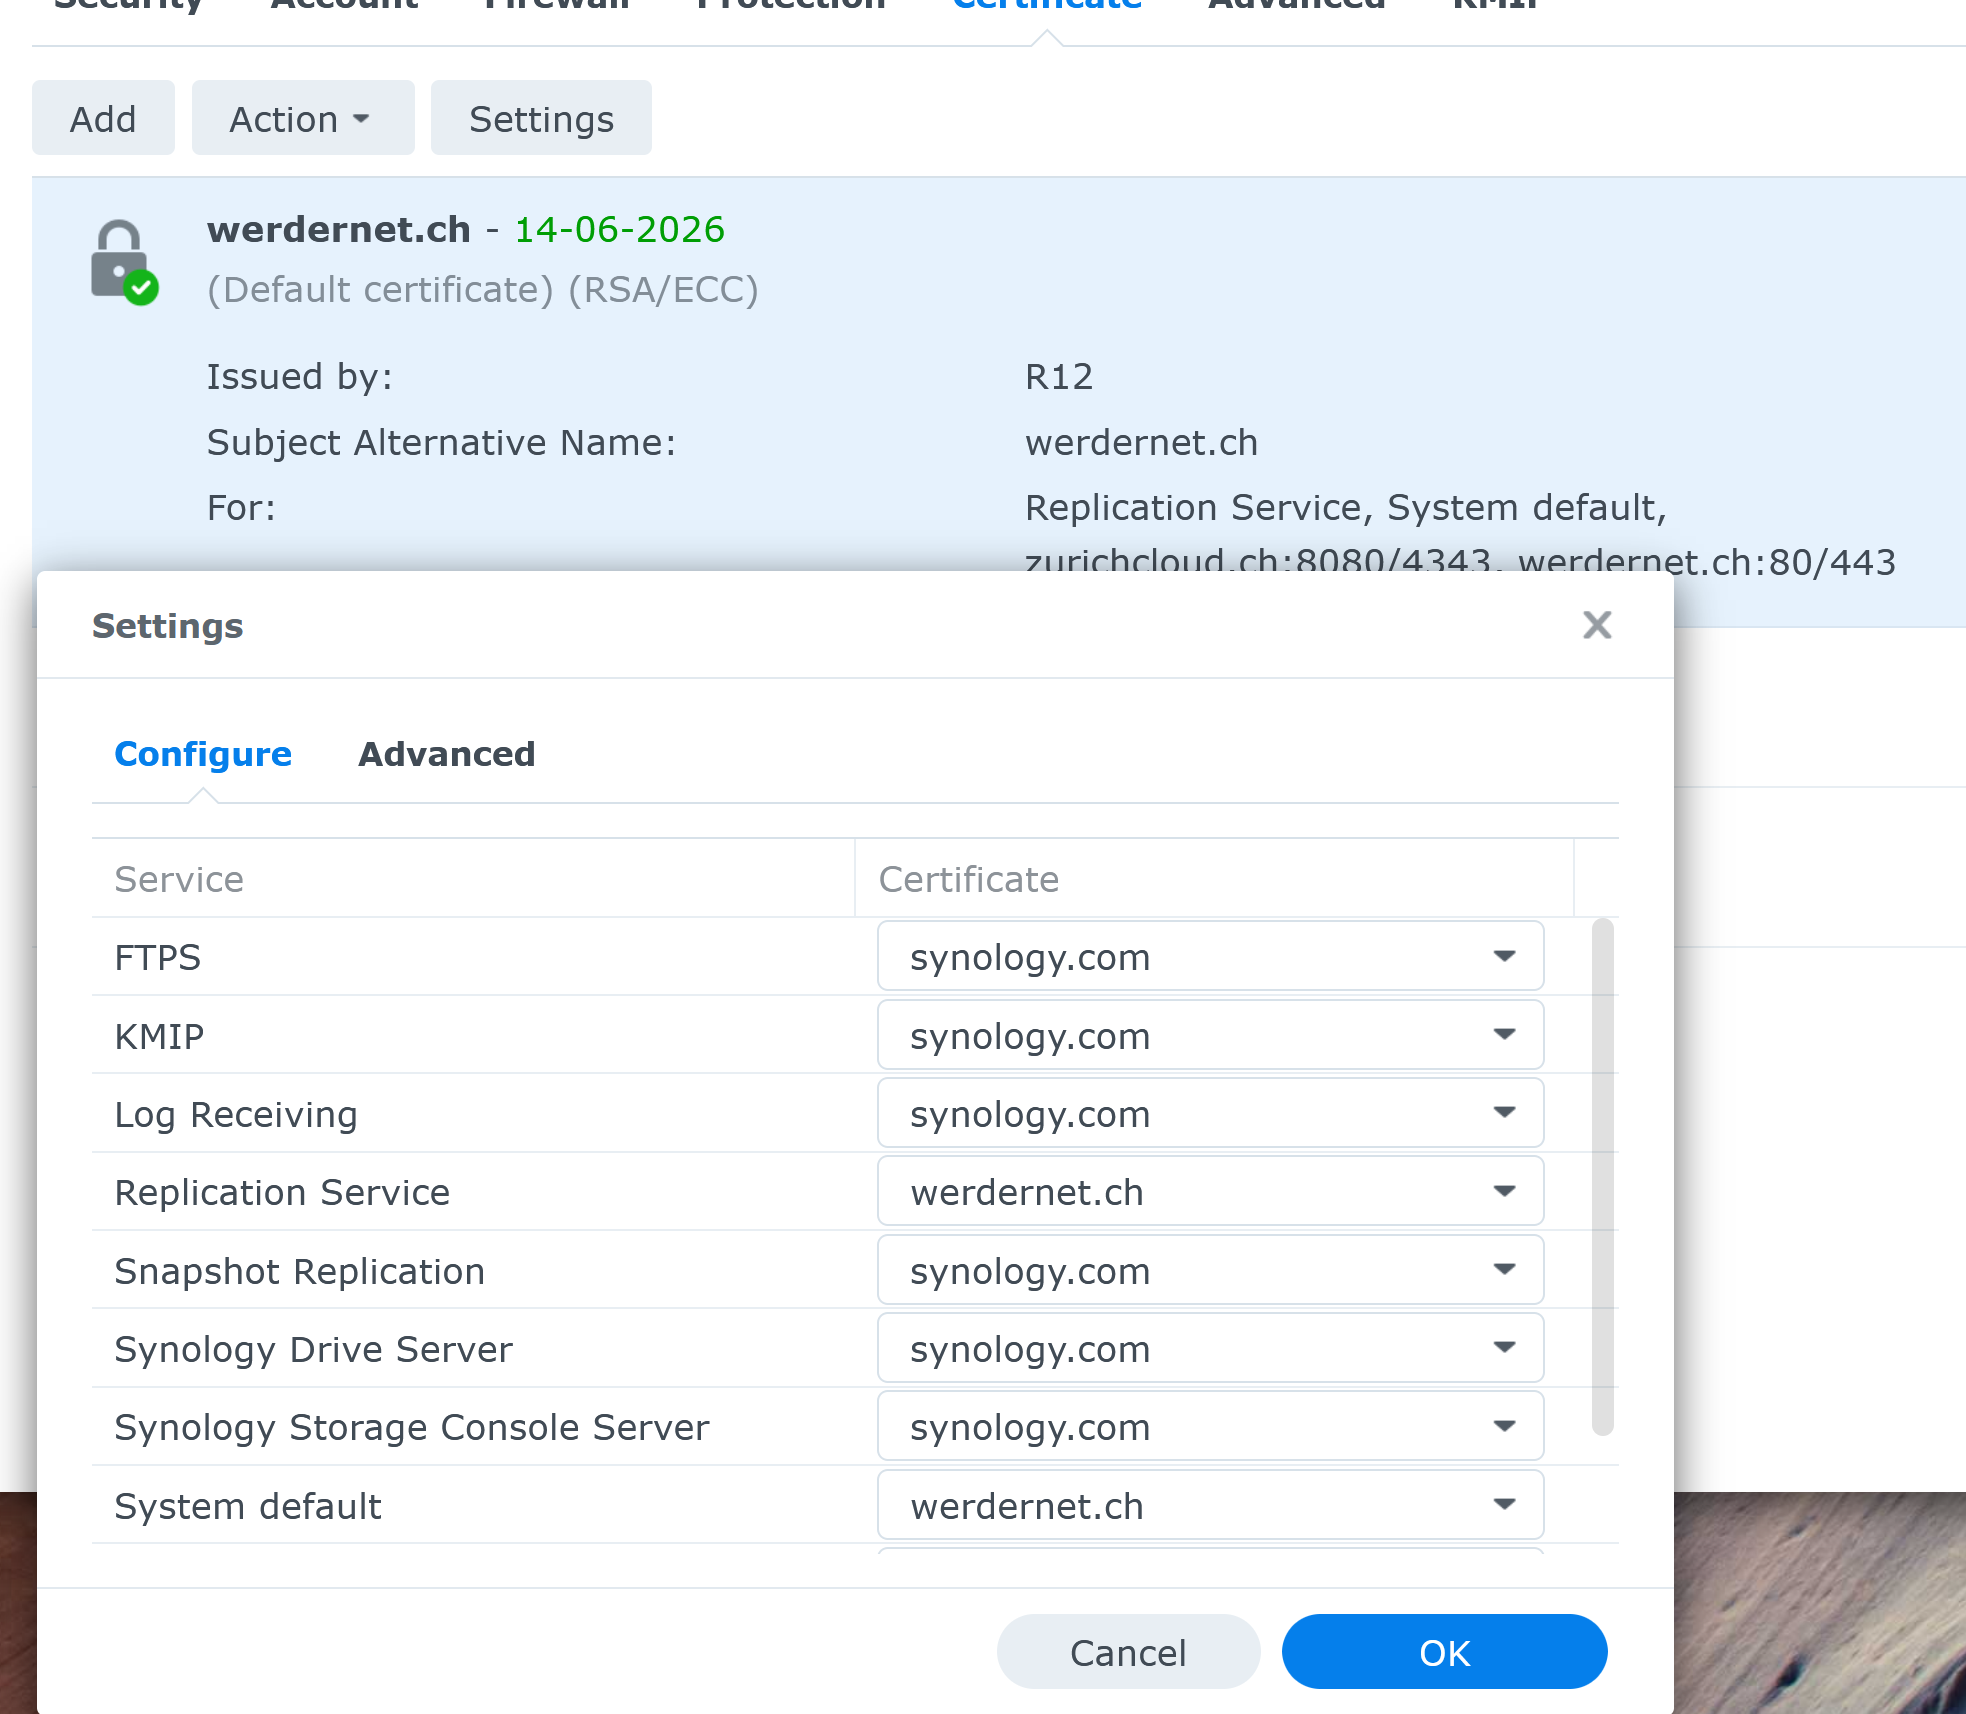
Using the settings button, two SSL certificates in my Synology NAS can be allocated to specific applications. However, the service names lack clarity. I configure the system default and replication service, which works for my web server. I would have wished to see the application names like File Station, Web Station, etc.
The built-in Let’s Encrypt integration in Synology DSM uses HTTP validation by default. That means your NAS must be reachable on port 80 from the internet. For many users, that is a dealbreaker. Maybe your ISP blocks port 80. Maybe you do not want your Synology NAS exposed to the public internet at all.
The DNS challenge is the alternative. Instead of proving domain ownership through an open port, you prove it by adding a TXT record to your DNS. No open ports needed. Your Synology device stays behind your firewall, and Let’s Encrypt still issues the certificate.
There is one important limitation: Synology DSM does not support DNS challenge natively for custom domains. The built-in certificate tool only supports DNS challenge for Synology DDNS domains (like yourname.synology.me). If you use your own domain, you need acme.sh to handle it. I cover acme.sh in the next section.
If you use a Synology DDNS address, good news. DSM handles DNS challenge automatically for wildcard certificates on synology.me domains. Here is what you do:
DSM takes care of the DNS validation behind the scenes because Synology controls the DNS for its own DDNS domains. No port forwarding required.
For a custom domain like werdernet.ch, DSM cannot create DNS TXT records on your behalf. It has no access to your DNS provider. This is where acme.sh comes in. It supports dozens of DNS providers through their APIs, including Cloudflare, Namecheap, AWS Route53, Dynu, DuckDNS, and many more.
The workflow looks like this:
A standard Let’s Encrypt certificate covers one specific domain, like nas.werdernet.com. A wildcard certificate covers the base domain and all its subdomains at once. The format looks like this: *.werdernet.com.
This is useful when your Synology NAS hosts multiple services on different subdomains. For example, you might have plex.werdernet.com, photos.werdernet.com, and drive.werdernet.com all pointing to the same NAS through a reverse proxy. Instead of requesting separate certificates for each, a single wildcard certificate covers them all.
This is important to understand: wildcard certificates can only be validated through DNS challenge. HTTP validation does not work for wildcards. That is a Let’s Encrypt requirement, not a Synology limitation.
If you use a Synology DDNS domain, DSM can request a wildcard certificate natively, because Synology manages the DNS records.
If you use a custom domain, you need acme.sh with DNS challenge to get a wildcard cert. When issuing a wildcard, always include the base domain alongside the wildcard. For example:
acme.sh --issue --dns dns_cf -d "werdernet.ch" -d "*.werdernet.ch"Without the base domain, the certificate covers subdomains but not werdernet.com itself.
If you face issues while installing or renewing your Let’s Encrypt SSL certificate on your Synology NAS, here are some steps to troubleshoot:
My Synology NAS Recommendations

I earn a commission if you make a purchase, at no additional cost to you.
Go to Control Panel > Login Portal > DSM Settings. Enable “Automatically redirect HTTP connections to HTTPS.” This ensures all connections to your Synology NAS use the encrypt certificate and no traffic goes over unencrypted HTTP.
Yes. A Let’s Encrypt certificate encrypts the connection between your browser and your Synology NAS. Without a valid certificate, login credentials and data are vulnerable to interception on the network. This is one of the main reasons to replace the default self-signed certificate.
You need DSM 6.2.4 Update 2 or above. If you are running DSM 6.2.3 or below, update your Synology NAS before requesting a certificate. DSM 7.2 is the current recommended version and has the most reliable Let’s Encrypt integration.
Yes. You can use acme.sh with different certificate descriptions to deploy separate certificates for different services or subdomains on the same Synology NAS. Each certificate is managed independently through environment variables and the synology_dsm deploy hook in Task Scheduler.
Setting up a Let’s Encrypt certificate on a Synology NAS is one of those tasks that takes 10 minutes and makes everything better. No more browser warnings, automatic renewal, and solid encryption at zero cost. If you are running a custom domain, the DNS challenge gives you a secure path without exposing ports to the internet.
I’d love to hear from you. Was this article helpful? Share your thoughts in the comments below. If you prefer, you can also reach me by email or connect with me on Reddit at Navigatetech.
Hi, I’m Edy Werder. I write hands-on guides about Proxmox, homelab servers, NAS, and WordPress, based on real setups I run and document.
No sponsors, no fluff—just real configs and results.
Enjoying the content?


