
By Edy Werder — IT Consultant & Tech Blogger
Need an additional network link for your ESXi host and not sure how to go about it? A VMware USB network adapter could be your silver bullet, but it’s not plug-and-play. You’ll need to install an ESXi USB driver to get everything up and running smoothly.
In this blog, I will show you step-by-step how to install a VMware USB network adapter driver.
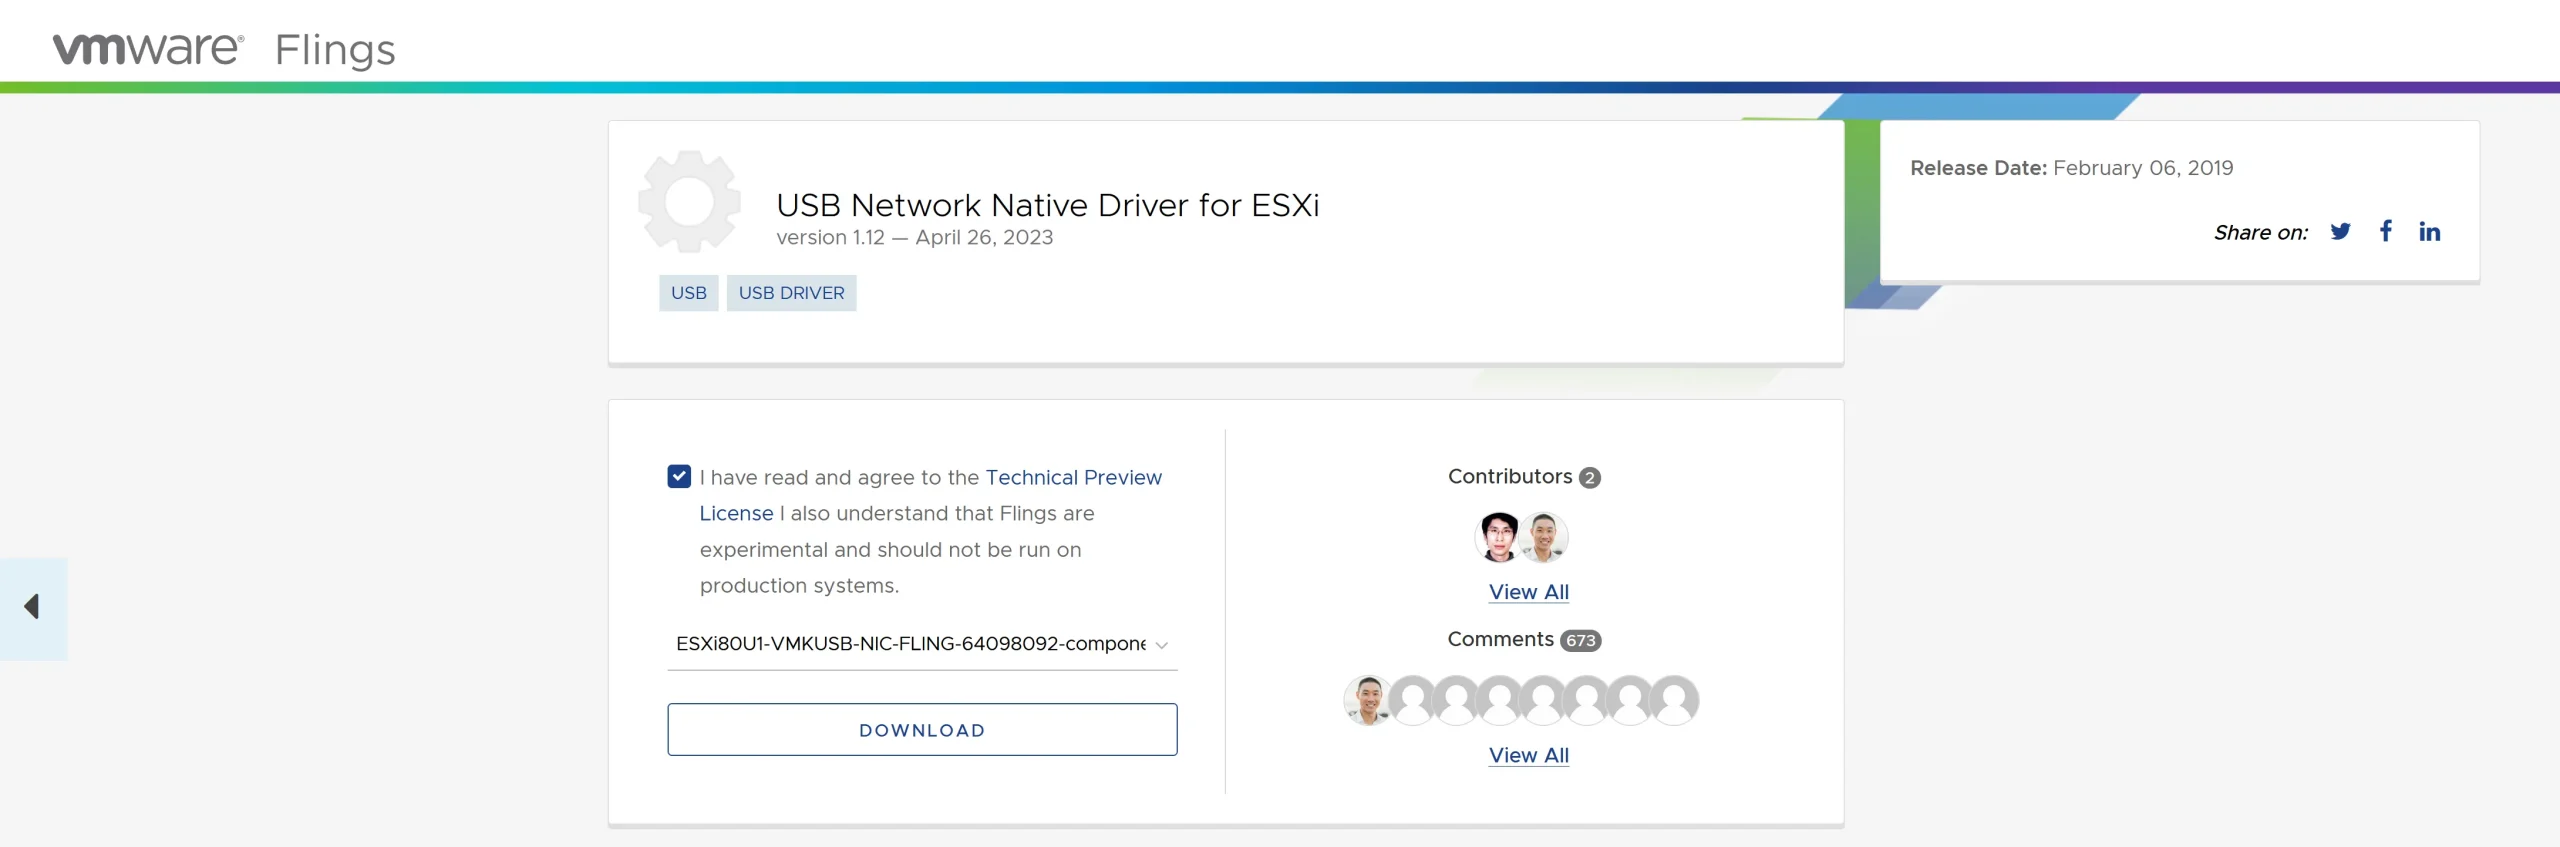
I use an Intel NUC mini-computer for VMware ESXi. The Intel NUC has only one NIC; I bought a USB network adapter for an additional network port. ESXi 8.0 can utilize the integrated network card of the Intel NUC. However, the operating system does not come with a pre-installed USB driver. Nonetheless, you can download the USB driver for ESXi 8.0 from VMware Flings and easily install it yourself.
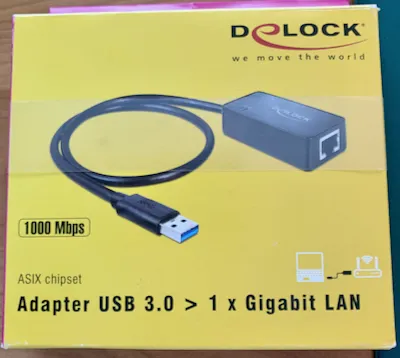
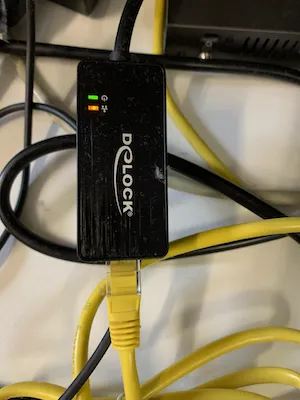
Before you buy the USB network adapter, check the requirements. Only specified chipsets are supported. My nic adapter has the ASIX chipset.
The network adapter is connected to the NUC; power is on, but there is no network activity.

Here is a USB network adapter from Amazon, which has the ASIX chipset on board

Furthermore, in VMware Center, only one nic is available.

Okay, let’s install the USB driver for ESXi 8.0. The same driver works for older ESXi versions, too.
Download the ESXi USB driver from here.
Upload the ZIP driver to your host using VMware Vcenter or the ESXi Web GUI. You could also use scp with ssh to upload the driver. I prefer the WebGUI; it is easier and faster.

I have two VMware datastores on my Intel NUC.
I uploaded the ZIP file to a folder ‘ISO’ in the datastore ‘NUC1 SATA’
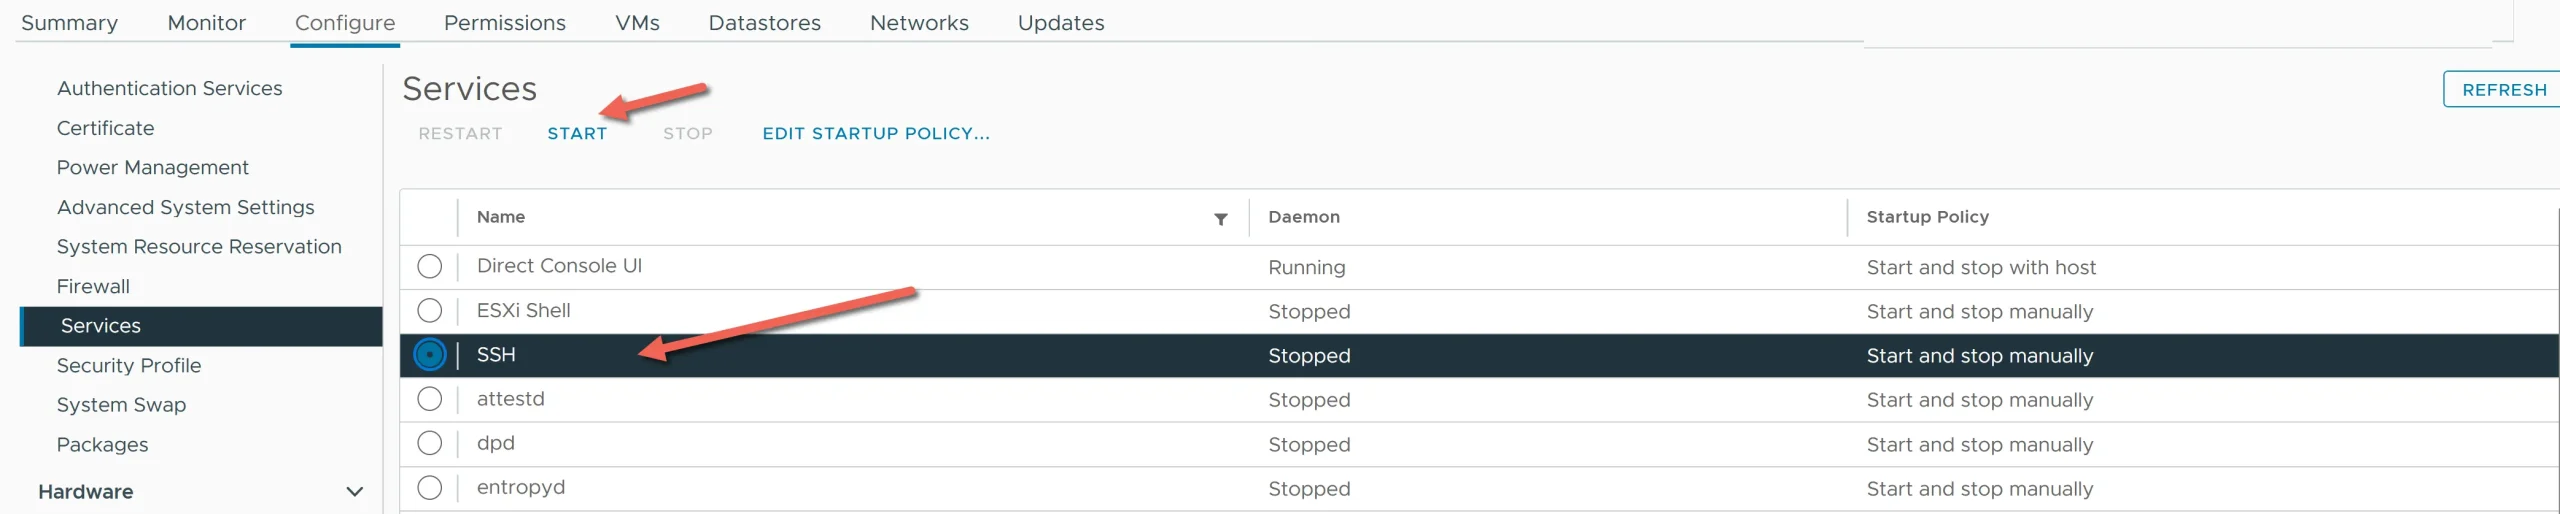
Start the SSH service in ESXi or VMware Vcenter.
Put the ESXi host in maintenance mode and then start your SSH client. I use Putty for Windows or Termius for MAC.
Watch my video on how I navigate SSH.

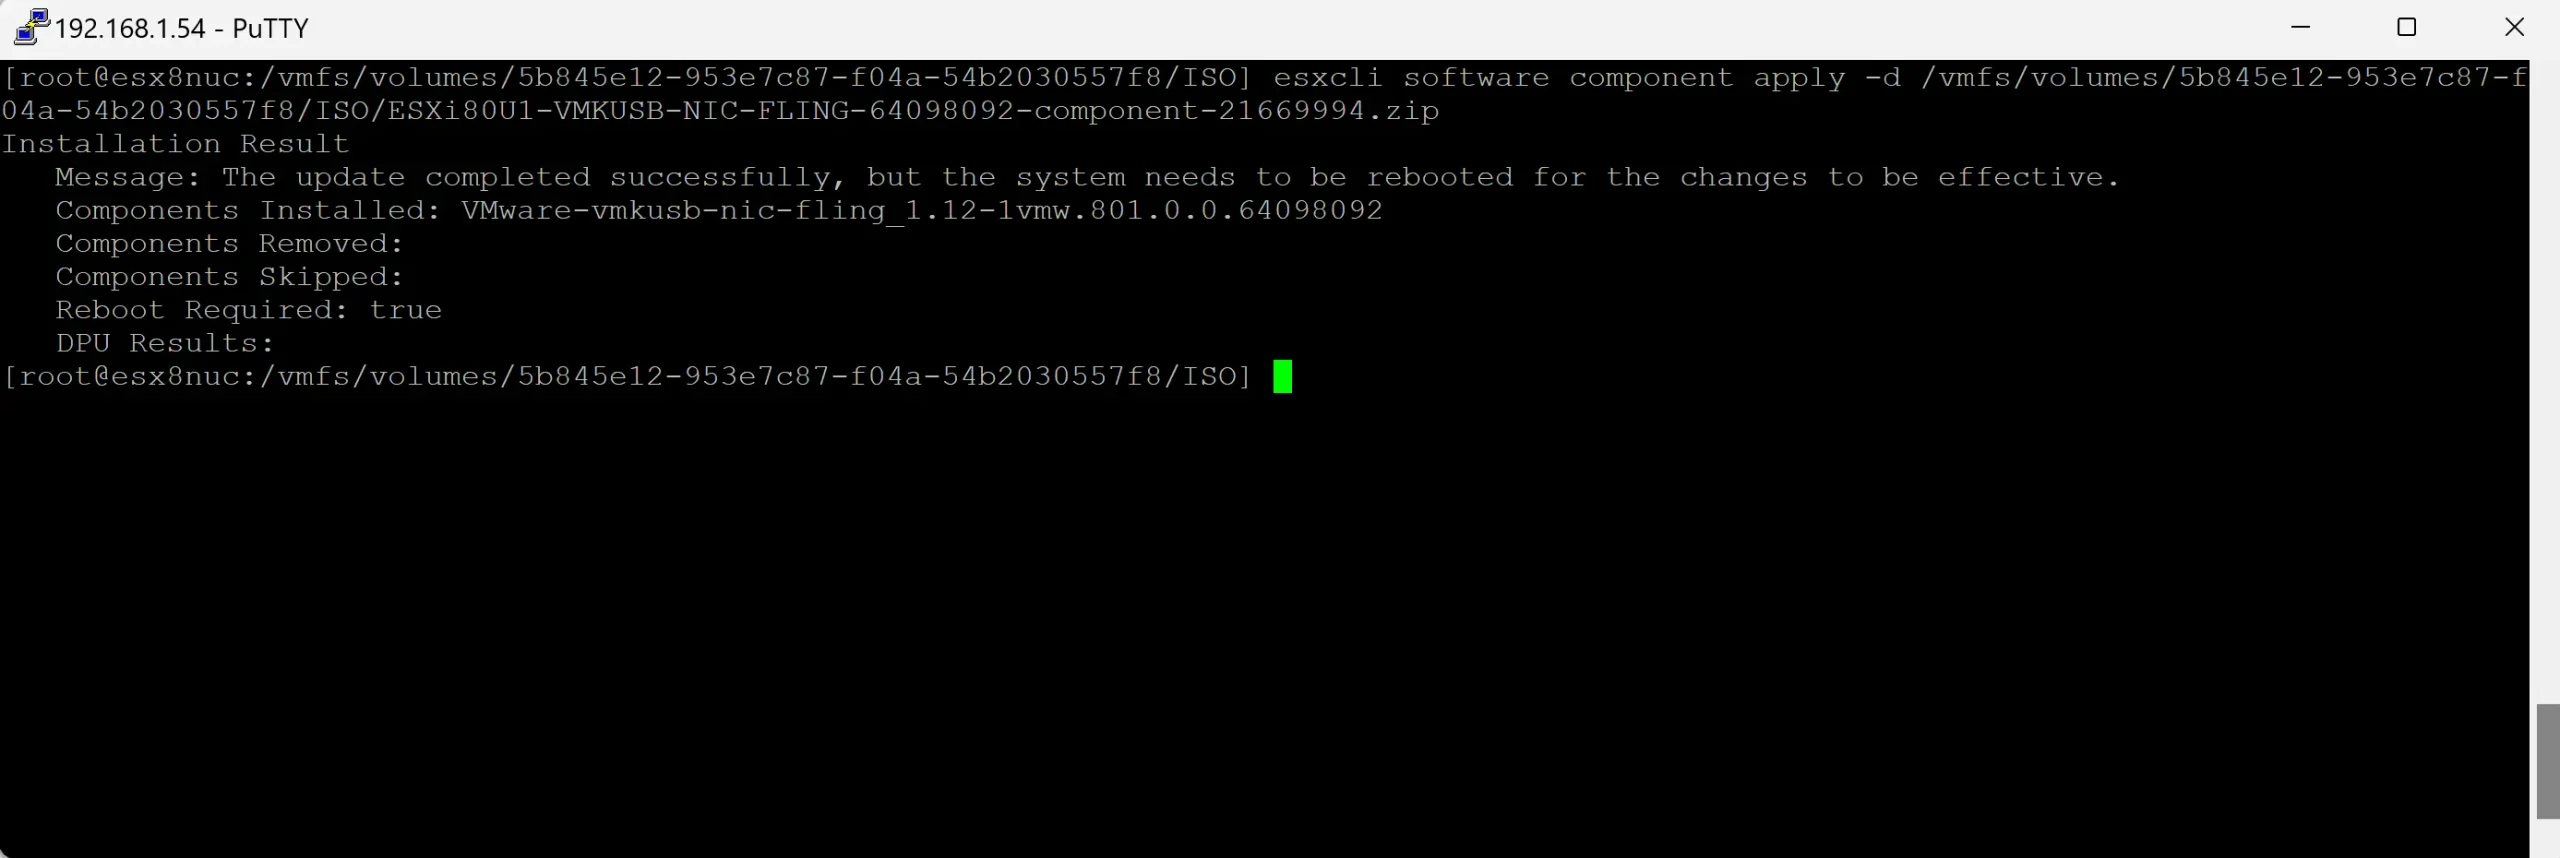
esxcli software component apply -d /vmfs/volumes/5b845e12-953e7c87-f04a-54b2030557f8/ISO/ESXi80U1-VMKUSB-NIC-FLING-64098092-component-21669994.zipJust one command is required to install the USB NIC driver
After a successful installation, you should see this
Exit the ESXi host from the ‘maintenance mode’ and reboot the host
The USB network adapter should appear now in Vmware Vcenter under the physical adapter and has network activities.

Congratulation! You are done 🙂
Later, if you upgrade ESXi, the USB driver should be retained. However, in the case of a fresh ESXi installation, it is necessary to reinstall the USB network card driver.
I want to draw your attention to another insightful blog post of mine. If you found the information on VMware’s USB network adapter helpful, you might also be interested in a comparison I made between Proxmox and ESXi.
This post delves into their respective features, performance, and overall efficiency. Whether you’re trying to decide between the two for your homelab or looking for a more environment-friendly option, this blog post provides a comprehensive analysis that could help you make an informed decision.
Hi, I’m Edy Werder. I write hands-on guides about Proxmox, homelab servers, NAS, and WordPress, based on real setups I run and document.
No sponsors, no fluff—just real configs and results.
Enjoying the content?
