
By Edy Werder — IT Consultant & Tech Blogger

Quick Answer
Synology Hyper Backup is a free backup application included in DSM. To set up a backup task, open Package Center, install Hyper Backup, and launch the wizard. Choose a backup destination (USB drive, remote NAS, C2 Storage, or cloud service), select the folders and applications you want to back up, configure a daily schedule, and enable Smart Recycle for automatic version rotation.
This guide is part of my Synology Series, where I cover practical tips for getting the most out of your NAS.
Hyper Backup is included free in Synology DSM and is my go-to tool for backing up critical data to off-site storage. In this guide, I walk you through the full setup: creating a backup task, choosing the right destination, configuring rotation with Smart Recycle, and restoring your data.
Synology Hyper Backup is a backup solution for Synology NAS that allows users to back up various kinds of data, including system configurations, shared folders, and applications/packages.
It provides intuitive and complete backup/restore solutions to help users back up/restore copies of critical data and restore applications and system configurations to a previous point.
It supports many backup destinations and a dedicated cloud backup service called Synology C2 for its users only.
The pros of Synology Hyper Backup include the following:
The cons of Synology Hyper Backup include the following:
Synology Hyper Backup settings will be accessed through your NAS’s WebGUI administration interface. The wizard intuitively configures a backup task.
Choosing the right backup destination for your data is essential, as it determines how secure and reliable your backups are. The popular options are local hard drives, external hard drives, and Synology C2 cloud services. Each of these destinations has advantages and disadvantages that you should consider.
Synology Hyper Backup offers a range of security and encryption options to help users protect their data. The primary security measure is built-in AES 256-bit encryption, which is available when backing up to an external drive or to the Synology C2 Cloud service. It is military-grade encryption that helps protect sensitive data from unauthorized access.
Whenever a backup is initiated, an exclusive version key is created for that specific version. In other words, each of your backups has its unique identifier.
You set up a schedulable backup task to automatically back up various data. It also supports multi-version backup, flexible backup rotation, and other advanced features to ensure the best data protection.
Consider factors such as how often you need to keep copies of their data, where it should be stored, and how much storage space it will consume over time. Then, you can arrange your backup schedule accordingly.
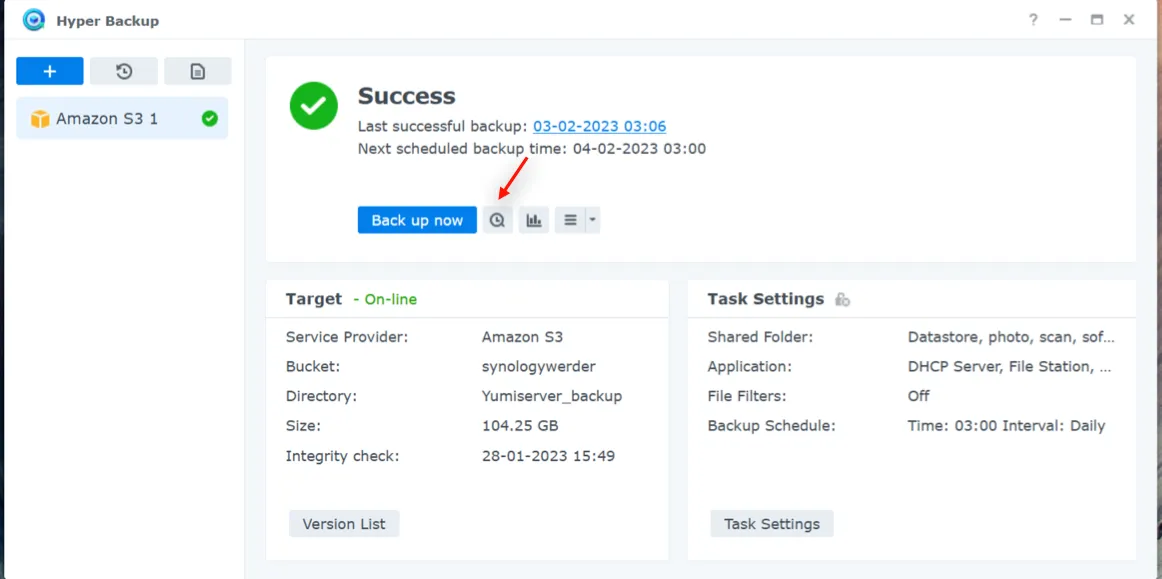
Synology Hyper Backup provides information about the backup history and statistics, such as the total number of backups created, the amount of data backed up, the last time a backup was performed, and the status of each backup. It also lets you view detailed reports on which files have been backed up and which have failed.
C2 Backups is a cloud backup solution from Synology that lets users back up almost all hard drives and data, with up to 32 versions.
The solution allows you to transfer files using SSL encryption, ensuring that your data remains secure in transit. C2 Backup offers affordable rates and is cheaper than Amazon S3.
C2 Storage has a data center in Frankfurt, North America, Seattle, and Asia, Taiwan.
Synology NAS devices offer a power scheduling feature that allows you to automate startup and shutdown times. Configuring this feature allows a remote Synology NAS to serve as an offline backup target, activating only during designated backup periods. This approach enhances data security by keeping the backup target offline when not in use and contributes to energy efficiency.
Hyper Backup uses advanced storage optimization techniques like cross-version deduplication and compression to reduce the backup data size. Cross-version deduplication ensures that identical files across multiple backup versions are stored only once, while compression minimizes the overall storage footprint without altering the original data. These features make Hyper Backup an efficient solution for managing backups on limited storage resources. Regular test restores are recommended to verify backup reliability and ensure data integrity.
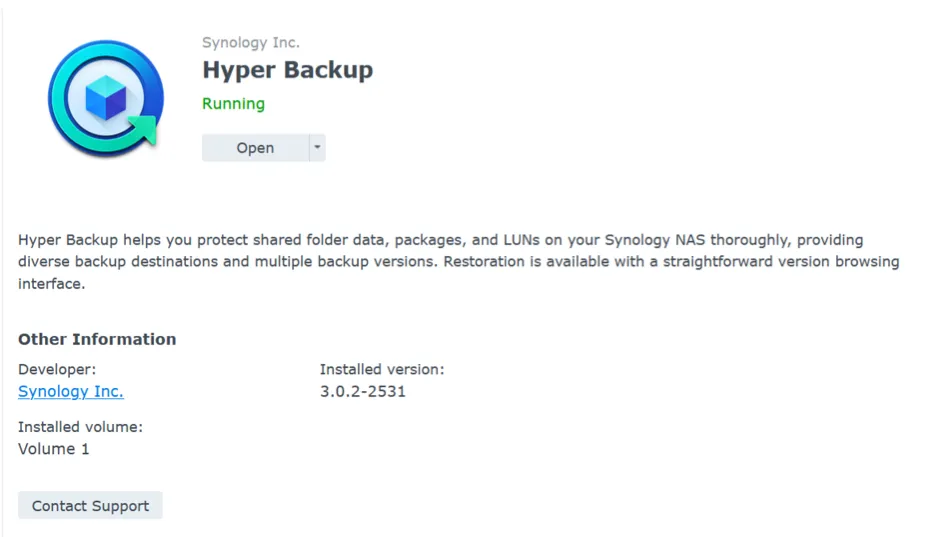
Log in to your Synology NAS device
double-click ‘Package Center and search for the Hyper Backup app
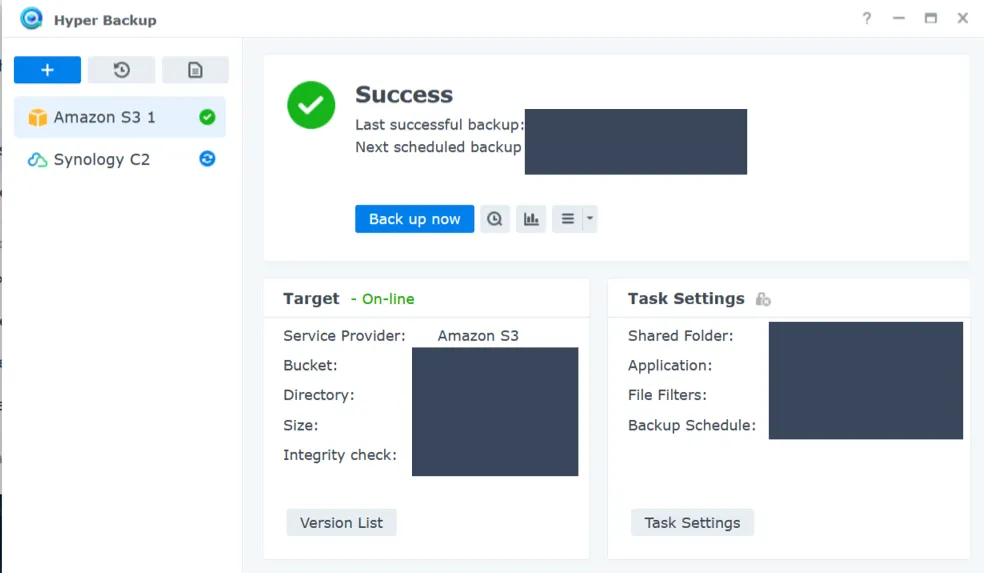
This screenshot shows that I have already configured two backup tasks. Click the + sign to configure a new backup task and choose ‘Data backup task’
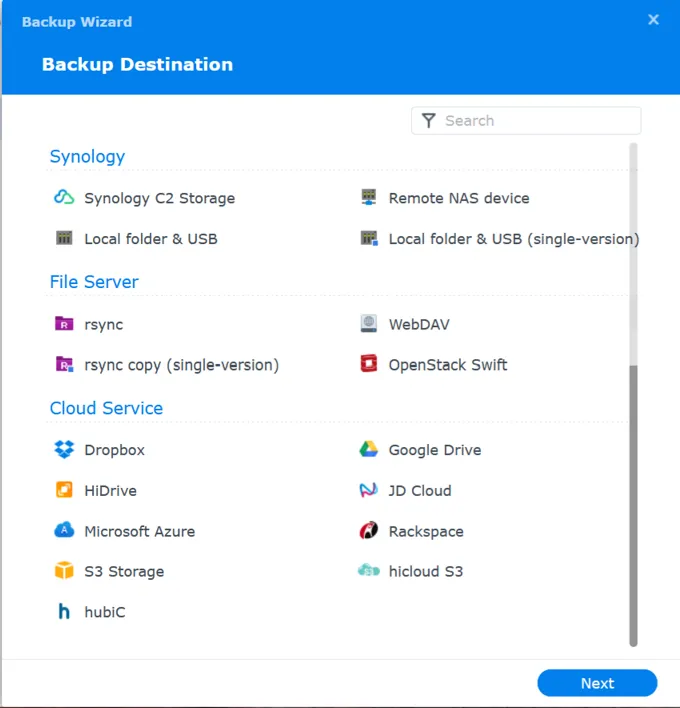
Synology supports all the popular Cloud services. I have been using the Amazon S3 service for many years. But lately, I discovered that the new Synology C2 service is less expensive.
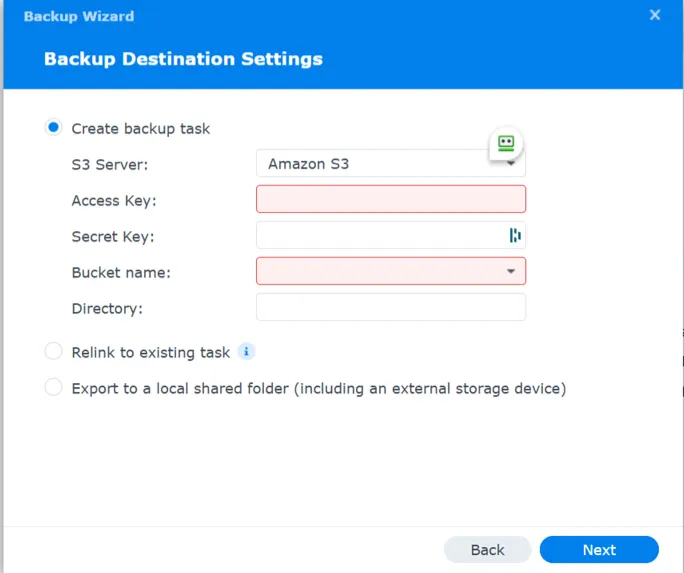
the Amazon (AWS), you first need an Access Key, Secret Key, and the Bucket name.
How to set up Amazon S3 is not part of this article, but here is an excellent tutorial.
How to create an Amazon S3 Bucket and AWS Access Key ID and Secret Access Key for accessing it.
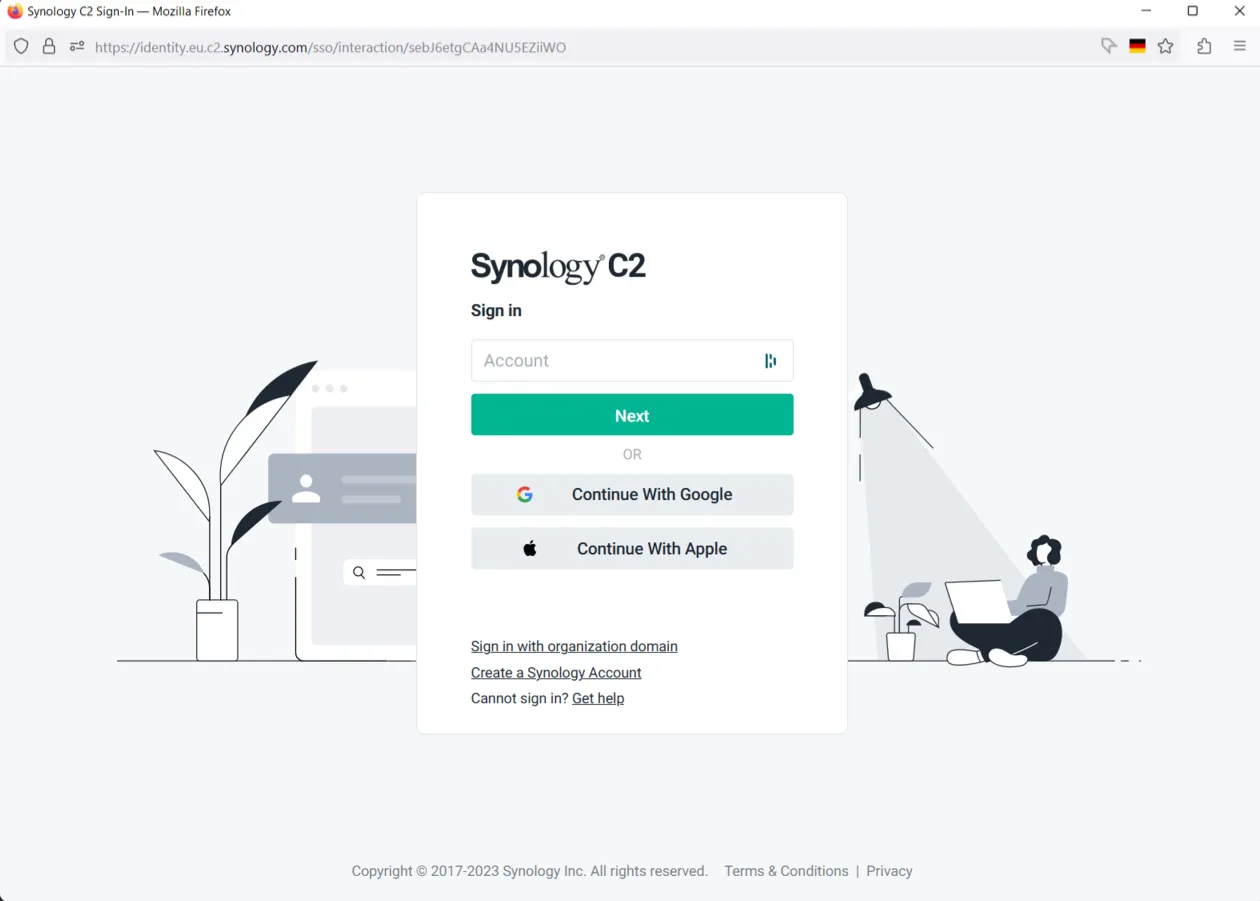
When you choose Synology C2 Storage and click the ‘next’ button, a browser window will open and guide you through creating a Synology account if you don’t have one yet. The wizard is pretty straightforward.
You will get a 30-day free trial. It is necessary to enter the payment information during registration, but you won’t get charged until the trial period expires.
Here you will find some more information about C2 storage with pricing plans.
Based on my own experience with Amazon S3, S3 is a good choice if you want to back up less than 200GB, if you have more data to back up, Synology C2 is a better choice.
It is also possible to back up to a second Synology NAS. For this, choose ‘remote NAS.’ All you need to know is the IP address or public DNS name. In combination with the Synology account, Quickconnect is available, which is a public DNS service.
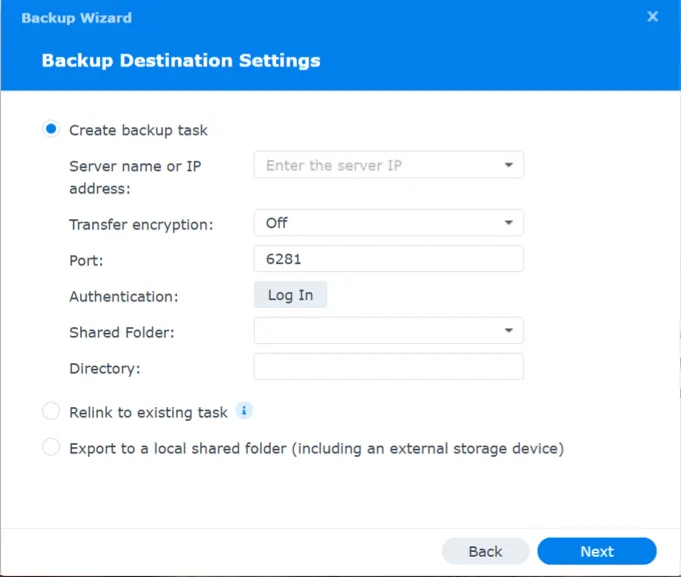
Another option is to use an rsync-compatible server as your backup destination. This is useful if you want full control over your off-site storage instead of using cloud services. I recently set this up with an Ubuntu server, including rsync configuration, backup module setup, and firewall rules.
In this step, you choose which shared folders from your Synology NAS to include in the backup task. You can select individual folders or back up everything.
After selecting the folder, the wizard asks whether you want to include installed applications and their configurations. Not all packages are supported, but the most common ones are. If you back up an application here, you can restore both the app and its settings later.
Next, you configure the backup schedule and task settings. You can set the backup to run daily at a specific time, which is what I recommend for most home users. Enable the data integrity check schedule here as well. It runs in the background and verifies that your backup data is consistent and accessible.
The last screen in the wizard is the rotation screen, which I cover in the next step.
Select the folders and applications of your Synology you want to back up. Followed by settings.
The last screen in the wizard is the rotation screen, which requires some more explanation.
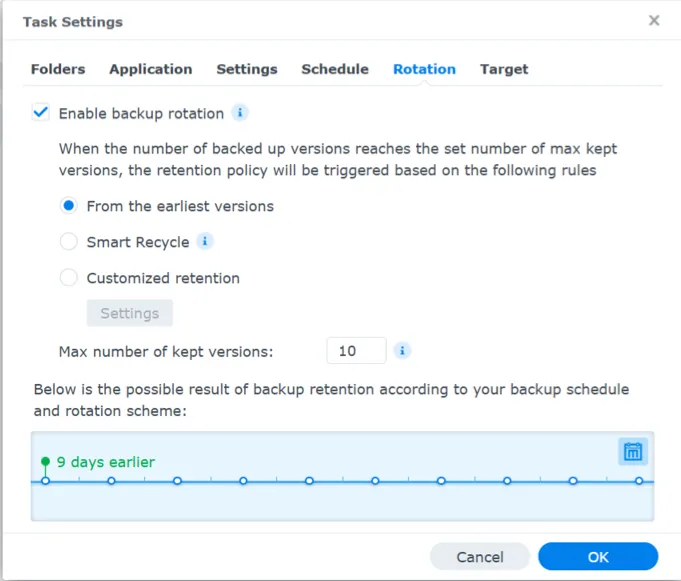
Backup rotation is a useful system for managing the various versions of your data backups. It works by automatically deleting unnecessary older versions, potentially freeing up storage space. This allows you to quickly access the most recent version of your data without searching through outdated or irrelevant files. You can easily enable this function in Task Settings or configure it when creating a new backup task. Backup rotation ensures that your most important information is always up-to-date, helping to reduce potential risks and saving you time in the long run.
Smart Recycle applies three retention tiers. For backups from the past 24 hours, it keeps one version per hour. For backups from the past month, it keeps one version per day. For anything older than one month, it keeps one version per week.
If you run a daily backup (which most home users do), the hourly tier does nothing. You only create one version per day, so there is nothing to thin out in the first 24 hours.
The real work happens in the weekly tier. After one month, Smart Recycle starts deleting daily versions and keeps only one per week. Over time, this adds up.
Here is a practical example. With 60 max kept versions and a once-a-day backup schedule, you get roughly 30 daily versions for the current month, plus about 30 weekly versions going further back. That gives you around 8 months of backup history.
The important thing to know: Smart Recycle does not cap how far back the weekly versions go. As long as you have not hit your max version limit, the “from the earliest” weekly tier keeps accumulating. If you want to control long-term storage usage, switch to Customized retention and add a rule such as “1 year / 1 month” to further thin out older versions.
The max number of kept versions is not a time period. It is a version count. With a daily backup, 60 versions cover about 8 months. Set it to 120, and you reach roughly 2 years.
For most home users who run daily backups, Smart Recycle is the simplest and most practical option. It keeps your recent backups intact and automatically thins out older versions to save storage. If you need more control over long-term retention, switch to Customized retention and define your own rules.
For home use, a few weeks of history is usually enough. For a small business, longer retention matters. A common example: an employee accidentally overwrites monthly invoices, and nobody notices until weeks or months later. If your oldest backup is only 30 days old, those files are gone.
Ransomware is another reason. It can sit dormant for weeks before encrypting anything. A short retention window means your clean restore points may already be rotated out.
With 60 max versions and a daily backup, you get about 8 months of history. Set it to 100, and you reach roughly 14 months. For a small business, that extra depth is worth the storage cost.
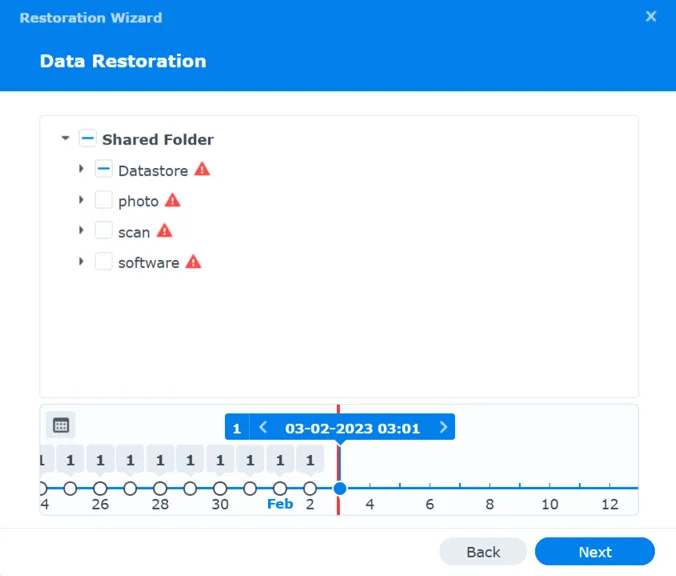
The warning symbol in the screenshot above indicates that the data will be overwritten.
Another method is restoring individual files and folders from Backup Explorer. Click the arrow shown in the screenshot.
If Synology NAS is no longer accessible, you can restore directly from the Backup Vault. Hyper Backup creates a .hbk file. This works only if you back up to another Synology NAS.

Synology Hyper Backup is an incredibly powerful tool for creating and managing digital data backups. It offers users a range of features to ensure their files are secure, such as easy setup, multiple backup destinations, flexible scheduling options, and more.
With this guide, you should better understand how Synology Hyper Backup works and quickly set up your backup task. Whether you’re backing up crucial business documents or want peace of mind knowing that all your important photos are safe from harm, Synology Hyper Backup can help ensure nothing gets lost in the shuffle!
Did you find this article helpful? Please leave a comment below or contact me directly by email at info@edywerder.ch
After learning the essentials of using Synology Hyper Backup, you might want to strengthen your setup by exploring how to use the Synology firewall effectively. Securing your data goes beyond backup strategies, and Synology’s firewall is a critical tool for preventing unauthorized access. This guide will help you configure firewall rules to enhance network protection, adding an extra layer of security to your backups. It’s an ideal next step for building a robust Synology ecosystem.
Hi, I’m Edy Werder. I write hands-on guides about Proxmox, homelab servers, NAS, and WordPress, based on real setups I run and document.
No sponsors, no fluff—just real configs and results.
Enjoying the content?
