By Edy Werder, a tech blogger with 20 years of experience in IT infrastructure
Proxmox’s user management, especially its root user, is not just different from standard Linux systems; it’s significantly different. This unique approach is not a quirk but a key factor in ensuring a secure virtualization environment.
In this article, I’ll guide you through the complexities of Proxmox user management, focusing on the all-powerful root user. Understanding this system is vital for your server’s security. Unlike typical Linux setups, Proxmox handles users in ways that can catch even experienced admins off guard.
I’ll explain why Proxmox’s root user is unique, how it differs from what you might expect, and why these differences matter for your system’s safety. Whether you’re new to Proxmox or looking to tighten your server’s security, I’ve got you covered.
Are you prepared to uncover the secrets of Proxmox user management and enhance your system’s security? Let’s get started!

This locks down who can touch your Proxmox host. My practical homelab guide picks up from here, covering the network and storage layers around it.
When I first set up Proxmox, I was surprised that sudo wasn’t included by default. This isn’t an oversight—it’s a deliberate design choice that sets Proxmox apart from many Linux distributions.
Proxmox builds on Debian but is streamlined for virtualization. The developers excluded sudo to keep the system lean and focused. It means that all administrative tasks are intended to be performed directly by the root user.
The root user in Proxmox isn’t just powerful—it has unique responsibilities. While Proxmox VE users can manage virtual machines and configure storage through the web interface, root access is crucial for certain core system functions. Most notably, root is required for clustering operations, making it irreplaceable for advanced Proxmox setups.
You might wonder, ” Can’t I just disable root for better security?” The short answer is no. Unlike standard Linux systems, where disabling root is often recommended, it’s not possible or advisable in Proxmox. Disabling root would break essential functionalities, especially in clustered environments, and could potentially lock you out of critical system management.
Understanding this unique approach to root access is crucial for managing your Proxmox server securely. In the following sections, I’ll show you how to work within this system while maintaining good security practices.
While Proxmox doesn’t come with sudo by default, I’ve found that installing it can add an extra layer of security and flexibility to your system. Here’s how I do it:
A step-by-step guide to installing Debian sudo:
First, I log in as root via SSH or the Proxmox shell
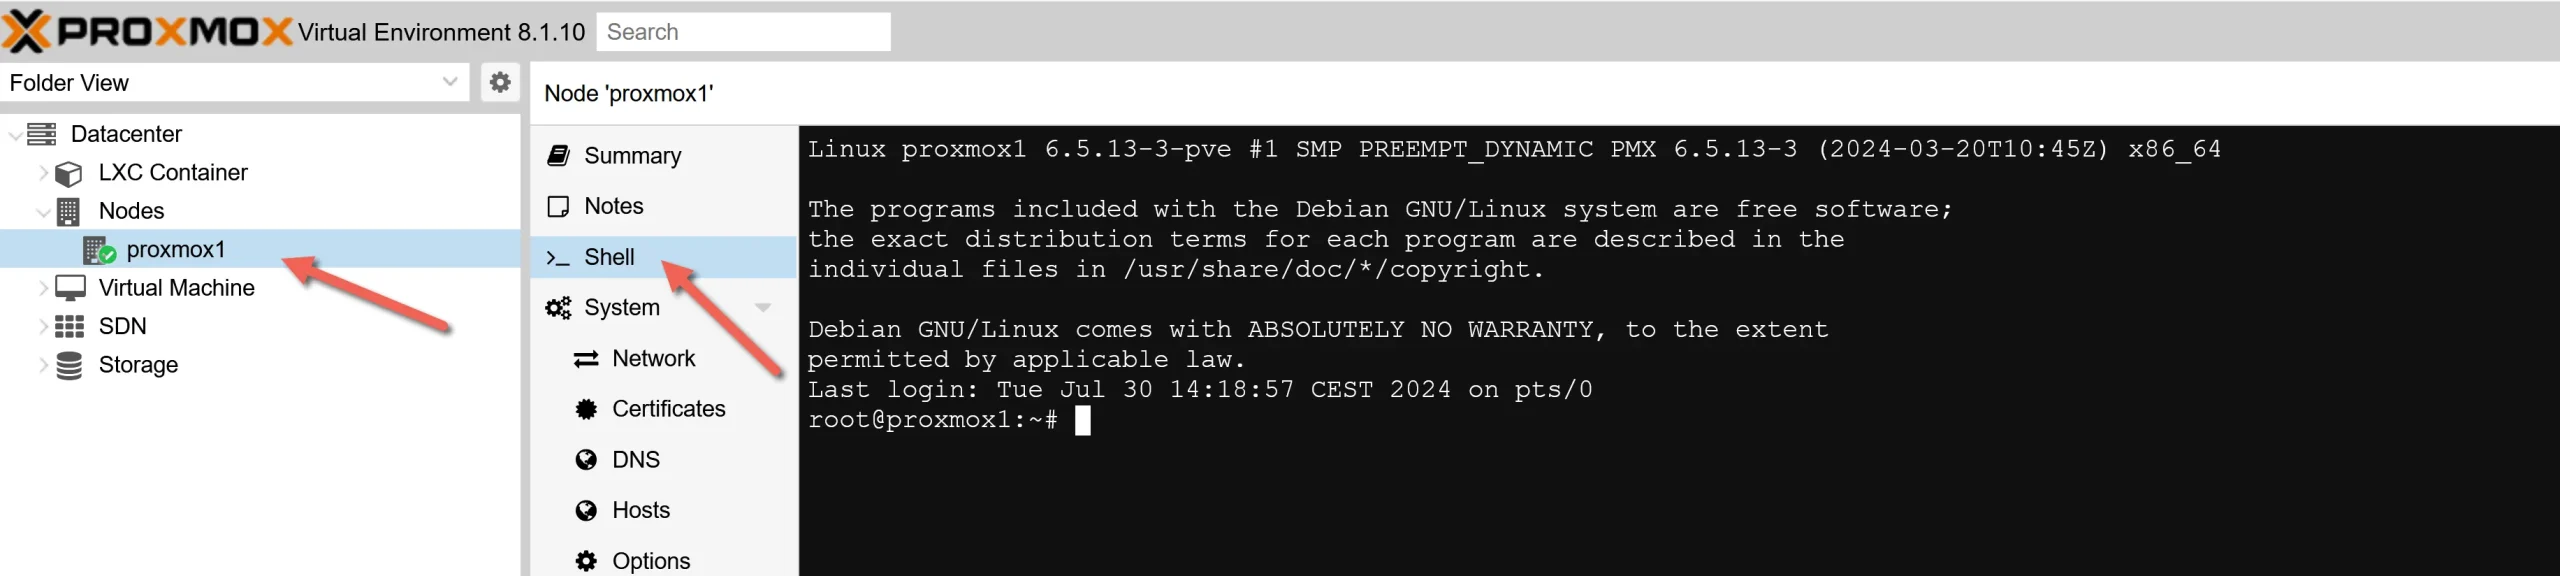
Then, I update the package lists
apt-get updateNext, I install sudo
apt-get install sudoAfter installation, I verify sudo is working
sudo -vIt’s that simple! But before you start using sudo, it’s important to understand its implications in a Proxmox environment.
Potential implications of adding sudo to Proxmox:
Remember, while sudo adds flexibility, it doesn’t entirely replace the need for root in Proxmox. In the next section, I’ll show you how to create a secure administrative user to maximize sudo.
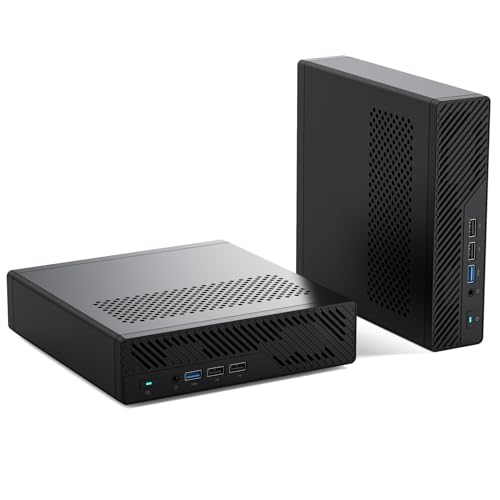
If you want to test Proxmox without spending a lot, a mini PC is the easiest starting point. The ones below are what I would recommend for a home lab or a small IT department.

I earn a commission if you make a purchase, at no additional cost to you.
Now that sudo is installed, let’s create a secure administrative user. I’ll guide you through the process step by step.
adduser adminuser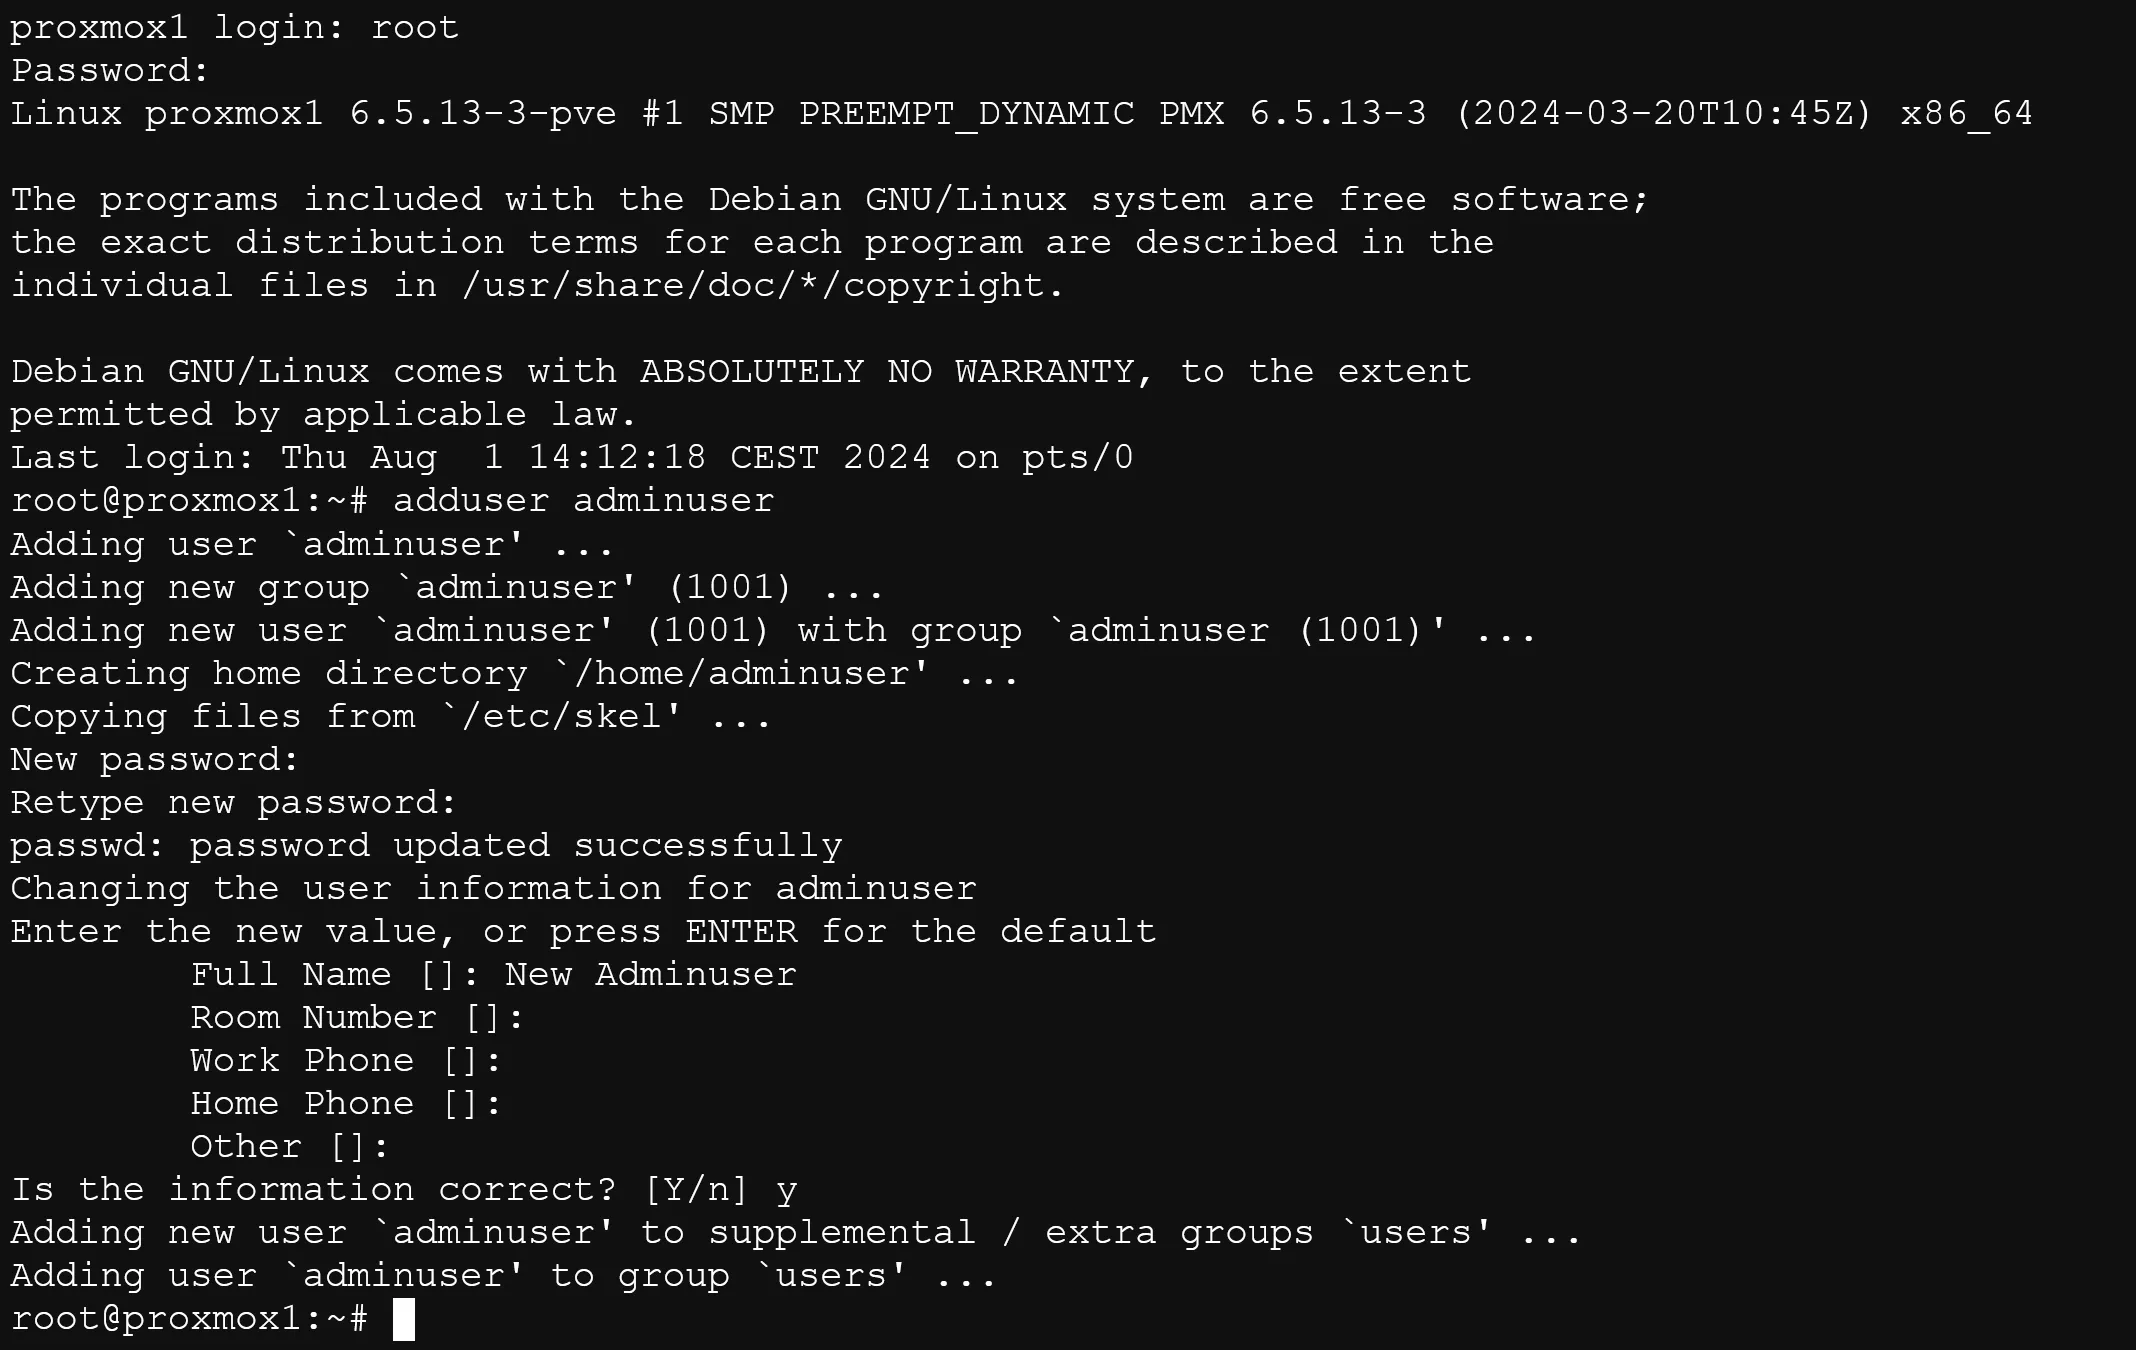
Granting sudo privileges to the new user:
I add the user to the sudo group:
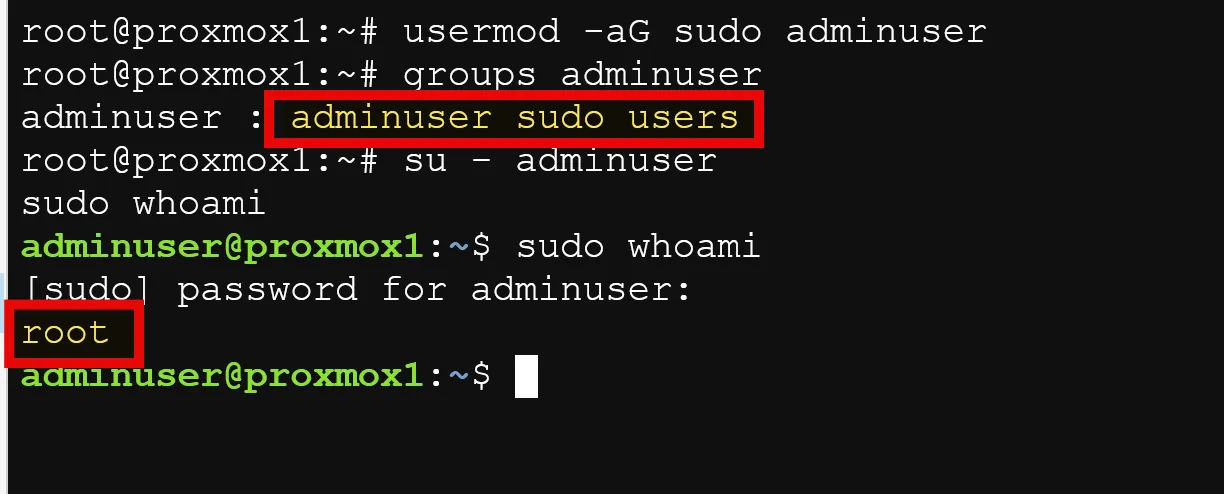
usermod -aG sudo adminuserTo verify, I check the user’s groups:
groups adminuserI test the sudo access:
su - adminuser
sudo whoami
This should return “root”.
Remember, while this user now has sudo privileges, it doesn’t automatically have full access to all Proxmox functions. In the following section, I will discuss effectively balancing root and admin user access.
Next, we have to add the new “adminuser” to the Proxmox GUI
Via GUI:
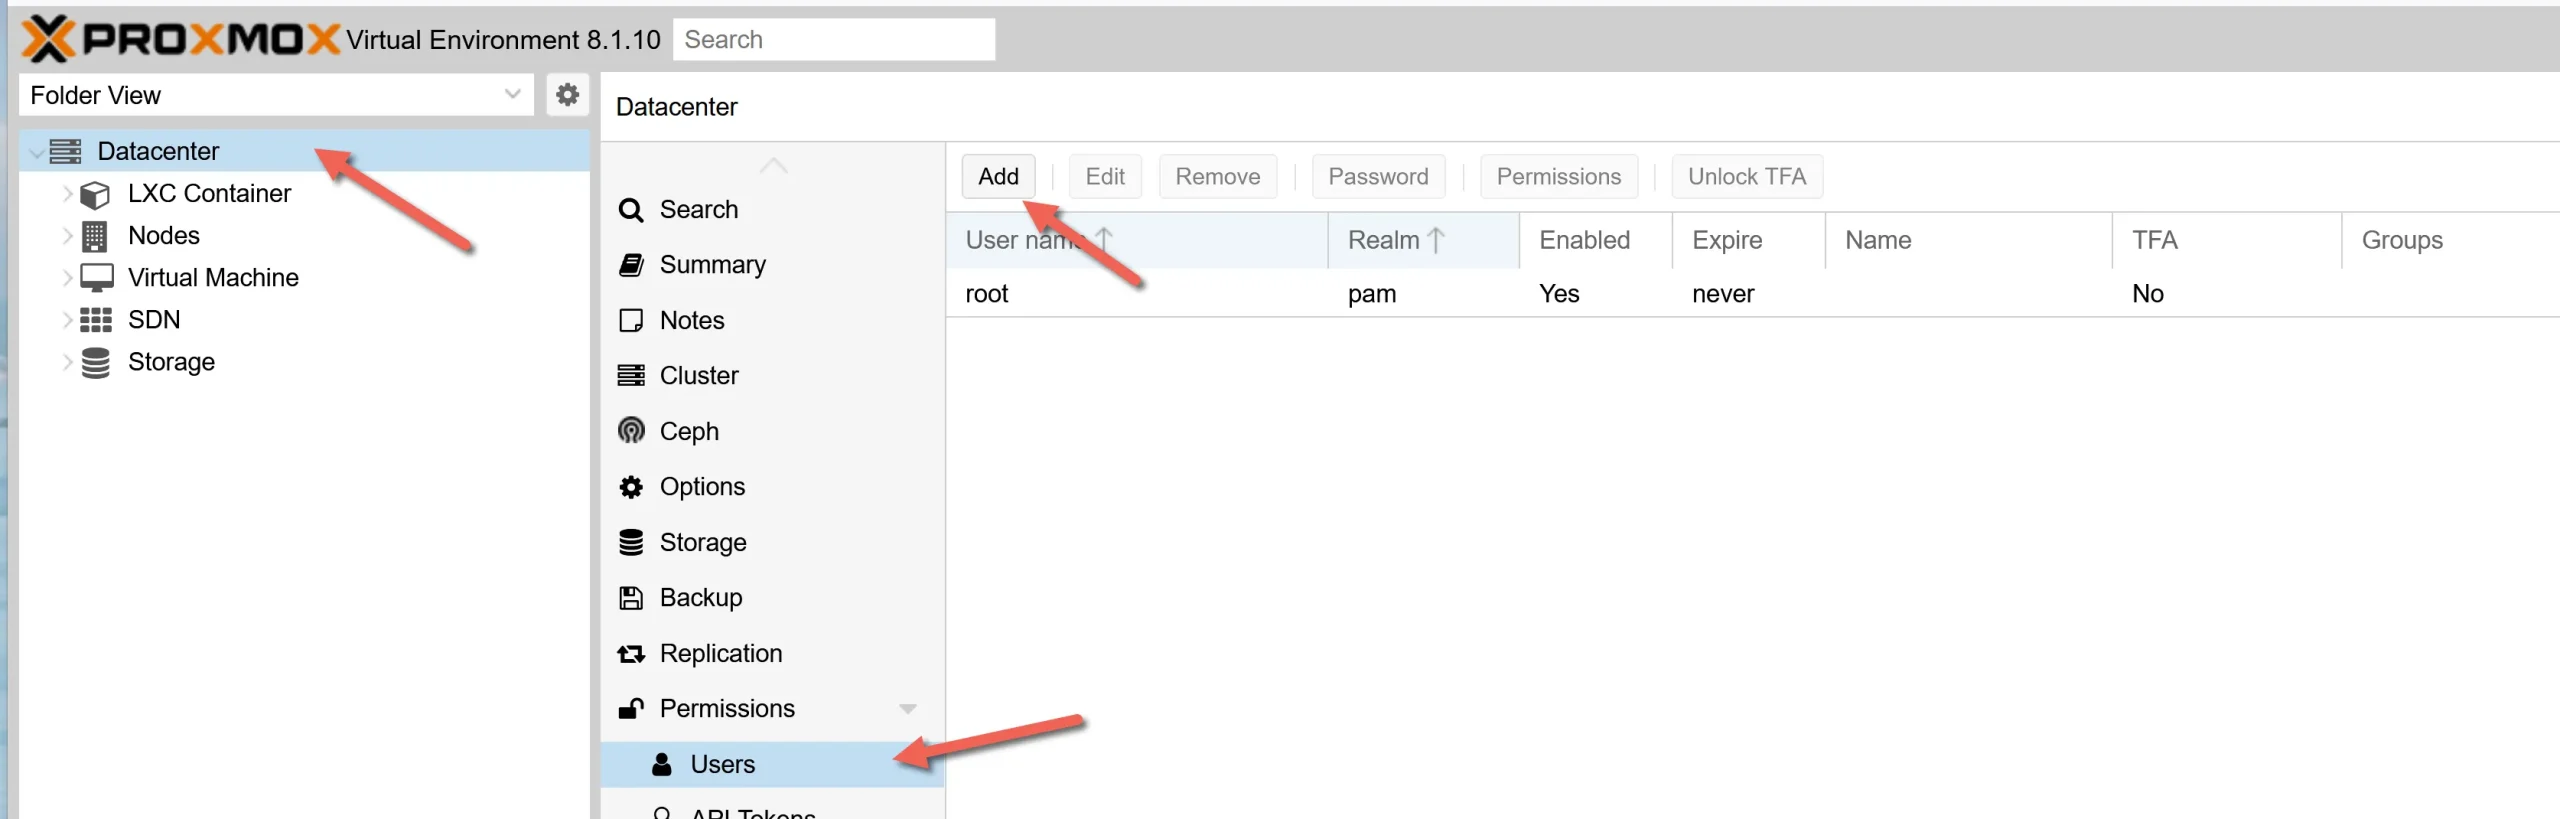
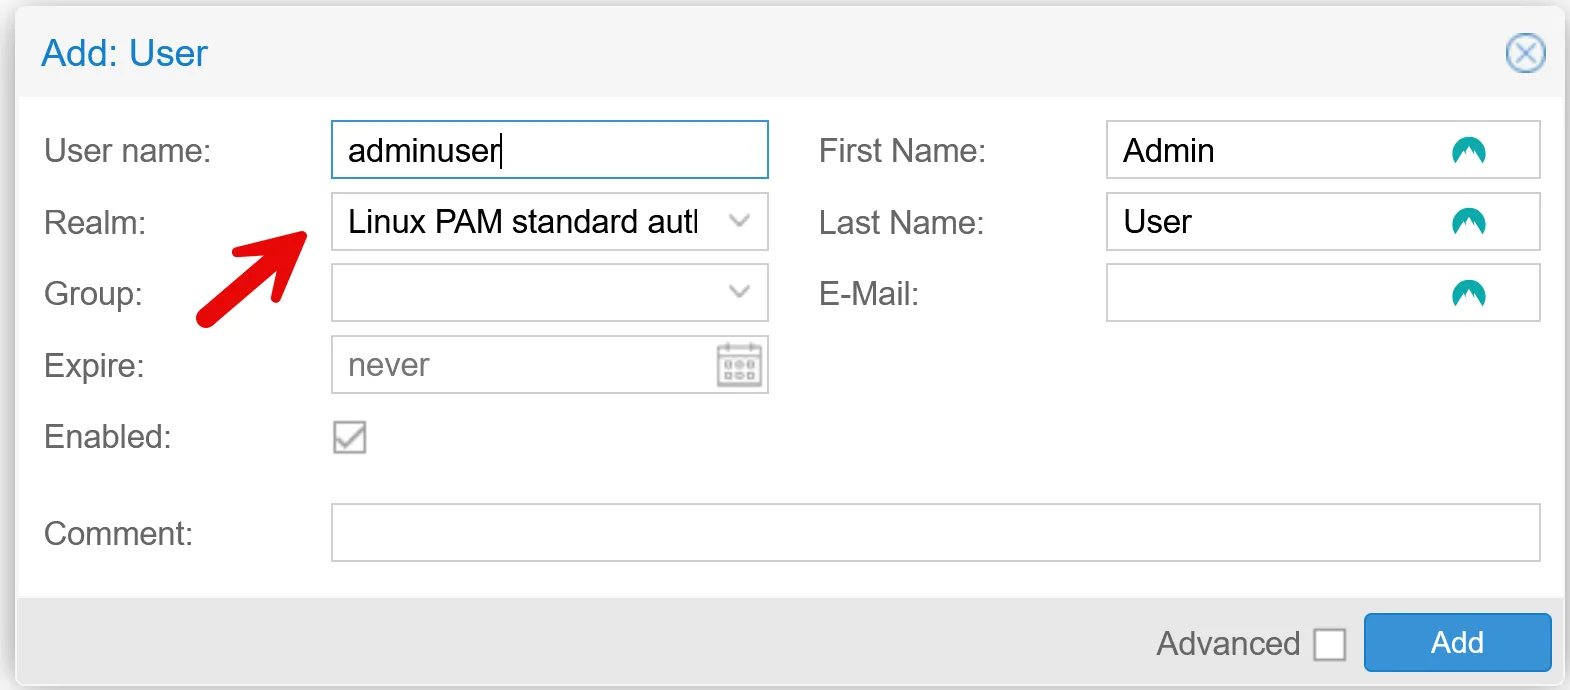
Note: The choice between Linux PAM and Proxmox VE realms has essential user access and management implications. We’ll explore these differences in depth in the “Proxmox-Specific Considerations” section later in this article. If you’re unsure, choose Linux PAM for now, as it allows access to both the shell and Proxmox web interface.
To give our new user the same permissions as the Proxmox root user, we need to assign the Administrator role:
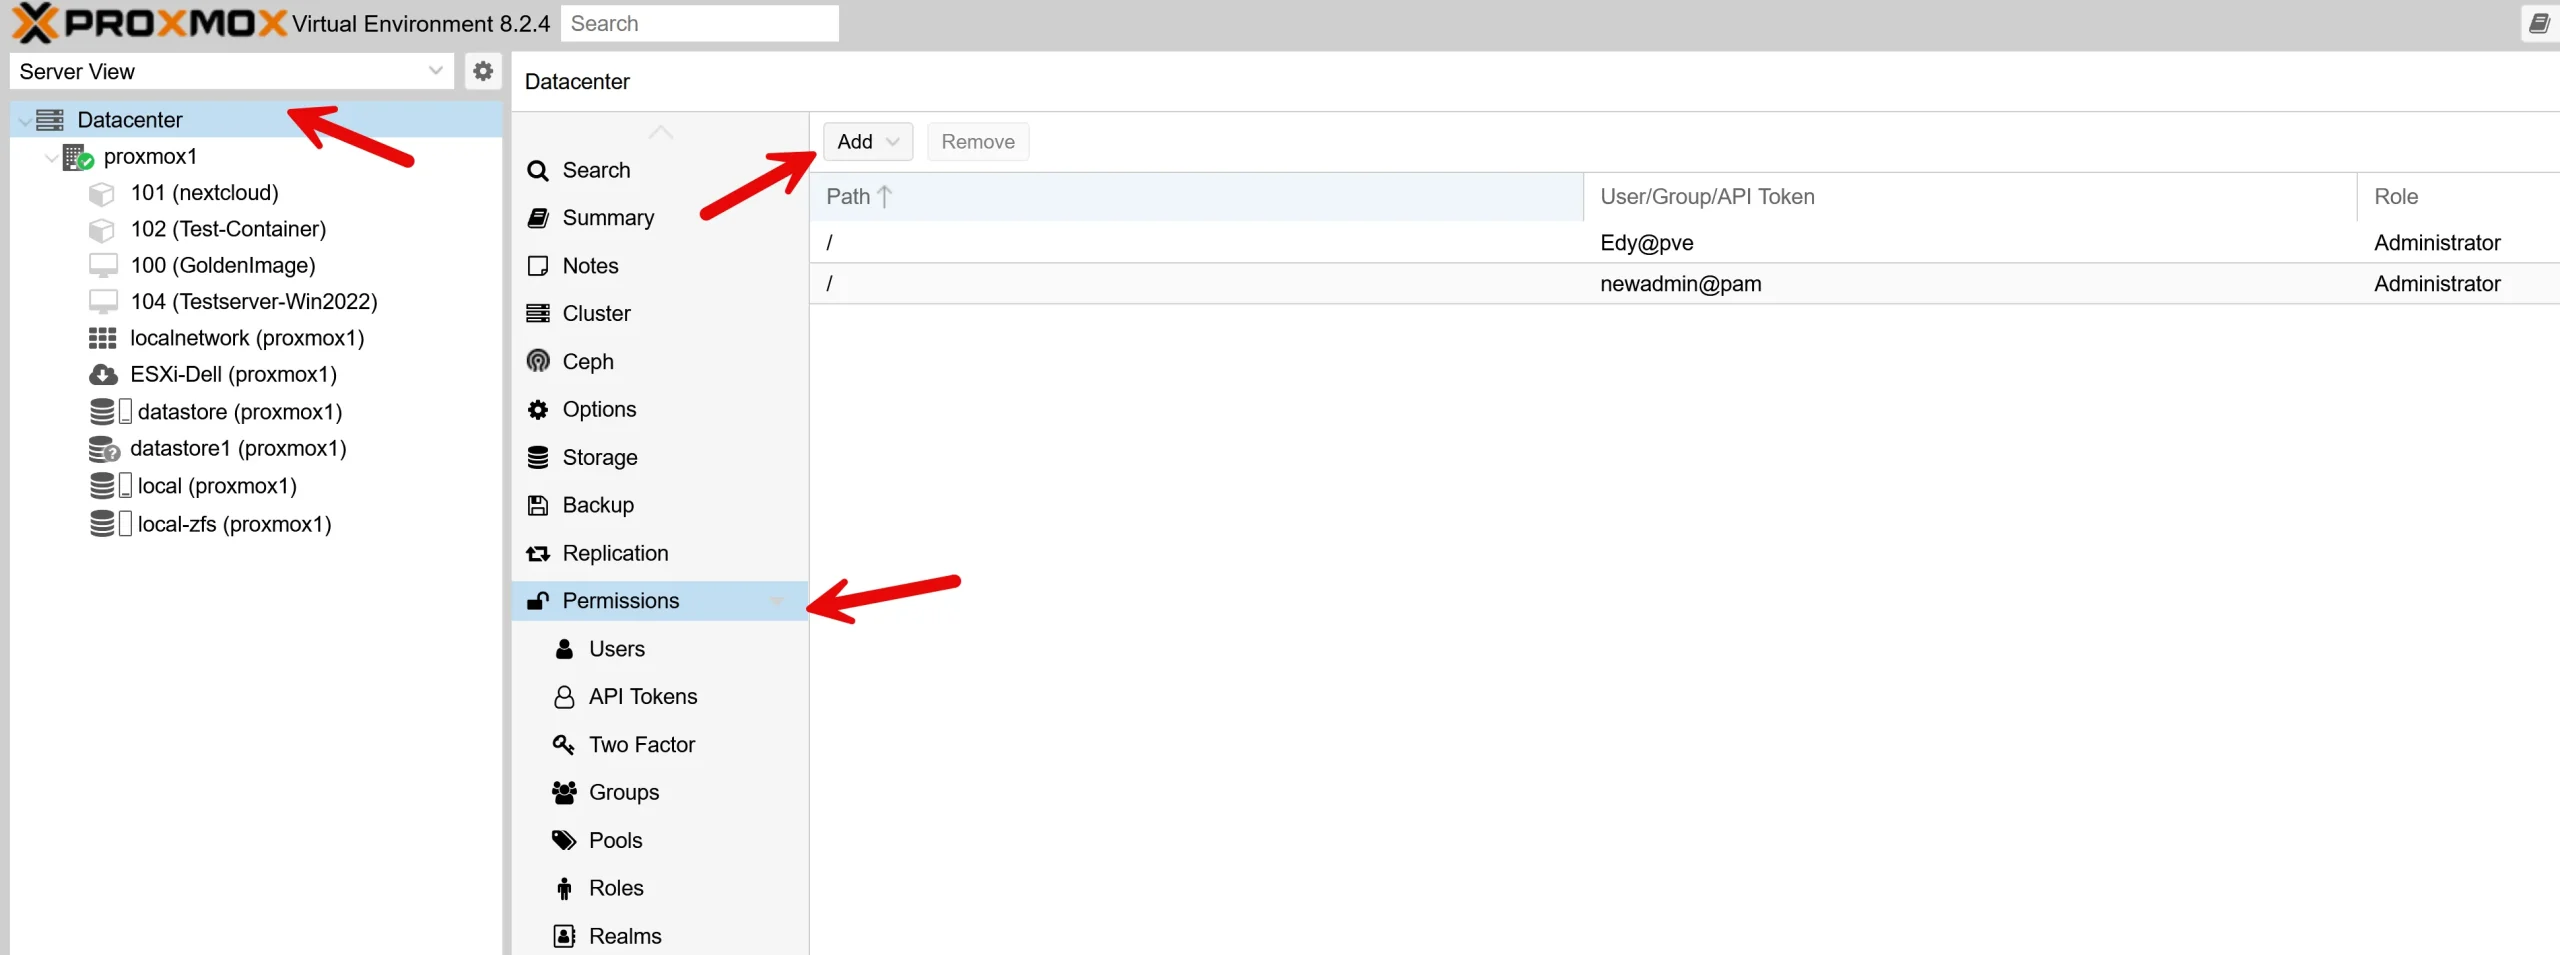
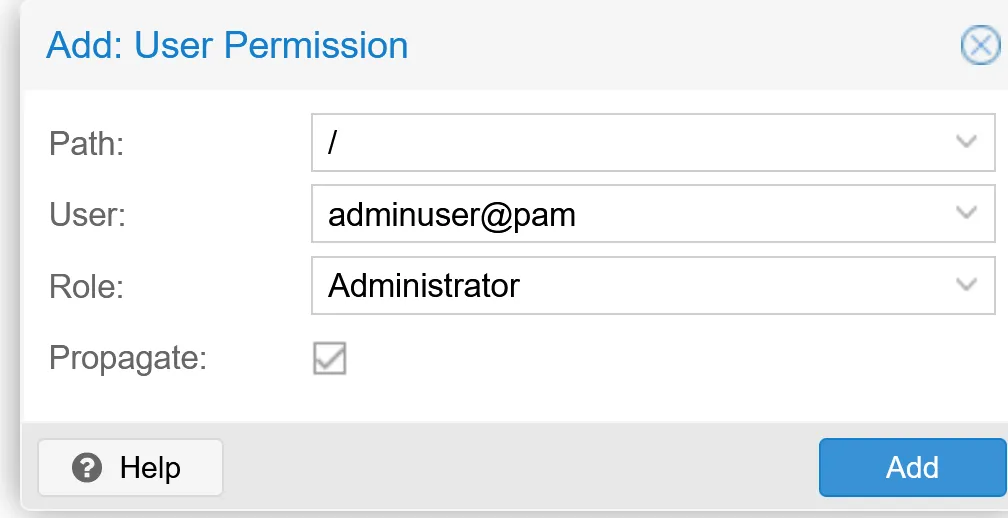
This grants ‘adminuser’ full administrative rights in the Proxmox web interface, similar to the root user. The user can now manage all aspects of Proxmox, including creating and managing VMs, storage, networking, and more.
Important: While this user now has full Proxmox administrative rights, remember that system-level tasks might still require the use of sudo or root access, depending on how you’ve set up the user (Linux PAM vs Proxmox VE).
One final, crucial point: While I’ve used ‘adminuser’ in this example for clarity, it’s not the most secure choice. From a security standpoint, it’s best to choose a username that’s not easily guessable. Avoid obvious choices like ‘admin’, ‘root2’, or anything related to your organization’s name.
In the next section, we’ll discuss how to balance using this new admin user with root access, ensuring both convenience and security.
Now that we’ve set up our new administrative user, it’s crucial to understand when to use it versus root access. This balance is key to maintaining security while ensuring smooth system operation.
When to use root vs. the new admin user (adminuser):
Best practices for minimizing root usage:
Limitations of the new admin user compared to root:
While our new admin user is powerful, it’s not identical to root:
Understanding SSH and shell access in Proxmox is important for balancing security and functionality. Here’s how I approach it:
Disabling root SSH access:
nano /etc/ssh/sshd_configPermitRootLogin nosystemctl restart sshdThis prevents direct root login via SSH, a standard security recommendation.
Alternate access methods: Even with root SSH disabled, I can still access the system as root when needed:
su - it to switch to root.Benefits of this approach:
By understanding these distinctions, I can maintain a better secure system while still having the flexibility to perform all necessary tasks. Remember, the goal is to minimize root usage, not eliminate it.
Proxmox uses two main authentication realms:
Choose Linux PAM for users needing both system and Proxmox access. Use Proxmox VE for users who only require web interface access.
Configuring Proxmox web interface permissions:
Remember, depending on your setup, some system-level tasks might still require root access or sudo use.
Proxmox Virtual Environment (PVE) supports TOTP (Time-based One-Time Password), a form of two-factor authentication (2FA) that significantly boosts your system’s security. Here’s how to set it up:
Enabling TOTP for a user:
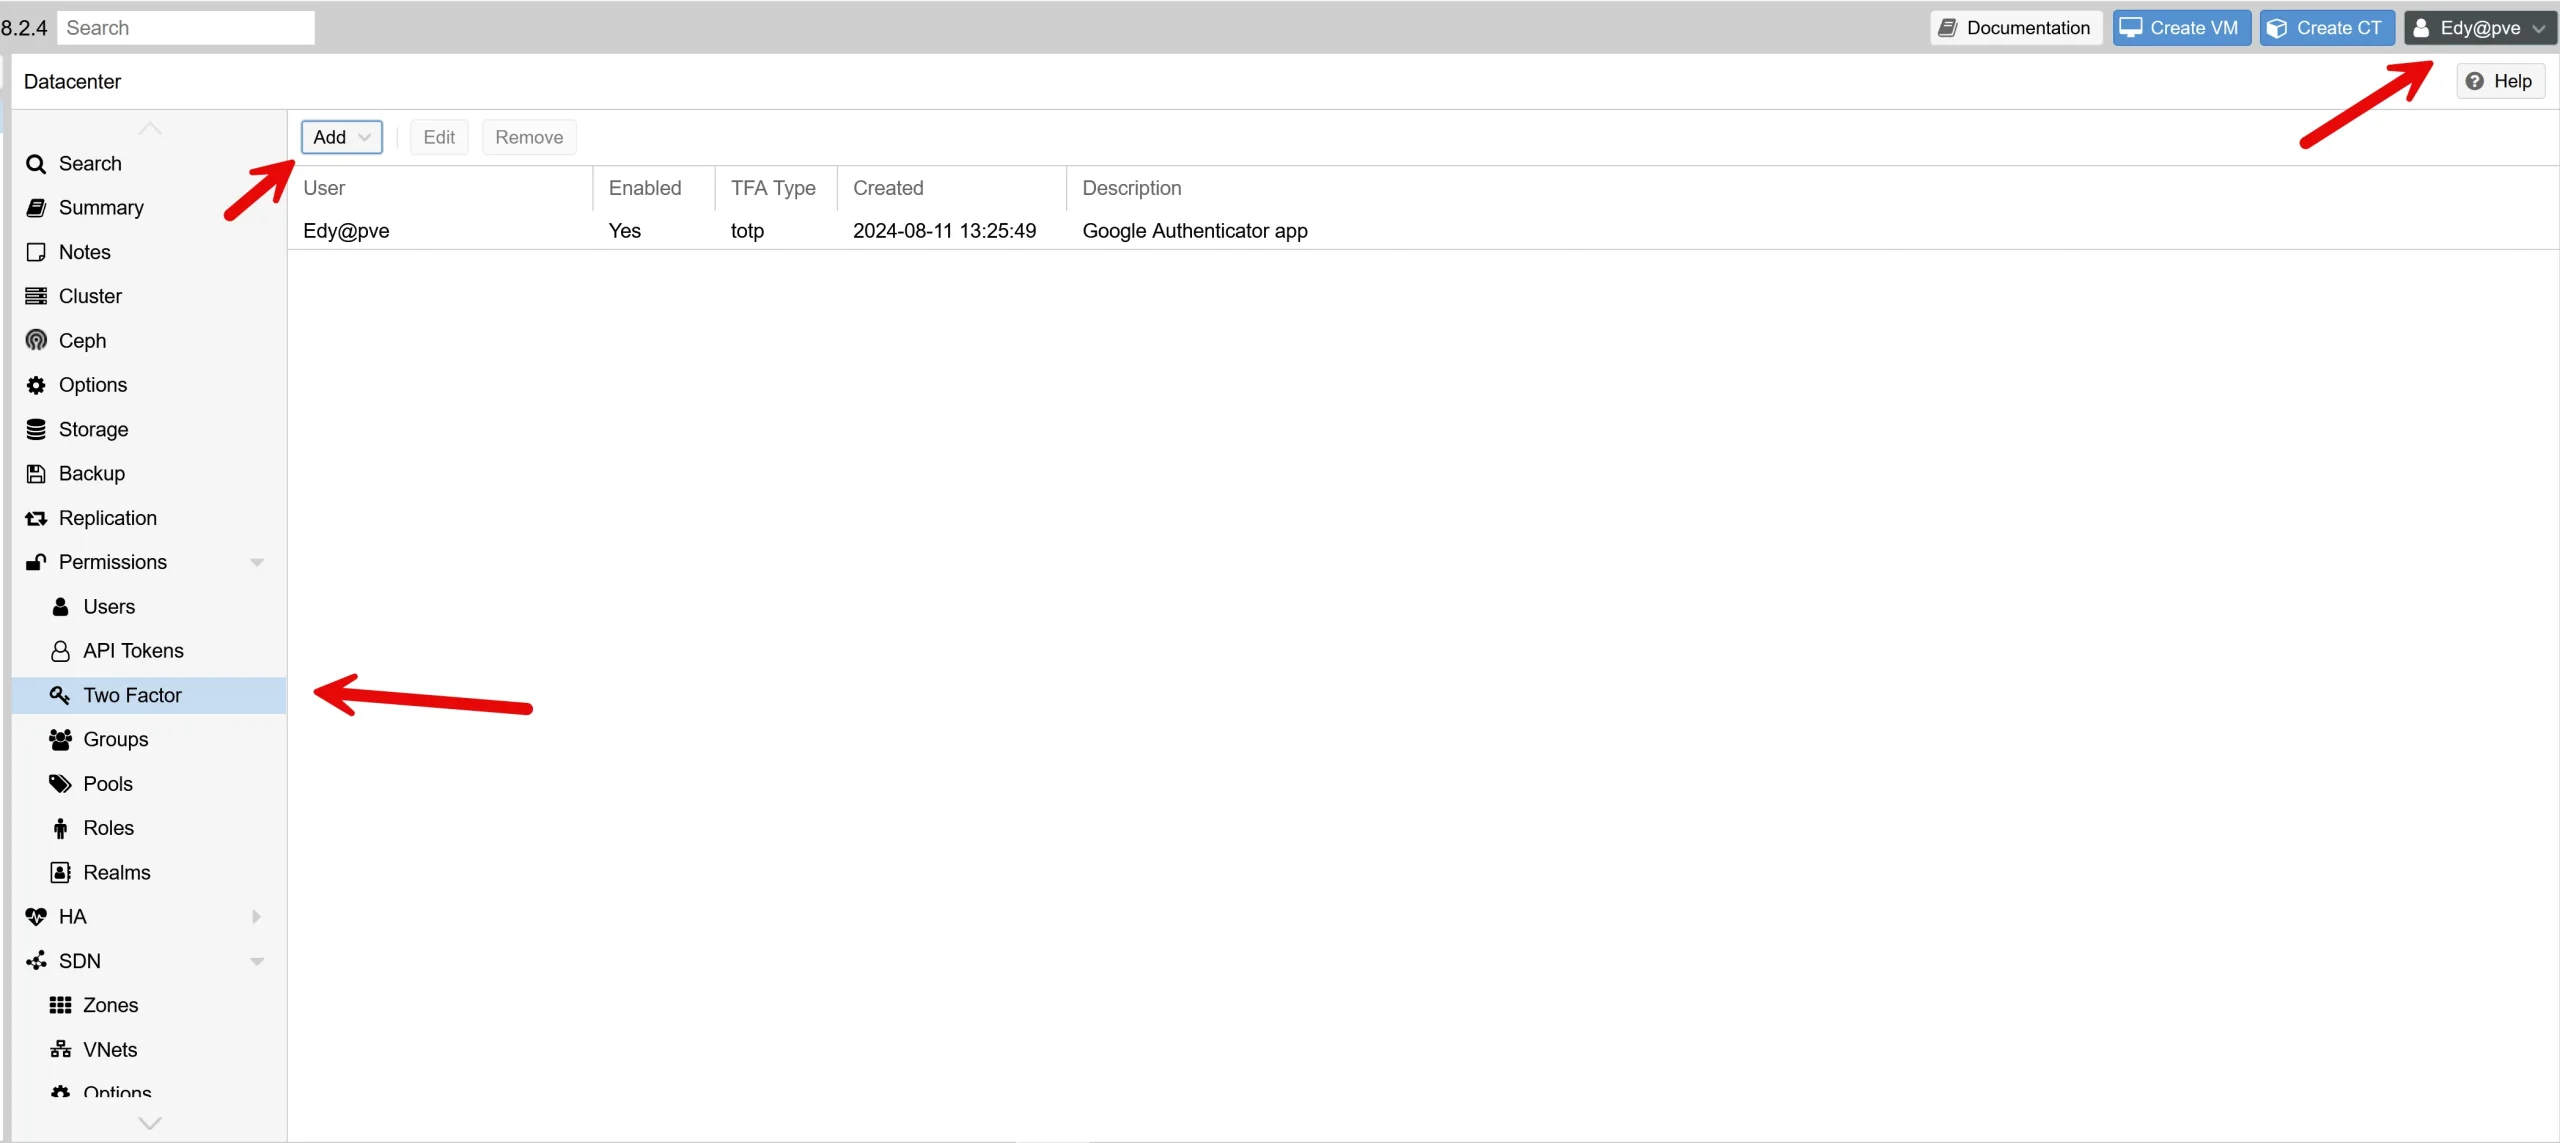
In the TOTP setup window:
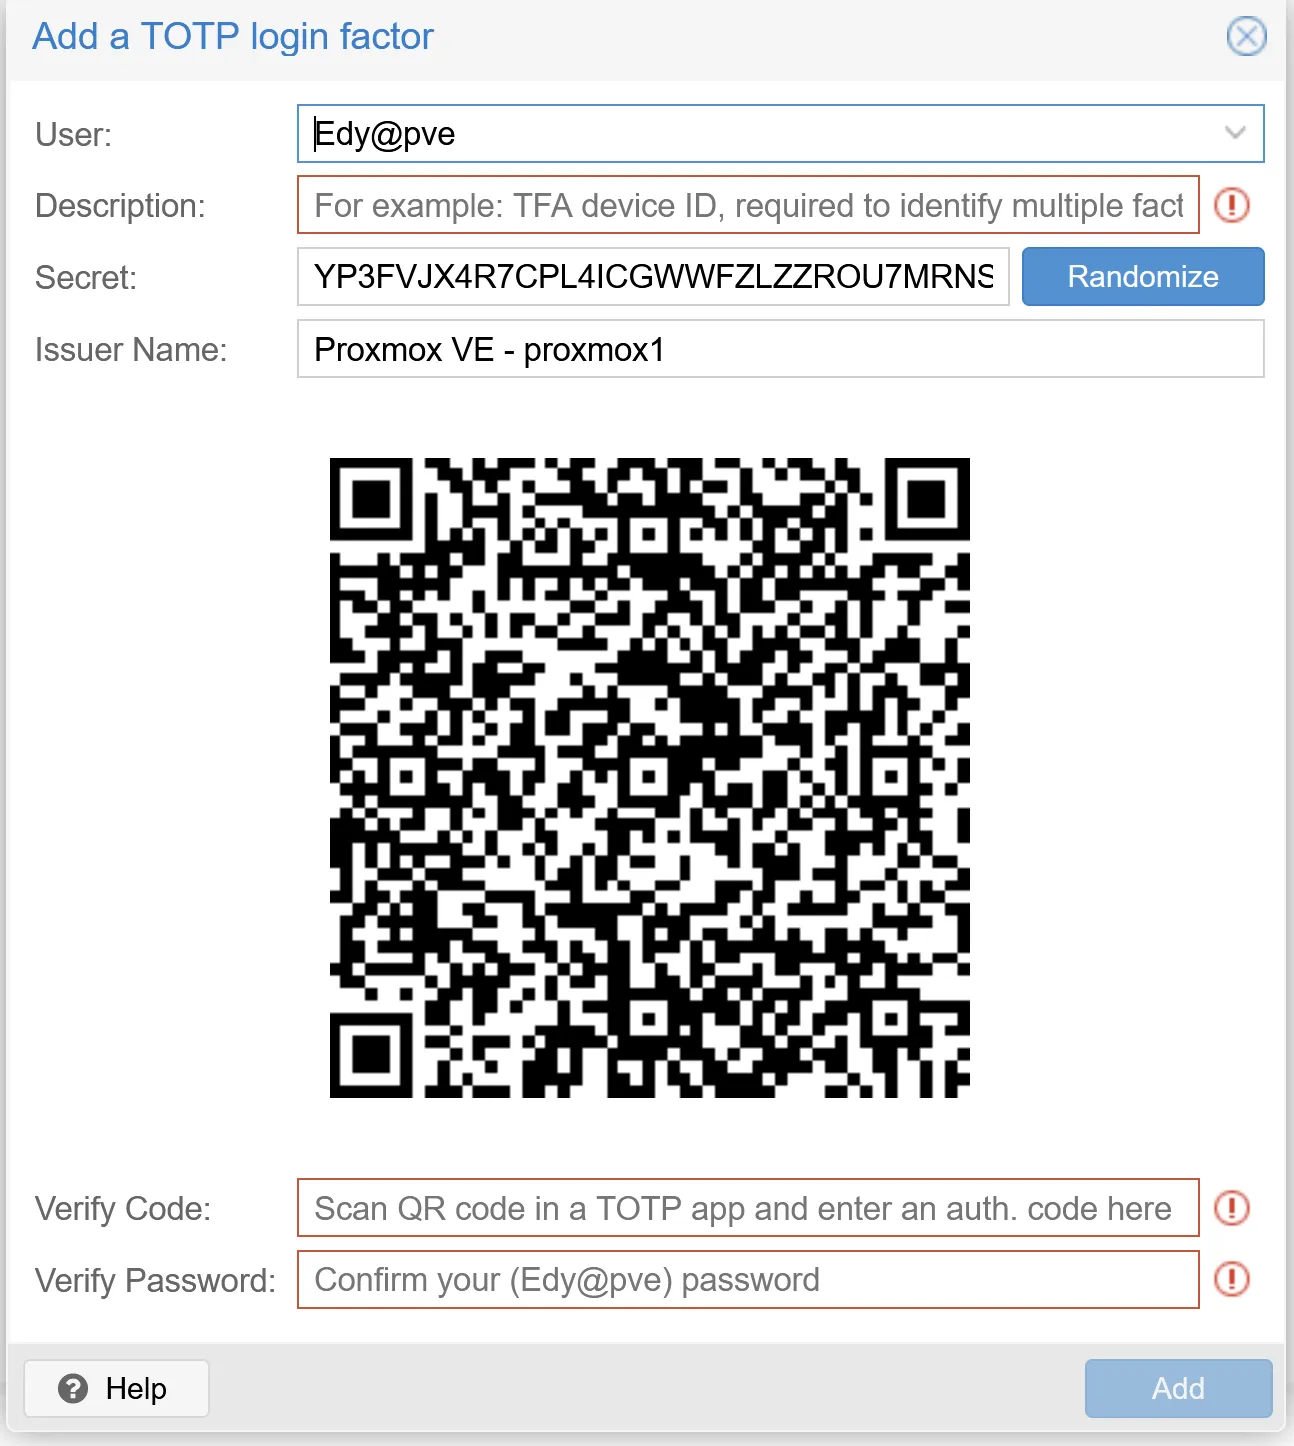
Realm-Wide 2FA Enforcement: While 2FA is set up per user, Proxmox allows enforcing it for all users within a specific authentication realm:
In the image below I force 2FA for the default Proxmox VE realm.
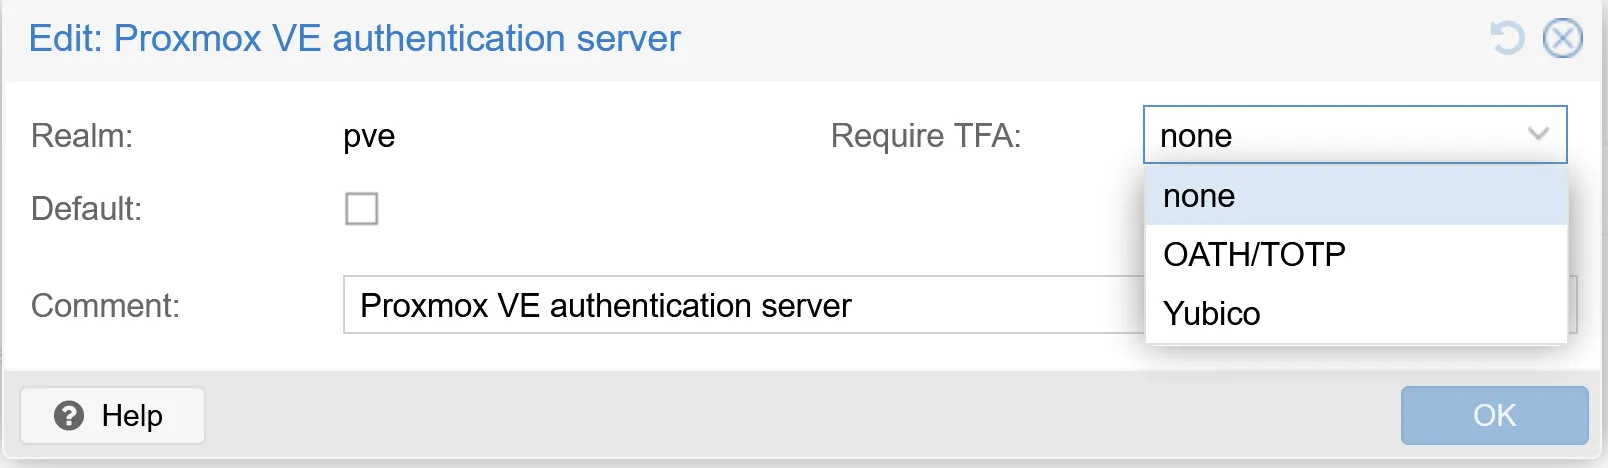
Important Considerations:
By implementing two-factor authentication (2FA), either on a per-user basis or realm-wide, you significantly increase the security of your Proxmox environment. This helps protect against unauthorized access, even if passwords are compromised.
To further enhance your Proxmox security beyond root user management, explore my guide on ‘Boost Securing SSH: Two-Factor Auth for Linux/Proxmox‘ for implementing robust SSH protection.
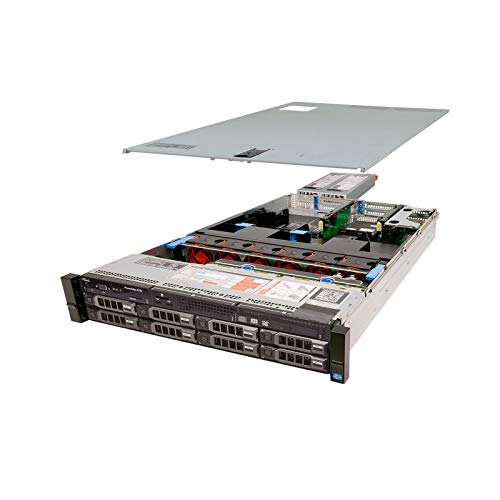
renewed Servers
The products are refurbished, fully functional, and in excellent condition.

I earn a commission if you make a purchase, at no additional cost to you.

I earn a commission if you make a purchase, at no additional cost to you.

I earn a commission if you make a purchase, at no additional cost to you.
I earn a commission if you make a purchase, at no additional cost to you.
Proxmox’s built-in monitoring tools primarily focus on system and VM operations rather than detailed user login/logout events.
You can check the Tasks and cluster log at the bottom for user activity. Unfortunately, Proxmox’s user activity logging is somewhat limited out of the box, and enhancing it may require additional setup or external tools.
Throughout this journey into Proxmox user management, we’ve uncovered the unique aspects of the root user, explored creating secure administrative accounts, and delved into enhancing security with 2FA.
As you apply these insights to your Proxmox environment, keep security at the forefront. Review user permissions regularly, encourage 2FA use, and stay updated on Proxmox’s latest security features.
With these practices, you’ll maintain a robust and secure virtualization platform.
Happy Proxmox administrating!
I’d love to hear from you. Was this article helpful? Share your thoughts in the comments below. If you prefer, you can also reach me by email or connect with me on Reddit at Navigatetech.
Before you go, if you’re managing a mixed environment or considering platform migrations, you might find this guide on Migrating from VMware to Proxmox particularly useful. It provides insights that complement the security measures you’ve just read about by offering a seamless transition strategy between these platforms.
Hi, I'm Edy Werder. I write hands-on guides about servers, virtualization, NAS and WordPress, based on setups I run in my own homelab. Real configs and real results, no fluff.
Enjoying the content?