
By Edy Werder — IT Consultant & Tech Blogger
Want to access your Synology NAS from anywhere without the hassle of VPNs, static IPs, or port forwarding? Synology QuickConnect lets you connect remotely in minutes, securely and without touching your router settings.
In this guide, I’ll walk you through the setup step-by-step, explain how QuickConnect works, compare it to DDNS and VPN options, and share its pros, cons, and ideal use cases — including my take on using it with Synology’s mobile apps.
Synology QuickConnect is a remote access service provided by Synology that allows you to easily connect to your Synology NAS from anywhere in the world. Without the need for complex network configurations or dealing with IP addresses, QuickConnect bridges the gap, enabling seamless access to your files, applications, and media. It’s like having your personal cloud storage but with the privacy and control of owning a NAS.
QuickConnect uses Synology’s secure servers to manage connections between your devices and your NAS. When you access your NAS remotely, your device communicates with Synology’s servers, which connect you to your NAS. This process eliminates the need for port forwarding and dynamic DNS setups, making the entire experience user-friendly and secure.
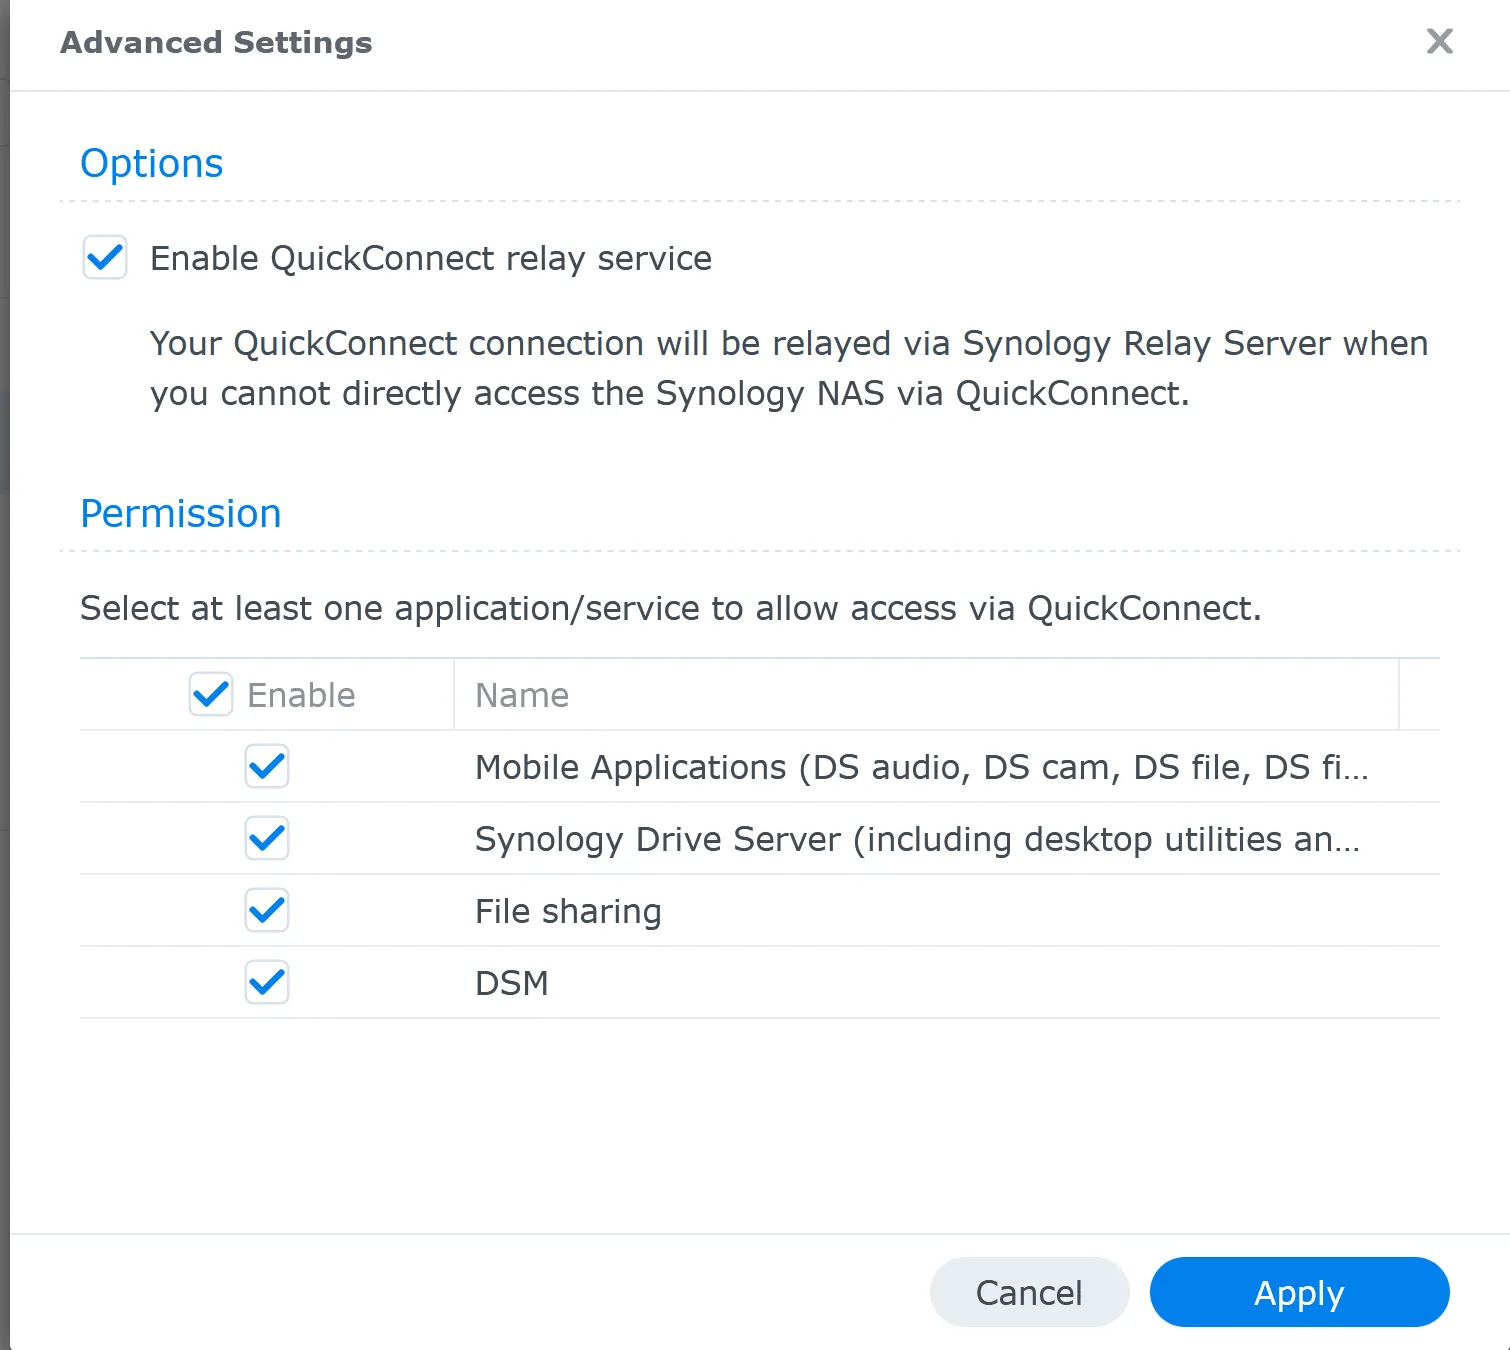
Moreover, Synology QuickConnect supports a wide range of Synology applications, allowing you to do more than just access files. Whether you want to stream media, manage downloads, or even keep an eye on your home with Surveillance Station, QuickConnect makes it all possible from any location.
Synology emphasizes the importance of security in their QuickConnect white paper: “QuickConnect’s robust security features are designed to provide peace of mind for users. By utilizing encrypted connections and secure authentication methods, we ensure that our users can access their data remotely without worrying about potential security threats” (Synology Knowledge Center)
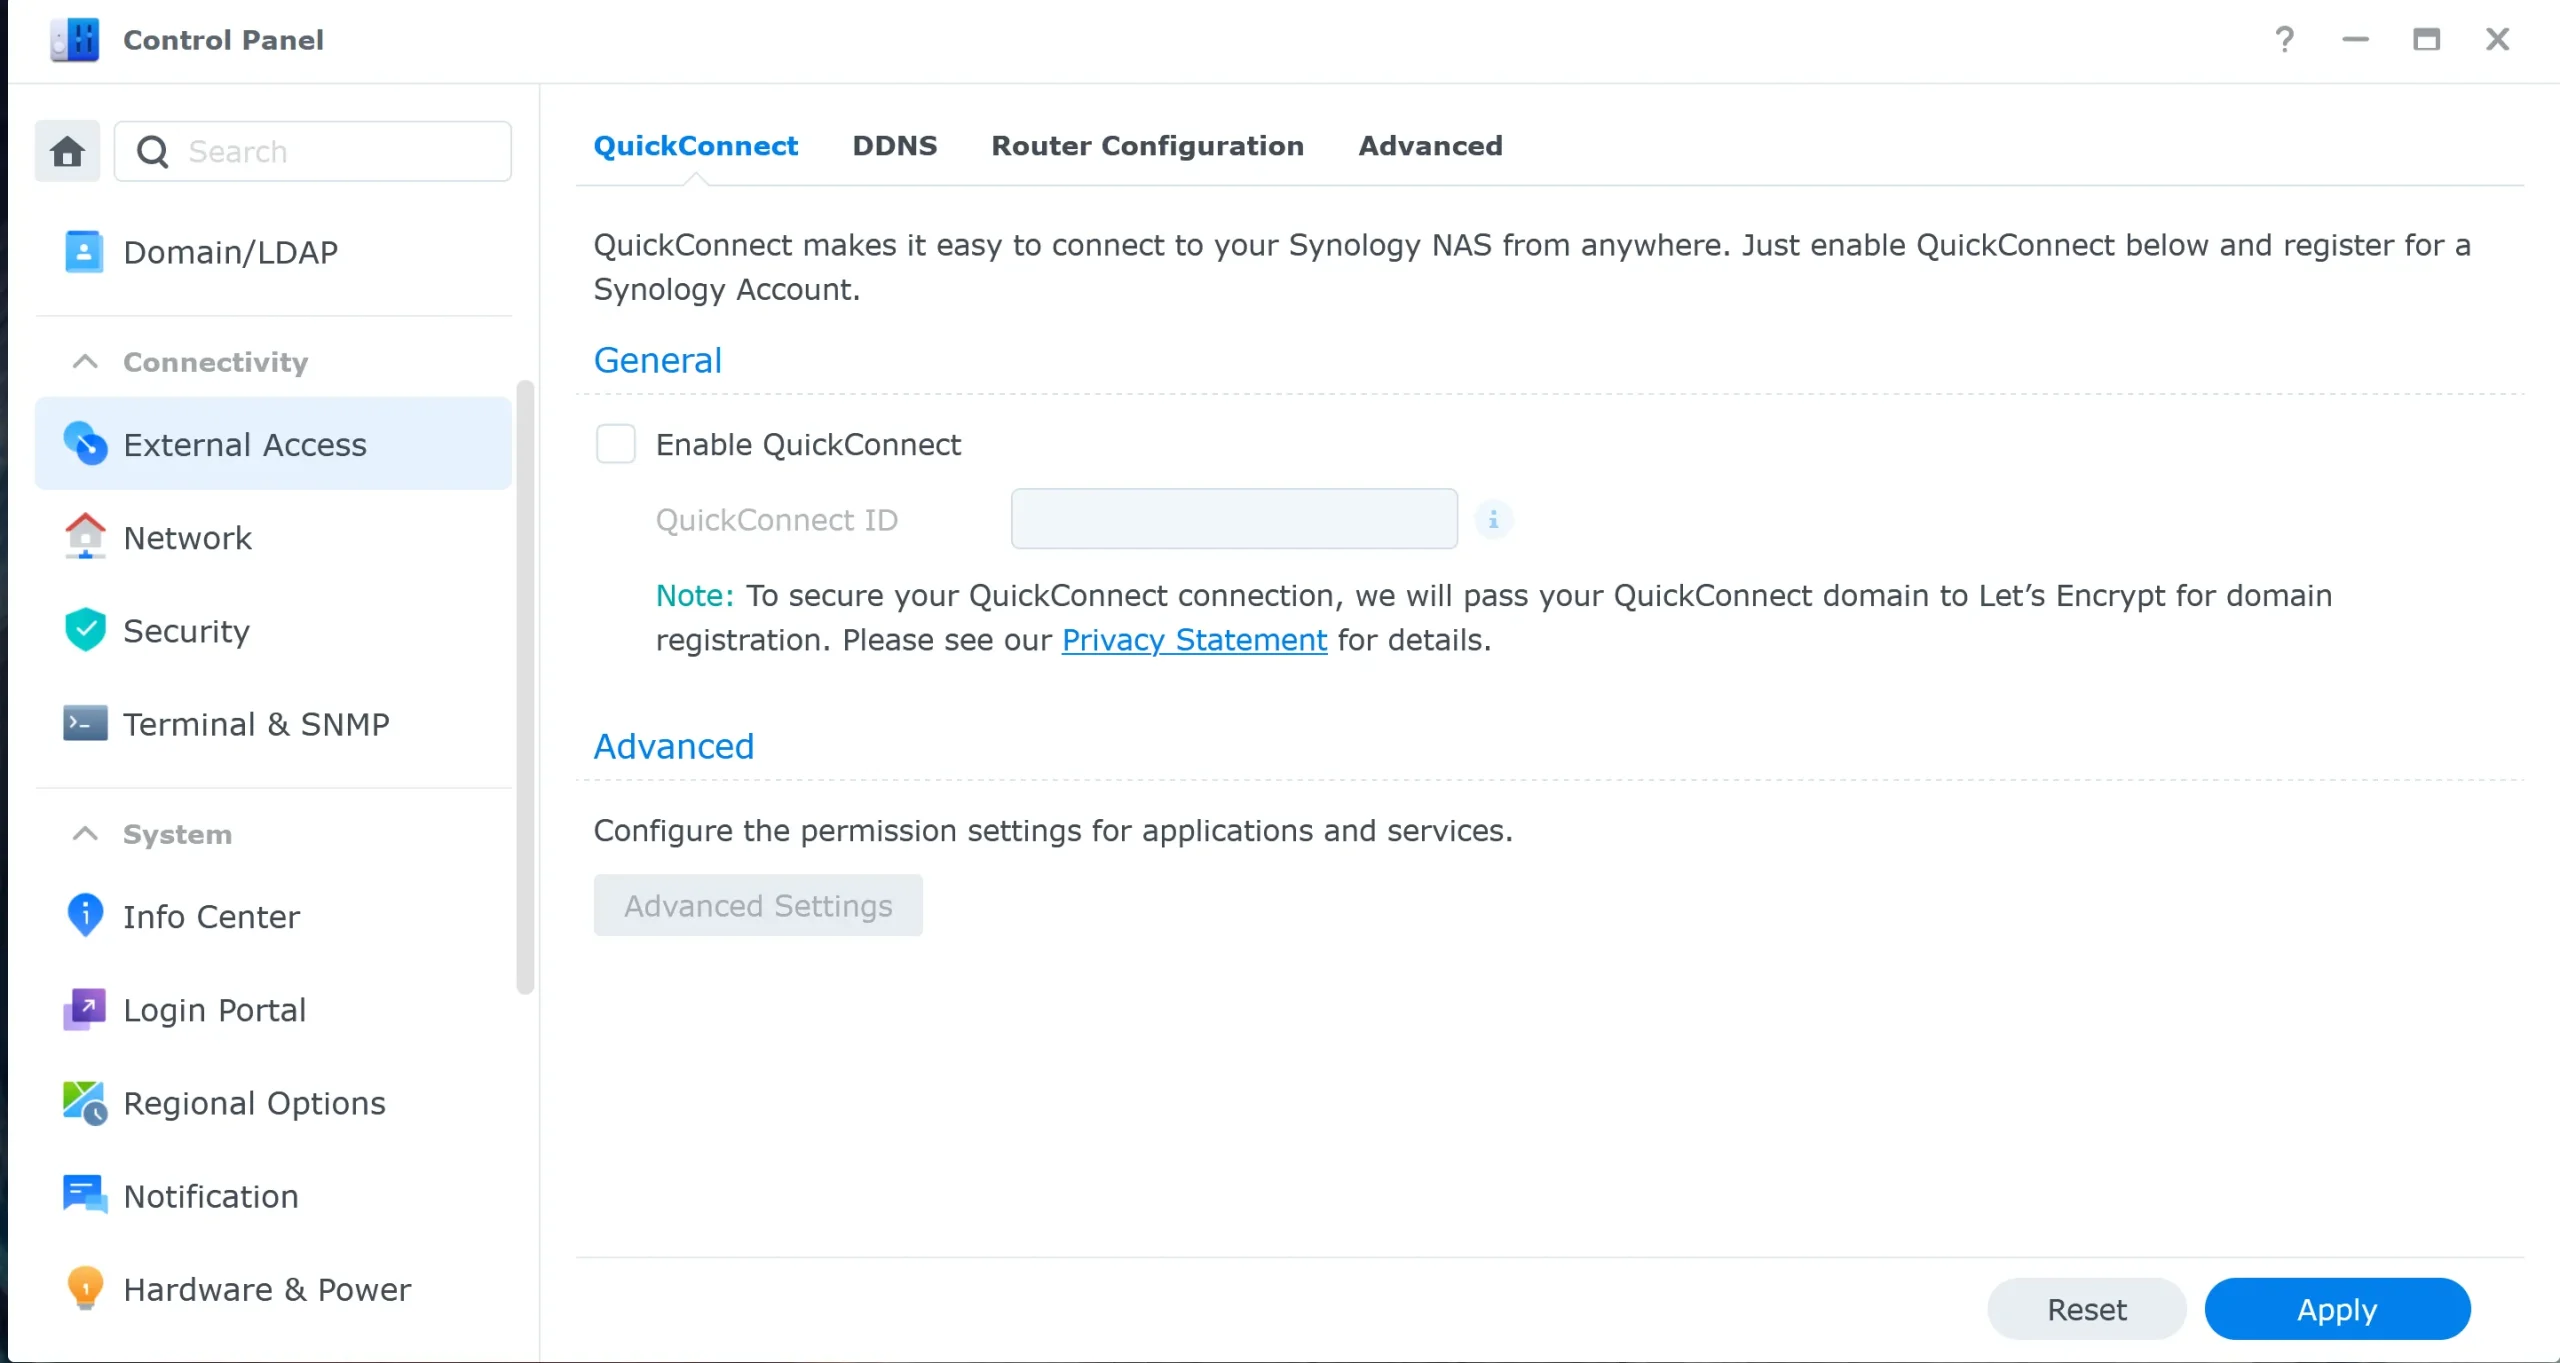
Enabling Synology QuickConnect is a straightforward process, especially with the improvements in DSM 7.2. Here’s a step-by-step guide to help you get started:
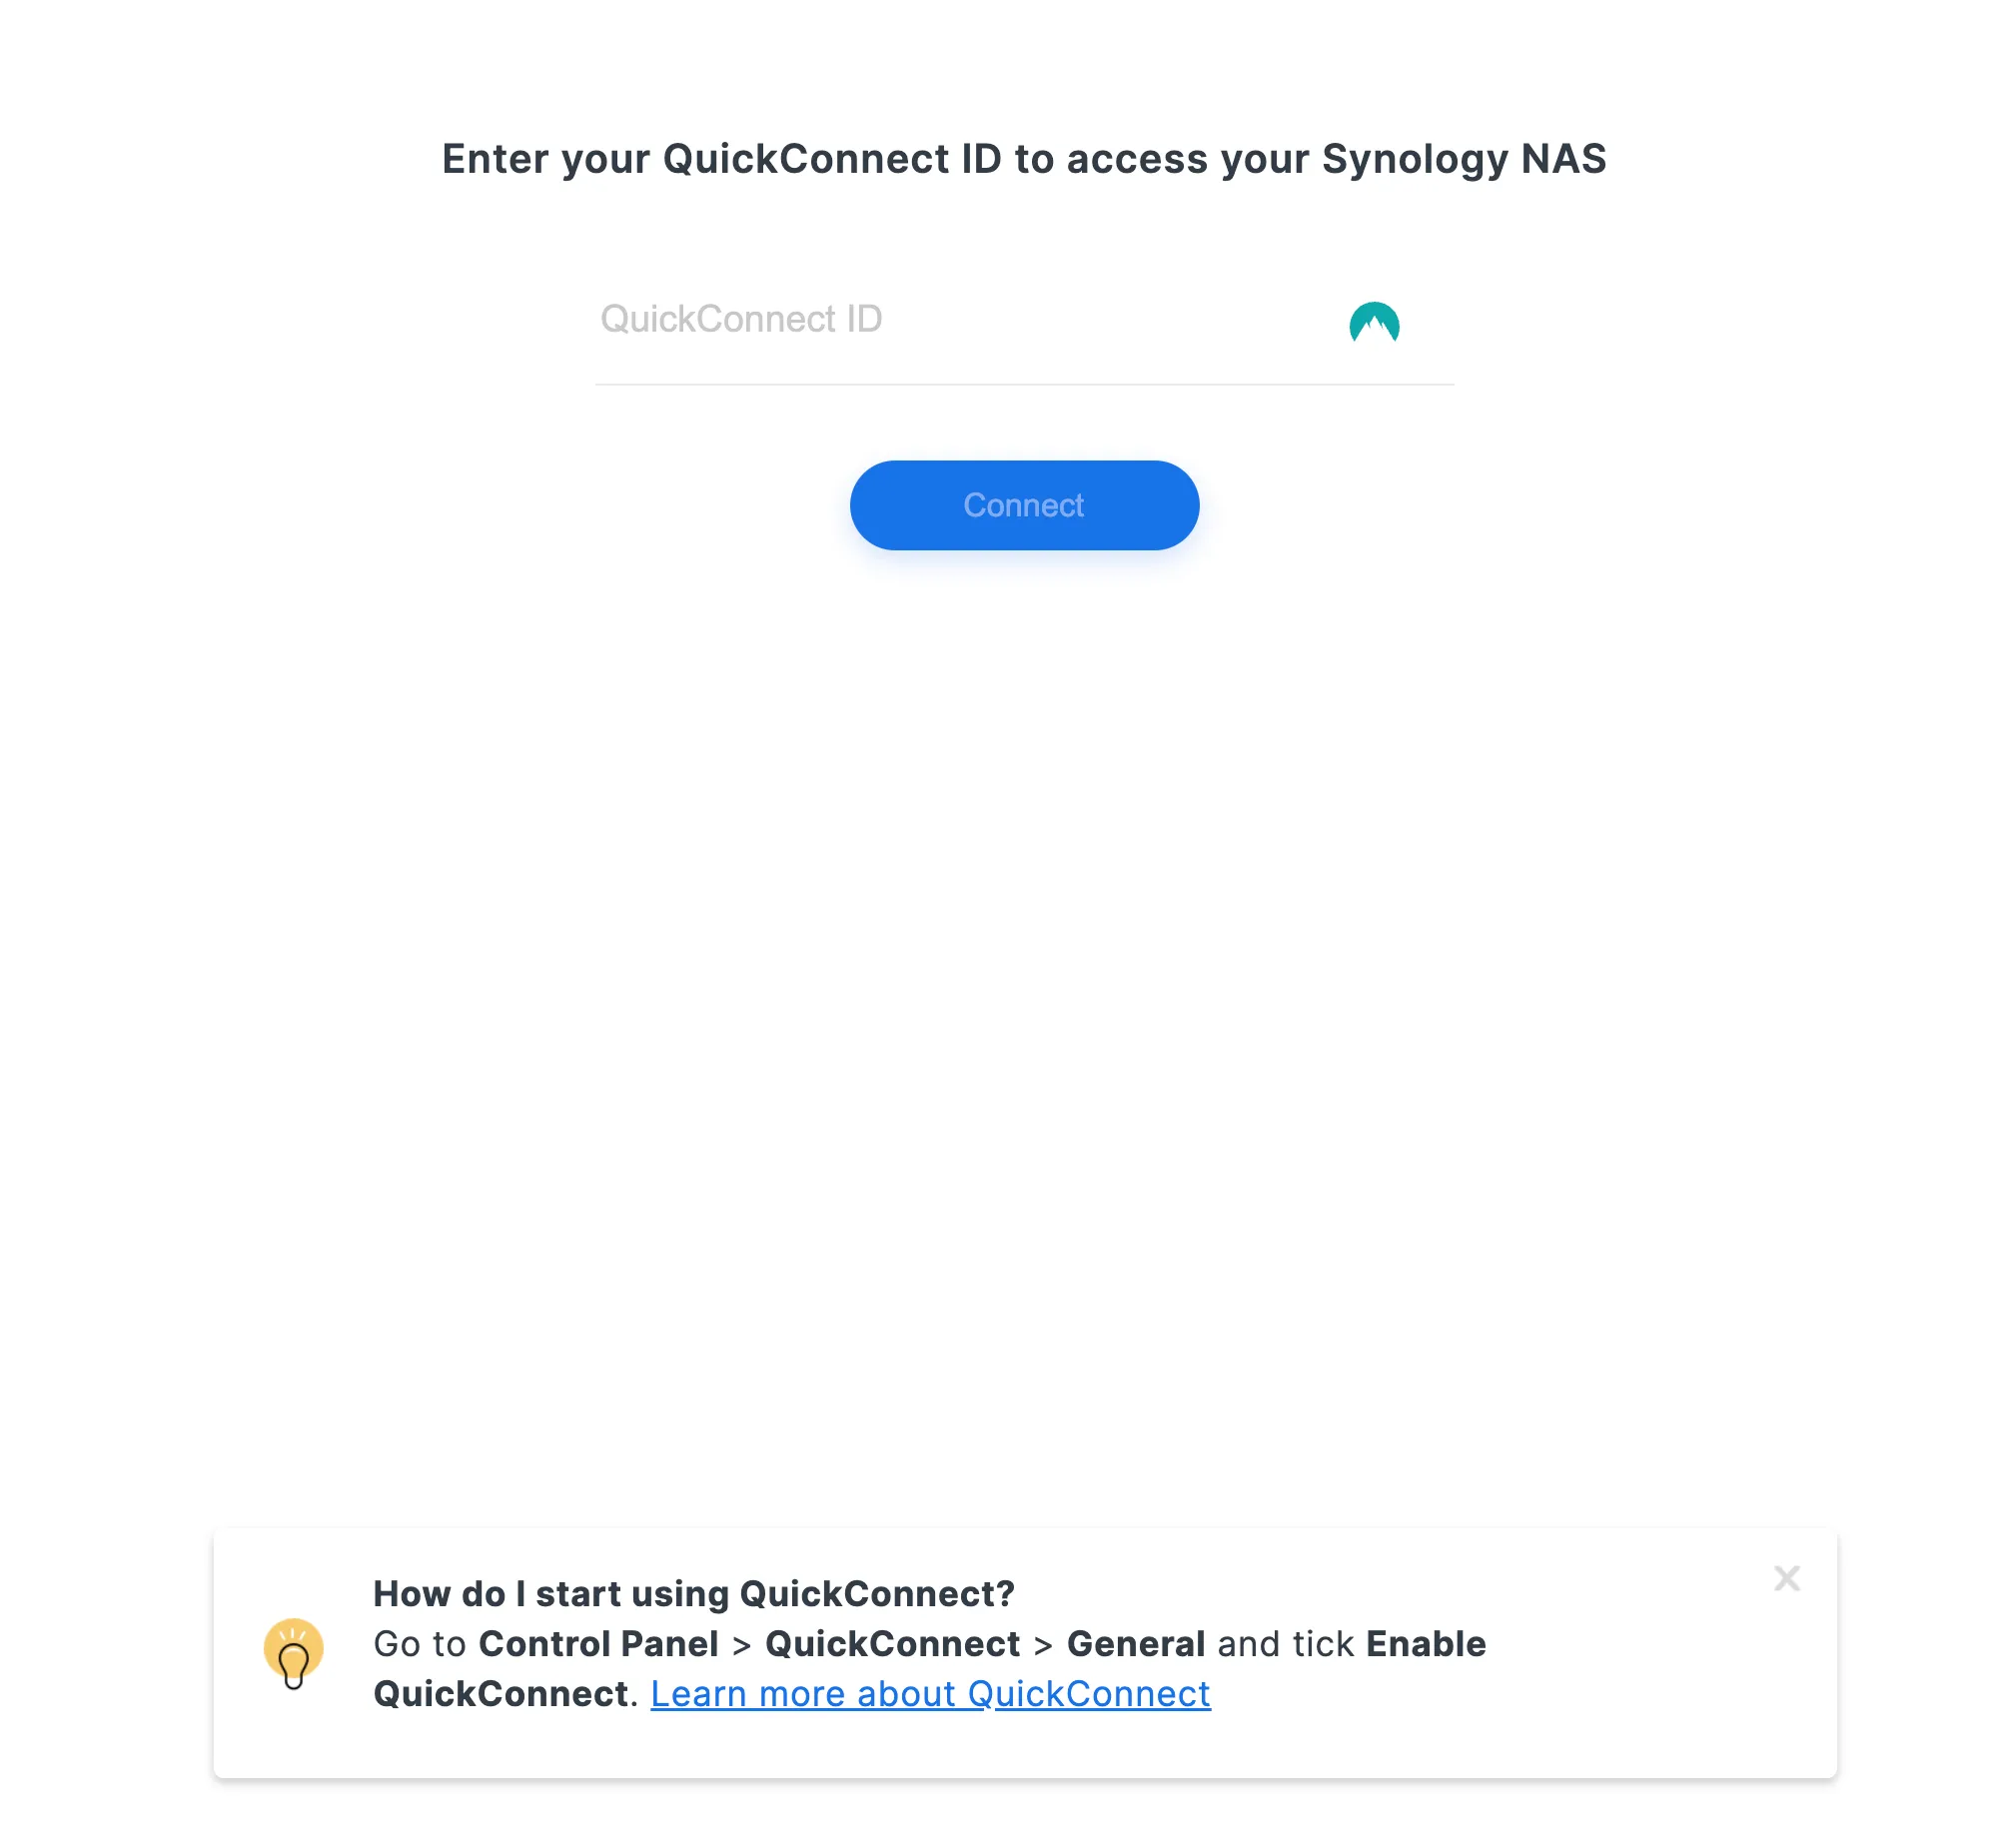
https://QuickConnect.to/YourQuickConnectID.In my case, the URL gets redirected to https://XXXr.de8.quickconnect.to/#/signin
The “de8” in the URL refers to the specific QuickConnect server region that your Synology NAS is connecting through. Synology uses different regional servers to manage and balance the load of QuickConnect connections. The “de” typically represents Germany, indicating the server’s geographical location, while “8” might denote a specific server or cluster within that region.
With effortless QuickConnect integration, your mobile device can become a powerful command center for your Synology NAS. Download Synology’s dedicated mobile apps, such as DS file, DS photo, or DS audio, and input your QuickConnect ID for an instantaneous connection, no matter your location. With these apps, your phone transforms into a remote control that easily accesses, manages, and shares your files.
If your current QuickConnect ID doesn’t meet your needs, changing it is a straightforward process. To ensure a smooth transition, follow these steps:
find.synology.com to locate it.Following these steps, you can easily update your QuickConnect ID to suit your needs better. This process ensures you can continue accessing your NAS remotely with a more fitting and personalized ID.
My pick
When it comes to remote access, security is paramount. Synology QuickConnect is designed with robust security measures to ensure that your data remains safe and accessible only to you. Here’s an easy-to-understand breakdown of the security features behind QuickConnect:
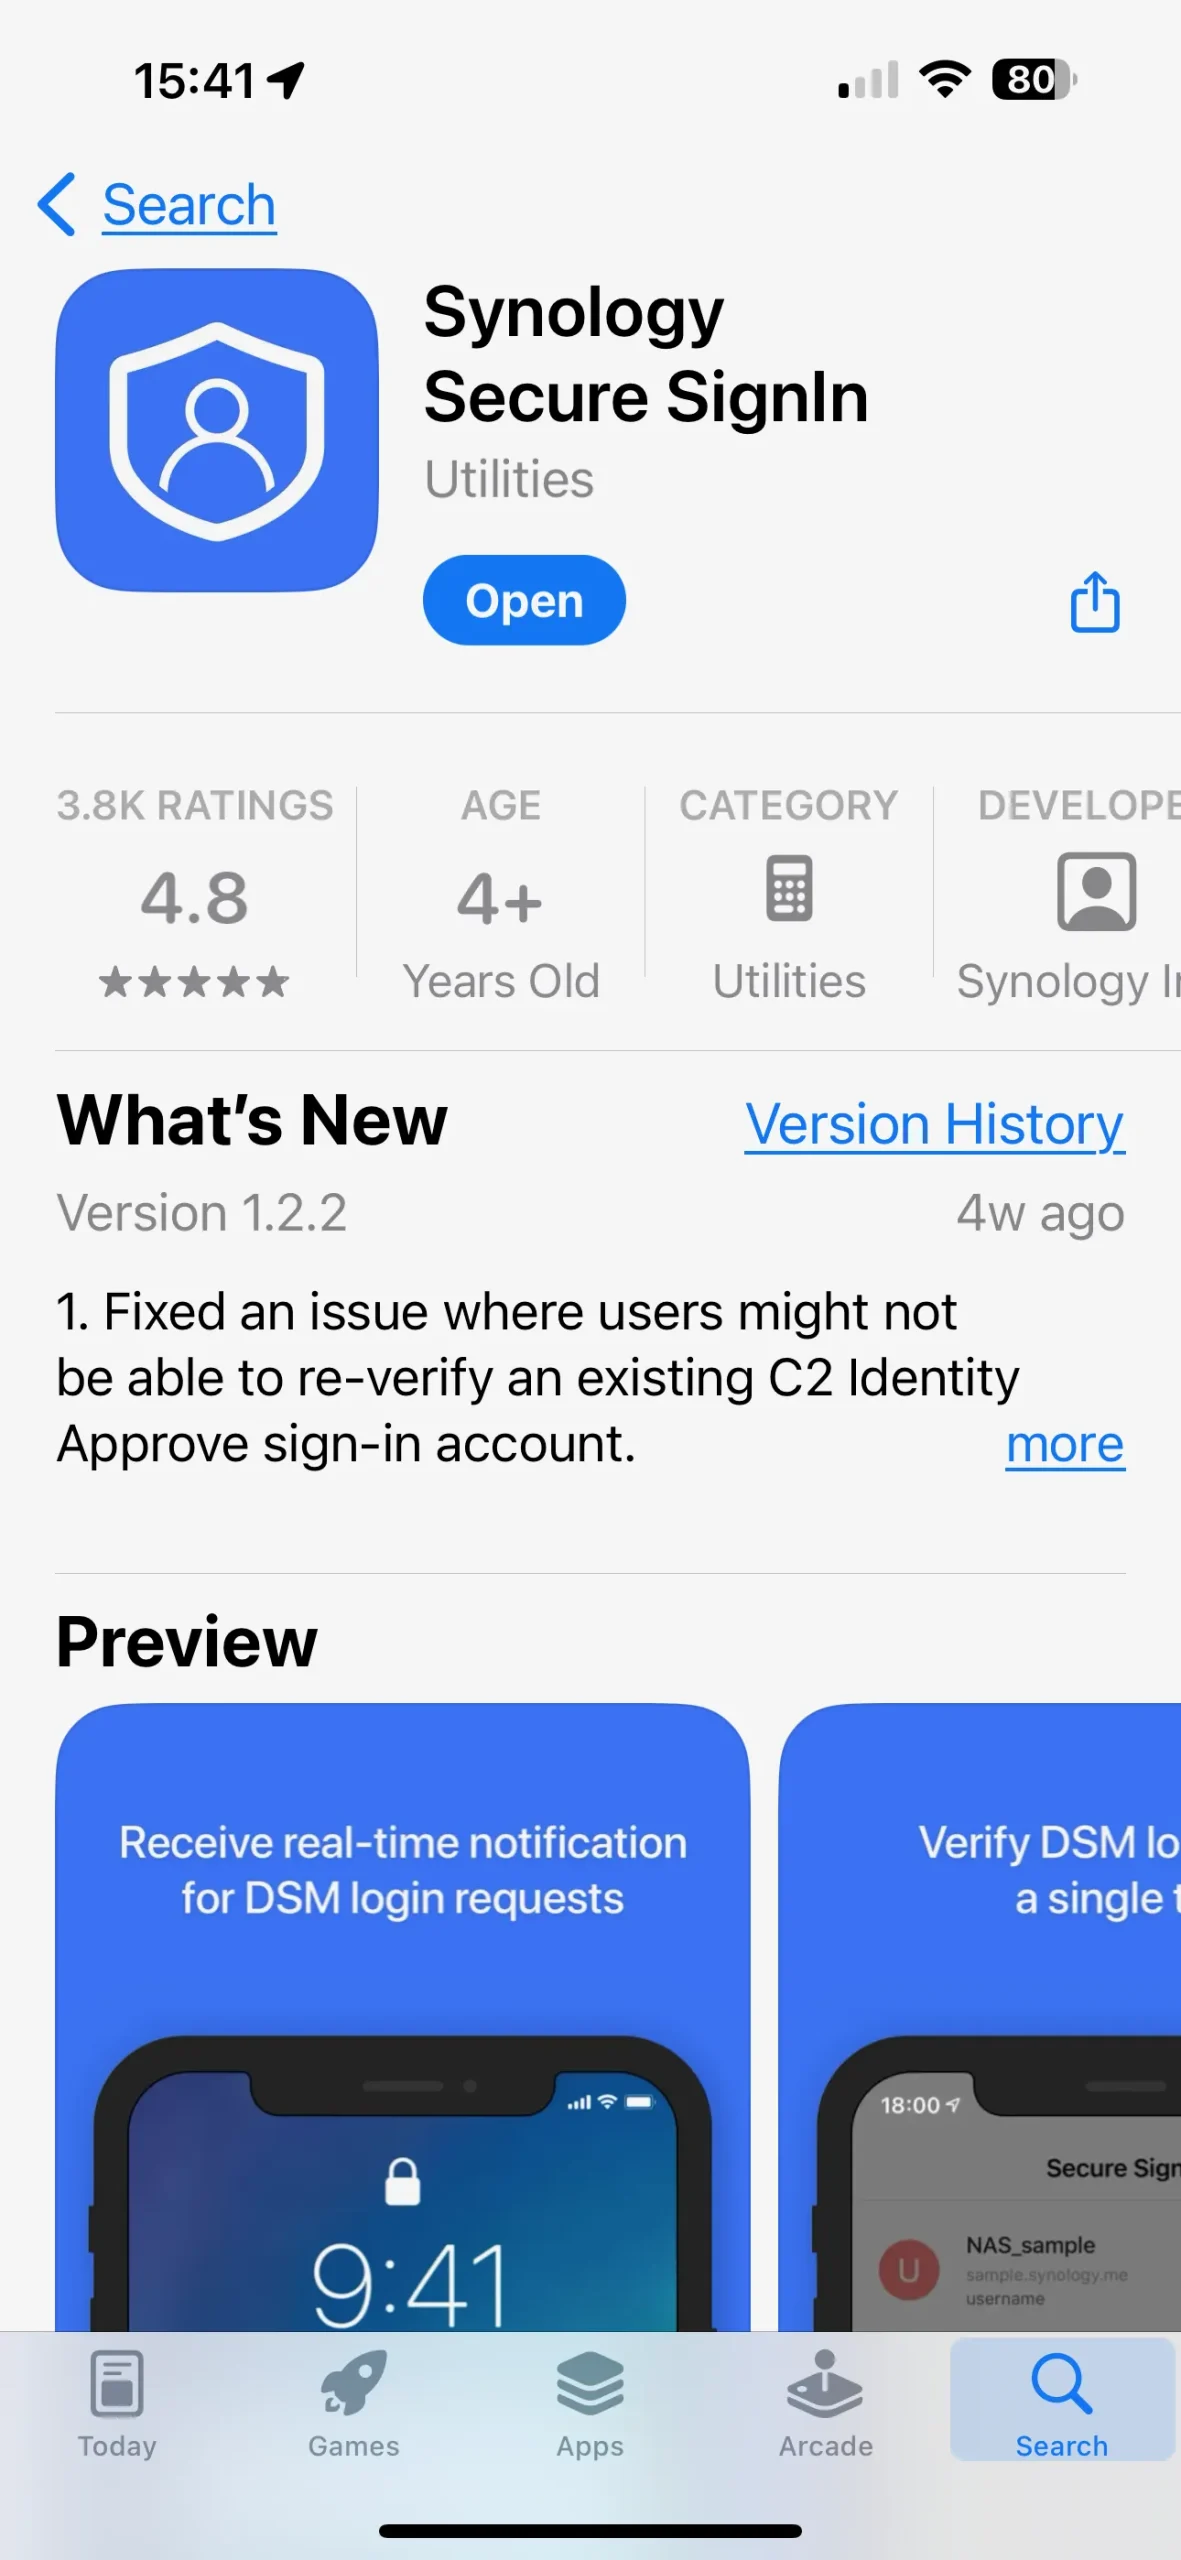
Unfortunately, it requires the app Synology Secure Signin for 2FA. I prefer to use the Google Authenticator or the Microsoft Authenticator app. It’s an app to install
If you just bought a new Synology NAS, setting up a Synology account with 2FA is part of the welcome process. However, it is not a requirement to use your NAS. You can even log in using Synology Quickconnect with a local Synology account created in Control Panel, User & Groups.
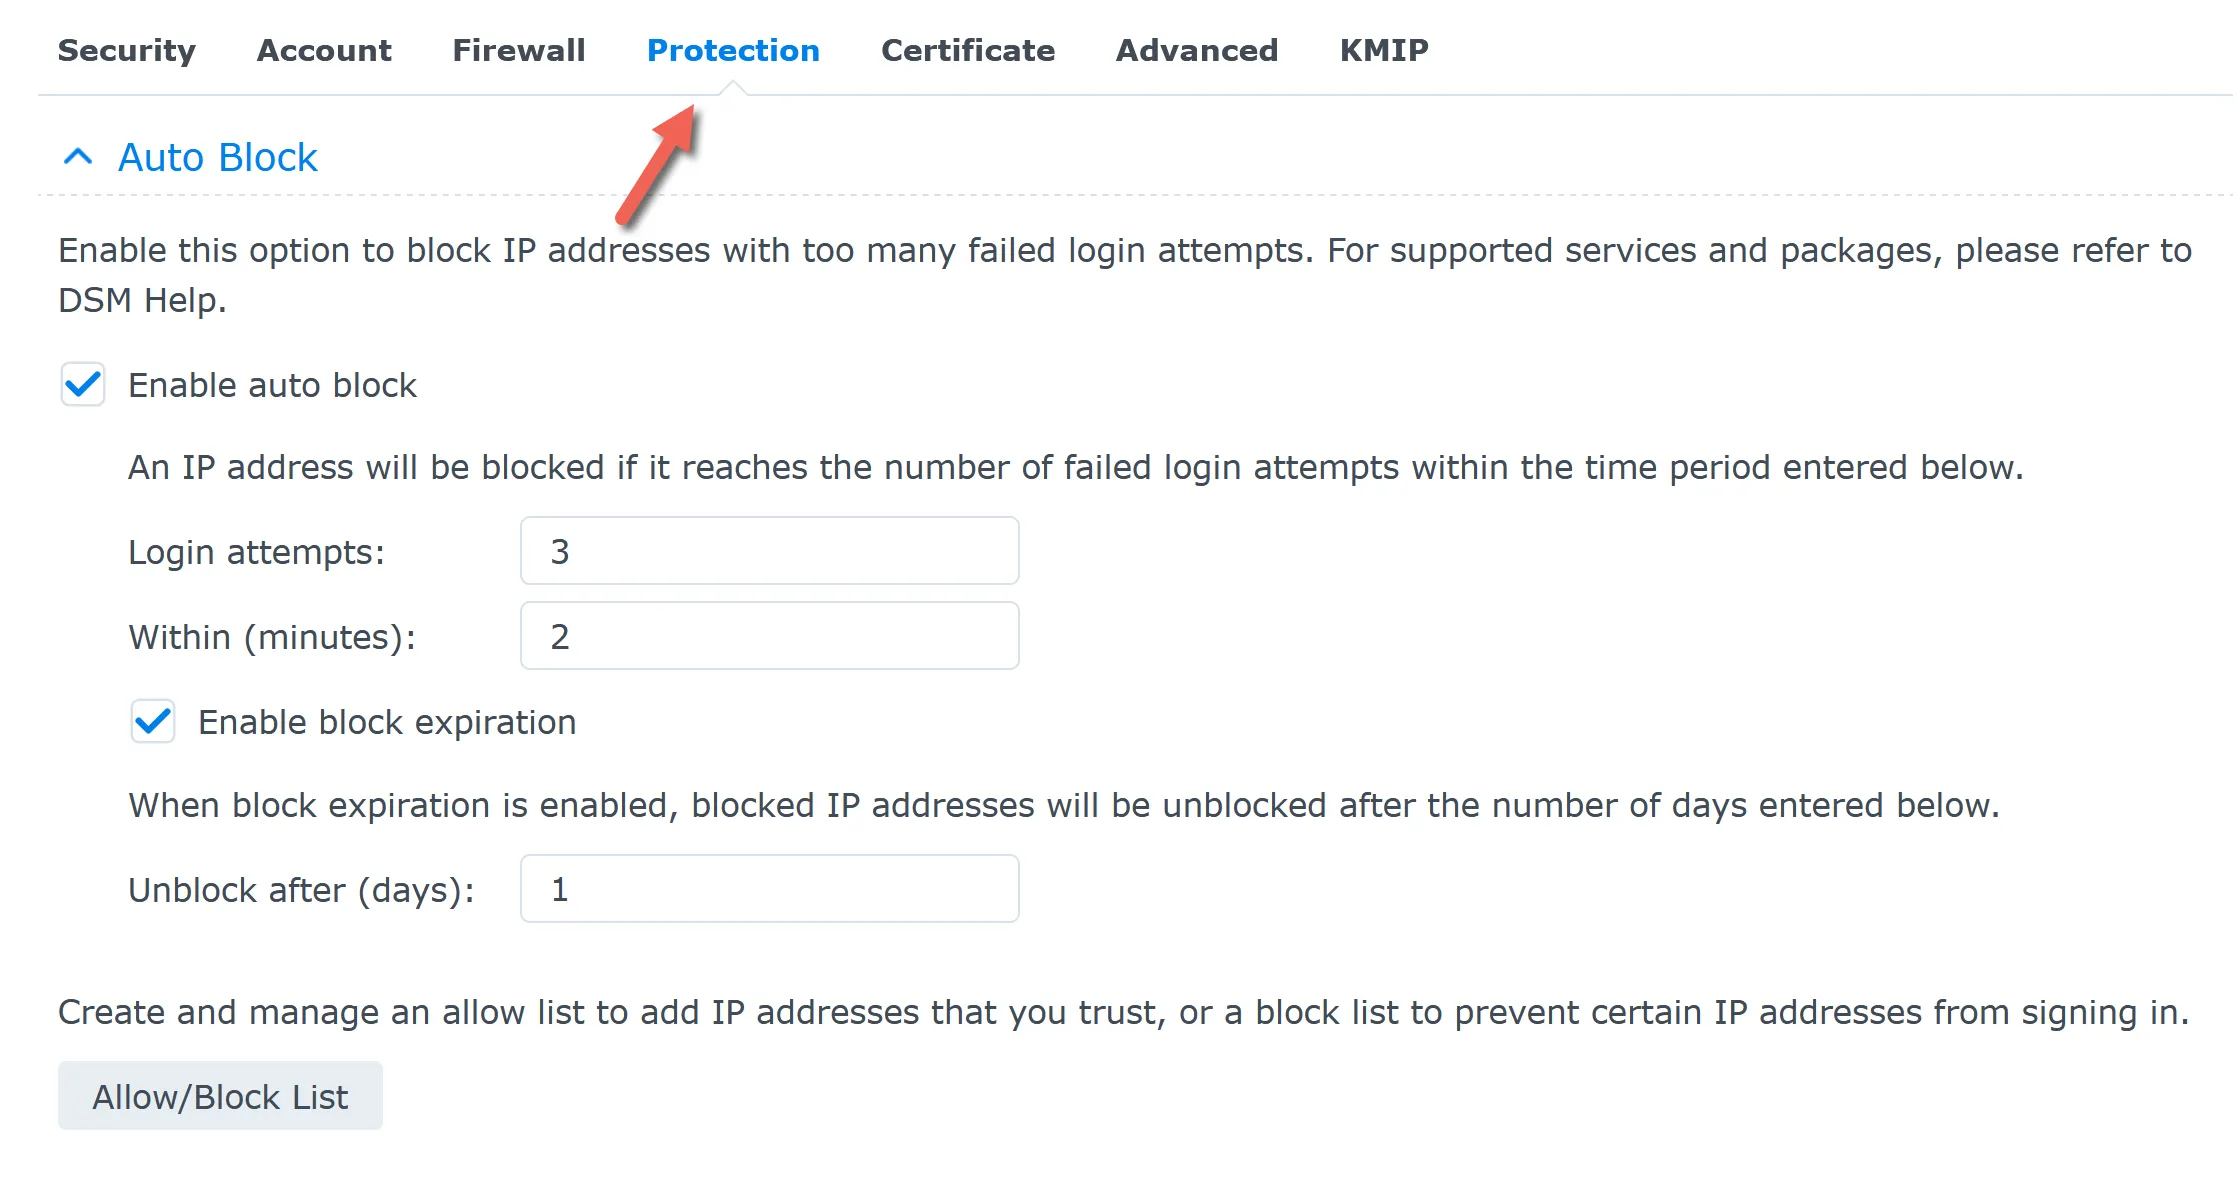
To further protect harden the Synology NAS, there are other settings to secure your Synology, which you can configure in the DSM Control Panel under the Security section.

Lastly, you need to update the DSM firmware regularly.
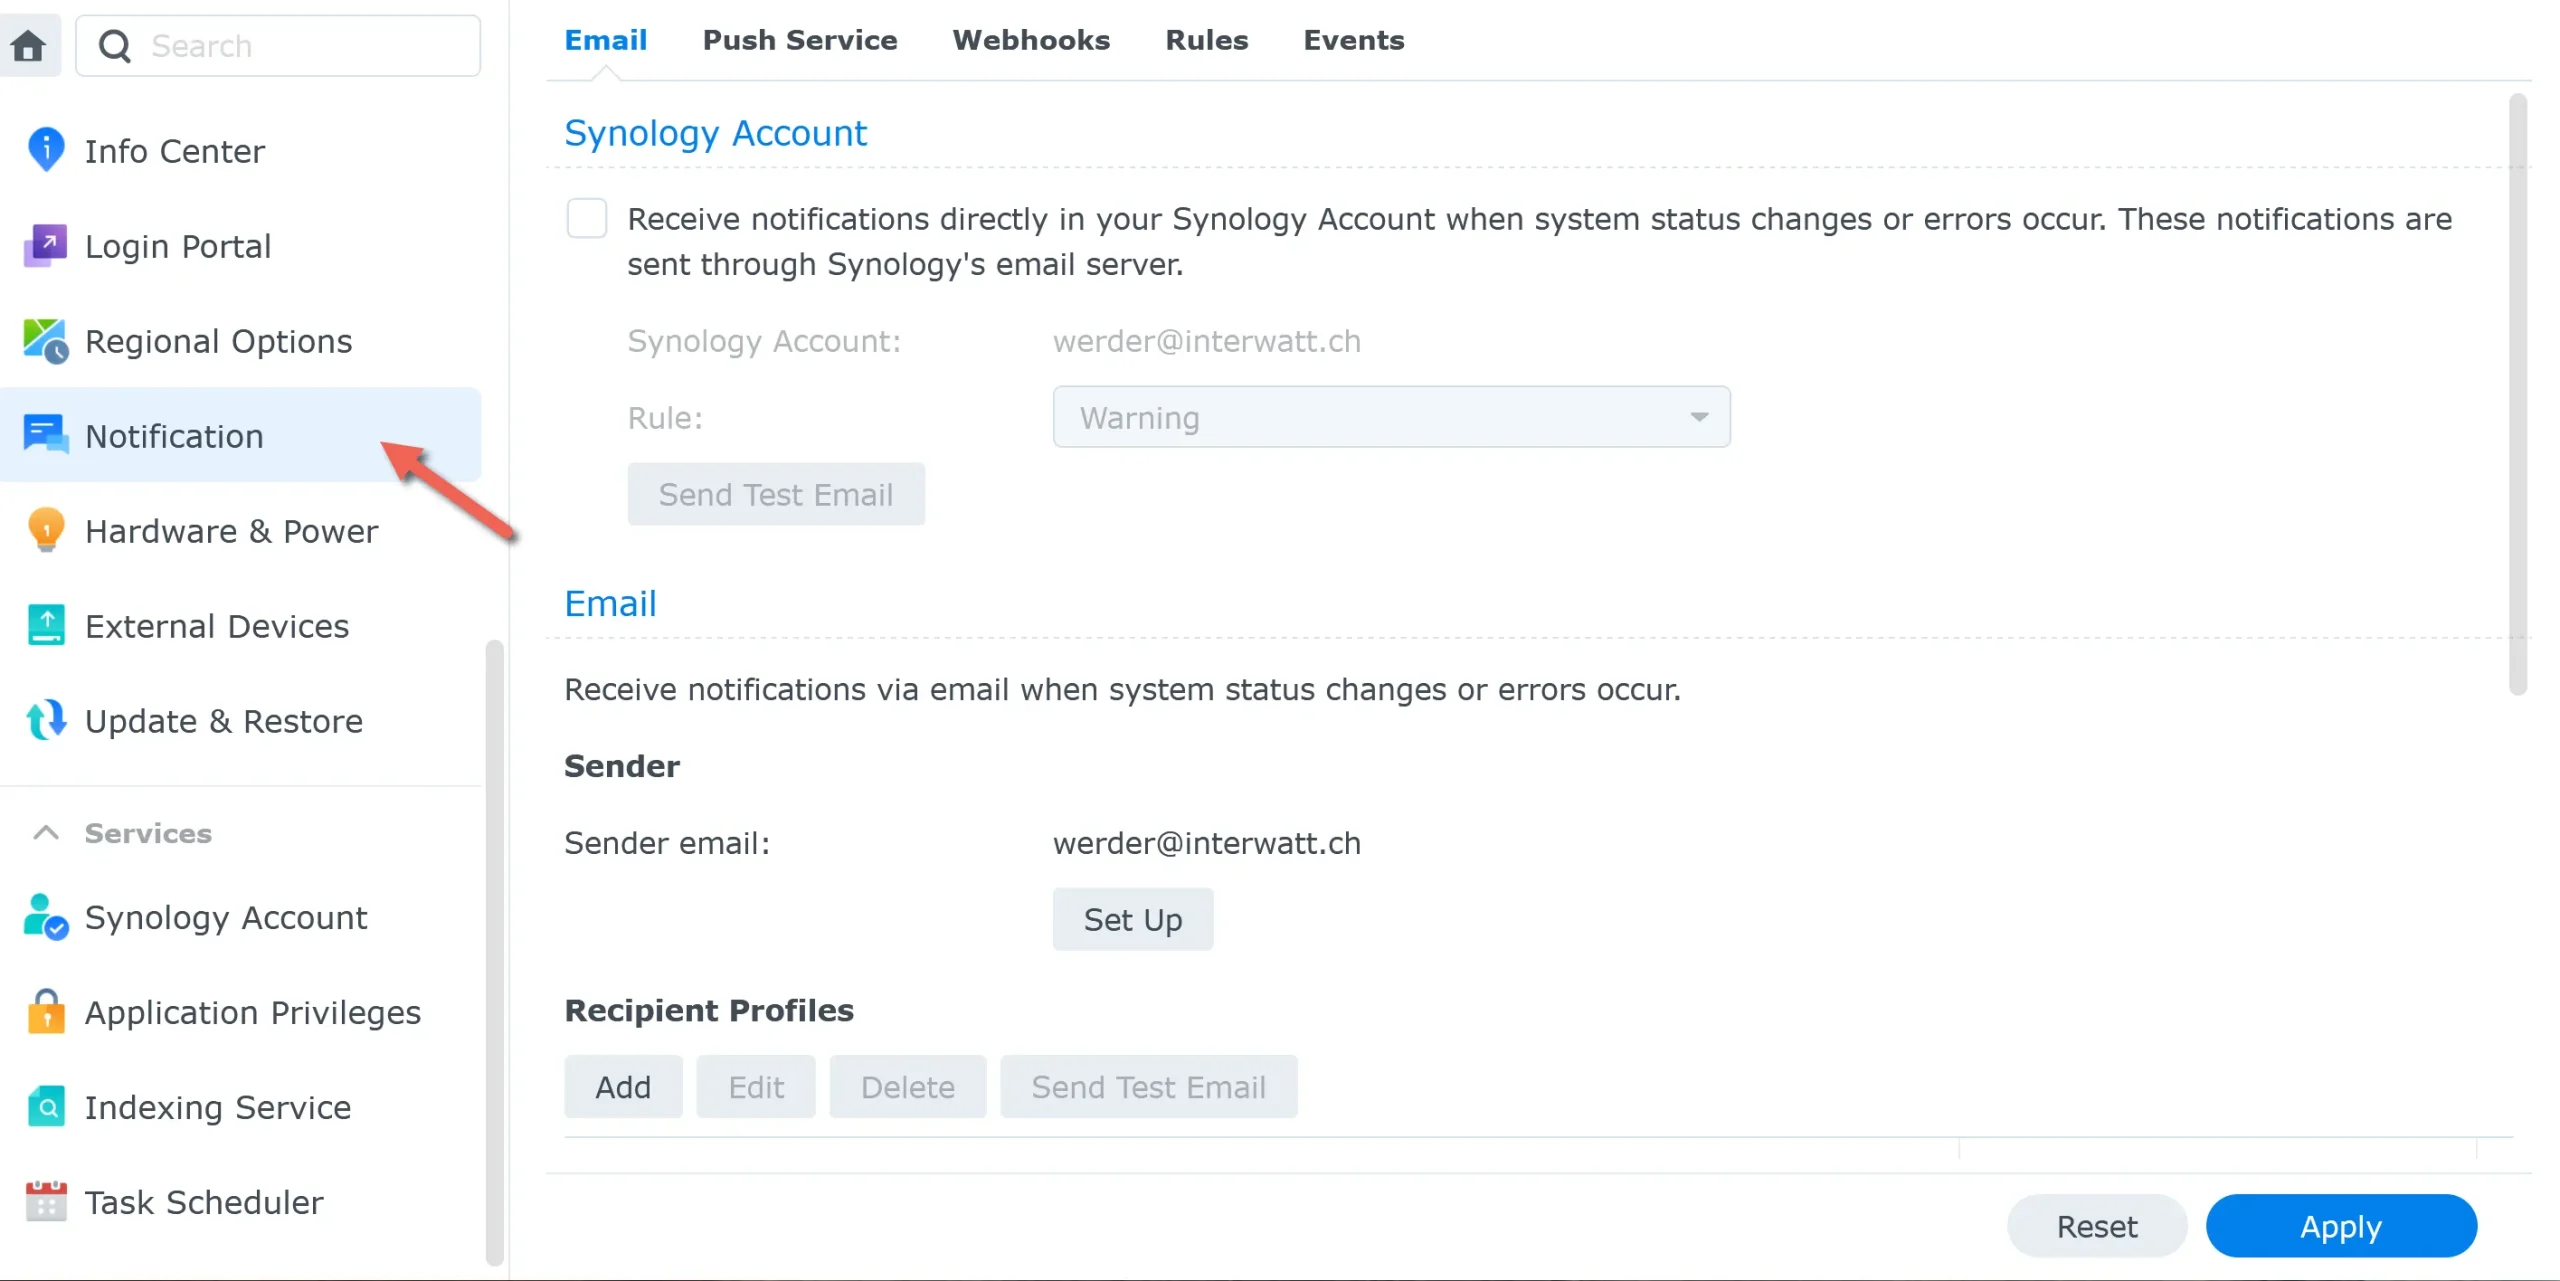
I recommend turning on email notifications. The NAS will email you if new DSM updates are available and send system alerts.
When evaluating Synology QuickConnect’s security, it’s essential to consider both the advantages and potential drawbacks.
One concern is that QuickConnect relies on Synology’s infrastructure, meaning Synology keeps a record of your NAS and its connections. This centralized approach could be a target for hackers. If Synology’s servers were ever compromised, there could be a risk to the privacy and security of your NAS.
On the positive side, QuickConnect simplifies remote access by eliminating the need for complex network configurations like port forwarding. This reduces the potential for user error, often leading to security vulnerabilities. QuickConnect uses secure authentication and encryption protocols to protect data in transit and supports two-factor authentication (2FA) for added security.
In my experience, the convenience and security features of QuickConnect outweigh the potential risks for most users. Regular updates, enabling 2FA, and monitoring for unusual activity can help mitigate these risks. While those who need absolute control over their data might prefer more hands-on configurations, QuickConnect provides a secure and hassle-free solution for remote access.
While Synology QuickConnect offers a convenient way to access your NAS remotely, other methods can also provide secure remote access. Two common alternatives are VPN (Virtual Private Network) and port forwarding.
A VPN is one of the most secure ways to access your NAS remotely. By setting up a VPN, you create an encrypted tunnel between your device and your home network, which allows you to access your NAS as if you were on the same local network.
For more detailed information on setting up a VPN on your Synology NAS, refer to Synology’s official VPN setup guide.
Port forwarding is another method for allowing remote access to your NAS by directing specific traffic from the Internet to it.
QuickConnect:
Traditional DDNS:
QuickConnect simplifies remote access for Synology users with enhanced security and ease of use, while DDNS offers a more flexible but technically demanding alternative.
To secure your remote access, ensure you enable two-factor authentication (2FA), use strong and unique passwords, keep your software updated, and configure your NAS firewall and IP blocking. Also, regularly monitor account activity for unusual login attempts. These steps will help protect your Synology NAS from unauthorized access.
While Synology QuickConnect offers a convenient and secure way to access your NAS remotely, I have mixed feelings about it. Personally, I prefer using port forwarding combined with local Synology accounts, enhanced with firewall settings and account blocking attempts. This approach gives me more control over my network’s security.
During onboarding a new Synology NAS, users are typically guided to set up a Synology account and a QuickConnect ID. This step is often seen as necessary, but it’s important to note that it’s not mandatory. Both the Synology account and QuickConnect can be set up later if desired.
However, I recognize the value of QuickConnect, especially when using Synology mobile apps. It significantly simplifies remote access, making it easier for users to connect to their NAS without dealing with complex network configurations. For those who prioritize ease of use and seamless integration with mobile devices, QuickConnect is a valuable tool.
In summary, while I prefer a more hands-on approach to securing my NAS, I acknowledge that Synology QuickConnect is an excellent solution for many users, especially those looking for hassle-free remote access. It strikes a good balance between security and convenience, making it a worthwhile feature for anyone looking to simplify their NAS experience.
I’d love to hear from you. Was this article helpful? Share your thoughts in the comments below. If you prefer, you can also reach me by email or connect with me on Reddit at Navigatetech.
Before you go, if you’re interested in exploring more about Synology, check out Which Synology NAS is Right for You?. This guide will help you navigate the various models and choose the best one for your needs. It’s a perfect next step to ensure you make the most informed decision for your network storage solutions. Happy reading!
Hi, I’m Edy Werder. I write hands-on guides about Proxmox, homelab servers, NAS, and WordPress, based on real setups I run and document.
No sponsors, no fluff—just real configs and results.
Enjoying the content?

Interessanter Beitrag, den ich per Zufall gefunden habe. Vielen Dank!
Ich schwanke immer mal wieder ob ich QuickConnect oder eigene Domain mit DDNS oder Wireguard-VPN nutzen soll.
Via QuickConnect ist es zum Beispiel nicht möglich, auf Apps die im Docker laufen zuzugreifen. DDNS mit SubDomain via ReverseProxy aber auch VPN kann dafür angewendet werden.
Natürlich ist ein VPN die sicherste Methode – setzt aber voraus, dass jedes Gerät den entsprechenden Client installiert hat und das ist bei mir nicht immer möglich.
Die grösste Flexibilität scheint mir eine eigene Domain, via ReverseProxy zu bieten. Aber eben, die sicherheitsbezogenen Anforderungen sind am grössten. 2FA, Firewall und viele andere Einstellungen an der Synology müssen aktiviert und eingerichtet sein.
Ich nenne es “Flexibilität” – aber effektiv ist es die Bequemlichkeit und die siegt leider immer mal wieder über die Sicherheit.
Beste Grüsse
Erich
Danke Erich für Deinen Kommentar. Ich benütze eine eigene Domain und habe einen Firewall und öffne die Ports für die Synology. Quickconnect ist einfach für Benutzer mit weniger Netzwerk Kenntnisse.
Hi Edy,
many thanks for this informative article. It summarizes the most important points in a nutshell and also gives you a good overview of alternatives in this area. Much apprechiated.
Greetings from Männedorf 🙂
Ich hätte auch den Artikel vorbei bringen können. 🙂