
By Edy Werder — IT Consultant & Tech Blogger
Discover the transformative power of using ‘Time Machine on Synology’ as a Mac user for data backups. This powerful integration combines MacOS’s Time Machine with Synology NAS to boost data security and streamline your backup process.
In this comprehensive guide, I’ll walk you through every step of setting up and optimizing Time Machine on Synology. From the initial configuration to expert tips, I’ll cover all the essentials you need to know to enhance your backup experience.
Join me as we explore how to make your data backups more efficient, effective, and worry-free!

Time Machine is an integral backup solution for every Mac desktop and laptop. Developed by Apple, this tool is designed to work seamlessly with both network disks and local storage devices connected via Thunderbolt or USB. Since its introduction in 2007 with Mac OS X 10.5 Leopard, Time Machine has evolved significantly, notably with the addition of APFS (Apple File System) support, which has improved the efficiency and speed of backups.
Time Machine is adept at safeguarding a wide array of data, from emails in Mail to documents in iWork, ensuring that presentations, contracts, and text files are safely archived. Notably, it offers the capability to restore these backups at any point in the future, providing users with not just security but also flexibility in data recovery.
Synology NAS assists Time Machine in backups and other stuff for Mac. I would add that using a Synology NAS saves your data on your local network and frees you from the extra cloud storage cost. You have complete control over everything, but remember to follow the 3-2-1 backup rule.
It is important to follow this rule while backing up your data: make three copies of your data and store them on two different media, such as disk and tape. Additionally, it is recommended to keep one separate copy of your data to use for recovery purposes in case of any mishap.
Time Machine enables network backups for your Mac. It was intriguing to discover that it automatically backs up the last 24 hours of data every hour, daily backups for the past month, and weekly backups for the previous month’s data. When the backup storage fills up, older backups are deleted. To change these backup settings, go to the “Time Machine Menu” and select “Time Machine Settings.”
Step 1: Log in to DSM and open the Control Panel, Shared folder
Step 2: Click the button ‘Create’ and select ‘Create Shared Folder?
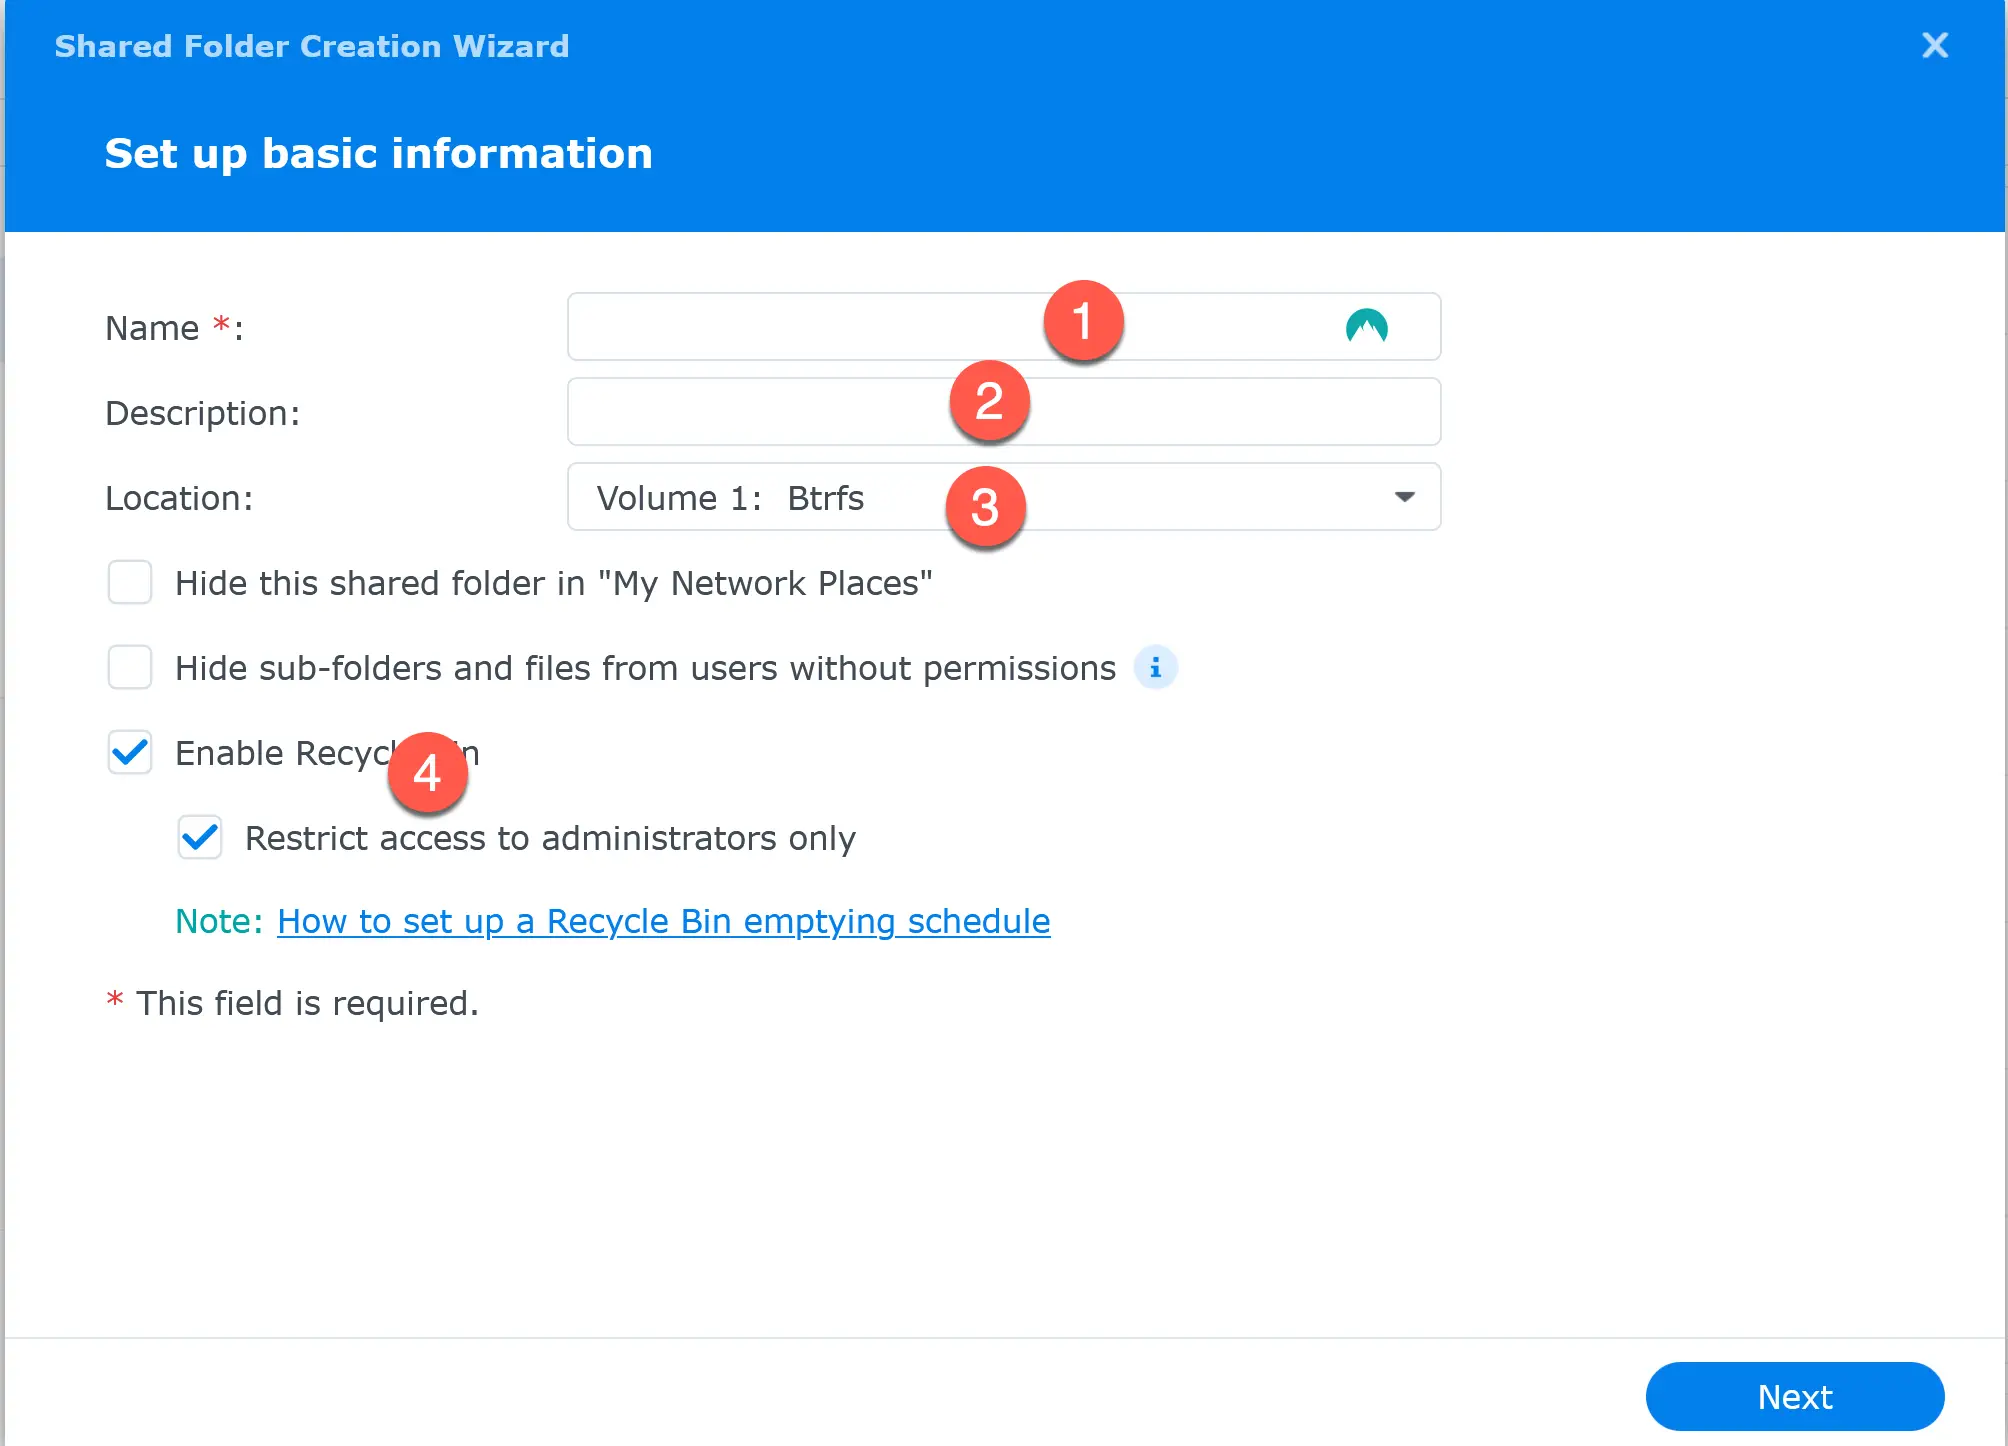
Click the ‘Next’ button
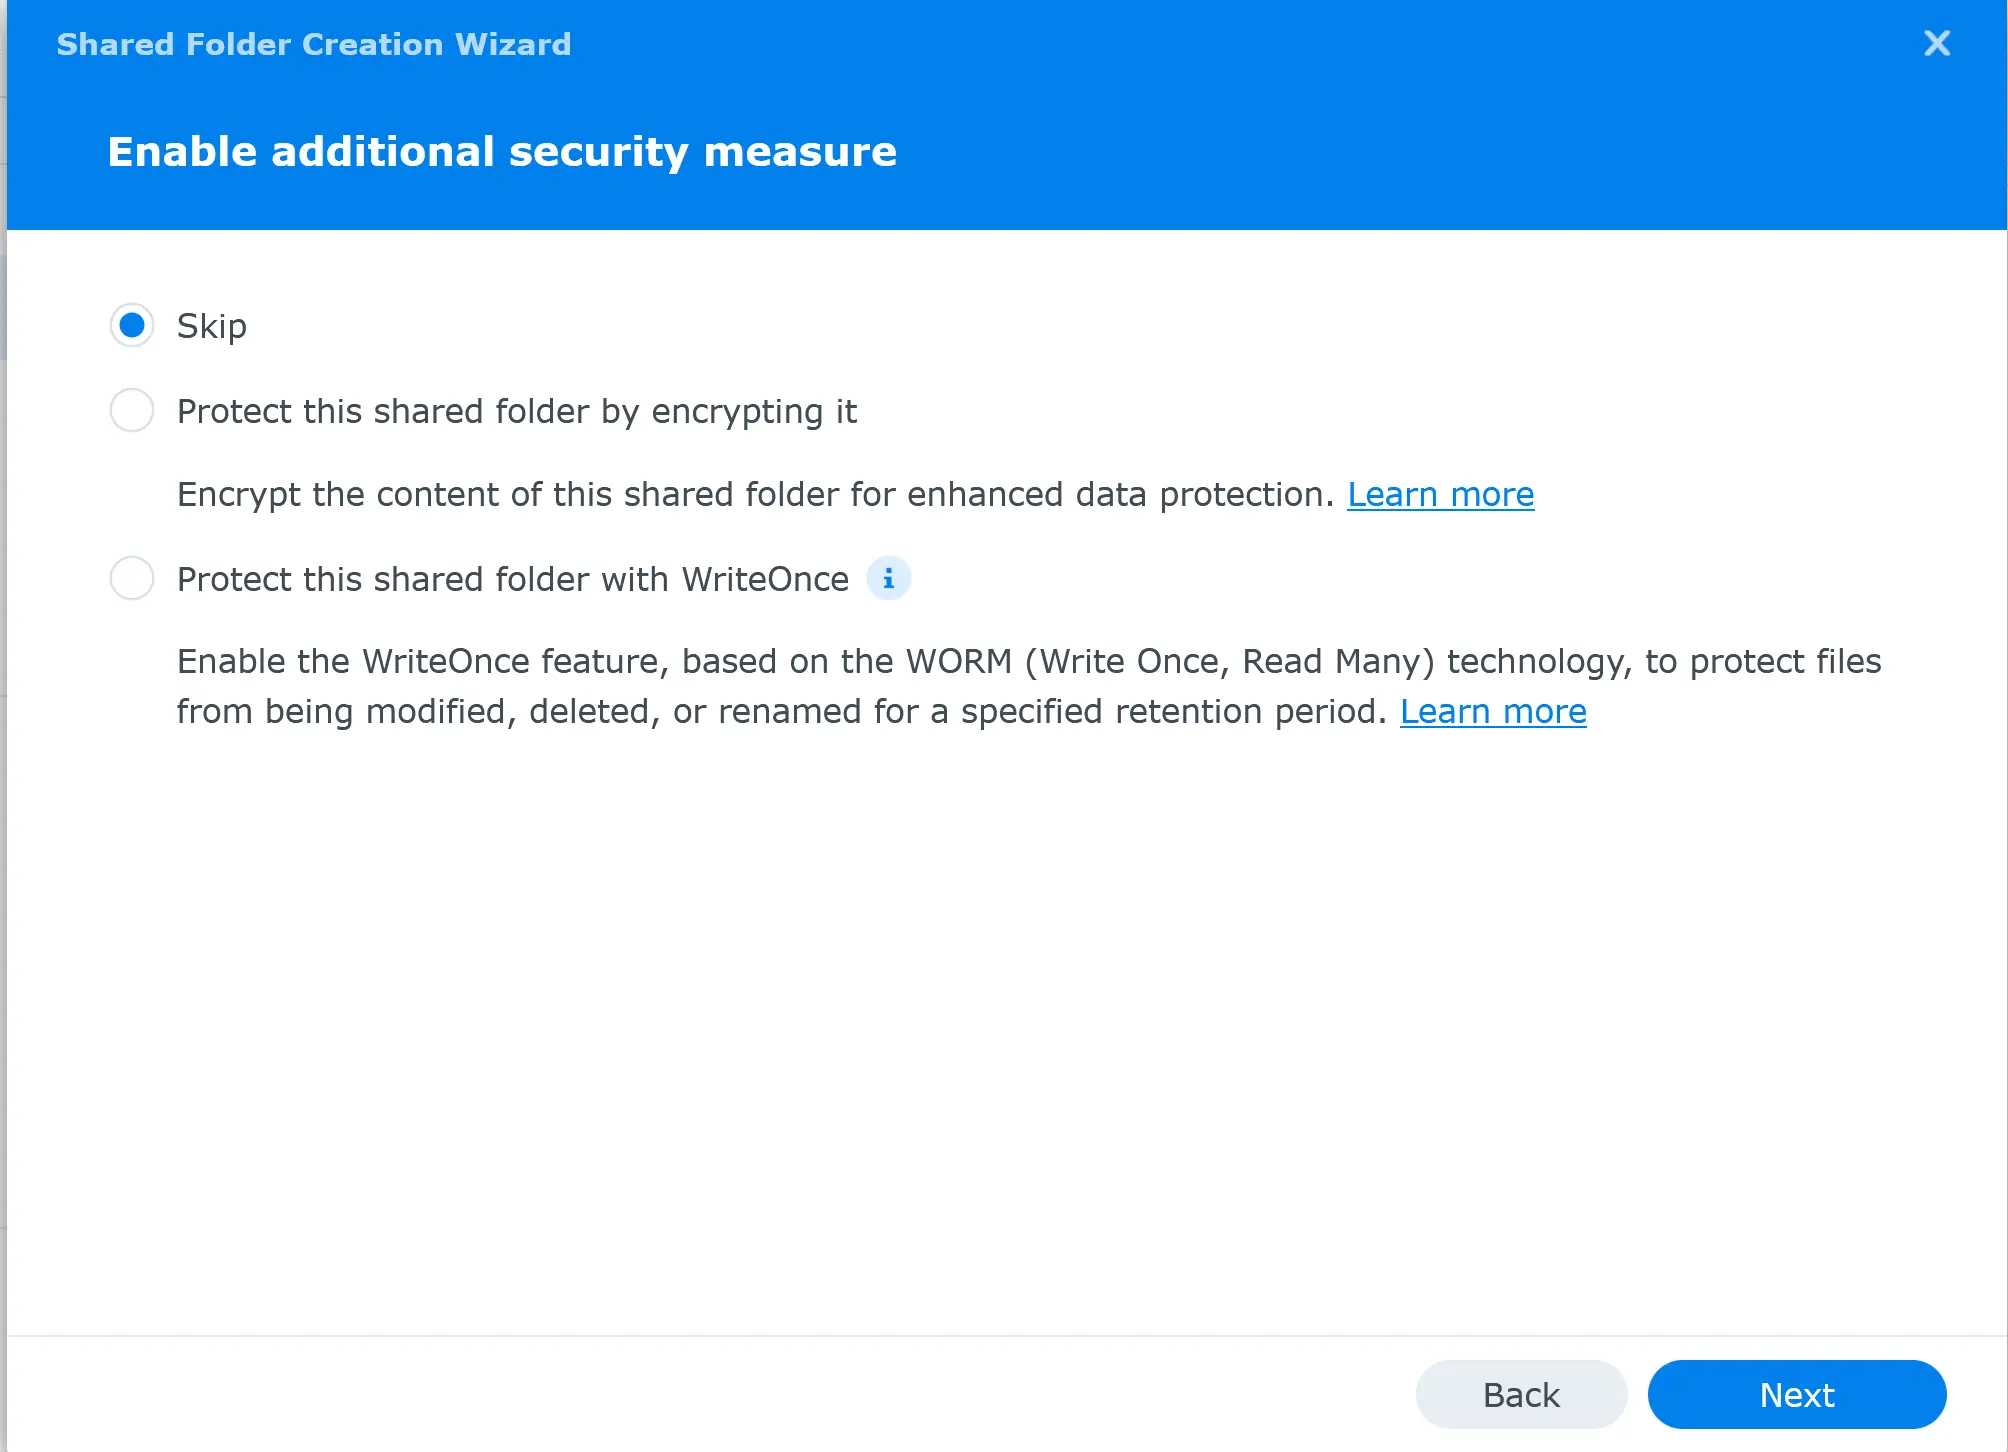
Here I would leave the default settings to ‘skip’ and then click the ‘Next’ button
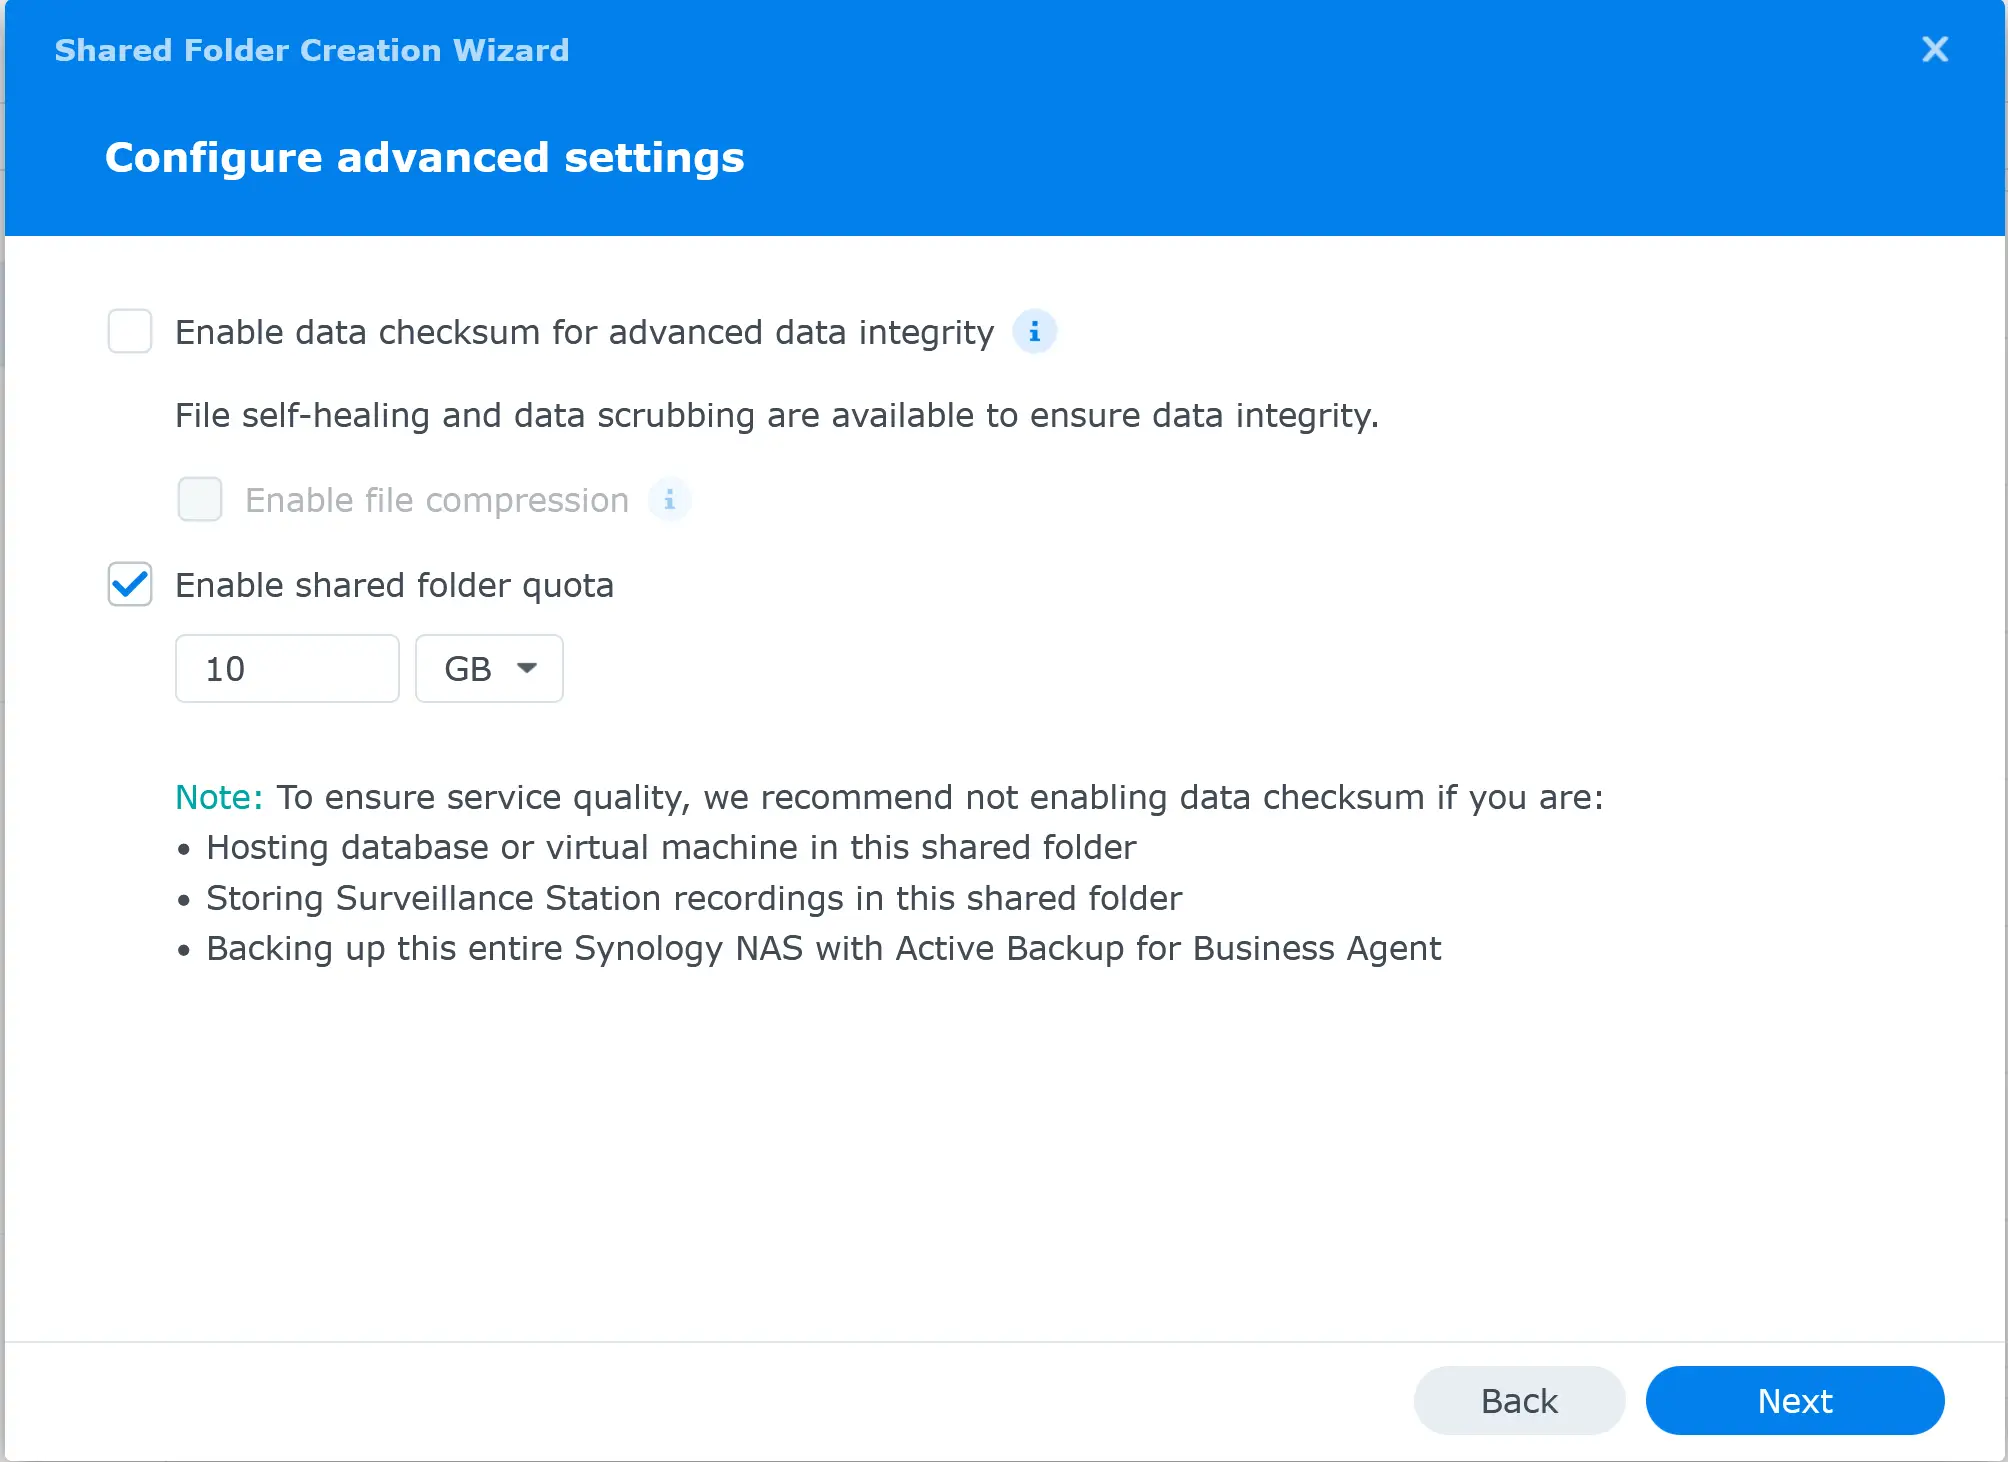
I highly recommend setting a folder quota. Otherwise, Time Machine will “eat” all the space on the volume.
As a general rule, I recommend setting a disk quota that is at least as large as the size of your Mac’s hard drive.
Click the ‘Next’ button and confirm the settings.
In the next screen, you need to assign permission to a user. You need to give ‘Read/Write’ permission to a user.
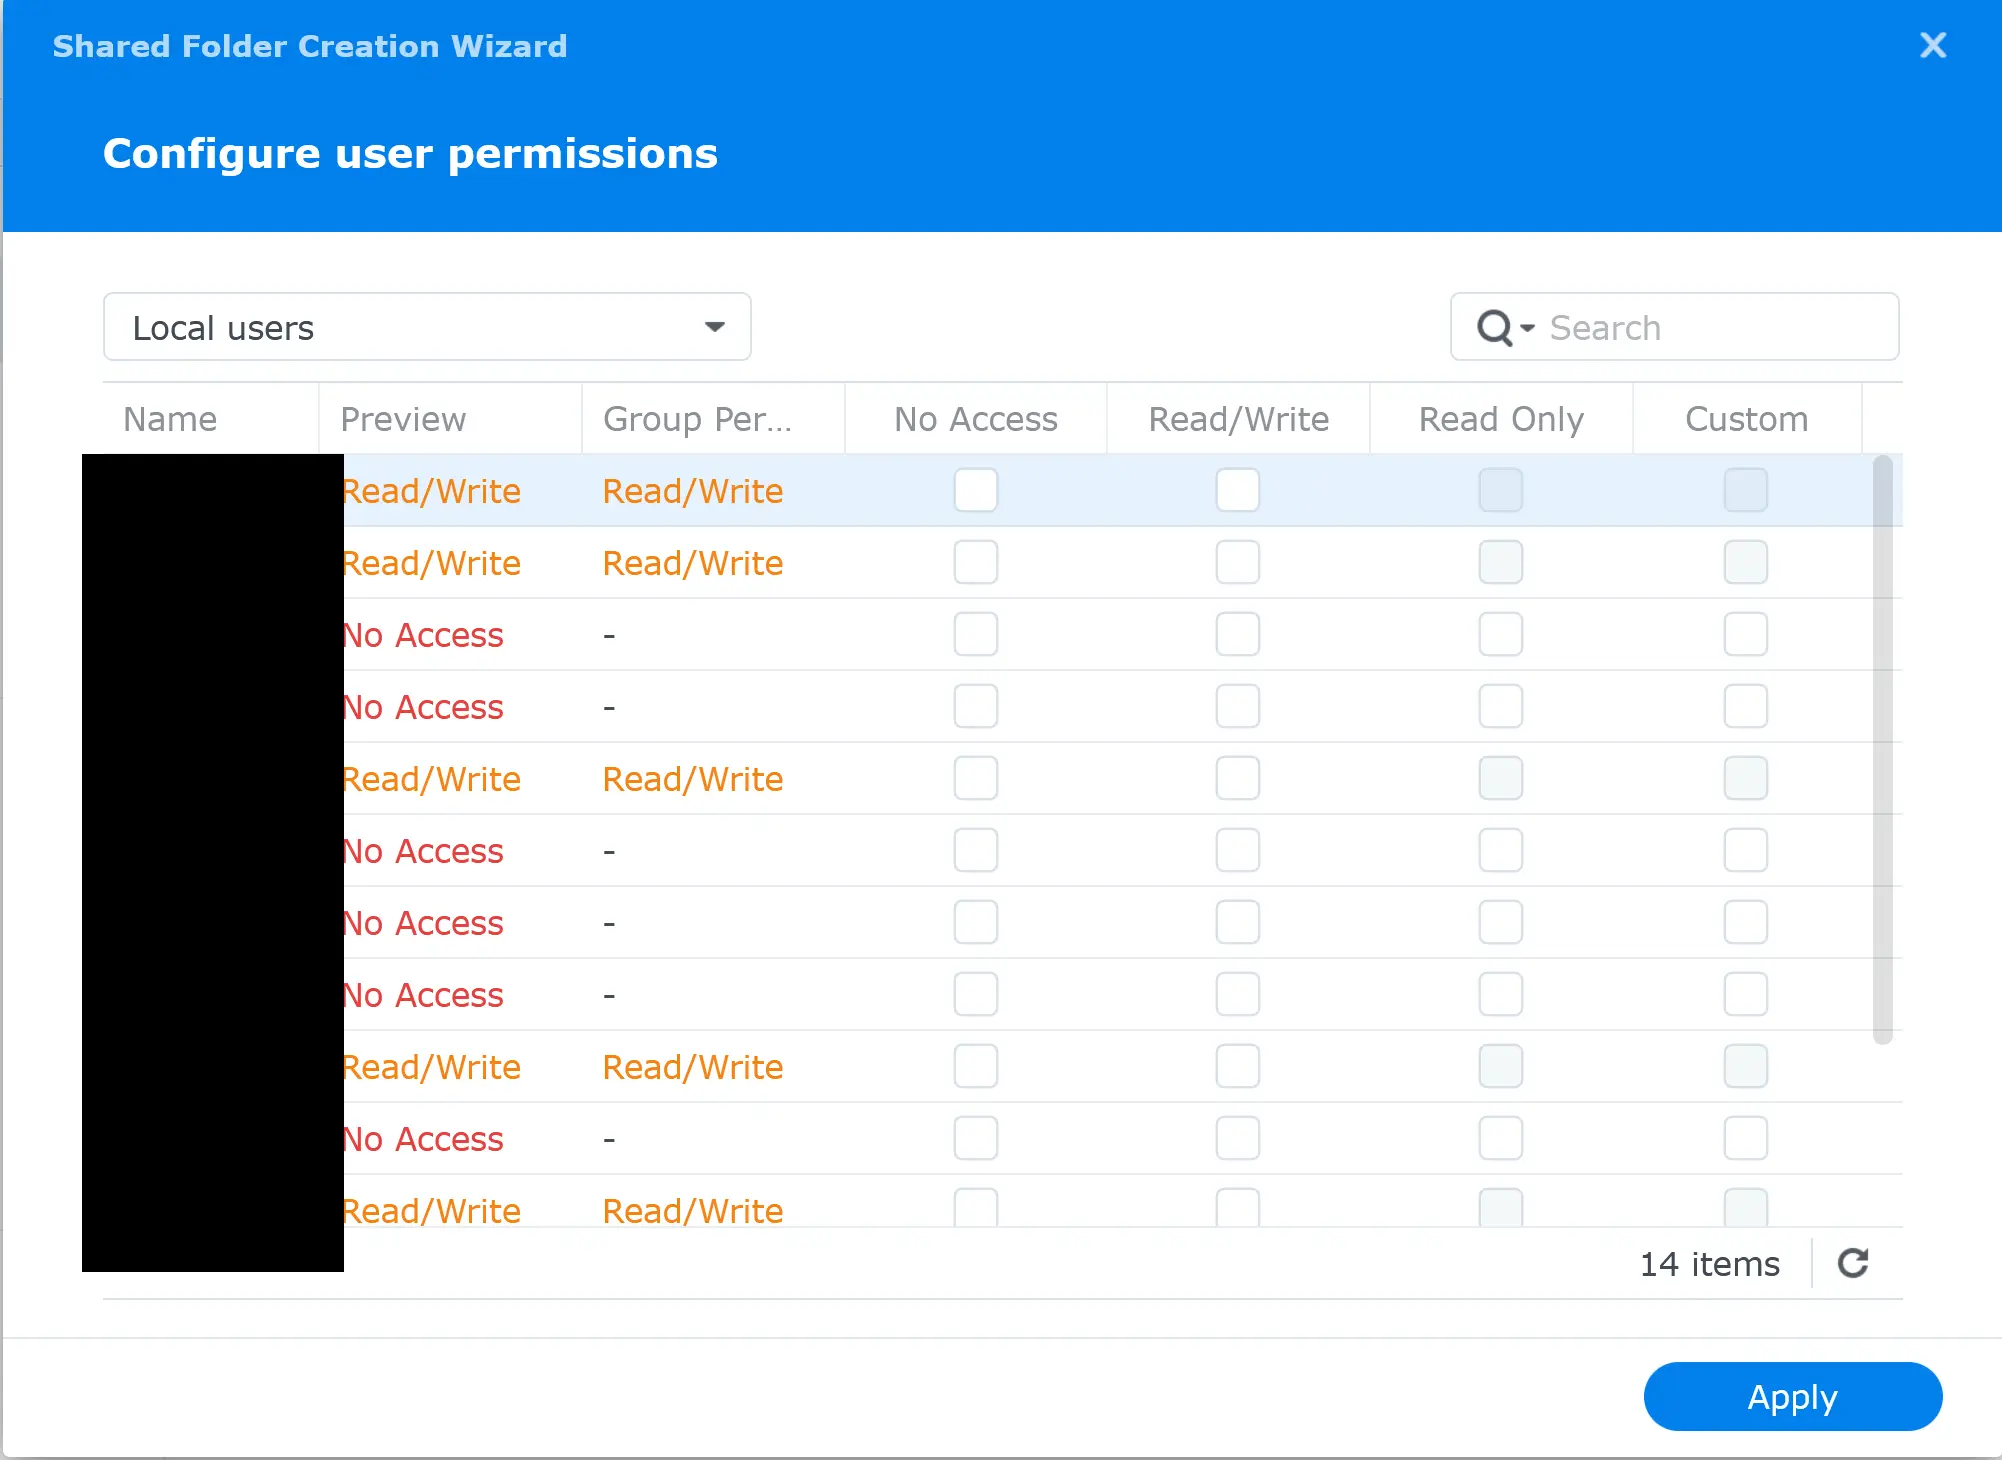
The folder is now ready for the Time Machine.
A few settings need to be changed on Synology NAS. First, you must turn on Bonjour Time Machine Broadcast for SMB on your NAS.
Open Control Panel and go to File Services.
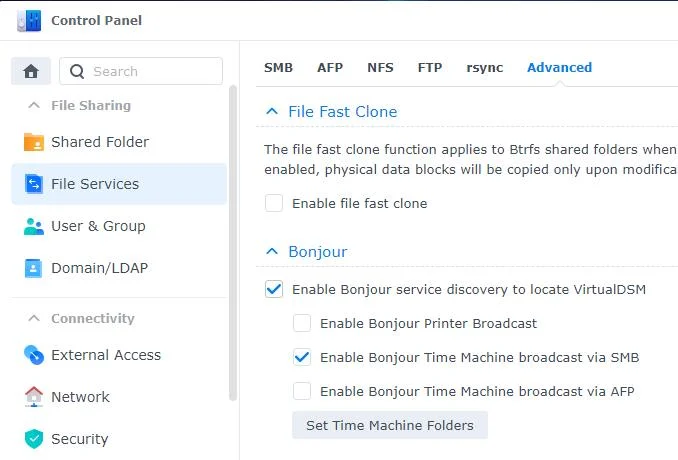
Click the Tab ‘Advanced’ – Enable the Bonjour service and click ‘Enable Bonjour Time Machine broadcast via SMB.’
Don’t enable the second option,’ via AFP’. Apple has deprecated the AFP protocol since 2017 with the release of MacOS High Sierra.
I noticed that when I have the tick for the AFP selected, my latest Apple Studio using Sonoma MacOS, Time Machine does not work reliably and does suddenly stop backing up.
Then click the Set Time Machine Folders button and select the folder you created in the previous step.

The Synology NAS portion is ready for Time Machine.

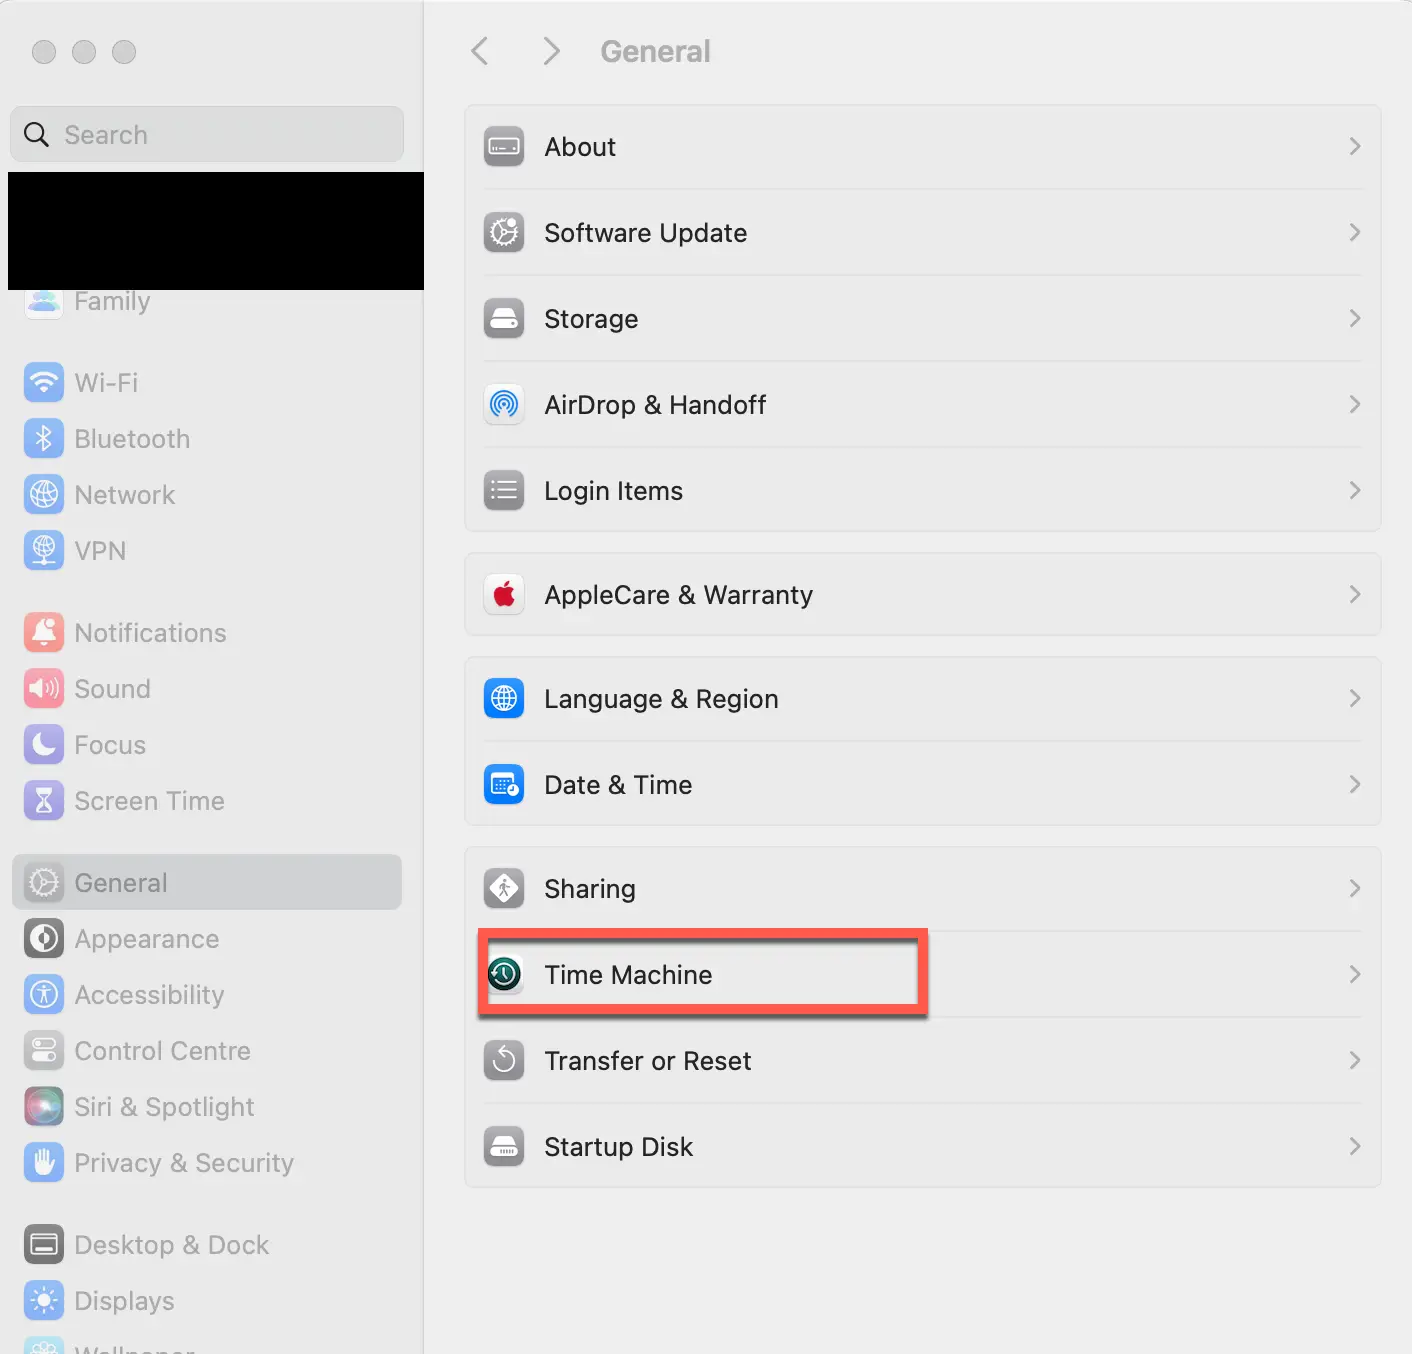
On your Mac, Go to “System Settings,” General, “Time Machine.”
Click the ‘+’ icon
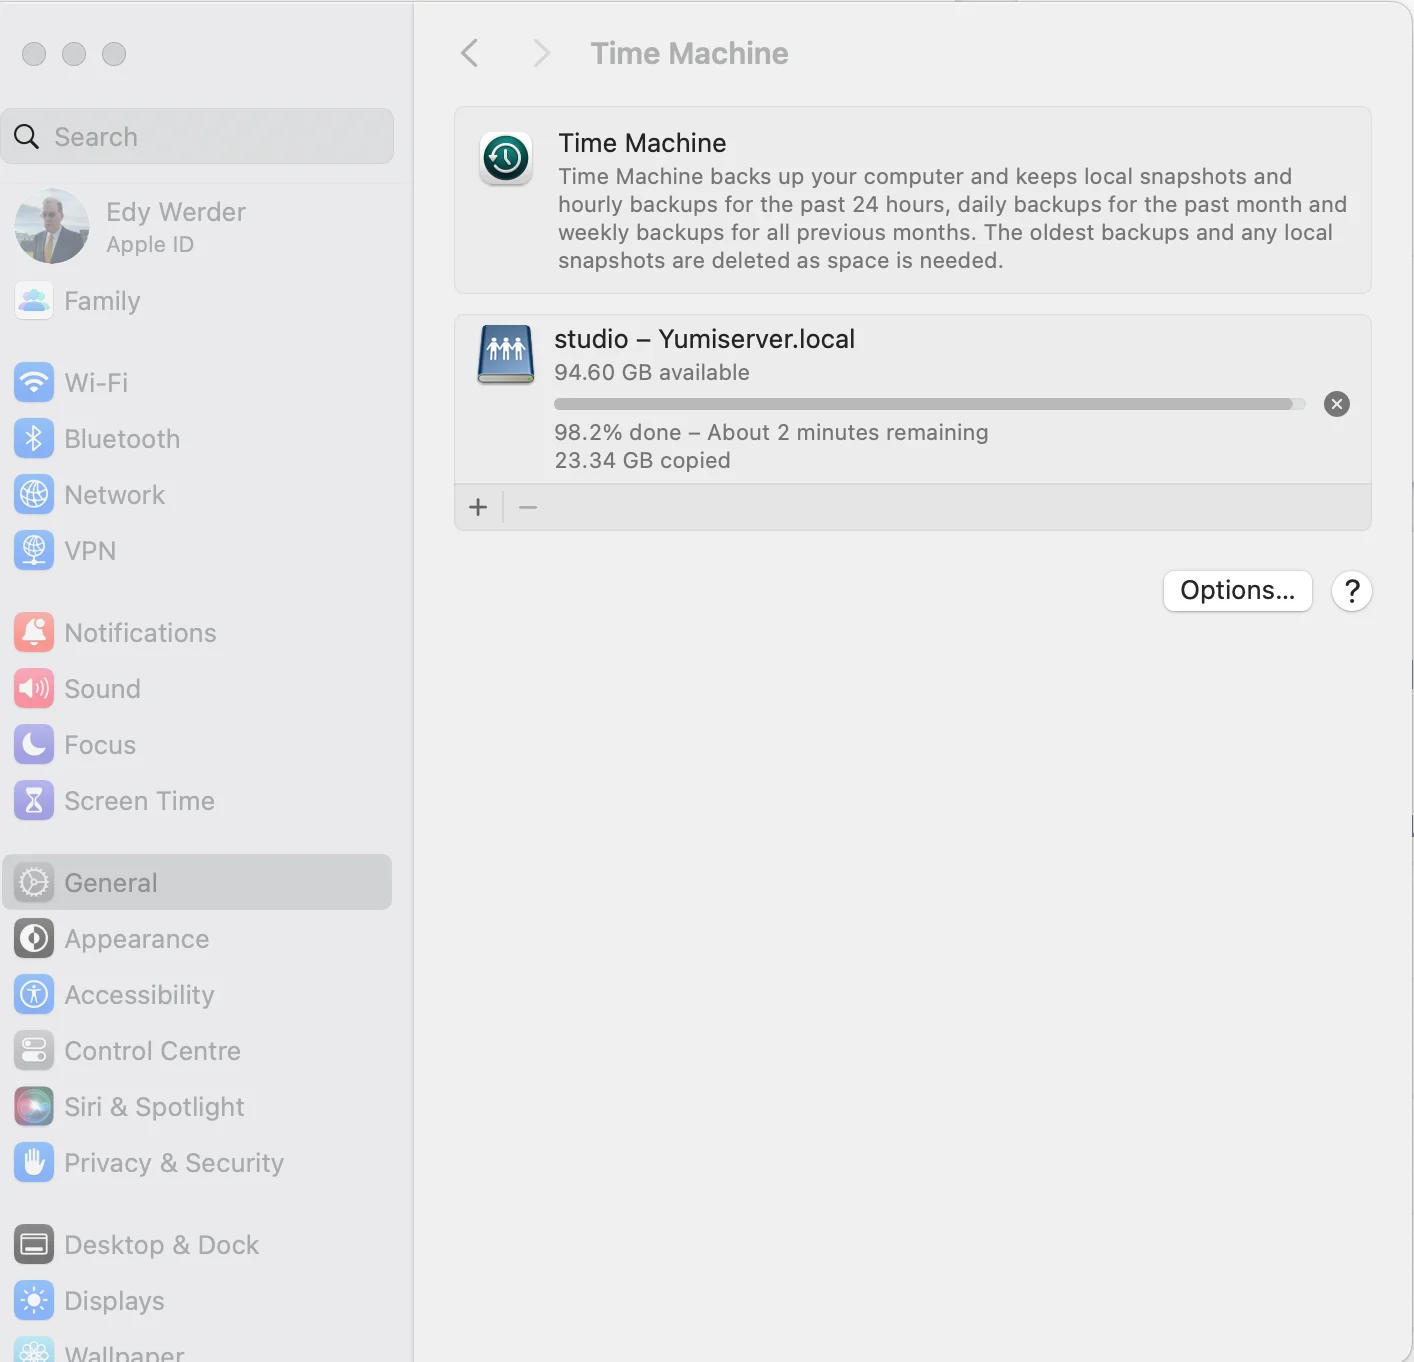
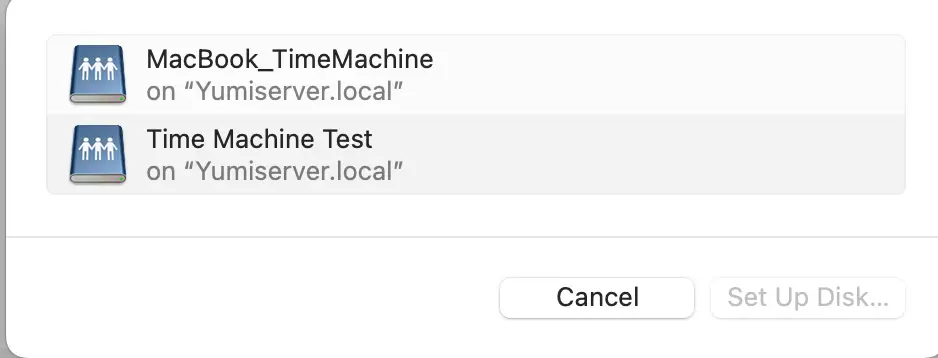
All available backup locations for Time Machine will appear. In my case, I created the shared folder ‘Time Machine Test’ on the Synology NAS.
I
Highlight it and click ‘Set Up Disk…’
Next, you need to enter the credentials for the folder. Remember that above, you assigned a user name to the shared folder.
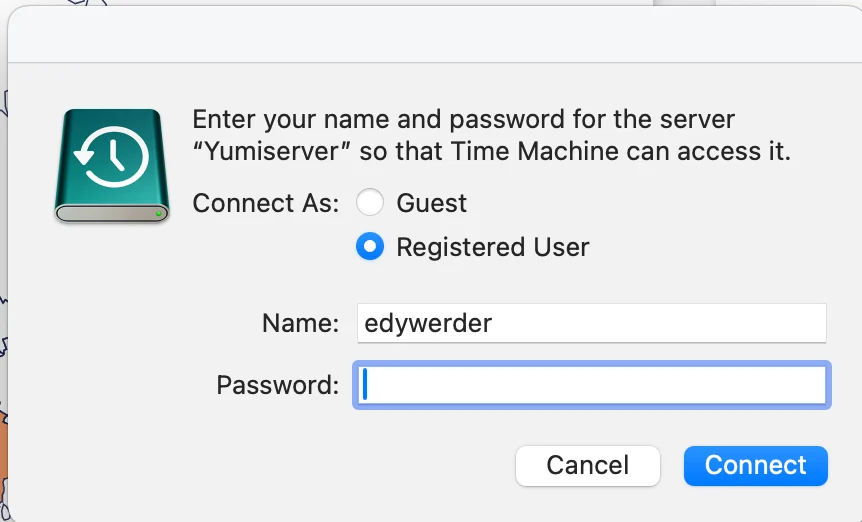
Lastly, you can encrypt the backup using a password.
Time Machine is ready to back up to the Synology NAS. The first backup will take some time, but subsequent backups will take much less time.
I recommend from time to time to check the status of the backups. Usually, MacOS notifications will inform you when there is a problem.
Regrettably, Time Machine might occasionally cease creating backups. This issue has also affected me, so I turned to the Reddit community for assistance. A helpful user responded with a suggestion.
To find out exactly why Time Machine is having issues, you should look at the logs. To do that, on the Mac that is running Time Machine:
/System/Applications/Utilities/Console.process:backupd and hit Return. This will filter out everything except Time Machine backup process messages in the displayed log.Don’t forget to go back into System Settings > General > Time Machine > Options and set Backup Frequency to: Automatically Every Hour when you are done streaming the log.
Credits to Reddit community user u/JollyRoger8X
My question, “Time Machine with Synology NAS,” is on Reddit here.
If you need to recover a specific file or folder on your Mac using Time Machine, the process is straightforward. Follow these steps to retrieve your data:
Click on the Time Machine icon in the menu bar and choose “Brows Time Machine Backups” If the icon isn’t in your menu bar, open System Preferences, select Time Machine, and check “Show Time Machine in the menu bar.”
Time Machine will display your backup files in a cascading interface that allows you to go back in time. Use the timeline on the right side of the screen or the up and down arrows to navigate to the date and time you want to restore from.
Use the Finder window in Time Machine to browse through your backups and locate the file or folder you wish to restore. You can use the search bar at the top right corner to search for specific files or folders.
Once you have found the file or folder, select it and click the “Restore” button. Time Machine will then copy the item back to its original location on your hard drive. If a file with the same name exists in the destination, Time Machine will ask if you want to replace it, keep both, or keep the original.
After restoring, exit Time Machine and navigate to the location where the file was restored. Open the file to ensure it has been correctly restored and is functioning as expected.
By following these steps, you can easily restore individual files or folders from Time Machine, making it a valuable tool for recovering lost data or reverting to previous versions of documents.
I’d love to hear from you. Was this article helpful? Share your thoughts in the comments below. If you prefer, you can also reach me by email or connect with me on Reddit at Navigatetech.


If you found the guide on using Time Machine with Synology NAS helpful, you might be interested in exploring more about Synology’s offerings. I recommend checking out Which Synology NAS next. This article will provide insights into different Synology models, helping you decide which one suits your needs best. It’s a great follow-up to deepen your understanding of Synology’s range and capabilities, especially considering a purchase or upgrade.
Hi, I’m Edy Werder. I write hands-on guides about Proxmox, homelab servers, NAS, and WordPress, based on real setups I run and document.
No sponsors, no fluff—just real configs and results.
Enjoying the content?
