
By Edy Werder — IT Consultant & Tech Blogger
Editor’s Note: This article was fully rewritten on July 11, 2026, covering VLAN design, firewall setup, and remote access. I also added a section about STP/UTP and cat network cabling.
A homelab network needs more than a router out of the box.
I run VLANs to separate my Proxmox cluster, NAS devices, and other lab traffic from my home network. My firewall handles routing between segments, and I host my own DNS server, so I reach everything by name instead of IP.
This guide covers how to plan and build a homelab network: subnetting, VLAN design, and where your firewall and DNS fit in. If part of it is already working, jump to the section you need.
Quick Answer:
A homelab network is a private network you build at home to run servers, VMs, and self-hosted services, kept separate from your everyday home devices. Most setups use VLANs to segment traffic, a router or firewall to control access, and a NAS or server for storage.
A homelab network is the network you build at home to run your own servers, VMs, and self-hosted services, kept separate from your regular home devices.
Mine runs on VLANs. One for my Proxmox cluster, one for NAS traffic, one for everything else. My firewall routes traffic between them, and DNS lets me reach every device by name rather than by IP address.
Before you install Proxmox yourself, check my system requirements guide so you don’t undersize your hardware.
You don’t need enterprise gear to start. A router and switch that support VLANs are enough.
A homelab network teaches you things a single flat network never will. You learn to isolate traffic, troubleshoot routing, and catch misconfigurations before they hit anything that matters.
I use mine to test changes before I apply them anywhere real. A broken VLAN rule at home costs me an evening. The same mistake on a client’s network costs them uptime.
It’s also good practice if you’re working toward a networking certification. Segmenting your homelab with VLANs gives you hands-on experience with the concepts you’ll be tested on. I cover how I set mine up in Configuring VLANs in Proxmox.
Now let’s explore the pros and cons:
Cost depends on what you already own and how much you add.
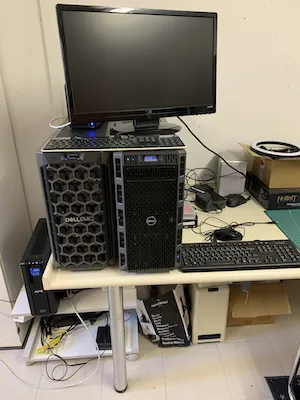
My main node is a Dell PowerEdge T360. It draws about 104W on average, which runs close to 18.74 CHF a month in power here in Switzerland. That’s the biggest recurring cost, not the hardware itself.
You can start much cheaper. A used mini PC or an old laptop uses a fraction of that power and runs Proxmox fine for learning the basics.
The real cost driver is what you add around the server: a managed switch, a dedicated firewall, extra NAS storage. Add those once you know what you actually need, not upfront.
Choosing the right location for your home lab network can impact functionality and user experience. Here’s what you need to consider:
My Home lab is in the basement. There is plenty of space, and heat is not an issue during the summer. I mostly access the devices remotely with RDP or WebGUI. I only go there when I need to re-plug something or restart the router.
If you’re adding a NAS to your network, see my Synology NAS guide for picking a model.
A router is your gateway for internet access.. In most cases, you cannot choose the router. You will receive it from your ISP. There are various flavors available, and they connect to the public network. DSL (common in Europe), Cable, or Fiber are connection methods.
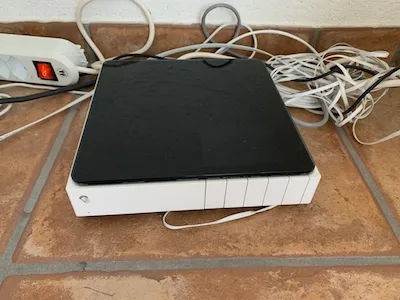
Typically, installation is a breeze. Routers have a WAN Port, several LAN ports, and even wireless capabilities. Personally, I find using the router in Bridge mode preferable, as it allows for seamless connectivity for devices connected to the LAN ports. Pay attention if your ISP supports dual stack IP; opt for IPv4. You will receive a dynamic IP address, which is usually okay.
Certain ISPs attempt to conserve IP addresses by allocating them in a range for communal areas. Such setups are not what you want for a homelab network. You need a dedicated IPv4, fixed or dynamic. A fixed IPv4 is the best; however, it is very expensive in Europe. Nevertheless, dynamic IPs rarely change since the ISP has to maintain logs by law, and the IP is bound with a reservation to the Ethernet (NIC) adapter.
Bridge mode turns off your router’s routing and NAT, so it just passes traffic through. This is useful when you want your own firewall or router handling that traffic instead of your ISP’s device.
A dedicated firewall gives you more control and better security than the router your ISP provides. You can filter traffic, set up a VPN, and route traffic between VLANs with real rules rather than basic NAT.
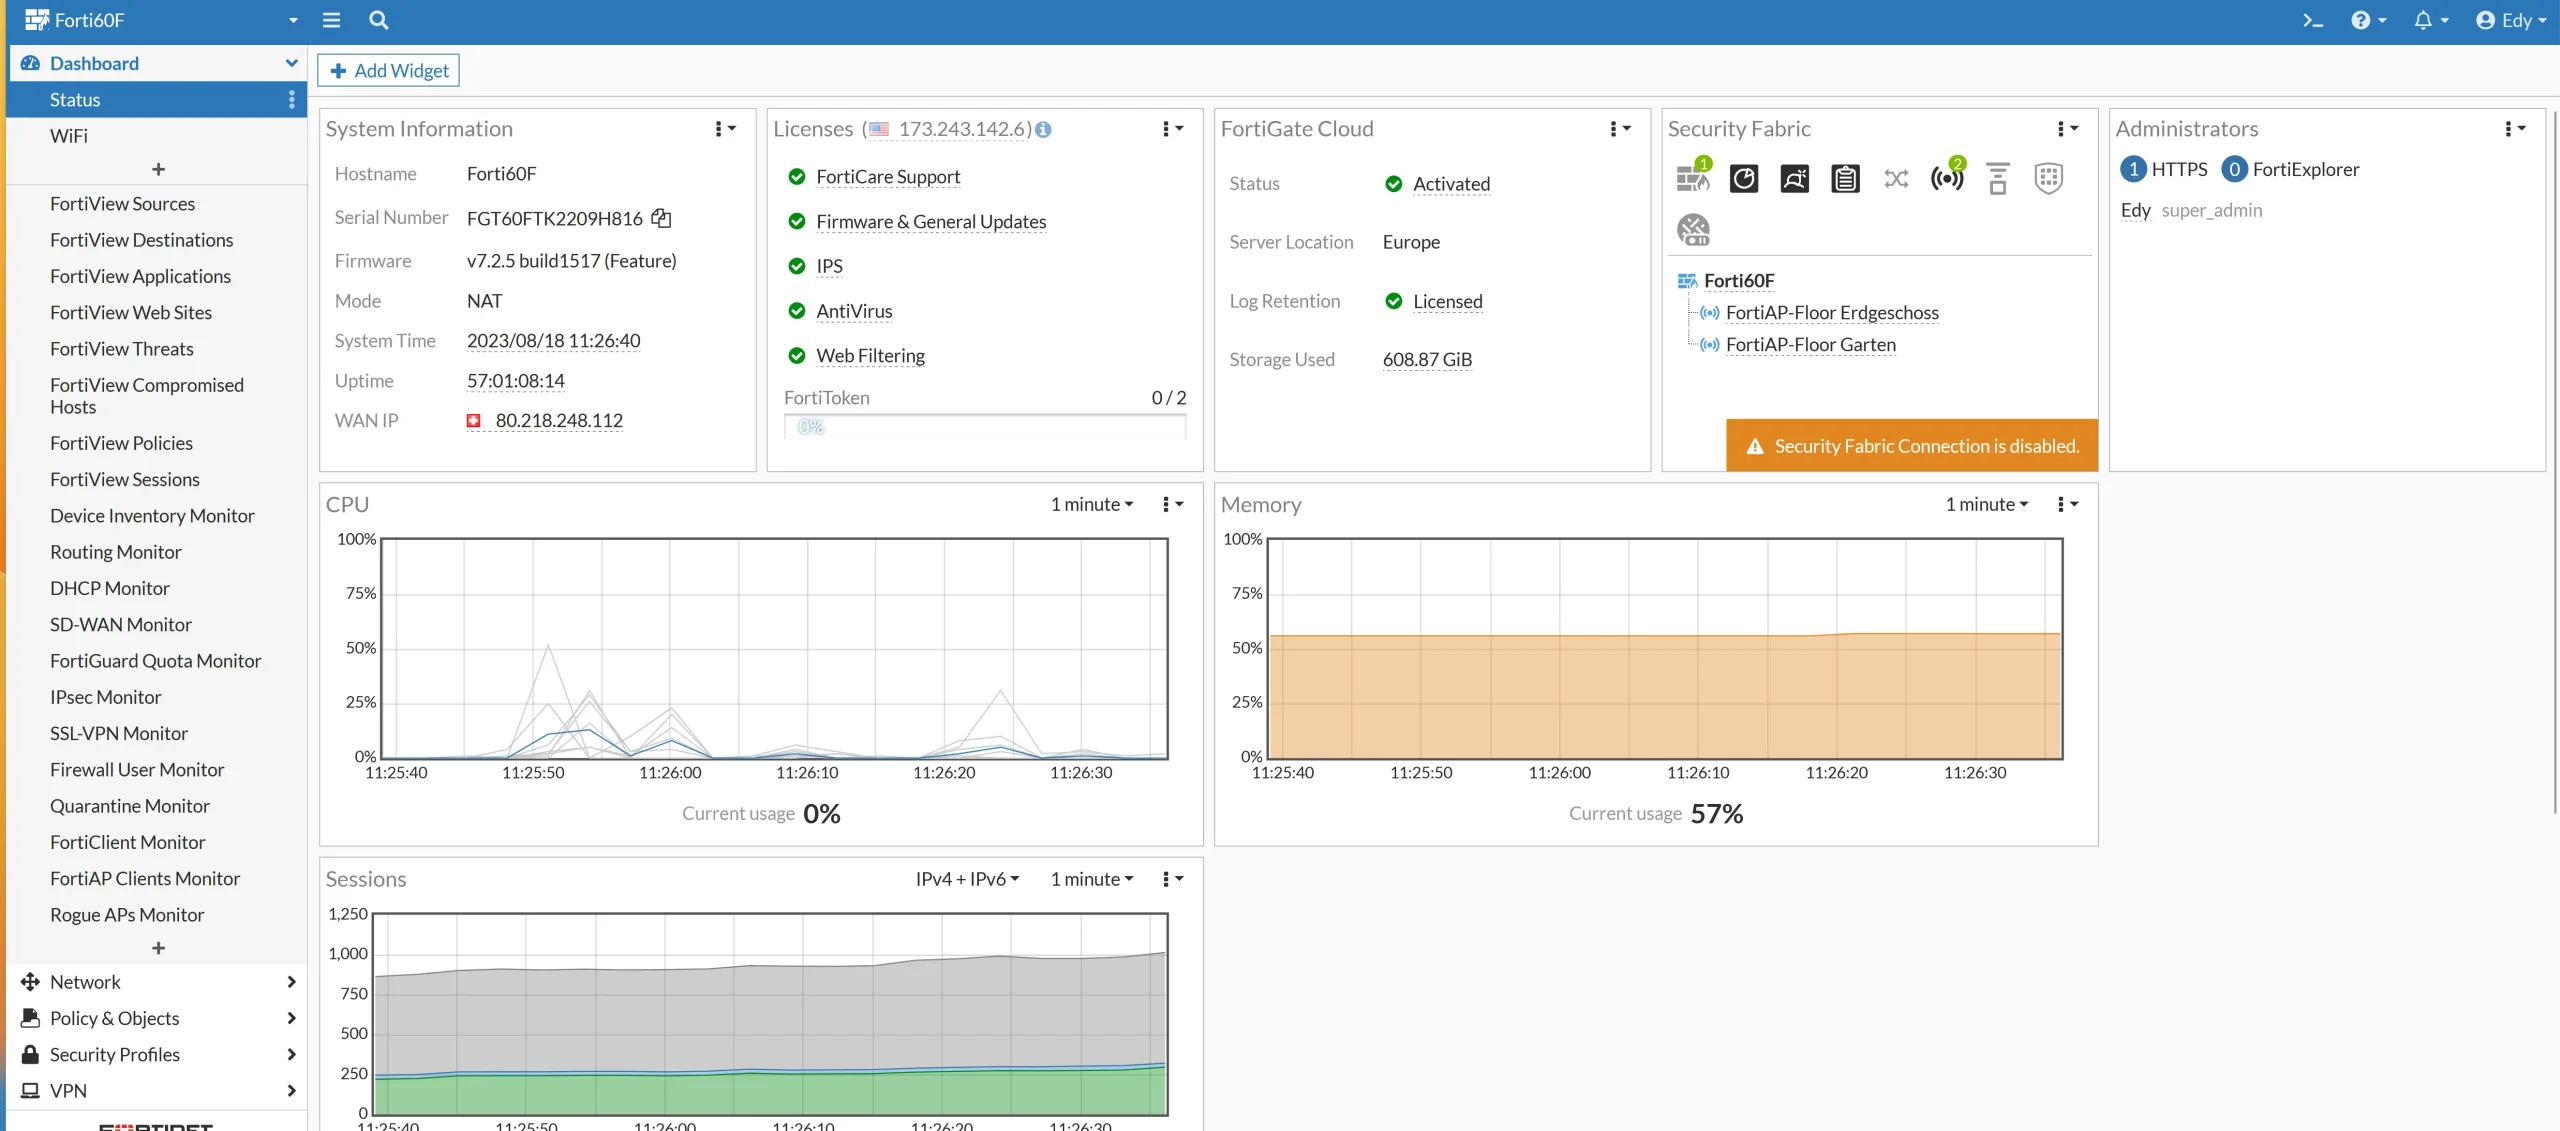
I run a FortiGate. It handles routing between my VLANs and provides a single dashboard to see what’s actually happening on my network.
FortiGate firewalls are popular for their pricing and expandability. You can manage them through the Web GUI or the CLI. Other solid options include Zyxel, Palo Alto Networks, and Unify. I compare pricing and features in my Best Homelab Firewall guide. If you’d rather run a software firewall, pfSense is a strong choice.
At the firewall level, you can configure settings for remote access vpn.
Furthermore, firewall rules can be configured to restrict access between devices across different VLANs, improving security management and control of your network environment.
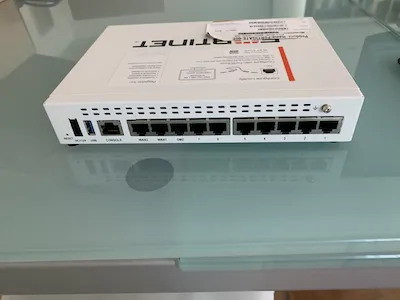
A switch connects the devices in your homelab network and moves traffic between them. The type you need depends on what you’re doing with your network. Here’s what to consider when picking one.
You can choose from different types of switches
PoE (Power over Ethernet):
In my experience, the capability of Layer 3 is already included in a good Firewall. While having a Layer 3 switch can be advantageous, it is not essential, and allocating funds toward other network equipment may be more practical.
I use a Netgear GS724T Layer 3 switch for my home networking. And honestly speaking, I have never used the Layer 3 functionality it offers.
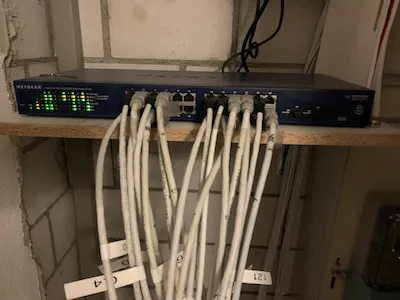
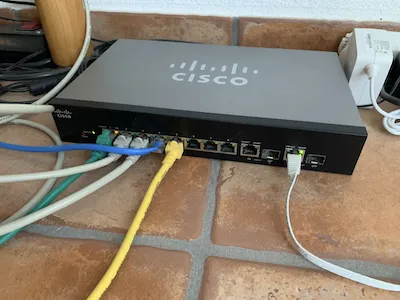
In general, Netgear offers a vast of functionality for a decent price which makes them attractive for homelab networking. Other brands like Cisco’s small business series offer a huge feature-rich playground too. I have bought 3 of these Cisco switches for the living rooms which provides POE for my Wireless access points.
10Gb switches aren’t enterprise-only anymore. Prices have dropped enough to make sense in a homelab, especially if you move large files between NAS devices or run VMs that need more bandwidth than 1Gb can handle.
Look for fanless models if noise matters to you, and check whether you need RJ45 or SFP+ ports before buying, since not all your gear may support both.
Some of the top picks on Amazon offer a unique blend of features and value to elevate your homelab network.


As mentioned above, the router from your ISP usually has Wireless built-in. I don’t recommend using it. Rather buy access points for your living room. Wireless is a good playground to explore VLans by separating them with different subnets (guest networks).
Wi-Fi 6 is gaining traction, so you might consider getting an Access Point with Wi-Fi 6 support. Ubiquiti access points are premier choices. My choice is FortiGate access points. Managing multiple networks is made easy and convenient with the FortiGate firewall. Its setup is simplified, making it a breeze to use.

UTP (unshielded twisted pair) network cable works fine. It is cost-effective, easier to install, and provides good performance.
STP (shielded) cables add a foil or braid layer to reduce interference, but require correct grounding at both ends. Poor grounding can actually make STP perform worse than UTP.
Some sources say Europe prefers STP, while the US and Canada mostly use UTP. This difference appears in older guides and is sometimes true for professional installs, where EN and ISO standards require shielding. But for home setups, this isn’t really the case. When I asked on r/homelab, most people used UTP Cat6, no matter where they lived. Those who chose STP usually had a specific reason, like a nearby radio transmitter, not just because of their location.
In my Swiss homelab, STP Cat6 is used, but it’s not necessary for everyone.
For homelabs, Cat6 is usually the best choice. It supports 1 Gbps over 100 meters and up to 10 Gbps for 37–55 meters. For full-length 10 Gbps, use Cat6a. Skip Cat7: it’s not an official RJ45 standard, is hard to install, and most Cat7 cables work like Cat6a.
To get faster network speeds, many people add a single high-speed link in key spots, such as between the main switch, server, and NAS, using a DAC cable or fiber. This lets you have 10GbE or faster without needing an expensive high-speed switch everywhere. Fiber is thin, affordable for short runs, and helpful for moving large files between devices.
One last tip: check your local electrical code before running cables. In some places, you can’t put power and network cables in the same conduit.
Confession time: I don’t use a rack or a half-height rack. I would wish to have one. It makes handling the devices with cabling easier and you will have less a mess. It’s something on my list for the next purchase.
Key features:
Pros:
Cons:
A decent open-frame or wall-mount rack from StarTech.com or Sysracks is worth checking out. I go into more detail in my [homelab rack article]. A typical full-size server rack is usually 42U high.
Networking is only one layer of a home lab build. My complete guide to building a home lab covers the hardware, storage, and services that connect to it.
When designing your network, it’s important to carefully plan the IP address convention and allocate subnets in a way that adds excitement to your homelab network.
Understanding Subnets: Subnetting is dividing an IP network into sub-networks. Each sub-network is called a subnet. It’s like dividing a large group into smaller teams with specific tasks.
Why Use Subnets?
How to Plan Subnets:
Enhance subnet flexibility by implementing VLAN tagging to enable seamless traffic flow. Easily carry VLAN traffic across switches by assigning Trunk ports. Maximize your network efficiency and flexibility with this smart configuration.
Remember, a solid grasp of IP schemas and subnets ensures a seamless networking setup!
If you run into trunk tagging issues later, I cover VLAN ID 4095 and its edge cases separately.
Your Public IPv4 address is like your home’s address on the internet highway. An IPv4 address is a unique set of numbers that identifies your device online
As previously stated, confirming that you have been assigned a genuine public IPv4 address is crucial. Only with a public IP address, you can forward traffic coming from the internet to your homelab network.
For example, you want to:
It’s important to have thorough documentation for your homelab network, even if it’s just for personal use. As your network expands and becomes more intricate, having detailed documentation can help you troubleshoot any issues that arise. Personally, I like to keep track of all the static IPs I’ve assigned to my devices in an Excel spreadsheet. I also maintain a list of my VLANs and the corresponding trunk ports on my switches. Furthermore, I document each switch, including the port numbers and the connected devices.
Monitoring your network activity is key to keeping your homelab secure and running optimally. This can include regularly checking for suspicious traffic or malicious connections in your server(s). Firewall manufacturers offer security and virus bundles. Turn on notifications on your firewall. It is also a good idea to use an external network monitor provider, which does from external some basic checks.
You don’t need to expose every service to reach your homelab from outside. Two approaches cover most cases.
My FortiGate runs its own SSL VPN. I connect through it whenever I need remote access, and it puts me straight onto my private network, no port forwarding required.
Tailscale is a popular alternative if you’d rather skip firewall VPN configuration. It runs on WireGuard and connects your devices directly, also without port forwarding.
Either way, avoid exposing RDP or admin panels straight to the internet. Route through a VPN first.
A homelab network doesn’t need to be complex on day one. Start with a router, a firewall, and one VLAN. Add more as you actually need it.
Mine grew from a single switch into three VLANs, a dedicated firewall, and my own DNS server. Yours doesn’t need to look like mine to work.
Once your network is solid, the real fun starts: what you actually run on top of it. If you want to go deeper into virtualization, Kubernetes, and home automation, Chris Kirby’s guide to setting up and leveling up a homelab is a solid next read — it picks up right where this one leaves off.
I’d love to hear from you. Was this article helpful? Share your thoughts in the comments below. If you prefer, you can also reach me by email or connect with me on Reddit at Navigatetech
Hi, I’m Edy Werder. I write hands-on guides about Proxmox, homelab servers, NAS, and WordPress, based on real setups I run and document.
No sponsors, no fluff—just real configs and results.
Enjoying the content?

