
By Edy Werder — IT Consultant & Tech Blogger
Editor’s Note: This article was updated on May 9, 2025, to clarify that Proxmox does not support shrinking virtual hard disks, and to include GParted as an alternative method for resizing the boot disk in Ubuntu 24.04.
Wondering how Proxmox increase VM disk size works? This guide walks you through the steps to resize a vDisk or add more storage. It’s simpler than you might think—and your VM will have the necessary space to grow.
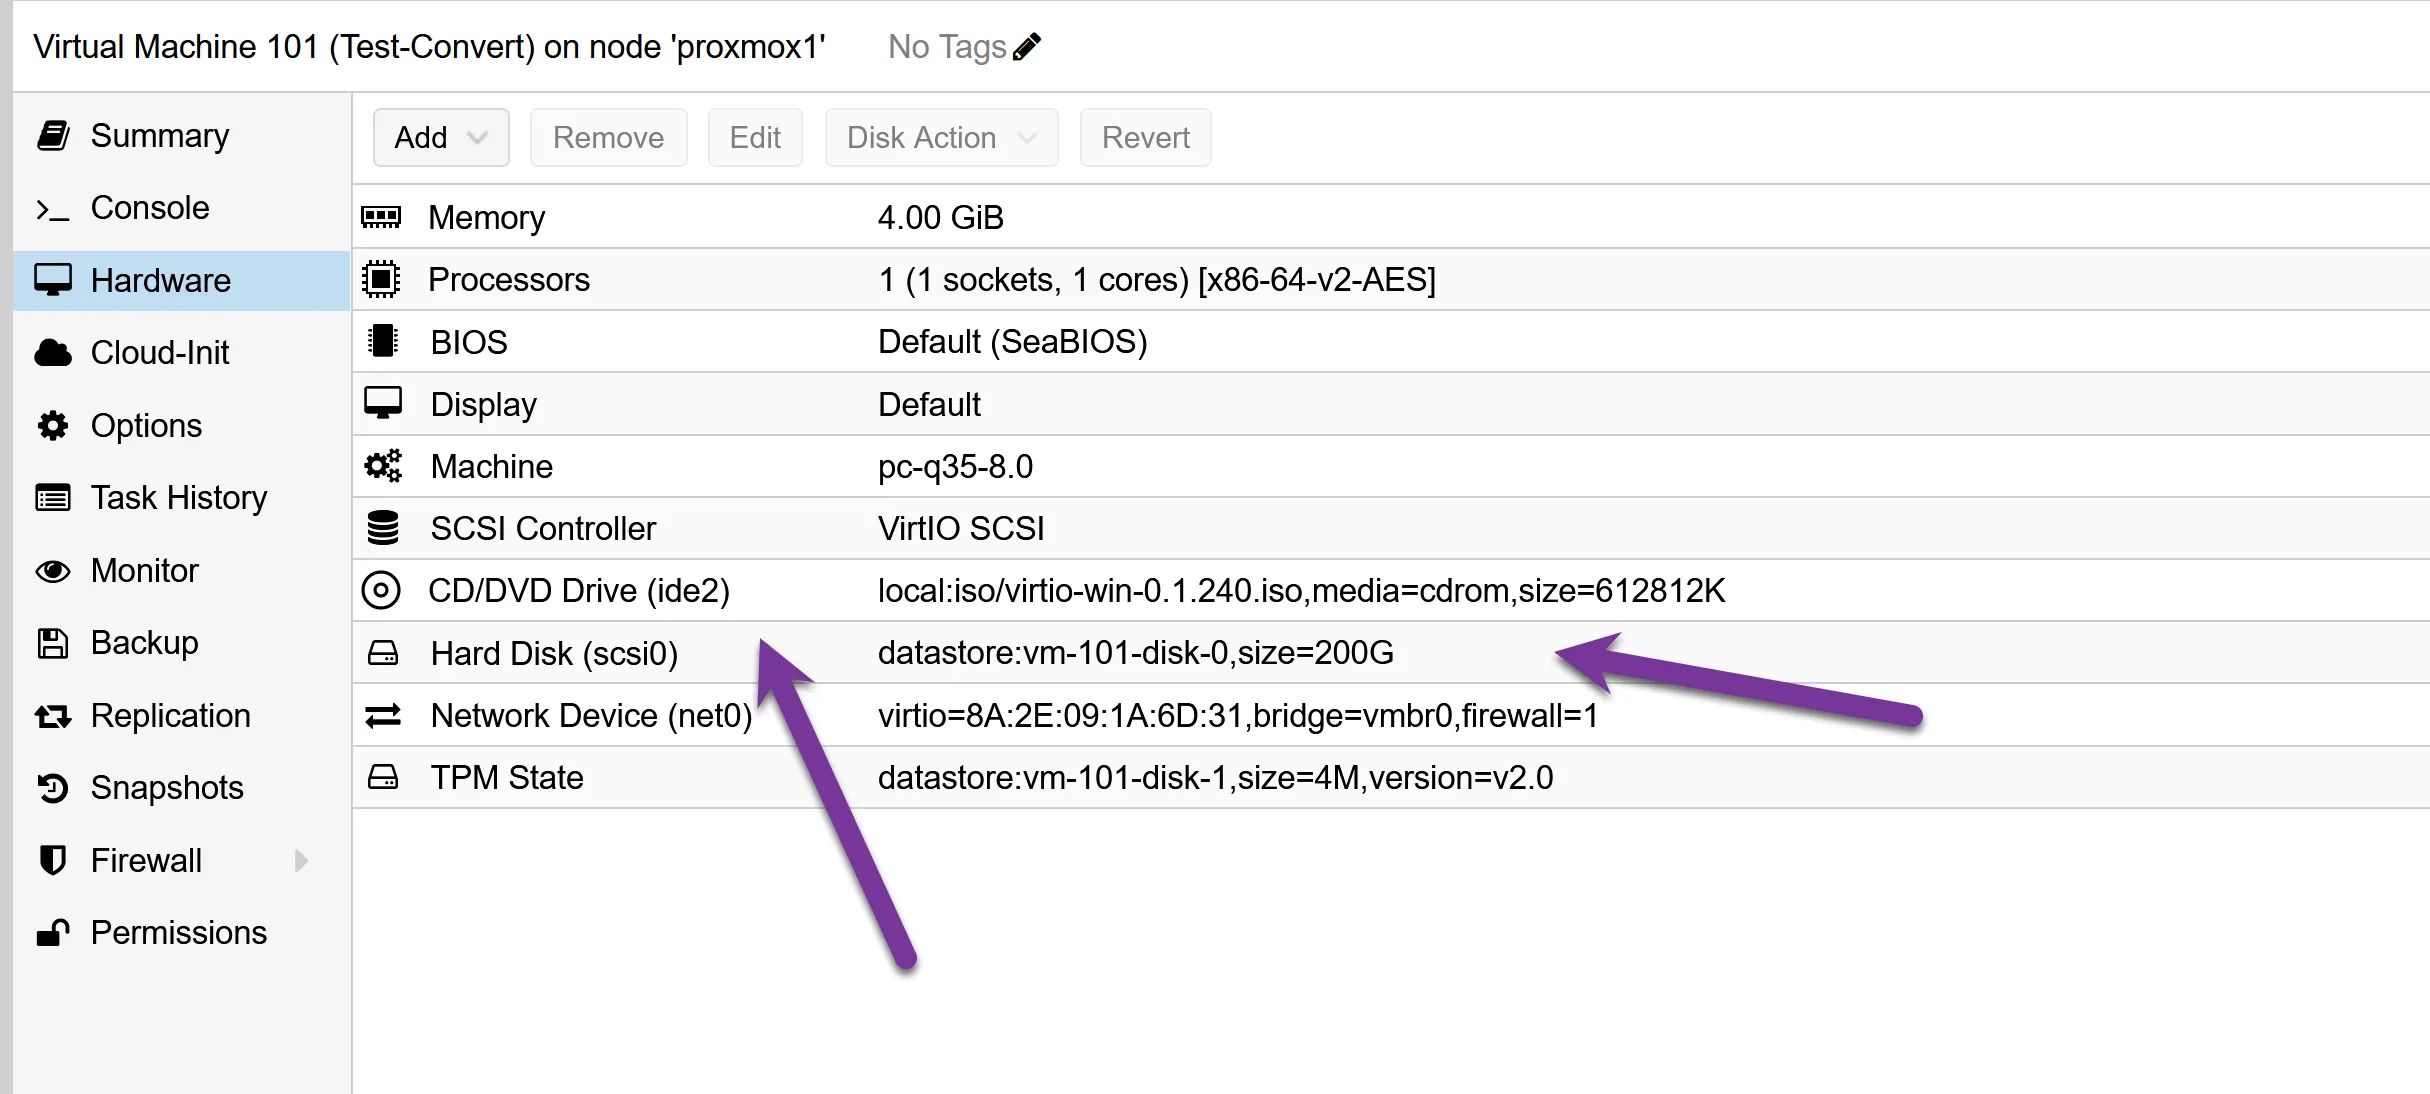
Before we jump into expanding disk space, let’s understand what a VM disk in Proxmox is. Essentially, a VM disk in Proxmox is a virtual hard drive. It’s where your guest stores its operating system, applications, and data. Like a physical hard drive, this virtual disk has a fixed size, but with a twist. Unlike physical hardware, you can resize this virtual disk as your needs change.
In Proxmox, VM disks are managed through storage pools consisting of local storage, network-attached storage (NAS), or even more complex configurations like SAN (Storage Area Network). Each VM disk is a file or a block device on these storage pools, and depending on your setup and requirements, it can be in various formats like qcow2, raw, or others.
Understanding these basics is key to effectively managing your VMs.
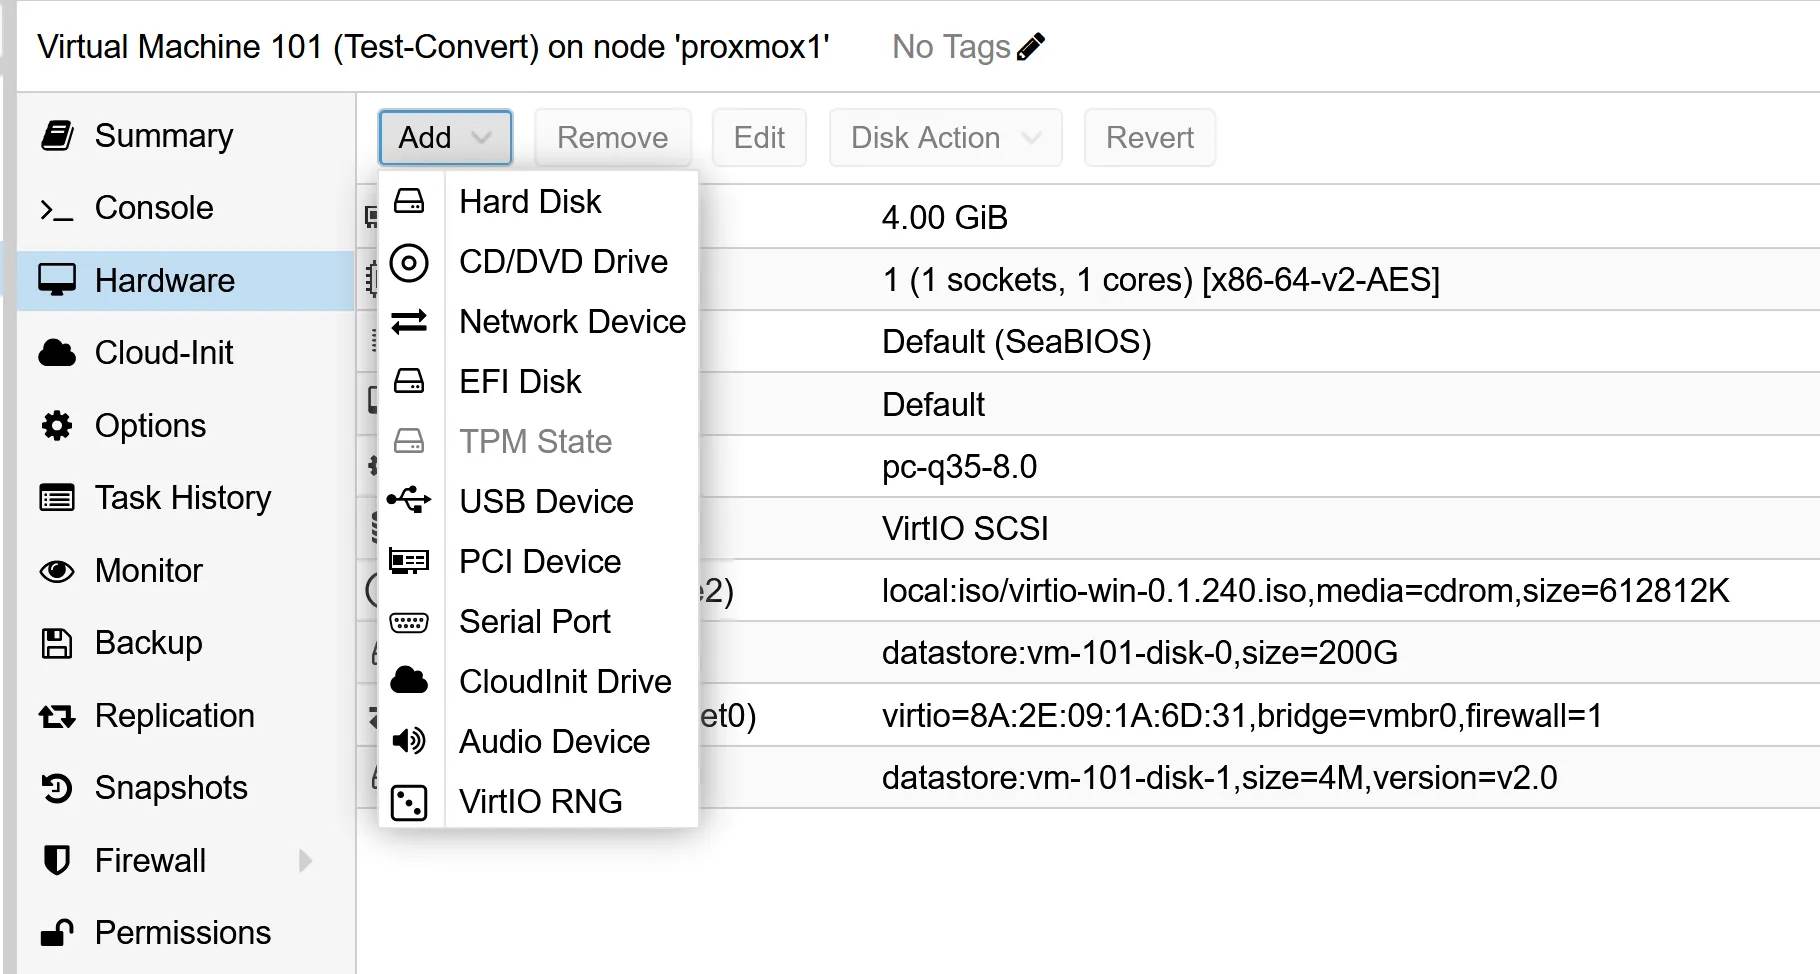
Creating a new VM Disk in Proxmox can help handle various needs, not the least of which is expanding your storage capacity. Picture this: your data is growing rapidly, and the current storage cannot keep up. Sounds scary, right? This is where the concept of creating a new disk comes to the rescue. You can use it for storing virtual machines, containers, and images. Additionally, NVMe disks, affordable and known for their speed, make for excellent choices when you’re considering adding a new VM Disk. Trust me, your Proxmox host will love it!
The short answer is, no, it should not. Increasing the size of your VM Disk in Proxmox doesn’t translate to immediate data loss. It is more like adding an extra room to your house to store more items. You get extra storage space to accommodate more data. However, a word to the wise: messing up with partitions while increasing disk size without knowing what you’re doing can lead to data loss. Hence, it’s highly recommended to back up your data before making any changes for your peace of mind.
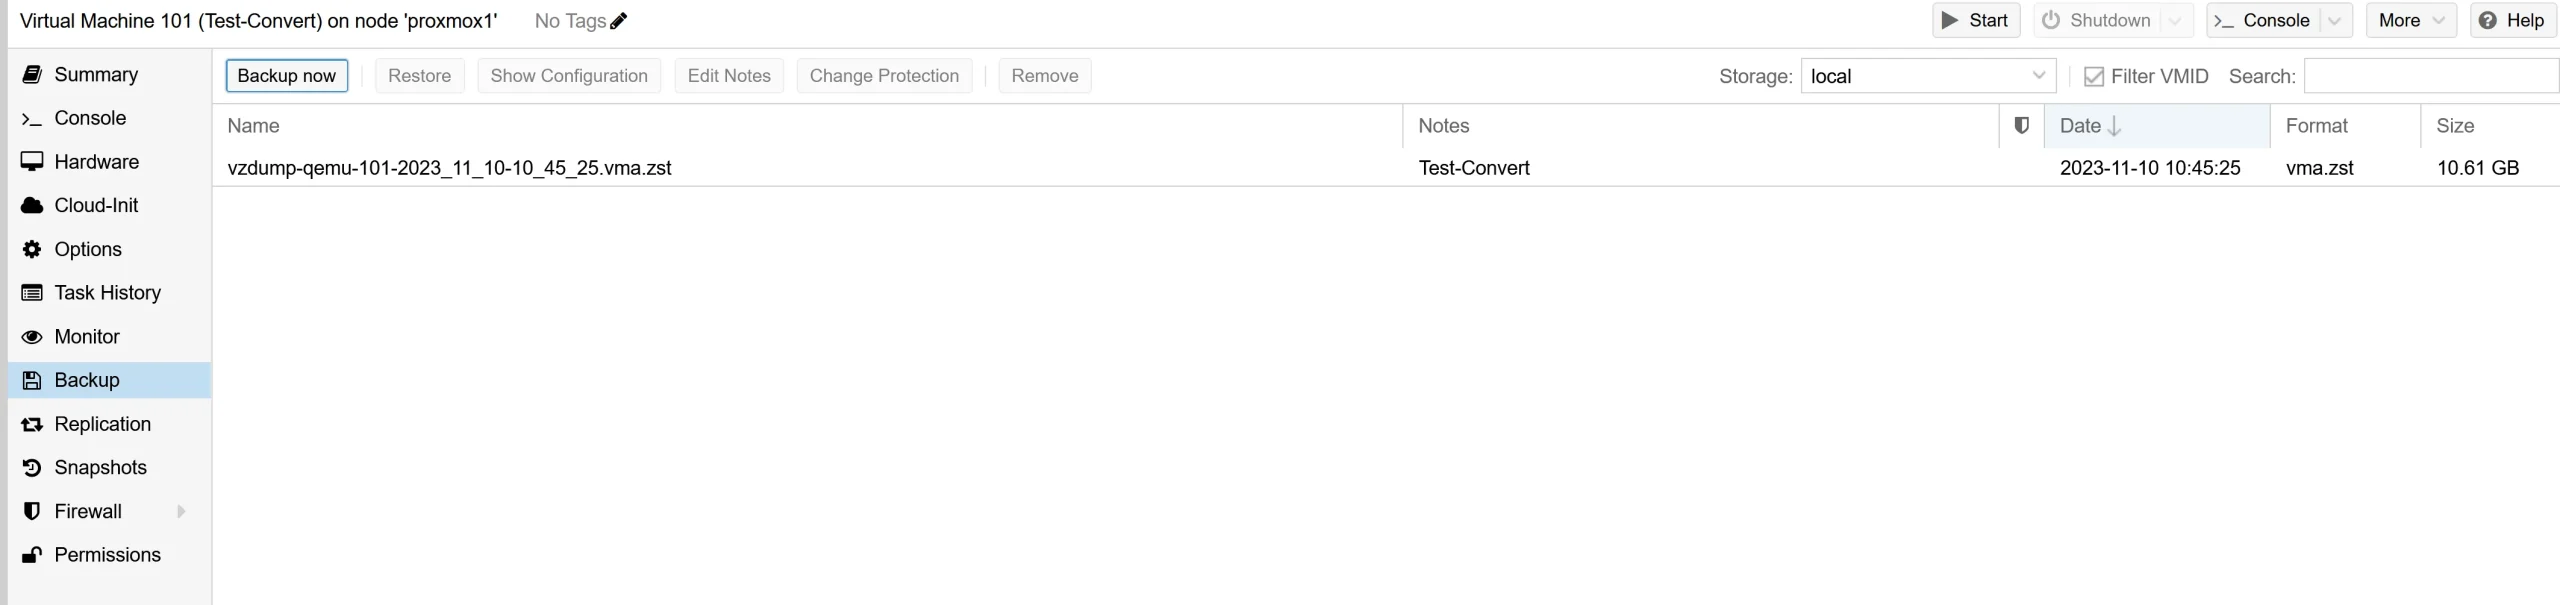
A backup becomes essential for data safety as your guest (VM) grows. With Proxmox, you can use the newly added storage space as backup storage for your VMs and containers. Just follow these steps:
Now, you can rest easy knowing your data is safe and sound.
A new window will appear where you can configure the disk settings:
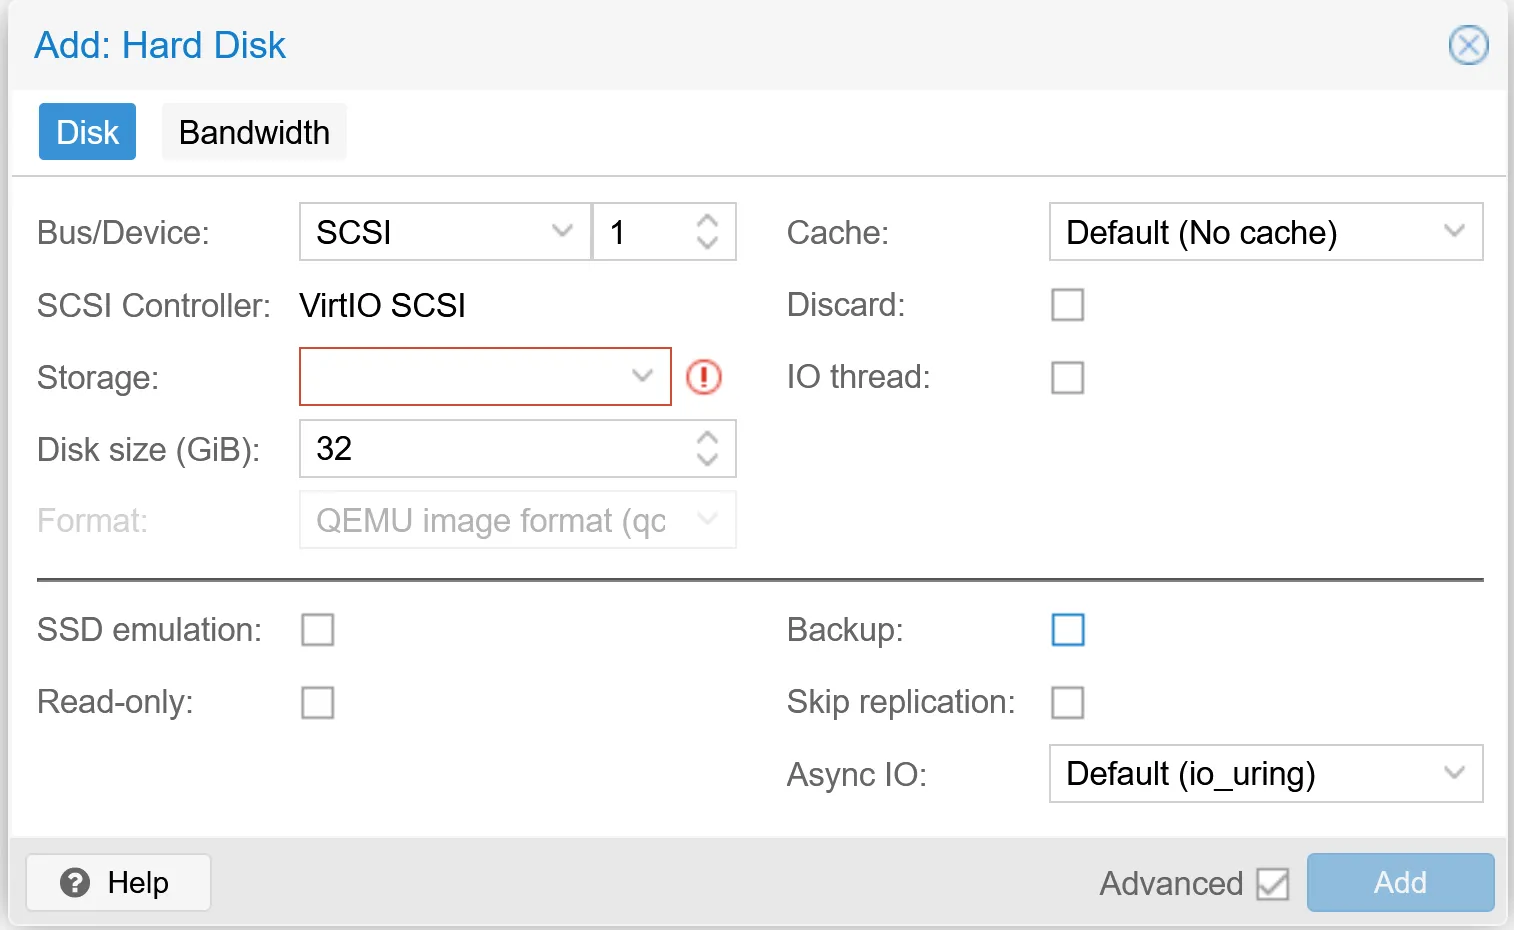
virtio0, sata0, etc.).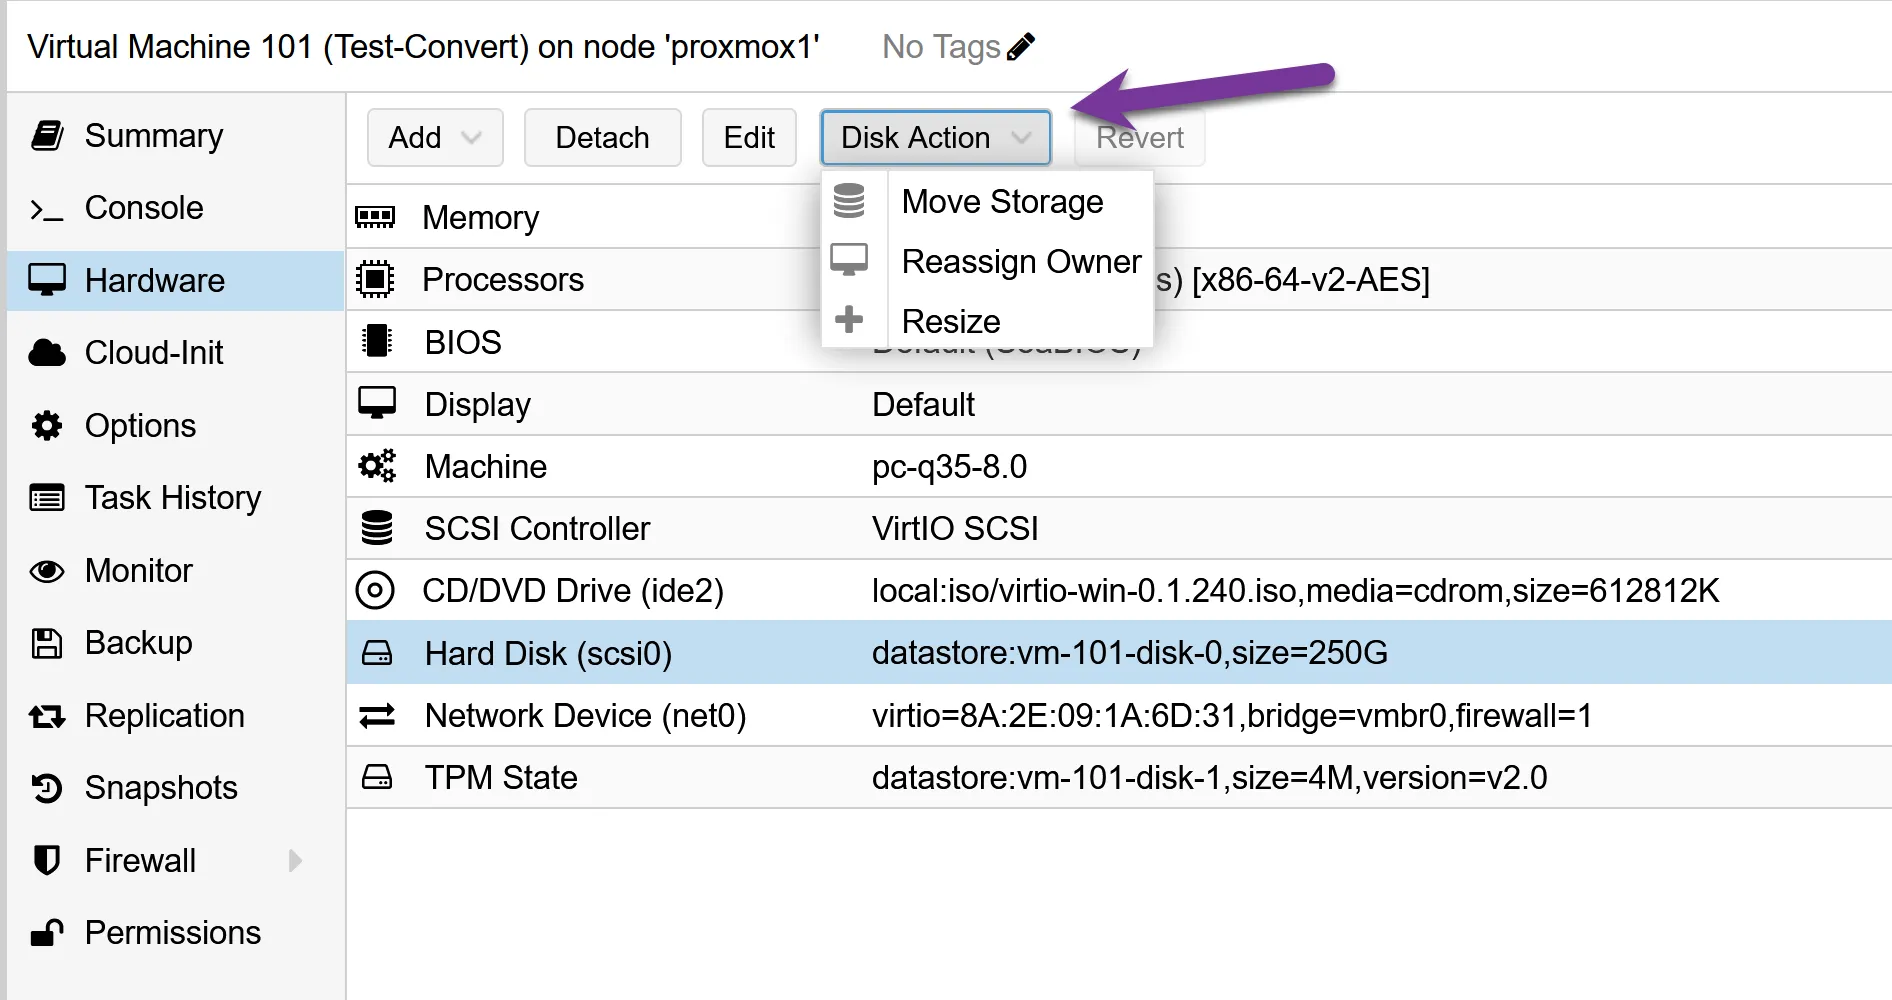
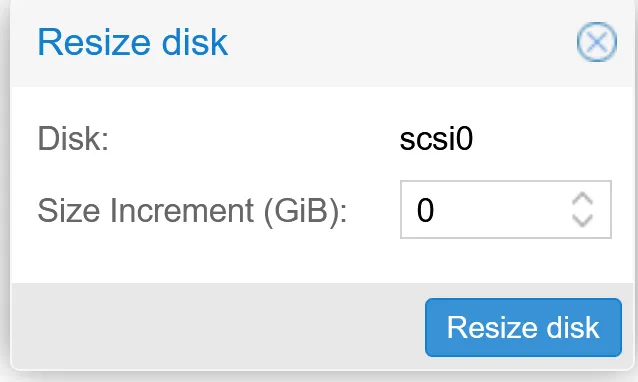
Note: While expanding a VM disk in Proxmox is straightforward using the Resize option, shrinking a disk is not supported via the Proxmox VE GUI or API. Reducing disk size requires manual steps on the command line and inside the guest OS and can be risky if not done correctly. For most setups, expanding storage is safer than attempting to shrink.
Enhance your virtualization experience with these budget-friendly and high-performing servers.
| Product Name | View on Amazon |
|---|---|
| Dell PowerEdge Dell R630 Server | 2X E5-2690 v4 = 28 Cores | 128GB RAM | 2X 1TB SSD (Renewed) | View on Amazon |
| Dell PowerEdge R730 Server 2X E5-2680v4 2.40Ghz 28-Core 128GB 8X 4TB 12G H730P (Renewed) | View on Amazon |
| ProLiant MicroServer Gen11 Tower Server w/one Intel Xeon E-2434, 3.4GHz 4-core 1P 32GB-U VROC 4LFF‑NHP 4TB HDD iLO KIT 180W External PS (HPE Smart Choice P74440-005) | View on Amazon |
| HPE ProLiant DL20 Gen11 Rack Server w/one Intel Xeon E-2436 Processor, 2.9GHz 6‑core 1P 32GB‑DR MR408i‑o 4SFF 2x500W RPS | View on Amazon |
| Dell PowerEdge R830 Server 2.20Ghz 56-Core 128GB 16x 300GB 15K H730P Rails (Renewed) | View on Amazon |
| Dell PowerEdge R440 Server 2X Gold 6126 2.60Ghz 24-Core 96GB 960GB SSD + 3.6TB (Renewed) | View on Amazon |
| HPE ProLiant DL380 Gen9 2U RackMount 64-bit Server + 2×8-Core E5-2640v3 Xeon 2.6GHz CPUs + 64GB PC4-2133P RAM + 8×600GB 10K SAS SFF HDD, P440ar RAID, 4×GigaBit NIC, 2×Power Supplies, NO OS | View on Amazon |
| HPE Proliant DL380 Gen10 8B SFF 2U Server, 2X Intel Xeon Gold 6126 2.6Ghz (24-cores Total), 192GB DDR4 RAM, 8X 1.2TB 2.5” 10K SAS 12Gbps, P408i-a SR 2GB RAID, No Operating System | View on Amazon |
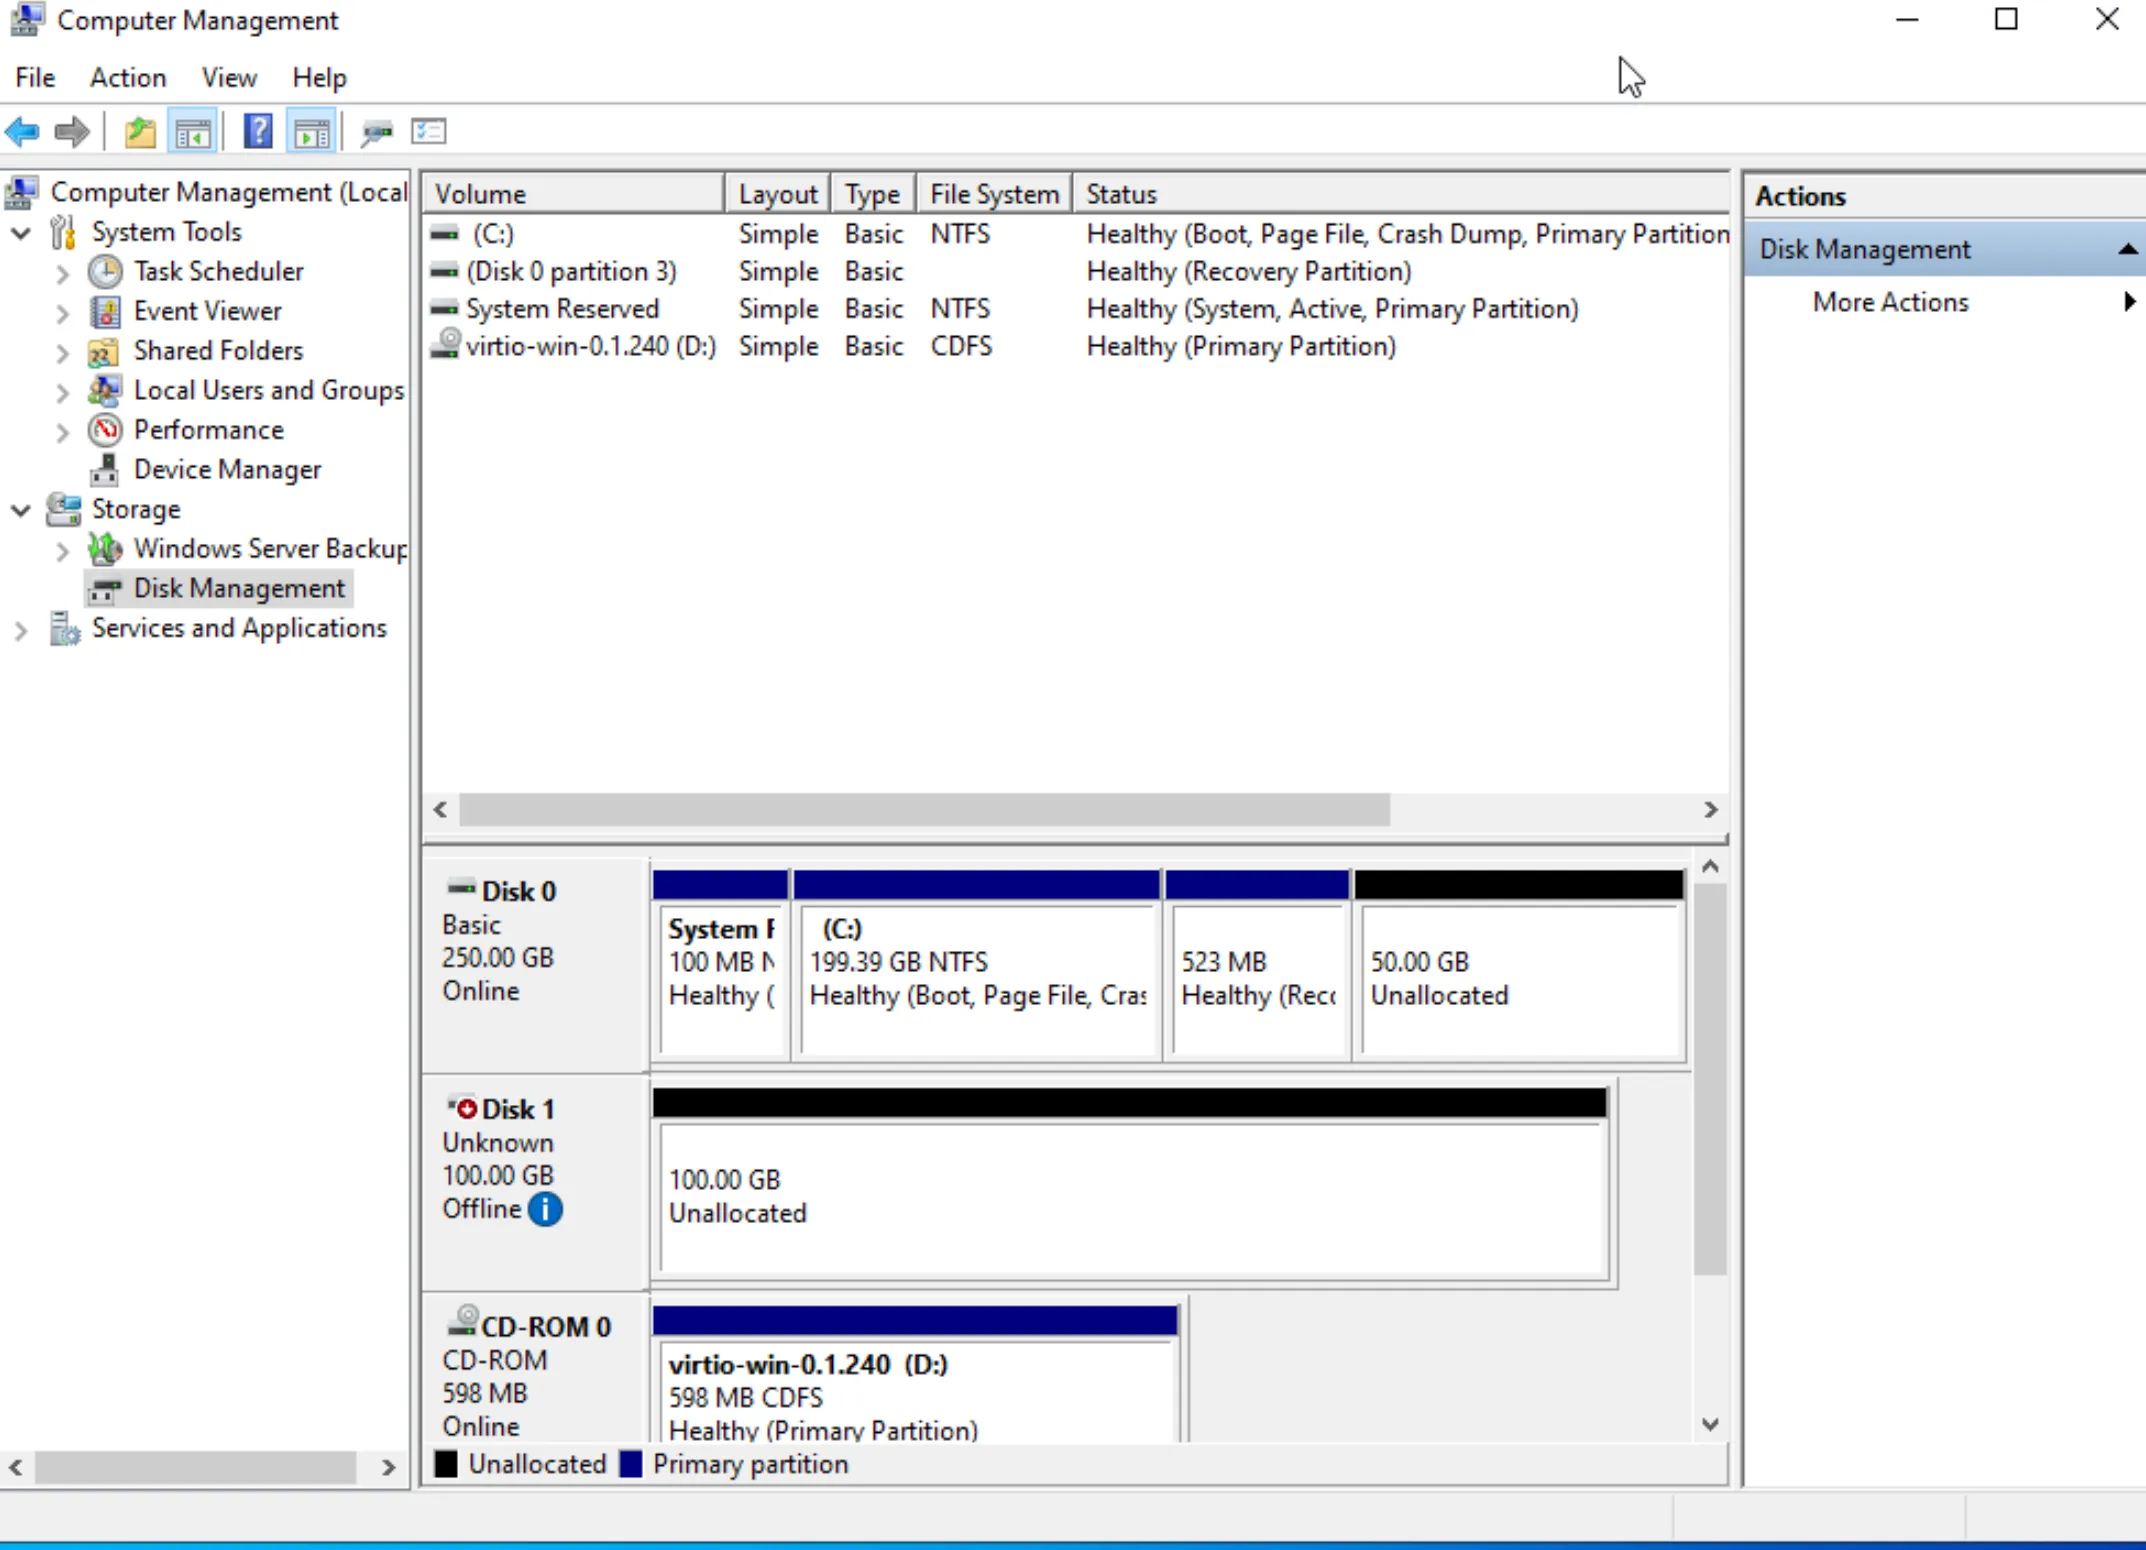
When adding a new disk to a VM in Proxmox, paying attention to the boot order settings is crucial. This step is often overlooked but can be vital, primarily if the new disk is not intended to be the primary boot device. Incorrect boot order settings can lead to boot issues or the VM attempting to boot from the wrong disk.
After adding a new disk, always double-check the VM’s boot order configuration to ensure it aligns with your intended setup. This simple check can save you from potential headaches caused by boot-related problems and ensures a smooth, uninterrupted operation of your VMs
Reducing the size of a VM disk is generally not recommended and can be quite risky. It’s a complex process that often involves shrinking the file system first, which carries a significant risk of data loss if not done correctly. Additionally, many virtualization platforms, including Proxmox, don’t natively support reducing the size of a VM disk due to these risks. However, advanced users may be able to utilize tools such as GParted to safely and effectively reduce the size of the VM disk.
In most cases, it’s safer and more practical to manage disk usage within the VM, such as by deleting unnecessary files or using disk cleanup tools, rather than attempting to reduce the disk size itself. If you need a smaller disk size, it’s often better to create a new VM with the desired disk size and migrate the necessary data. However, some virtualization software may offer a resize option that allows you to adjust the disk size without creating a new VM.
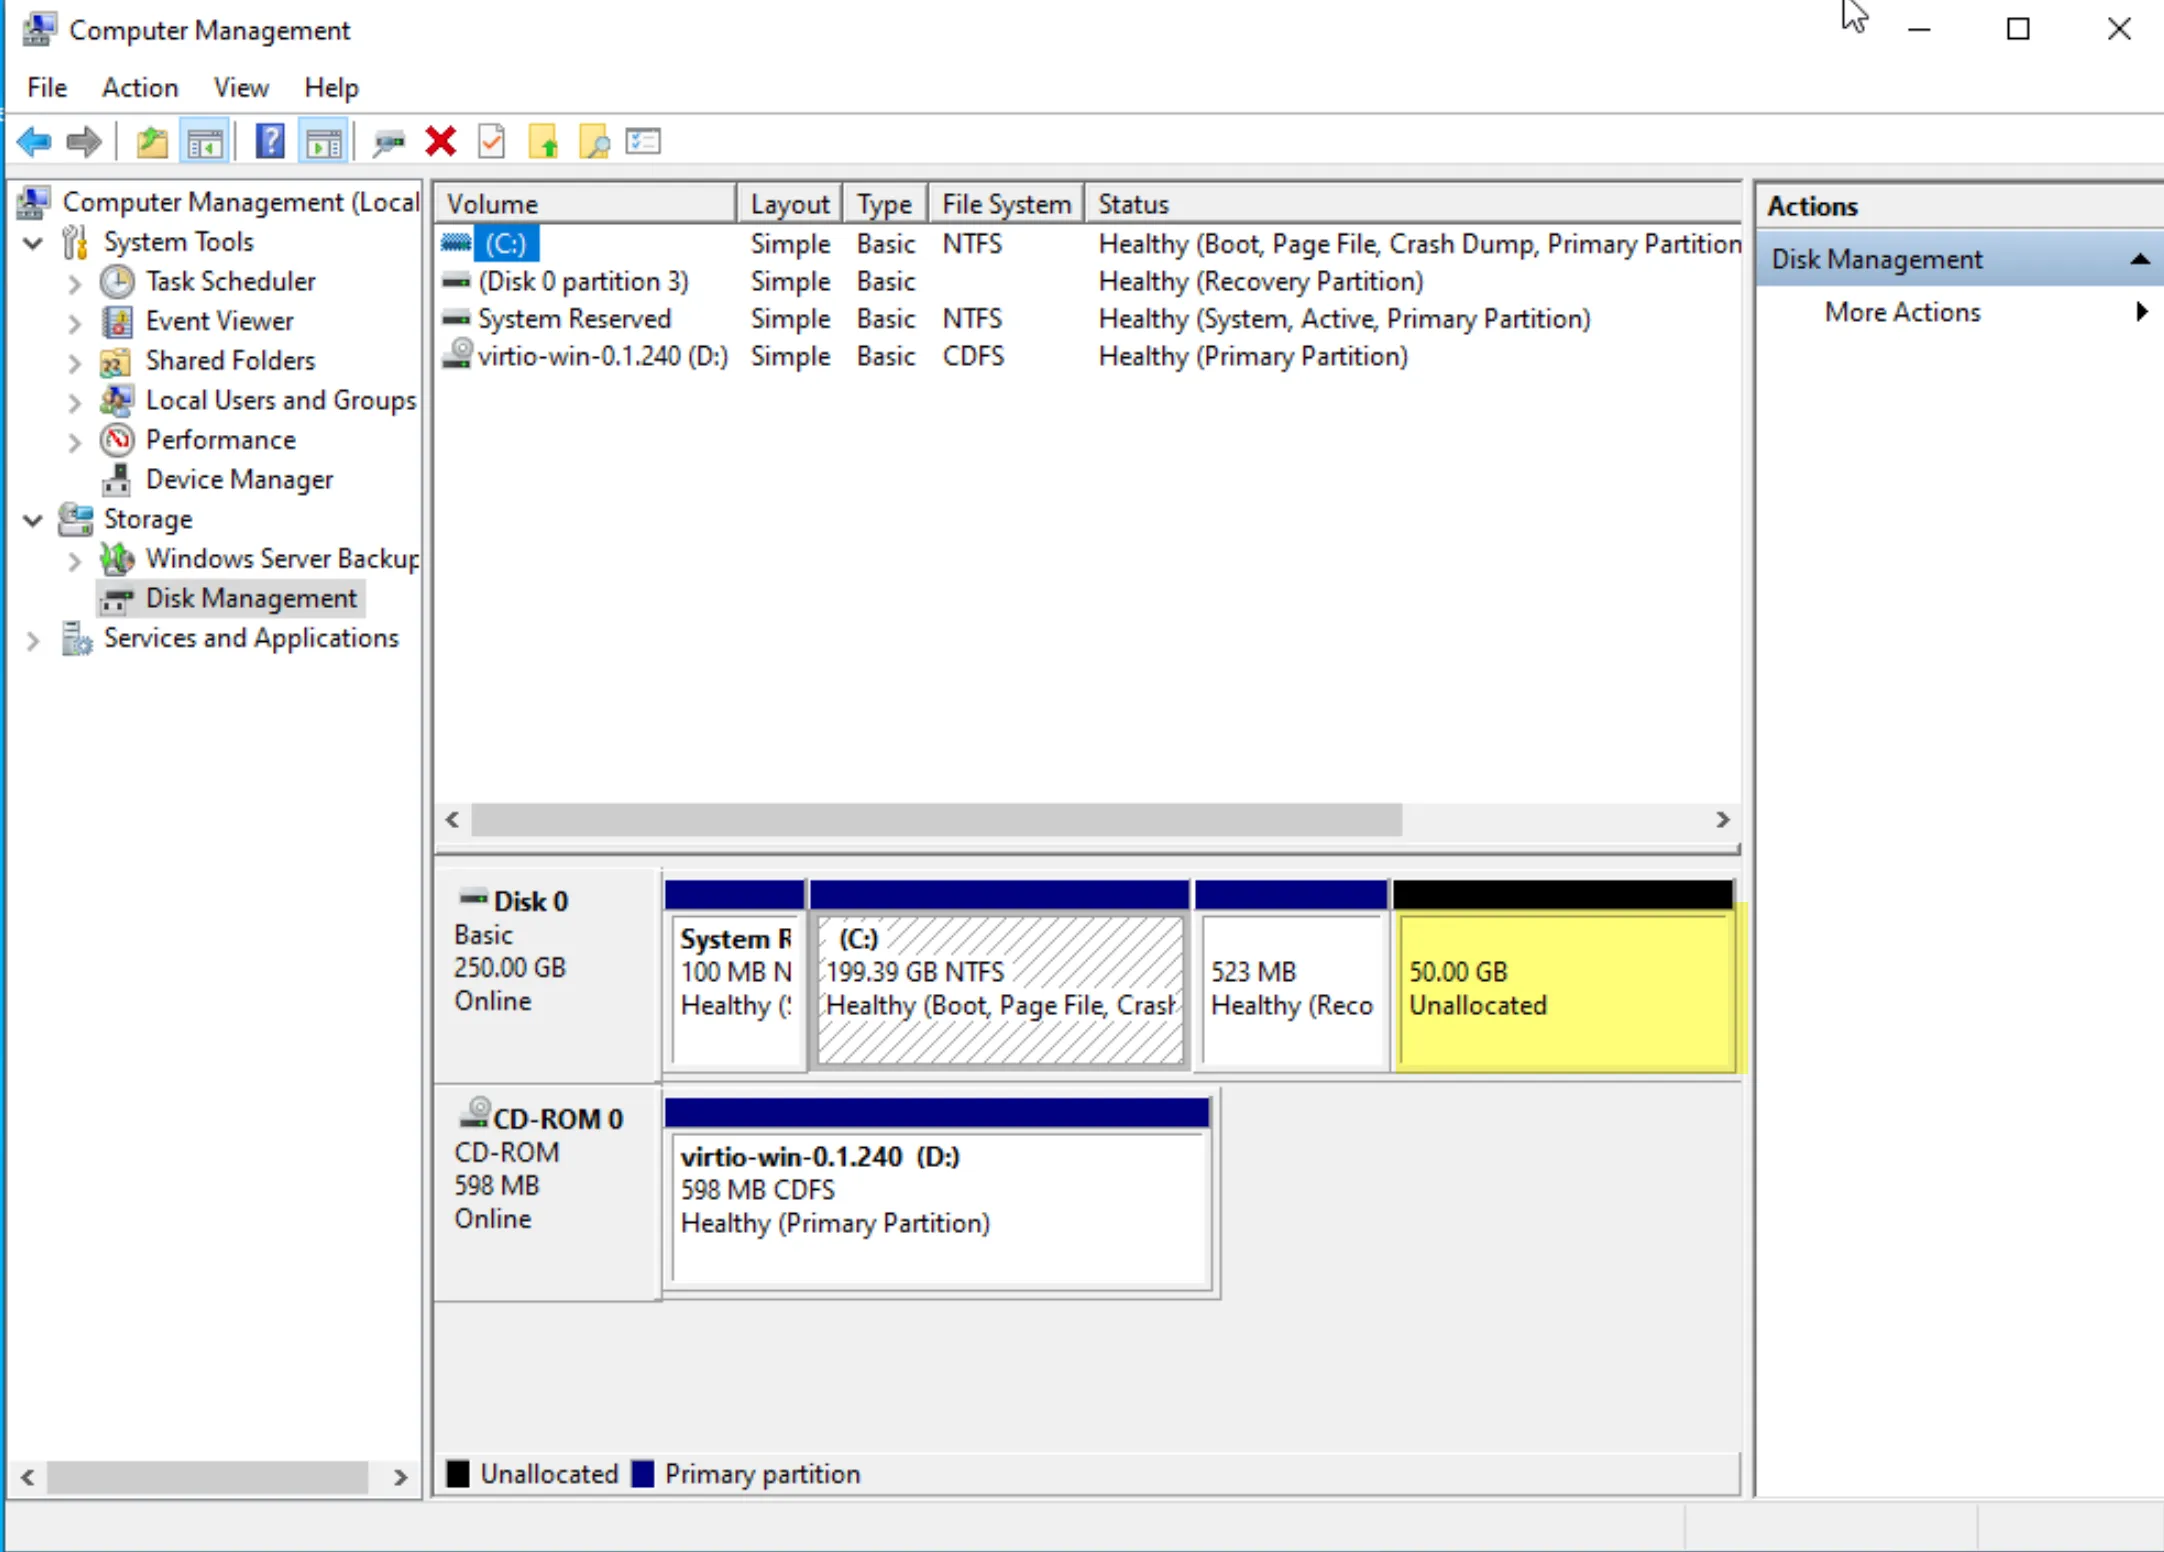
When you install Windows on a virtual machine, the setup process automatically creates several partitions, each serving a specific purpose. The most notable ones are:
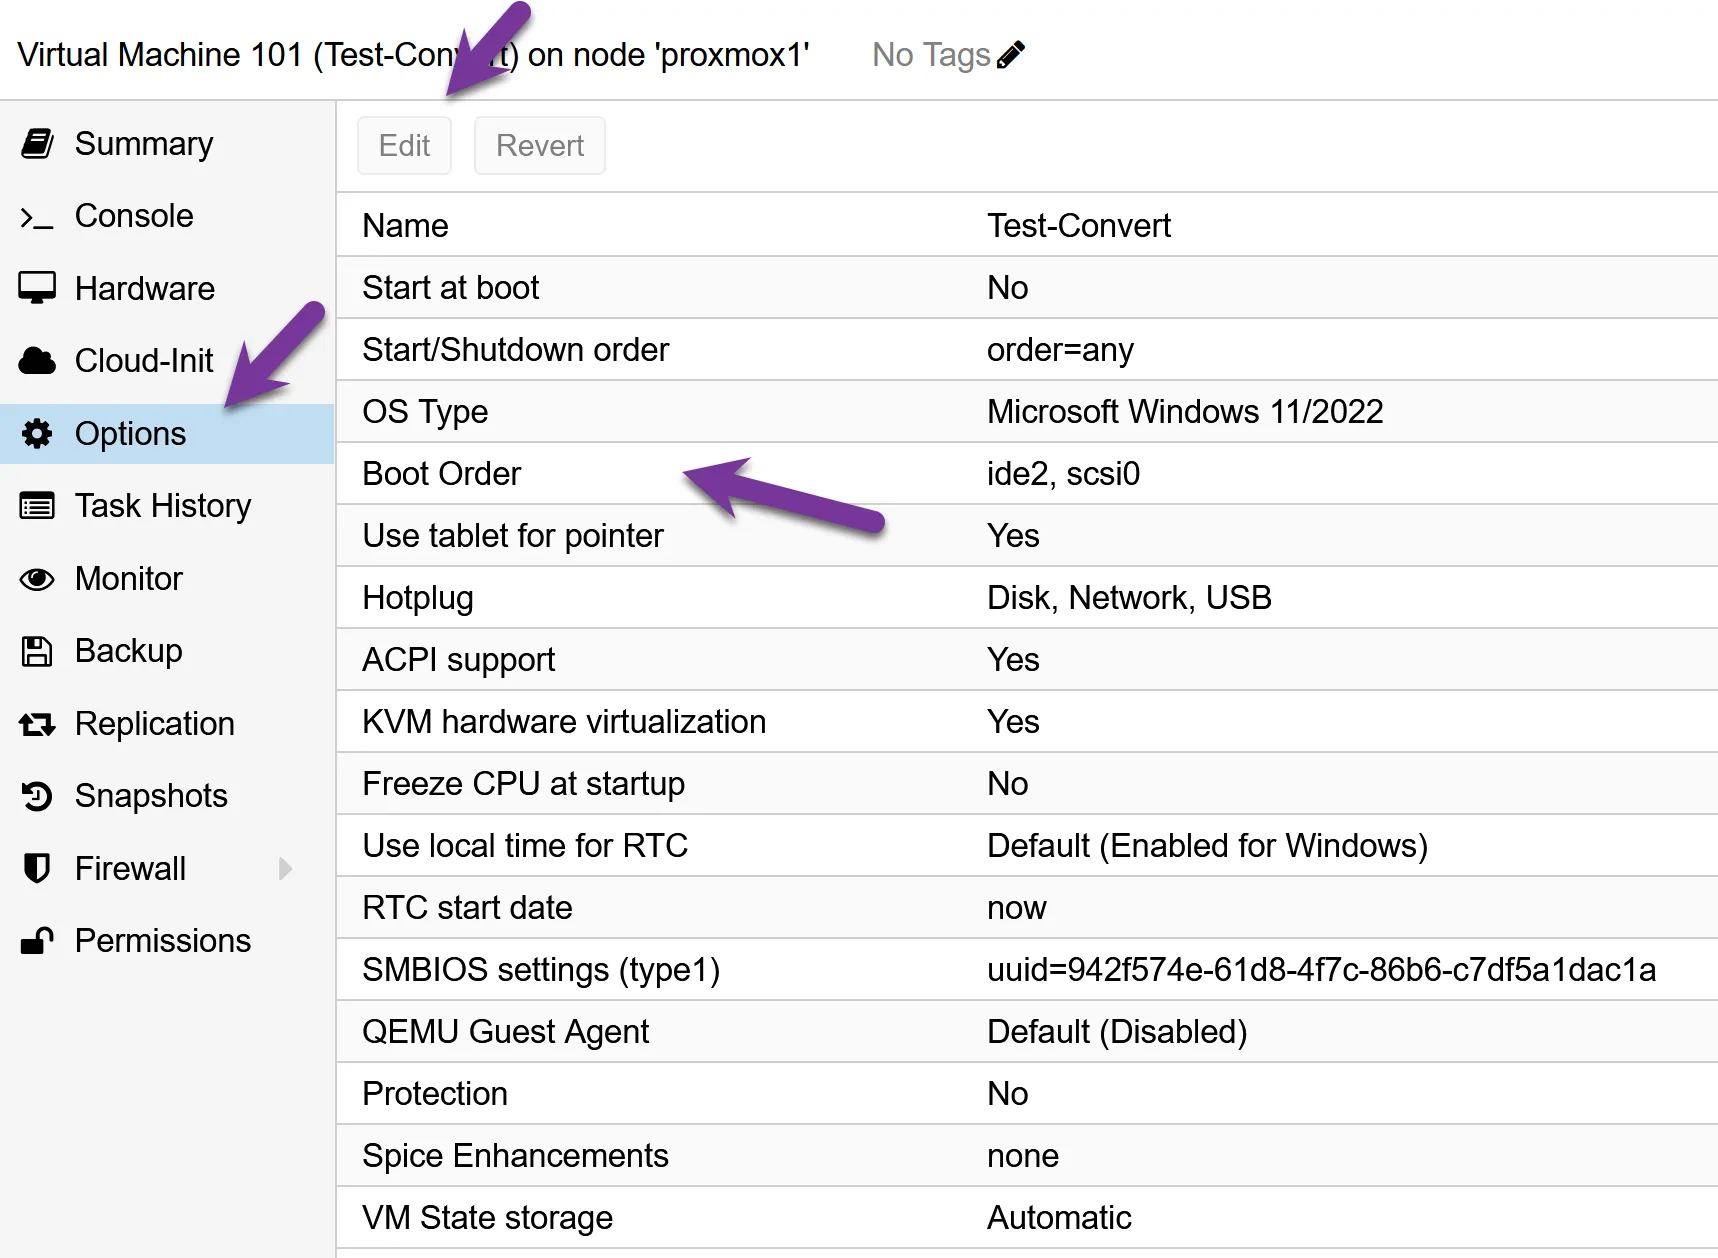
Understanding these partitions is key when resizing or modifying your VM’s disk space, especially if you want to increase the boot partition size.
When setting up a Windows VM in Proxmox, carefully plan your disk space allocation. Ideally, size the installation disk (C: drive) appropriately before installing Windows, ensuring it has enough space for the operating system and essential applications. This foresight can prevent the need for complex resizing operations later on.
Adding a separate disk to your virtual machine is a good idea if you need more storage space for things like user data, documents, or specific applications. You can mount this disk as the D: drive (or any other letter you prefer) within Windows. This approach makes it easier to manage your disks, keeps your data organized, and can help improve your system’s performance and backup efficiency.
The screenshot below displays the resized Proxmox disk we completed earlier. However, only the last partition can be expanded in the Windows guest, not the C Drive.
However, with partition tools, you can rearrange the partition Windows created during setup. This process needs more time, and I don’t recommend it.
Some references for Partition management.
There are a lot of Linux flavors available. I stick to this article for the Ubuntu distro.
In a standard installation of Ubuntu Server 24.04, the partition structure is designed to be straightforward and efficient, particularly when following the recommended setup. The installer primarily creates the following key partition:
/): This is the central partition where the Ubuntu operating system and all system files, applications, and user data are stored. It forms the core of the Ubuntu file system hierarchy.Unlike previous versions, Ubuntu Server 24.04 typically uses a swap file instead of a dedicated swap partition. The system dynamically manages this swap file and resides.
For more detailed information, you can use:
fdisk -l (requires superuser privileges):
sudo fdisk -l and press Enter.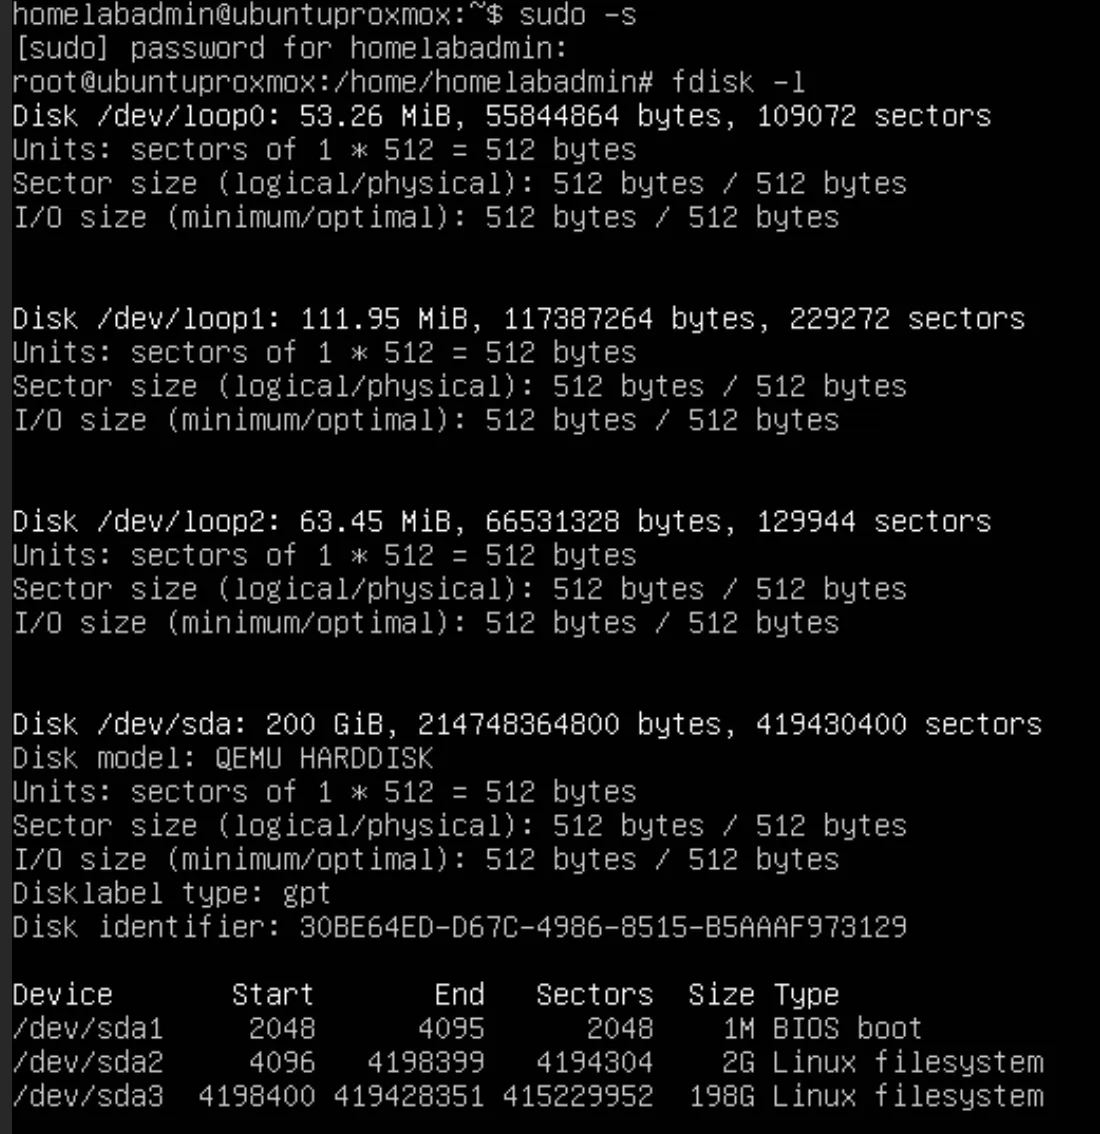
lsblk to list all block devices and confirm the new disk is recognized (e.g., /dev/sdb).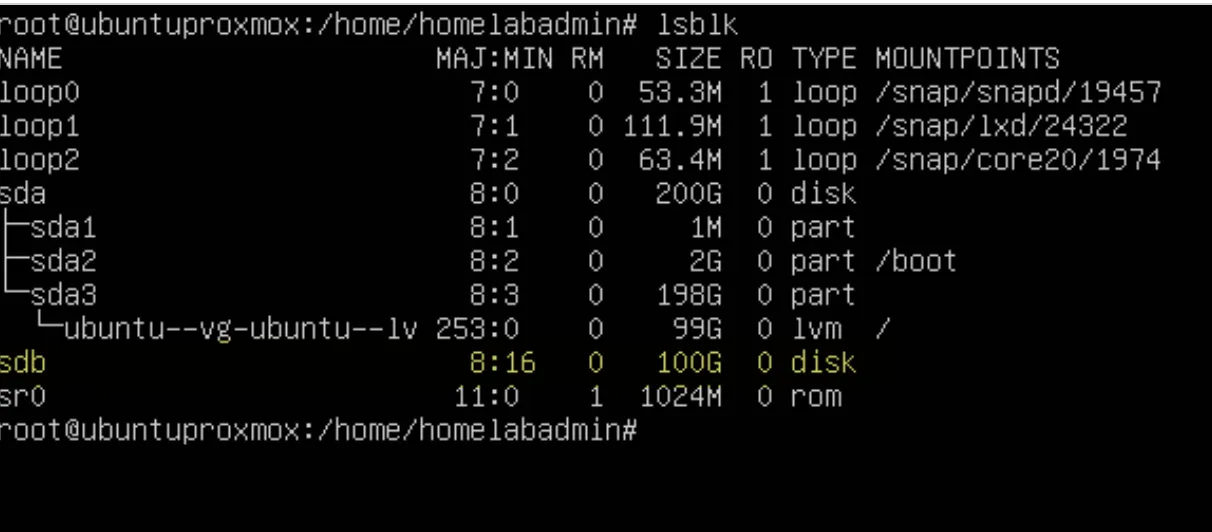
fdiskfdisk with superuser privileges: sudo fdisk /dev/sdb (replace /dev/sdb with your disk identifier).n and follow the prompts to specify partition size and type.w to write the changes and exit fdisk.ext4, using: sudo mkfs.ext4 /dev/sdb1 (replace /dev/sdb1 with your new partition identifier).sudo mkdir /mnt/newdisk (you can replace /mnt/newdisk with your preferred mount point).sudo mount /dev/sdb1 /mnt/newdisk./etc/fstab file.sudo nano /etc/fstab (or your preferred editor) to open the file./dev/sdb1 /mnt/newdisk ext4 defaults 0 2 (adjust the partition identifier and mount point as necessary).df -h It should now show the new partition mounted in your specified directory.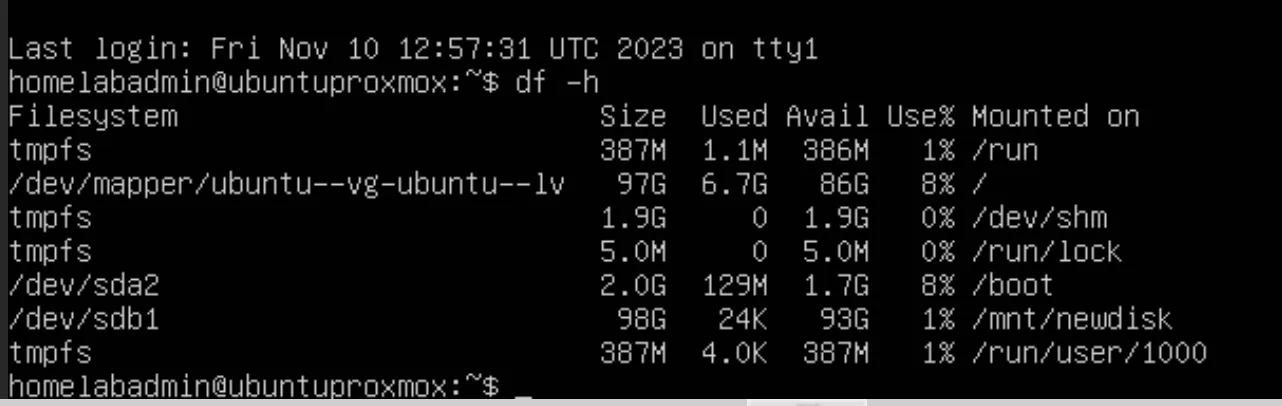
Important Notes:
/dev/sdb and /dev/sdb1 with the actual identifiers for your disk and partition.ext4 It is a common choice, but you can use other file systems as needed.Alternative: Use GParted for Resizing (GUI Method)
If you prefer a graphical interface or need to resize the boot disk, you can boot the VM with a GParted Live ISO. It provides a safe and user-friendly way to resize partitions, including the root partition, without using command-line tools.
To use it:
And there we have it! You’ve just increased your VM Disk in Proxmox, step by step. If you’re as thrilled about Proxmox as I am and wonder how it squares up against other server virtualization platforms, I’ve got just the read for you. Head on over to my other blog post, “Proxmox vs. ESXI: Is Proxmox an alternative to ESXi?” where I dive into a detailed comparison. I’m sure you’ll find it enlightening!
Hi, I’m Edy Werder. I write hands-on guides about Proxmox, homelab servers, NAS, and WordPress, based on real setups I run and document.
No sponsors, no fluff—just real configs and results.
Enjoying the content?
