By Edy Werder, a tech blogger with 20 years of experience in IT infrastructure
In this guide, I show you how to SSH into Synology NAS using DSM 7. You’ll learn how to enable SSH, connect from your computer, and apply a few simple steps to keep access secure.
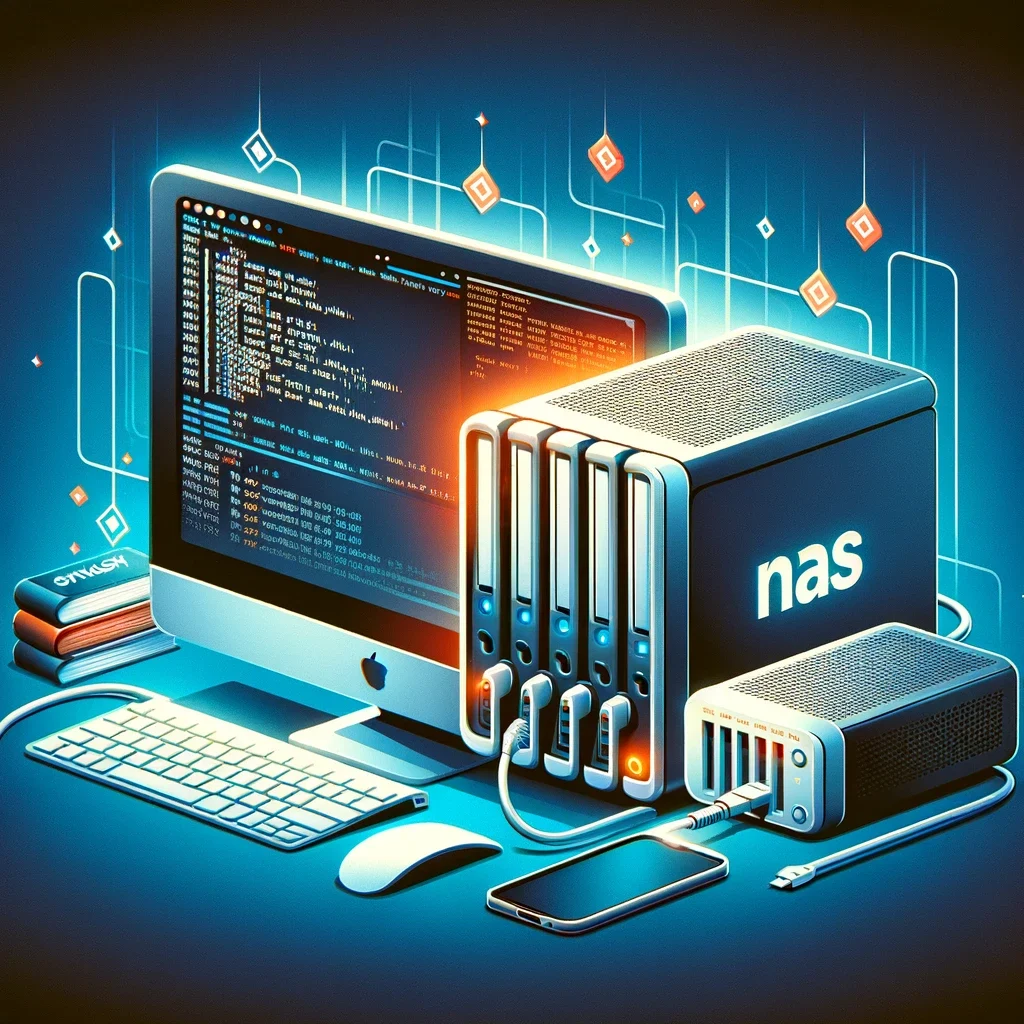
Enable SSH in Control Panel → Terminal & SNMP, then connect from your computer with ssh username@nas-ip (port 22 by default). For better security, restrict SSH to trusted IPs and use SSH keys.
Before we dive into SSH into your Synology NAS, let’s quickly talk about what SSH encryption is. SSH, or Secure Shell, is a secure way to access and manage another computer, like your Synology NAS, remotely over the internet. It’s like having a safe, encrypted tunnel to send commands and manage your NAS, no matter where you are.
SSH lets you manage your Synology NAS securely from a terminal, which is handy for troubleshooting and advanced setup tasks. Next, I’ll walk you through enabling SSH and connecting safely.
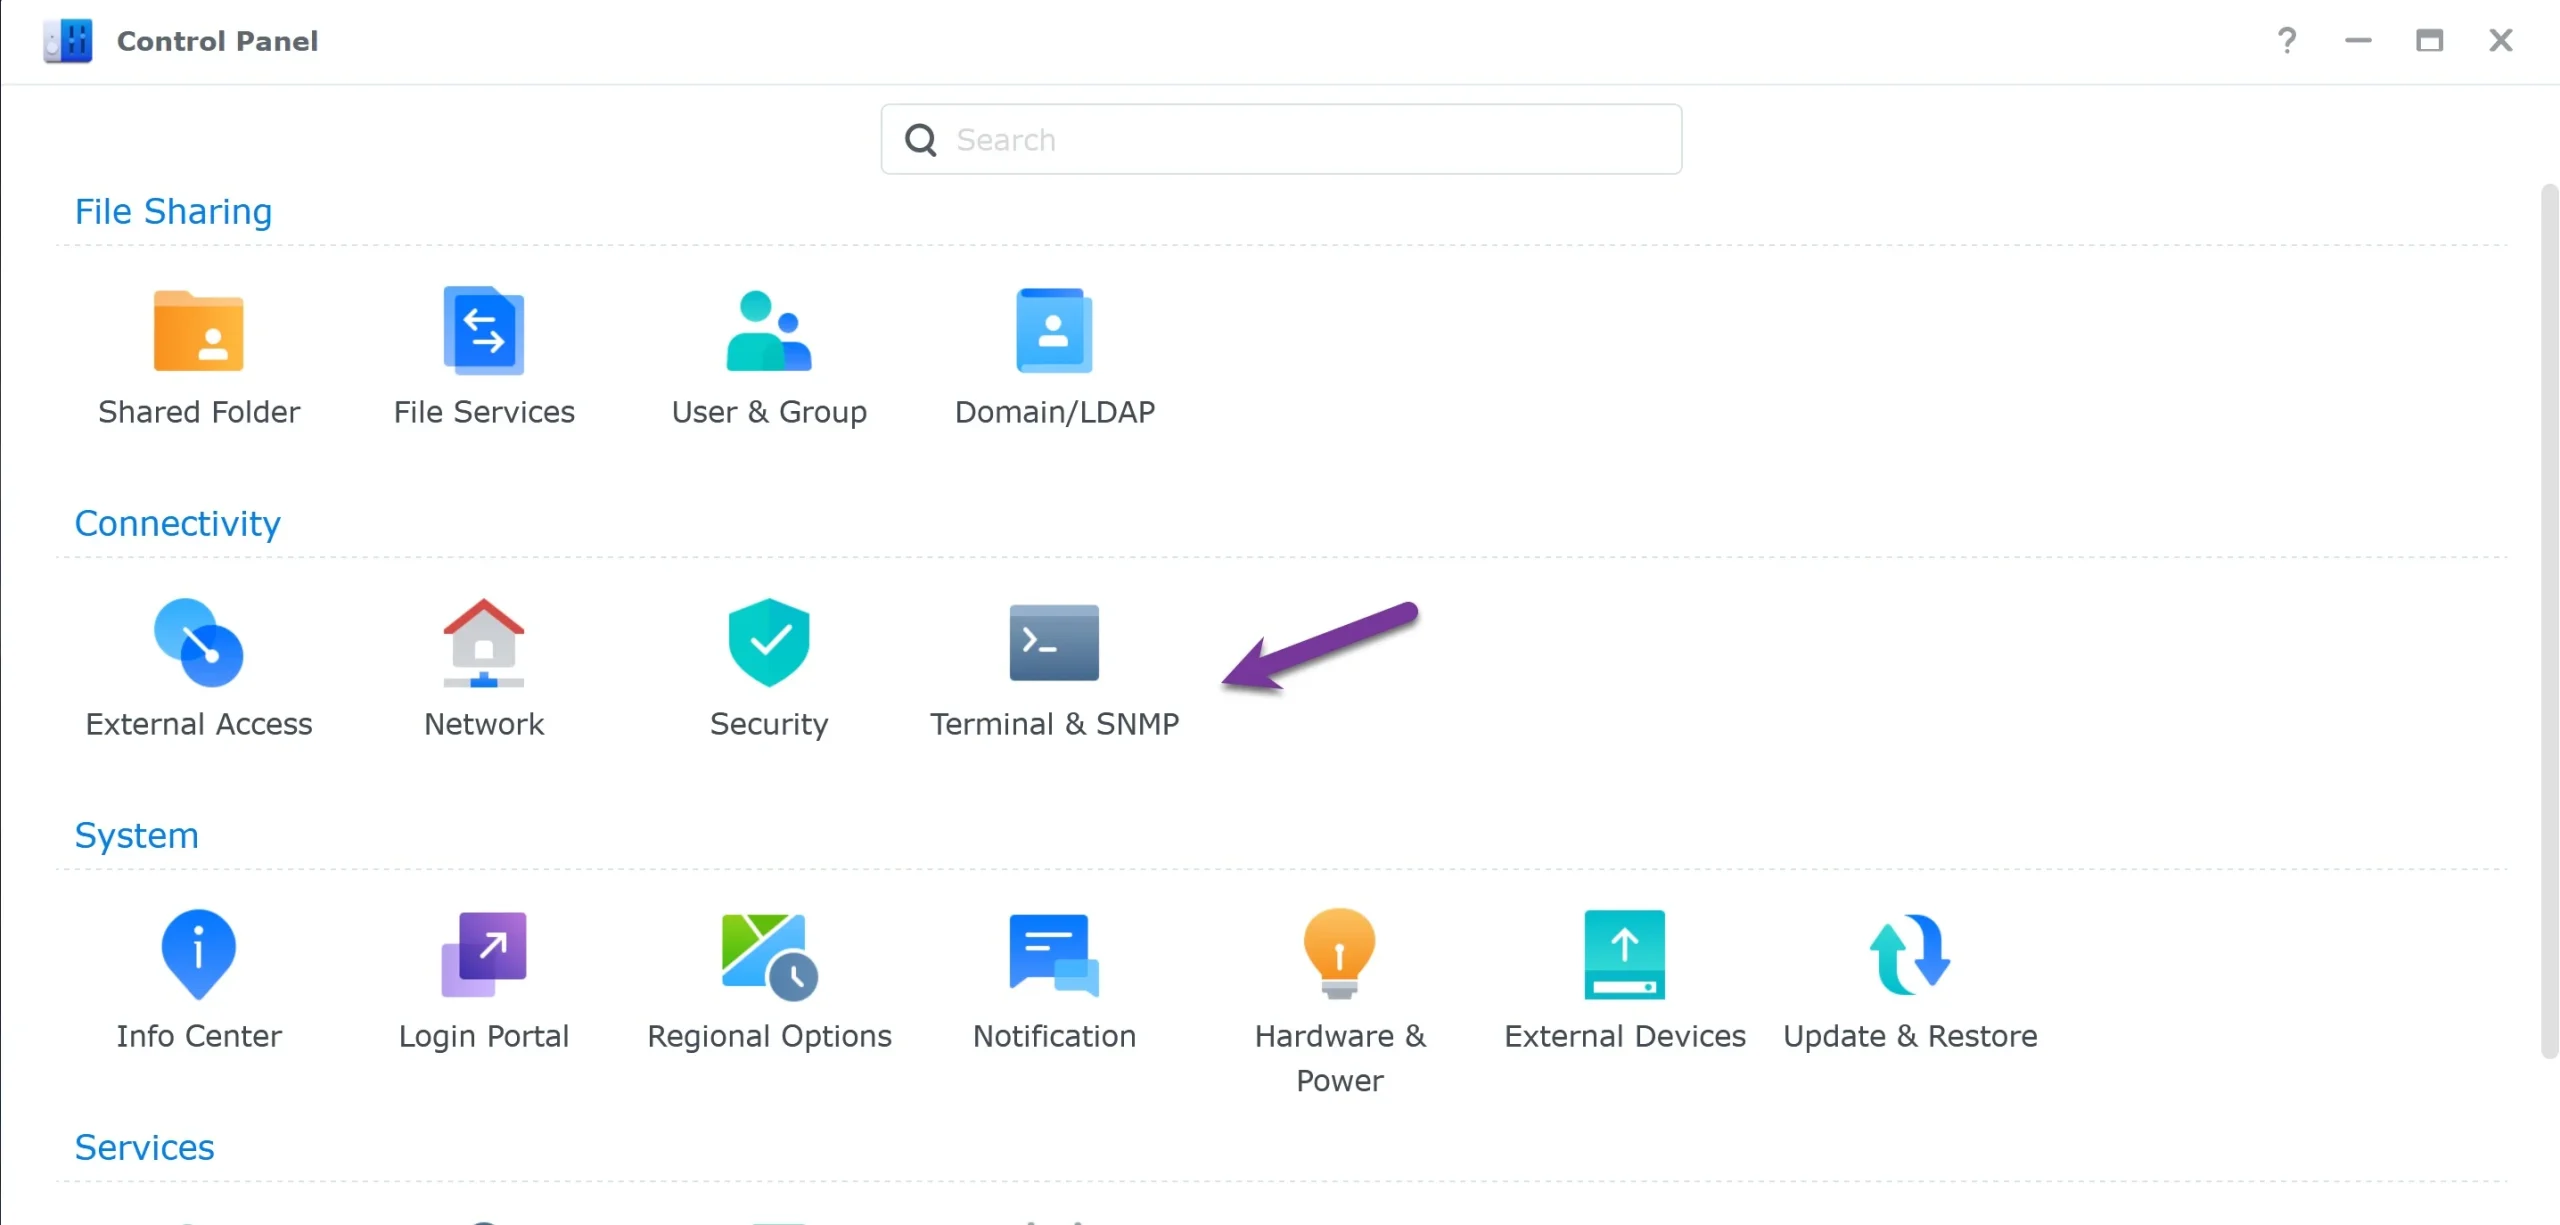
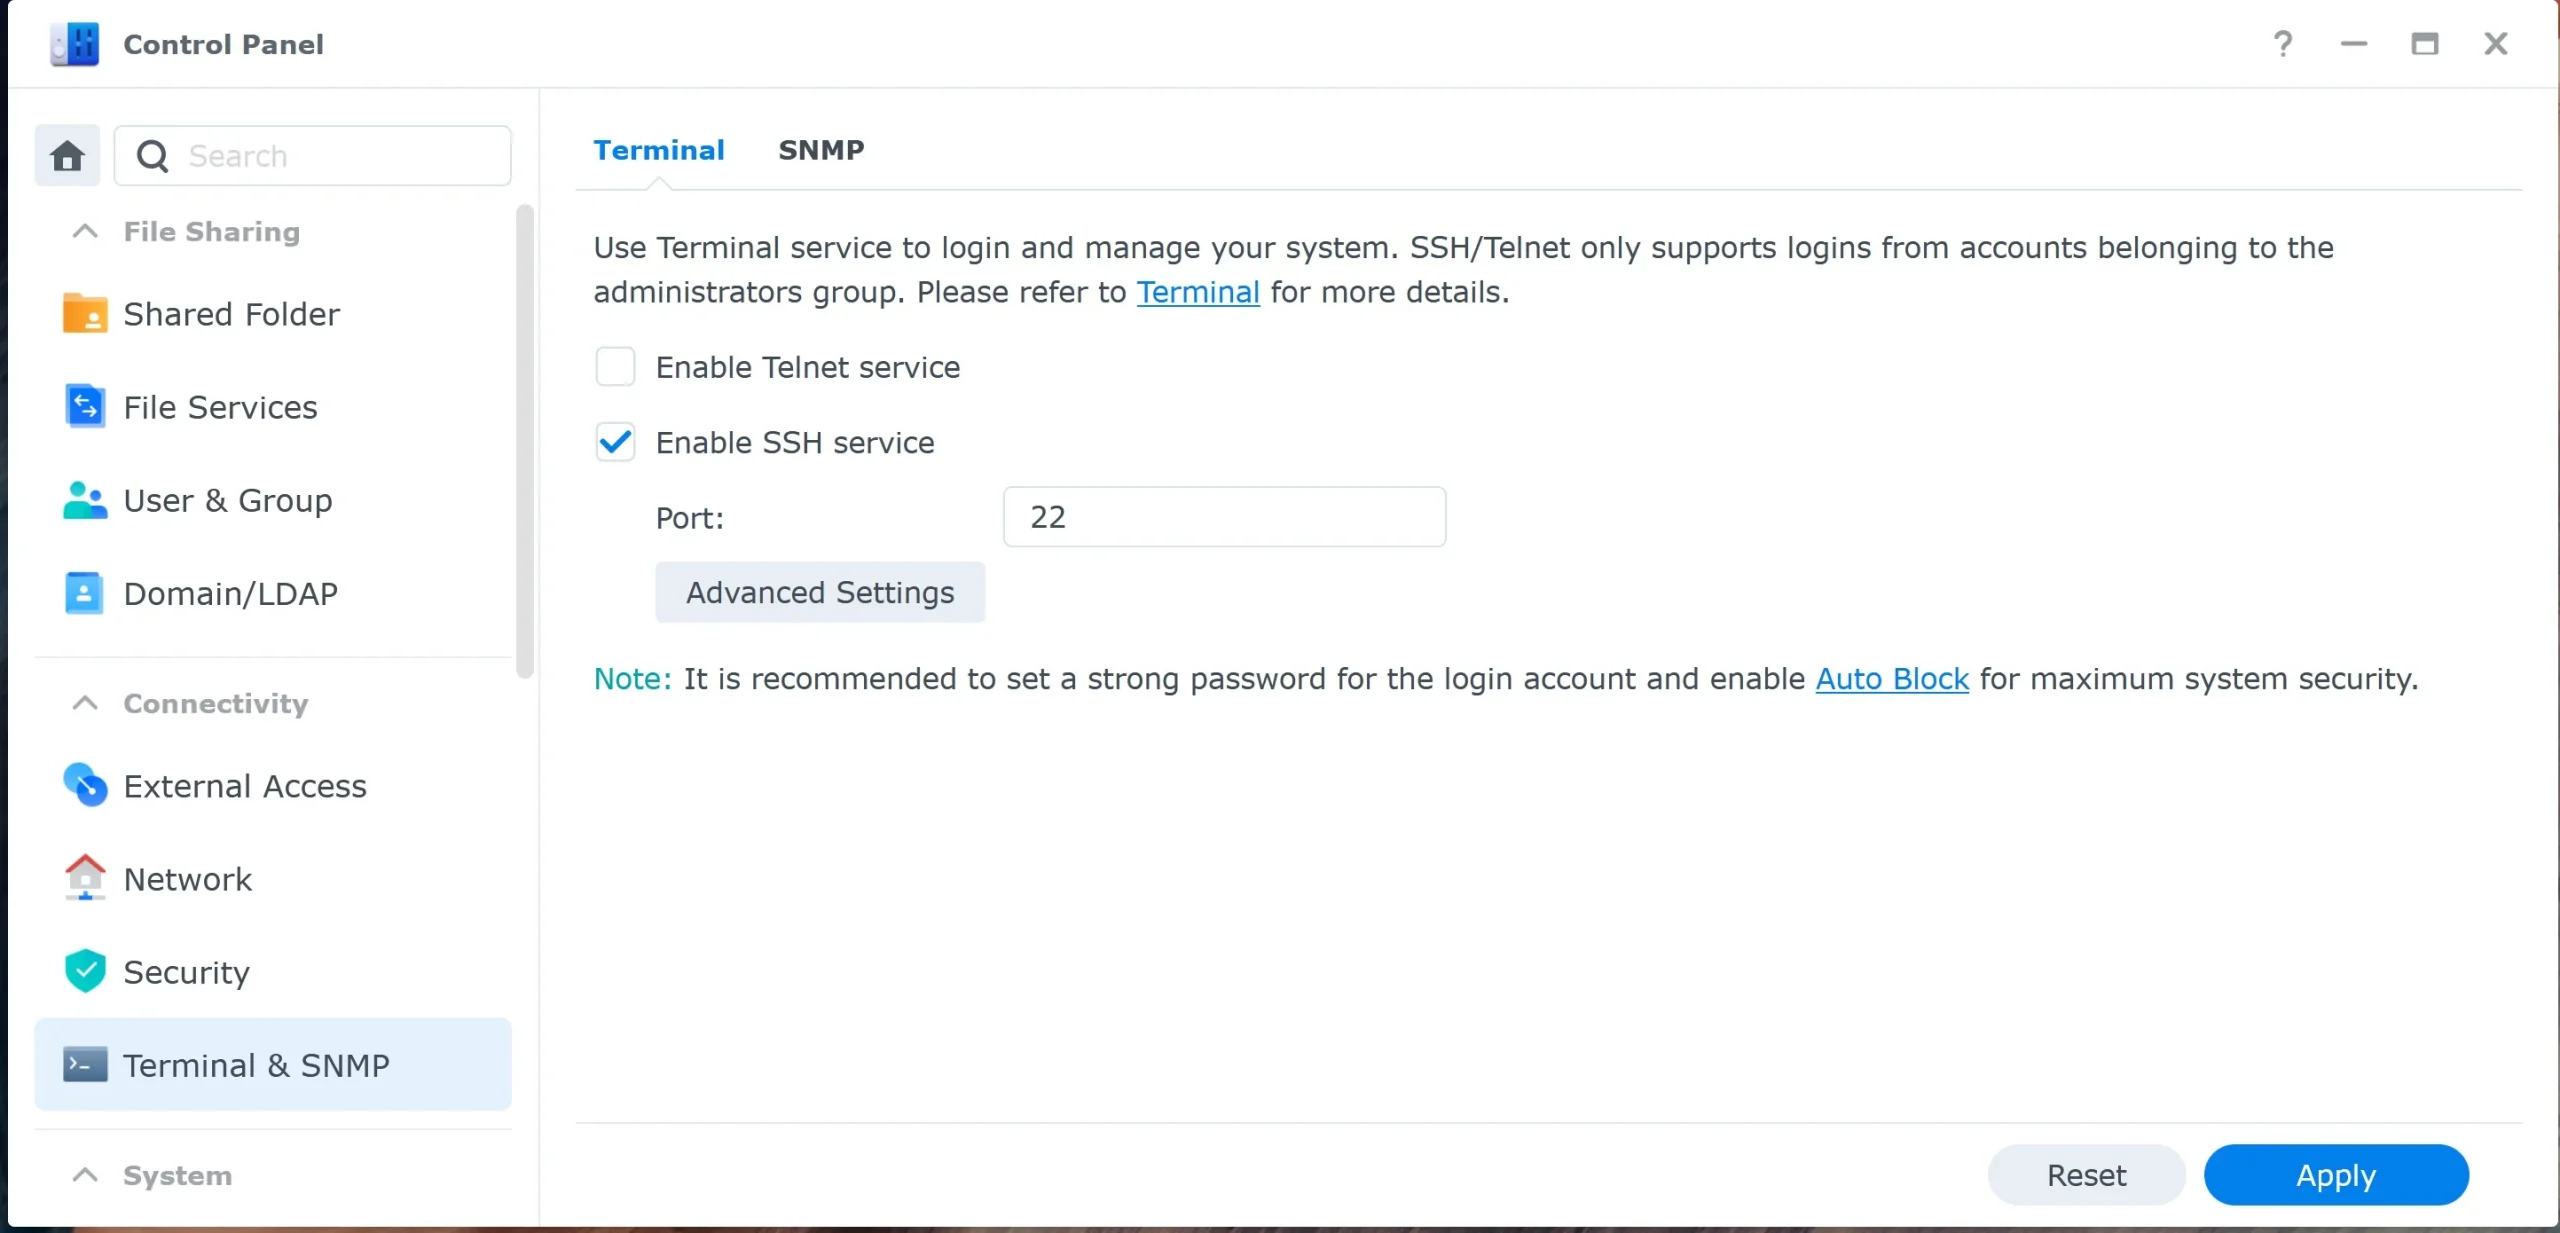
Enabling the SSH service on your Synology NAS is an easy and crucial part of the setup process. Here’s how you can do it by making a few configurations:
And there you have it! The SSH service should now be enabled on your Synology NAS.
If you’ve strengthened your Synology NAS device’s security with a firewall, creating an allow rule for the SSH port to function correctly is essential. To do this, follow the steps below:
In the below case, the firewall rule for the SSH service is present and not allowed. I need to allow it first, before SSH will work.
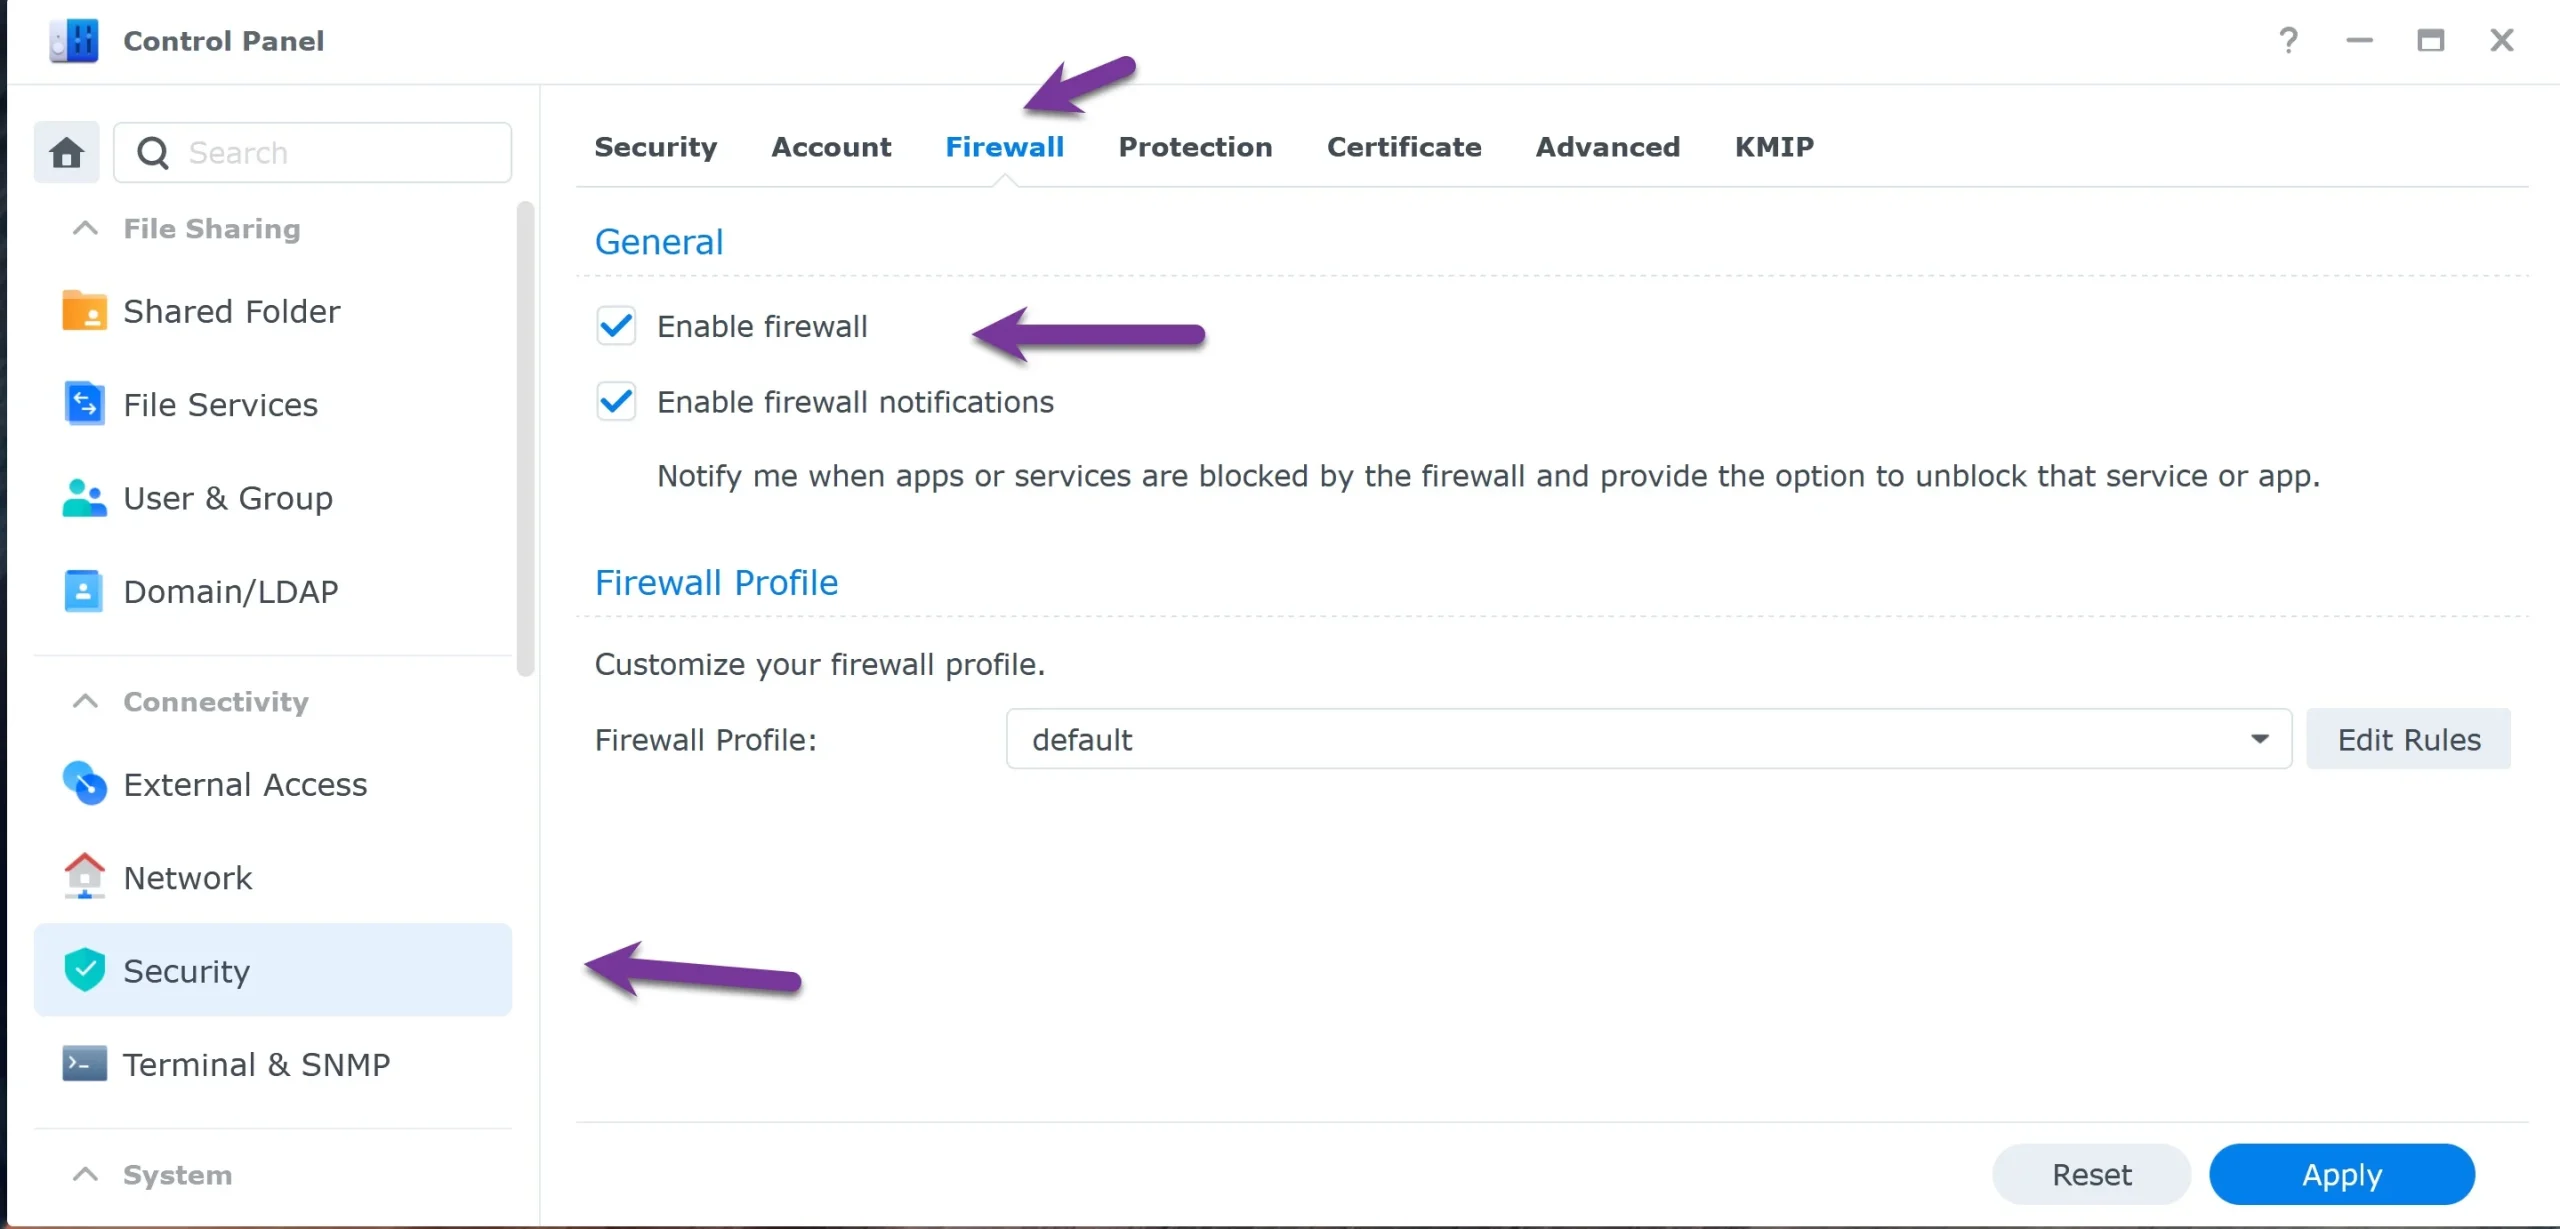
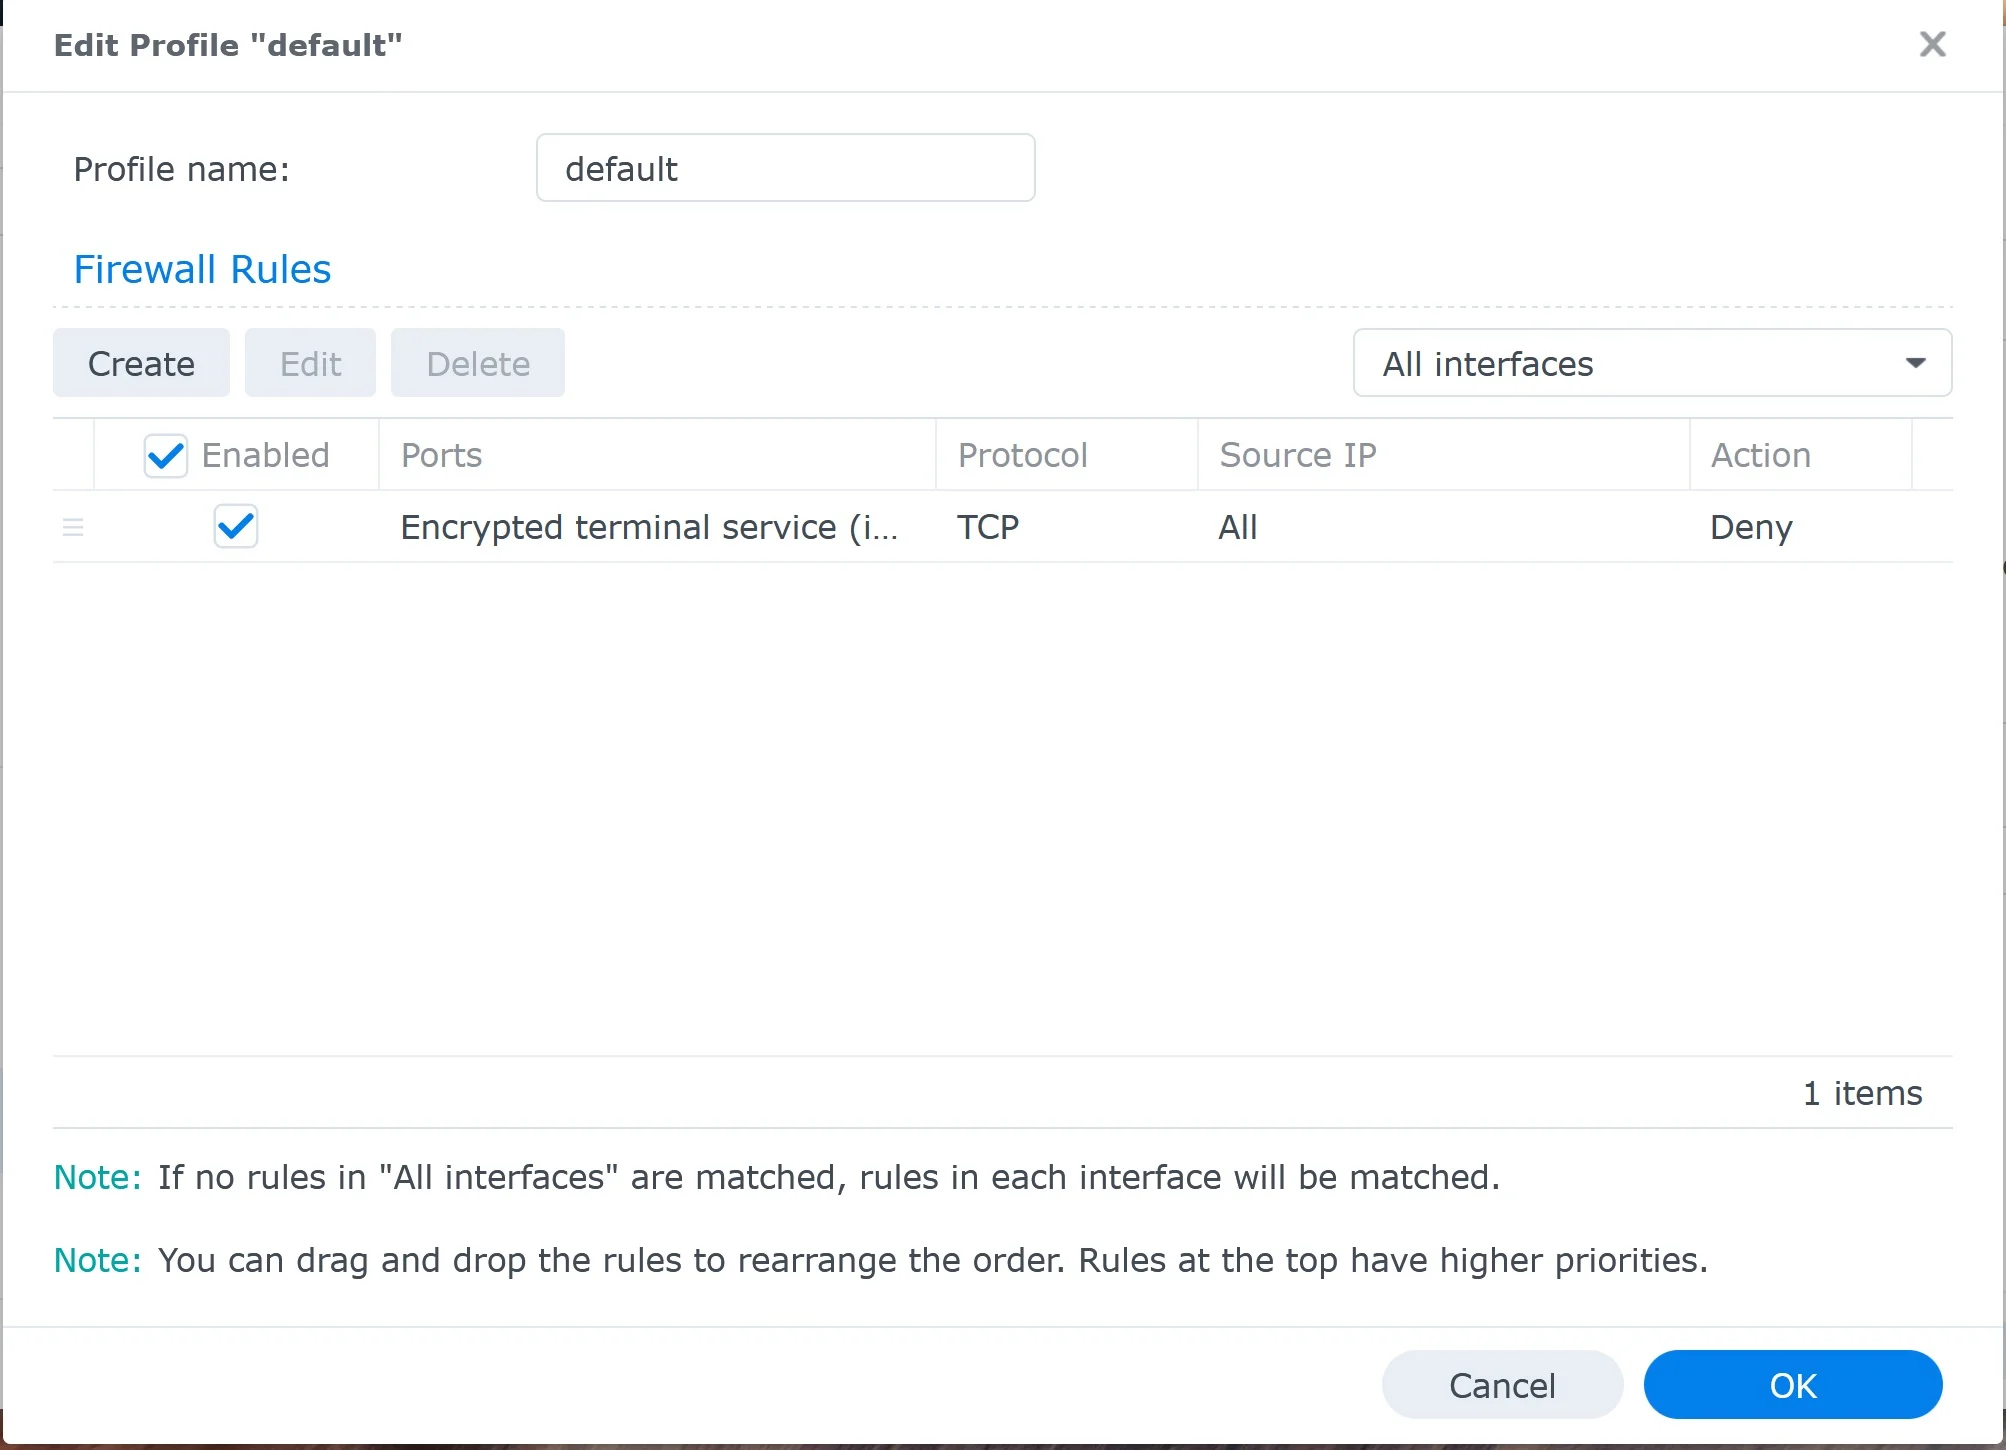
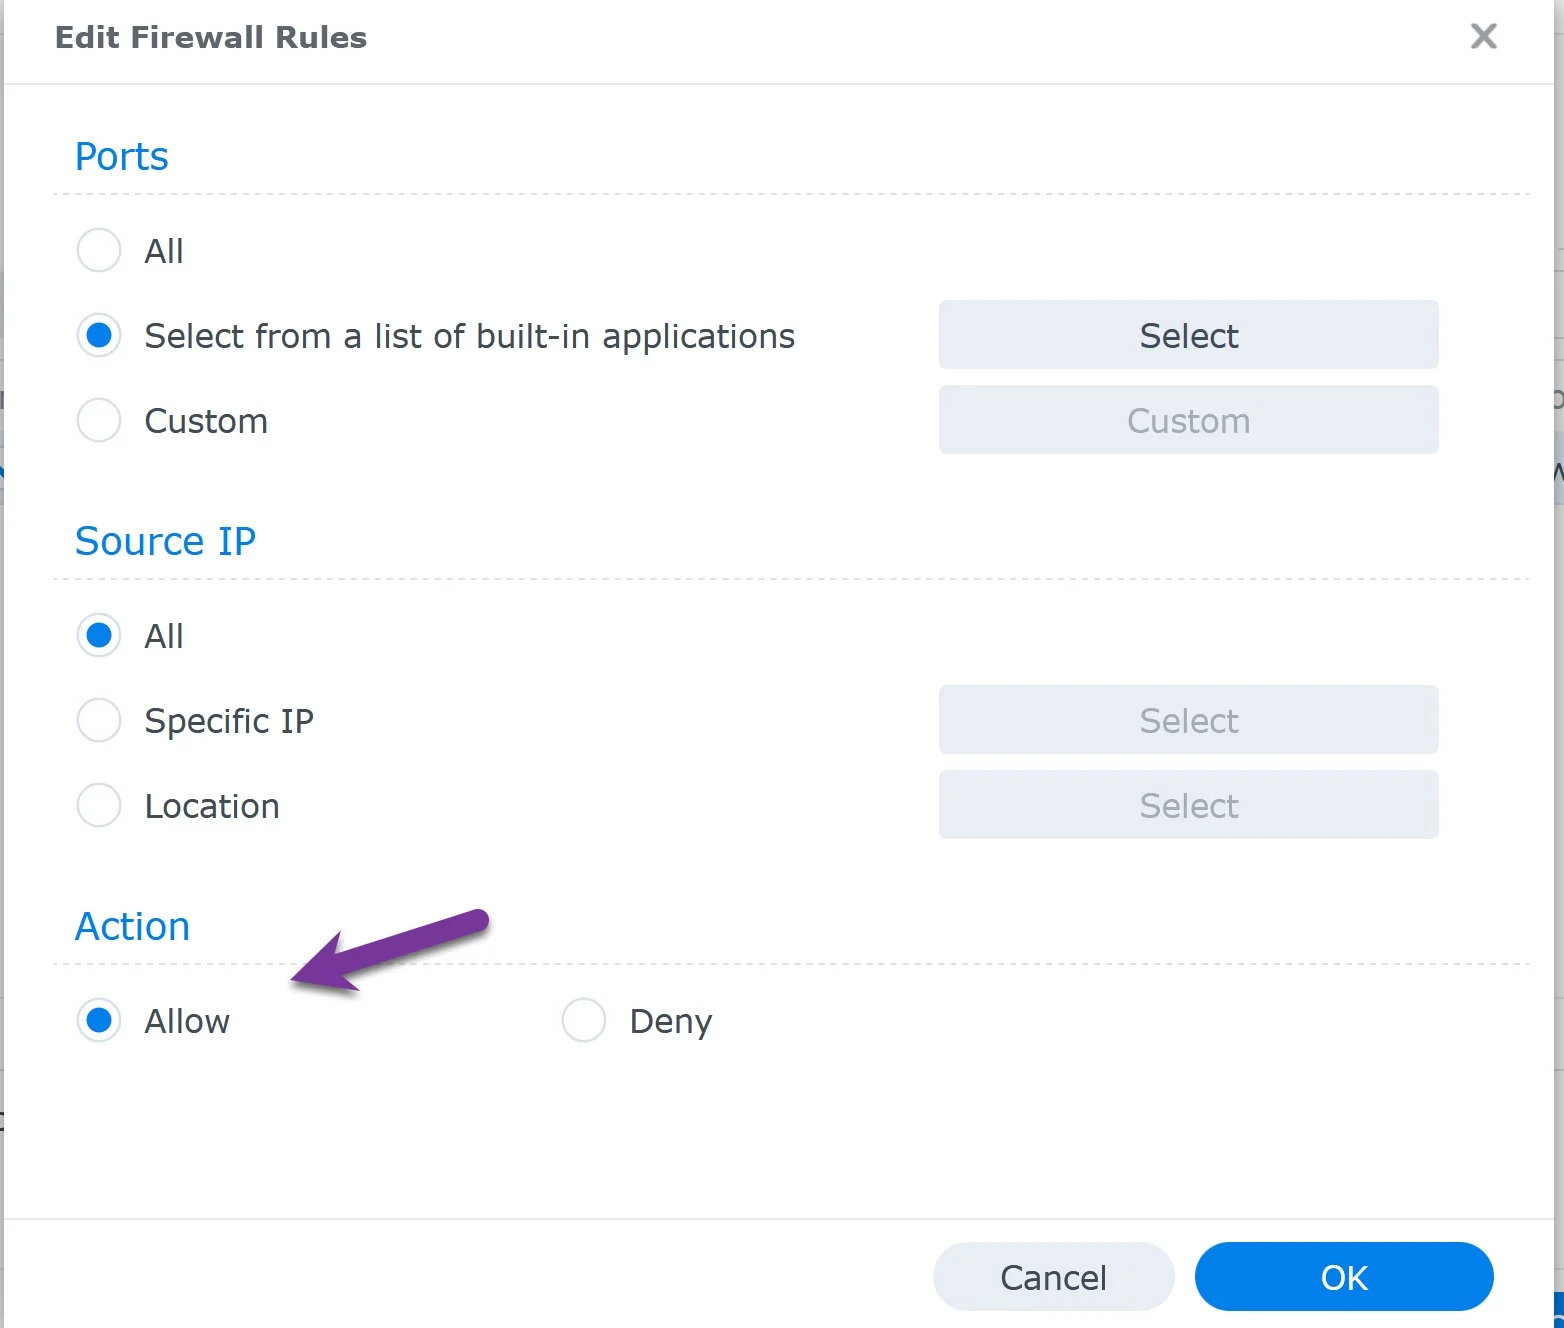
I recommend reading my article Synology Firewall, describing how to effectively enable and configure the firewall. Understanding the Synology Firewall’s unique functionalities is crucial for enhancing your NAS security.
Setting up SSH access on your Synology NAS is not just about enabling the SSH service; it’s also about deciding who gets to use it. In Synology DSM (DiskStation Manager), users are organized into groups, each with its own permissions set.
administrators (admin account) allows the user to perform a wide range of tasks, similar to having administrative privileges.administrators group during the creation process in the DSM Control Panel.Installing an SSH server client is straightforward on Windows 10 and MacOS. Here, we look at how to do it on both operating systems. Once the server client is installed, you can easily connect to a remote server using the command line interface.
For Windows 10 (1809 or newer): Microsoft incorporated an OpenSSH client for these versions. Here’s how to install it, with all the necessary info.
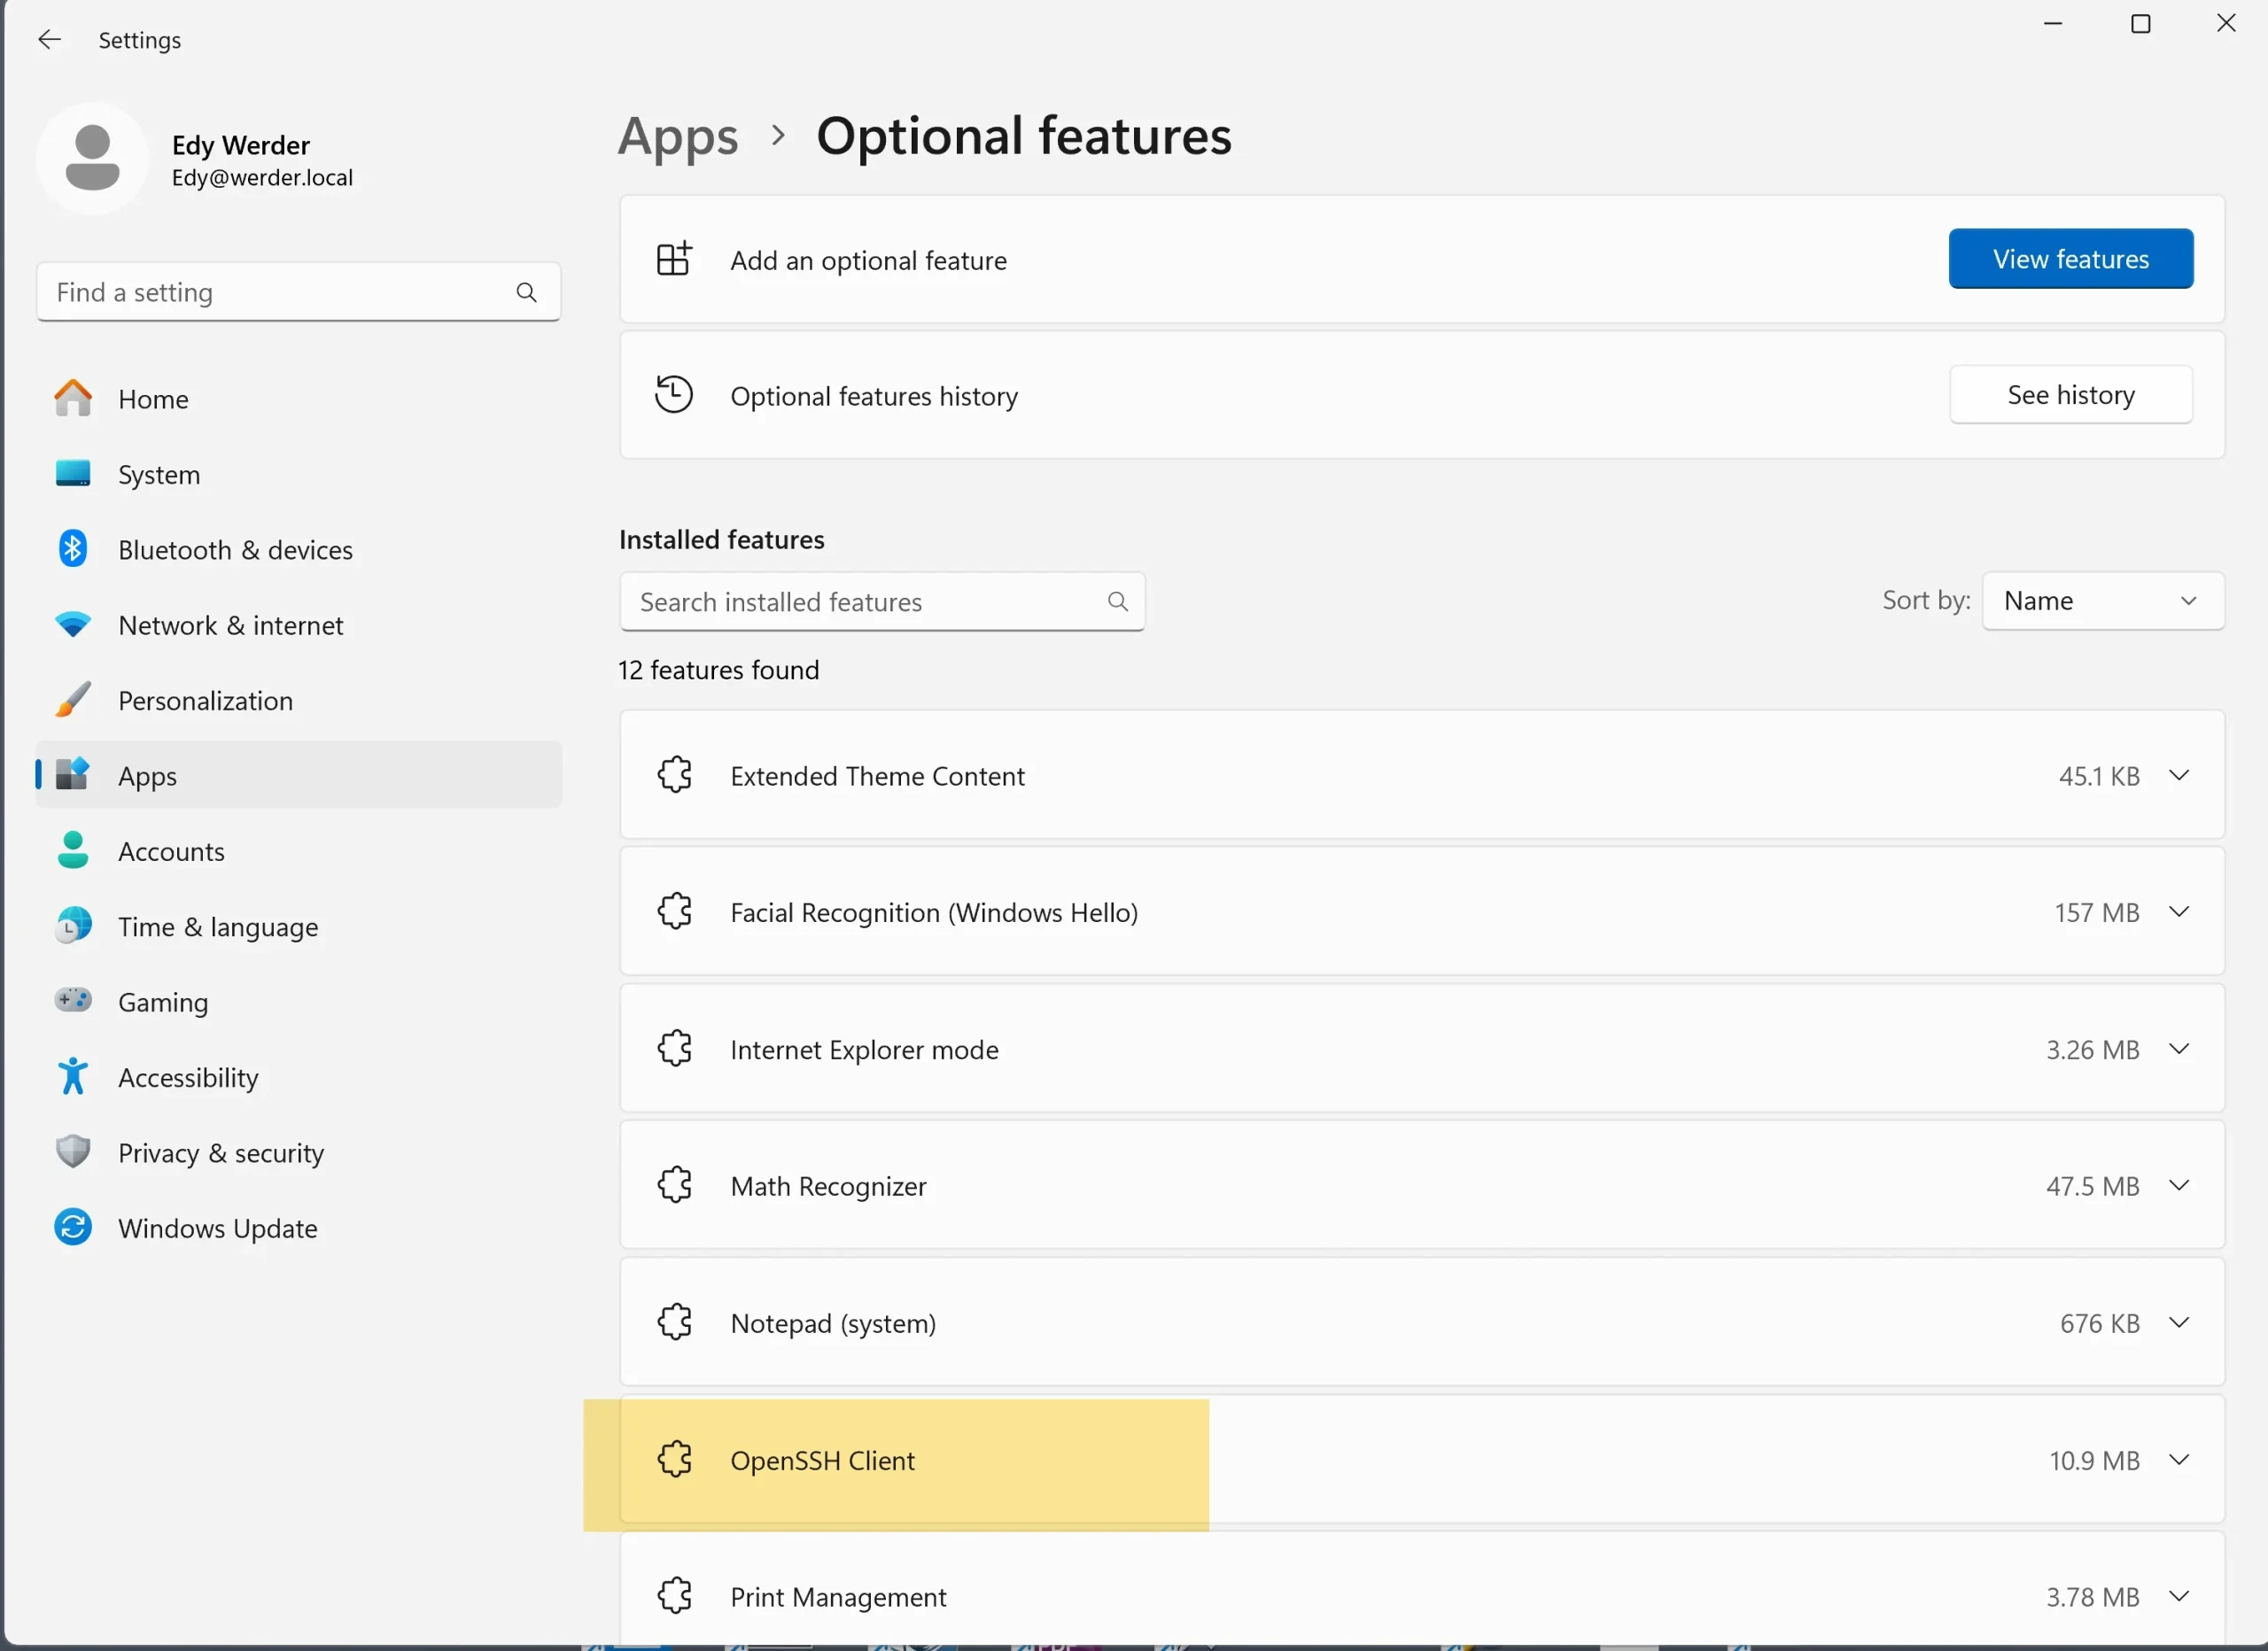
For MacOS: Fortunately, for MacOS users, Terminal has the ssh tool built-in SSH capabilities. Therefore, no additional installation is necessary. You can access the ssh tool by launching Terminal and executing your SSH commands there.
For those who prefer a more graphical interface, PuTTY is an excellent alternative. Initially designed for Windows, it’s ported over to other operating systems. PuTTY is easy to operate and free to download.
Once you’ve installed the SSH client, you can establish a secure connection to the Synology NAS.
featured blog
A Complete Buying Guide
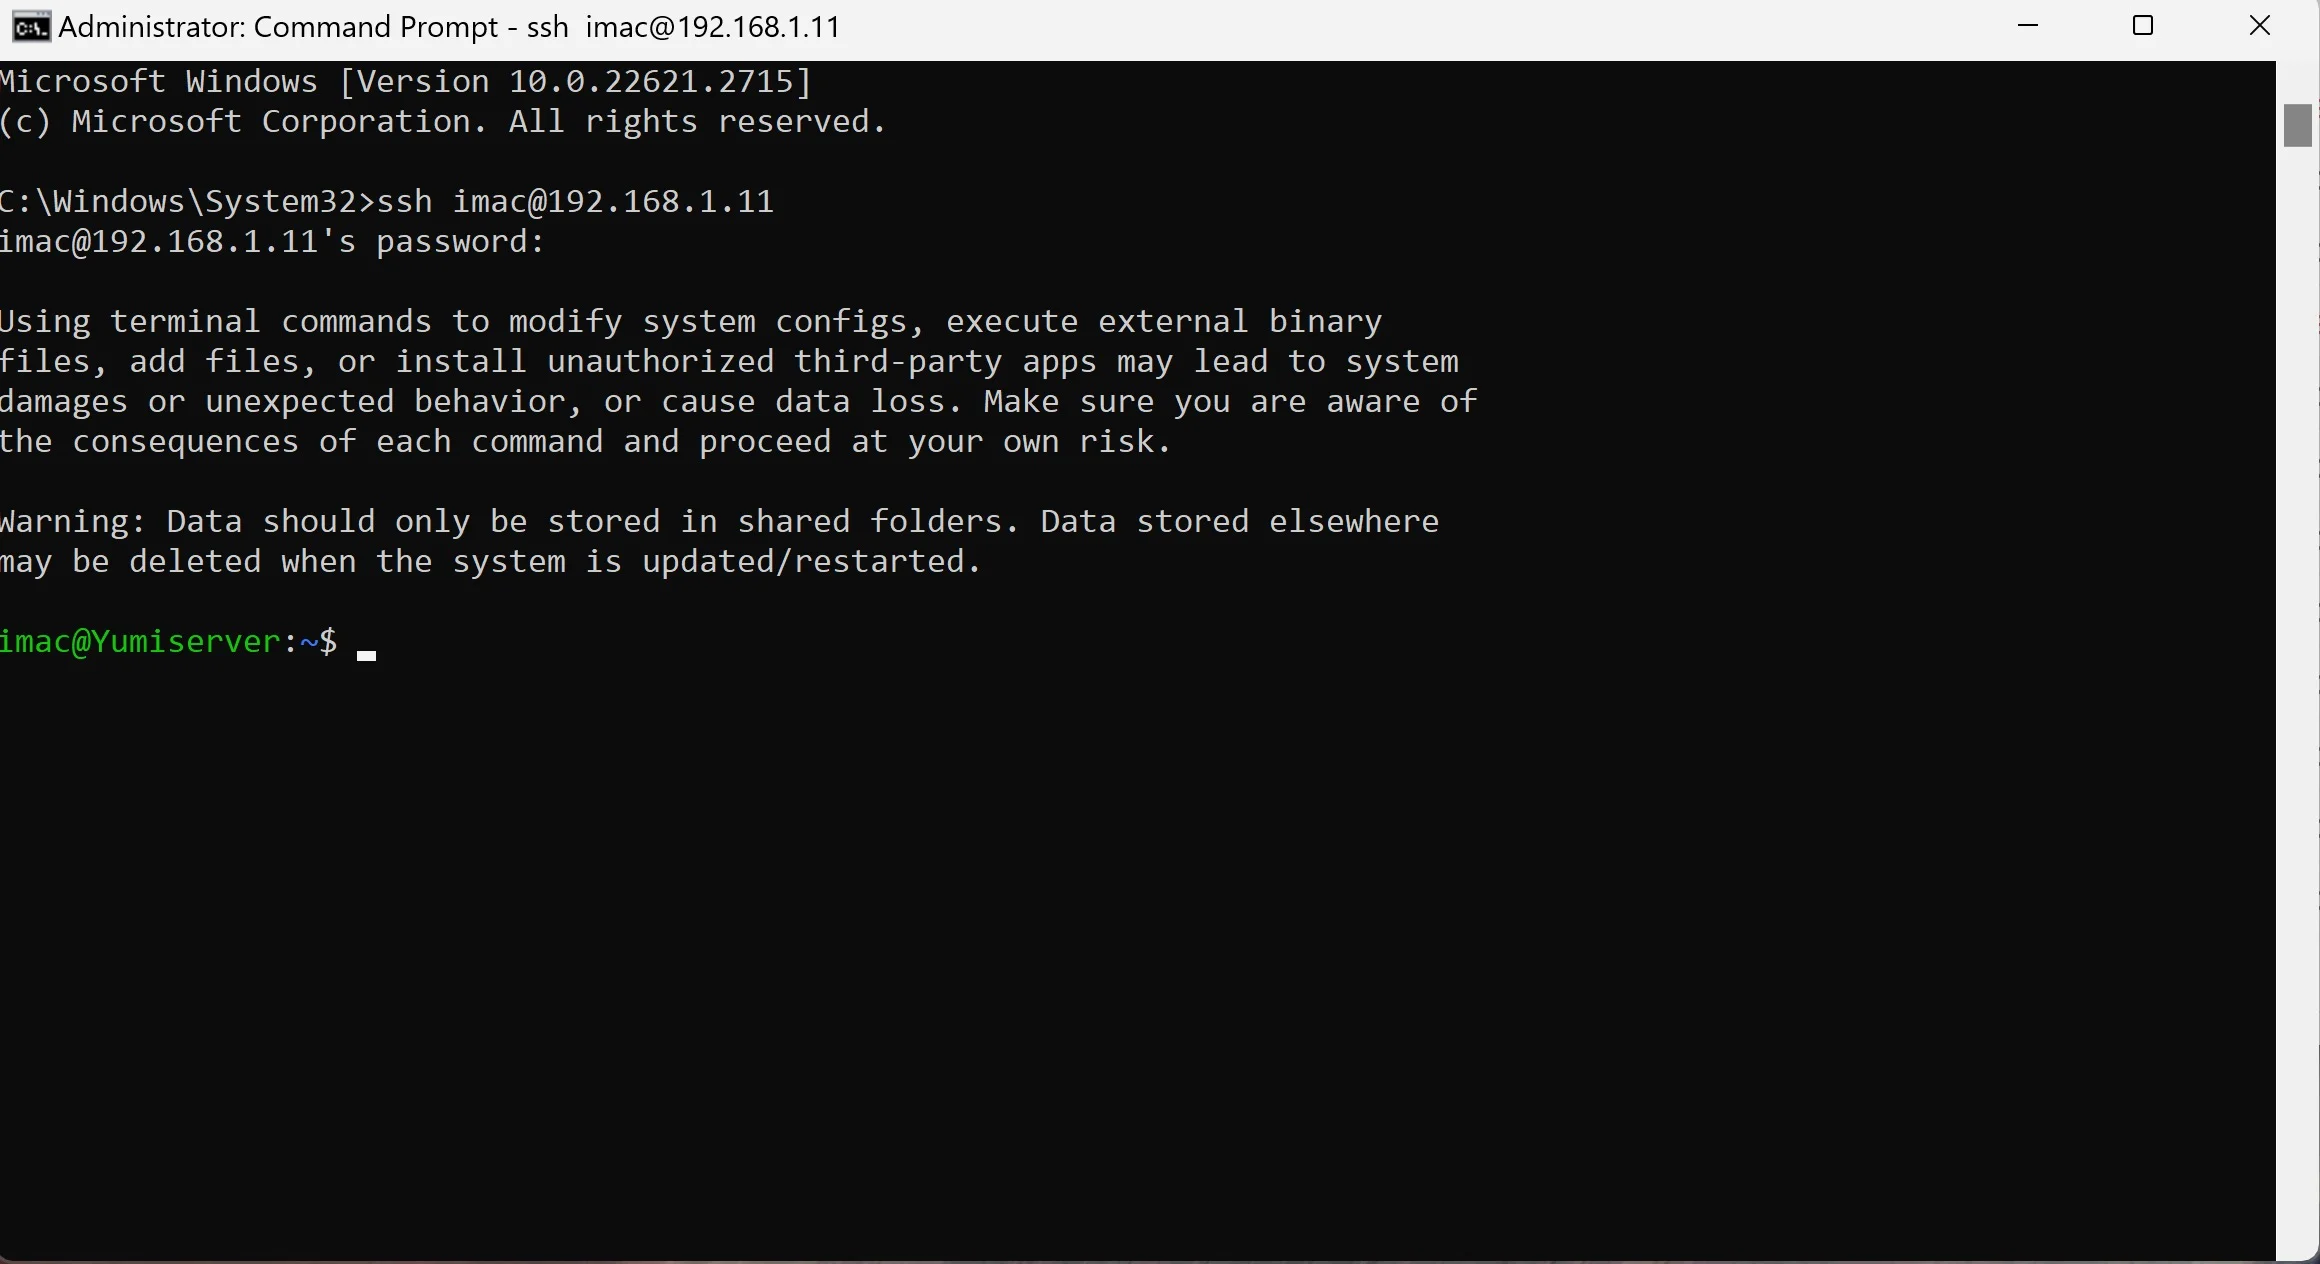
If you’re a Windows user, you can use the Command Prompt or PowerShell window to access your Synology NAS via SSH. Here’s how:
ssh followed by your Synology NAS user name and the IP address of your Synology NAS. The command format should look like this: ssh username@IPaddressyes to establish the connection.Remember: Replace “username” and “IPaddress” with your actual Synology NAS username and the device’s IP address.
If you’re a MAC user, the Terminal application comes preinstalled and has built-in support for ssh. Here’s an overview of how you can use it:
ssh username@IPaddressRemember to replace ‘username’ and ‘IPaddress’ with your Synology NAS username and the device’s IP address.
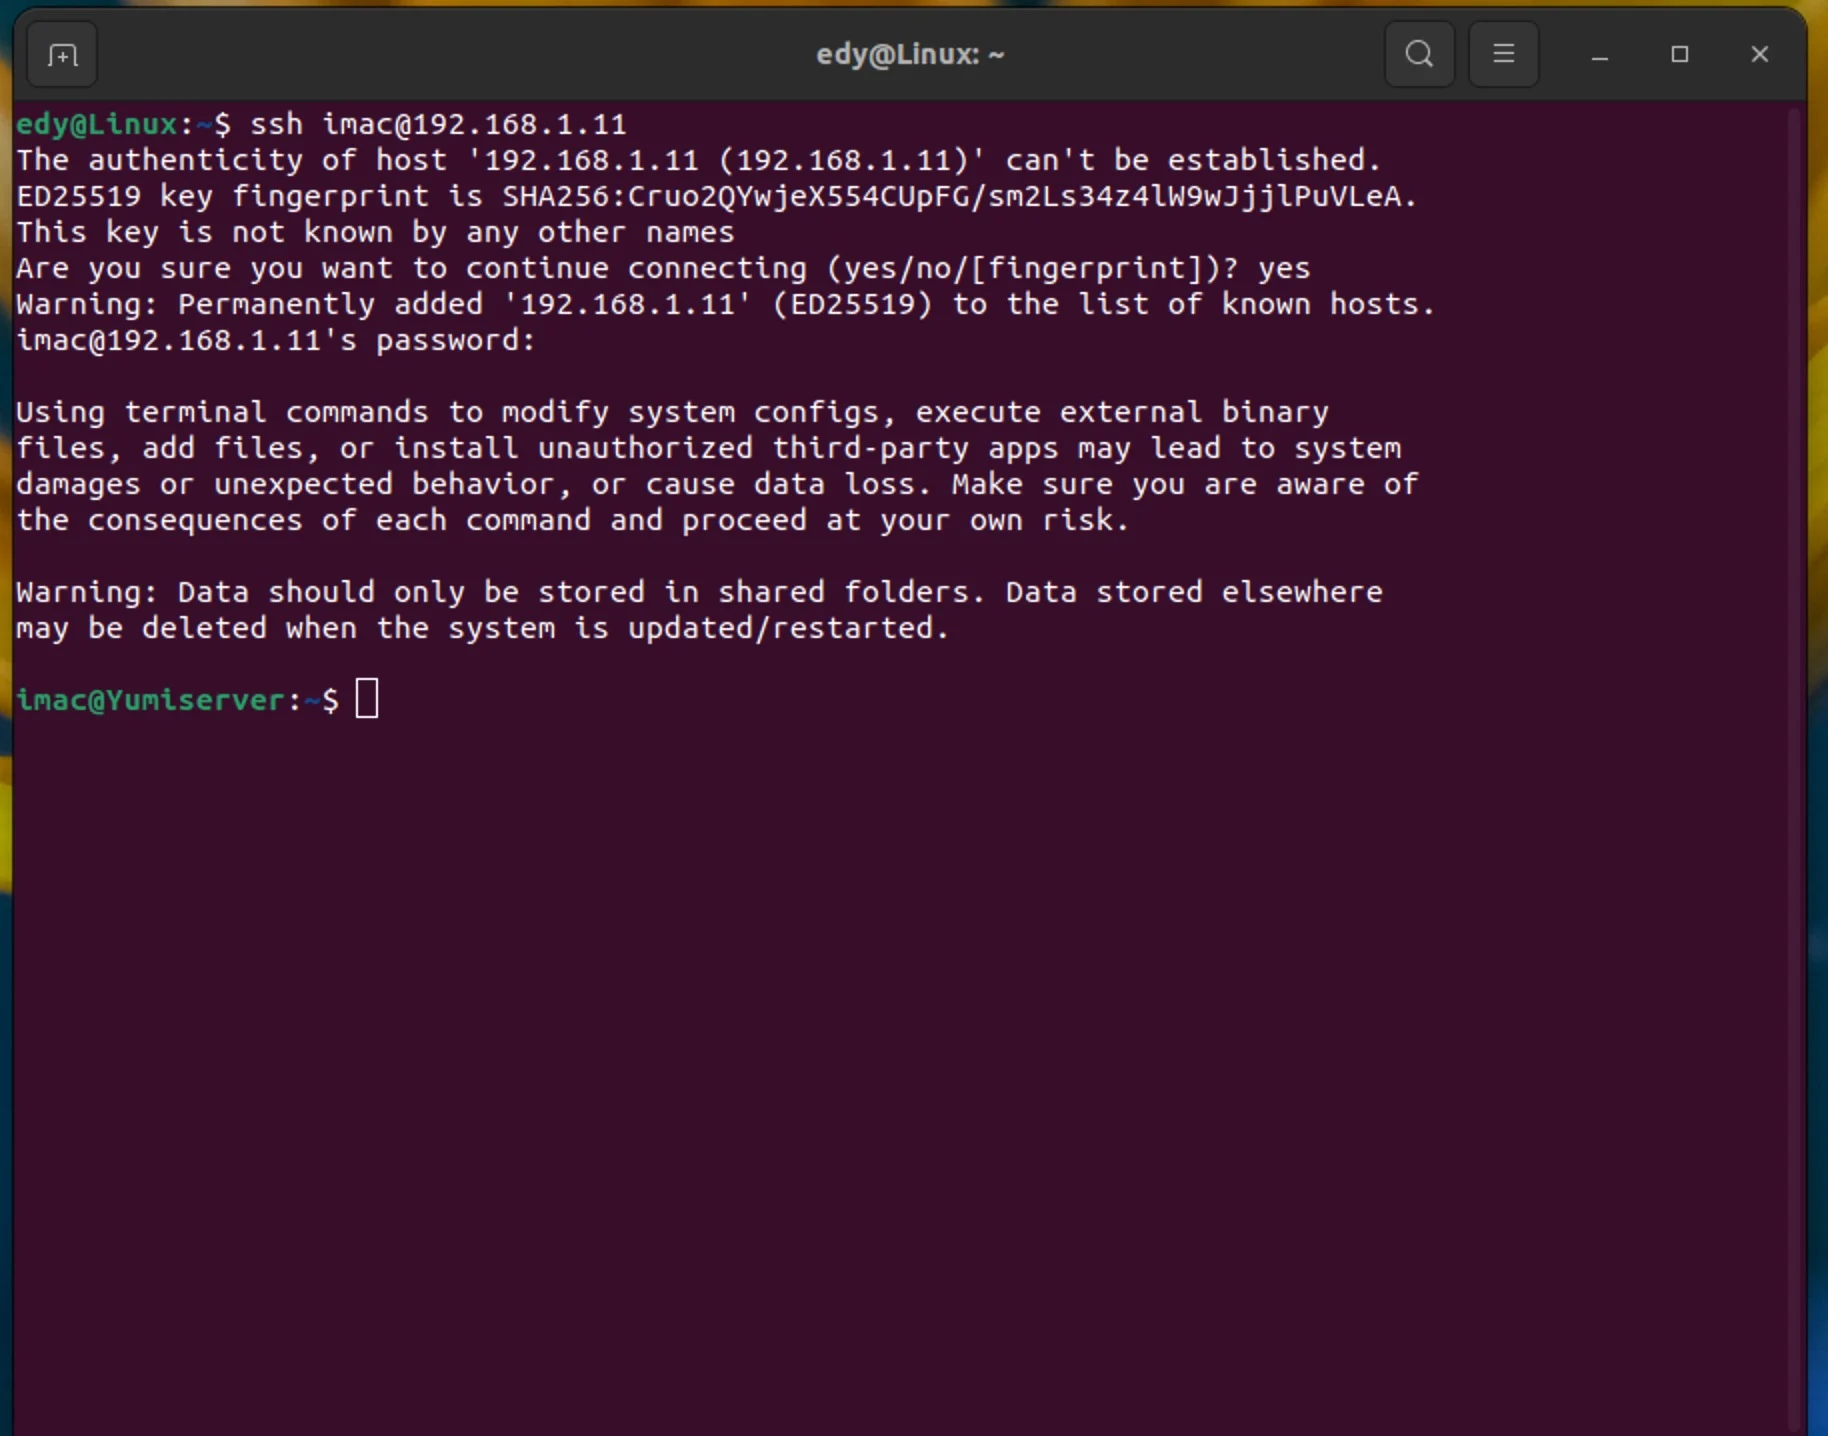
SSH comes pre-installed on most Linux distributions, which means accessing the Synology NAS via SSH is painless. Here’s how to do it:
ssh username@IPaddressyes to proceed.Remember: replace “username” and “IP address” with your Synology NAS username and IP address, respectively.
Now that you’re connected, you can use the essential SSH commands to manage your Synology NAS from the Linux terminal.
Knowing some essential SSH commands, such as the ls command or cd command, can significantly improve your experience with the Synology NAS. Here are a few important ones you might find handy:
ls: List all files and directories in the current directory.cd [directory]: Change your current directory to the specified directory.pwd: Print the full filepath of the current directory.cp [file1] [file2]: Copy the contents of file1 to file2.mv [file1] [file2]: Move or rename file1 to file2.rm [file]: Delete the specified file.exit: Terminate the SSH session and return to your local terminal.Remember, when executing commands, replace brackets and the content inside with your filenames or directories.
With a bit of practice, following this tutorial, you’ll become more proficient with these commands, unlocking the full potential of your Synology NAS.
My pick
SSH provides robust security for network communications, but it’s crucial to adhere to best practices to protect your Synology NAS. Here are some tips:
Remember, it’s paramount to safeguard your Synology NAS, especially when enabling powerful features like SSH, which can compromise the entire filesystem if mishandled. With these safety measures in place, such as securing your credentials, you can securely unlock the potential of your NAS device.
I’d love to hear from you. Was this article helpful? Share your thoughts in the comments below. If you prefer, you can also reach me by email or connect with me on Reddit at Navigatetech.
Before you go, if you found the guide on SSHing into Synology insightful, I highly recommend checking out WordPress on Synology. This article is a fantastic follow-up, especially if you want to leverage your Synology NAS for more than just file storage. It dives into how you can host your own WordPress site directly from your Synology device, combining the convenience of NAS with the power of the world’s most popular content management system.

Hi, I'm Edy Werder. I write hands-on guides about servers, virtualization, NAS and WordPress, based on setups I run in my own homelab. Real configs and real results, no fluff.
Enjoying the content?