
By Edy Werder — IT Consultant & Tech Blogger
Hello, tech enthusiasts. Edy here. This guide covers setting up SSH keys on Synology from start to finish: enabling SSH in DSM, generating keys with PuTTYgen on Windows, and switching to key-based login for better security.
You’ll get a clear step-by-step walkthrough to connect safely and lock things down.
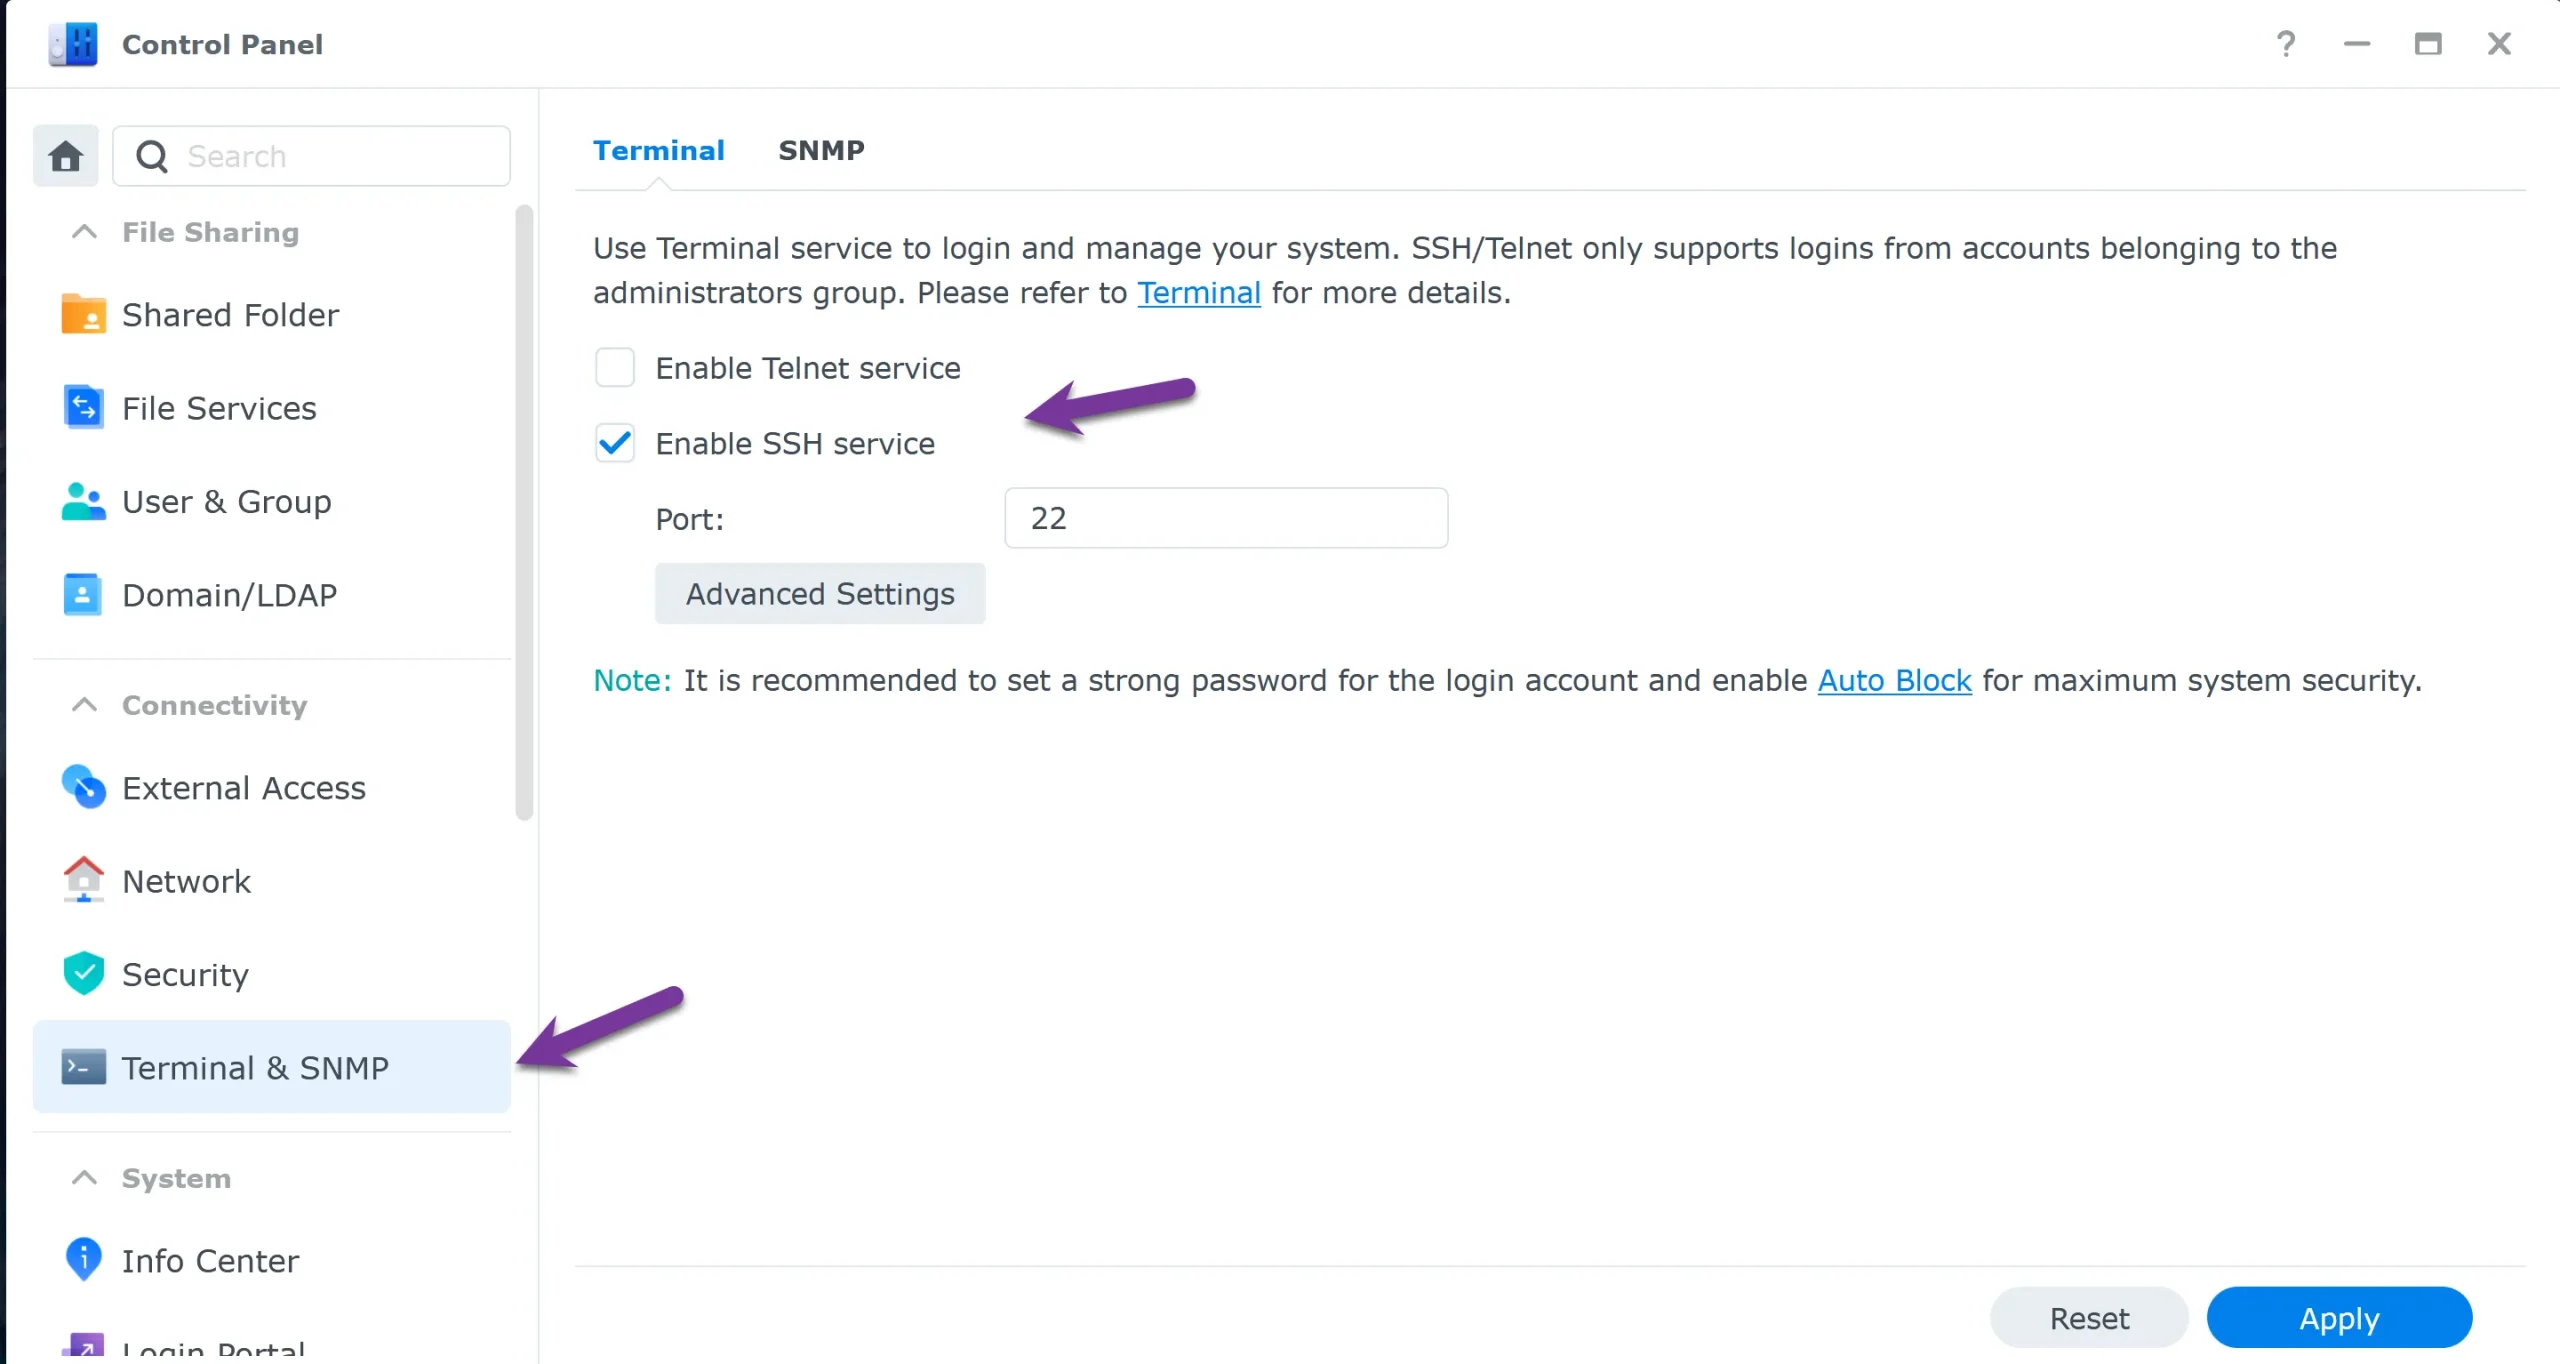
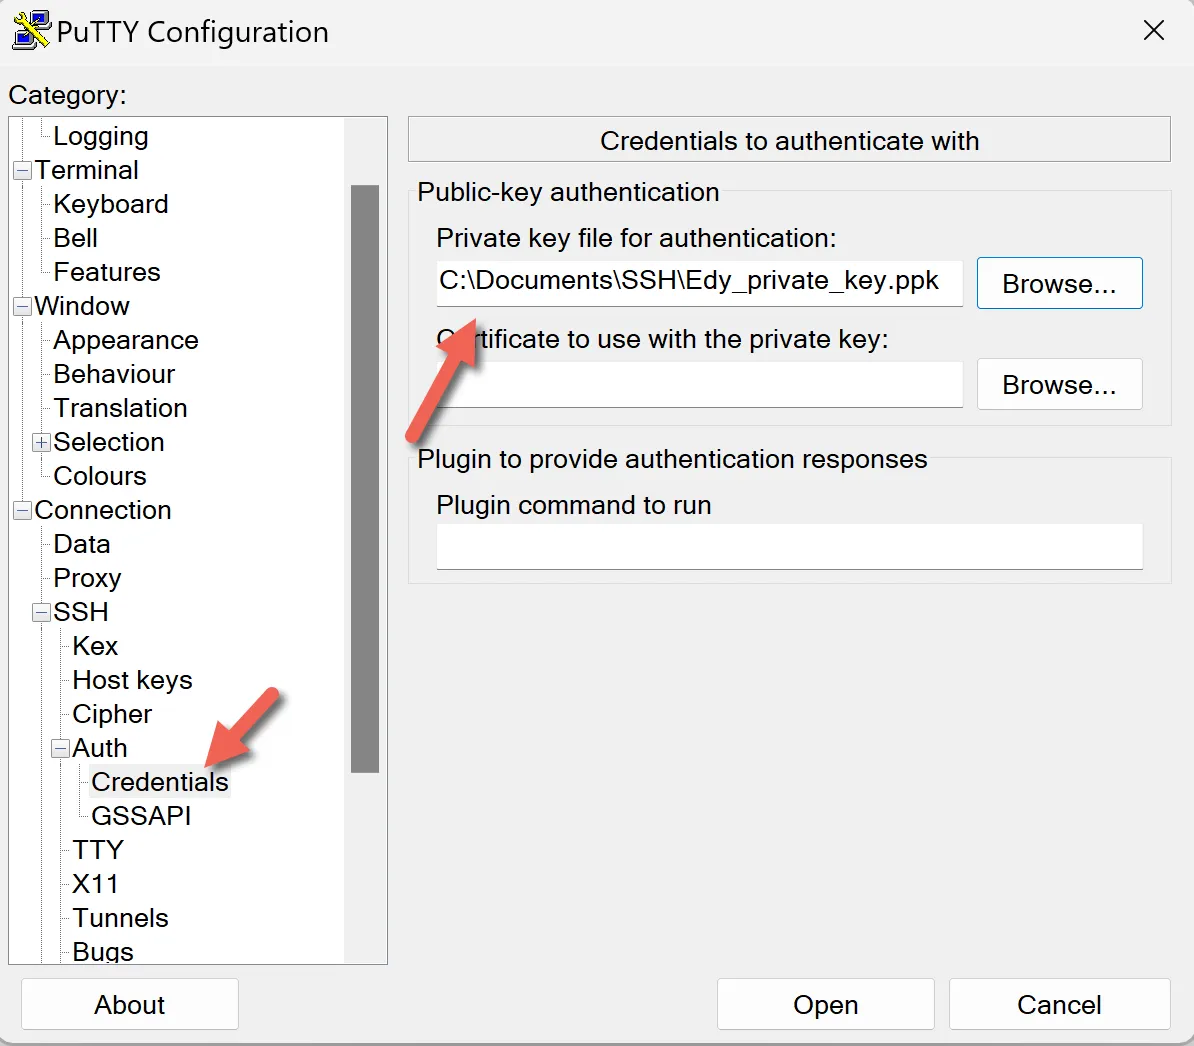
Setting up SSH keys on Synology is safer than password logins. Enable SSH in DSM web interface, generate a key pair with PuTTYgen on Windows, then add the public key to authorized_keys in your Synology user’s ~/.ssh folder. Test key-based login with the private key first. Only then disable password login and further lock SSH down.
Securing your Synology NAS with SSH begins with creating a robust SSH key. I’ve always found PuTTYgen to be an excellent tool for this. Here’s my approach:
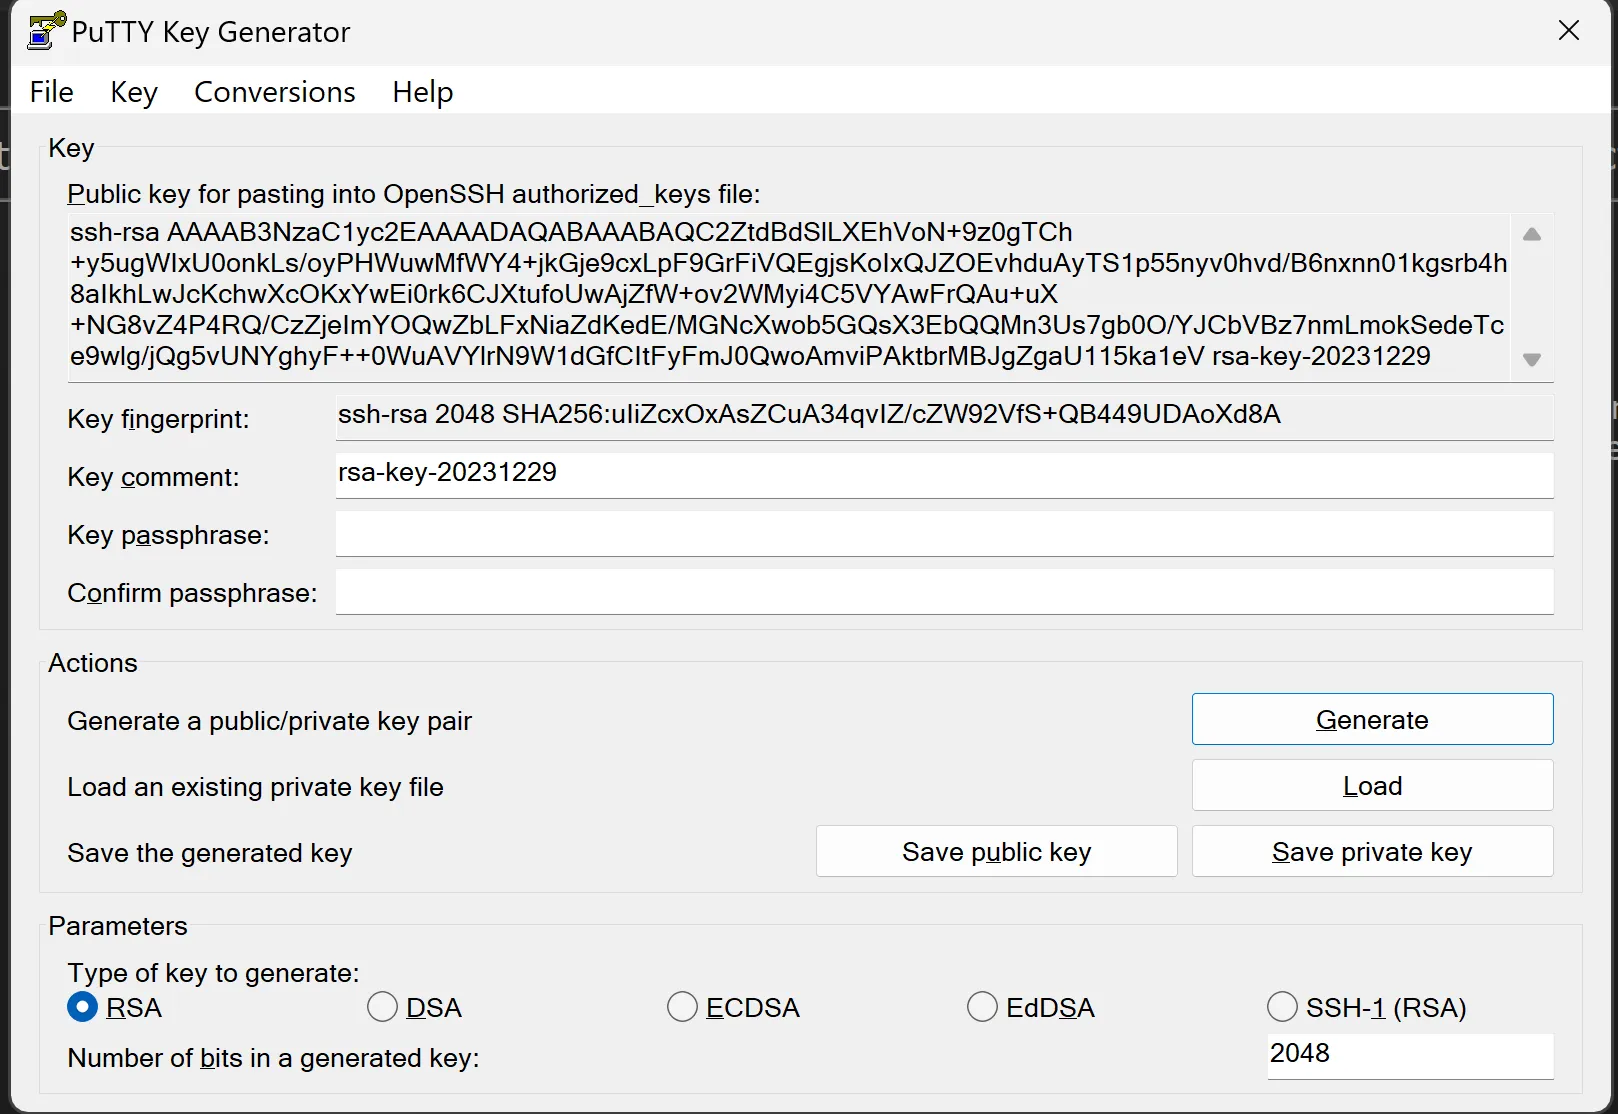
Optional Passphrase:

Ensure that the public key in the authorized_keys file is on a single line with no breaks. Sometimes, copying and pasting can insert line breaks that invalidate the key.
Below is an example the line should start with “ssh-rsa….”

With our SSH key ready, let’s apply it to the Synology NAS.
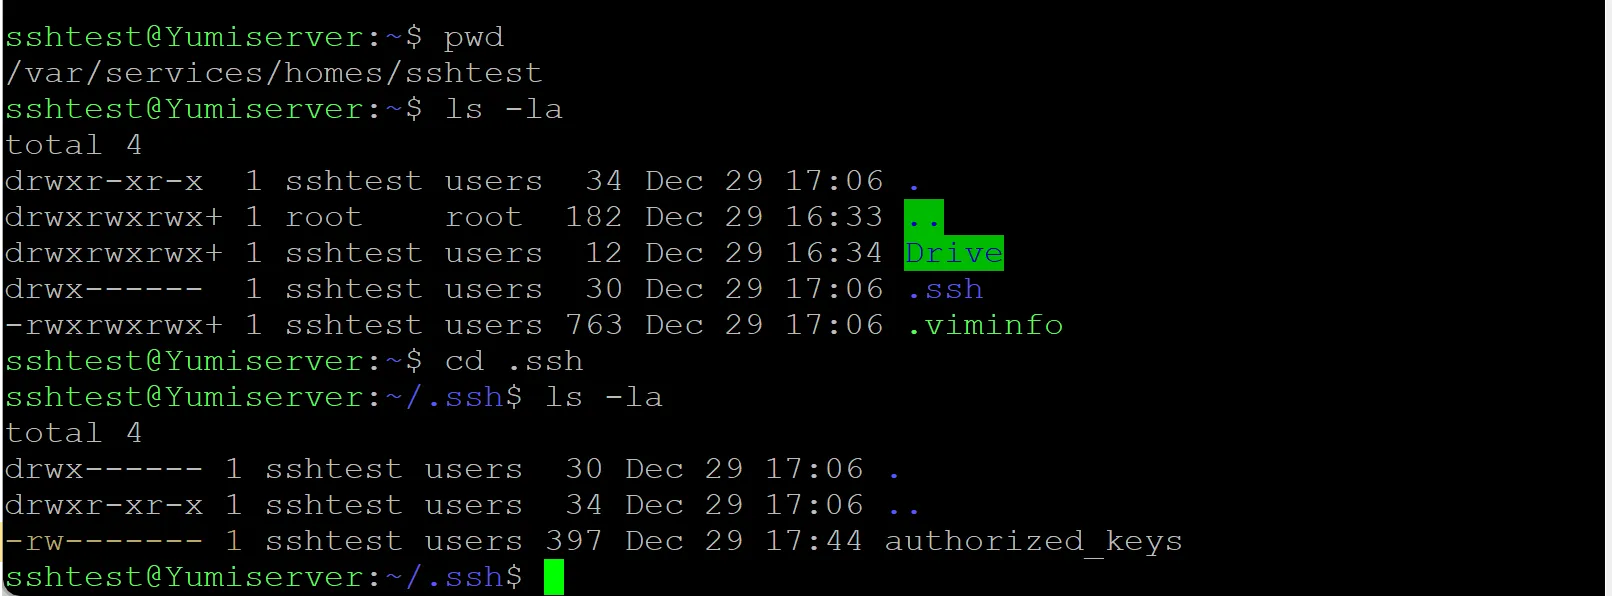
The file ~/.ssh/authorized_keys must be created on the Synology NAS to store the public key.
.ssh Folder:authorized_keys File:To establish secure SSH access with authorized_keys on a Synology NAS, it’s crucial to adjust the permissions of user home directories. By default, Synology sets these directories to 777 permissions, which are overly permissive and can lead to SSH errors such as ‘server refused the key.’
For Individual User Home Directory:
For All User Home Directories:
Additional Steps for .ssh and authorized_keys:
.ssh directory in each user’s home has 700 permissions (chmod 700 .ssh), and the authorized_keys file has 600 permissions (chmod 600 .ssh/authorized_keys).In the screenshot below, you see the permission for the folder .ssh and for the file authorized_keys
I recommend my article “Linux file permissions explained: What you need to understand” for more information about Linux file and folder permissions. A good reference is the chmod calculator.

That’s it for setting up SSH keys on Synology with PuTTYgen. You now have SSH key authentication in place, which is a big security upgrade over passwords. If you want to harden things further, review your sshd_config, keep the sshd service running only when you need it, and restrict access in DSM Firewall to trusted IPs. Questions or edge cases? Drop them in the comments.
I’d love to hear from you. Was this article helpful? Share your thoughts in the comments below. If you prefer, you can also reach me by email or connect with me on Reddit at Navigatetech.
If you found the guide on setting up SSH keys on Synology insightful, you might appreciate the next step: SSH into Synology. This article delves into securely accessing your Synology device via SSH, building on the knowledge you’ve gained about SSH key setup. It’s a practical read for enhancing your remote management skills and ensuring secure access to your Synology NAS. Perfect for tech enthusiasts aiming to streamline their network management tasks!
Hi, I’m Edy Werder. I write hands-on guides about Proxmox, homelab servers, NAS, and WordPress, based on real setups I run and document.
No sponsors, no fluff—just real configs and results.
Enjoying the content?
