
By Edy Werder — IT Consultant & Tech Blogger
Looking for homelab ideas? Here are 25 projects I either run in my own lab or have planned next, organized by where you start and how your lab grows.
You don’t need expensive hardware to start a homelab. One mini PC running Proxmox VE is enough for your first five projects. Almost every idea on this list is free, open-source software. The only real cost is hardware, and you add it in stages, not upfront. Pick one project, get it running, then grow.
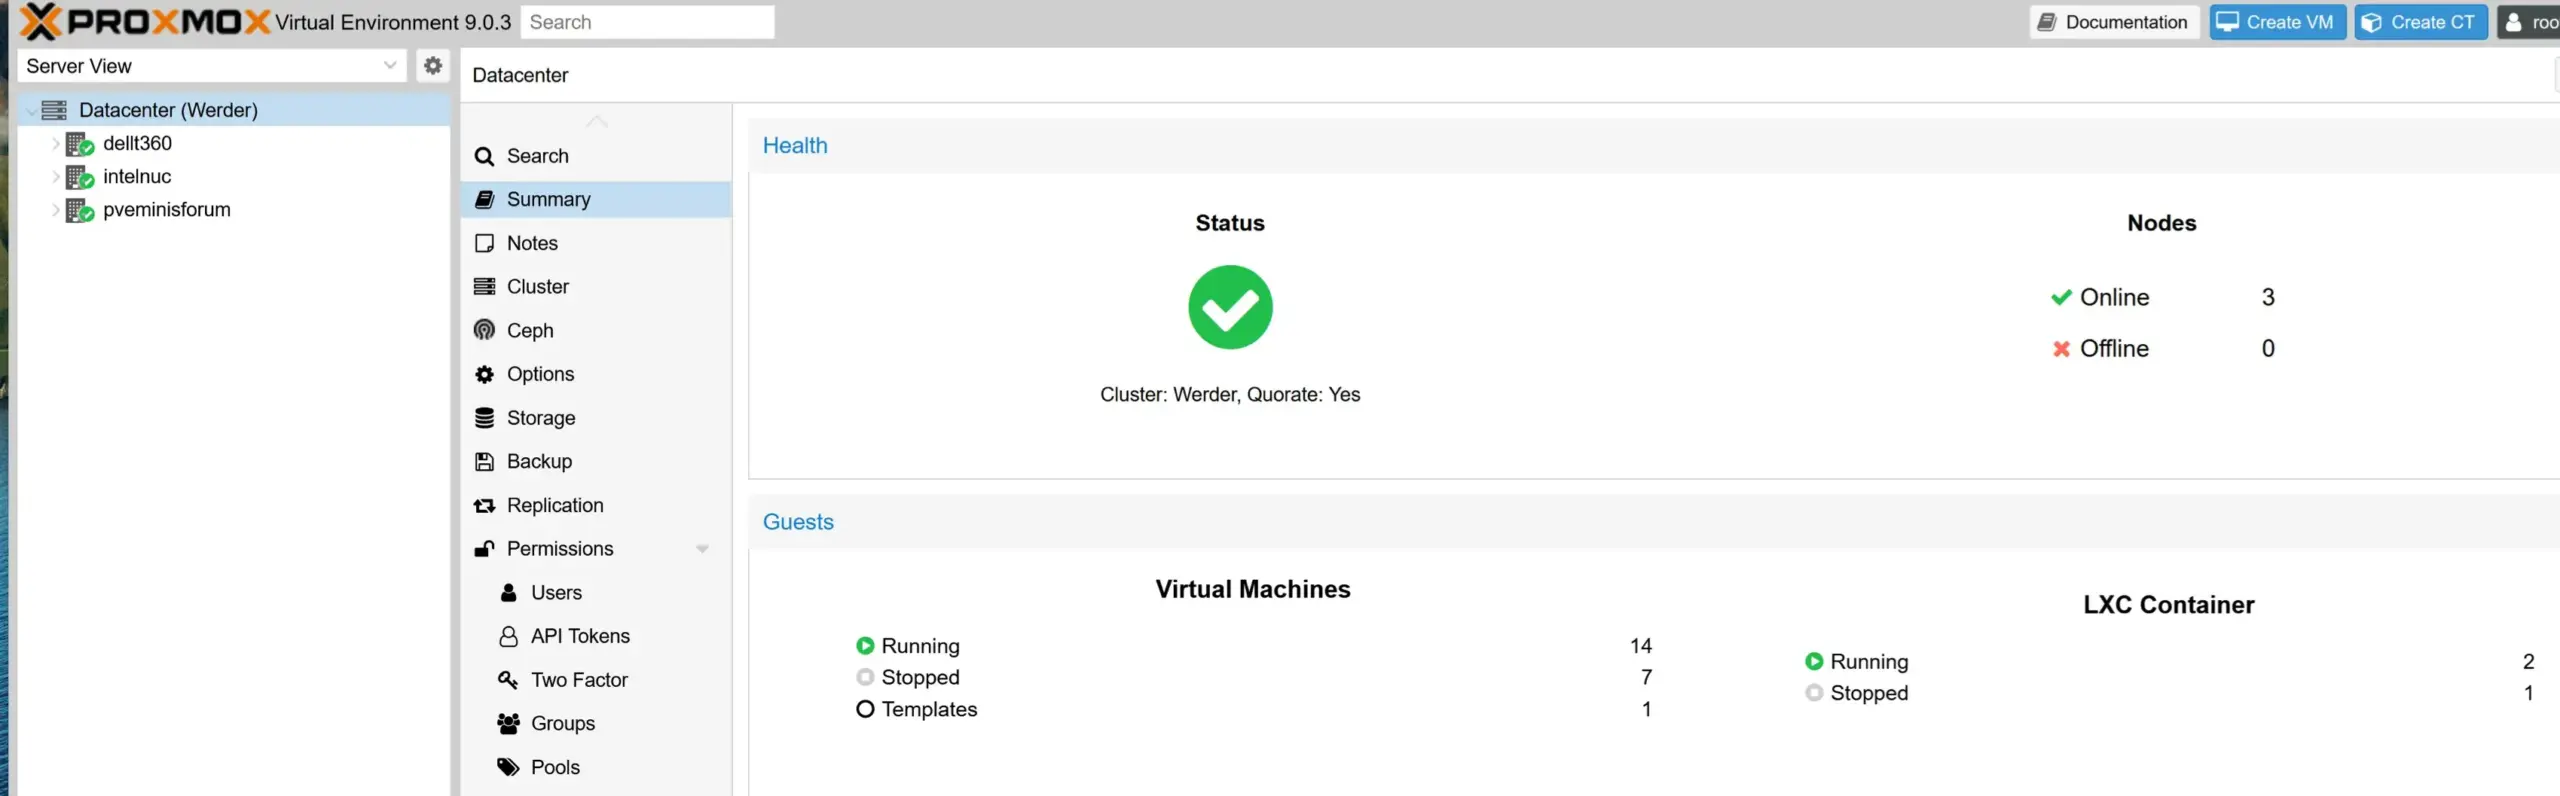
How does a homelab start? Usually one of two ways: you got an old enterprise server for free from work, or you have a mini PC and wonder if it can do more. I’ve been through both. My lab today runs a three-node Proxmox cluster, two Synology NAS units, a separate Mini-PC with Proxmox and a dedicated backup server. Every project below comes from that setup.
Every homelab idea needs some hardware to start with.
That’s a great way to start. A retired Dell or HP server gives you hardware most beginners never touch. Lots of RAM, redundant power supplies, a proper RAID controller, and remote management via iDRAC or iLO. Skills you only learn on real enterprise gear. My lab includes a Dell PowerEdge T360 and a T440, and they’re excellent learning machines My Homelab setup.
Enterprise servers are built for performance. My T360 draws around 104 watts on average, and noise can be a factor depending on where it lives (Quiet Server for Home Lab). The simple fix is to consider it as your lab machine, not your 24/7 host. Power it on when you’re experimenting, shut it down when you are done.
Later, a small mini PC can handle the always-on services while the big server stays your playground. I measured the real numbers across my hardware here Low Power Home Server: Real Power Consumption.
This is the classical way, and it’s the better starting point for most people. A used mini PC starts around $150 to $250, sips power, and sits silently on a shelf. That’s the real entry price of a homelab, not $2,000.
My own three-node cluster runs on a Dell PowerEdge T360, a Minisforum MS-01, and an Intel NUC. The T440 and the Acemagic K1 run standalone. Best Mini-PC for Proxmox
The Raspberry Pi is the classic budget entry. It works well for lightweight services like DNS or ad blocking. However, given the prices of a mini PC, a used mini PC wins out for virtualization over a fully equipped Raspberry Pi. I run mini PCs instead of Pis for that reason.
Why Proxmox and not VMware? Cost, mostly. Since Broadcom took over, VMware licensing is priced for enterprises, not homelabbers. A limited free ESXi version exists again, but it lacks clustering, live migration, and HA. Proxmox VE gives you all of that for free, open source. The one case where VMware still makes sense at home: you have a license through work and want to study for a certification on the same stack you run in the office. For everyone else, Proxmox is the standard for homelabbers, and I compared both in detail (Proxmox vs ESXi).
Every virtualization project below assumes Proxmox.
Virtualization is the basis skill. One physical host becomes many servers. Everything else on this list builds on it.
Cost: free, runs on your existing hardware.
Proxmox VE is free, open-source, and the homelab standard for virtualization. Install it, create an Ubuntu Server VM, and you’ve crossed the line from “a computer” to “a homelab.” My step-by-step guide covers the whole install (How to Install Proxmox Server). If you want to compare alternatives first, I tested five hypervisors, (Best Hypervisor for Home Lab).
Cost: free.
Should a service run as a VM or a container? Run both and learn the difference yourself. Proxmox supports both natively. A VM emulates a complete machine with its own kernel: strong isolation, any operating system. An LXC container shares the host kernel: starts in seconds, uses a fraction of the RAM. I broke down the trade-offs and which I use where (Proxmox Containers vs VM).
Cost: free with an evaluation license.
Learn how to run the best Windows Server as a guest VM with VirtIO drivers. I documented the full setup.
How to Install Windows Server on Proxmox with VirtIO Drivers

The 180-day evaluation license is all you need to start. For my lab, I went a step further and bought a Visual Studio Professional subscription with three years of coverage for around $1,200 from Trusted Tech Team. It includes licenses for Windows 11, Windows Server, and SQL Server for dev and test use, plus a $50 monthly Azure credit. Worth it once Windows VMs become a permanent part of your lab.
Cost: free, saves you money.
VMware ESXi was free for years. It’s now commercial, and the homelab world moved on. If you still have an old ESXi box, migrating a VM to Proxmox is a genuinely useful project that mirrors what companies are doing at scale (VMware to Proxmox Migration). I was using ESXi with Vcenter for years and I loved it, but I migrated everything to Proxmox without regret.
This is the question every beginner faces after the third service: Should data live inside VMs or on a separate network storage system?
My answer: to both, I run a Windows file server as a Proxmox VM for central storage. My Synology NAS covers two other jobs. Synology Drive syncs my working files to my laptop, so the data I need travels with me when I’m away from home. And the NAS serves as a backup target that’s independent of the VM layer.
What matters isn’t where data is stored. A file server VM is perfectly fine, since Proxmox Backup Server captures the entire VM. The NAS adds snapshots, RAID, and an independent copy on separate hardware. Avoid the setup where one disk failure means the data is gone.
The starting point: one mini PC with a big SSD and everything inside VMs is a fine first step. Don’t buy a NAS on day one. Add one when your data starts to matter, or when you want your files synced across devices.
Cost: from ~$300 used, plus drives.
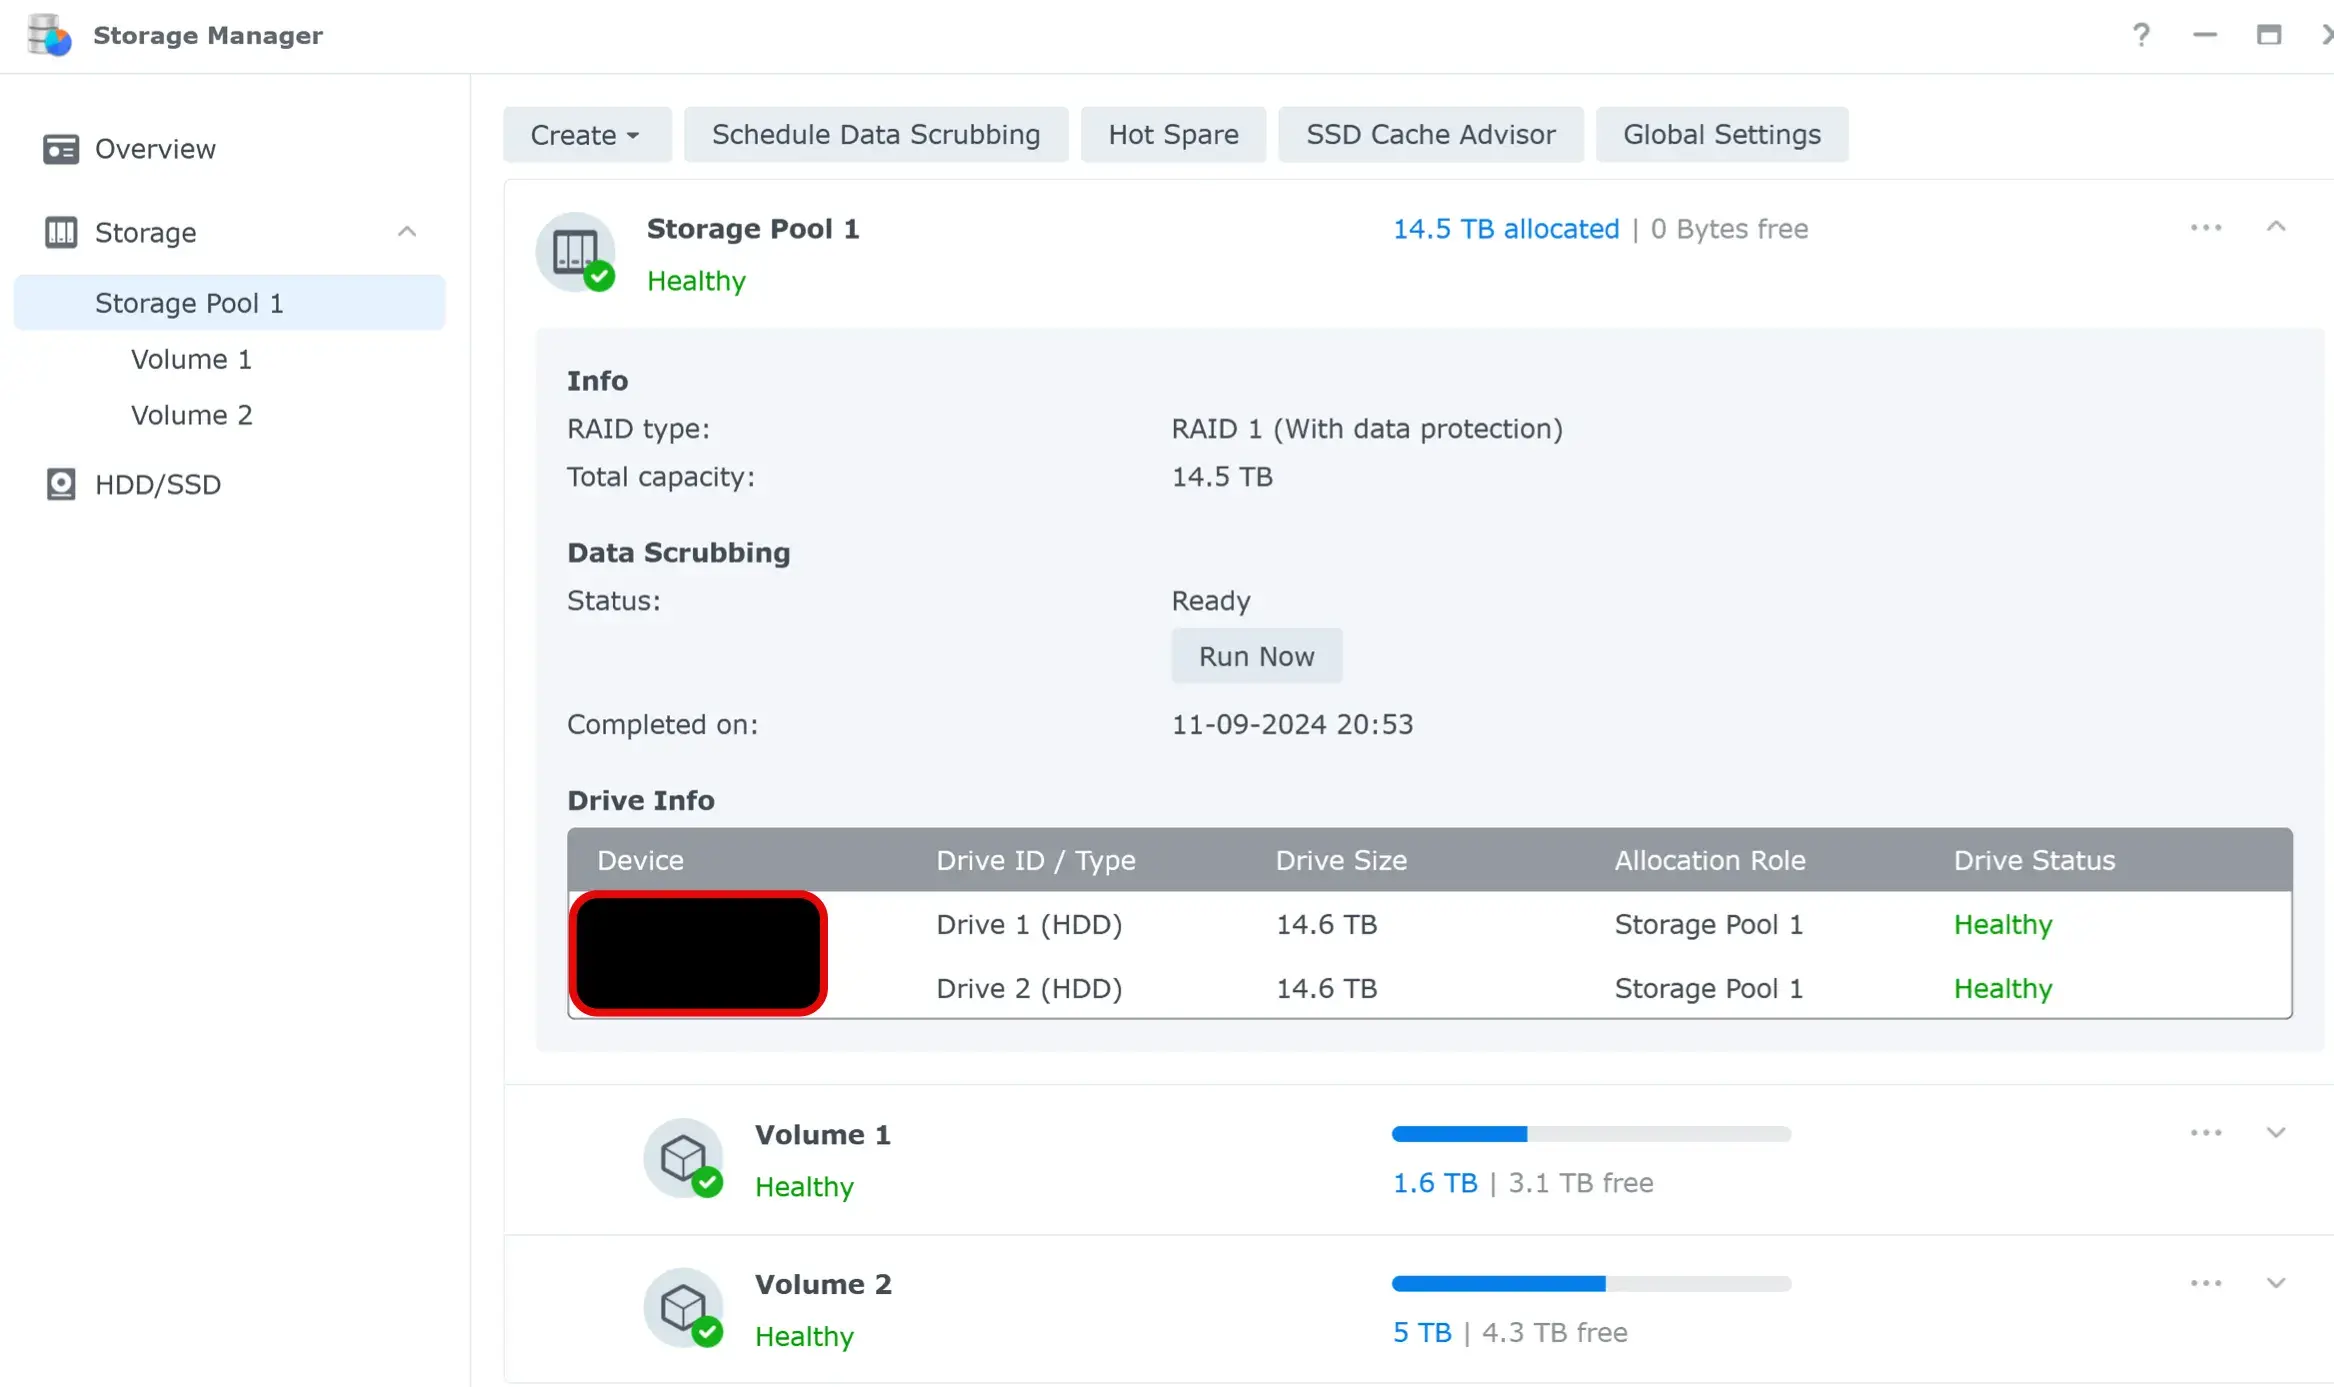
I run two Synology NAS units for different jobs: one as a backup repository, one for file sync. Start with my buying guide (Best Home NAS), the Synology comparison (Best Synology NAS), and don’t save money on drives (Best Hard Drives for NAS).
Cost: free on existing hardware.
The inverse idea: run VMs on the NAS, or run the NAS as a VM. Synology’s Virtual Machine Manager turns a NAS into a small hypervisor (NAS Virtualization with Synology VMM), and TrueNAS inside Proxmox is the popular DIY route. TrueNAS handles both NAS and SAN protocols.
VMM consumes memory; most Synology models ship with little. If I’m buying RAM, I’d rather put it into a Proxmox node, where it helps every VM.
Cost: free. spare disk helps
ZFS combines a filesystem and RAID into one solution, with checksums that detect silent data corruption. It’s built into Proxmox, and it powers TrueNAS. I wrote a comparison of EXT4 and ZFS on Proxmox to get you started (Proxmox Filesystems Unveiled: A Beginner’s Dive into EXT4 and ZFS).
My recommendation is to learn ZFS by doing, but not on your production data. A separate box with a few old hard drives is the best exercise. Create a pool, pull a disk mid-write, watch it heal, destroy it, start over. Breaking ZFS on purpose is the best way to learn.
This is the fun part and the reason most people build a homelab. Self-hosted services replace subscriptions with software you control. Everything in this section is free and runs on the mini PC from the starting point above. A self hosted password manager like Vaultwarden is another strong candidate I’ll cover separately.
Cost: free.
Nextcloud replaces Dropbox and similar cloud services with your own sync, calendar, and file-sharing. I run it as a VM and documented the install (Nextcloud on Proxmox). An LXC container works too.
The calendar is the part I’m still exploring: if the sync proves reliable across devices, it could replace my Outlook calendar entirely. That would be one more subscription gone.
Cost: free.
DNS is how you stop typing IP addresses. Run an internal DNS server for your home network, or go further and host your own public nameserver, which is the project that taught me the most about how the internet actually works (DNS Server at Home).
A Synology NAS can handle this job too Synology DNS Server Setup
Cost: free.
Every change on my blog gets tested in a staging environment first. Hosting WordPress in your lab is perfect for that, or for a family site that never touches the public internet (WordPress on Synology). You learn web servers, PHP, and databases in one project.
Cost: free with a Synology NAS.
Synology Drive provides me with Dropbox-style sync across all my machines without a subscription. My working files sync to my laptop automatically, so when I’m traveling, everything I need is already local. No VPN, no remote session, no “the file is on the server at home.” It has saved me from my own mistakes more than once Synology Drive.
Cost: free.
Pi-hole blocks ads at the DNS level for every device on your network, including phones and TVs. No browser plugin needed, nothing to install per device. It runs happily on a Raspberry Pi, an LXC container, or a small VM. AdGuard Home is the main alternative with a more modern interface and built-in DNS encryption.
This is one of the most popular first homelab projects for a reason: the hardware requirements are minimal, and because it works at the DNS level, the effect applies to every device in the house at once.
Cost: free software, storage you already have.
Media servers like Jellyfin and Plex turn your NAS into your own streaming service. Your movies, your music, your media library, no monthly fee. Jellyfin is fully free and open source. Plex is more polished but locks more features behind its subscription, which somewhat defeats the purpose of self-hosting.
Both run as a VM, a container, or directly on many NAS models. One thing to plan for: transcoding video for different devices needs CPU power, or a GPU if the library grows. This is one of the most requested homelab projects in every community thread asking what to self-host.
Cost: free.
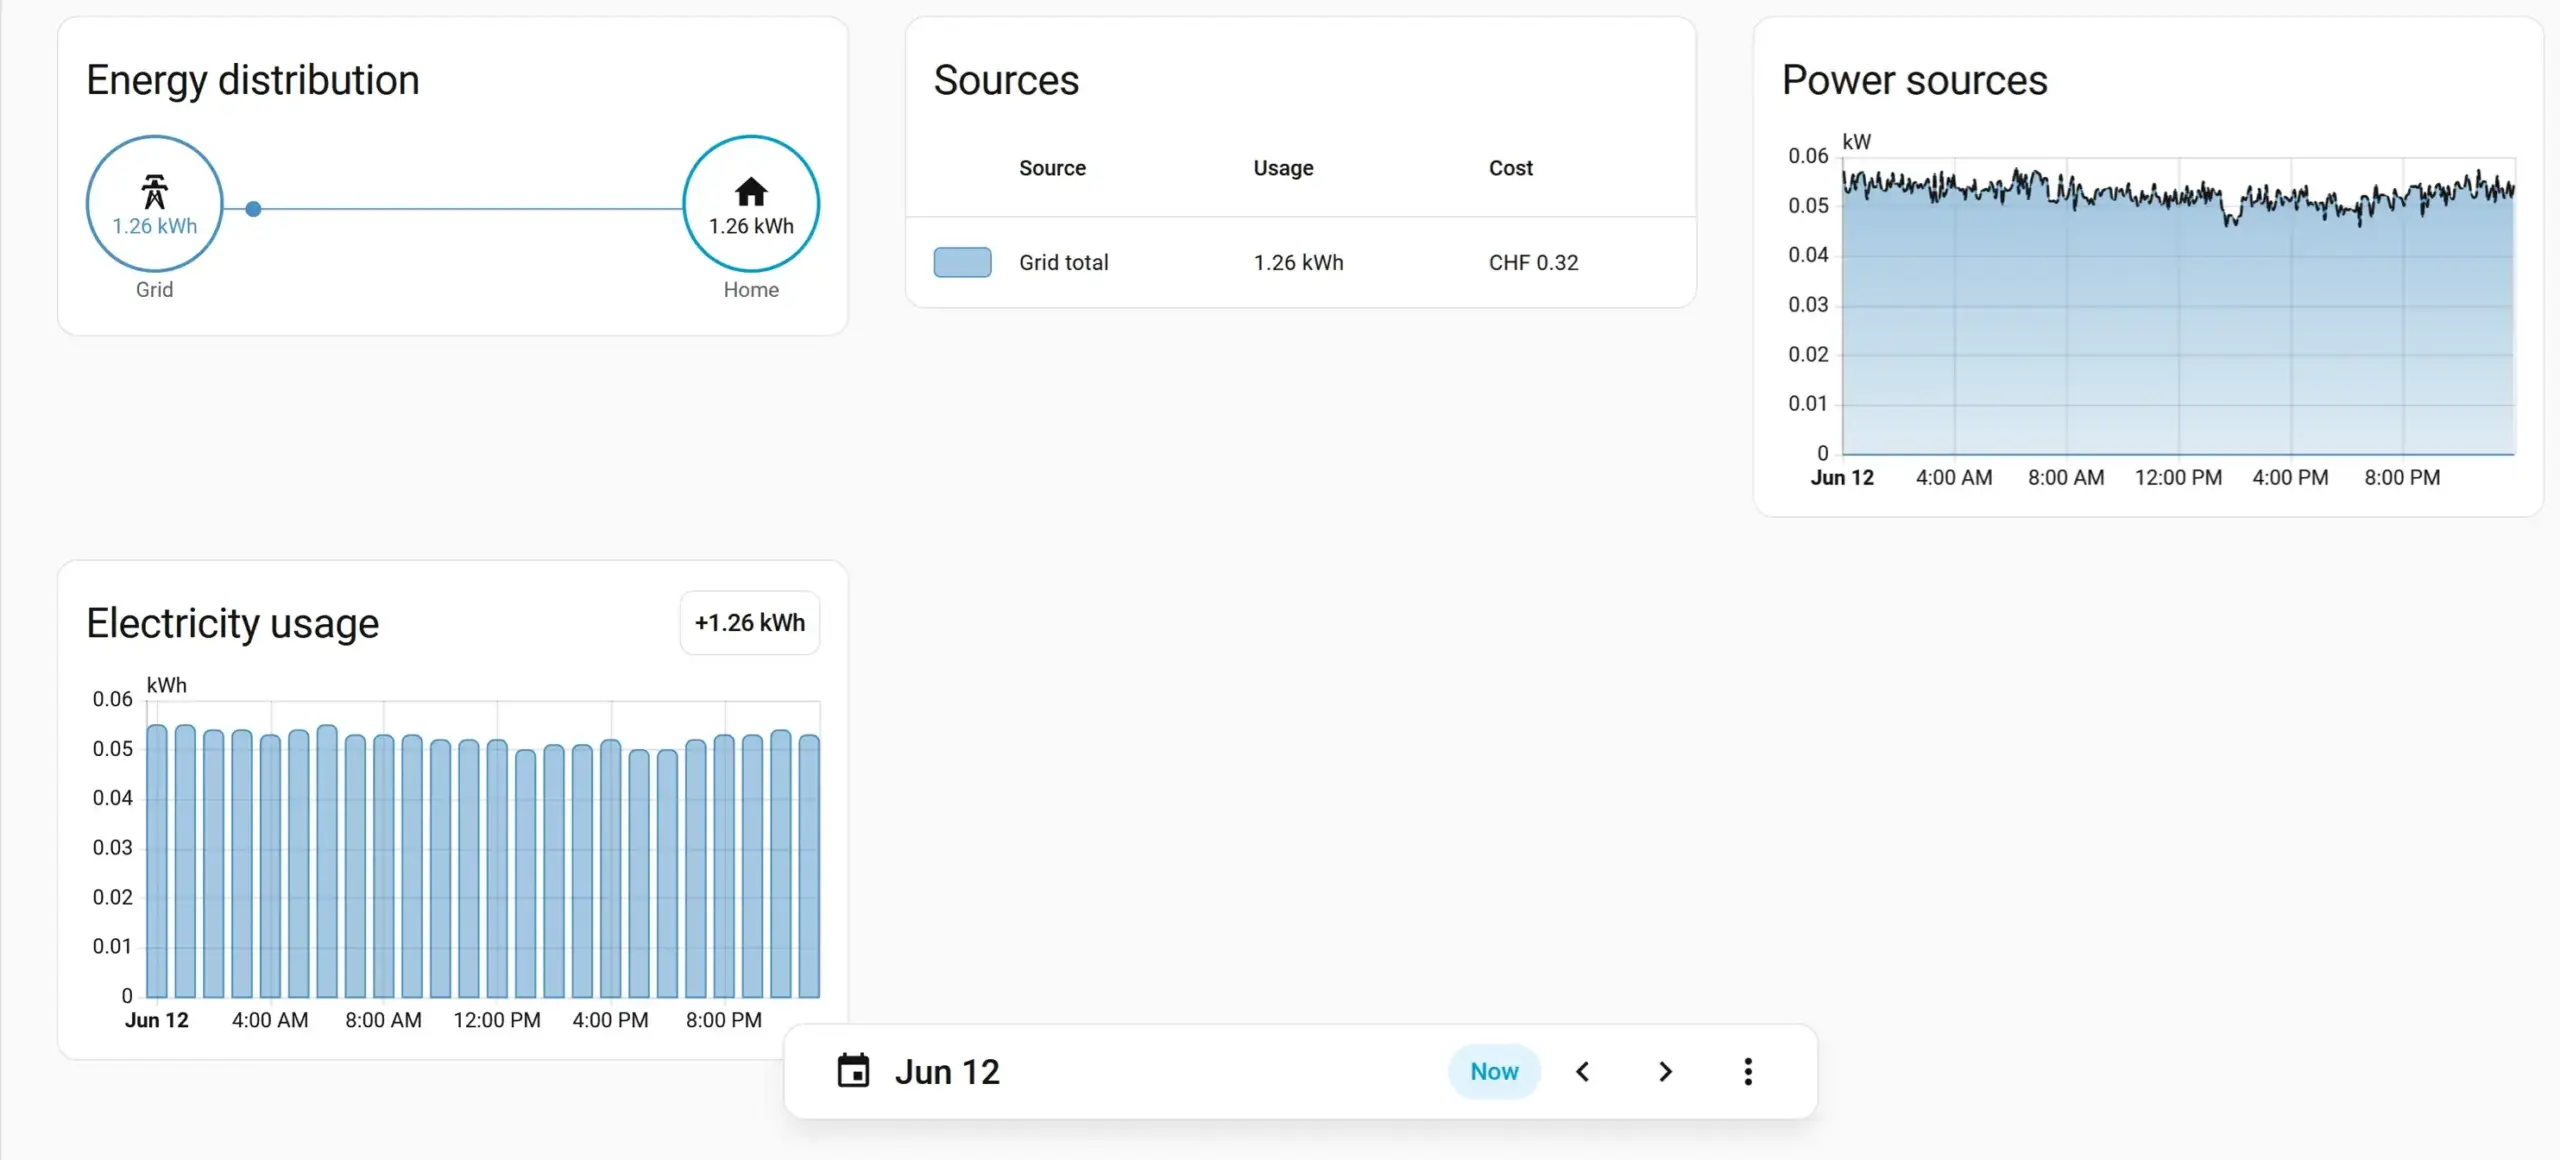
Home Assistant integrates smart home devices locally, without sending your data to anyone’s cloud. It’s the bridge between homelab and smart home, and a natural VM on any Proxmox host. My favorite use is a smart plug that measures the actual power draw of my homelab hardware. So I know what each box actually costs.
Cost: free software.
Game servers are how a lot of people fall into the homelab hobby in the first place. A private Minecraft, Valheim, or CS2 server for you and your friends runs on modest hardware and teaches real skills along the way: port forwarding, firewall rules, resource limits, and keeping a service online. Most popular games have a community Docker image, so deployment is often a single container. If your homelab started as “I just wanted to host a game for friends,” you’re in good company.
At some point the default setup of one flat network behind your ISP router stops being enough. Networking projects are where a homelab starts feeling professional.
Cost: free with a managed switch.
VLANs split a single physical network into isolated zones. IoT devices like cameras shouldn’t sit in the same VLAN as your Proxmox Cluster. You need a managed switch that supports 802.1Q, and the configuration on the hypervisor side is straightforward (Configuring VLANs in Proxmox).
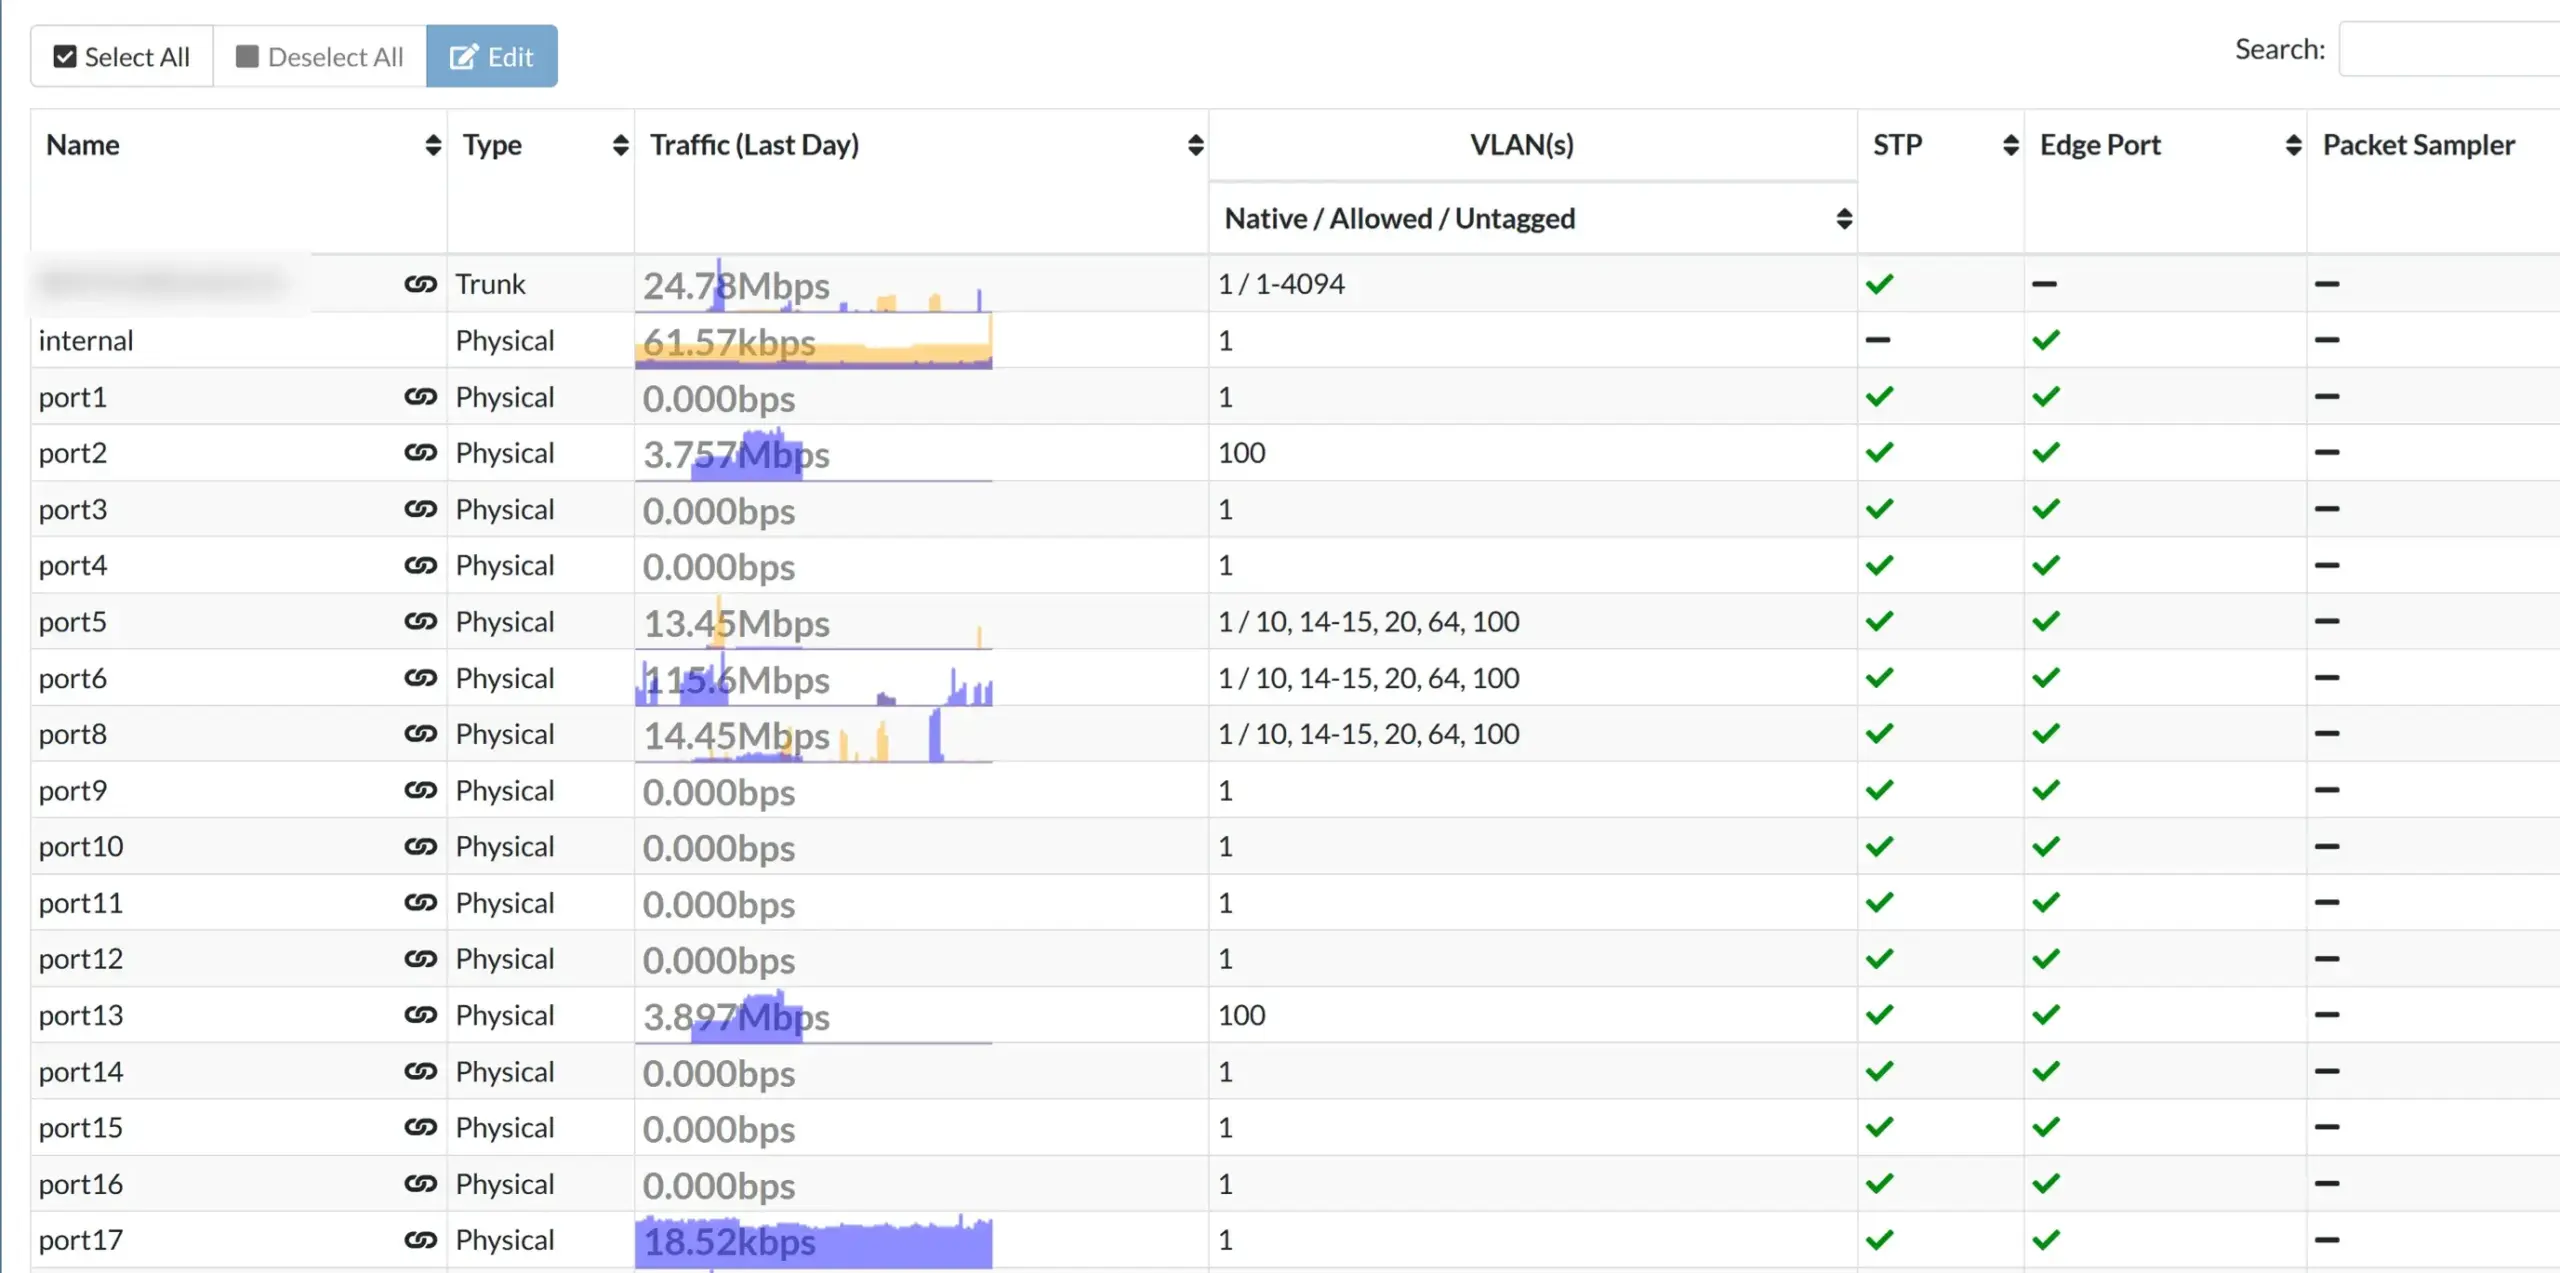
Cost: free software, or dedicated hardware.
The router from your ISP, sitting behind the cable modem, is not a firewall strategy. A dedicated firewall gives you rules per VLAN, logging, and an isolation environment for risky experiments. I run Fortinet hardware, but free options like OPNsense run as a VM or on a small box (Best Homelab Firewalls).
Cost: free.
Reaching your lab from outside without exposing services to the internet is what a VPN is for. I run the VPN built into my FortiGate firewall, though honestly, I rarely need it. Synology Drive already syncs my working files to my laptop, so most of the time, the file I want is on my laptop before I leave the house.
For most homelabbers without enterprise firewall hardware, WireGuard is the answer: fast, simple, built into the Linux kernel. Tailscale builds on WireGuard and needs almost no configuration. A popular combination from the homelab community: Pi-hole plus a VPN means your ad blocking follows you onto mobile data.
One rule, regardless of which you pick: never port-forward your Proxmox web UI or other admin panels directly to the internet. A VPN is how you reach them safely.
Cost: free.
A reverse proxy puts all your services behind clean hostnames with valid HTTPS instead of juggling IP:port combinations. One entry point, automatic SSL certificates that renew themselves, and proper encryption on every service. Nginx Proxy Manager is the friendly starting point with a web UI; Traefik and Caddy are the more advanced routes. It becomes essential once you run more than a handful of services. A full setup guide is on my list for this blog, with the SSL certificate side covered in detail.
Nobody googles homelab ideas hoping to find backup projects. That’s exactly why this section exists. These are the projects people skip until they lose data.
Cost: free software, a spare machine helps.
Proxmox Backup Server gives you deduplicated, scheduled, verified backups of every VM and container. Mine runs bare metal on a small Celeron mini PC and backs up the whole cluster. The deduplication is the part that surprises people: similar VMs share data blocks, so a dozen backups take far less space than you’d expect. The key word is verified. PBS checks that backups are actually restorable, not just written. I covered the full setup and how it performs in practice.
Remember the difference: a snapshot is not a backup. A snapshot lives on the same hardware as the VM. PBS is a separate copy that survives the host dying.
Cost: free software, a second location.
The 3-2-1 rule: three copies of your data, on two different media, one offsite. PBS holds the local backups, a Synology NAS keeps a second copy via Hyper Backup, and an offsite copy lives on a server I control in a friend’s data center.
The clean way to do off-site in the Proxmox world is to set up a second PBS at the remote site that pulls backups from your main one. Pull beats push for ransomware safety. If your home network is compromised, the attacker can’t reach a remote server that pulls backups on its own schedule. There are paid tools like Veeam that add immutable backups. Two PBS instances and the pull model get you there for free.
Storing data off-site doesn’t require a data center. A second PBS at a relative’s house or an encrypted cloud bucket does the same job. What matters is that a fire, a flood, or ransomware at home can’t reach the last copy.
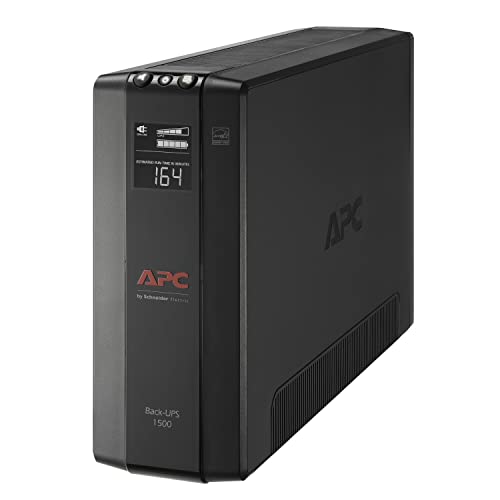
Cost: from ~$150.
The least exciting purchase in my lab, and one of the most important. A UPS prevents data corruption when power blips and buys time to shut down cleanly during a real outage. Mine is an APC unit.
NUT, Network UPS Tools. One USB cable connects the UPS to a single machine. NUT sends the status to other devices. I run the NUT server on my PowerEdge, with NUT clients on the Intel NUC and the Minisforum MS-01. When the power drops, every node sees it and shuts down in order.
I’ve had a real outage since setting it up, and it worked exactly as intended: clean shutdowns across the cluster, no corrupted VMs.
Cost: free.
If a service is reachable, someone will try to log in. Adding 2FA to SSH on Linux hosts and Proxmox takes 20 minutes and removes the most common attack path (Securing SSH with 2FA). While you’re at it, sort out your Proxmox user and root setup (Proxmox User and Root Security).
Cost: free.
I run both tools side by side on two identical VMs and let real attackers hit them. Fail2ban bans IPs based on log patterns (Fail2ban with Email Notification). CrowdSec adds a community blocklist that pre-blocks around 15,000 known-bad IPs before they reach the VM, and it caught CVE exploitation attempts that Fail2ban can’t see.
I put both through weeks of live traffic and wrote up the full comparison with the data (Fail2ban vs CrowdSec article).
Cost: free.
Monitoring tells you a service died before someone else does. Uptime Kuma is the self-hosted answer to status pages: simple, clean, free. I use it to watch my websites, so I know about downtime before a visitor or a client does, not after. It checks HTTP endpoints, ping, DNS, and more, and sends alerts to wherever you already look (email, Telegram, a webhook). For deeper metrics and data analytics on your lab itself, Prometheus and Grafana are the next step up, but Uptime Kuma answers the one question that matters most: is it up?
Spend when the lab tells you to, not before. The growth path I followed, and recommend:
Stage 1: one box. A single mini PC running Proxmox runs all the free projects above. Stay here as long as it’s fun.
Stage 2: add network storage. When your data starts to matter, add a NAS and move files out of VM disks (Best Home NAS).
Stage 3: add a second node. Two or three Proxmox nodes give you migration and high availability, and Proxmox includes both for free (Proxmox Cluster 2 Nodes). This is also when a rack starts making sense (Choose the Perfect Homelab Rack).
Stage 4: automate it. Advanced homelabs treat infrastructure as code. Terraform and Ansible rebuild your setup from configuration files. That’s a future chapter for my lab too.
For the complete roadmap with hardware, software, and setup order, see my full guide (The Ultimate Homelab Guide).
Do you want to browse all my gear in one place?
I created an Amazon storefront with all the gear I use and recommend.
Homelab projects are tasks you run on your own hardware at home: virtualization, self-hosted services, networking, storage, and security. Each project teaches a skill useful for professional IT work.
Learning, self-hosting, and protecting your data are the big three. A homelab is a personal environment for experimentation where breaking things is the point.
Install Proxmox VE and create one VM. Proxmox opens everything else on this list. After that, pick whichever service solves a real problem in your household. Nextcloud for files, Pi-hole for ads, a media server for your library.
Use what you already have. An old desktop, a used mini PC for around $150, or a Raspberry Pi for lightweight services is enough to start. All the software in this guide is free and open source. The only cost is hardware, and used marketplaces keep that low. Buy more only when a project actually needs it.
No, not to start. One machine with a decent SSD is enough for your first projects. You need a NAS when your data outgrows that box or becomes irreplaceable.
I’d love to hear from you. Was this article helpful? Share your thoughts in the comments below. If you prefer, you can also reach me by email or connect with me on Reddit at Navigatetech.
Hi, I’m Edy Werder. I write hands-on guides about Proxmox, homelab servers, NAS, and WordPress, based on real setups I run and document.
No sponsors, no fluff—just real configs and results.
Enjoying the content?

