
By Edy Werder — IT Consultant & Tech Blogger
Editor’s note (Updated May 2025):
Broadcom’s acquisition of VMware has changed how users access ESXi installation files. The offline bundles and vendor-customized ISOs I originally referenced in this article are no longer publicly available. Below is the updated information to reflect the current situation:
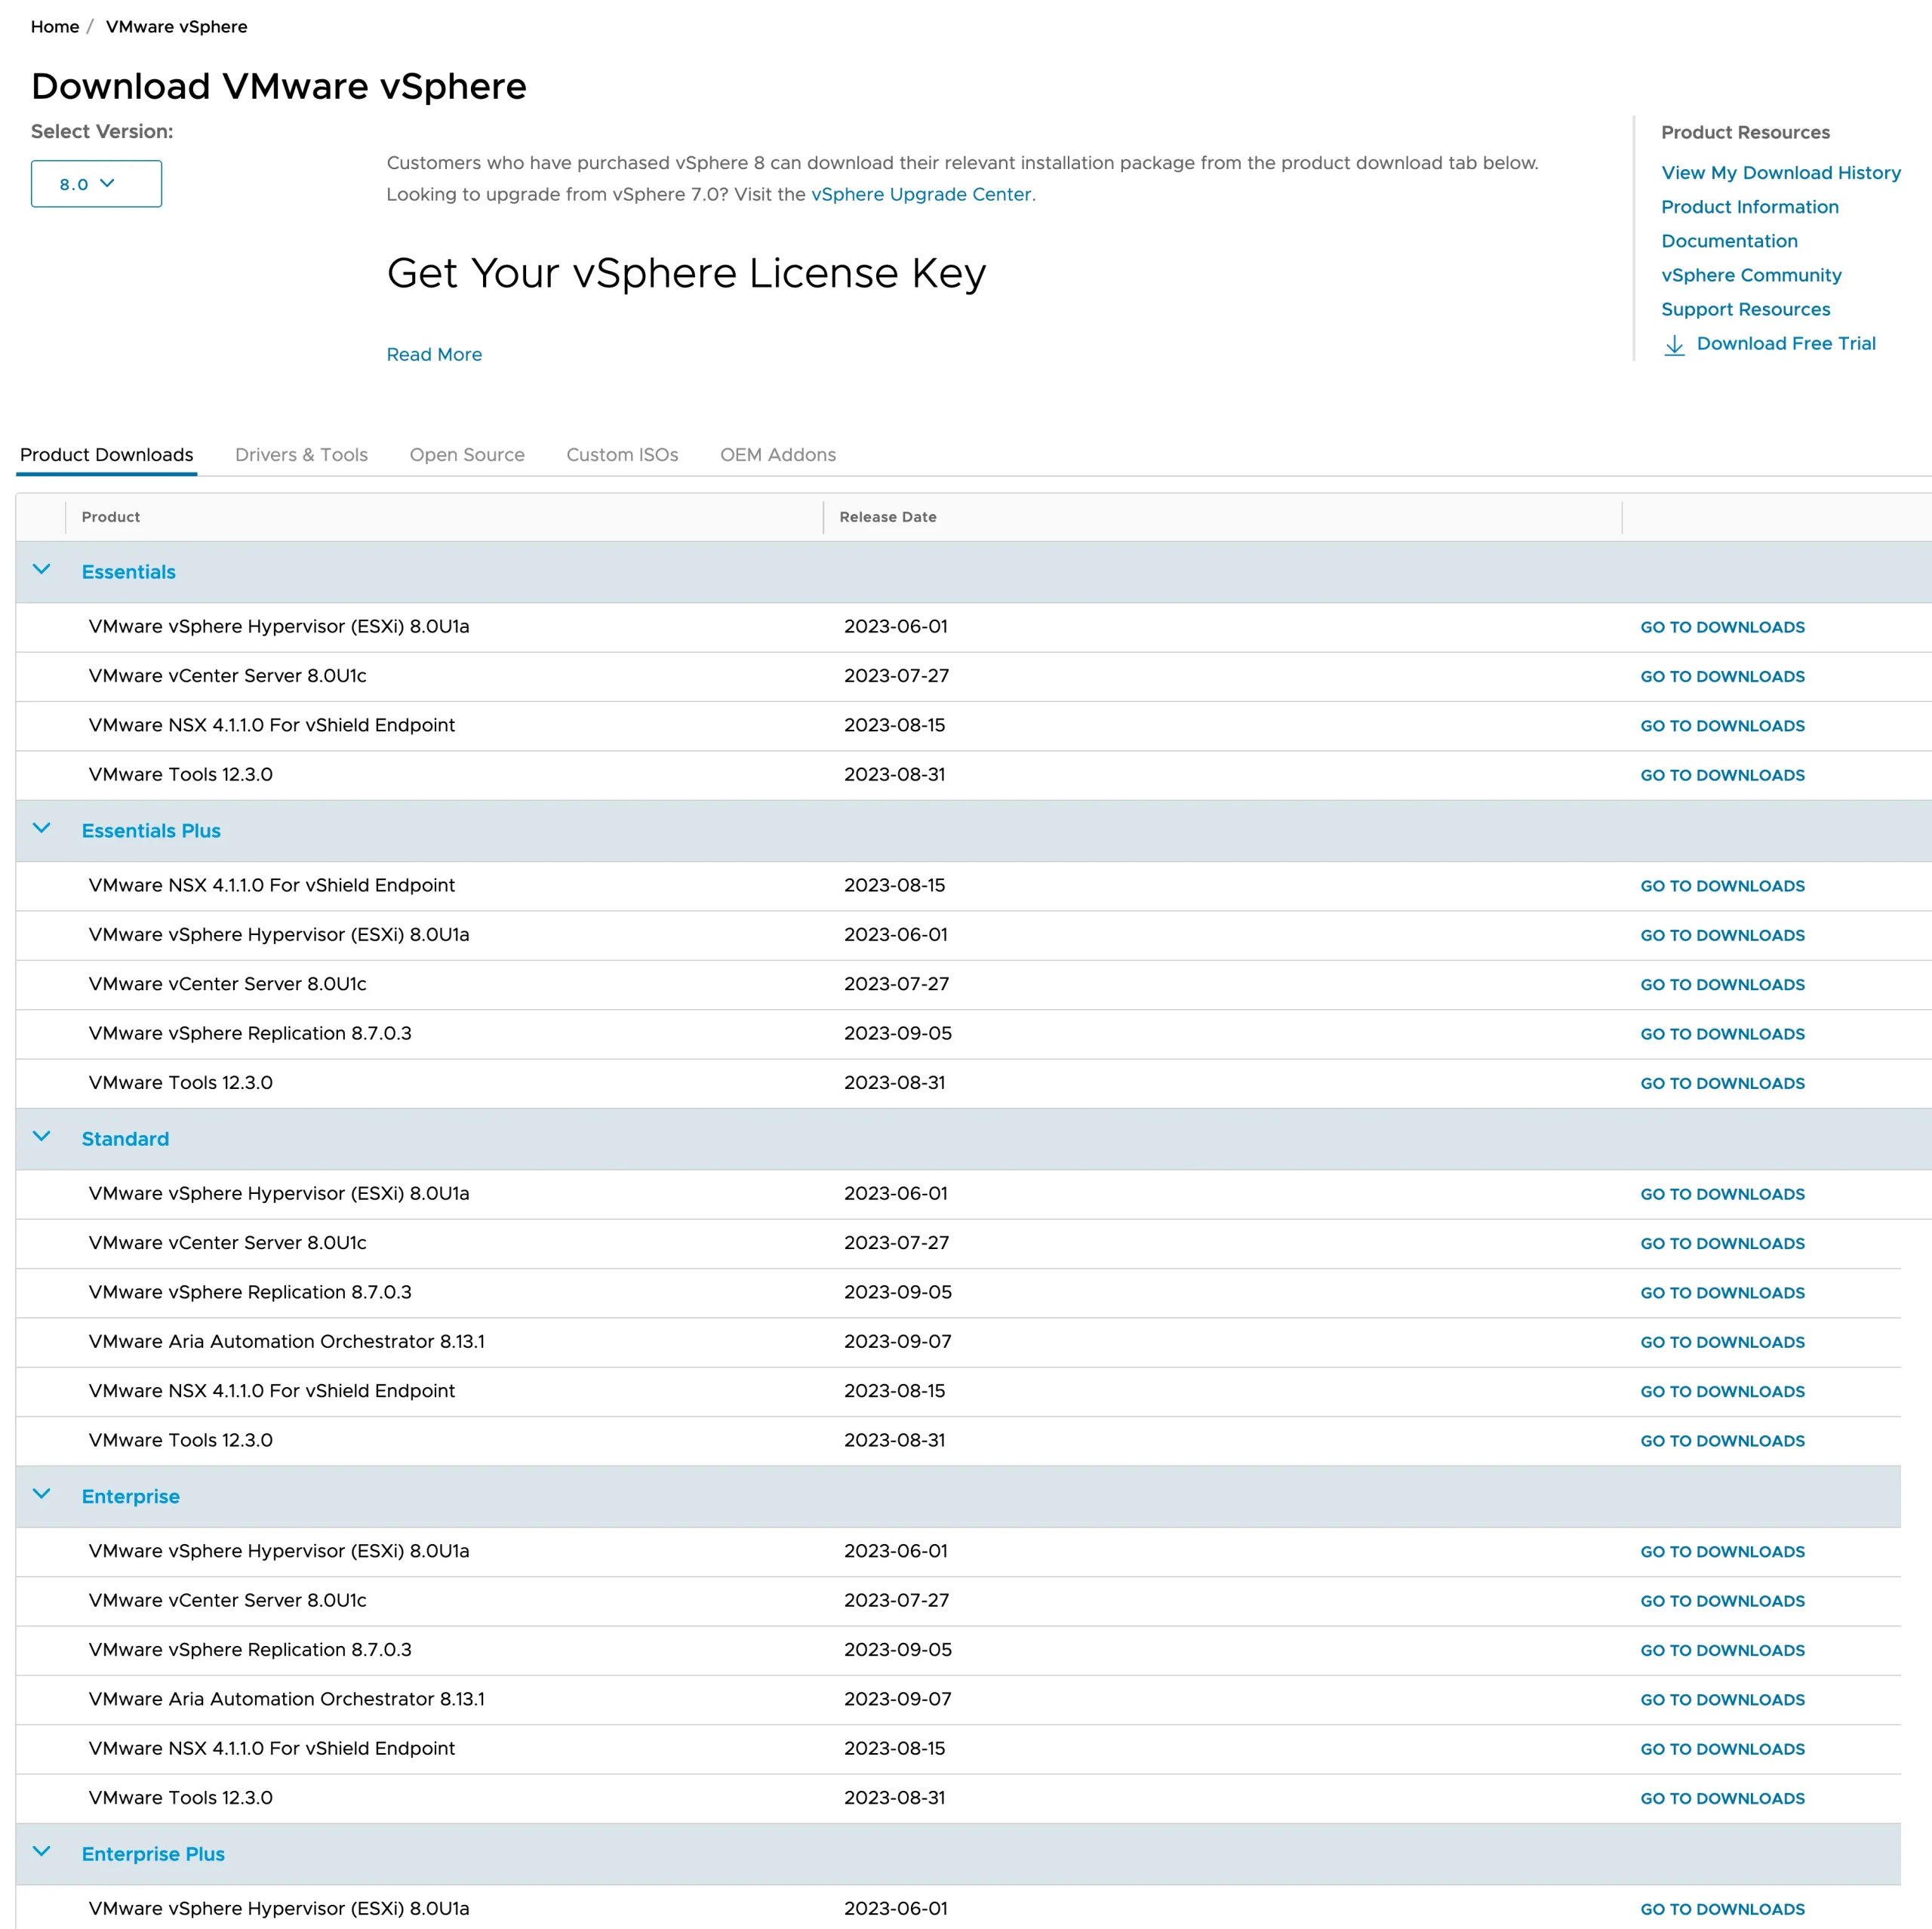
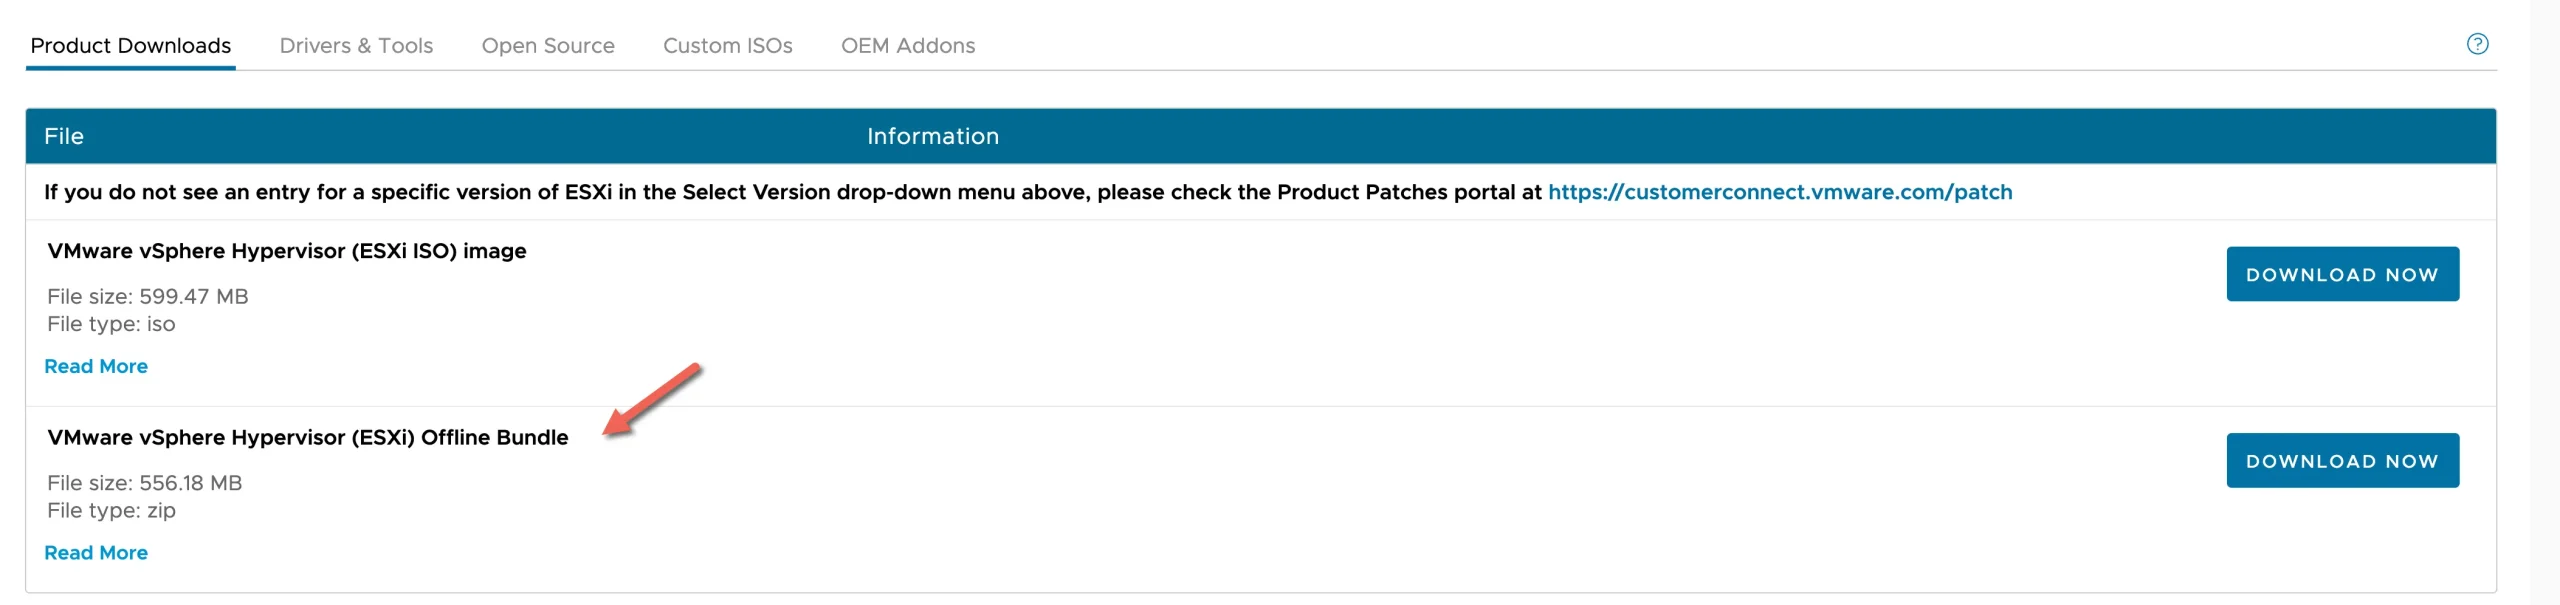
The free ESXi ISO installer is still available from VMware’s official site. It can be used for clean installations, but it does not include vendor-specific drivers.
If you’re using a Dell, HP, or Lenovo server, I recommend downloading the custom ESXi ISO directly from the manufacturer’s website. These versions are tailored for your hardware.
Offline bundles (ZIP files) needed for CLI upgrades are now restricted to customers with an active Broadcom support entitlement.
You can still follow the upgrade process using esxcli—just make sure you have access to the correct offline bundle before proceeding.
Introduction
Are you looking for an easy way to upgrade an ESXi host from the command line? Or maybe you’re just looking for a quick guide to get started. In either case, you came to the right place.
Upgrading ESXi hosts is pretty straightforward, but you can speed up the process using the command line. This guide shows you two ways to upgrade an ESXi host from the command line, saving time while increasing your chances of success.
When is an upgrade via the command line the only way?
Example / Details
Sometimes, the latest ESXi ISO does not support your server or RAID controller. This means VMware has more likely removed the VIB driver of your RAID controller. When you try installing from the ISO, ESXi will not recognize your RAID controller and, therefore, will not be able to install ESXi on your server.
An option is to install an older ESXi version that still supports the RAID controller. After that, you can upgrade ESXi via the command line to the latest version.
Of course, you could integrate the VIB driver into the ISO and install the latest version immediately. However, I figured out that going the way with first installing a supported ESXi version is much easier.
The command line option is also the preferred method when you don’t have access to the server because it is remote. The only requirement is that you have a computer on-site, preferably a physical machine.
Getting ready to update ESXi host without Vcenter
Upgrade requirements/image profile
There are no update requirements. Your host should, however, still be supported with the latest version of ESXi. However, it is not required since the upgrade process keeps any custom VIB drive installed.
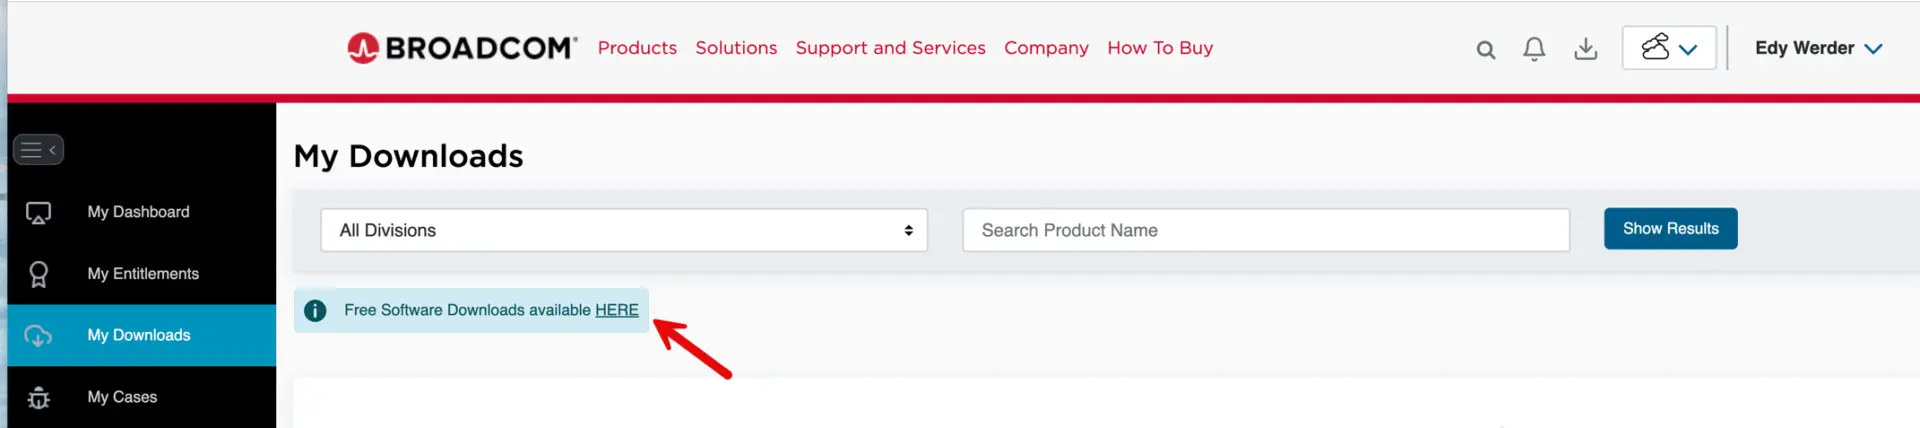
You need access to my VMware portal and a login to download the latest zip (image profile) version from VMware.
What steps are involved in upgrading ESXi host from the command line interface?
In a nutshell:
There are two ways from the command line, and I will show you both.
To upgrade an ESXi host remotely, you must follow a few steps. First, you’ll need to download the latest version of ESXi from VMware’s patch portal and upload it to your datastore. Once uploaded, you can put the host into maintenance mode with either the UI or CLI. After that, you can upgrade your host from the command line using a compatible profile. Finally, reboot your host once the update is complete.
- Method 1: Online Installation
Download the required update directly from the VMware repository - Method 2: Offline Installation
Download first the Offline Bundle (ZIP) from the My VMware portal.
Method 1 requires that your ESXi host has internet access, and the network firewall ruleset, should allow it.
Important Update (2025):
After Broadcom’s acquisition of VMware, the download process for ESXi has changed significantly. Access to offline bundles (ZIP files) and vendor-customized ISOs is now limited to users with an active support entitlement. This affects upgrade workflows using esxcli, which require the offline bundle.
However, the free version of ESXi is still available as a standard ISO image. You can register and download it from Broadcom’s official support site. This ISO is suitable for fresh installations but does not include vendor-specific drivers.
If you’re using a Dell, HP, Lenovo, or similar branded server, I recommend downloading the custom ESXi ISO directly from the manufacturer’s support website. These include drivers tailored for your hardware. While I can’t link to the vendor pages, you can easily find them by searching:
“Dell custom ESXi ISO site:dell.com”
“HPE custom ESXi ISO site:hpe.com”
“Lenovo custom ESXi ISO site:lenovo.com”
These custom ISOs work well for fresh installations. For upgrades, you’ll need access to the corresponding offline bundle, which is now behind Broadcom’s support wall.
Affordable Servers for Virtualization Enthusiasts
Enhance your virtualization experience with these budget-friendly and high-performing servers.
| Product Name | View on Amazon |
|---|---|
| Dell PowerEdge Dell R630 Server | 2X E5-2690 v4 = 28 Cores | 128GB RAM | 2X 1TB SSD (Renewed) | View on Amazon |
| Dell PowerEdge R730 Server 2X E5-2680v4 2.40Ghz 28-Core 128GB 8X 4TB 12G H730P (Renewed) | View on Amazon |
| ProLiant MicroServer Gen11 Tower Server w/one Intel Xeon E-2434, 3.4GHz 4-core 1P 32GB-U VROC 4LFF‑NHP 4TB HDD iLO KIT 180W External PS (HPE Smart Choice P74440-005) | View on Amazon |
| HPE ProLiant DL20 Gen11 Rack Server w/one Intel Xeon E-2436 Processor, 2.9GHz 6‑core 1P 32GB‑DR MR408i‑o 4SFF 2x500W RPS | View on Amazon |
| Dell PowerEdge R830 Server 2.20Ghz 56-Core 128GB 16x 300GB 15K H730P Rails (Renewed) | View on Amazon |
| Dell PowerEdge R440 Server 2X Gold 6126 2.60Ghz 24-Core 96GB 960GB SSD + 3.6TB (Renewed) | View on Amazon |
| HPE ProLiant DL380 Gen9 2U RackMount 64-bit Server + 2×8-Core E5-2640v3 Xeon 2.6GHz CPUs + 64GB PC4-2133P RAM + 8×600GB 10K SAS SFF HDD, P440ar RAID, 4×GigaBit NIC, 2×Power Supplies, NO OS | View on Amazon |
| HPE Proliant DL380 Gen10 8B SFF 2U Server, 2X Intel Xeon Gold 6126 2.6Ghz (24-cores Total), 192GB DDR4 RAM, 8X 1.2TB 2.5” 10K SAS 12Gbps, P408i-a SR 2GB RAID, No Operating System | View on Amazon |
Step 1
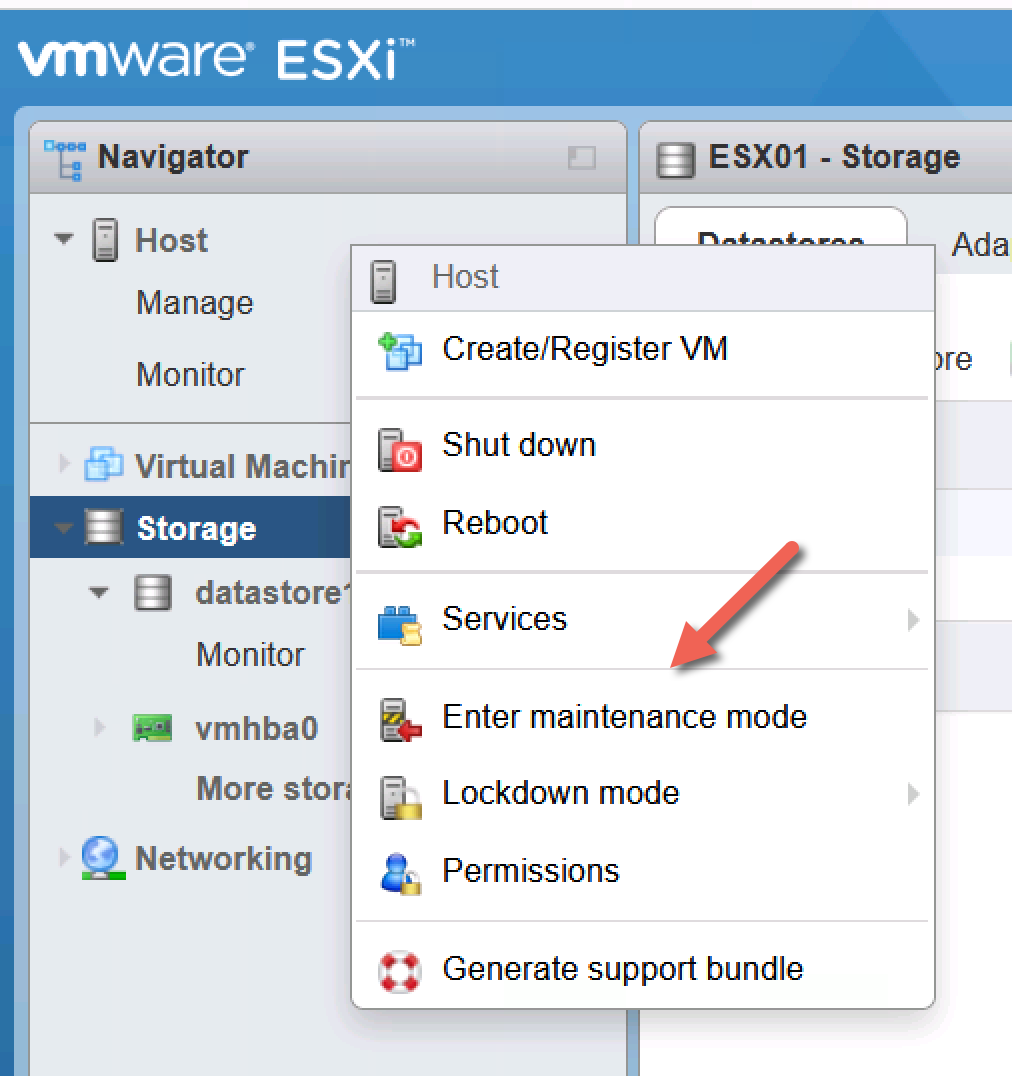
Put the host in maintenance mode. The easiest way is to use the web browser. Right-click the host and choose ‘enter maintenance mode’. Before that, you need to move all VMs to another host or shut down all VMs.
Step 2
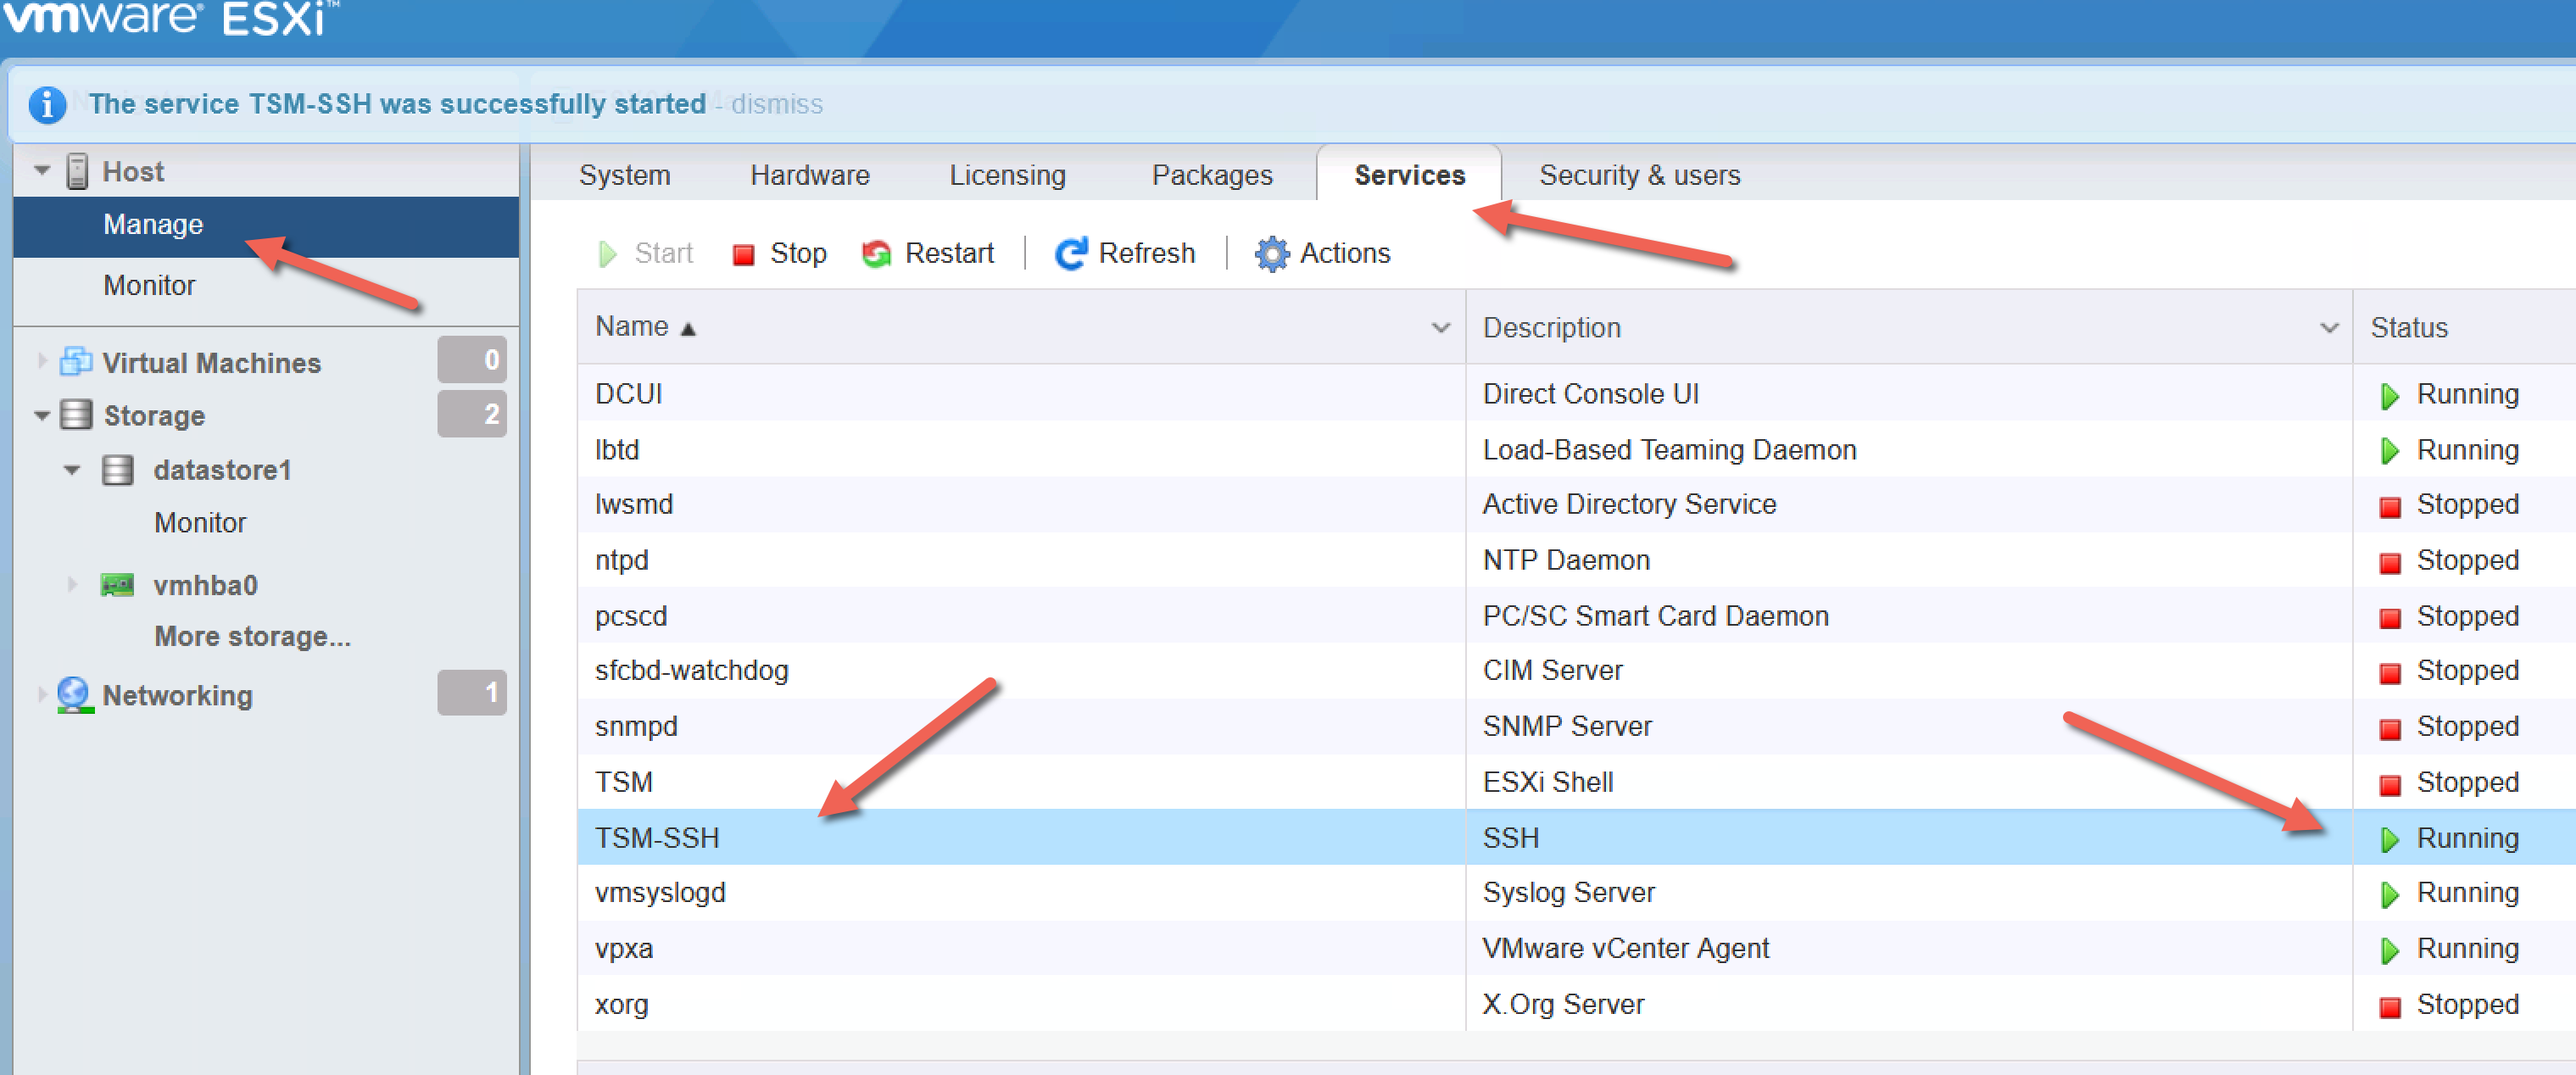
Now, it is time to SSH into the host for the upgrade process using the command line. I use Putty (Windows) or Termius (MAC) as my go-to ssh client.
By default, ssh is disabled on ESXi hosts. You need to start the service using the web GUI.
Step 3
It is also possible to put the host in maintenance mode using ssh; below is the command
esxcli system maintenanceMode set –enable true.List all ESXi profiles available online
esxcli software sources profile list --depot=https://hostupdate.vmware.com/software/VUM/PRODUCTION/main/vmw-depot-index.xmlYou will receive a long list, it is better to filter it for ESXi 8.0
esxcli software sources profile list --depot=https://hostupdate.vmware.com/software/VUM/PRODUCTION/main/vmw-depot-index.xml | grep -i ESXi-8esxcli software sources profile list -d /vmfs/volumes//62ab518c-47c98334-f7ff-0cc47a6c43c4/VMware-ESXi-7.0U3d-19482537-depot.zip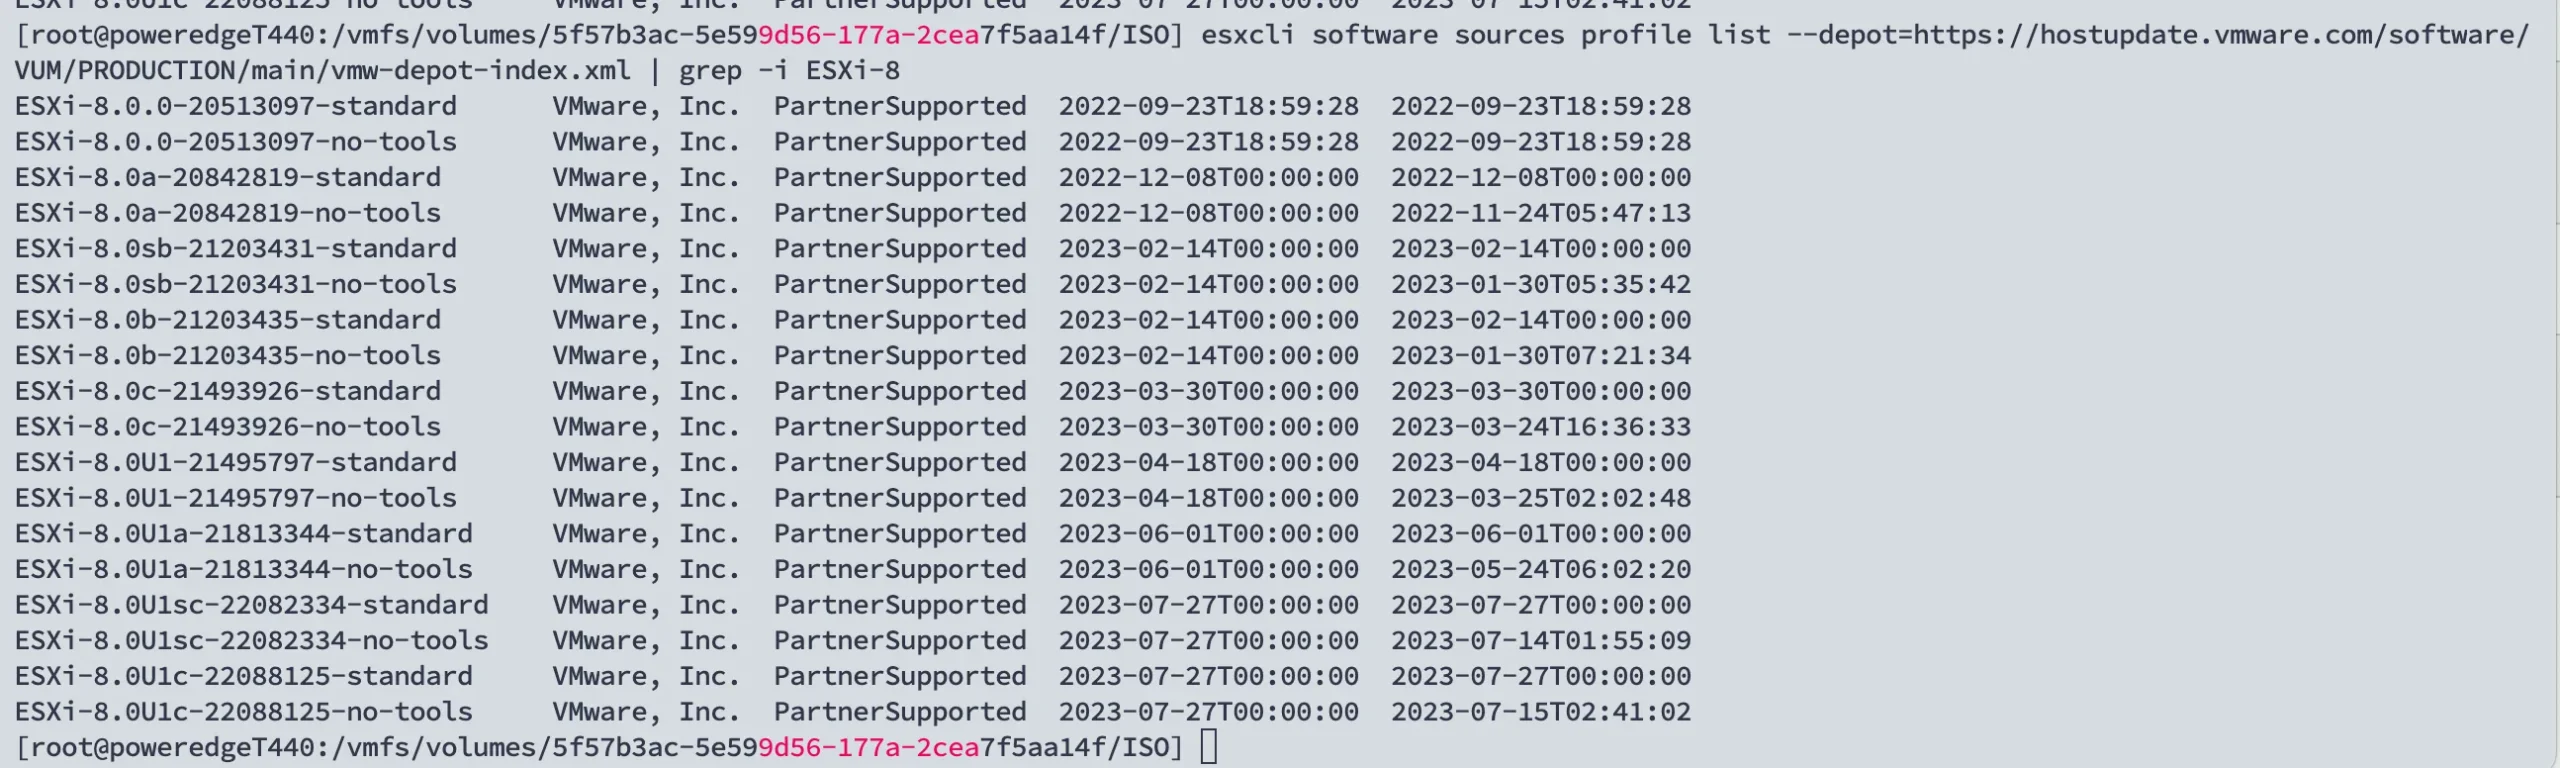
Here, you can see all the profile images in the offline bundle. Which one shall I choose?
- ESXi8.0 standard – Contains all patches
- ESXi8.0 no-tools – Contains all patches but no VMware Tools
- ESXi8.0 s-standard – Contains security patches only
- ESXi8.0 s-no-tools – Contains security patches only and no VMware Tools
, so the image profile with ‘s” are security patches only.
For a detailed explanation of the ESXi profile image please visit the website of virten.net.
We want to install the standard image profile with all patches, In this case it is ESXi-8.0U1c-22088125-standard.
Please note for simplicity, I didn’t write down the number
esxcli software profile update -d https://hostupdate.vmware.com/software/VUM/PRODUCTION/main/vmw-depot-index.xml -p ESXi-8.0U1c-22088125-standard.You will get a warning message if you have some hardware that is no longer supported. See the command below to force the upgrade with the ‘–no-hardware-warning’ switch.
esxcli software profile update -d https://hostupdate.vmware.com/software/VUM/PRODUCTION/main/vmw-depot-index.xml -p ESXi-8.0U1c-22088125-standard.--no-hardware-warningWhen the update is successful, you will see this message
The update completed successfully, but the system needs to be rebooted for the changes to be effective.You can also reboot the host from the web GUI. After the reboot, you should notice the new ESXi version number in the Web GUI. Please don’t forget to exit the host from the maintenance mode and also stop the ssh service. The ssh service should never run when you don’t need it. VMware will also indicate a warning in the GUI when the ssh service is running.
Step 1
Download the ESXi Upgrade file called Offline Bundle from the VMware Portal. You need to have a valid Vmware login. I find the files are not easy to find. Here is the direct download link to VMware vSphere. The ESXi hypervisor is what you are looking for. There isn’t a difference between the Hypervisor Edition and ESXi. It is the same file.
Step 2
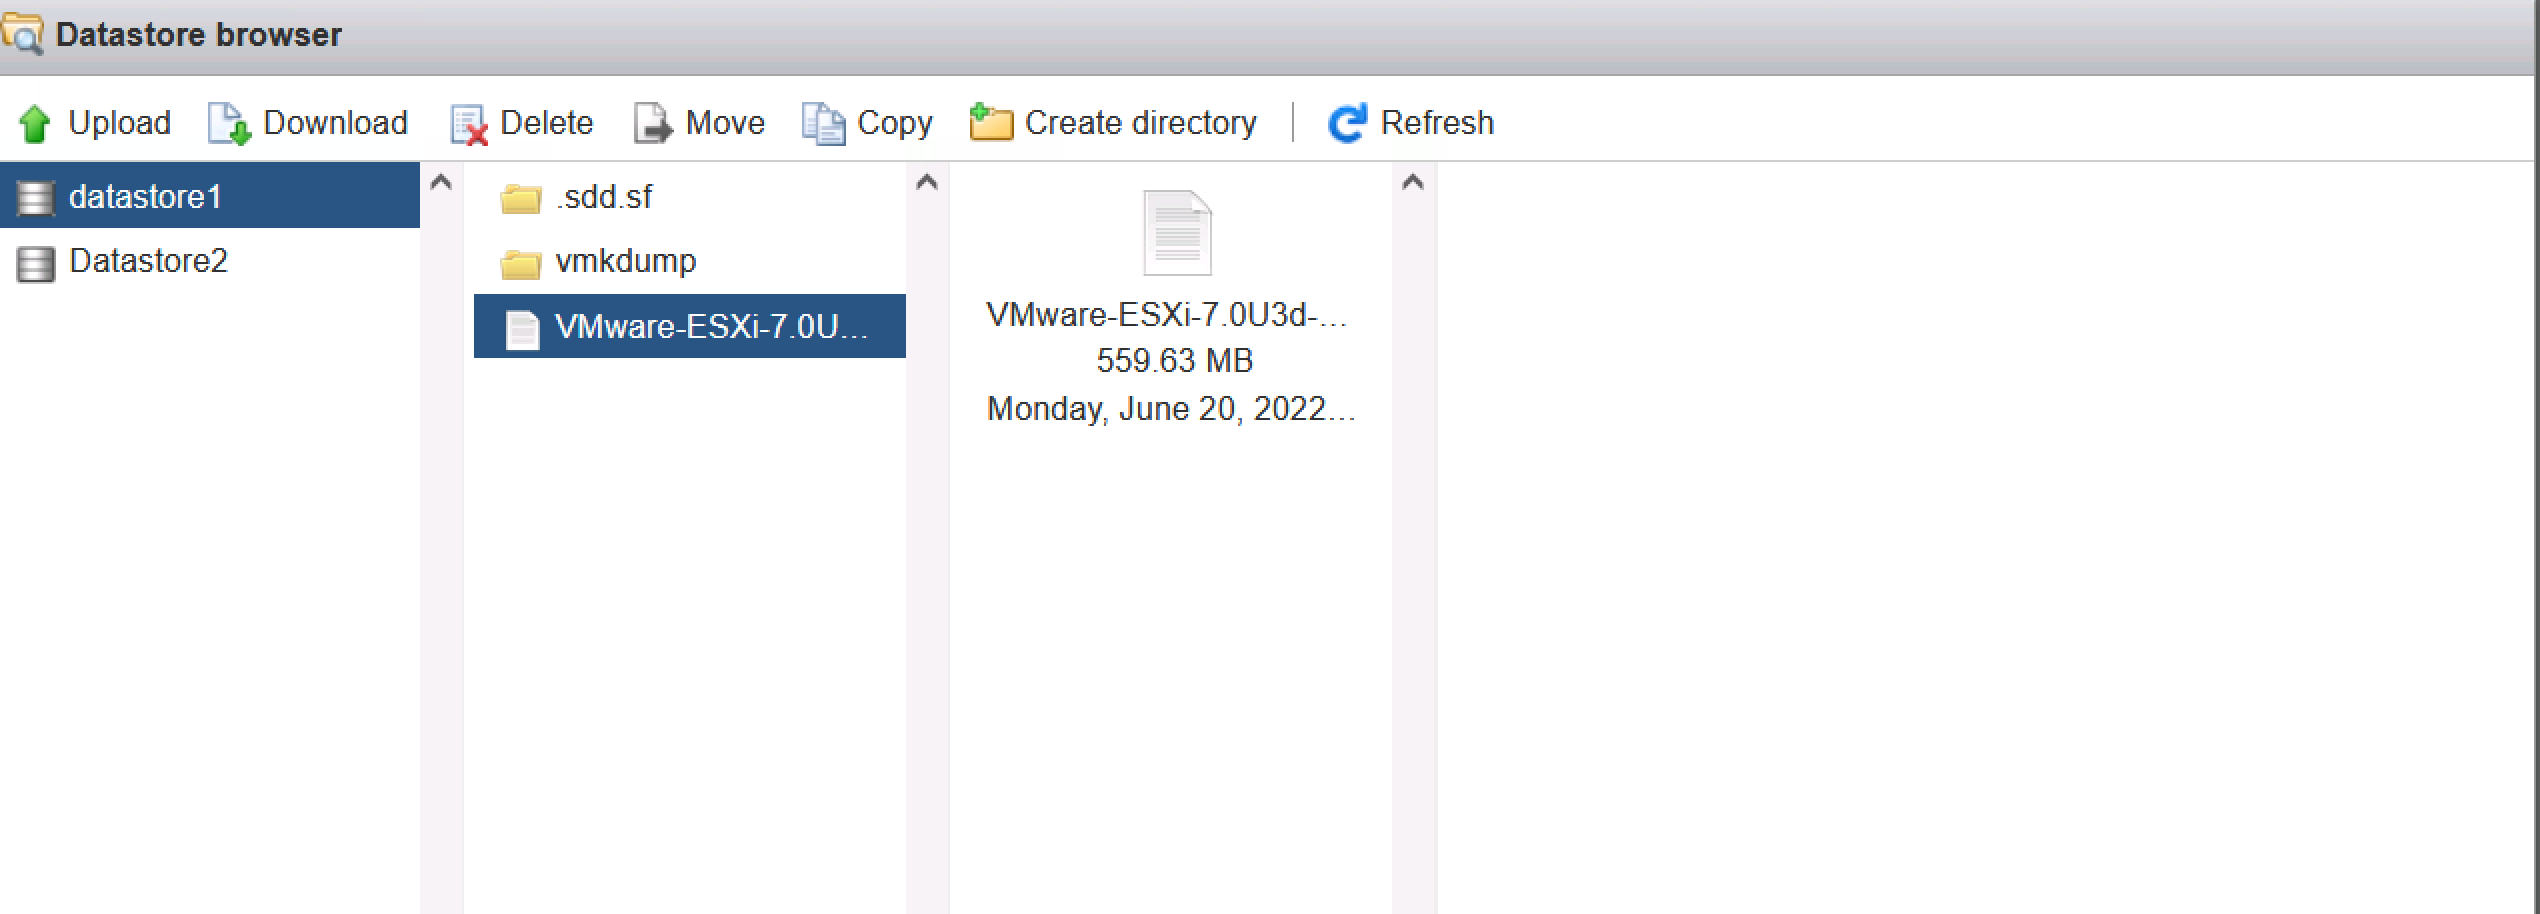
Upload the zip file to your ESXi host. There are two ways: use the web browser or an SCP client like WinSCP. I prefer the web browser method.
Step 3
Put the host in maintenance mode. The easiest way is to use the web browser. Right-click the host and choose ‘enter maintenance mode’. Before that, you need to move all VMs to another host or shut down all VMs.
Step 4
Now, it is time to SSH into the host for the upgrade process using the command line. I use Putty (Windows) or Termius (MAC) as my go-to ssh client.
By default, ssh is disabled on ESXi hosts. You need to start the service using the web GUI.
Step 5
It is also possible to put the host in maintenance mode using ssh; below is the command
esxcli system maintenanceMode set –enable true.We need to locate the uploaded zip file in step 2 to identify the correct path naming. Type
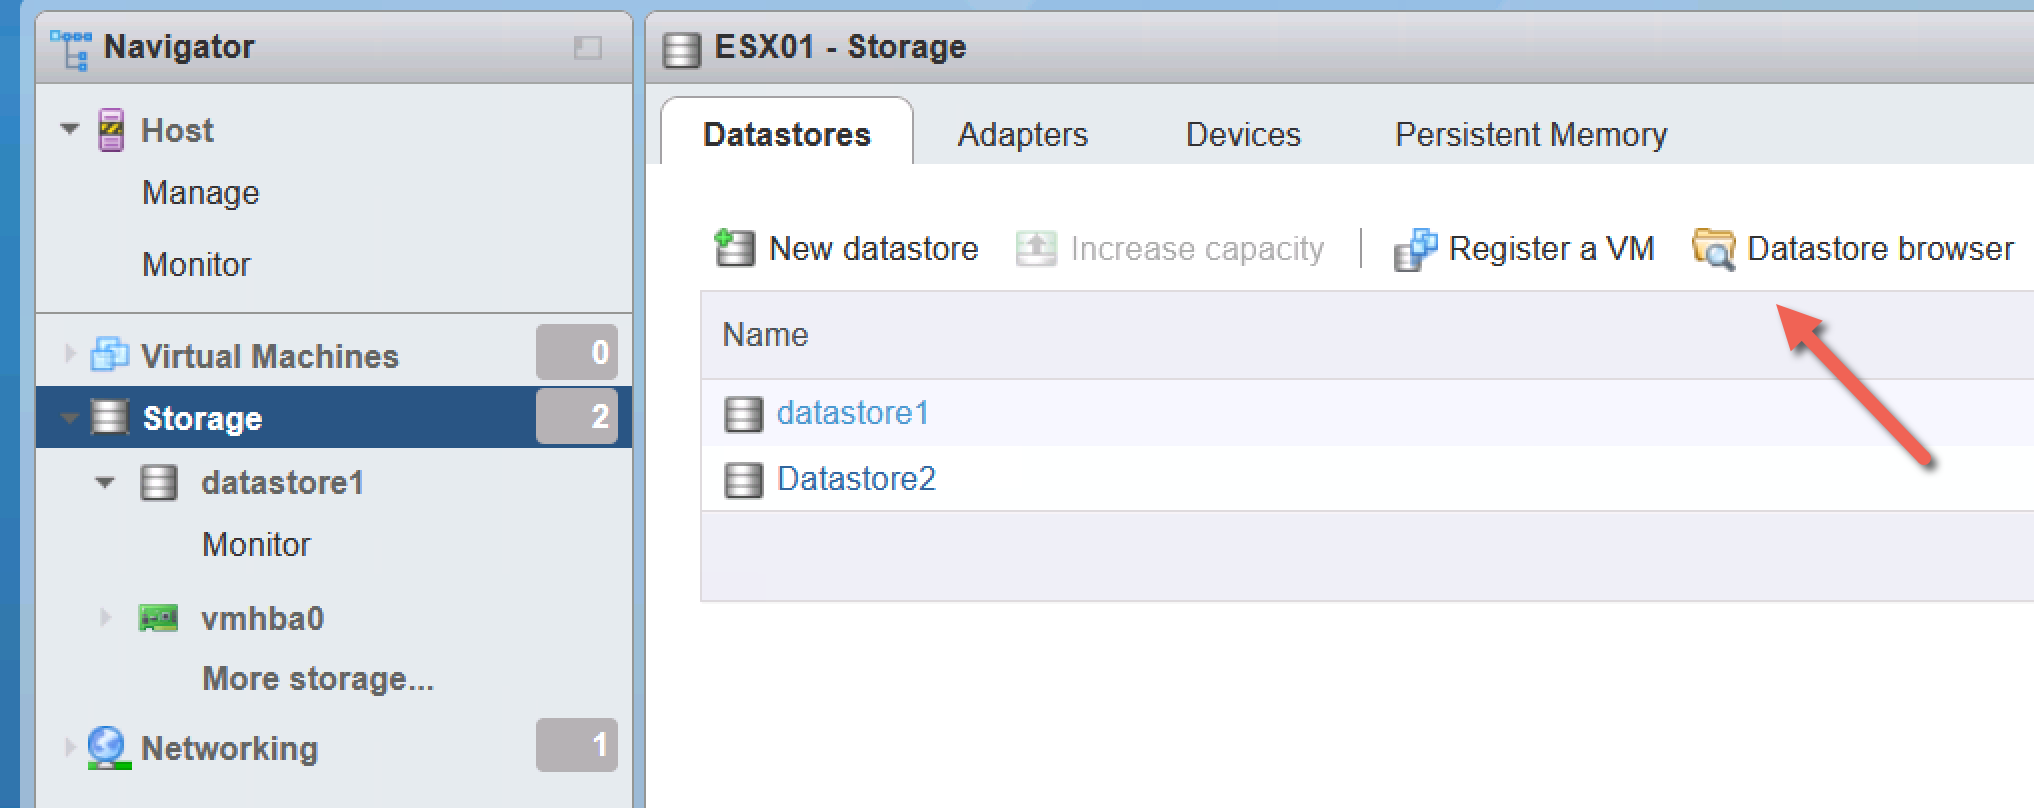
cd /vmfs/volumesThis is the location where ESXi stores the datastores.
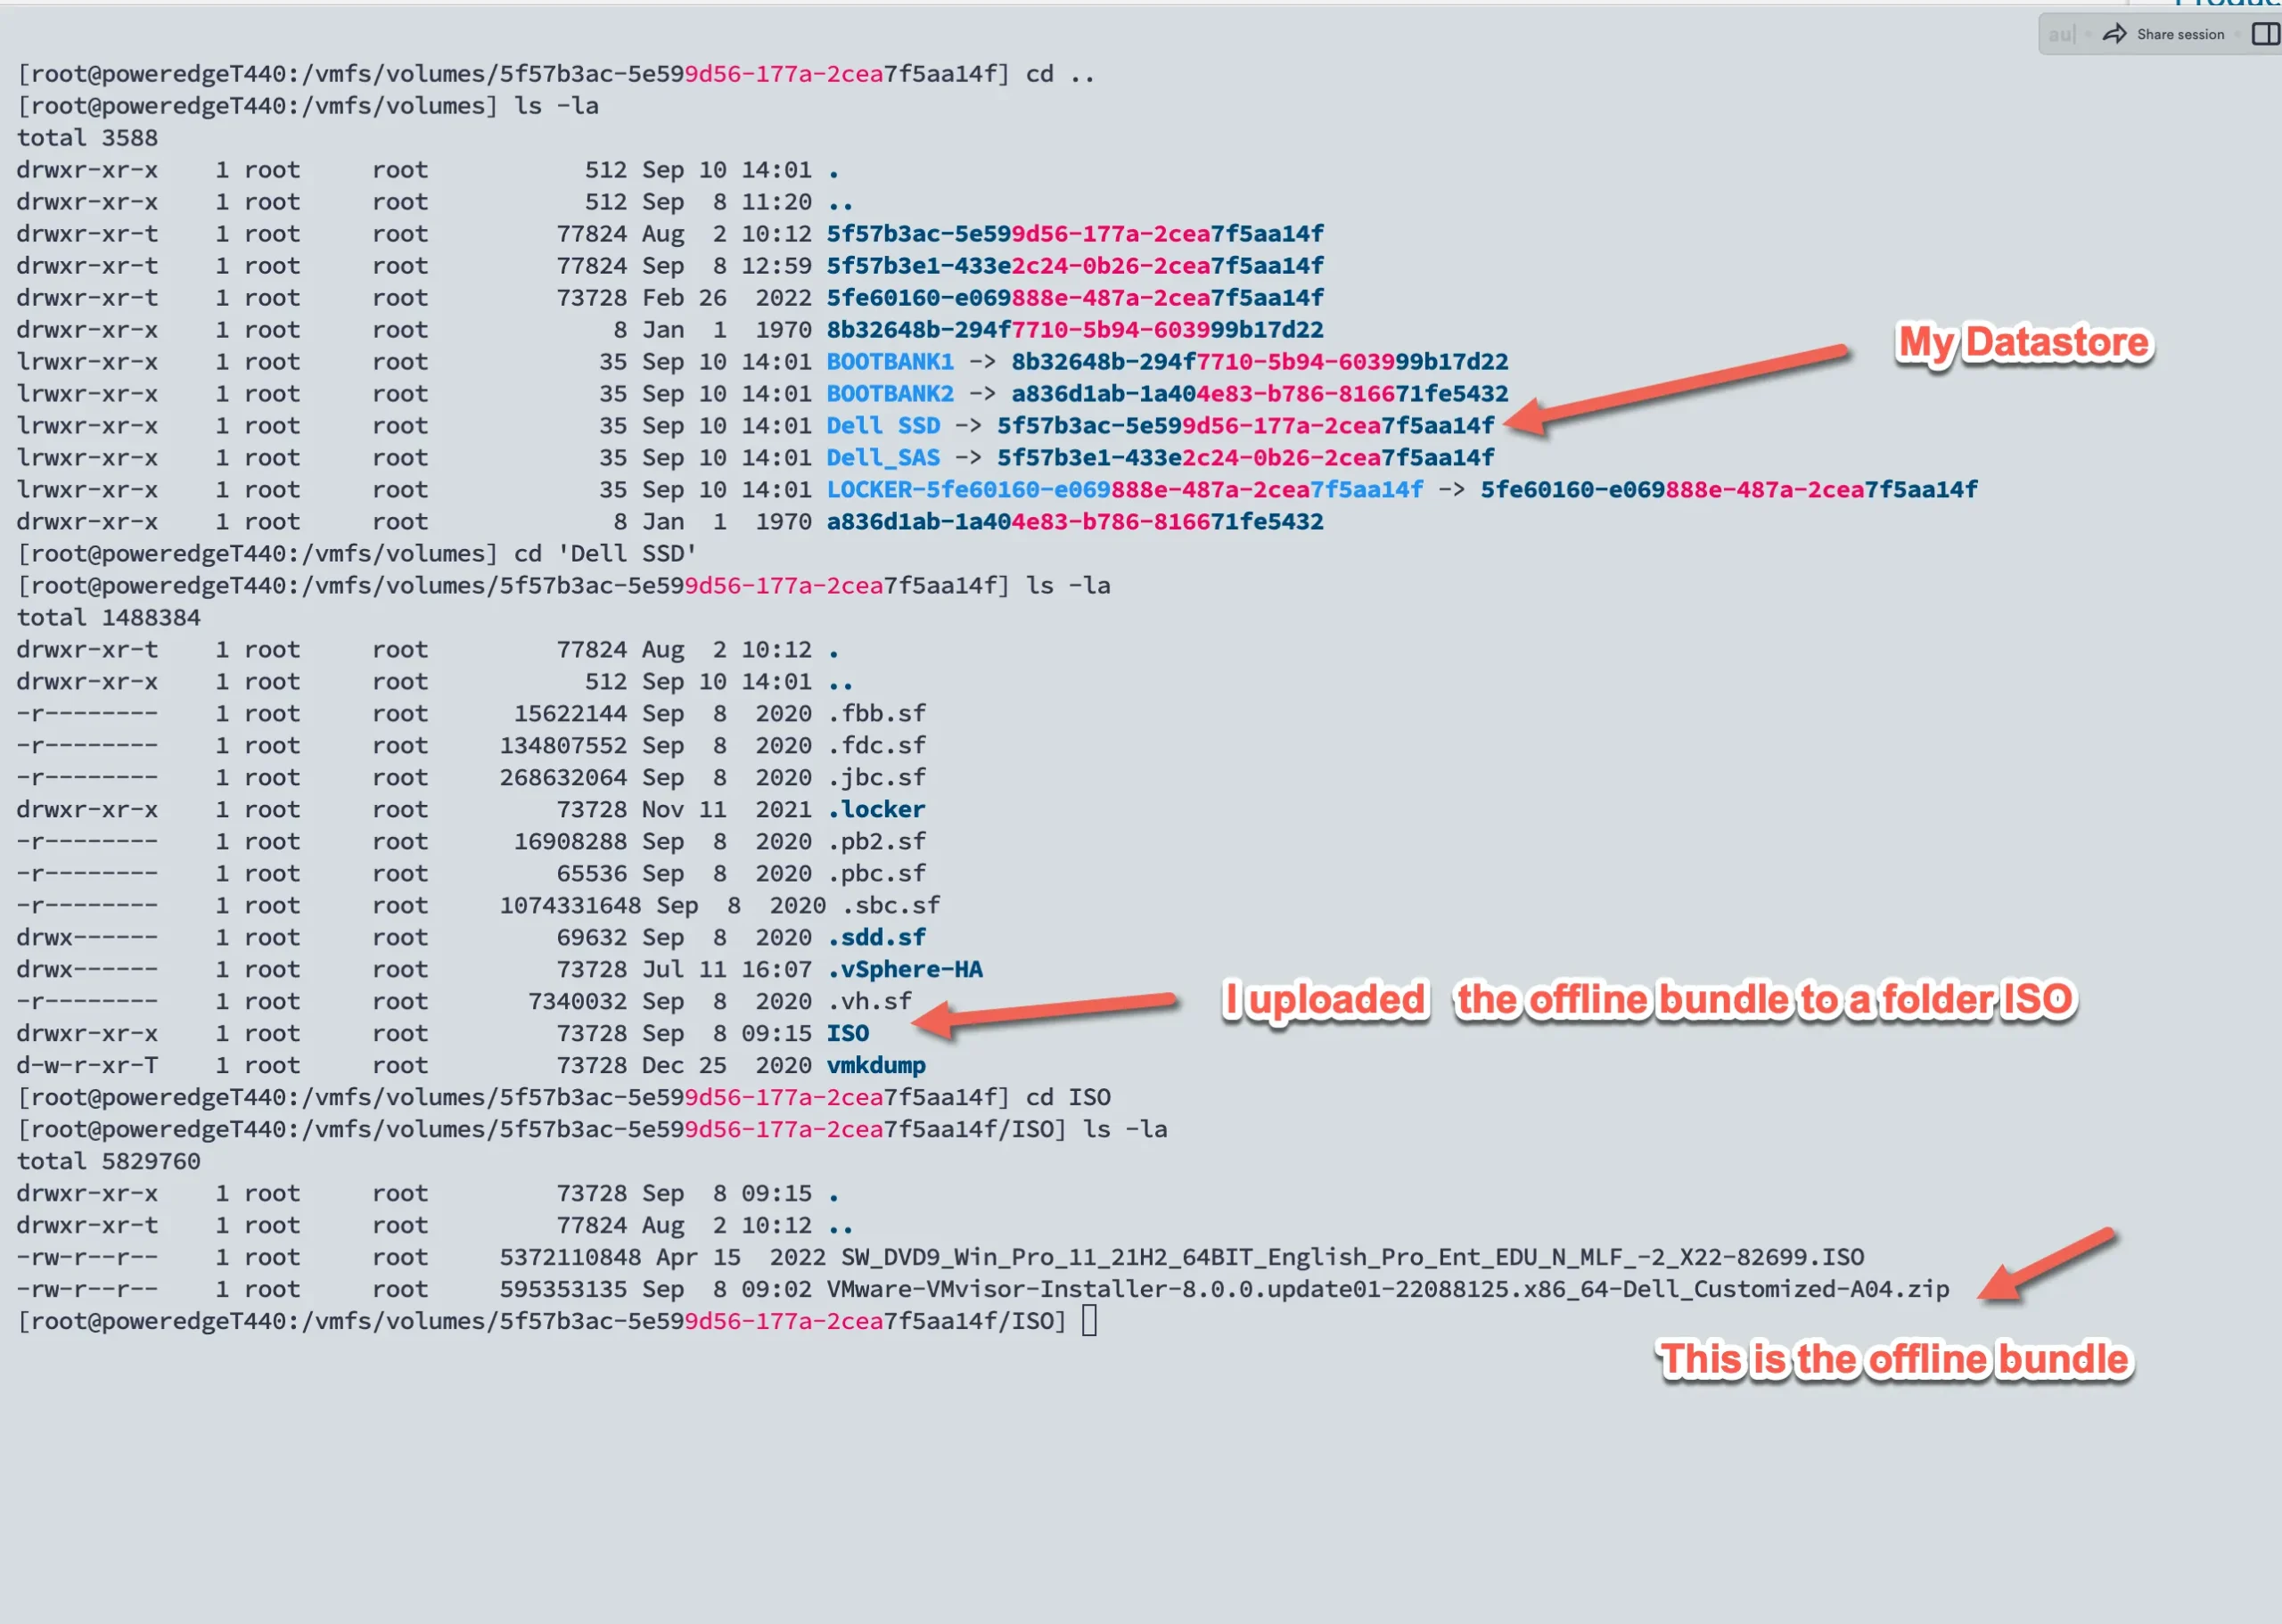
In the picture above, you can find the ESXi Offline Bundle. In my case, I uploaded the ZIP file to the datastore ‘Dell SSD’ and to my folder ‘ISO.’
Now it’s time to upgrade ESXi with the below command. Please note to use the full path name and not symlinks like ‘Dell SSD’
In my case, the full path name to the ZIP file is
/vmfs/volumes/5f57b3ac-5e599d56-177a-2cea7f5aa14f/ISOand here is the command for the upgrade installation
esxcli software vib install -d /vmfs/volumes/5f57b3ac-5e599d56-177a-2cea7f5aa14f/ISO/VMware-VMvisor-Installer-8.0.0.update01-22088125.x86_64-Dell_Customized-A04.zipThe update completed successfully, but the system needs to be rebooted for the changes to be effective.You may also get a long list of VIb files installed. These are drivers. As long as you see the above message you are fine.
Step 6 (last step)
Reboot the host using this command
rebootDon’t forget to stop the SSH service in ESXi GUI or Vcenter
What are the Vmware update methods other than from the command line?
Yes, there are a few alternative methods for upgrading an ESXi host. One is to use the ISO image, which you can download from VMware’s website. You can then create a USB boot drive and directly boot the host from the USB stick. You need to have physical access to the server. As mentioned above, this is sometimes not even an option for upgrading the ESXi host.
Another method is to upgrade your host using vSphere Lifecycle Manager (previously vSphere Update Manager). This requires VMware Vcenter. However, this is not an option if you have only the Essential Kit licensed.
What are the benefits of upgrading an ESXi host from the command line?
Some benefits of upgrading an ESXi host from the command line include automating the process and avoiding potential GUI-related issues easily. Additionally, upgrading from the command line can be faster and more reliable than using the vSphere Client or vSphere Web Client.
- There is no need to shut down the host first
- No physical presence is required
- easier management
- enhanced security
My pick

WordPress on Synology
How to install and run
FAQ
I’d love to hear from you — was this article helpful? Share your thoughts in the comments below. If you prefer, you can also reach me by email or connect with me on Reddit at Navigatetech.
Before you go …
I want to draw your attention to another insightful blog post of mine. If you found the information on how to upgrade ESXi host helpful, you might also be interested in a comparison I made between Proxmox and ESXi.
This post delves into their respective features, performance, and overall efficiency. Whether you’re trying to decide between the two for your homelab or looking for a more environment-friendly option, this blog post provides a comprehensive analysis that could help you make an informed decision.
About the author
Hi, I’m Edy Werder. I write hands-on guides about Proxmox, homelab servers, NAS, and WordPress, based on real setups I run and document.
No sponsors, no fluff—just real configs and results.
Enjoying the content?
