
By Edy Werder — IT Consultant & Tech Blogger
This guide is for Exchange Server administrators who need to renew SSL certificates for their organization’s email infrastructure.
Certificate renewal is a regular task you can’t ignore. When certificates expire, your users lose access to email services. Email clients throw security warnings. Mobile devices stop syncing. Your entire communication system grinds to a halt.
Starting with Exchange Server 2019 CU11, Microsoft removed certificate renewal from the Exchange Admin Center (ECP) web interface. PowerShell is now the only supported method. This might sound intimidating, but it’s actually straightforward once you know the steps.
This complete tutorial walks you through renewing your Exchange certificate using PowerShell commands. You’ll learn to create certificate requests, work with certificate authorities, and bind your new certificate to Exchange services—all without downtime.
Who This Guide Is For:
- Exchange Server administrators managing on-premises email infrastructure
- IT professionals responsible for certificate management and security compliance
- System administrators who need to renew certificates before expiration
- MSPs (Managed Service Providers) handling Exchange servers for multiple clients
Who This Guide Is NOT For:
If you’re running Exchange Online (Microsoft 365), you don’t need this guide. Microsoft handles all certificate management automatically for cloud-based Exchange. This tutorial is specifically designed for administrators of on-premises Exchange Server 2019 (CU11 or later).
My certificate authority provider, ssls.com will only issue a certificate for one year, but I paid for three years. If you still have the certificate request file from last year, creating a new one is unnecessary. In that case, you can skip steps 1 and 2.
Renew the Exchange certificate with Exchange management shell
Find out what the thumbprint is of the certificate you need to renew
Get-ExchangeCertificate | where {$_.Status -eq "Valid" -and $_.IsSelfSigned -eq $false} | Format-List FriendlyName,Subject,CertificateDomains,Thumbprint,NotBefore,NotAfter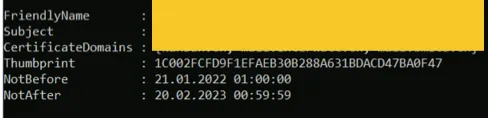
Step 2 – Create a certificate renewal request file
Create a certificate request file and save it on the local drive.
$txtrequest = Get-ExchangeCertificate -Thumbprint 1C002FCFD9F1EFAEB30B288A631BDACD47BA0F47 | New-ExchangeCertificate -GenerateRequest
[System.IO.File]::WriteAllBytes('C:CertsCert2023CertRenewal.req', [System.Text.Encoding]::Unicode.GetBytes($txtrequest))
Replace the text in blue.
You should get a CertRenewal.reg file at the location specified. Open it with Notepad, and you will see ***begin new certificate request*** has been created.
Step 3 – Buy from a certification authority
Buy an SSL certificate from your authority provider. I’m using SSLs.com for my Exchange Server 2019 certificate. As part of the process, you can choose which web server the certificate should be processed for. Choose Windows Server or IIS.
Ensure you receive a .pfx file from your authority provider. If this is impossible, convert the bundle you receive to a .pfx file containing the private key.
First, you will be asked for the CSR—CertRenewal.reg in my example—and then you will receive the private key. It is important to save it in a text file, such as Notepad. The starts with —–BEGIN PRIVATE KEY—–
Step 4 – Domain verification
The SSL authority provider will request domain verification. Usually, there are two ways: by email or TXT DNS record. It’s up to you what you choose. I like using the email verification process.
I bought a Positive SSL certificate for multiple domains. I received a for each domain a verification email. All I had to do was to visit the website specified in the verification email and paste the verification code. I bought the certificate for three domains, so I received three emails.
Usually, you cannot choose which email address you want to get the verification email sent to. In my case, some email IDs with the domain were suggested. Normally, there are hostmaster@, webmaster@, or admin@. Since I’m an Exchange administrator, I add the email address to my normal email ID as an alias. A simple solution. 🙂
After completing the verification process, you will receive an email with the certificate as a ZIP file.

- STAR.bns.legal.ca-bundle: This file contains intermediate certificates establishing the trust chain between your SSL certificate and the Certificate Authority’s root certificate.
- STAR.bns.legal.crt: This is your primary SSL certificate for the domain
- STAR.bns.legal.p7b: This PKCS#7 file typically includes the certificate chain (similar to
.crt), but it doesn’t include the private key.
Since these files don’t include the private key, you’ll need to use the private key you used in step 3 when you created the Certificate Signing Request (CSR)
Affordable Renewed Servers for Virtualization Enthusiasts
Enhance your virtualization experience with these budget-friendly and high-performing renewed servers.
| Brand | Model | Buy in US | Buy in UK | Kaufe in Deutschland |
|---|---|---|---|---|
| Dell | Poweredge R710 | View on Amazon | View on Amazon | Gehe zu Amazon |
| Dell | Poweredge R630 | View on Amazon | View on Amazon | Gehe zu Amazon |
| HPE | ProLiant DL360 Gen10 | View on Amazon | View on Amazon | Gehe zu Amazon |
| HPE | Proliant DL380 Gen 9 | View on Amazon | View on Amazon | Gehe zu Amazon |
| HPE | Proliant ML350 Gen10 | View on Amazon | View on Amazon | Gehe zu Amazon |
| Supermicro | E300 | View on Amazon | View on Amazon | Gehe zu Amazon |
Step 4a
If you have not received .pfx file from your certificate authority. You would need to create one with contains the private key as well. A good tool is OpenSSL for Windows, which you can download from here.
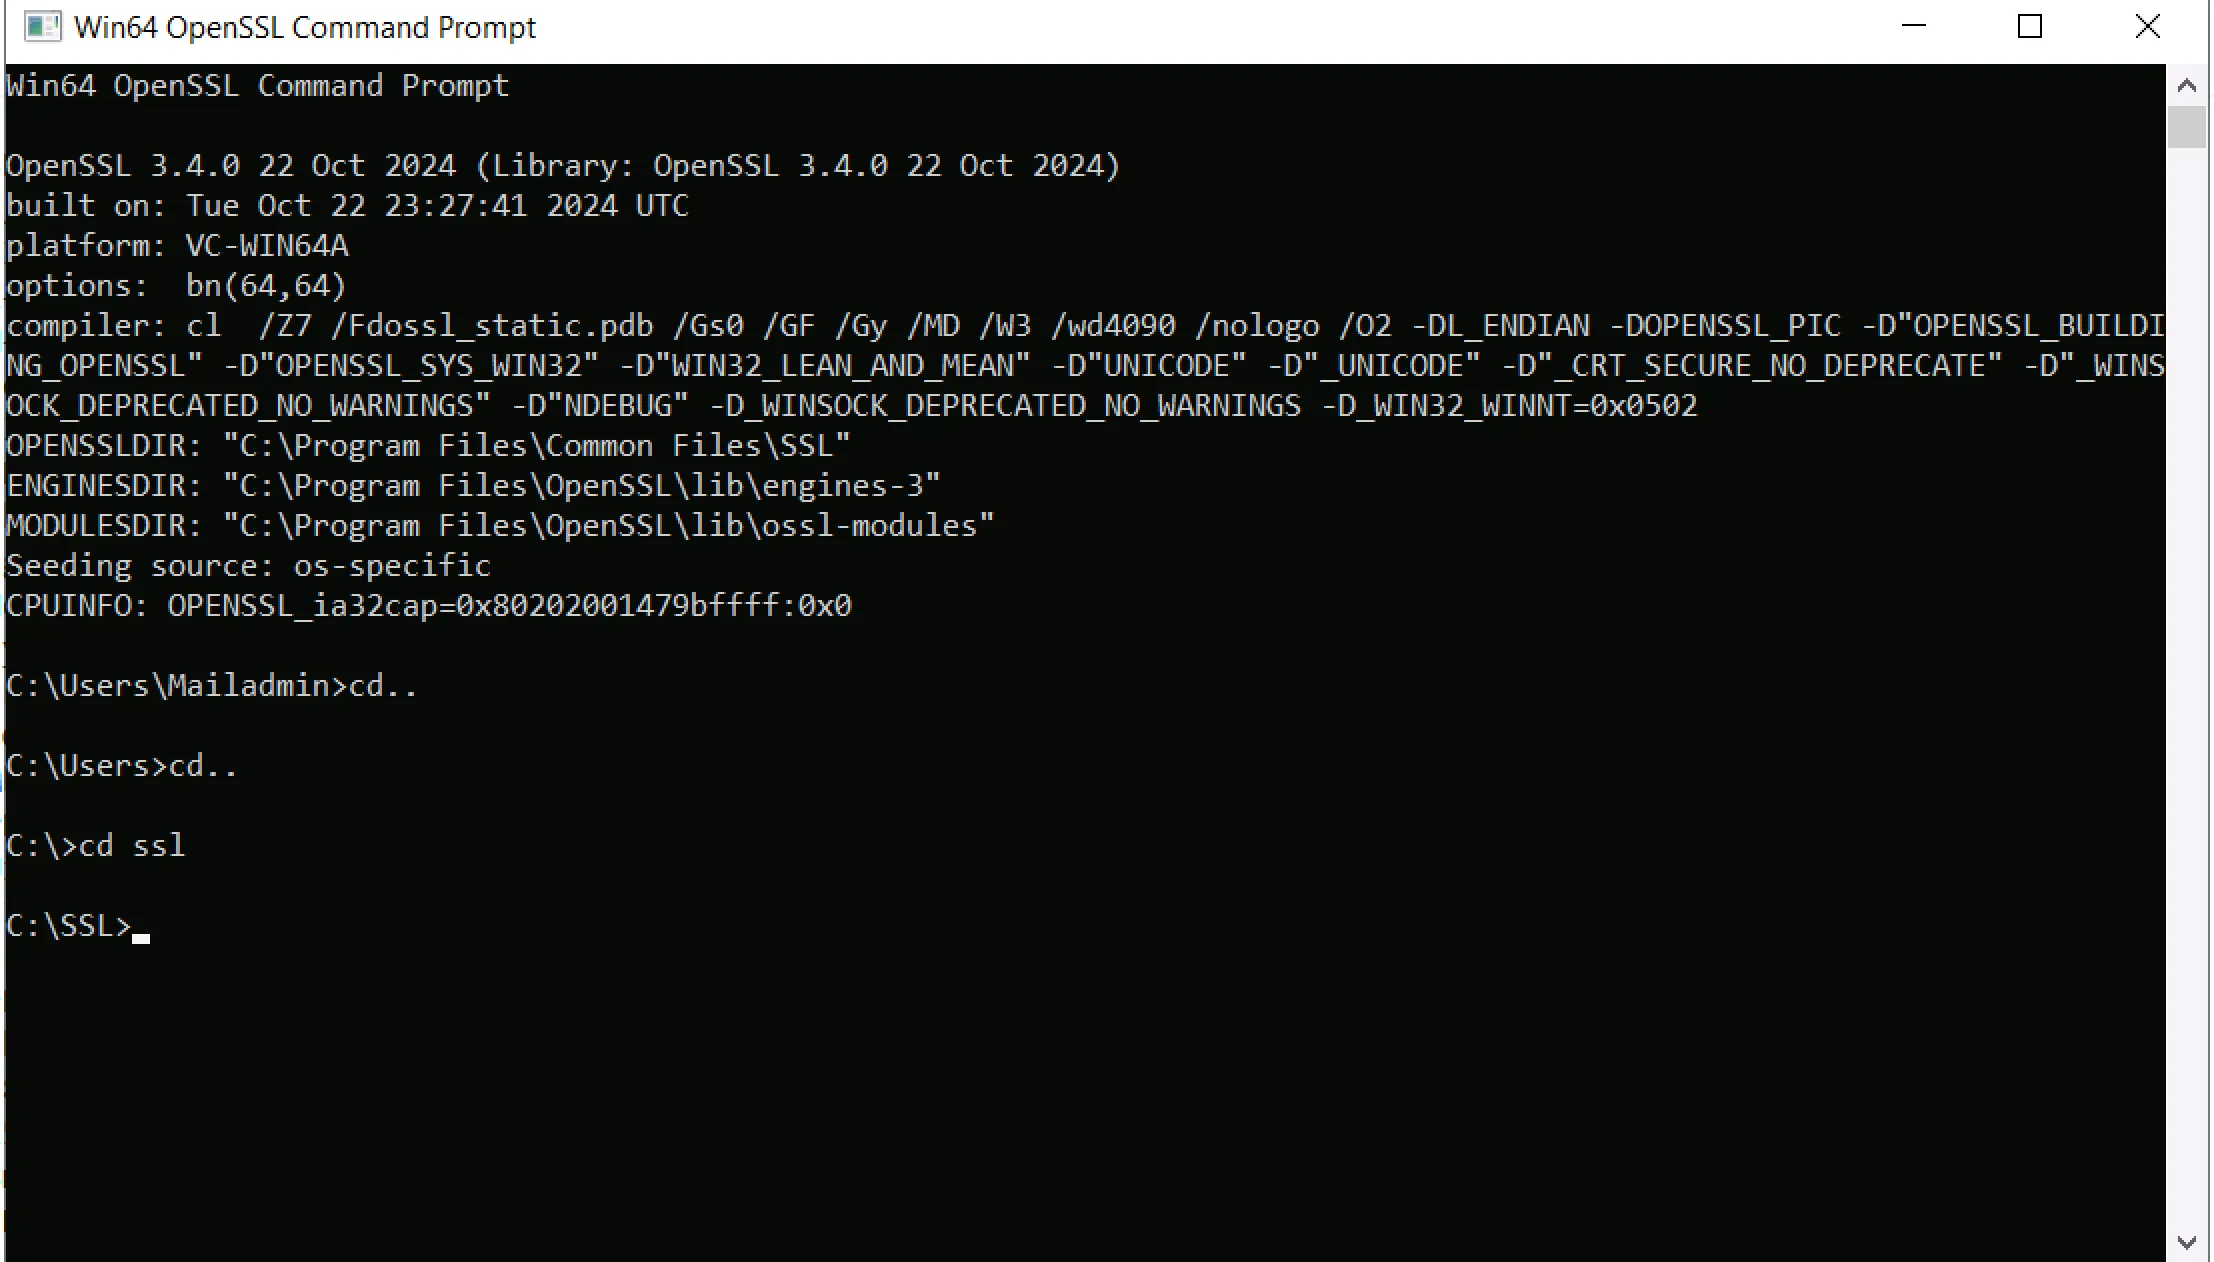
Use OpenSSL to combine your primary certificate (STAR.bns.legal.crt), the CA bundle (STAR.bns.legal.ca-bundle), and your private key
openssl pkcs12 -export -out STAR.bns.legal.pfx -inkey STAR.bns.legal.key -in STAR.bns.legal.crt -certfile STAR.bns.legal.ca-bundleMy example is Star.bns.legal.key, the private key I saved in step 3.
You will be prompted to set a password to protect the .pfx file. This password will be required when importing the .pfx file into services like IIS or Exchange.
Step 5
Copy the .PFX file to the Exchange Server. It’s time to import the certificate to the certificate store. Type ‘certmgr’ in the Windows search field and start ‘manage computer certificates

Right-click certificate under Personal, and click ‘All task’ import; Store Location is.’Local Machine’. Browse to the location where you have saved the extracted certification and import the pfx file.
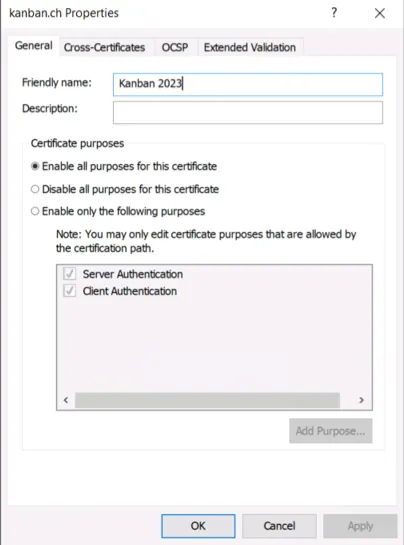
The certification should appear in the right pane. I recommend assigning a ‘friendly name’ to the certificate, but this is optional. Right-click the certificate and properties.
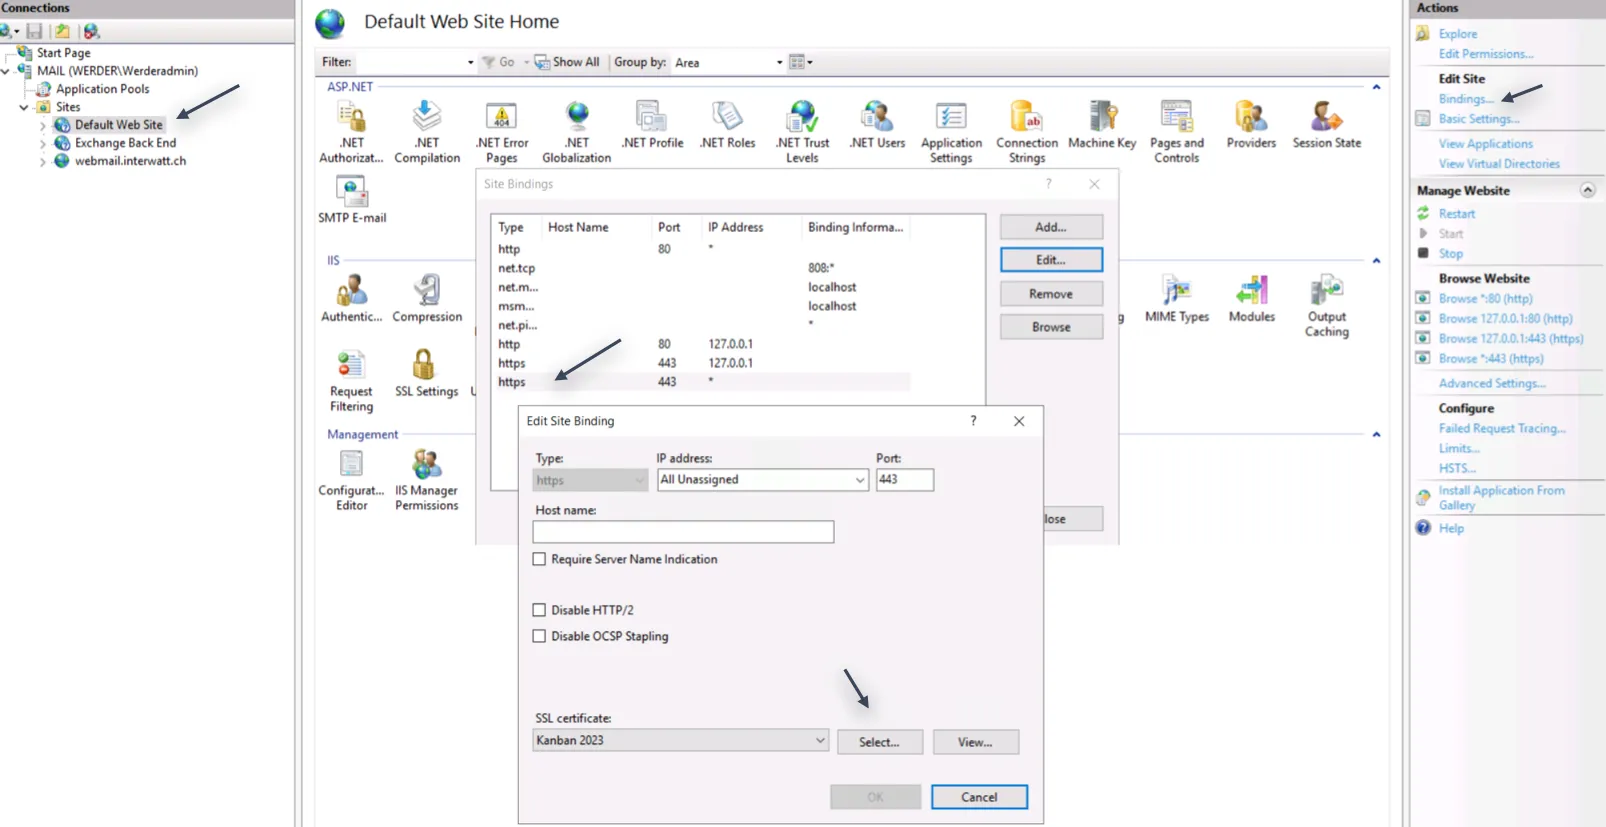
Step 6 – Bind to the default web site
Bind the new certificate to IIS
Start IIS manager, select ‘Default Web site’, Bindings
Step 7 (Last) – Import Exchange certificate and assign services
Import the .PFX files to Microsoft Exchange.
Import-ExchangeCertificate -FileData ([System.IO.File]::ReadAllBytes('C:SSL2024STAR.bns.legal.pfx')) -Password (ConvertTo-SecureString -String '1234' -AsPlainTextIn my example, I chose a simple password, “1234”
and then enable the Exchange services for the new certificate
Enable-ExchangeCertificate -Server "notos.bns.legal" -Thumbprint "use the thumprint of the certificate" -Services SMTP,IIS -ForceSMTP and IIS are, in most cases, fine unless you use IMAP and POP3, too.
Verify the assignment of the service.s
Get-ExchangeCertificate | Format-List FriendlyName, Subject, Services, Thumbprint, NotBefore, NotAfterRestart IIS and restart the ‘Microsoft Exchange Transport’ service if you can restart the server even better.
The new certificate should appear in the Exchange Admin Center (ECP) with the friendly name you gave it. It’s all done!
Many Exchange tasks are performed today by Powershell. The WebUI ECP is only for simple tasks like creating or modifying a user mailbox. See also my separate article about giving mailbox permission using PowerShell. It is much easier than visiting the user’s desk and doing it manually in Outlook.
I have created a health checklist for Exchange Server that may be useful for your work.
I’d love to hear from you — was this article helpful? Share your thoughts in the comments below. If you prefer, you can also reach me by email or connect with me on Reddit at Navigatetech.
Before you go …
If you’ve just updated your Exchange certificate as detailed in the renew Exchange certificate post, it might be a good time to consider putting your Exchange Server into maintenance mode. This precaution can help you avoid service disruptions and ensure all systems are running smoothly. Check out how to do this effectively in the Exchange Server in maintenance mode guide. This follow-up read is particularly useful for maintaining optimal server performance and security post-update.
Related Articles
About the author
Hi, I’m Edy Werder. I write hands-on guides about Proxmox, homelab servers, NAS, and WordPress, based on real setups I run and document.
No sponsors, no fluff—just real configs and results.
Enjoying the content?
