
By Edy Werder — IT Consultant & Tech Blogger
Welcome back to our journey with WordPress on Synology NAS! If you’ve been with me through my previous guide, “Step by Step Guide on How to Install and Run WordPress on Synology NAS”, you’ve successfully set up WordPress on your Synology device. But that was just the start.
Today, I’m excited to take you further into how to optimize WordPress on Synology for optimal performance. Together, we’ll explore everything from perfecting your domain settings to mastering port forwarding. I’m here to help you ensure your WordPress site isn’t just up and running and at its best. Let’s dive into unlocking the full potential of your WordPress on Synology NAS!
Register a Domain
The initial step in setting up your WordPress site on Synology NAS is essential—registering a domain name. This isn’t just a technical formality; it’s about giving your site a professional appearance and boosting its credibility. A custom domain is vital to establishing your brand’s identity.
For domain registration, I rely on Namecheap. Their competitive pricing and user-friendly interface make the process straightforward and budget-friendly. But when it comes to country-specific domains, like .ch for Switzerland, Hostpoint is my go-to registrar. They’re local and understand the nuances of the Swiss market.
A tip from my experience: try to keep your domain registrars to a maximum of two. This approach helps in better organizing and managing your domains. By centralizing them, you streamline the management process, making it much more efficient.
Also, I’m a proponent of keeping your web hosting and domain registration separate. This separation offers flexibility, especially when you need to switch hosting providers. It’s a strategy that worked well for me.
You can reach my WordPress installation with the URL https://werdernet.ch
Set Port forwarding to ports 80 and 443
In most cases, you have received a router from your Internet ISP. Most routers are capable of forwarding ports to internal devices. We want to forward ports 80 (http) and 443 (https) to the Synology device. You need to determine what your Synology IP address in your network is. I don’t recommend a dynamic IP address for the Synology NAS. In Control Panel, Network, you will see the IP address and if it’s manual or dynamic (DHCP)
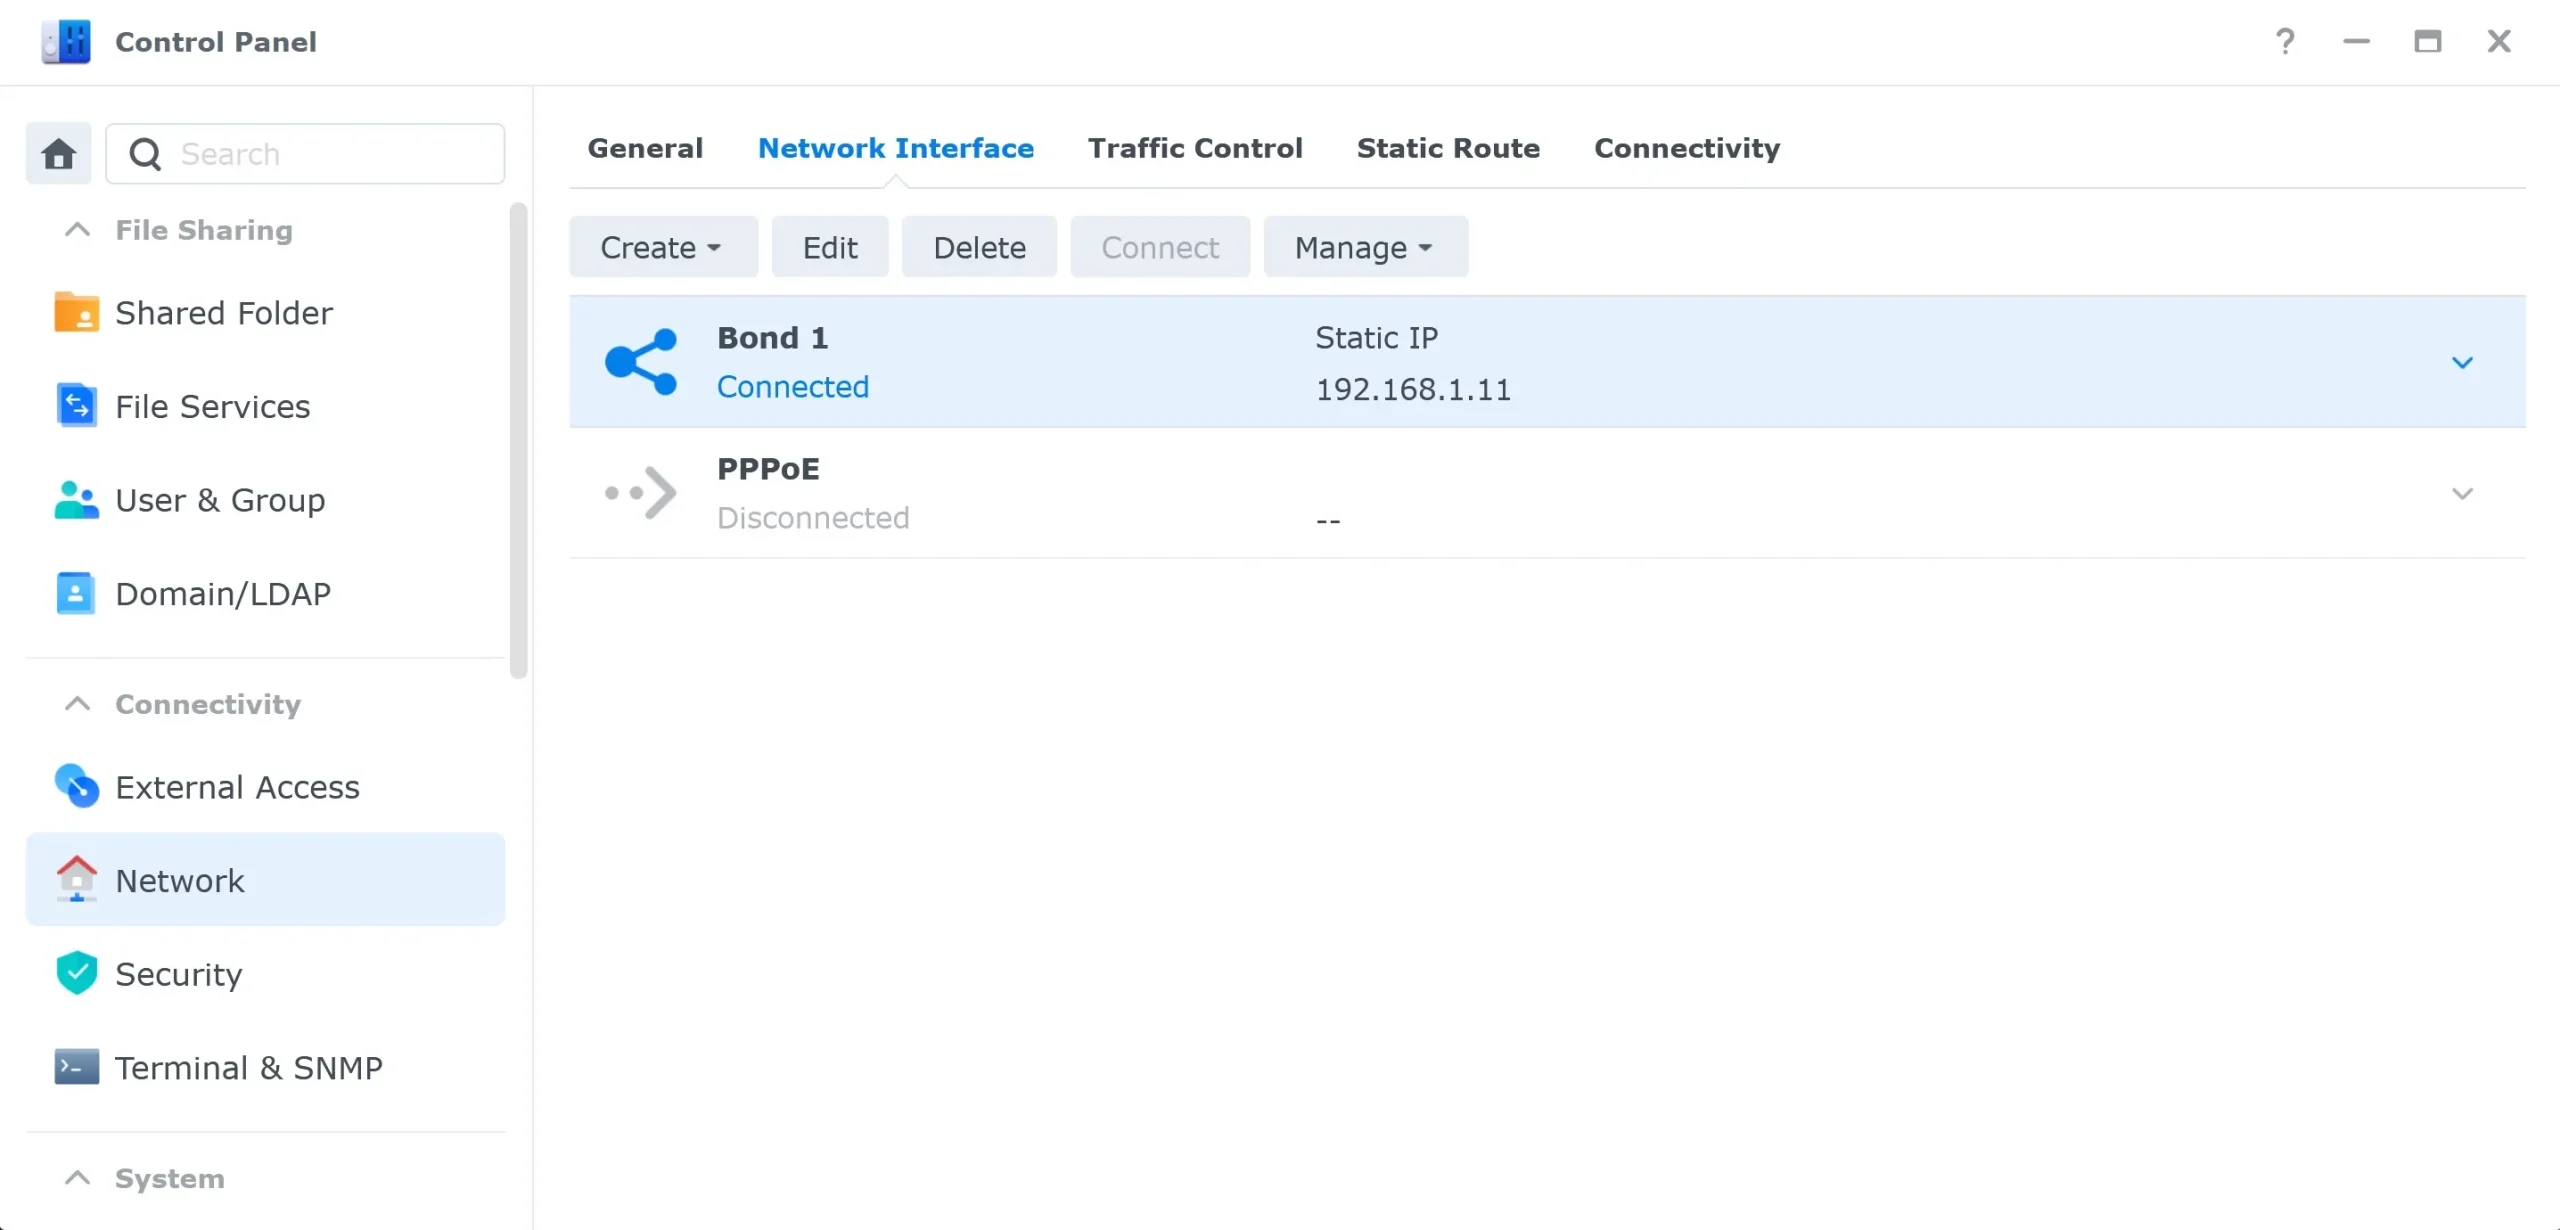
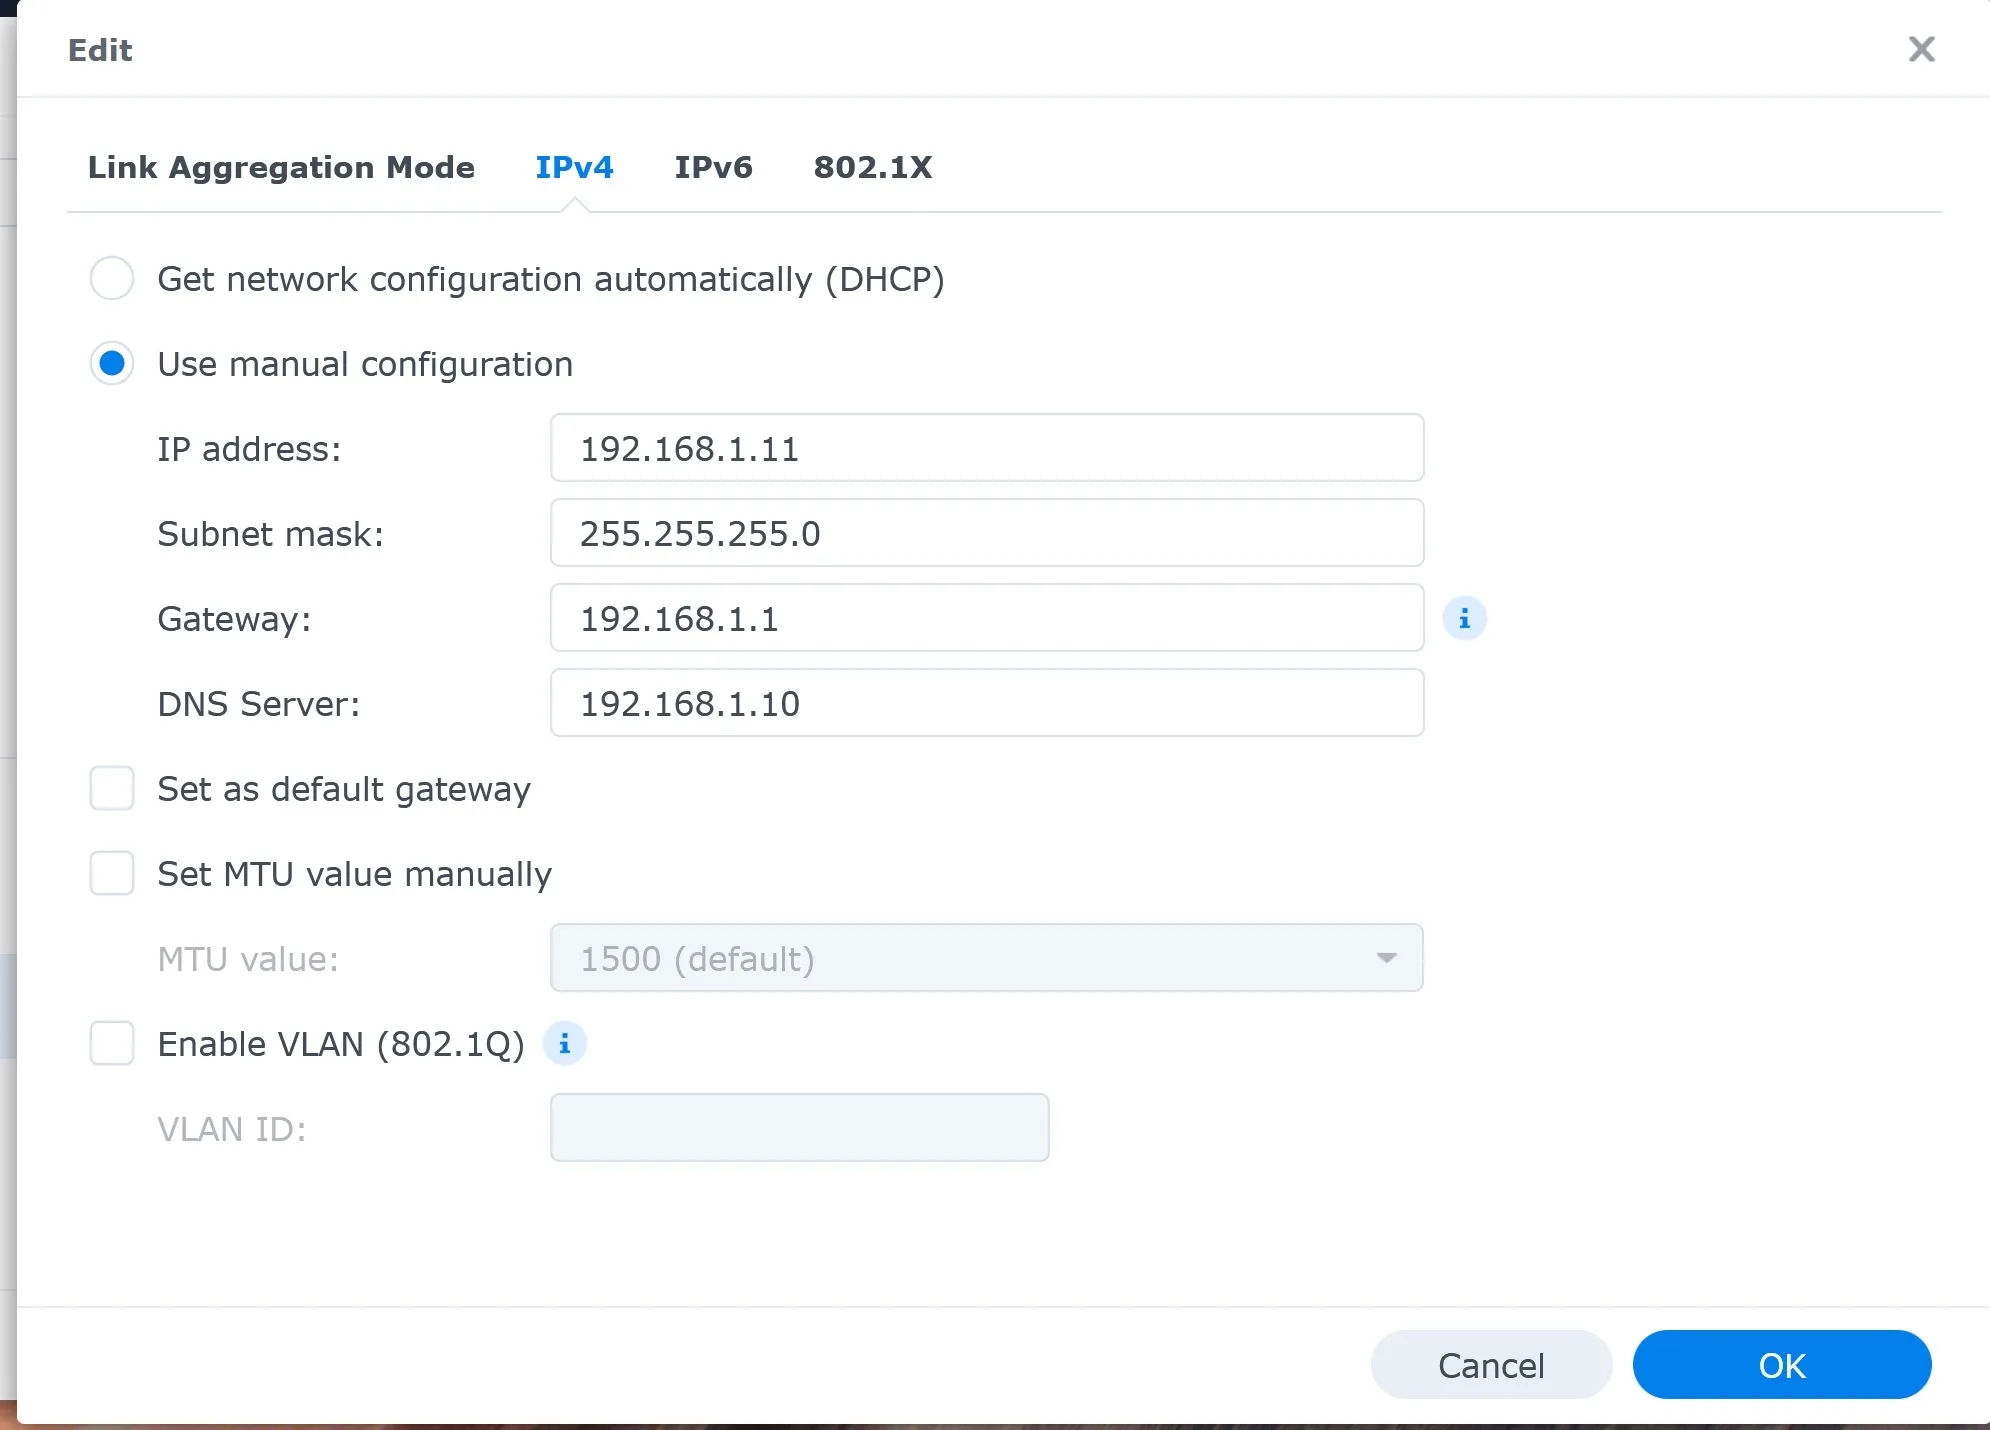
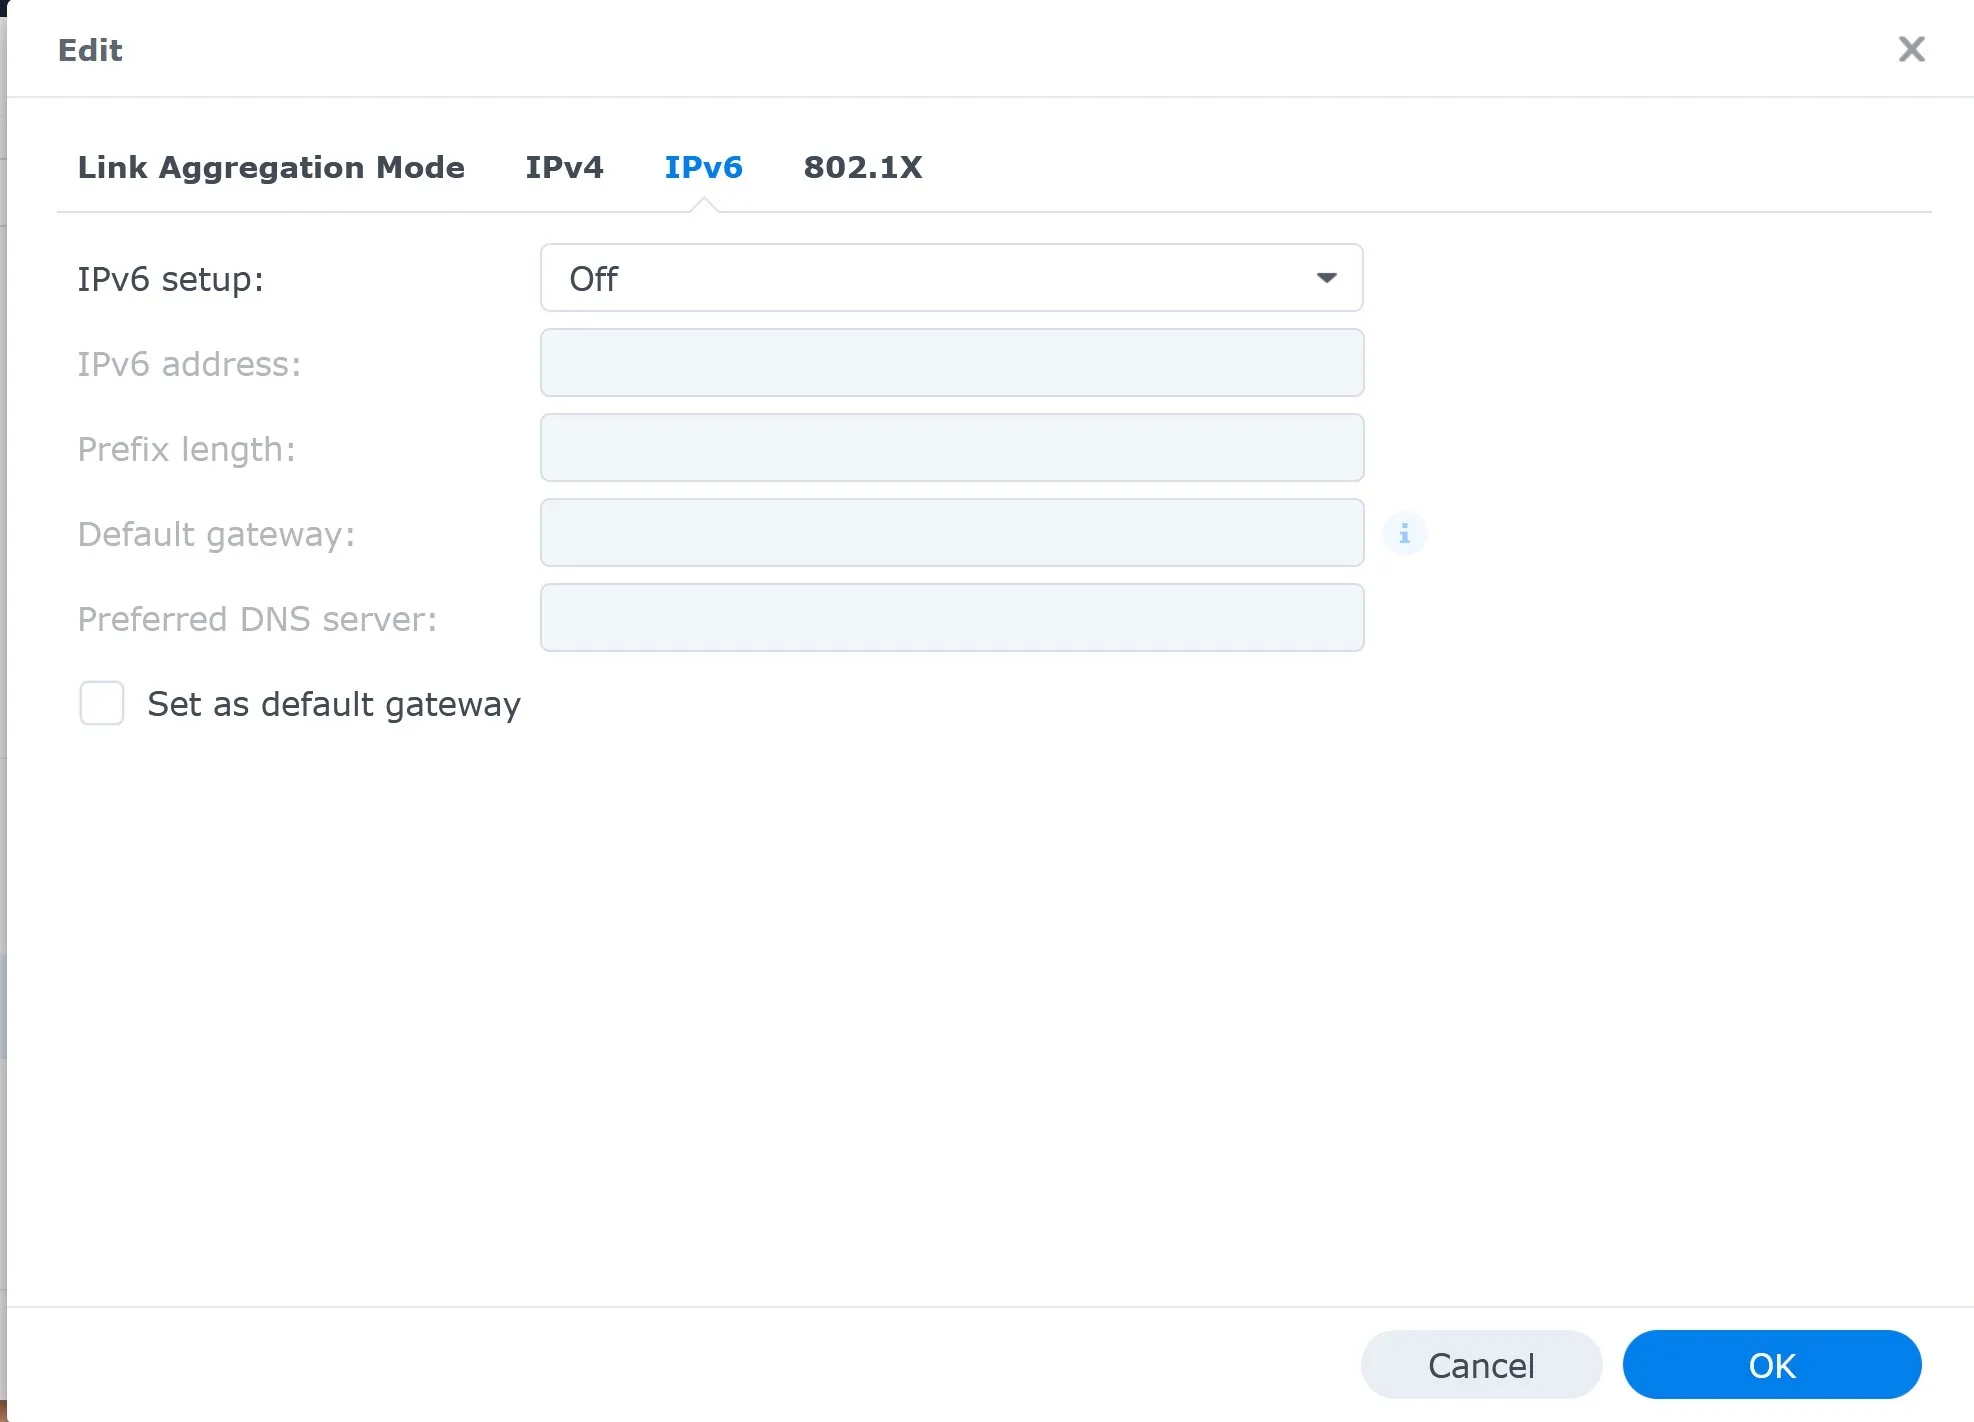
I recommend disabling the IPv6 address. There is no need to use IPv6 in the internal network. As you see, I use the 192.168.0/24 subnet.
External (Public) IP address
After setting up a domain and port forwarding, the next step is setting up your WordPress website to be accessible from the Internet. Usually, a web server has a fixed IP address, and the domain points to that IP address. However, your Internet ISP assigns a DHCP address, which is, strictly speaking, not a fixed IP address and can change without notice. You can visit this website to determine the external or public IP address.

Some ISPs will give you both IPv4 and IPv6 (dual-stack). If you have received an IPv6 address, I recommend contacting your ISP to get an IPv4 address.
The Synology NAS has built-in support for DDNS providers, which will map the IP address to the domain name. I don’t use DDNS. I use Dynu.com, which is a free service.
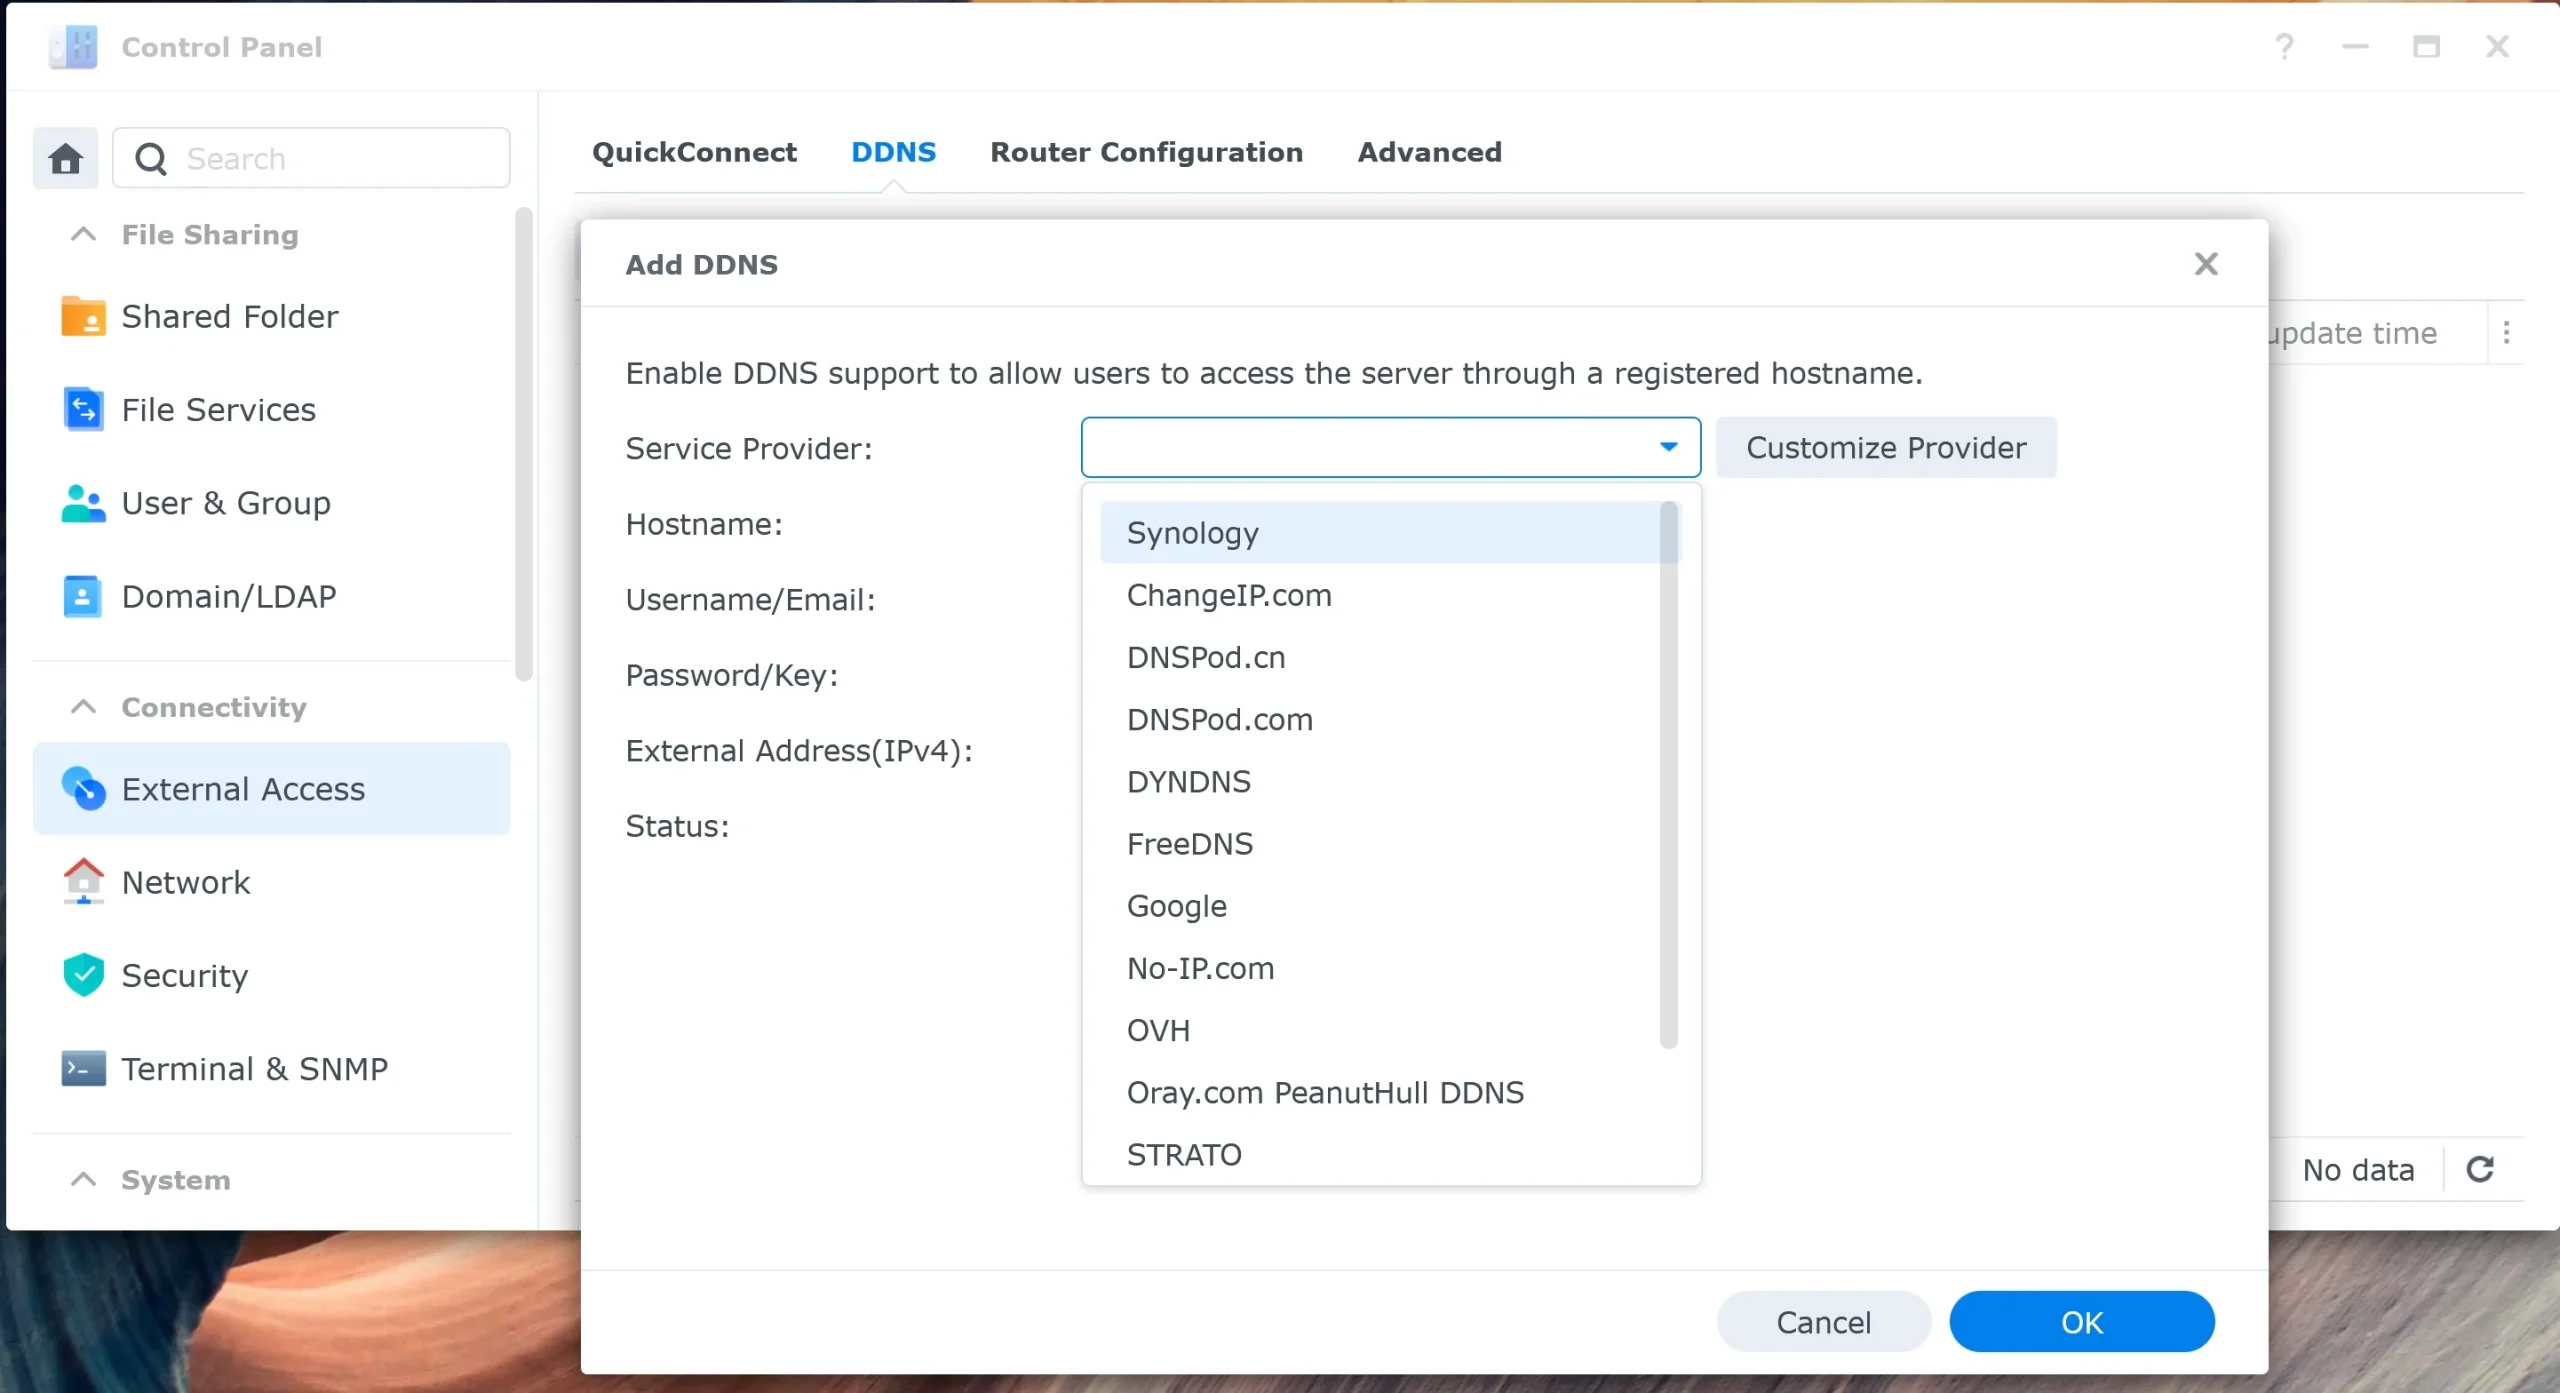
Please follow my article, Synology SSL certificate, to obtain an SSL certificate from Let’s Encrypt for Free. Synology has built-in support to install the certificate.
Synology installs WordPress in a subdirectory.
Unfortunately, the default installation of WordPress in the Synology Package Center places it in a subdirectory named ‘WordPress’, making it impossible to access the website solely through the domain URL.
Digging deeper into the issue, looking at the Web Station, we see WordPress was installed as a service, and under Web Portal, we know the web portal WordPress has an alias. I haven’t figured out yet how to redirect the root URL to the WordPress subdirectory.
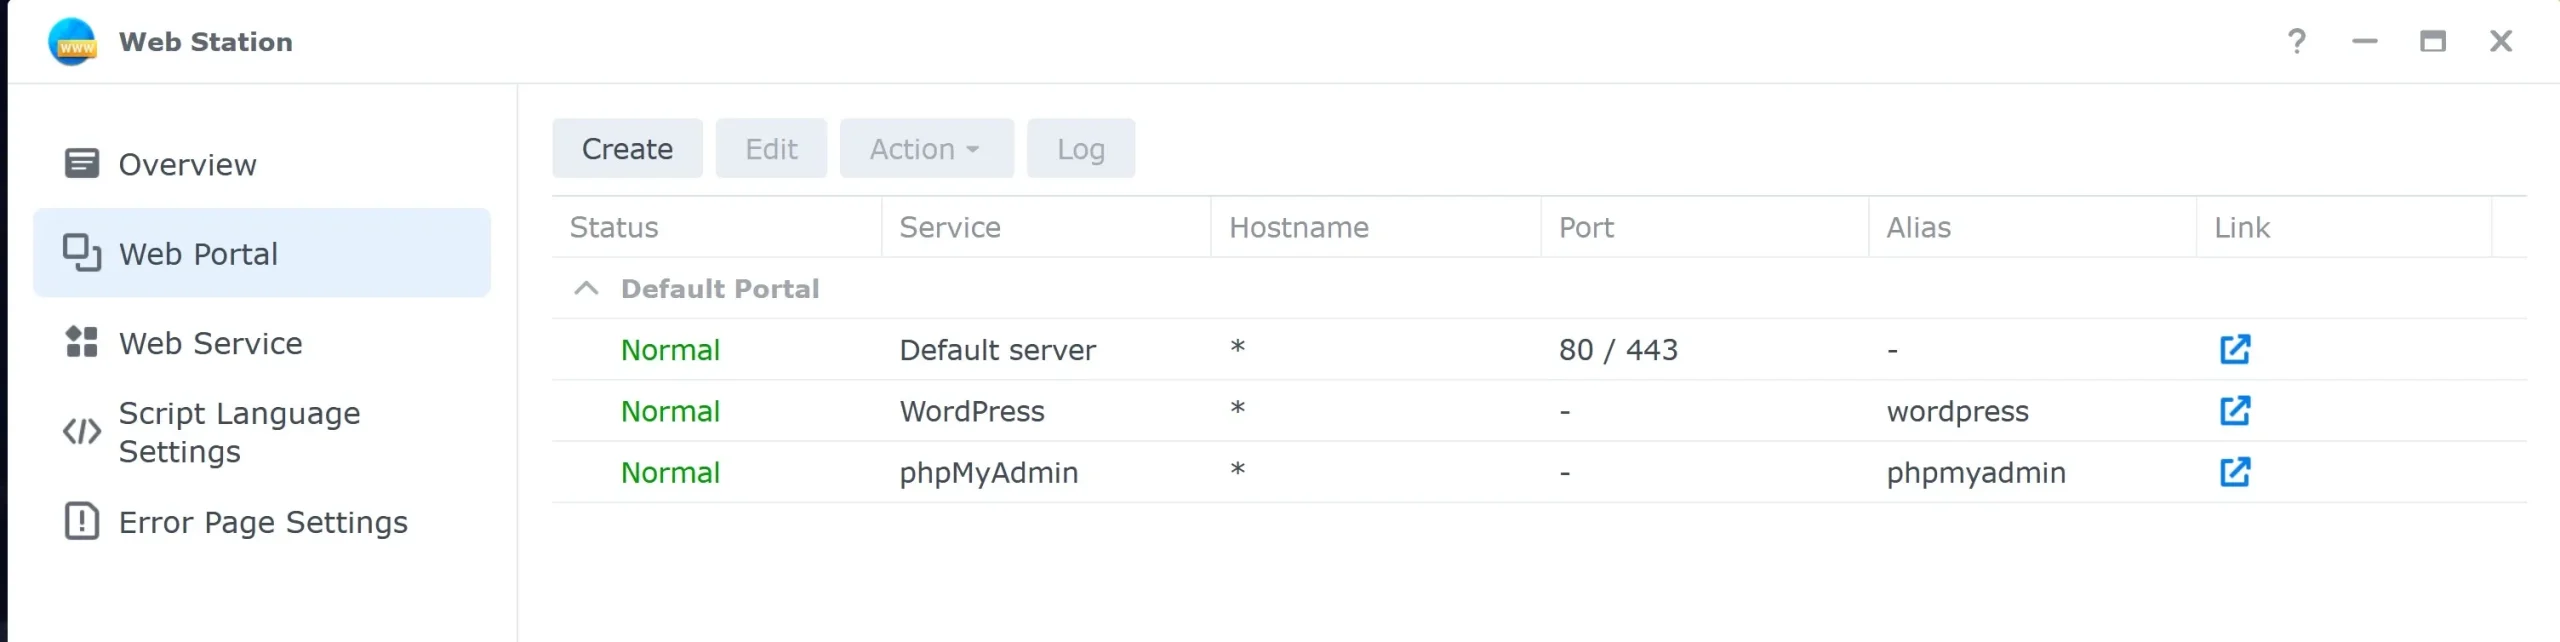
Please let me know your solution in the comment section below. Google tells me to edit the .htaccess file in the WordPress directory for the redirection, but I’m not sure it’s the solution since the Web server first needs to redirect the URL.
Edit: Credit to reader Mike for mentioning this KB article from Synology How do I change my WordPress site address?
My Synology NAS I use in my homelab


Backend: Optimize WordPress on Synology
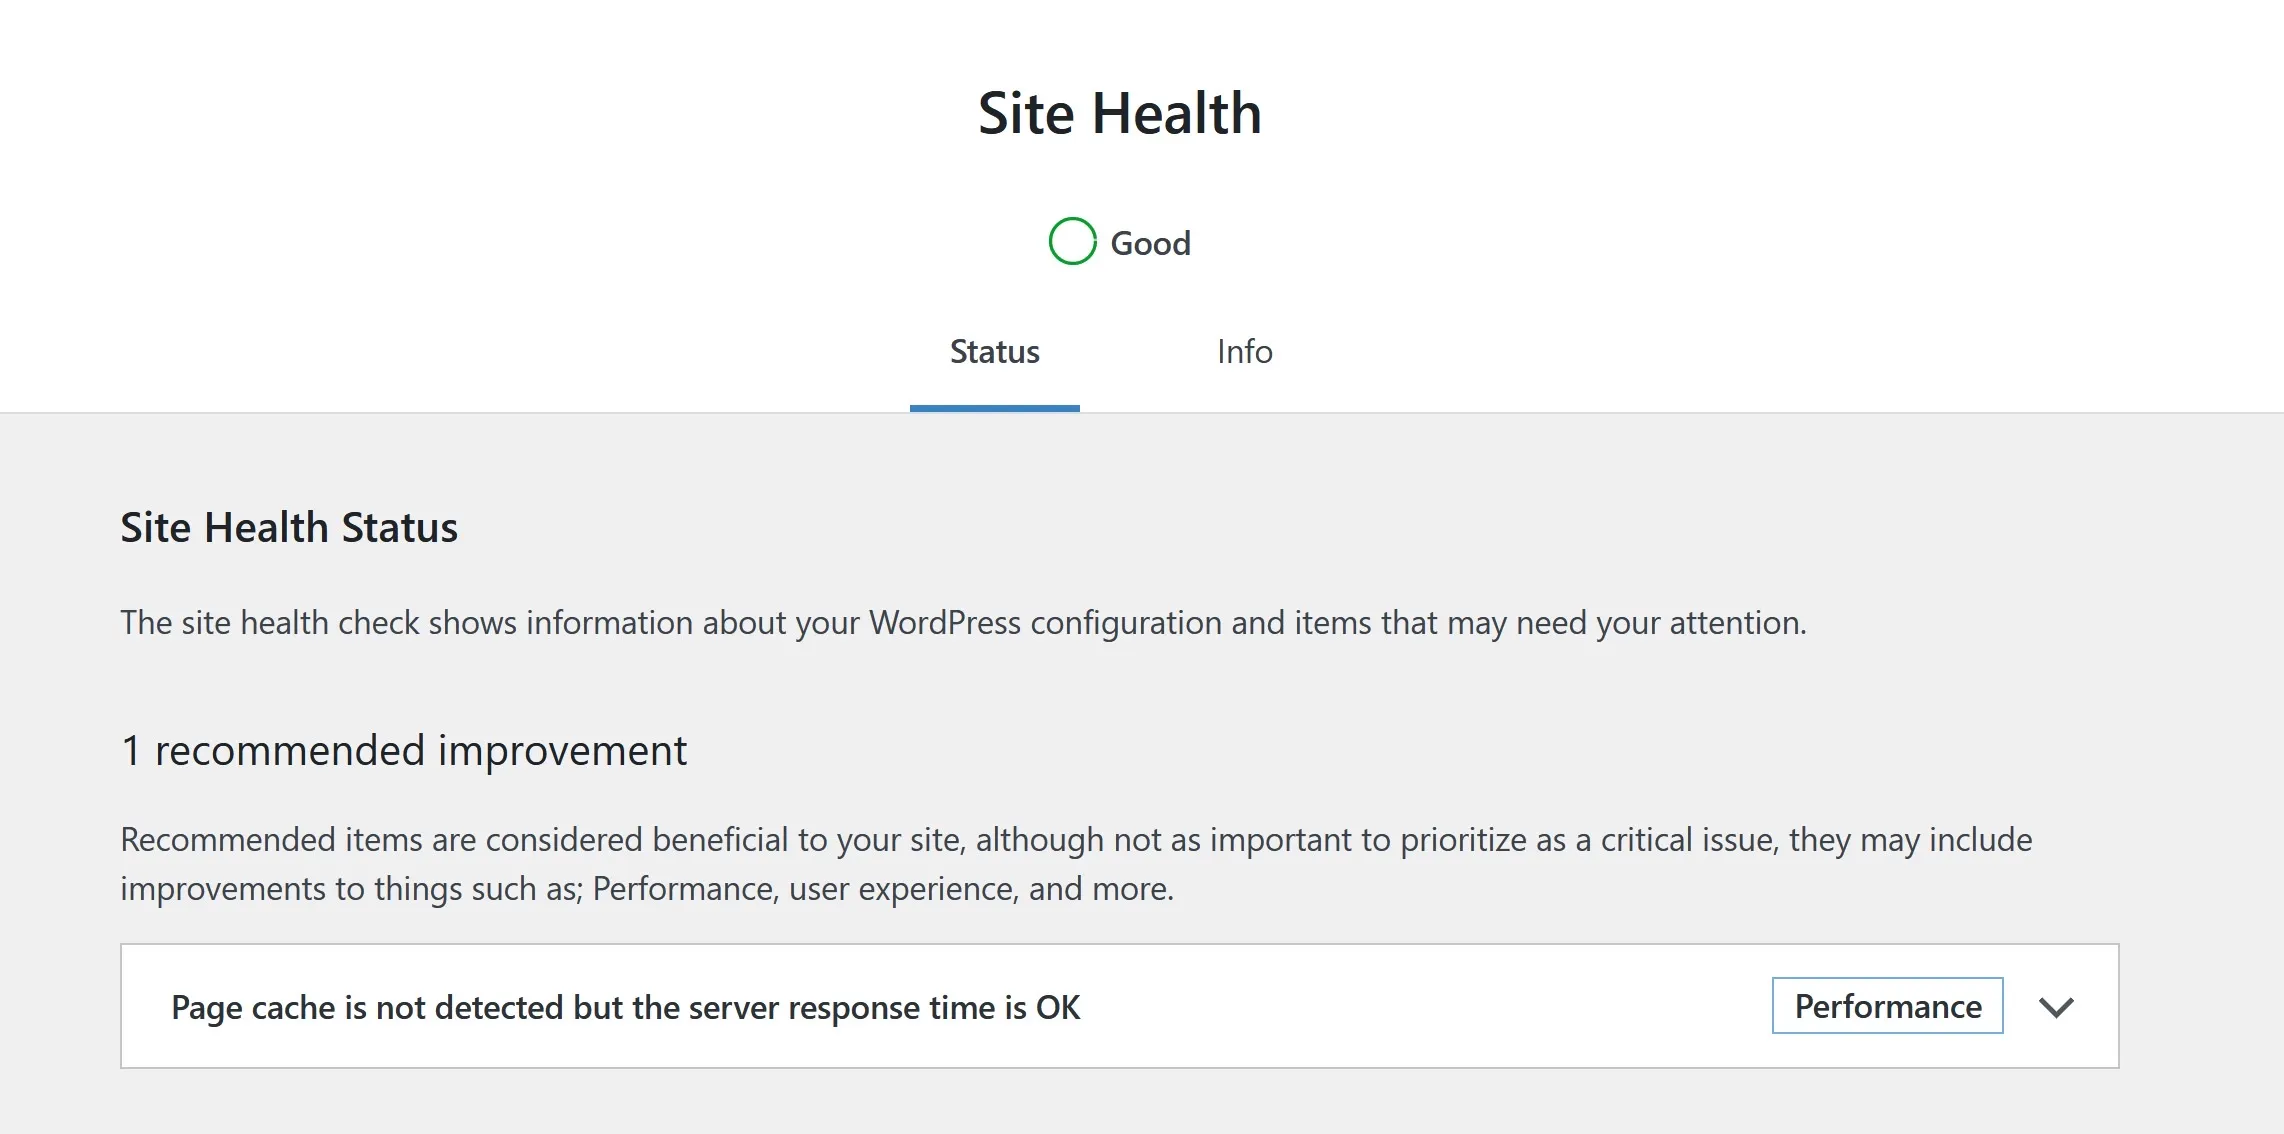
Going to the WordPress backend, under Tools, Site Health, WordPress is happy with the server response time, although no page cache is installed.
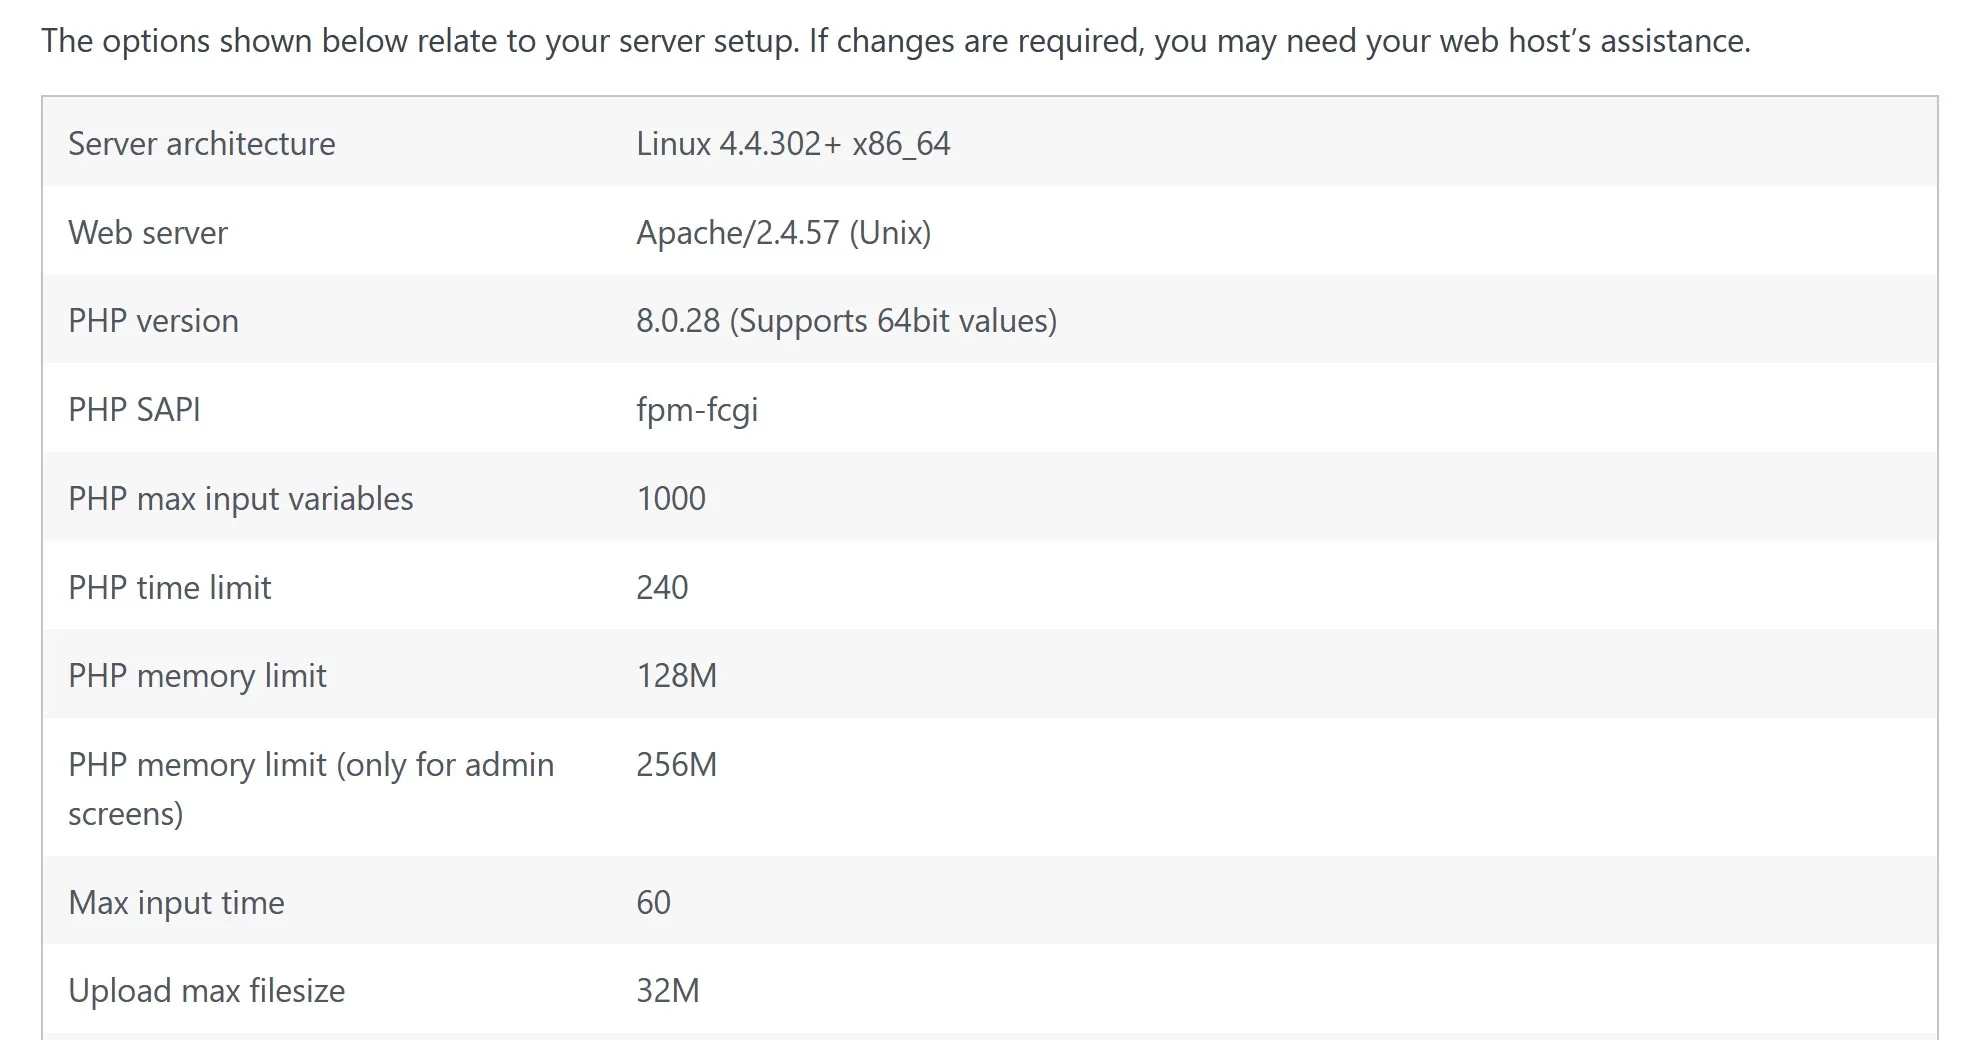
Server info shows the installed PHP version and memory allocation.
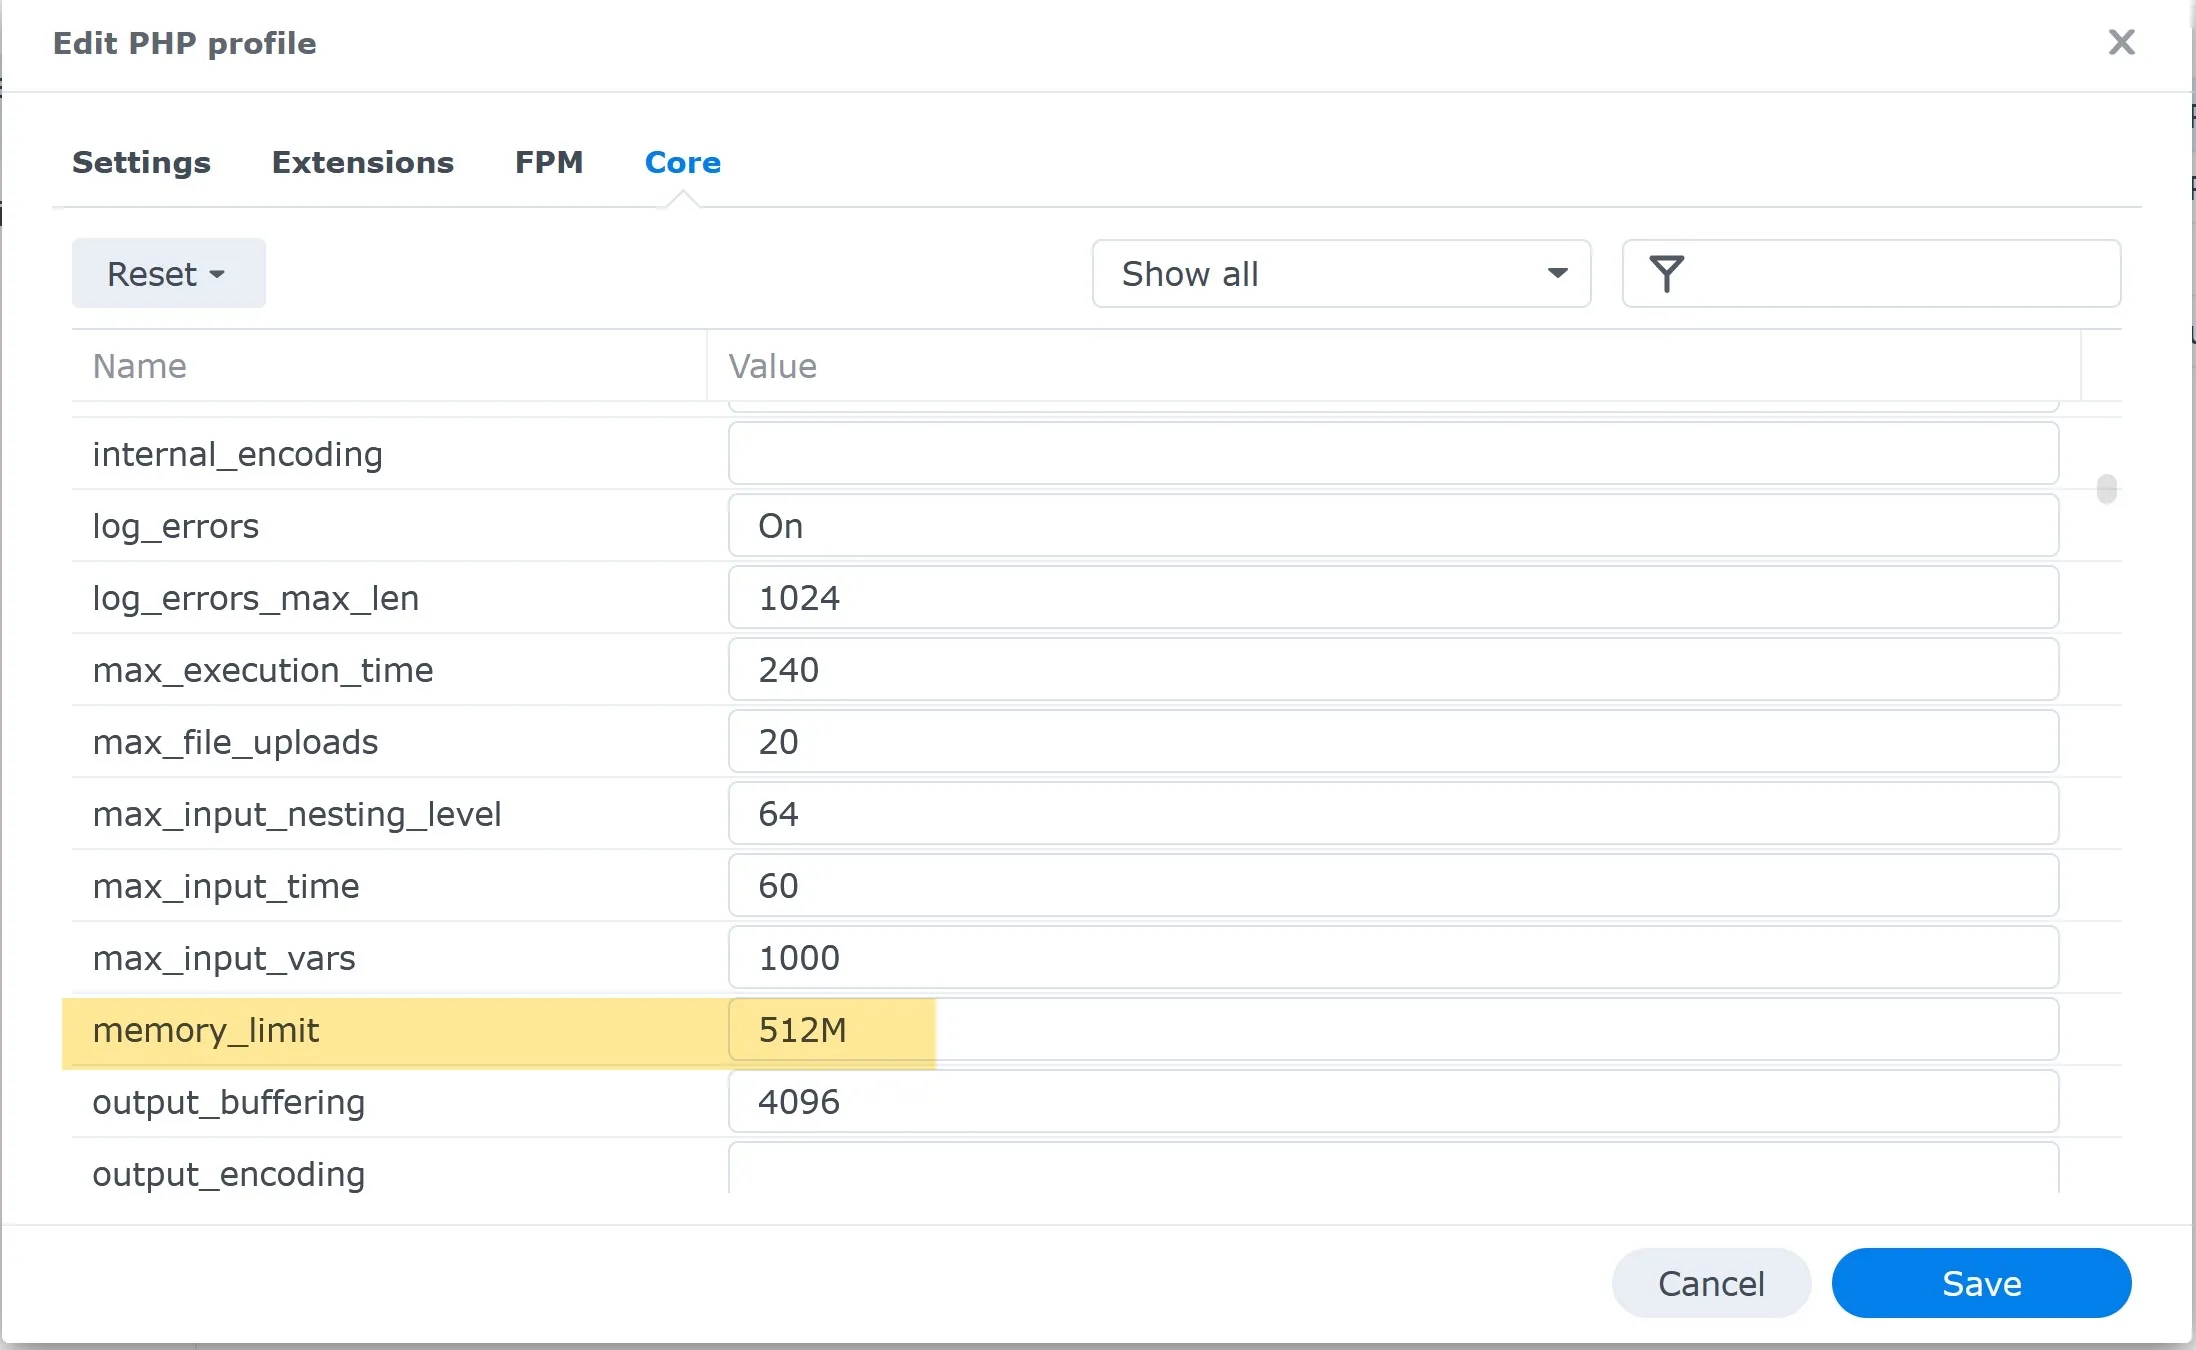
I want to increase some PHP limits. Returning to Synology Web Station, Script Language Settings, click on “WordPress,” then edit; you can edit many PHP settings.
In the Core tab, you can increase the memory limit.
Backend: Install a Security plugin
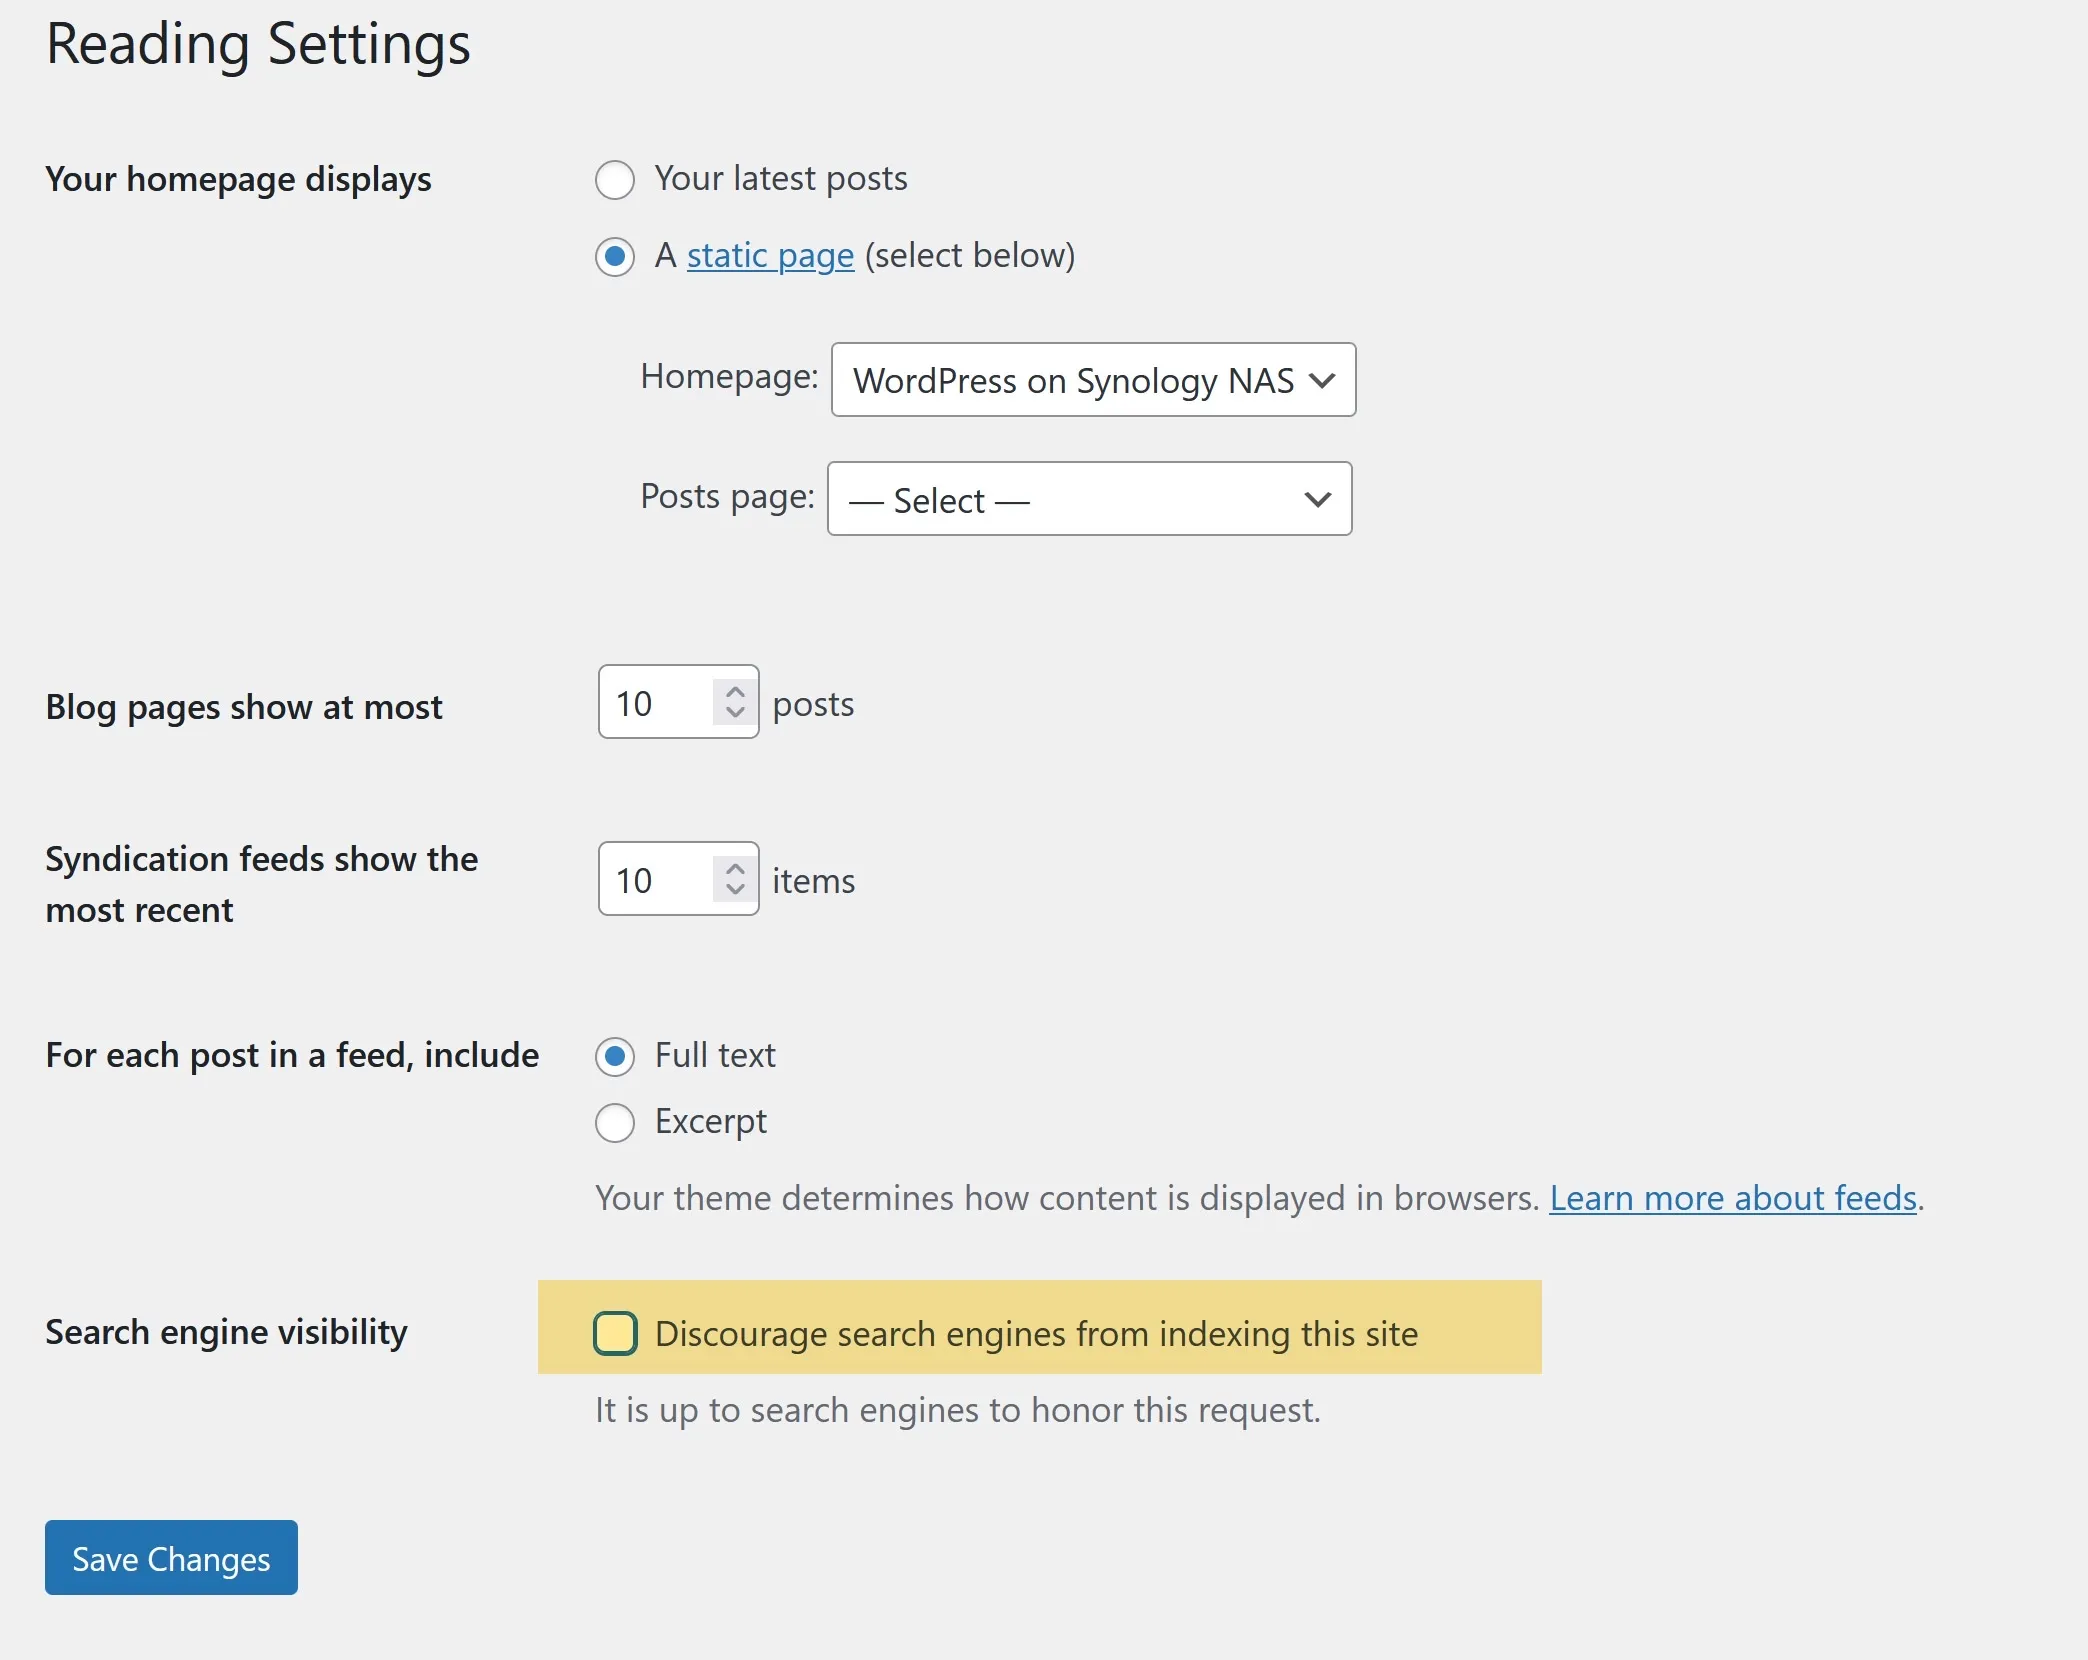
Once you have created a website and removed the “discourage search index from indexing this site,” the website will soon be a target of hackers. Good hosting companies have several levels of shields in place against hackers. A good security plugin will help you keep your website safe and secure. It will also help you monitor the traffic coming into your site to make sure it is legitimate and not malicious activity. This way, you can be sure your website and Synology have good protection.
I recommend the SolidWP Security Pro plugin. Although there is a free version, I recommend the Pro version. It monitors the website and blocks unauthorized login attempts.
This article is a work in progress.
I’d love to hear from you. Was this article helpful? Share your thoughts in the comments below. If you prefer, you can also reach me by email or connect with me on Reddit at Navigatetech.
Before you go …
If you found the insights on optimizing WordPress on Synology valuable, you might be interested in exploring another aspect of Synology’s capabilities. Check out Synology Drive, where you’ll discover how to use Synology Drive for file synchronization and backup effectively. This article will give you a deeper understanding of maximizing your Synology NAS for data management. It’s a great follow-up to enhance your Synology toolkit knowledge.
About the author
Hi, I’m Edy Werder. I write hands-on guides about Proxmox, homelab servers, NAS, and WordPress, based on real setups I run and document.
No sponsors, no fluff—just real configs and results.
Enjoying the content?

Here is the procedure to remove the /wordpress alias in DSM v7.2:
https://kb.synology.com/en-global/DSM/tutorial/how_to_change_my_WordPress_site_address
Many thanks – it works perfect and I adjusted my article with credits to you.