By Edy, Tech Expert & Blogger
Unlock the full potential of your Synology NAS with Synology Virtual Machine Manager, a powerful tool that brings NAS virtualization to your fingertips. With VMM, you can efficiently run virtual machines on your NAS — no extra hardware or hypervisor is needed.
In this guide, I’ll show you how to get started and explain why this solution is both cost-effective and surprisingly capable. Whether you’re exploring alternatives to Proxmox or VMware ESXi, Synology VMM offers a streamlined virtualization experience built into DSM.

Unleashing the Power of NAS Virtualization
The Charm of Synology NAS Virtualization
Running VMs on my Synology NAS feels like unlocking a secret power. With NAS virtualization, I can play with different operating systems, test new software, and ensure everything runs smoothly before pushing anything live. It’s like having multiple servers in one device—no need to buy extra hardware. That’s a huge win for saving money and reducing clutter.
My Synology NAS isn’t just storage anymore; it’s become a full virtualization host, capable of running Windows, Linux, or even another instance of DiskStation Manager. I often set up sandbox environments to experiment safely without putting my main system at risk.
Plus, with the btrfs file system, I get snapshot capabilities and enhanced data protection.

The VMM has my back with snapshots and replication to keep data safe if anything goes wrong. It turns my NAS into an all-in-one server that can do almost anything I need.
What is Synology Virtual Machine Manager (VMM)?

Explore the Synology Virtual Machine Manager realm, VMM, where technology enthusiasts find their haven. This isn’t just a tool; it’s your command center, effortlessly bringing virtualization into your workspace. Seamlessly run various operating systems on your reliable Synology NAS, expanding the possibilities of your digital domain.
Features and Benefits
I love how Synology Virtual Machine Manager (VMM) makes running virtual machines simple. It turns my Synology NAS into a powerful server where I can create and manage different operating systems.
- Multiple Operating Systems: With VMM, I can run Windows, Linux, or Virtual DSM on my NAS. This is perfect for testing programs or setting up separate computer environments without buying new hardware.
- Cost-Effective: Combining computer storage and network tasks on one device saves money. There’s no need for separate servers when Synology VMM does it all.
- Snapshots and Replication: The tool gives me instant snapshots and the power to copy VMs to other places. If something goes wrong, I can quickly return to a working version or move it somewhere safe.
- High Availability: For essential services, VMM keeps them up even if there’s trouble. It switches operations to another NAS without stopping service—a real lifesaver.
- Clustering Features: Big companies will like this one. They can connect up to seven Synology NAS devices together. This makes a strong group of servers that work as one.
- Virtual DSM Licenses: Running a virtual DSM doesn’t always come free. But you can try at first and then decide whether to pay for more features or stick with the basics.
- Simple Management Tools: I don’t need deep tech skills to use VMM. The interface is easy, and it guides me through setting up new VMs every step of the way.
- Supports Key Business Services: Using Active Backup for Business, my essential data stays safe because it’s backed up automatically.
- Flexible Resource Allocation: I control how much memory and processing power each VM gets. This helps balance everything so that all the systems run smoothly together.
Types of VMs You Can Run Using Synology VMM
Synology Virtual Machine Manager lets me run different types of VMs on my NAS. Here’s a rundown of the virtual machines I can set up:
- Windows VMs: I can create VMs that run versions of Windows, making it super handy for testing software or running applications that need Windows.
- Linux-based VMs: Linux enthusiasts rejoice, as we can also host various Linux distributions. This opens up a world of open-source applications and services.
- Virtual DSM: This is cool because it allows me to have a virtual version of Synology’s DiskStation Manager. It’s like having another Synology NAS within my actual NAS.
How to Install Synology Virtual Manager

Diving into Synology’s Virtual Machine Manager installation is simpler than you might think – I’ll walk you through the transformative steps, ensuring your NAS isn’t just storage but a virtualization powerhouse; keep reading to unlock this game-changing capability.
Gather All You Need – Creating a virtualization environment.
I appreciate how easy it is to start using virtualization with Synology. All I have to do is prepare my NAS and create a virtual space with just a few clicks. Of course, I need to ensure that my Synology model supports virtualization and that I have enough storage and RAM available before I begin.
Let’s get everything ready to use Synology Virtual Machine Manager. I’ll make sure you have what it takes before we dive in.
- A compatible Synology NAS: Check that your Synology NAS can run VMM. Only specific models work with it. See my article Which Synology NAS
- The latest DiskStation Manager (DSM): This is the operating system for your NAS. You’ll need the most recent version.
- Enough storage space: Virtual machines take up a lot of room. Make sure you have enough on your NAS.
- SSDs, if possible: Using solid-state drives boosts your VMs’ speed and reliability.
- RAM upgrade: More memory helps your virtual machines run smoother. Consider adding more to your NAS.
- Network setup: Plan how your virtual machines will connect to the network. You might need extra interfaces or switches.
- VMM from Package Center: Download the Virtual Machine Manager package from the DSM’s Package Center.
- Windows or Linux ISO files: Have these ready to install Windows or Linux-based virtual machines.
- License purchase for VMM Pro features: Decide if you need advanced VMM Pro features and purchase a license if necessary.
Now that you’ve got your area prepped for those future VMs. Let’s move on to “Easy Steps to Install VMM.”.
Easy Steps to Install VMM
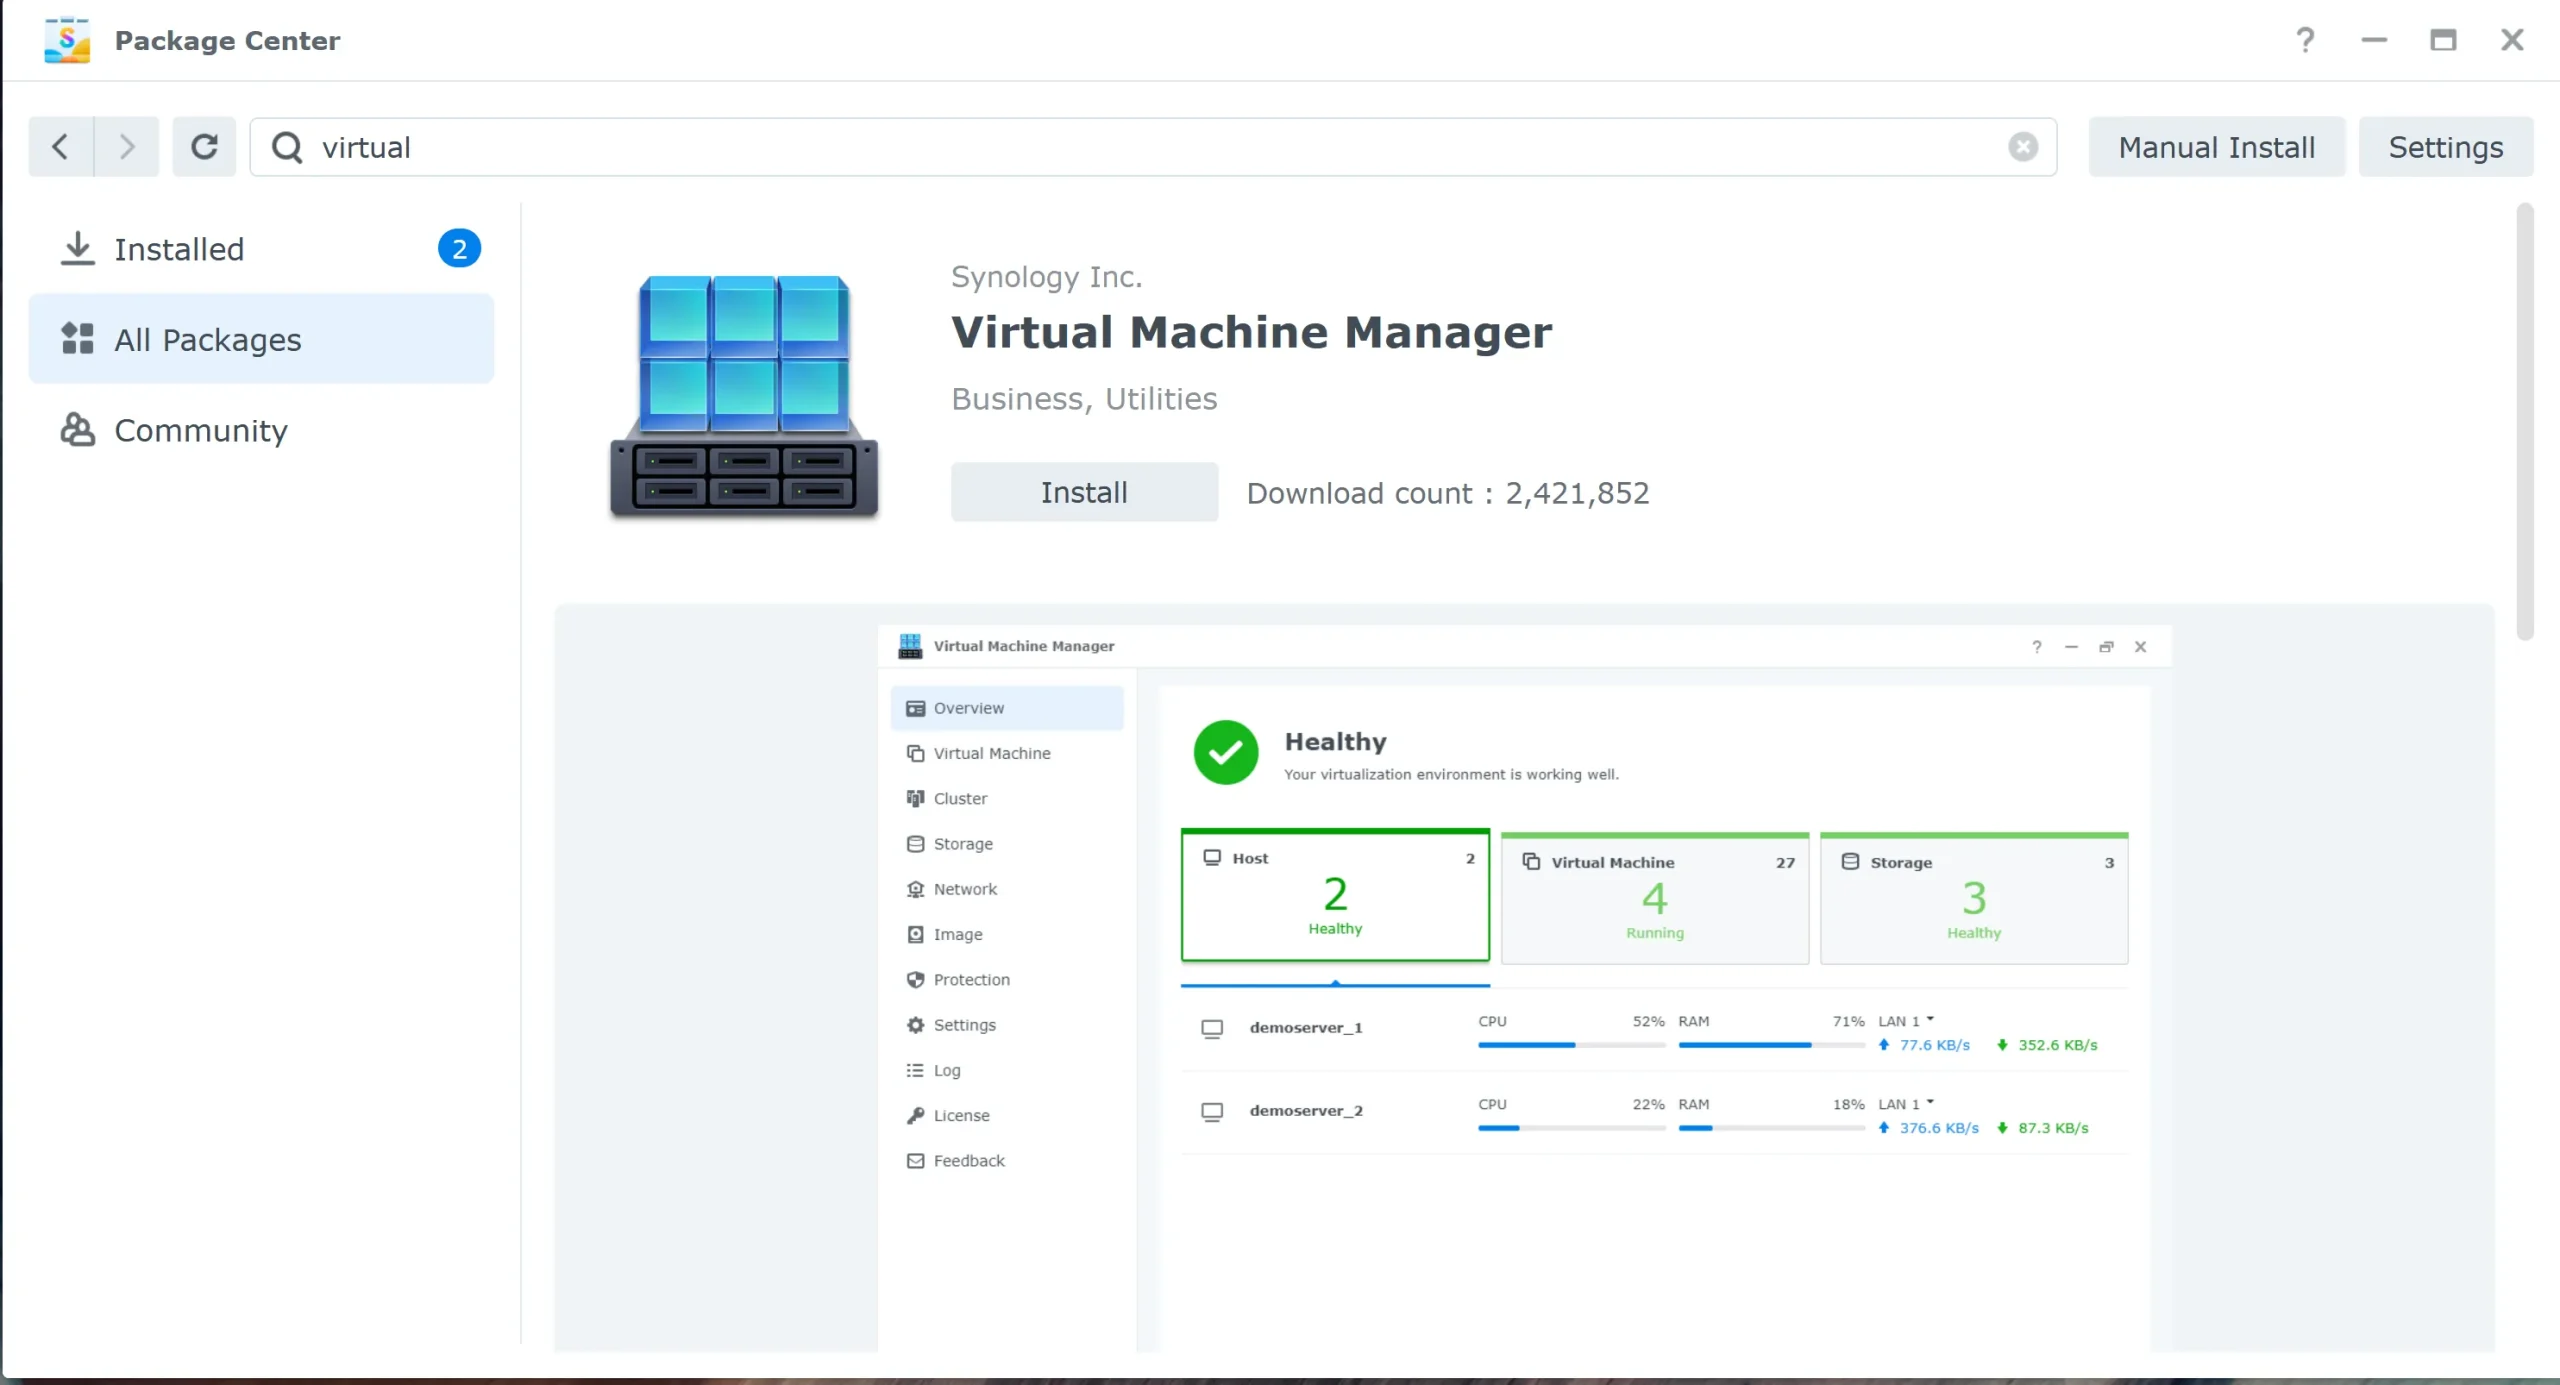
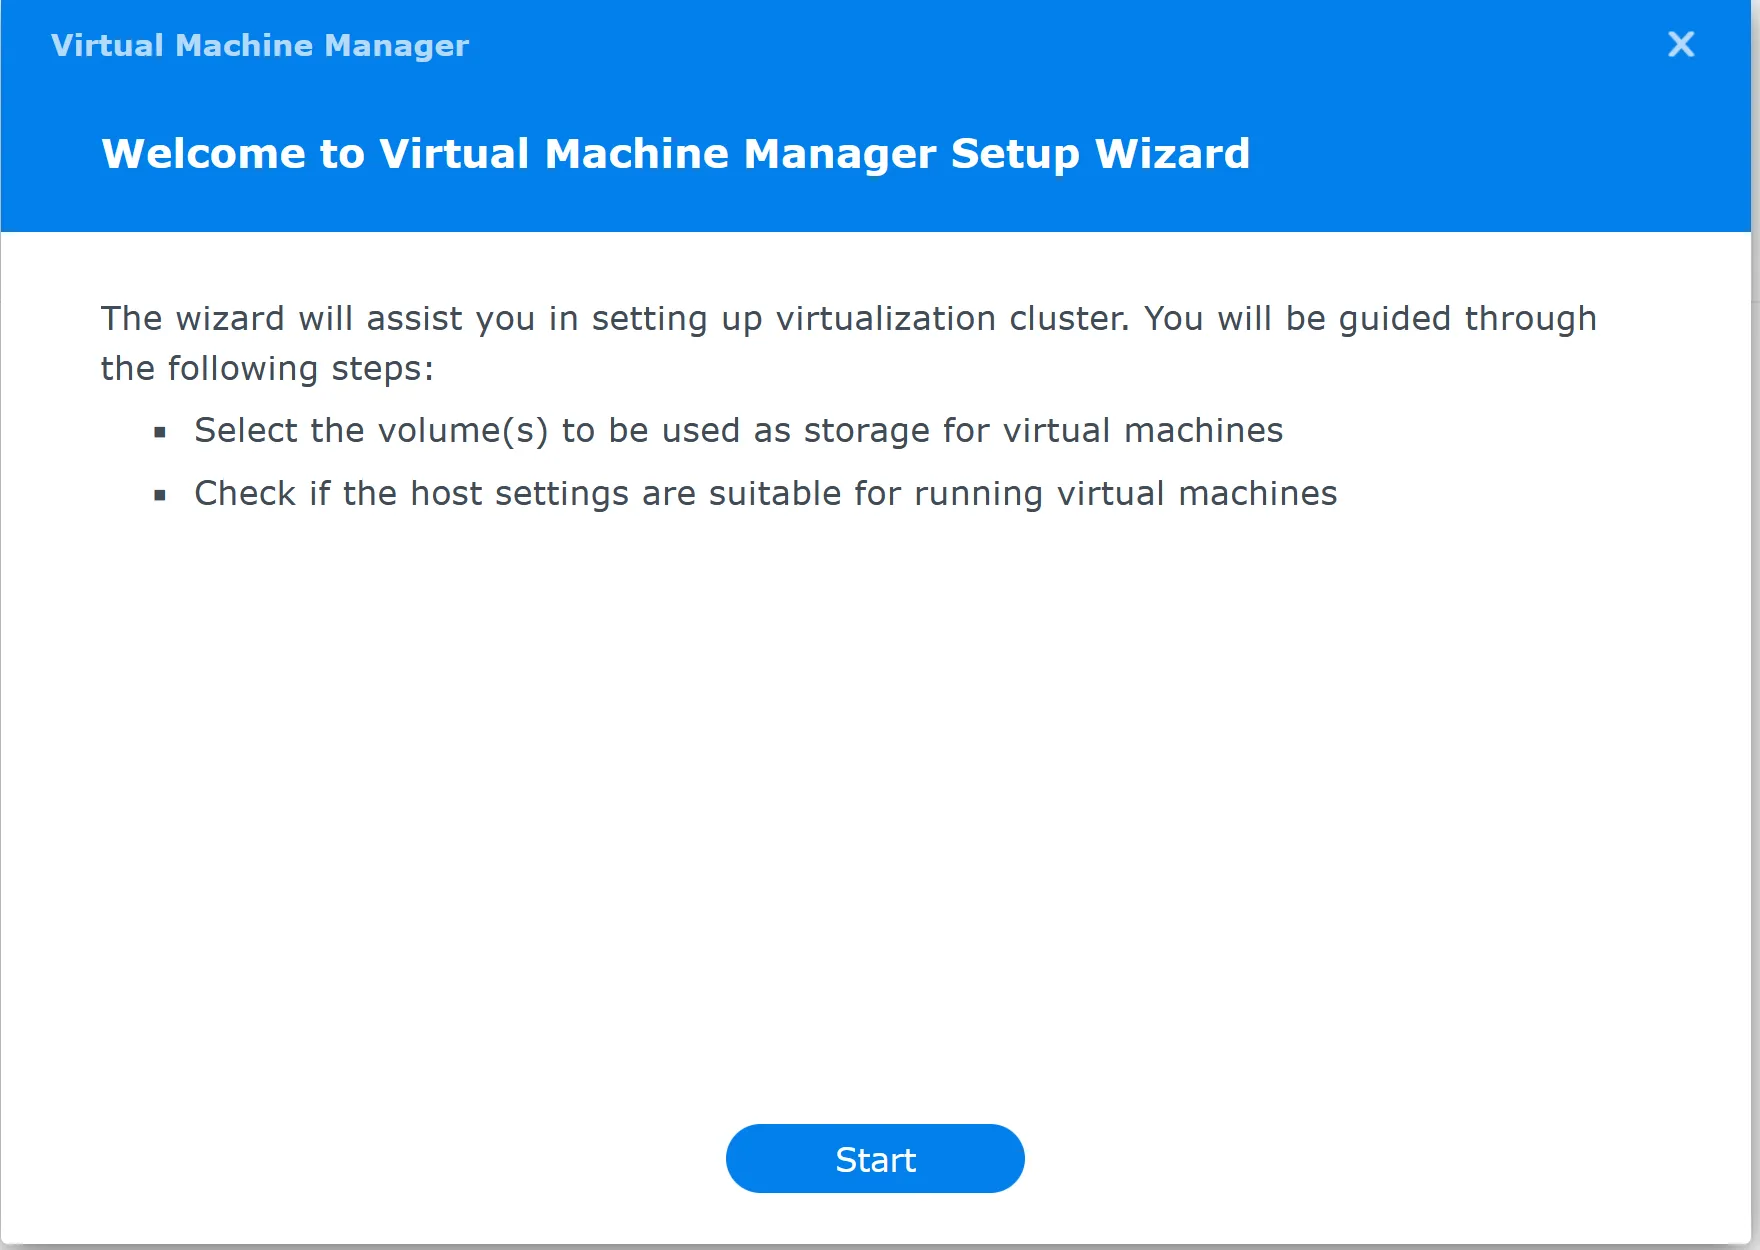
Synology Virtual Machine Manager (VMM) turns your Synology NAS into a powerful server. Let’s get started on how to install this tool and run virtual machines.
- Open your DiskStation Manager (DSM) interface. It’s the control center for everything on your NAS.
- Head over to the Package Center, where you find all sorts of apps for your NAS.
- Look for “Virtual Machine Manager” in the search bar and click ‘Install.’ The system will handle the download and installation. Synology will also install the “Replication Service” package.

- Once installed, open VMM from the main menu to start setting up.

- Create a storage space for virtual machines by going to “Storage Manager” and then “Volume.” This place is where all your VM data will live. It’s a good idea to plan and create a separate volume if you can.
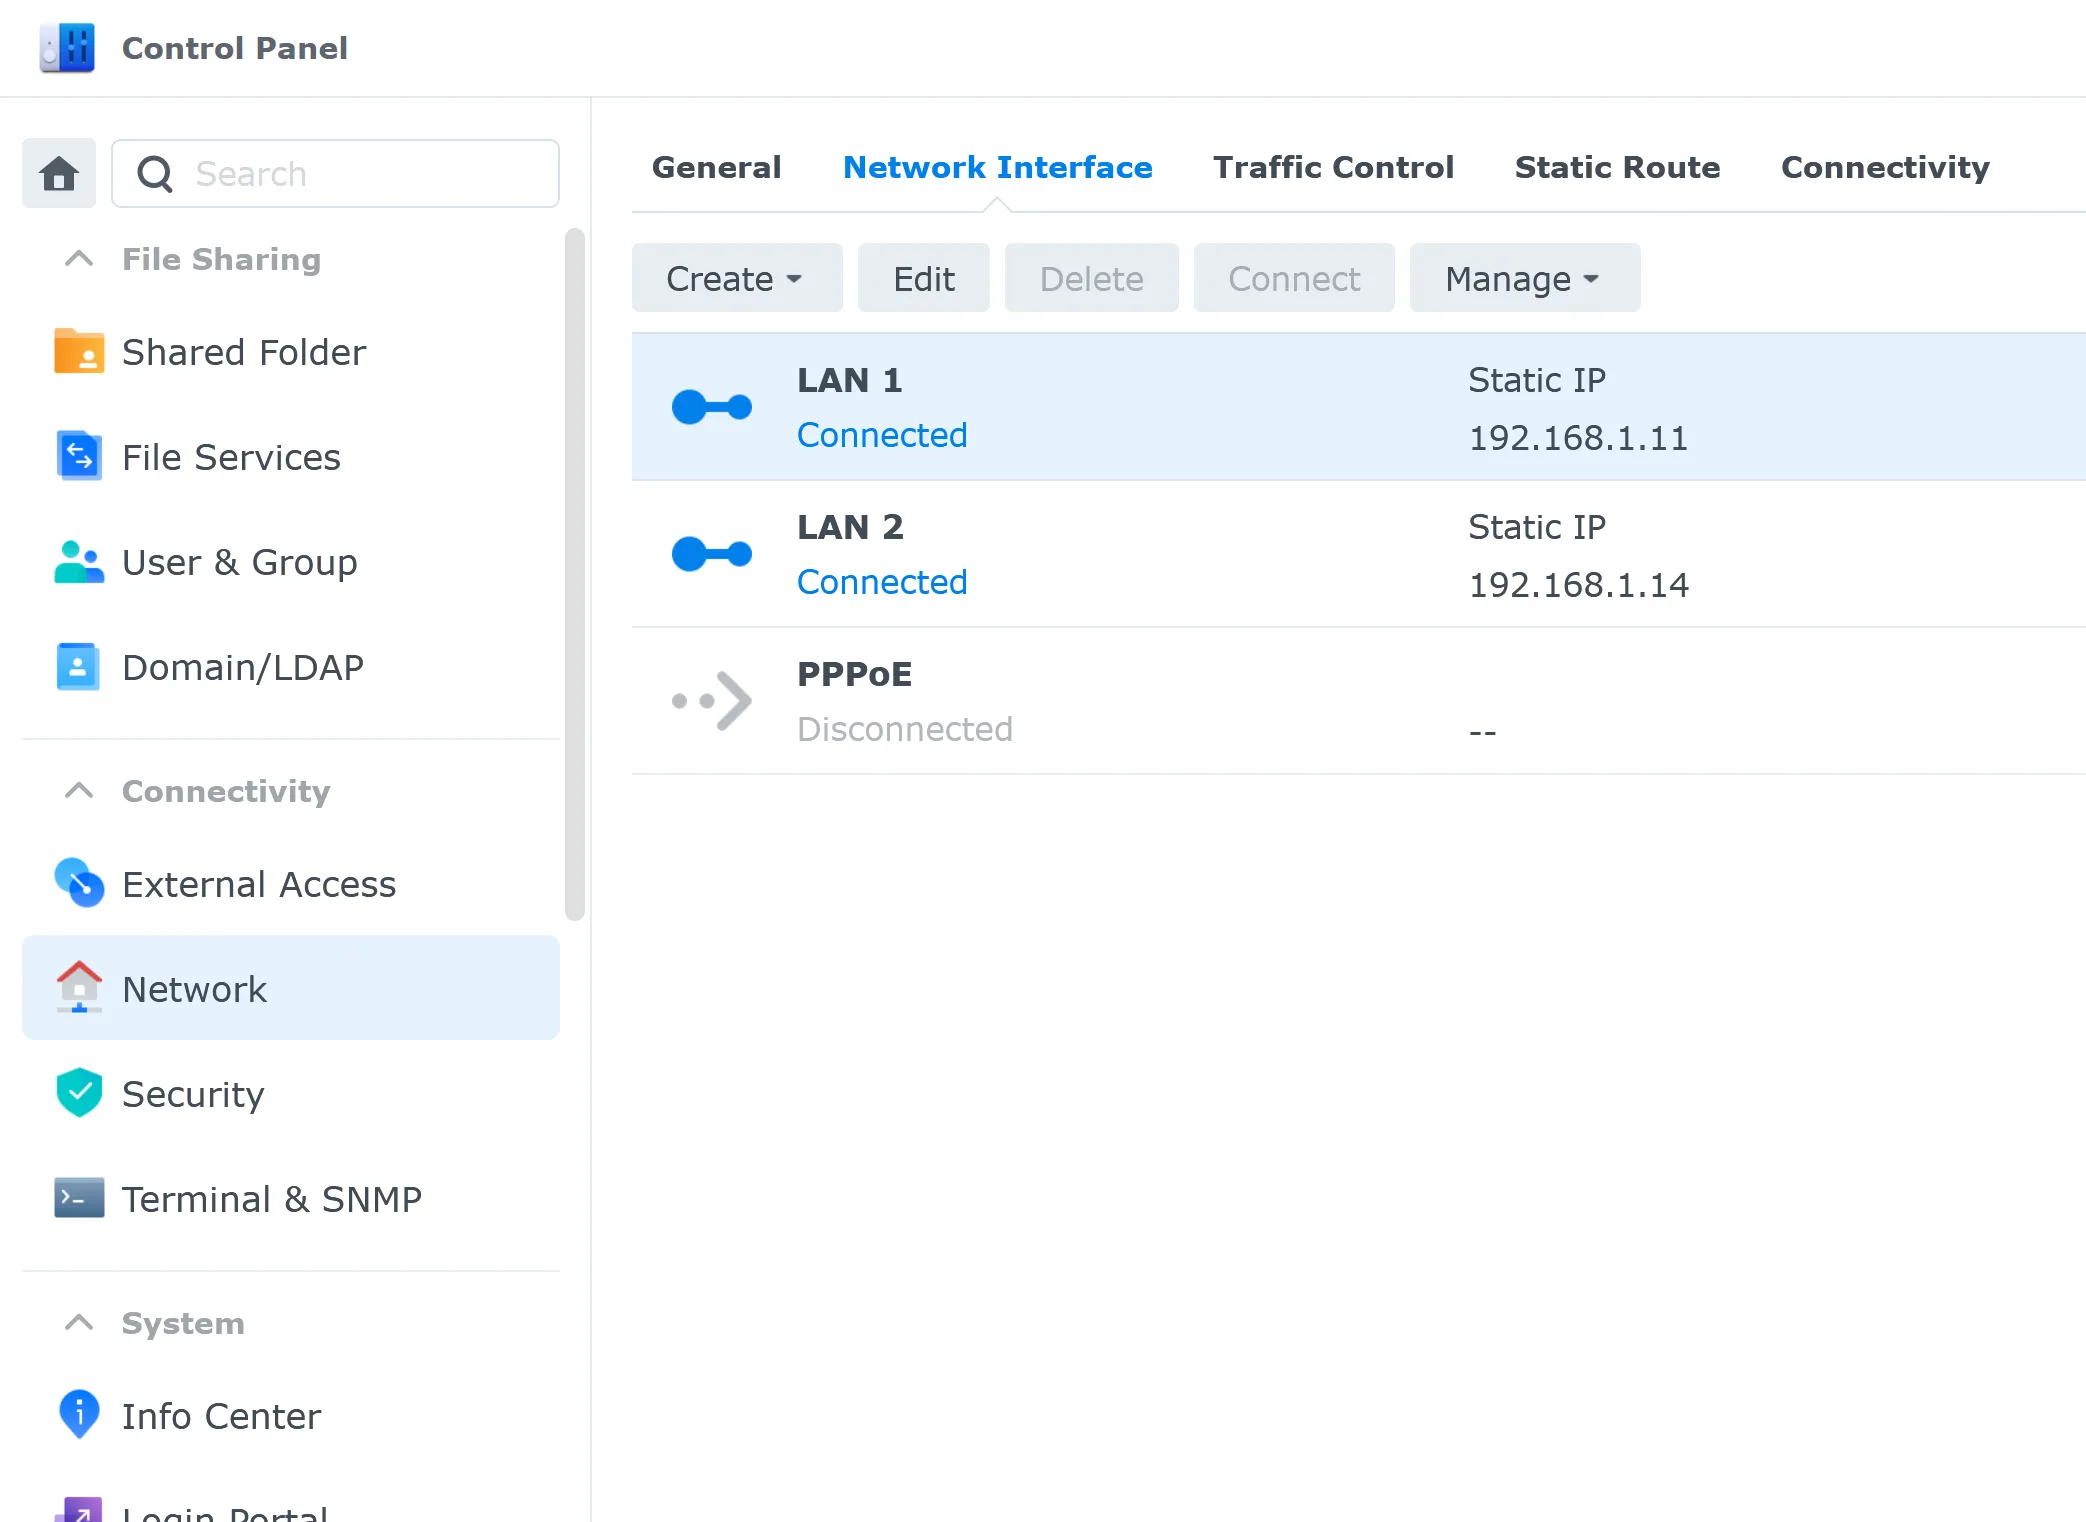
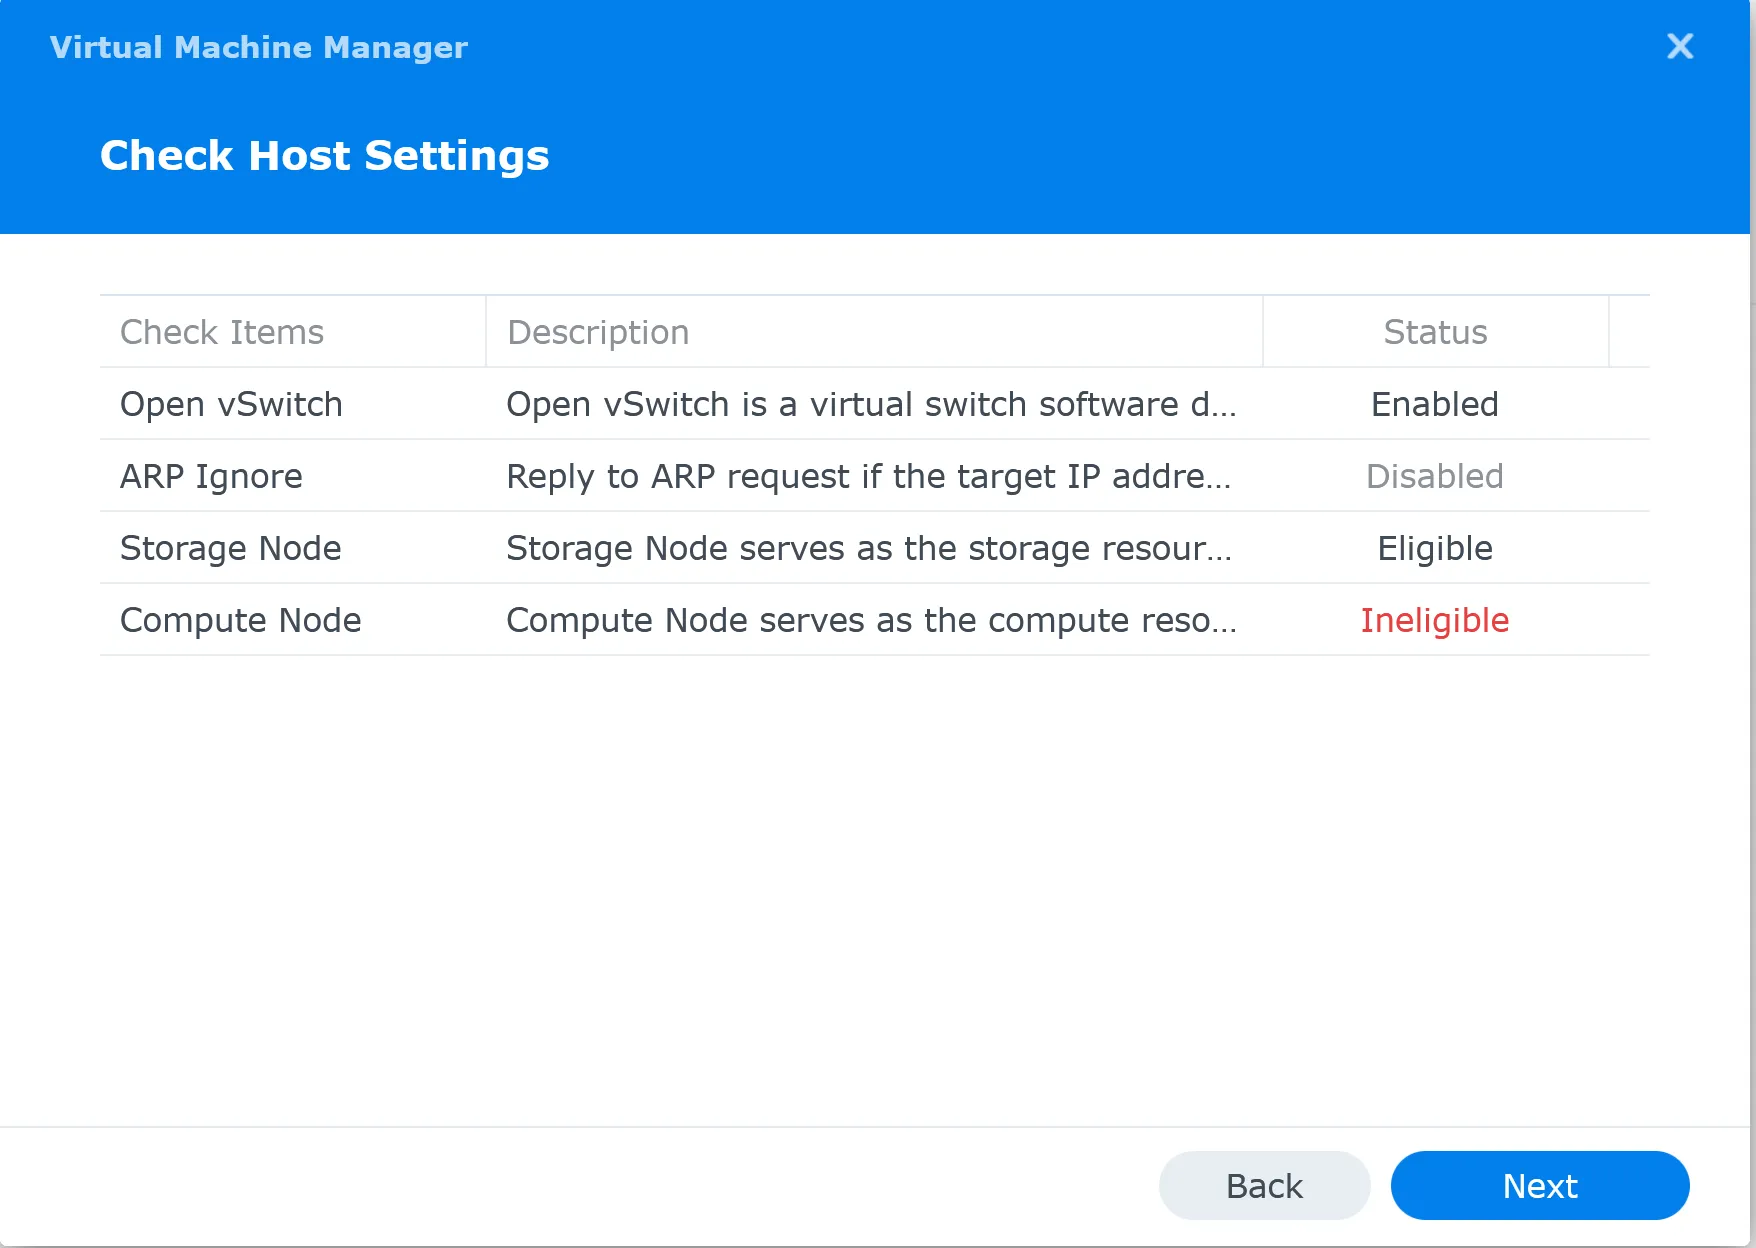
Configure all your network interfaces; in my case, I have two network interfaces. Please make sure that you don’t use a bond for configuration. Bond means configuring network interfaces to use the same IP address. The Virtual Machine Manager automatically configures ‘Open vSwitch. It’s not compatible with a bond.

- Next, after the wizard configured the open vSwitch, you see a confirmation screen with items status.

- Click ‘next’ and you see that the Virtual Machine Manager installation is done

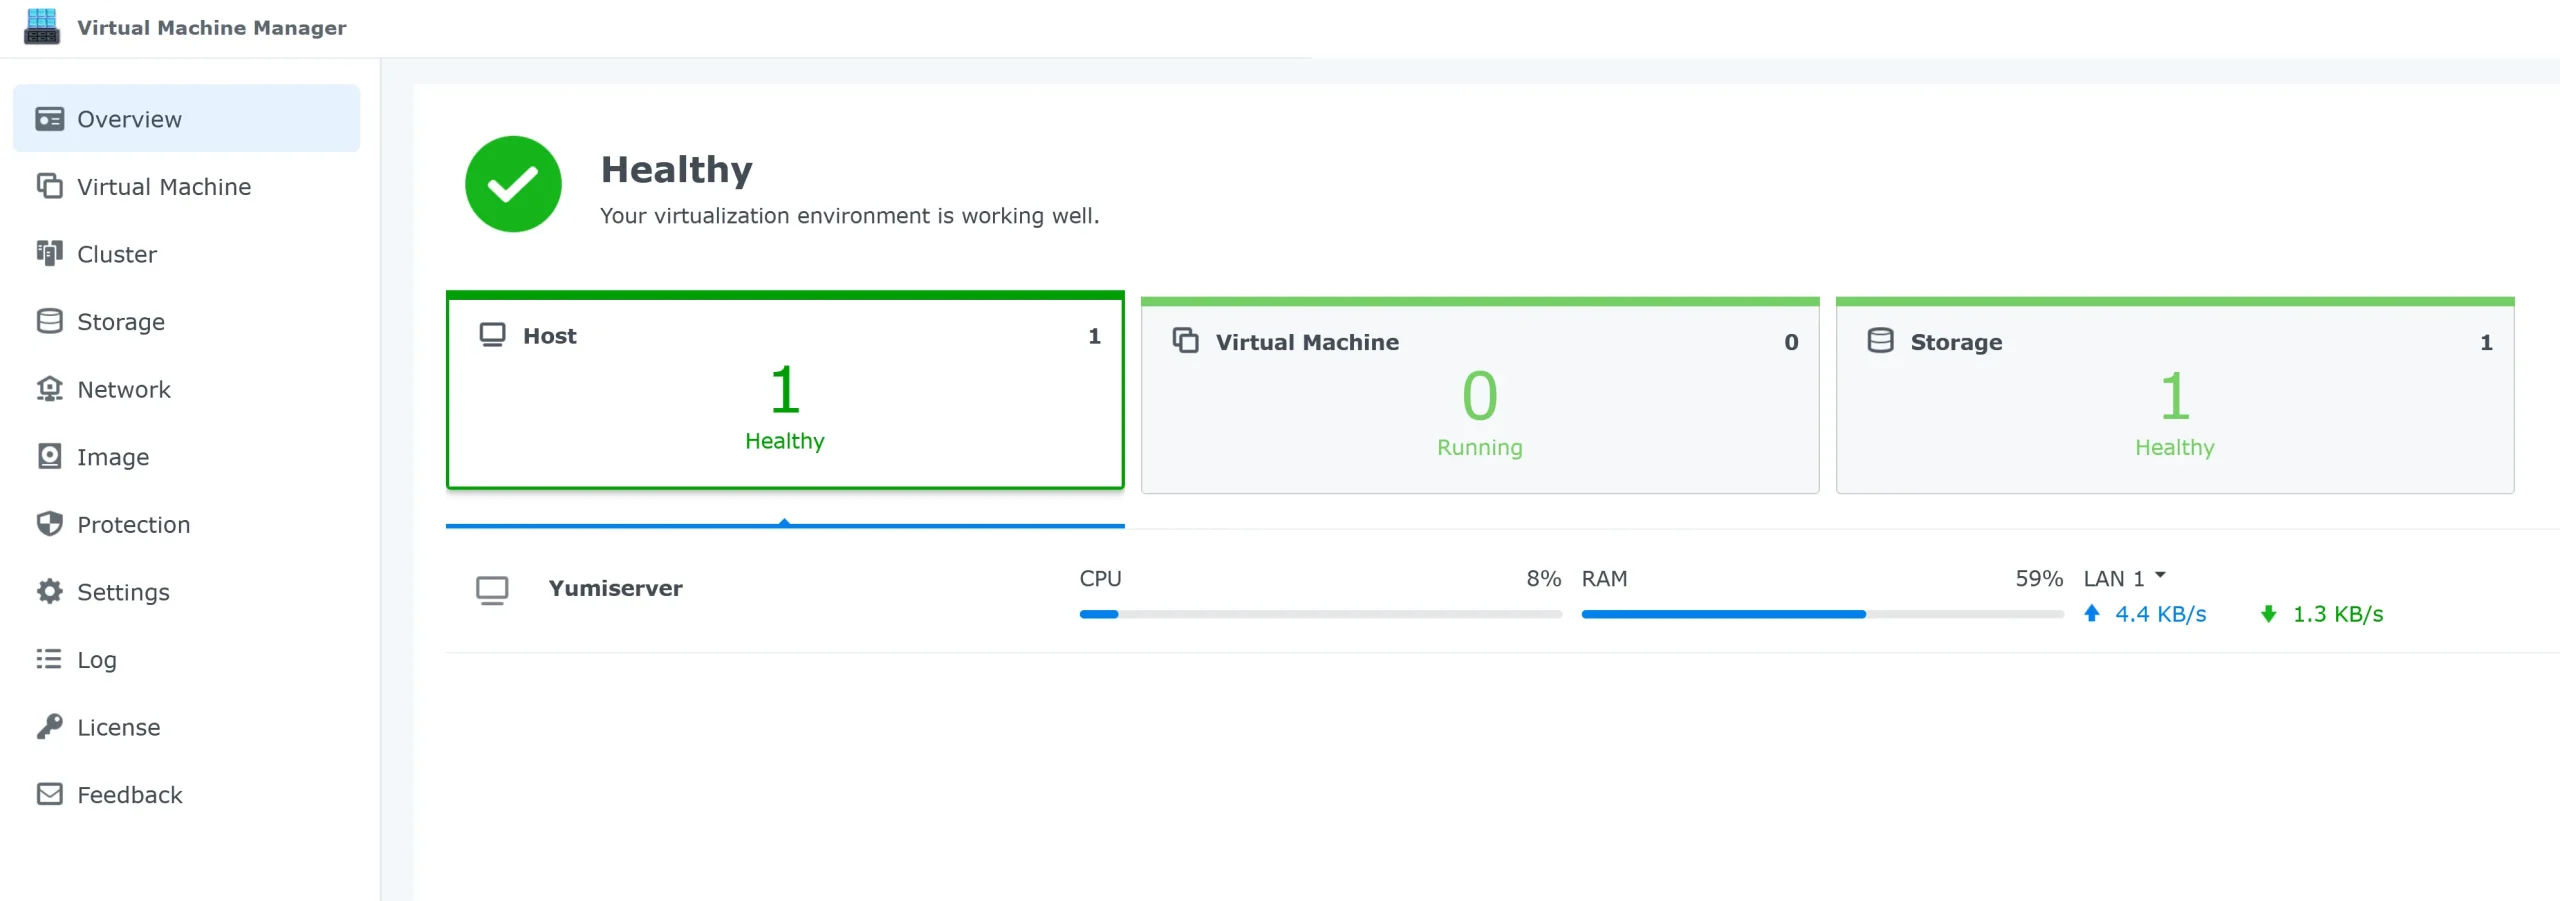
You are now all set to create your first VM

Guide to setting up a Windows VM
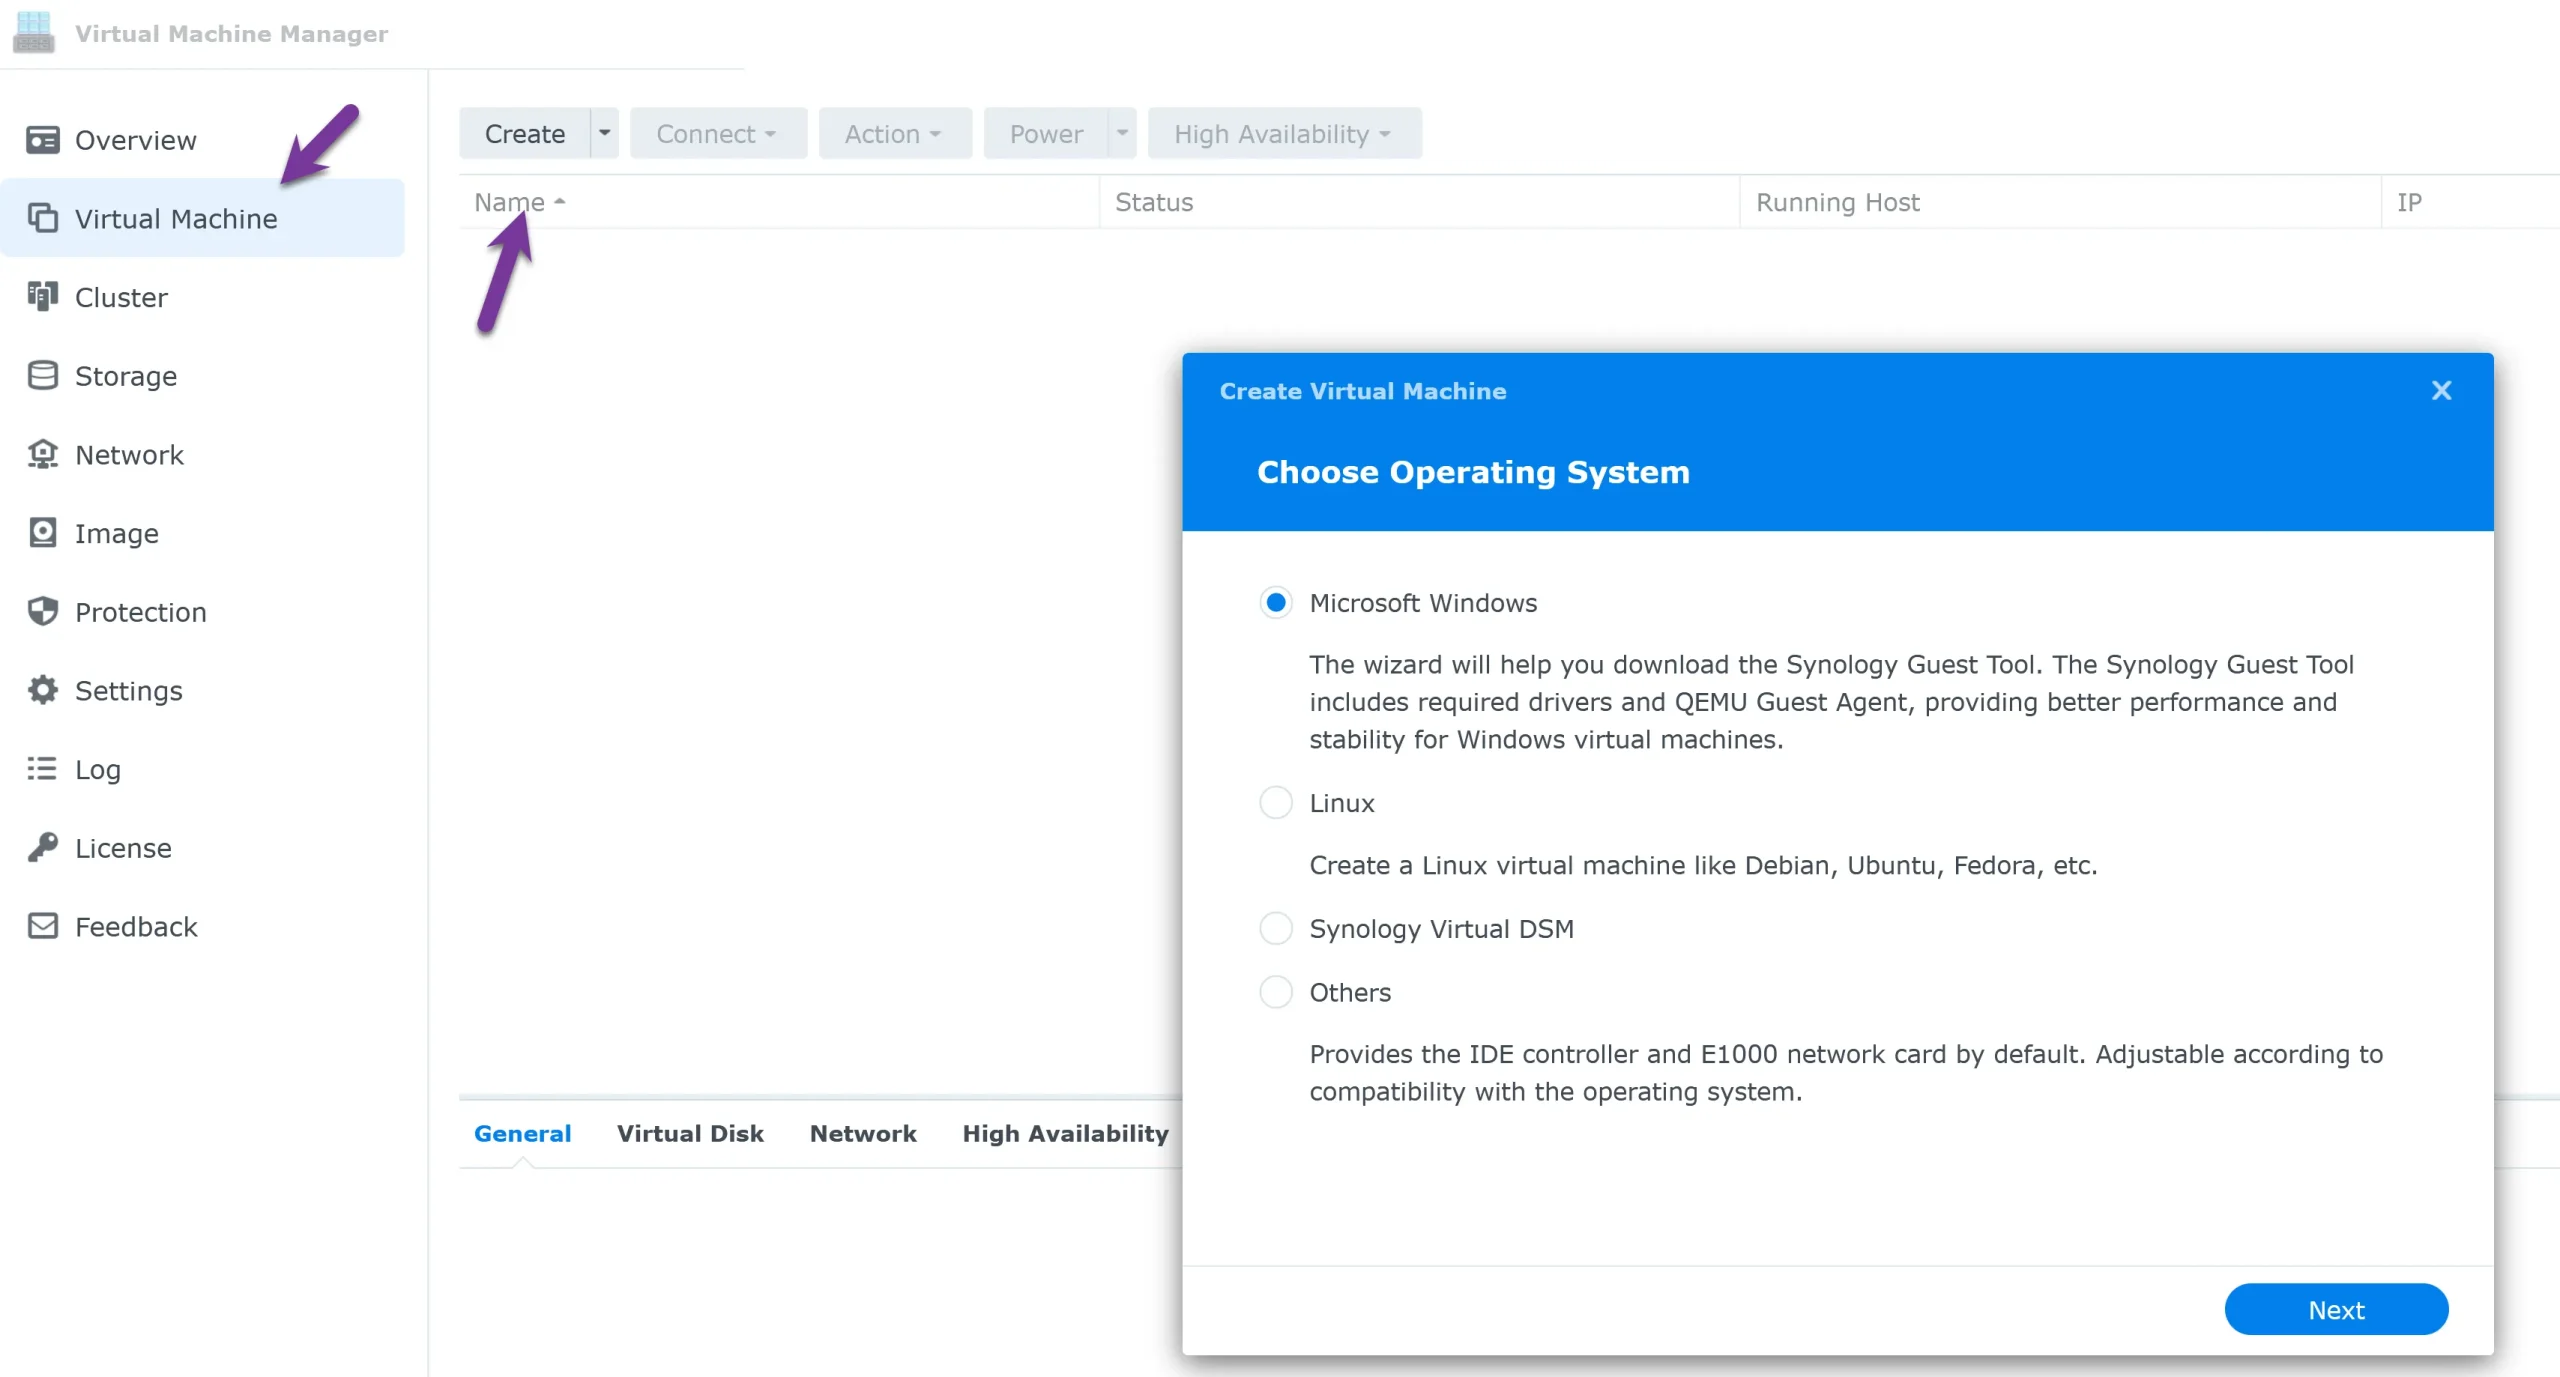
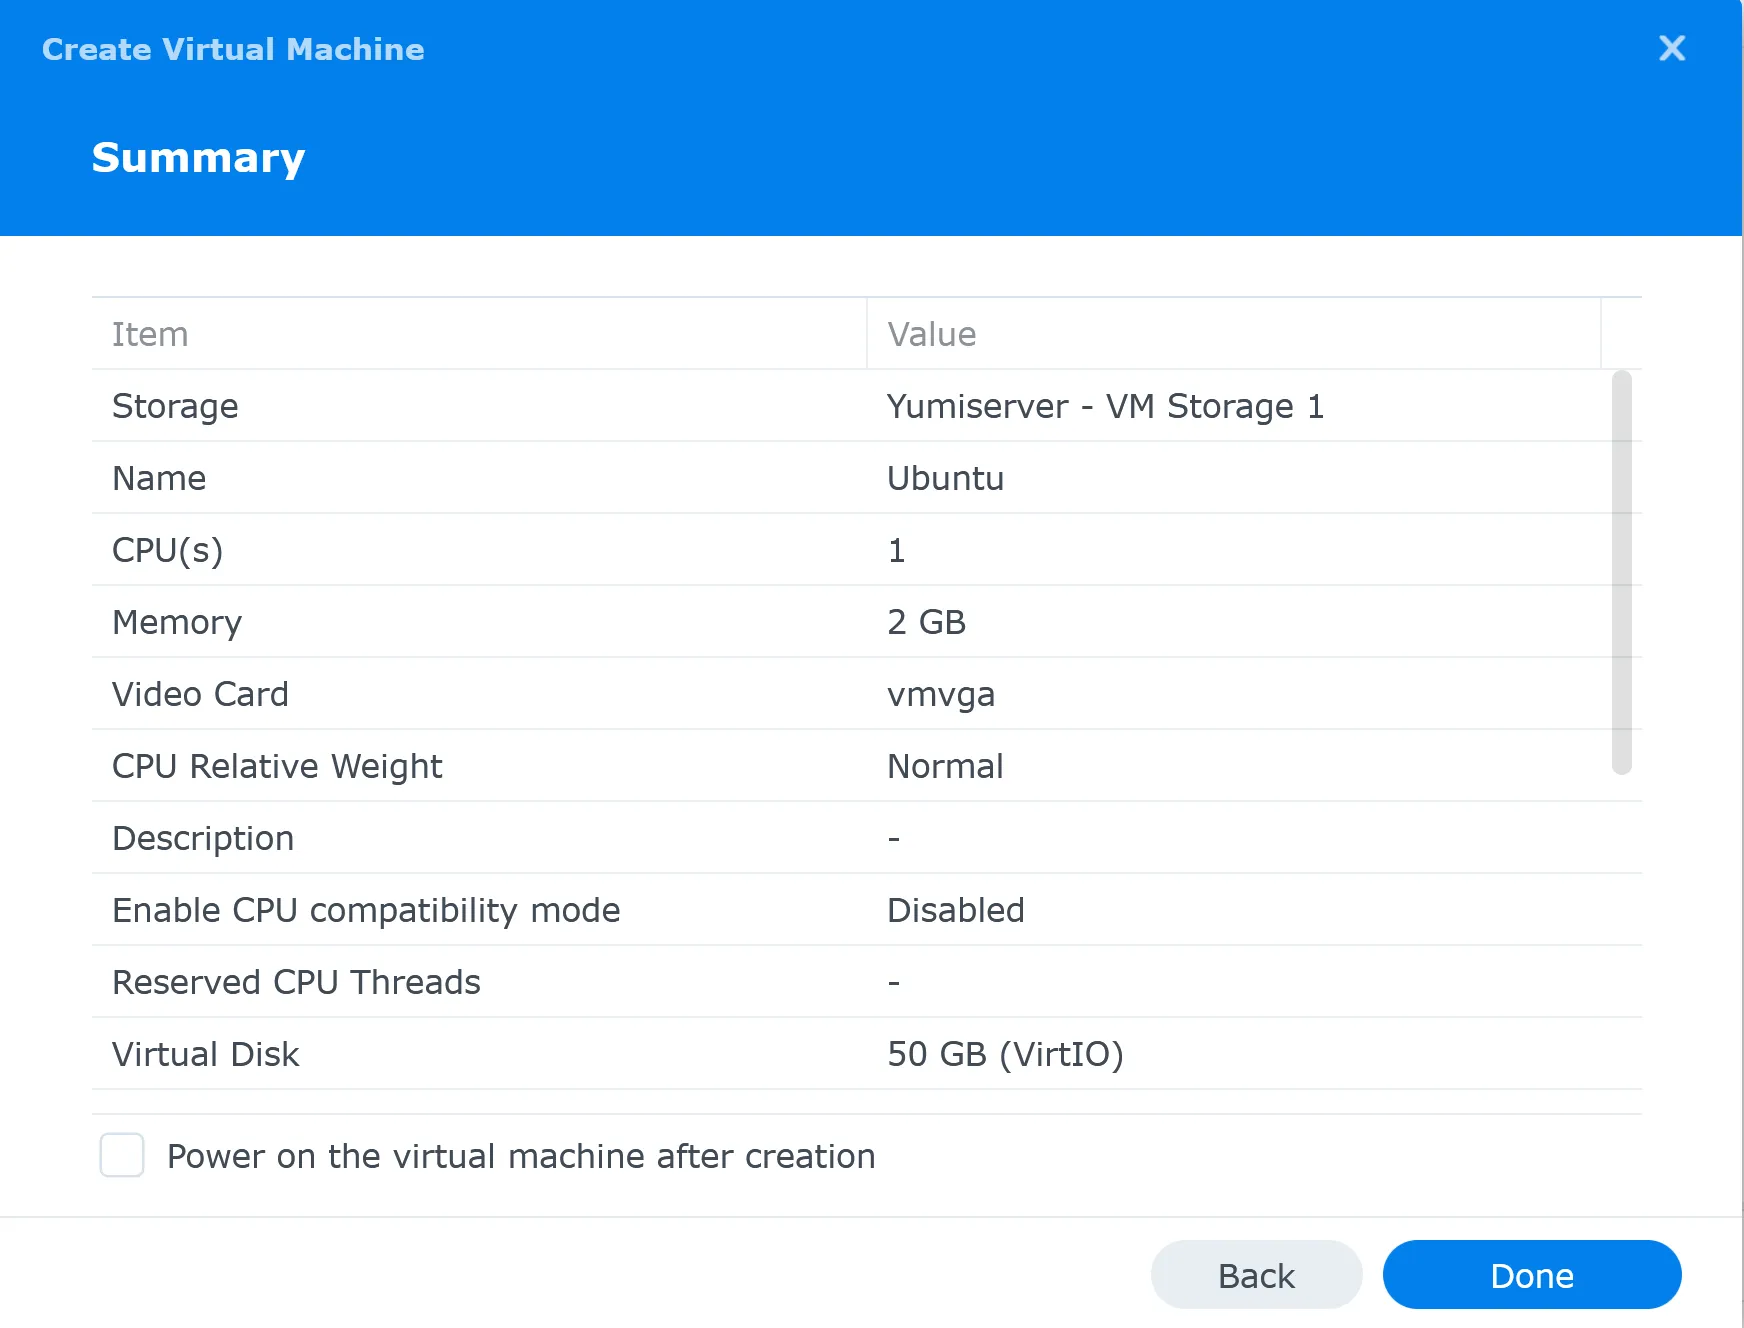
Let’s create our first VM, a Linux guest. I recommend downloading the installation ISO file and storing it somewhere on the NAS. Later, during the wizard process, you can assign the disk image ISO file to the wizard.
- Click ‘Virtual Machine’ on the left sidebar and then create

- A wizard will guide you through the process; here is a listing of the VM options you can perform
- choose the guest operating system: Windows, Linux,
- select storage, where you want to store the VM; remember you can connect Synology NAS to share storage
- general settings: Name of VM, CPU, Memory, video card, and priority
- Virtual Disk size: how much space do you want to assign to the VM
- network interface
- ISO file, autostart, keyboard layout, BIOS: UEFI or standard
- Permissions
- Once installed, install Synology Guest Tool for better performance and features. Here is a good guide from Synology tools.

Virtual DSM License
Navigating the licensing landscape for your virtual Synology setup is crucial—it’s like having the right key to unlock a treasure chest of features. Let’s dive in and explore how getting that license can elevate your virtualization experience, ensuring you’re all set for seamless operation and management without a hitch.
Licensing plans
Understanding the licensing landscape for Synology’s Virtual Machine Manager is pivotal—after all, it dictates just how much virtualization power is at your fingertips. Here’s a snapshot of what you need to know:
Licensing Plan | Features | Max Virtual DSM Instances | Target Deployment |
---|---|---|---|
Free Version | Basic virtualization, snapshot, storage management | Varies by NAS model | Small office/home office, personal use |
VMM Pro | Advanced clustering, snapshot retention, remote replication, live migration, high availability, remote storage migration | Up to 7 connected Synology NAS | Enterprise deployments |
Let’s not overlook that the free tier satisfies basic needs, perfect for dipping your toes into the virtualization pool. For those who demand more—think businesses and power users—the VMM Pro packs a hefty feature set with impressive specifications. It’s a game-changer, enabling seamless management of multiple machines while offering features that are nothing short of robust. With VMM Pro, you wield the full potential of Synology’s virtualization capabilities, handling more demanding scenarios like a champ.
Tips for virtualization on Synology
For those who want to delve deeper, I have a wealth of tips, tricks, and expert add-ons exclusively designed for virtualizing with Synology, readily available at your fingertips. The most out of running virtual machines (VMs) on your Synology NAS.
- Make sure your Synology NAS model supports VMM. Check the list of compatible devices to save time.
- Select the right resources for your VM. Allocate enough CPU, RAM, and storage to ensure it runs smoothly.
- Use SSD (flash) cache to speed up VM operations. This helps with faster data access and better performance.
- Keep your NAS firmware updated. New updates often mean better stability and new features for your virtual machines.
- Protect your VMs with regular virtual machine snapshots. They can save you from data loss if something goes wrong.
- Consider buying a VMM Pro license if you need advanced features like high availability or fault tolerance.
- Plan for disaster recovery by integrating Active Backup for Business. Run failover copies of important machines without disruption.
- Set up a network environment within VMM that mirrors your real-life setup for accurate testing conditions.
- Create backup schedules in VMM, so you don’t have to worry about doing it manually each time.
Available add-on packages
Synology Virtual Machine Manager lets me run virtual machines on my NAS, providing excellent functionality. With the suitable add-on packages, I can do even more!
- VMM Pro: This one’s a big deal. It turns my NAS into a powerful hypervisor that can handle more VMs and offers advanced features like live migration. Live migration means moving VMs from one Synology NAS to another without stopping them.
- Virtual DSM: I can create virtual instances of Synology’s operating system, which is handy for testing or isolating tasks. Plus, it helps me avoid downtime during hardware failures.
- Active Backup for Business: This package works with VMM to back up and run failover copies of my virtual machines. Failover keeps services running even if one machine goes down.
- Synology High Availability (SHA): If I have two identical Synology NAS models, SHA can make them work together. They mirror each other so the other takes over instantly if one fails.
- Snapshot Replication: Snapshots let me save and restore VM states easily. If something goes wrong, I roll back to a snapshot taken before the problem.
- Licenses for additional VMs: I need extra licenses to run more than the primary number of VMs. They’re valid for one year, and I can activate them in my control panel.
Compatible Synology NAS models
For more information, please check my article, ‘Which Synology NAS should I buy? Here are some suggestions for NAS I recommend with VMM. I suggest buying a diskless NAS and purchasing the hard drive and memory separately to have more configuration options.
I would love to get some feedback from you. Was this article helpful? Please share your opinion with me in the comment section below. Or, if you prefer a more personal touch, feel free to email me directly at info@edywerder.ch. Your thoughts and insights are always appreciated.
Before you go …
If you found the intricacies of setting up a virtual machine on a Synology NAS interesting, you might appreciate diving deeper into the world of home labs. I recommend checking out Homelab Software & Hardware, where you can explore a range of software and hardware options to enhance your personal tech playground. This article is particularly useful for tech enthusiasts looking to expand their knowledge and setup, offering insights into various configurations and tools that can elevate your home lab experience.
Related Articles
Tech Expert & Blogger
Hi, I’m Edy. With over 30 years of experience in the IT industry, I’ve tackled numerous tech challenges.
As a solopreneur, I write articles to fill the gaps I notice in my work and online.
My mission? To provide clear, step-by-step tech guidance and improve the information you find on the web
Enjoying the content?