
By Edy Werder — IT Consultant & Tech Blogger
Introduction
As a system administrator, securing SSH access is crucial for protecting my servers. That’s why I’ve implemented two-factor authentication (2FA) on my Linux and Proxmox systems. In this guide, I’ll walk you through the process of securing SSH with 2FA, step by step.
I’ve found that adding this extra layer of security reduces the risk of unauthorized access, even if someone manages to get hold of a password. Whether running a standard Linux distribution or a Proxmox virtualization environment, these steps will help you lock down your SSH connections.
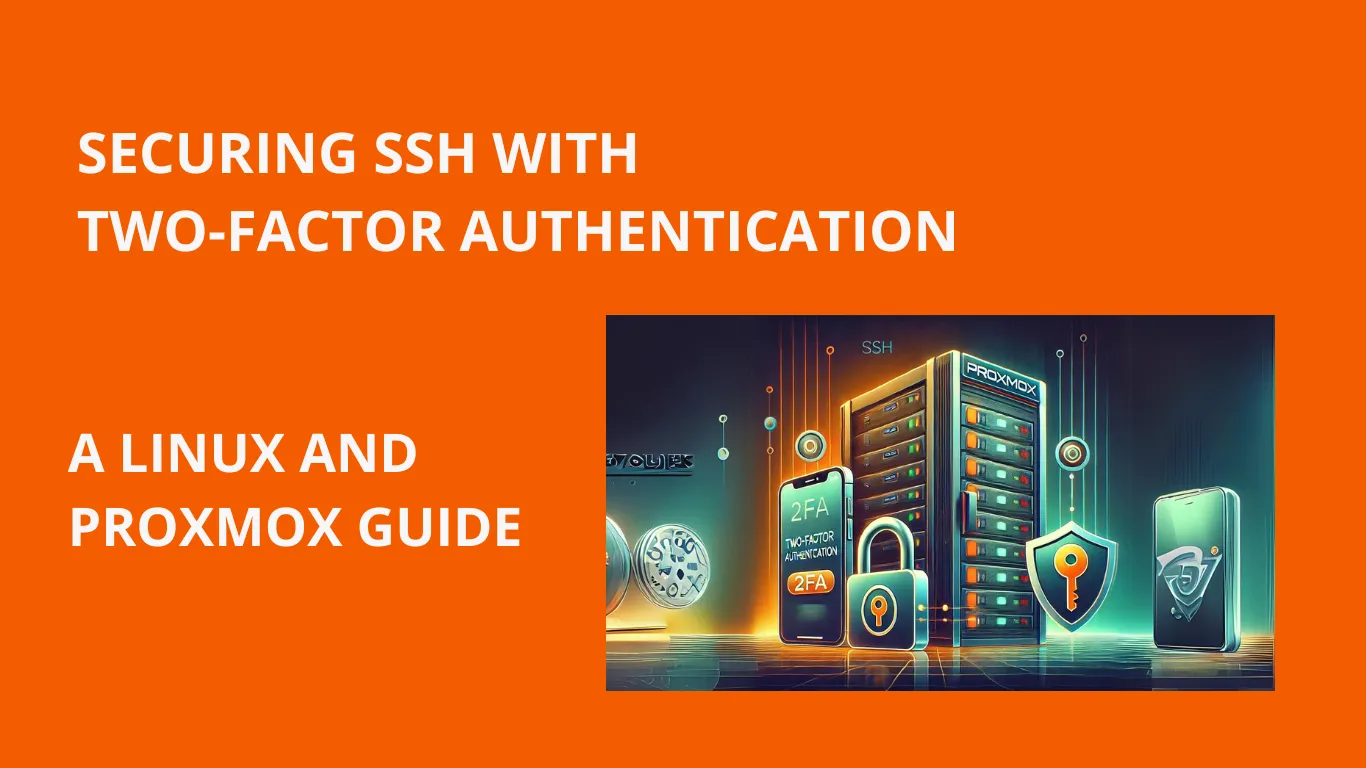
Let’s dive in and strengthen your server’s defenses!
Prerequisites
Before securing SSH with two-factor authentication, I always ensure I have everything I need. Here’s what you should check:
- Access: Ensure you have root or sudo access to your Linux or Proxmox system.
- SSH: Verify that SSH is installed and running. On most systems, I check this with:
systemctl status sshor
systemctl status sshdLook for “Active: active (running)” in the output. This confirms that SSH is installed and running. SSH may not be installed or running if neither command shows an active service.
- Package Manager: Make sure your package manager is up-to-date. I run:
apt update- Google Authenticator PAM Module: Let’s check if it’s already installed:
dpkg -s libpam-google-authenticatorIf you see “package is not installed,” don’t worry. We’ll install it in the next step.
- Mobile Device: You’ll need a smartphone with a TOTP (Time-based One-Time Password) app. I use Google Authenticator, but Microsoft Authenticator, Authy, or any other TOTP-compatible app will work just as well. Choose whichever you’re most comfortable with.
With these prerequisites, we can start setting up two-factor authentication for SSH. In the next section, I’ll show you how to install the necessary software if it’s not already on your system.
Installing the Google Authenticator PAM Module
If we discovered in the prerequisites that the Google Authenticator PAM module wasn’t installed, let’s take care of that now. You can skip this step if you’ve already confirmed it’s installed.
To install the module:
sudo apt install libpam-google-authenticatorAfter the installation is completed, I always verify it was successful:
dpkg -s libpam-google-authenticator | grep StatusThis should return “Status: install ok installed” if everything went well.
With the PAM module now installed (or confirmed to be already present), we’re ready to set up 2FA for our user accounts. In the next section, I’ll guide you through configuring it for your first user.
Setting Up 2FA for a User
Now that we have installed the Google Authenticator PAM module let’s set it up for a user. I’ll do this for my account, but you can apply these steps to any user on your system. my username is ‘edyadmin’
- First, I switch to the user account I want to set up 2FA for
su - usernameReplace ‘username’ with the actual username.
- Now, I run the google-authenticator command:
google-authenticator- The command will ask several questions. Here’s how I typically respond:
- “Do you want authentication tokens to be time-based?” I answer ‘y’ for yes.
- It will then display a QR code and a secret key. I scan this QR code with my smartphone’s authenticator app.
- “Do you want me to update your “~/.google_authenticator” file?” I answer ‘y’.
- “Do you want to disallow multiple uses of the same authentication token?” I usually answer ‘y’ for better security.
- “By default, tokens are good for 30 seconds. Do you want to change this?” I typically answer ‘n’ to keep the default.
- “If the computer you are logging into isn’t hardened against brute-force login attempts, you can enable rate-limiting.” I answer ‘y’ to enable this protection.
- After answering these questions, the setup is complete. I save the emergency scratch codes displayed – they’re crucial if I lose access to my authenticator app.
With these steps, I successfully set up 2FA for my user account. In the next sections, we’ll configure SSH to use this new authentication method.
Modifying PAM Configuration
Now that we’ve set up 2FA for our user, we need to configure PAM (Pluggable Authentication Modules) to use it with SSH. Here’s how I do it:
- First, I open the PAM configuration file for SSH:
sudo nano /etc/pam.d/sshd- At the top of this file, right after the
@include common-authline (if it exists), I add:
@include common-authnauth required pam_google_authenticator.so nullokWhat does the ‘nullok’ option.
- Without ‘nullok’:
- 2FA is strictly required for all users.
- Users who haven’t set up 2FA won’t be able to log in at all.
- With ‘nullok’:
- 2FA is required only for users who have set it up.
- Users who haven’t set up 2FA can still log in with their password or SSH key.
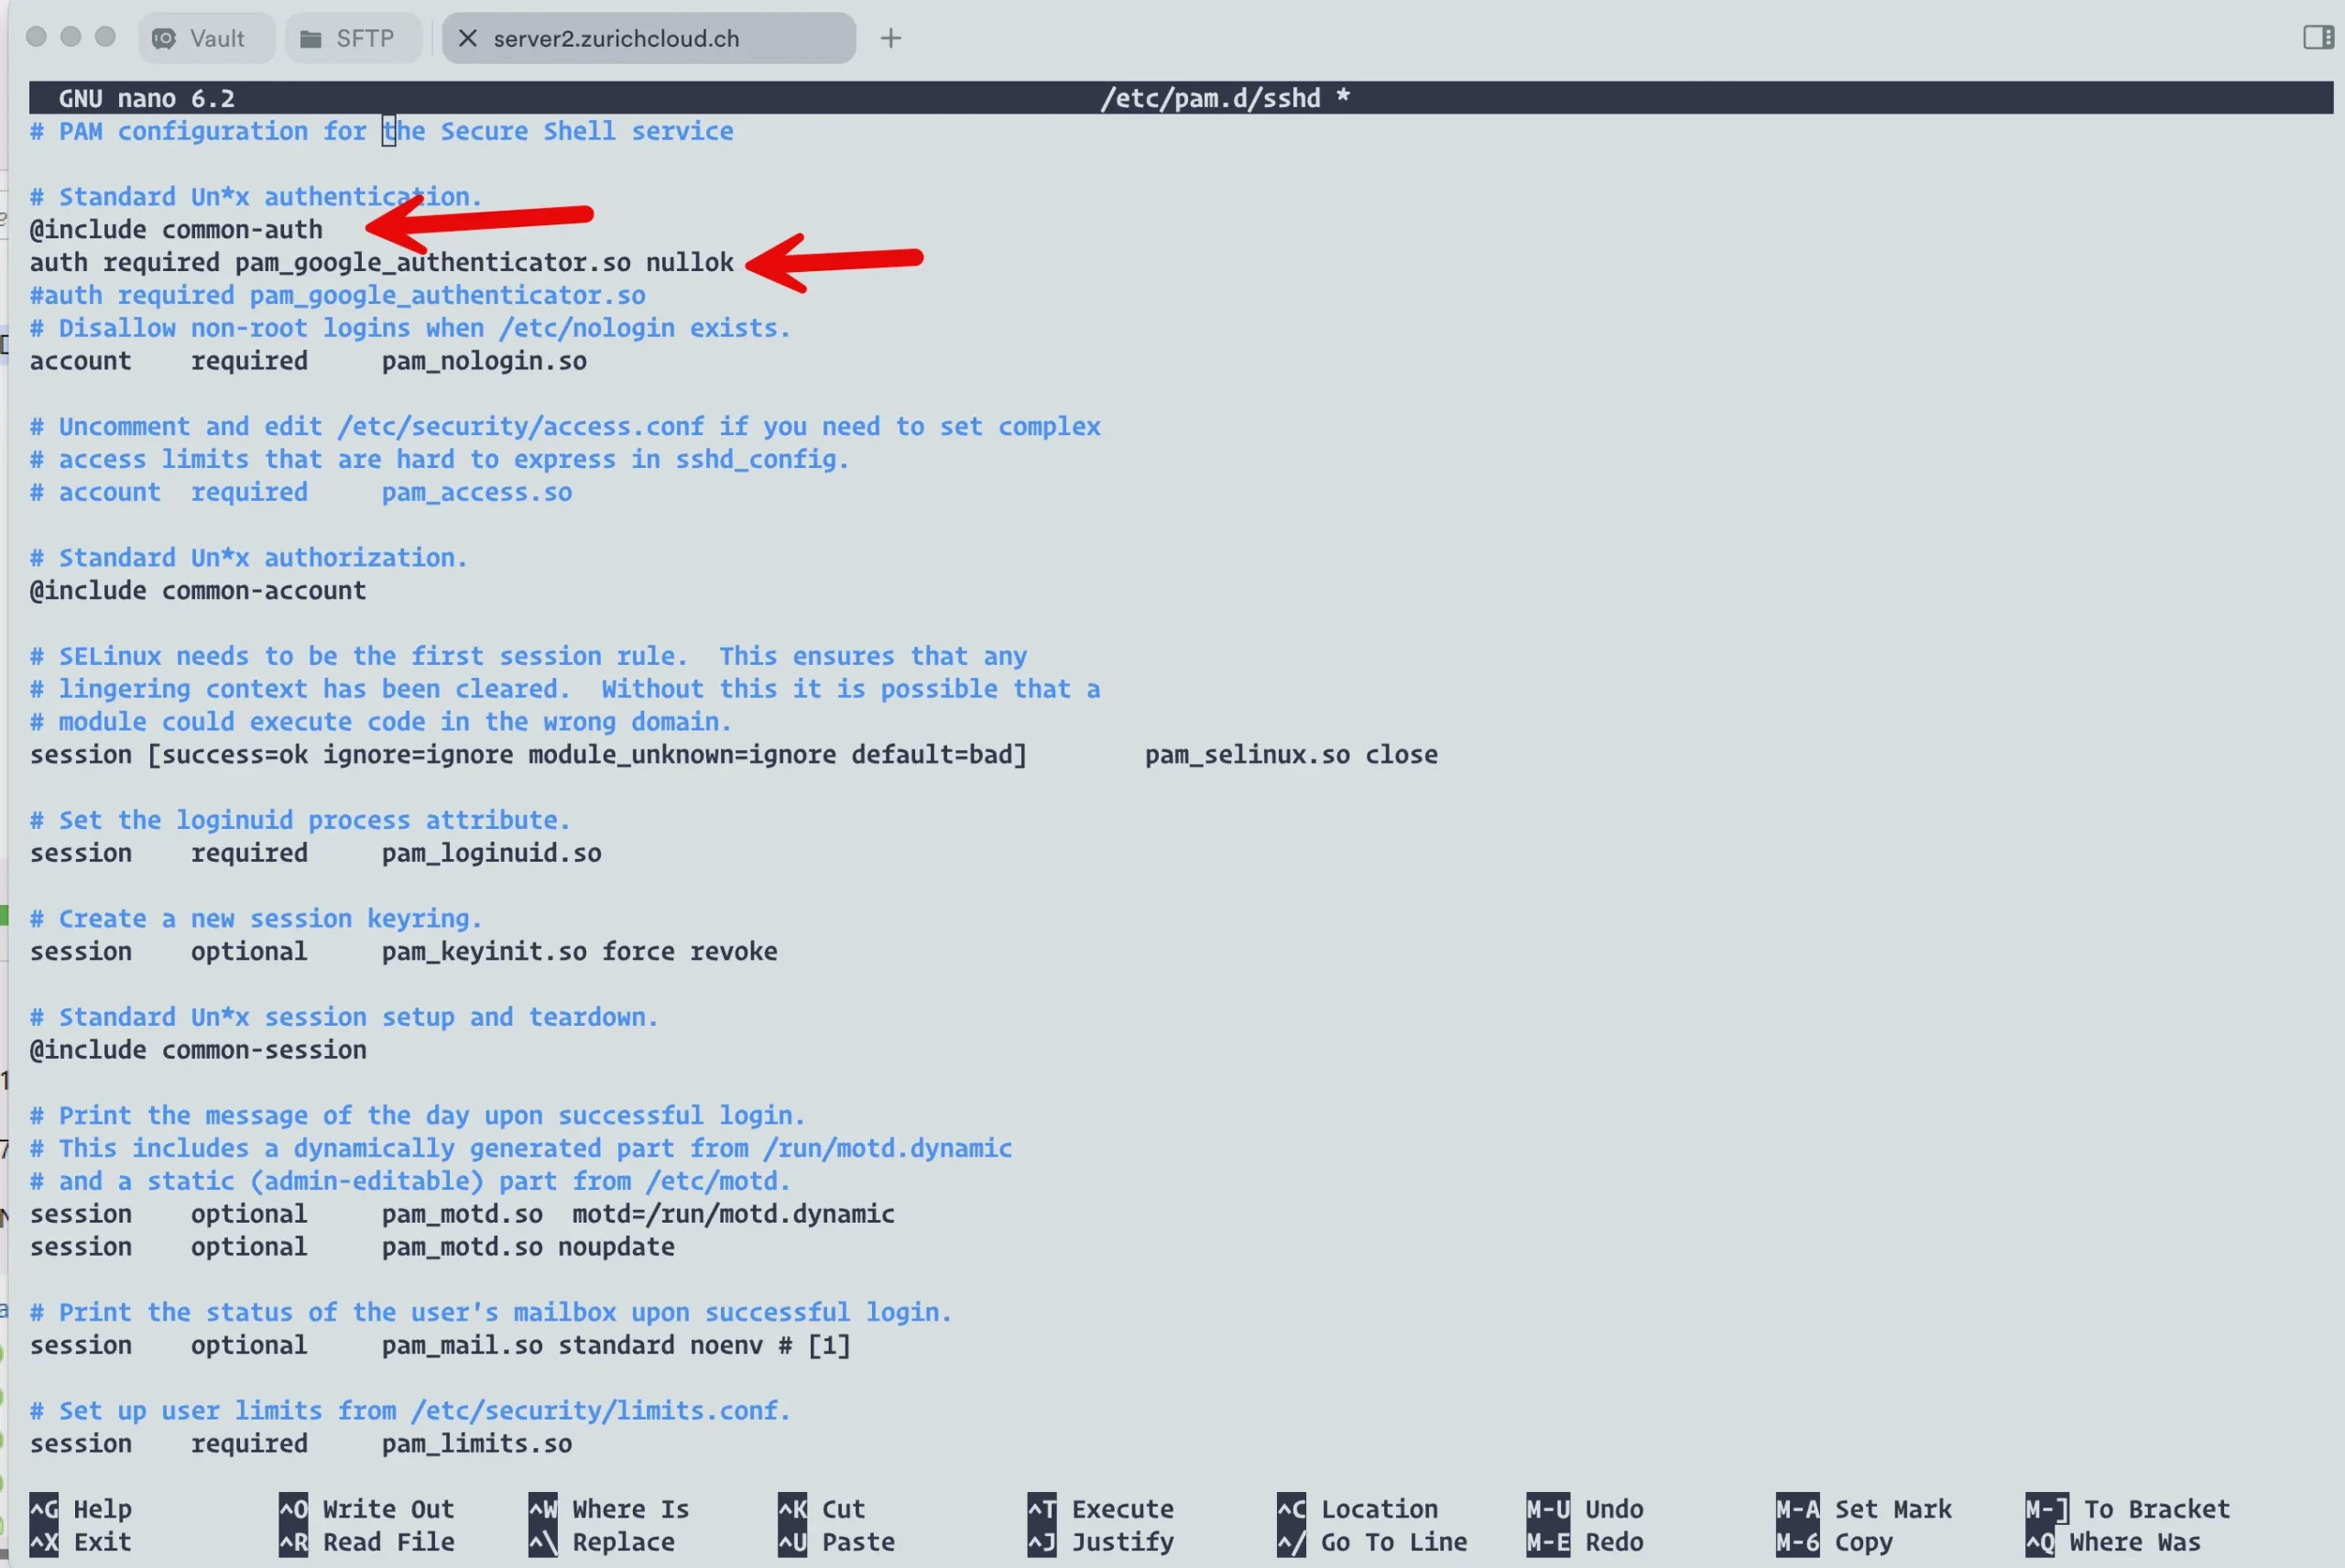
- I save the file and exit the editor (in nano, that’s Ctrl+O, then Enter and Ctrl+X to exit the editor).
- Next, I open the SSH daemon configuration file.
sudo nano /etc/ssh/sshd_config- In this file, I look for the line that says:
PubkeyAuthentication yes
PasswordAuthentication yes
KbdInteractiveAuthentication yes
UsePAM yes
AuthenticationMethods keyboard-interactive,publickey keyboard-interactive
This allows authentication with either a public key + password or a public key + 2FA code.
It’s possible that in your sshd_config file, you have to add the lines.
- I save this file and exited the editor as well.
After making these changes, we need to restart the SSH service so that they take effect. We’ll do that in the next section and test our new setup.
Testing the 2FA Setup
After configuring PAM and SSH, testing our new 2FA setup is crucial. Here’s how I do it:
- First, I restart the SSH service to apply our changes
sudo systemctl restart sshd- Now, it’s time to test. I open a new terminal window or tab, keeping my current session active as a fallback. I can also use the Windows cmd
ssh username@your_server_ipI’ll be prompted for my password, and then I’ll be asked for my 2FA (verification code).
For a deeper dive into Proxmox user management, including the intricacies of the root user, check out my related article: What Secrets Lie Behind the Proxmox User Root?
Affordable Servers for Virtualization Enthusiasts
Enhance your virtualization experience with these budget-friendly and high-performing servers.
| Product Name | View on Amazon |
|---|---|
| Dell PowerEdge Dell R630 Server | 2X E5-2690 v4 = 28 Cores | 128GB RAM | 2X 1TB SSD (Renewed) | View on Amazon |
| Dell PowerEdge R730 Server 2X E5-2680v4 2.40Ghz 28-Core 128GB 8X 4TB 12G H730P (Renewed) | View on Amazon |
| ProLiant MicroServer Gen11 Tower Server w/one Intel Xeon E-2434, 3.4GHz 4-core 1P 32GB-U VROC 4LFF‑NHP 4TB HDD iLO KIT 180W External PS (HPE Smart Choice P74440-005) | View on Amazon |
| HPE ProLiant DL20 Gen11 Rack Server w/one Intel Xeon E-2436 Processor, 2.9GHz 6‑core 1P 32GB‑DR MR408i‑o 4SFF 2x500W RPS | View on Amazon |
| Dell PowerEdge R830 Server 2.20Ghz 56-Core 128GB 16x 300GB 15K H730P Rails (Renewed) | View on Amazon |
| Dell PowerEdge R440 Server 2X Gold 6126 2.60Ghz 24-Core 96GB 960GB SSD + 3.6TB (Renewed) | View on Amazon |
| HPE ProLiant DL380 Gen9 2U RackMount 64-bit Server + 2×8-Core E5-2640v3 Xeon 2.6GHz CPUs + 64GB PC4-2133P RAM + 8×600GB 10K SAS SFF HDD, P440ar RAID, 4×GigaBit NIC, 2×Power Supplies, NO OS | View on Amazon |
| HPE Proliant DL380 Gen10 8B SFF 2U Server, 2X Intel Xeon Gold 6126 2.6Ghz (24-cores Total), 192GB DDR4 RAM, 8X 1.2TB 2.5” 10K SAS 12Gbps, P408i-a SR 2GB RAID, No Operating System | View on Amazon |
Best Practices and Security Considerations
While implementing 2FA significantly enhances your SSH security, there are additional considerations to ensure a robust and manageable setup:
Backing up 2FA Keys:
- I always securely store the initial QR code or a secret key generated during the 2FA setup.
- I keep emergency scratch codes in a safe, offline location.
- I am considering using a secure password manager to store 2FA backup information for critical systems.
Losing access to your authenticator app without backups can lock you out of your server.
Handling Multiple Users:
- I create clear documentation on the 2FA setup process for all users.
- I enforce a policy requiring all users to enable 2FA.
- I use the ‘nullok’ option in PAM configuration initially to allow a phased rollout:
auth required pam_google_authenticator.so nullok- Once all users have set up 2FA, I remove ‘nullok’ to enforce 2FA across the board.
By adhering to these practices, I balance robust security and practical usability in my SSH configuration with two-factor authentication.
SSH keys and 2FA significantly reduce your attack surface. To automate brute-force blocking, I compared Fail2ban vs CrowdSec to find the better tool for homelab SSH protection.
Conclusion
Implementing two-factor authentication (2FA) for SSH significantly enhances the security of your Linux systems, including Proxmox nodes. By requiring both something you know (password or SSH key) and something you have (2FA code), you create a robust defense against unauthorized access.
The steps we’ve covered work across various Linux distributions and can be directly applied to Proxmox servers, providing additional protection for your virtualization environment. Remember, the small effort of setting up 2FA pays off immensely in improved security.
I encourage you to implement these measures in all your critical systems. In today’s threat landscape, 2FA is not just a luxury—it’s a necessity for maintaining the integrity and security of your servers.
I’d love to hear from you. Was this article helpful? Share your thoughts in the comments below. If you prefer, you can also reach me by email or connect with me on Reddit at Navigatetech.
Before you go …
Before you go, if you’re managing user accounts on your Linux servers, you might find it useful to learn how to effectively manage users and groups in Ubuntu. This guide will help you streamline user management, ensuring tighter security and better organization. You can explore the details in this article. It’s a great next step after securing SSH with 2FA.
About the author
Hi, I’m Edy Werder. I write hands-on guides about Proxmox, homelab servers, NAS, and WordPress, based on real setups I run and document.
No sponsors, no fluff—just real configs and results.
Enjoying the content?
