
By Edy Werder — IT Consultant & Tech Blogger
When setting up a website using Elementor, one of the critical decisions you’ll make is whether to disable the default colors and fonts. This choice can affect your design workflow, especially when using custom CSS.
In this tutorial, I’ll guide you through both options and share my preferred method for building websites.
Understanding Elementor’s Default Settings
In Elementor’s settings, you can enable or disable global colors and fonts. These settings determine how your website handles colors and fonts across all elements, including headings, text, and buttons.
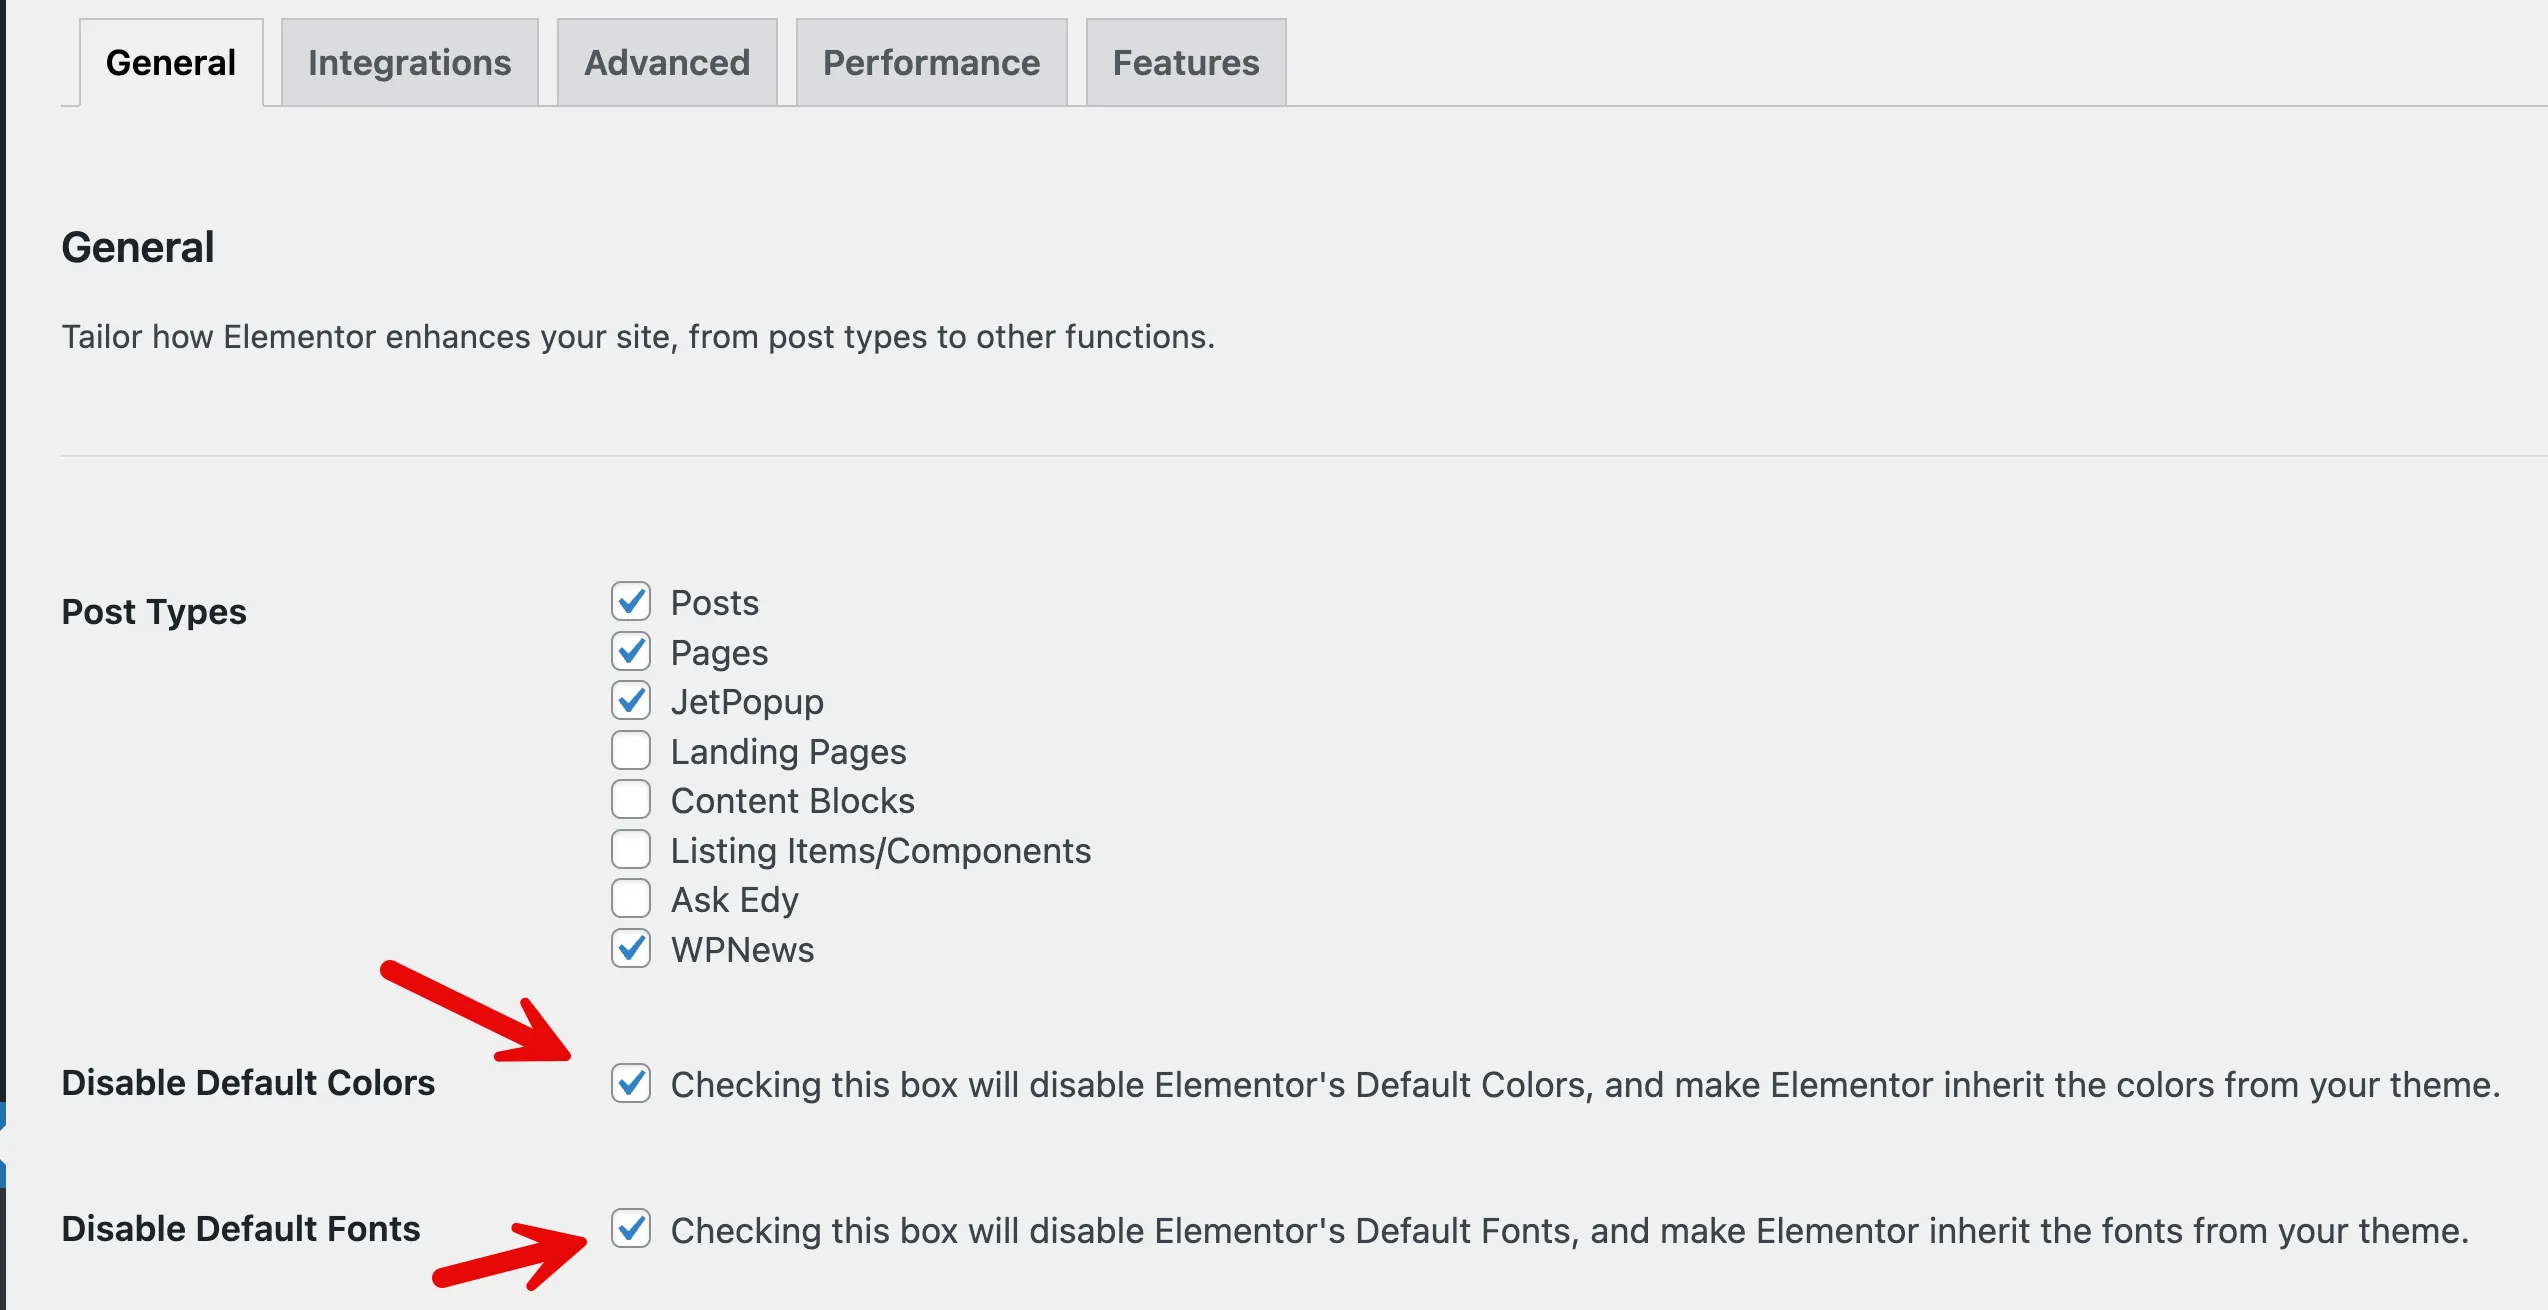
You’ll find the checkboxes in Elementor, Settings under General:
- Disable Default Colors
- Disable Default Fonts
Unchecking Both: Using Default Colors and Fonts
If you uncheck both boxes, Elementor will automatically recognize the colors and fonts you set in your Site Settings. This can streamline your design process.
Example: Unchecking Both Boxes
Let’s look at an example. I’ve custom-loaded the Montserrat font and applied it to the site globally. The font and color automatically apply when I drag a heading widget onto the page. The heading adopts the primary color and the Montserrat font, which I have set as global defaults.
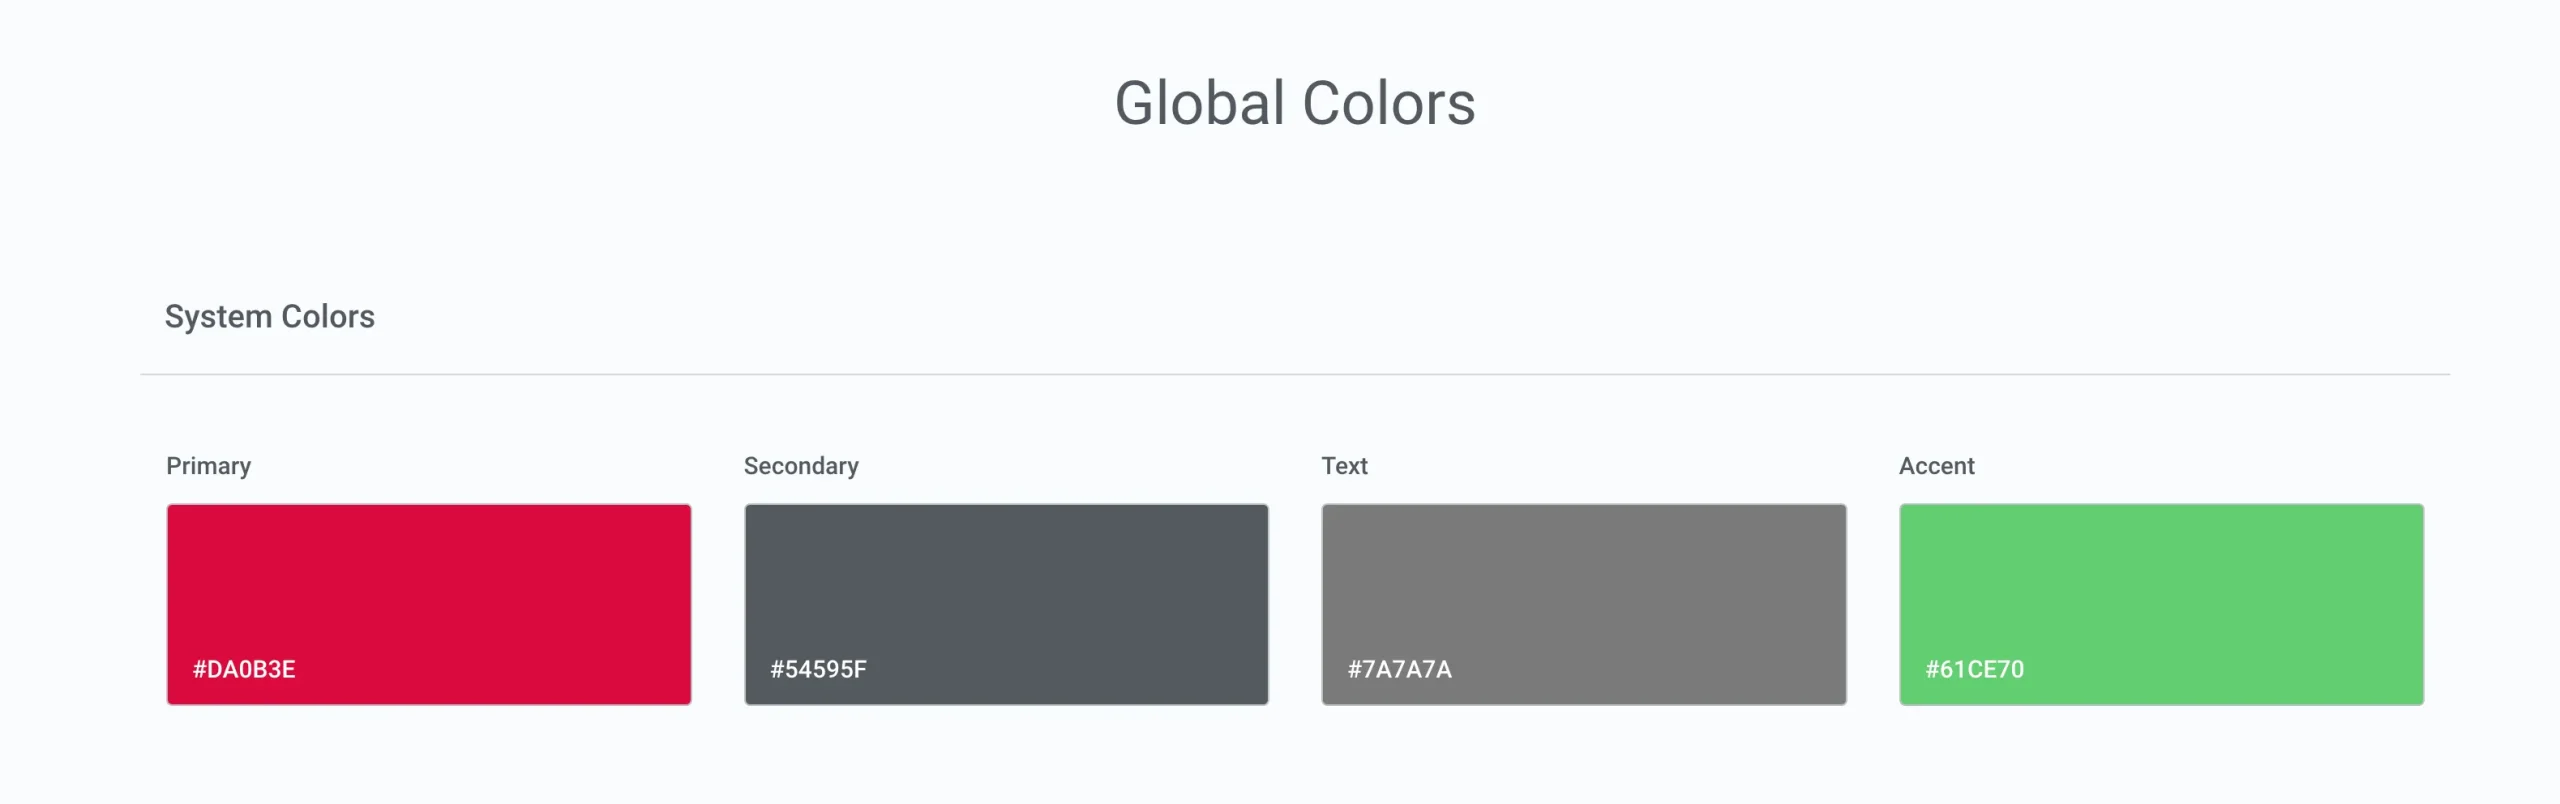
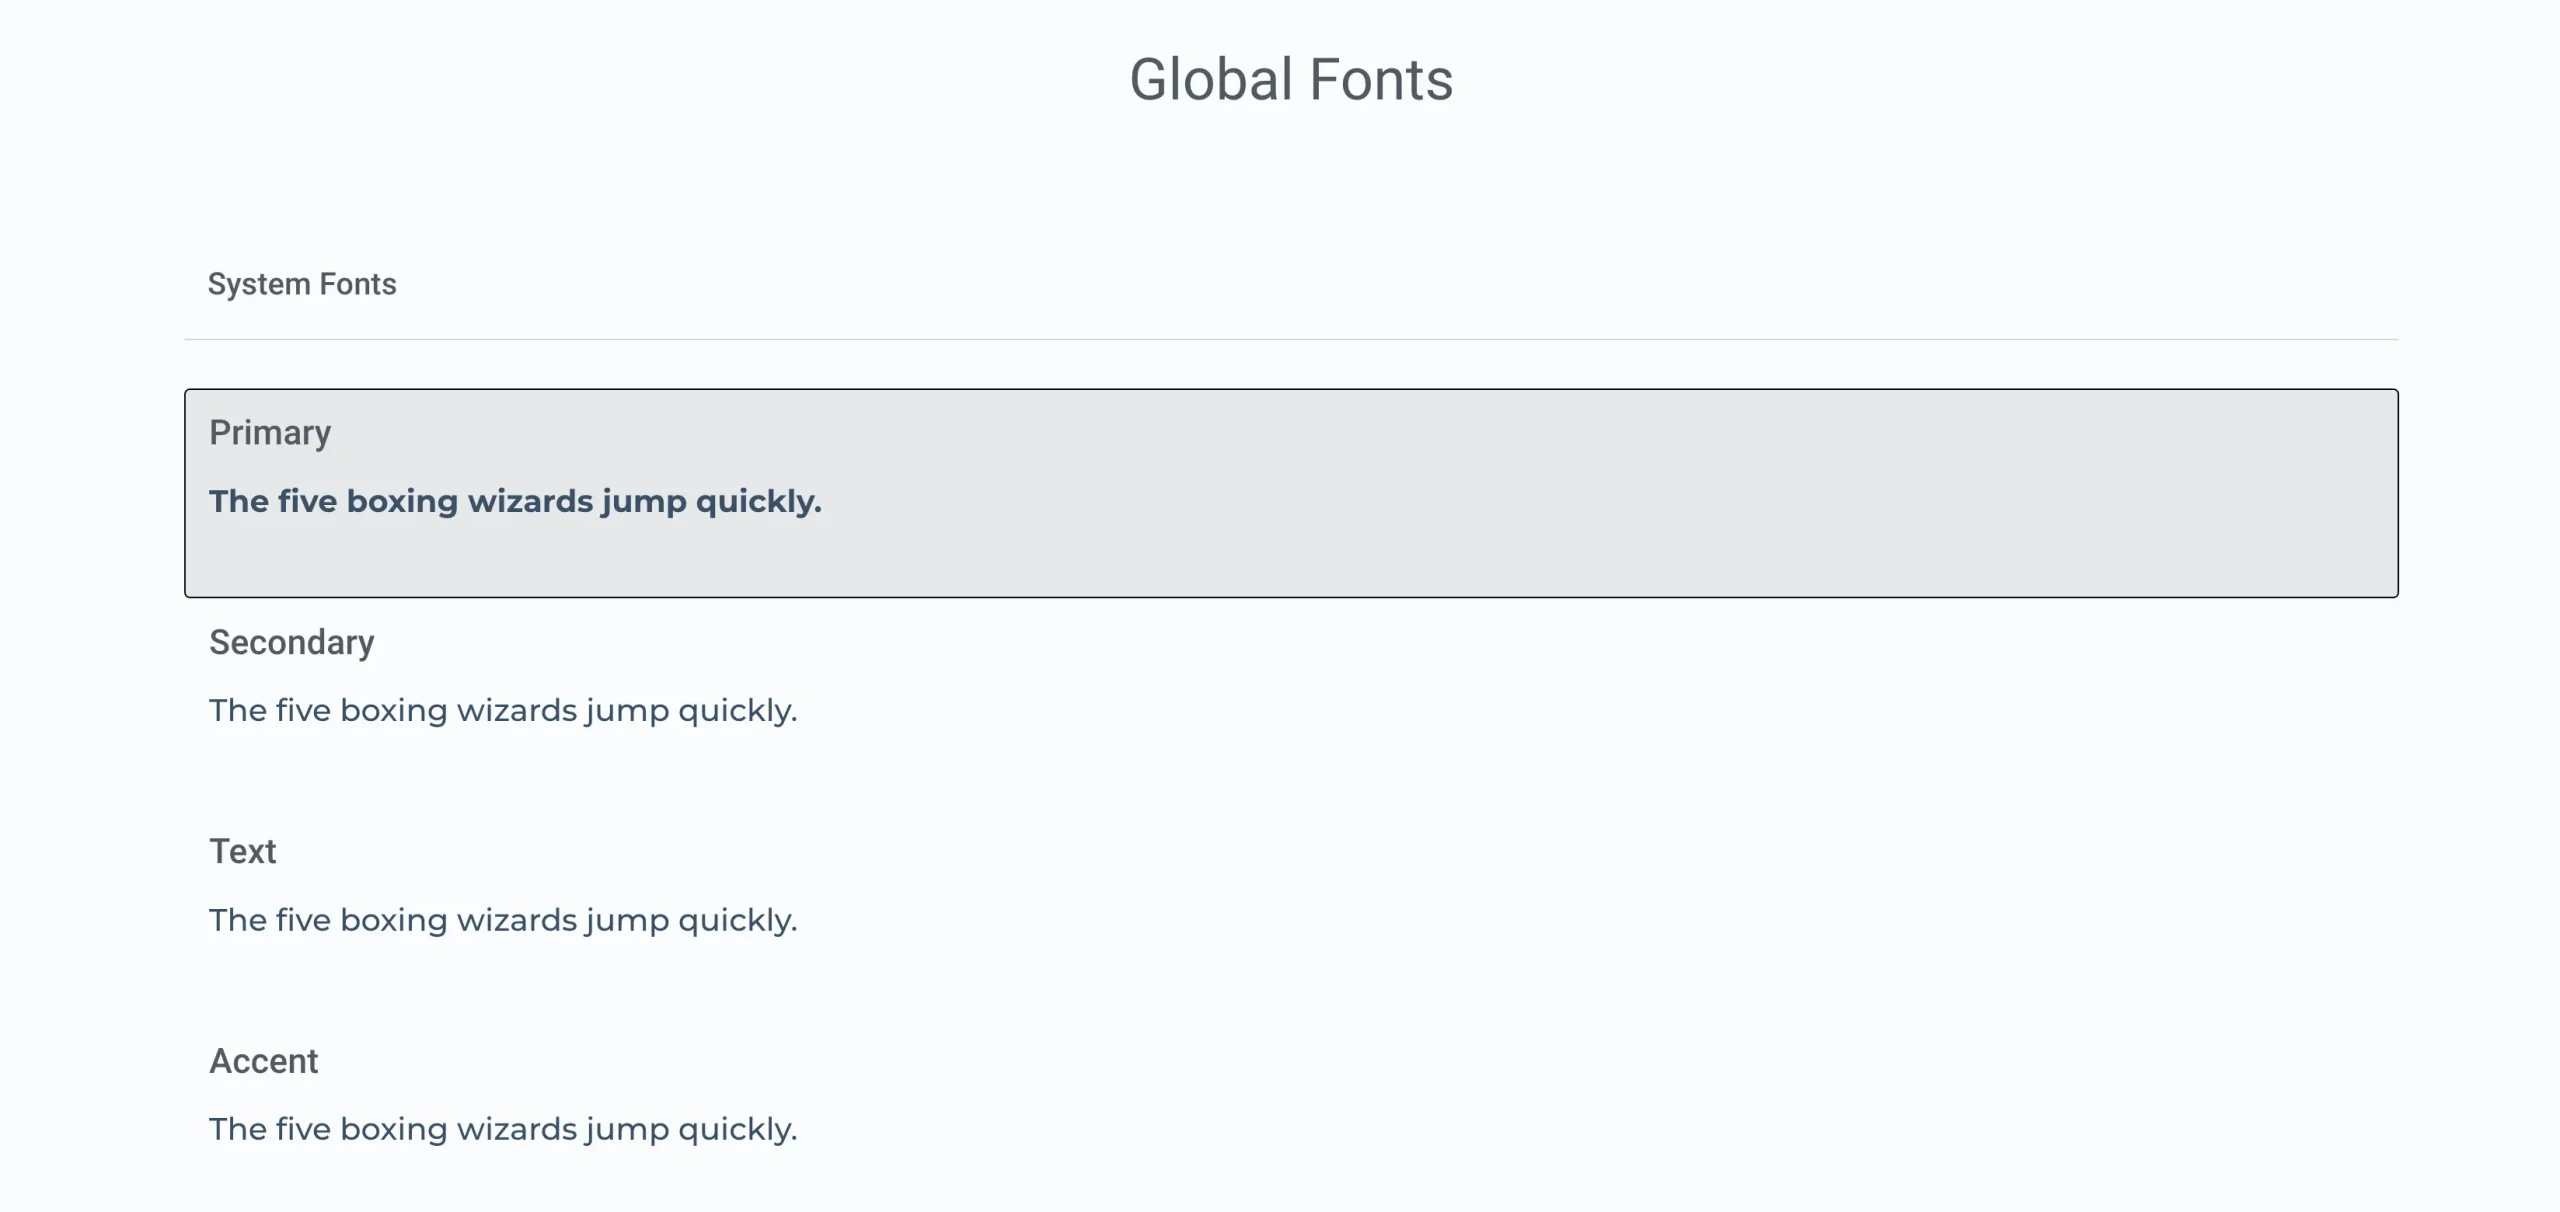
This approach is ideal if you want to maintain consistency across your site. Any time you add a new heading, button, or text widget, Elementor will automatically apply the global styles you’ve defined.
Adding Custom CSS
When you uncheck both options and want to use custom CSS, things can get tricky. You can add custom font sizes, weights, or colors, but you’ll need to use the !important rule to override the default global styles.
For example, if you want to change an H1 heading’s font color via CSS, you’d add:
h1 {
   color: var(--e-global-color-accent) !important;
   font-family: Verdana !important;
}
Without the !important tag, your custom styles may not apply, as Elementor’s global settings take precedence.
Checking Both: Complete Control with CSS
If you check both boxes, Elementor won’t automatically apply your global colors or fonts to elements. It allows for greater control when using custom CSS because the global settings won’t interfere with your custom styles.
Example: Checking Both Boxes
After checking both boxes, you’ll notice that no global colors or fonts are applied when you drag a heading widget onto the page. You can apply your custom CSS without using the !important tag. For instance, adding the following CSS will apply your desired styles without conflict:
h1 {
   color: var(--e-global-color-accent);
   font-family: Verdana;
}
By checking both boxes, you ensure that your custom styles are applied more cleanly without the need for overrides.
My Preferred Method: Disable Default Fonts and Color
I prefer a hybrid approach when building websites. I like to uncheck the fonts option so that my custom-loaded fonts (like Montserrat) automatically apply across the site. It ensures consistency, and I can still override it with custom styles if needed.
However, I typically check the colors option. It allows me to apply custom CSS for specific elements while still using the global colors for most parts of the site. I also set up custom color schemes in my site settings, allowing me to create a more organized CSS framework.
Elementor font and color settings: Which Option Is Best for You?
Ultimately, whether you check or uncheck the boxes in Elementor depends on your workflow:
- Unchecking both is great for maintaining consistency across your site, as Elementor automatically applies your global colors and fonts.
- Checking Both gives you complete control when adding custom CSS without needing the !important rule.
I recommend experimenting with both methods to see which suits your design style. Checking both boxes might simplify your work if you frequently use custom CSS. But unchecking both might be the better choice if you want an easy-to-manage setup without diving into CSS.
Whichever approach you select, remember that you can always directly override global styles within Elementor’s Style tab. It gives you even greater flexibility in creating the ideal design for your website.
The inspiration for this article is from Imran’s YouTube video.

I would love to get some feedback from you. Was this article helpful? Please share your opinion with me in the comment section below. Or, if you prefer a more personal touch, feel free to email me directly at info@edywerder.ch Your thoughts and insights are always appreciated.
Before you go …
Before you go, if you’re diving into customizing Elementor’s fonts and colors, it might also be useful to stay updated on the latest features and improvements. Check out the current version of Elementor to see what new tools are available that could enhance your design workflow. Staying informed about updates ensures your site is optimized and running smoothly with the latest capabilities.
Related Articles
About the author
Hi, I’m Edy Werder. I write hands-on guides about Proxmox, homelab servers, NAS, and WordPress, based on real setups I run and document.
No sponsors, no fluff—just real configs and results.
Enjoying the content?

How I set up my global fonts
1. First, I always tick both boxes to prevent Elementor’s default styling from affecting anything.
2. Then, I go to the global settings and set the body font family to my custom font. This will apply to the whole website.
3. Next, I create global fonts (and global colours) like Heading XL, Heading L, Heading M, Text Base, Text M, and so on. I base these on CSS variables that I made using Core Framework.
4. After that, I return to the global typography settings and apply those global typography styles to H1, H2, H3, and other headings.
5. Finally, whenever I want to change an Elementor Heading widget, I simply use the global fonts I created earlier.