
By Edy Werder — IT Consultant & Tech Blogger
Editor’s Note: This article was refreshed on December 29, 2025, to include new stats and developments.
WordPress Backup: Why Do I Need One?
Backing up WordPress isn’t optional. One bad plugin update, a compromised admin login, or a hosting issue can lead to hours of downtime unless you have a clean backup you can restore quickly.
Cloudflare’s latest Radar “Year in Review” analysis of sites associated with the top 5,000 domains found WordPress at 47% in the CMS category. The Cloudflare Blog Popular platforms attract automated attacks simply because they’re everywhere — and WordPress is everywhere.
Attackers typically don’t “hack WordPress” in a Hollywood way. They look for easy wins like:
- Outdated plugins/themes with known vulnerabilities
- Brute-force attempts against /wp-login.php (and sometimes xmlrpc.php)
- Weak or reused passwords (especially on admin accounts)
- Insecure file upload points (forms, media handling, misconfigured plugins)
- Exposed config/log files (backups left in
/wp-content/, debug logs, etc.) - No 2FA / too many users with admin rights
- Stolen session cookies
In this guide, I’ll show you how I approach WordPress backups so you end up with a full backup you can restore, stored safely off-site, and tested often enough that you actually trust it.
WordPress Website Backup: When Do You Actually Need It?
A WordPress backup becomes “essential” the moment you need to undo something fast without guessing what broke.
Here are the most common situations where I’m genuinely happy I have a recent backup:
- After a hack or malware infection, I want to roll back to a clean version from before the compromise.
- Before major updates: WordPress core, theme, or plugin updates are the #1 “something suddenly doesn’t work” moment. I always take a backup first.
- After a hosting/server issue: Even good hosts can have outages or corrupted files. A backup lets me restore (or move) the site quickly.
- Before migrations: Switching hosts, changing domains, or moving from staging to live is much safer when you can restore instantly.
- When human error happens: Deleted pages, overwritten content, or broken settings are way more common than people admit.
A couple of backup rules I stick to:
- Store at least one copy off-site (not only on the same server as your website).
- Check your backup logs occasionally to ensure the jobs are actually completing.
- If your backups contain sensitive data, store them securely (and ideally encrypted, depending on the tool/service).
That’s the mindset.
What do WordPress site backups include?
A proper WordPress backup has two parts: your files and your database.
- WordPress files
- wp-content/ (this is the important one): your themes, plugins, uploads/media, and any custom files
- Optional but acceptable to include: WordPress core files (you can re-download them, but including them makes restores simpler)
- Your configuration (most importantly
wp-config.php; sometimes also.htaccess/web.configdepending on the server)
- WordPress database
- Posts, pages, comments
- Users and user roles
- Settings (site options), plugin settings, WooCommerce data, etc.
My rule: store at least one backup copy off-site (for example, Dropbox or S3) so a server issue can’t wipe out both your site and your backups.
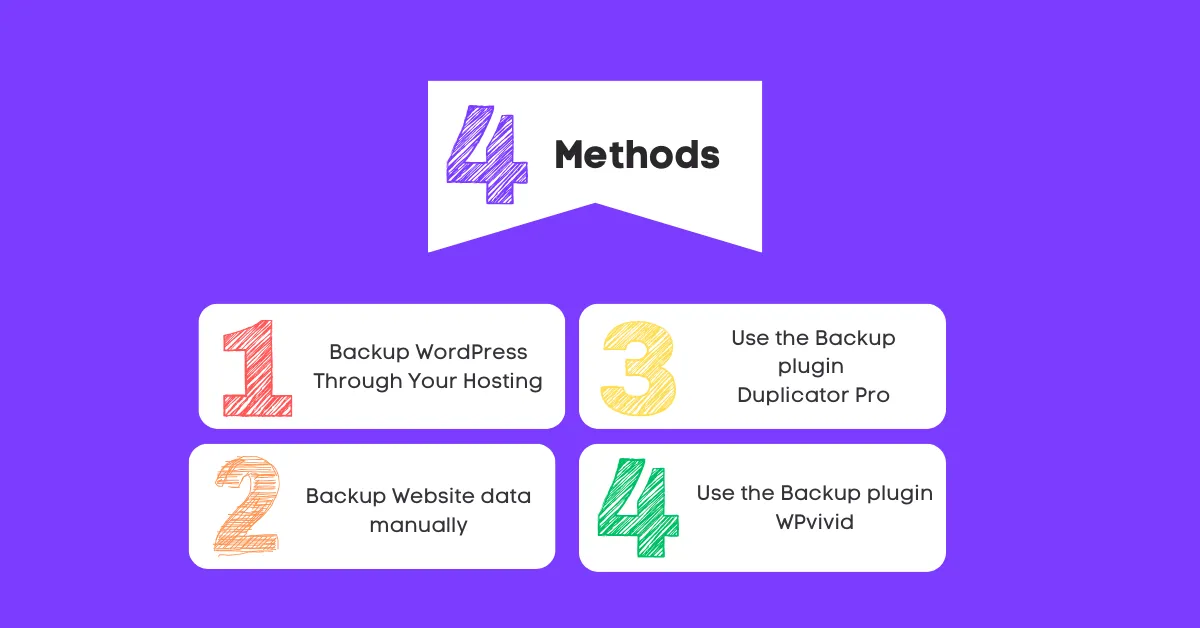
In the following discussion on this website blog, I’ll introduce some methods to set up backups for your site. I’ll highlight my experiences with Duplicator Pro and WPvivid backup services, which have served me well. UpdraftPlus plugin is another apt solution for frequent, automatic backups, freeing up valuable server resources while offering a safety net against unexpected incidents.
Method 1: Back up WordPress Through Your Hosting
The first way to back up WordPress is through your hosting account. This method uses a backup system that saves a copy of your website as it exists on the server. This comprehensive backup can include all of your files and your database. You’ll need to access the admin panel for your hosting account and locate the backup tool. The process of creating a backup will vary by host, but most offer simple, guided processes.
Web host backups are an essential feature offered by any good hosting company. If your hosting company integrates with a control panel like CPanel, you’ll have easy access to the backup option. For instance, Siteground employs its own Site tools with a backup feature. Furthermore, all hosting companies provide multiple backups, which means you can restore from an older backup if required.
The backup system can range from automatic, daily backups to manual-only backups. The optimal scenario is having the option of daily automatic backups stored for several days, with the capability to make a manual backup before any significant changes.
Here’s a glimpse of the SiteGround Site Tools, where the backup section falls under security. They safeguard backups for 30 days and offer the option to manually initiate a backup.
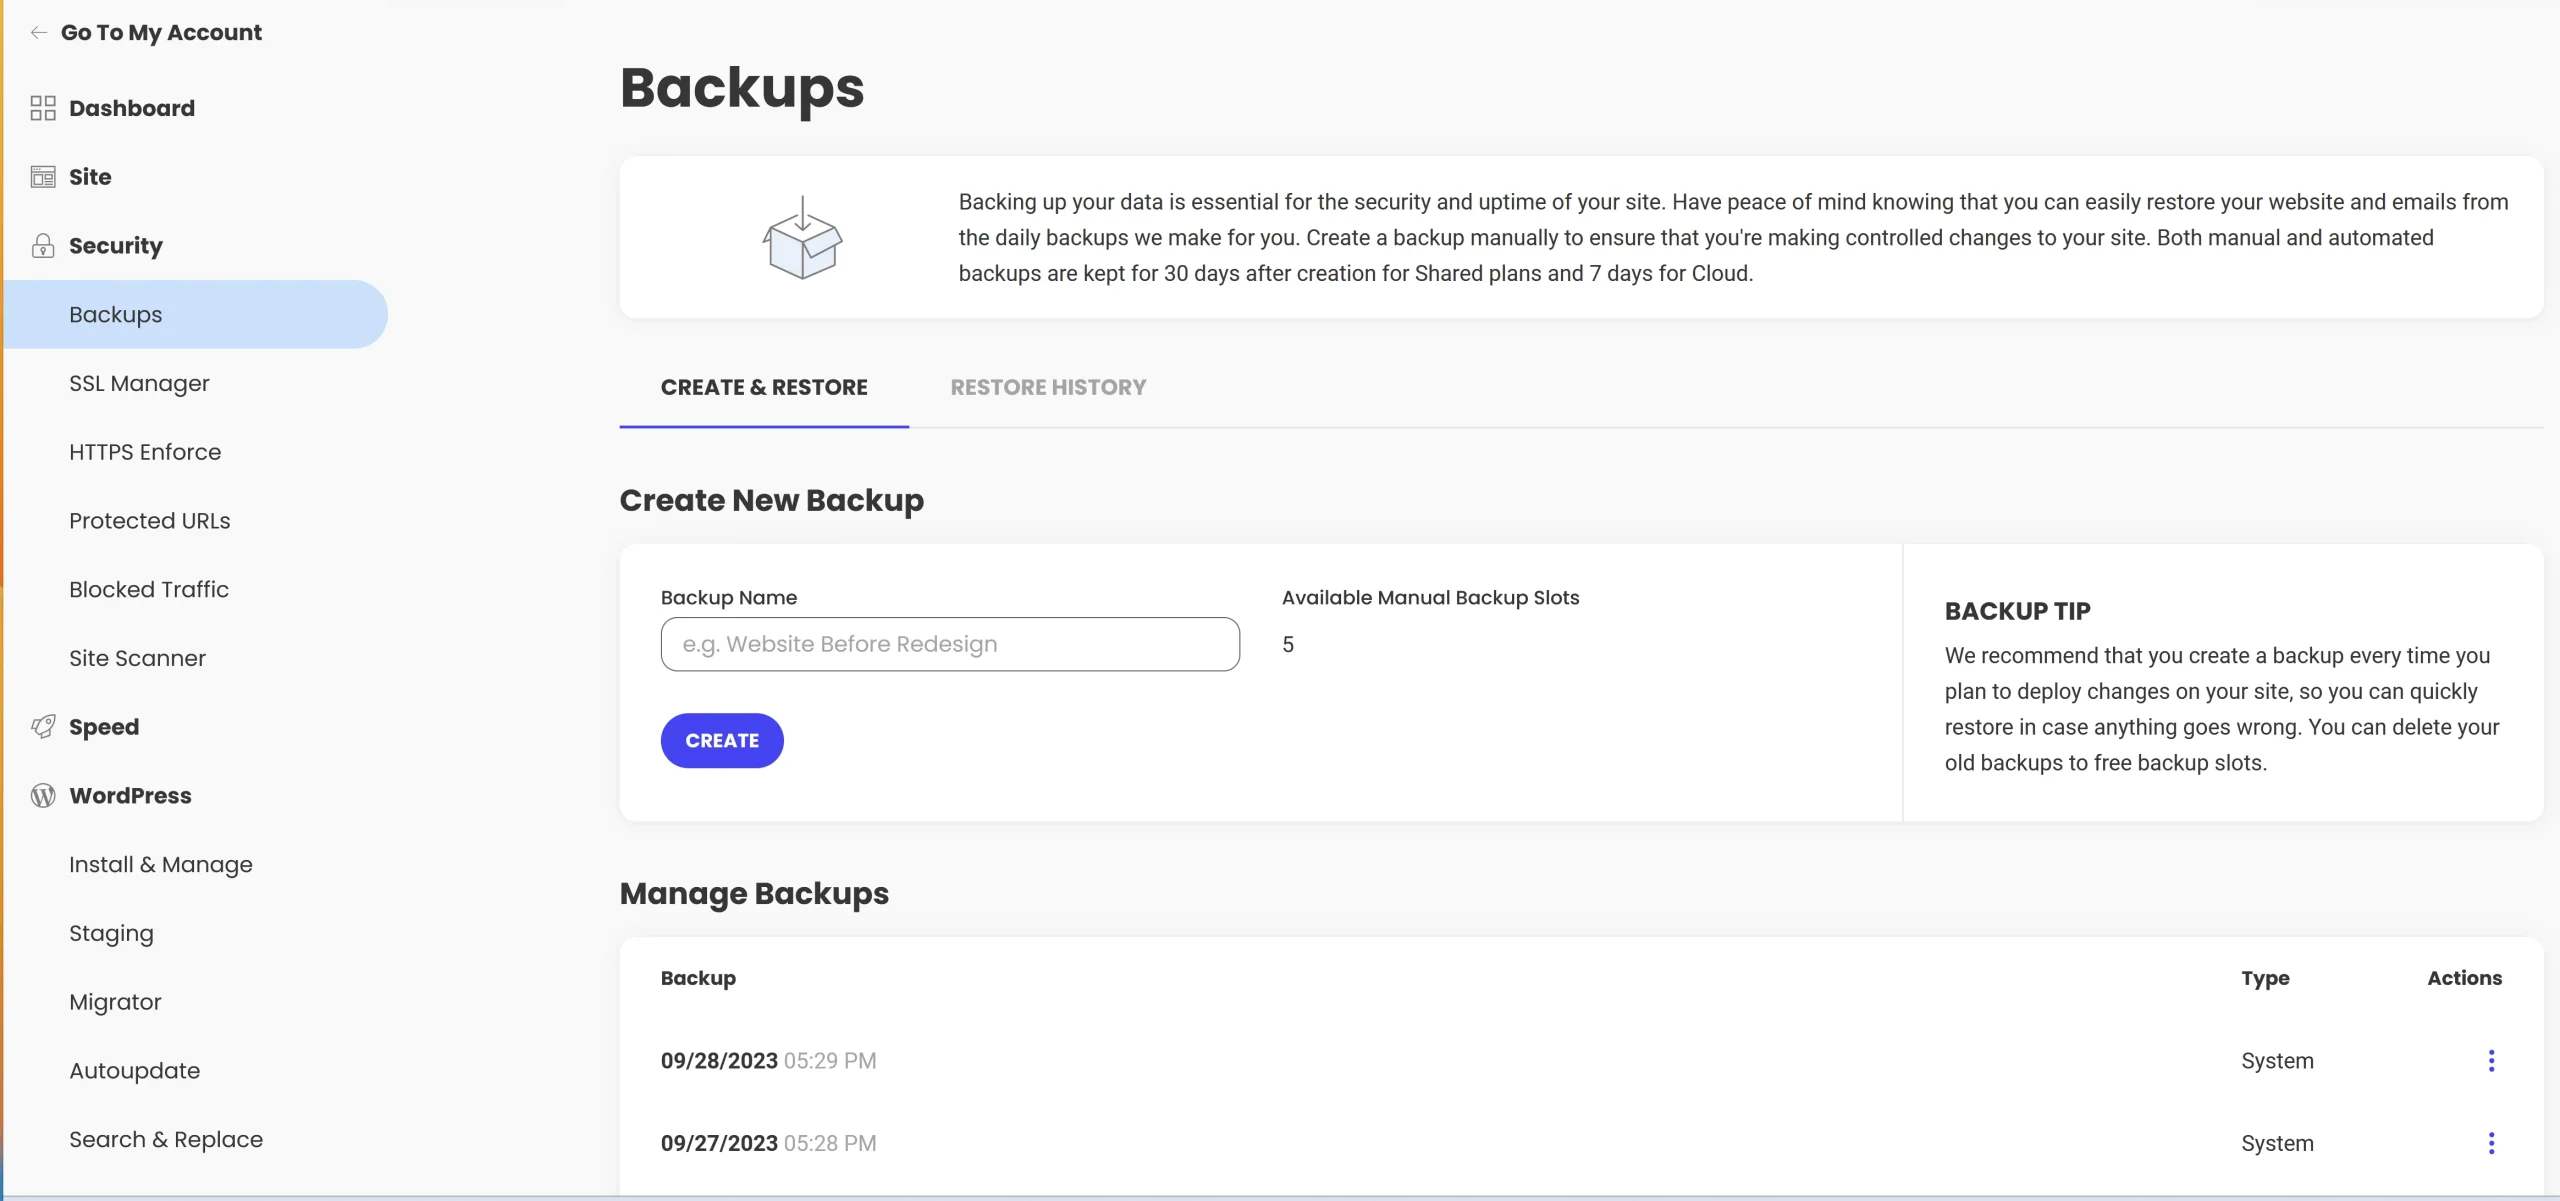
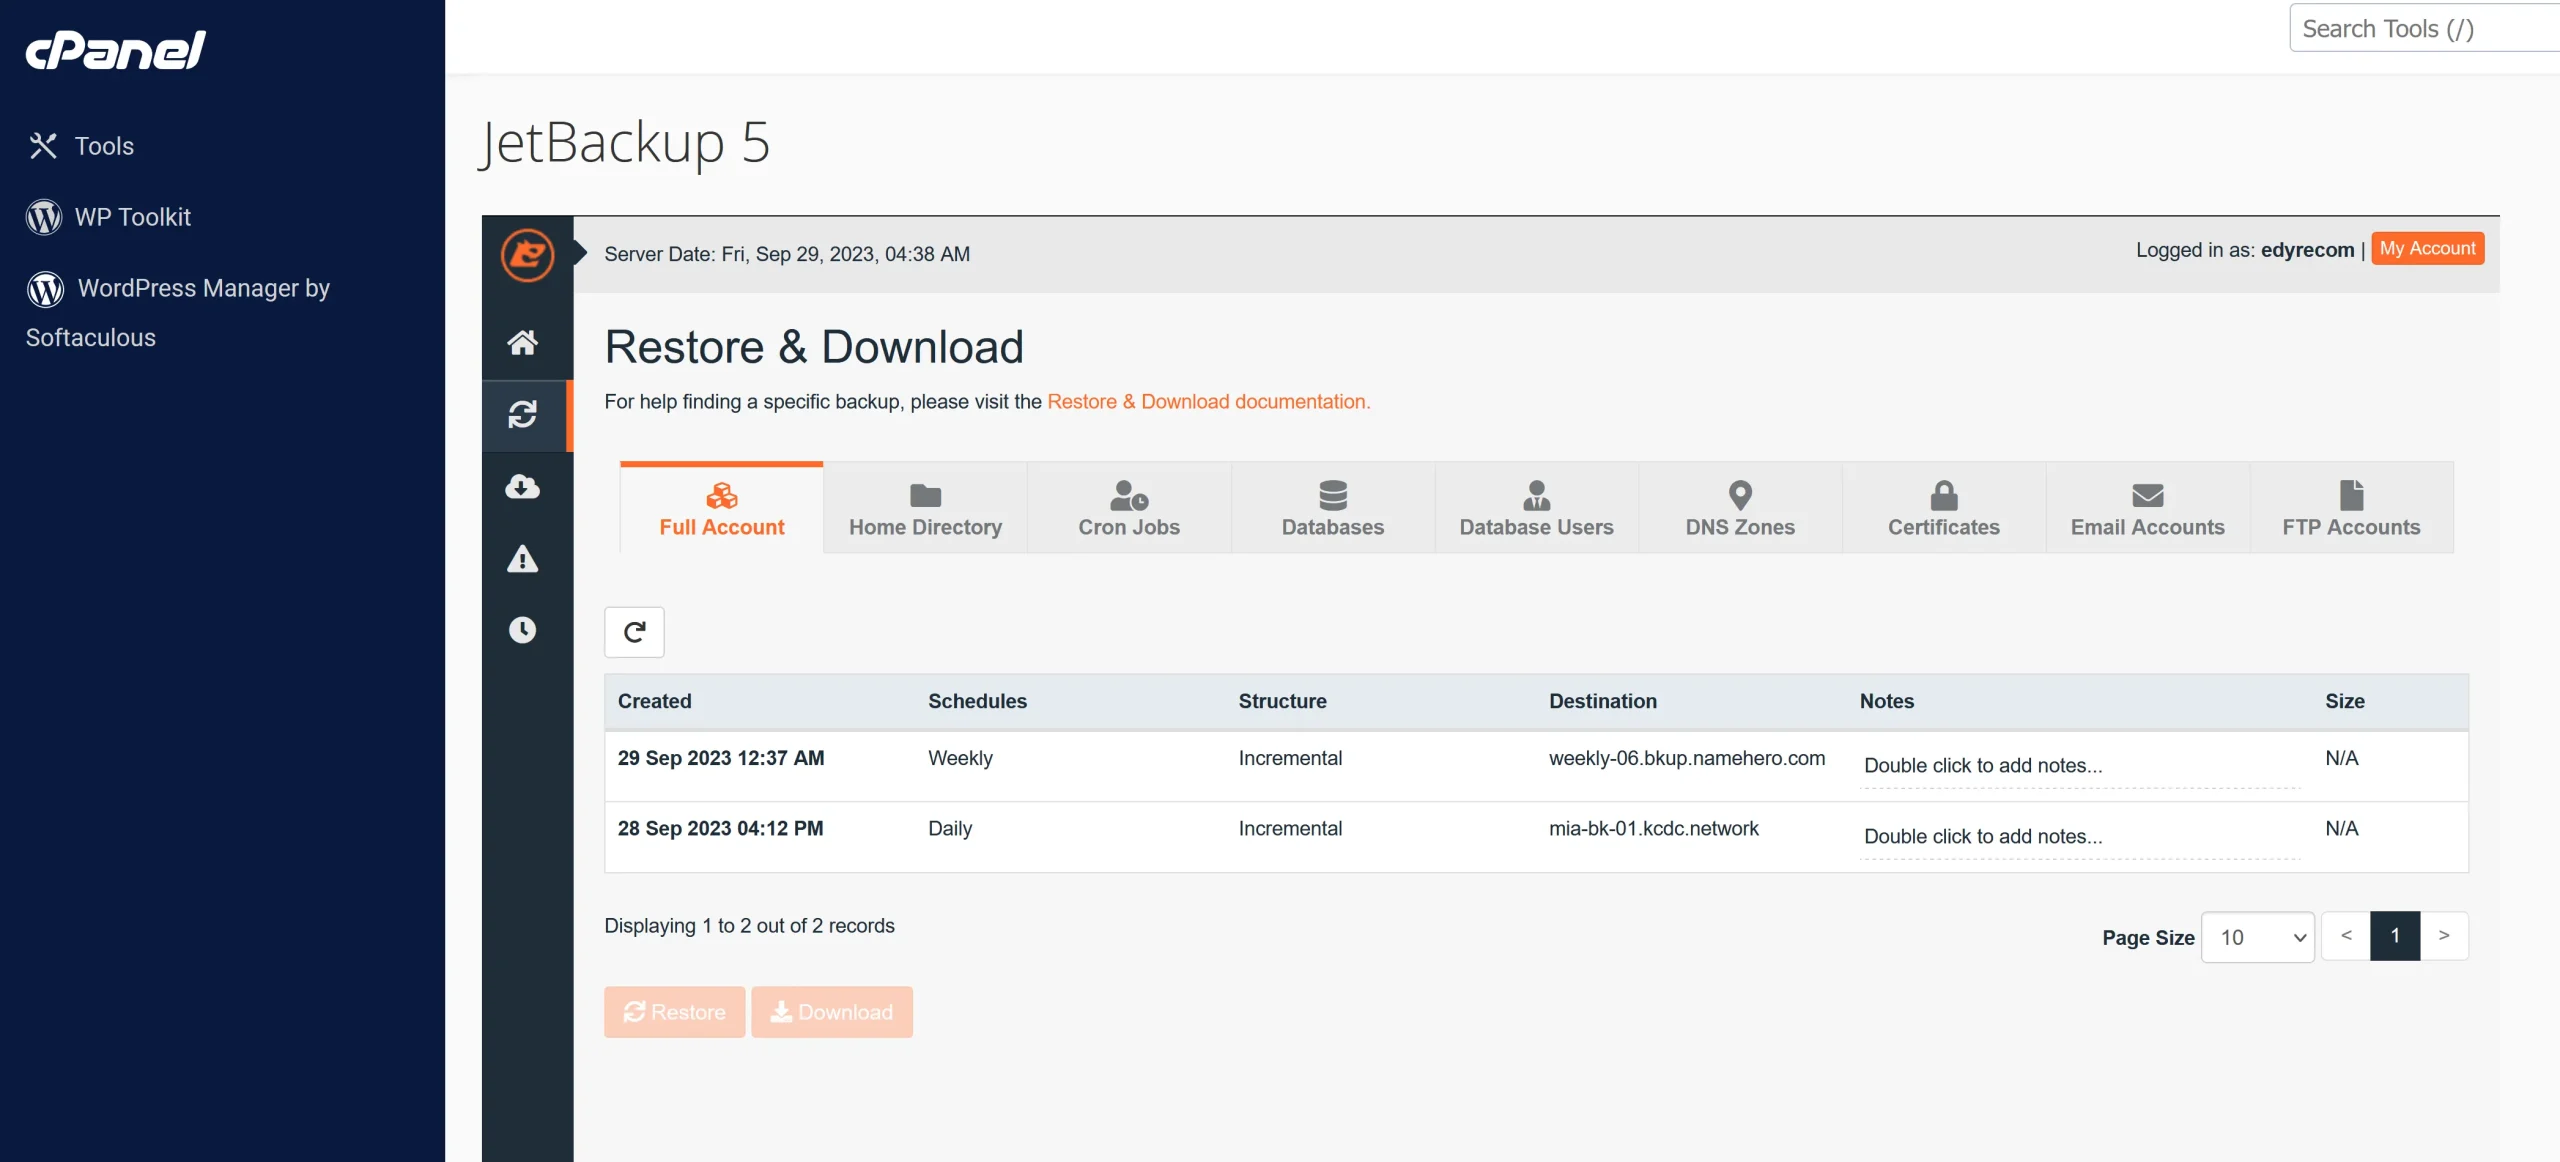
NameHero, a leading web hosting provider, amalgamates a CPanel interface with JetBackup. Incorporating automated backups running nightly and weekly, in essence, NameHero maintains just two automatic WordPress backups for each site, which may be considered insufficient by some. There are additional options to manually create a backup or download it to your cloud server. On the other hand, SiteGround does not offer the facility to download a backup.
It’s important to note that backup configurations may vary across web hosting companies, so understanding your host’s server resources and policies can help mitigate potential server issues.
Method 2:Backup Website data manually
To manually back up WordPress, you must download all your files and database from your WordPress site. You can save these files on your computer or an external hard drive.
Download Website Files to a backup location
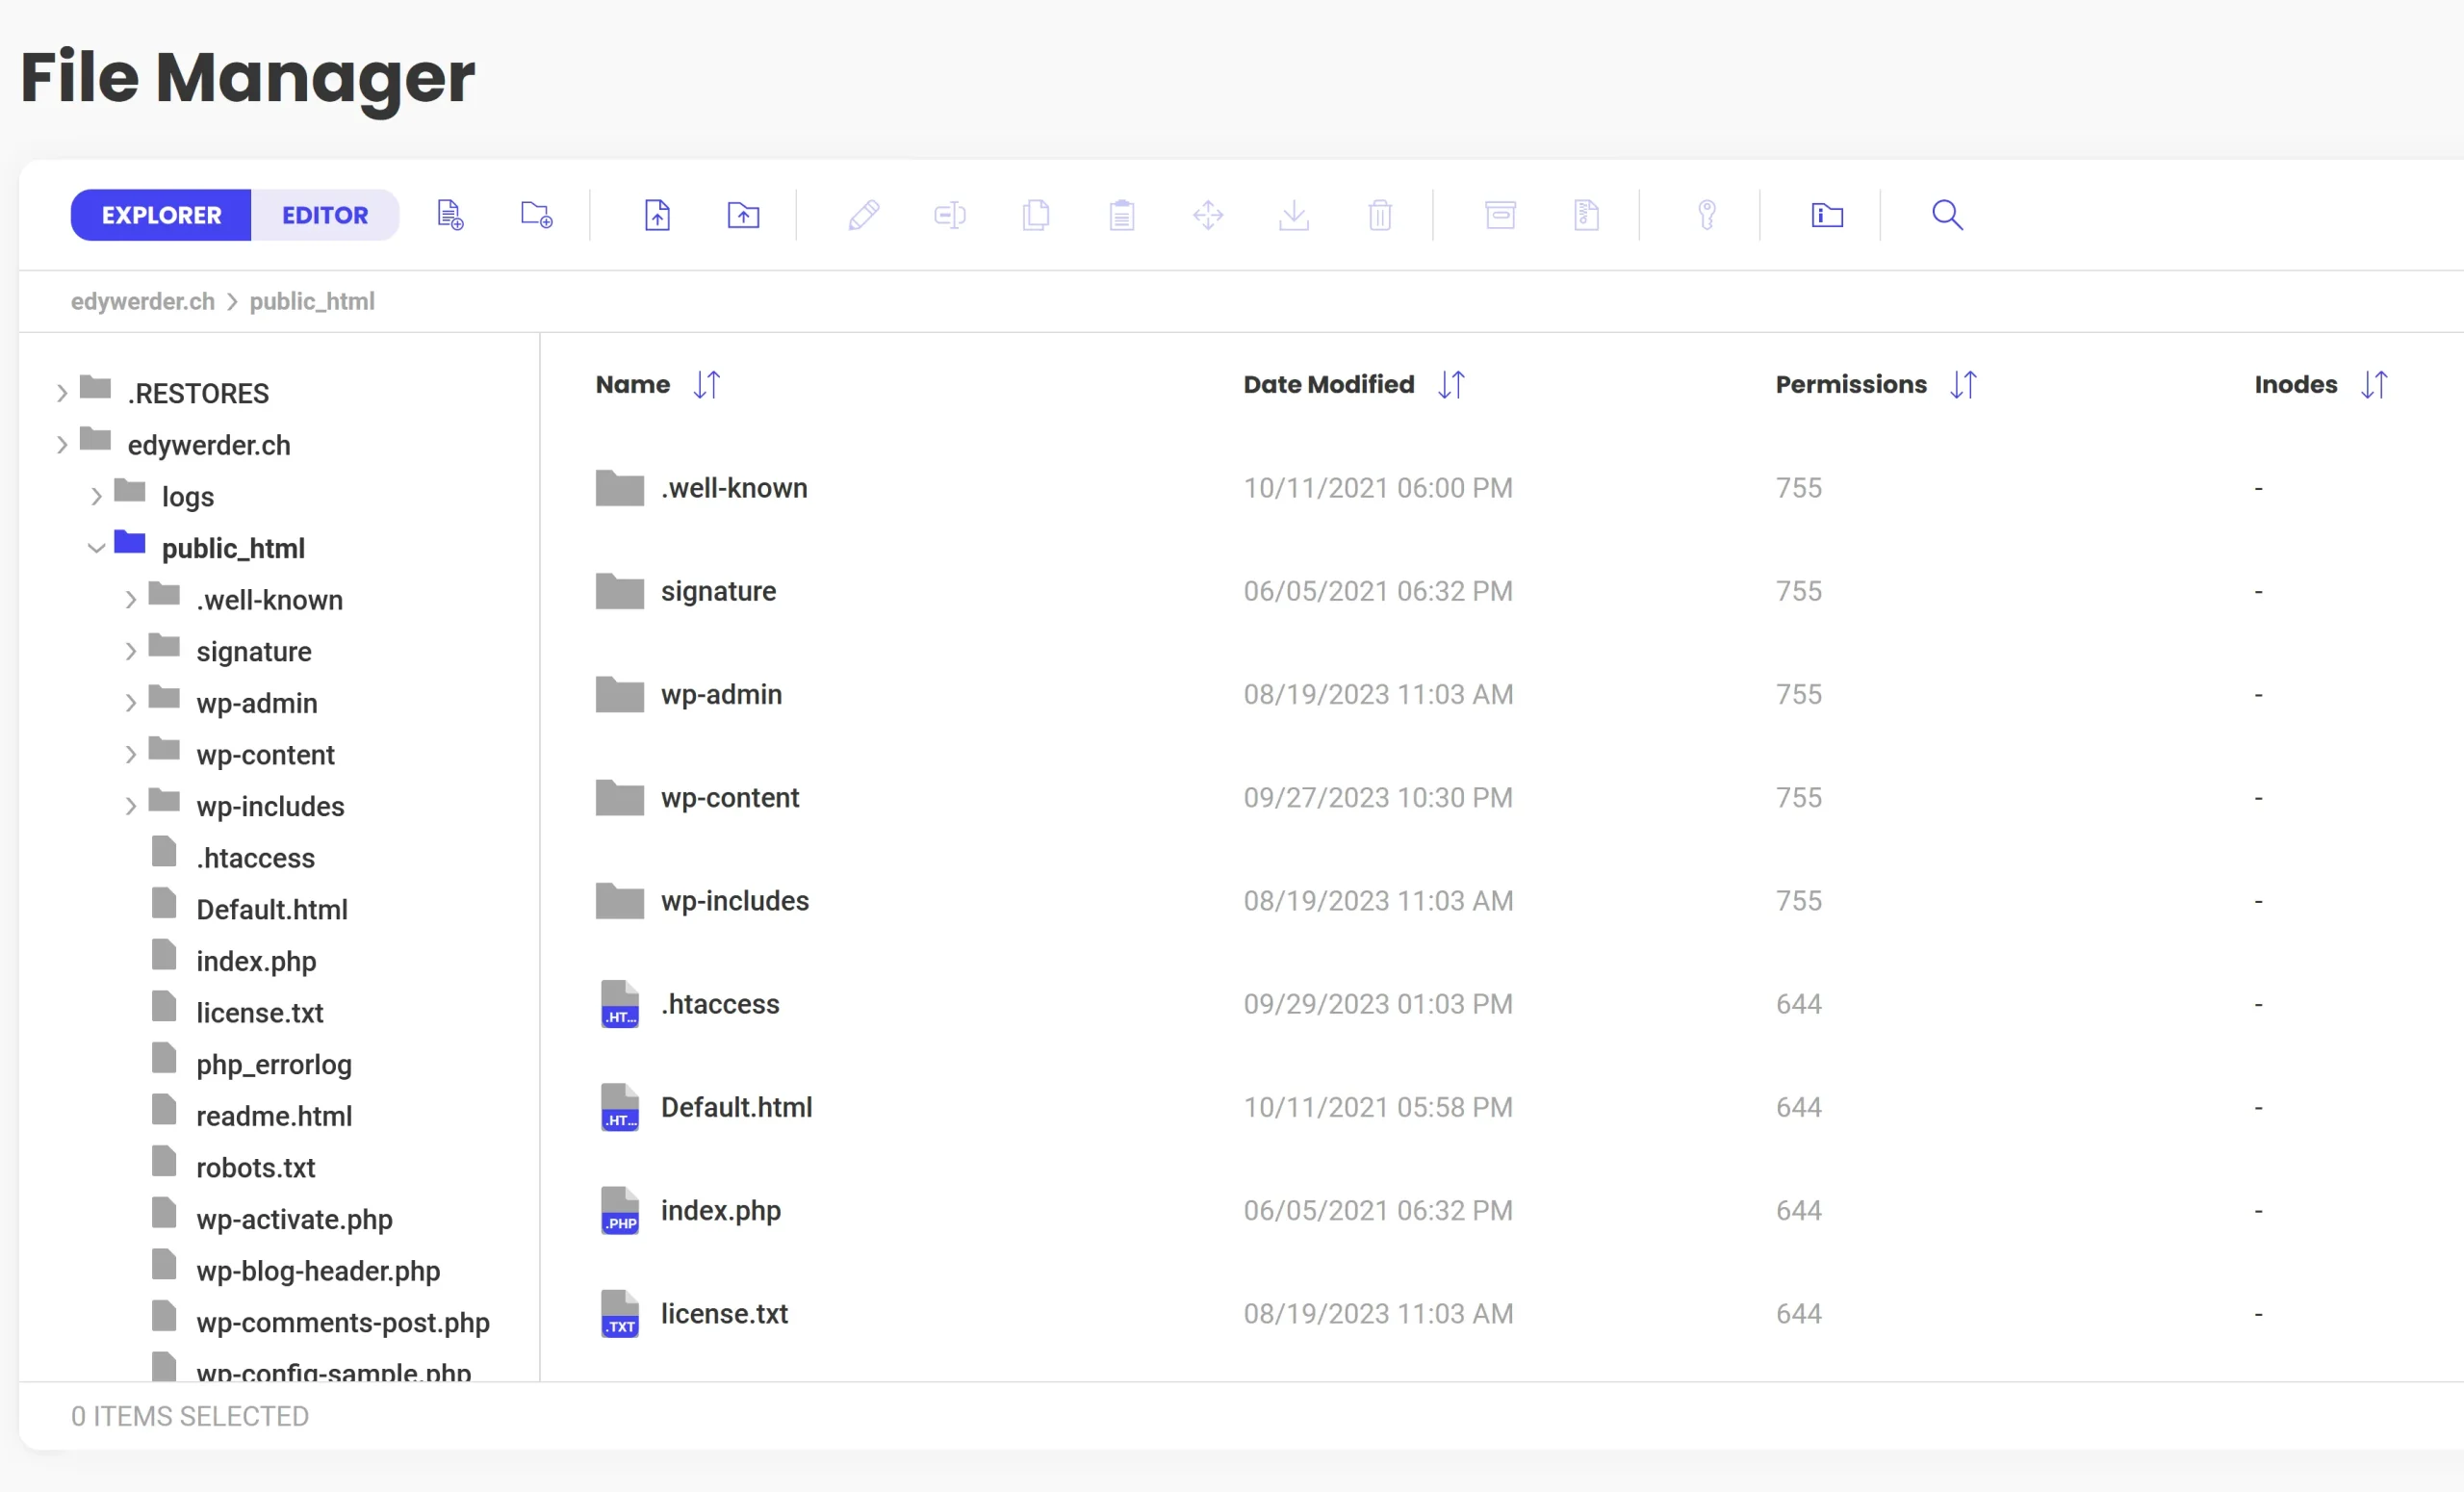
The WordPress directory contains:
- Sub-folders wp-admin
- Wp-content
- Wp-includes files starting with wp-(wp_config. php) required by your WordPress site
The wp-content folder houses all your themes, plugins, cache, and uploads, to name a few, among other things. The wp-admin directory contains all the files needed for your WordPress administration area. In contrast, WordPress’s core files reside in the wp-includes folder, which stores all of WordPress’s pivotal code.
To get the crucial backup package for your site, there are two conventional methods to download WordPress files:
- Venture into CPanel or Site Tools (Siteground), click on File Manager, and locate the WordPress directory, typically termed as public_html or home. The directory’s name will differ if you have more than one WordPress installation. With CPanel, direct download of folders and files isn’t feasible. You first need to create a compression file. Select the directory you desire as your backup, and click on `compress.` This will generate a ZIP file in the chosen folder. After this, download the compressed ZIP file to your local hard drive.
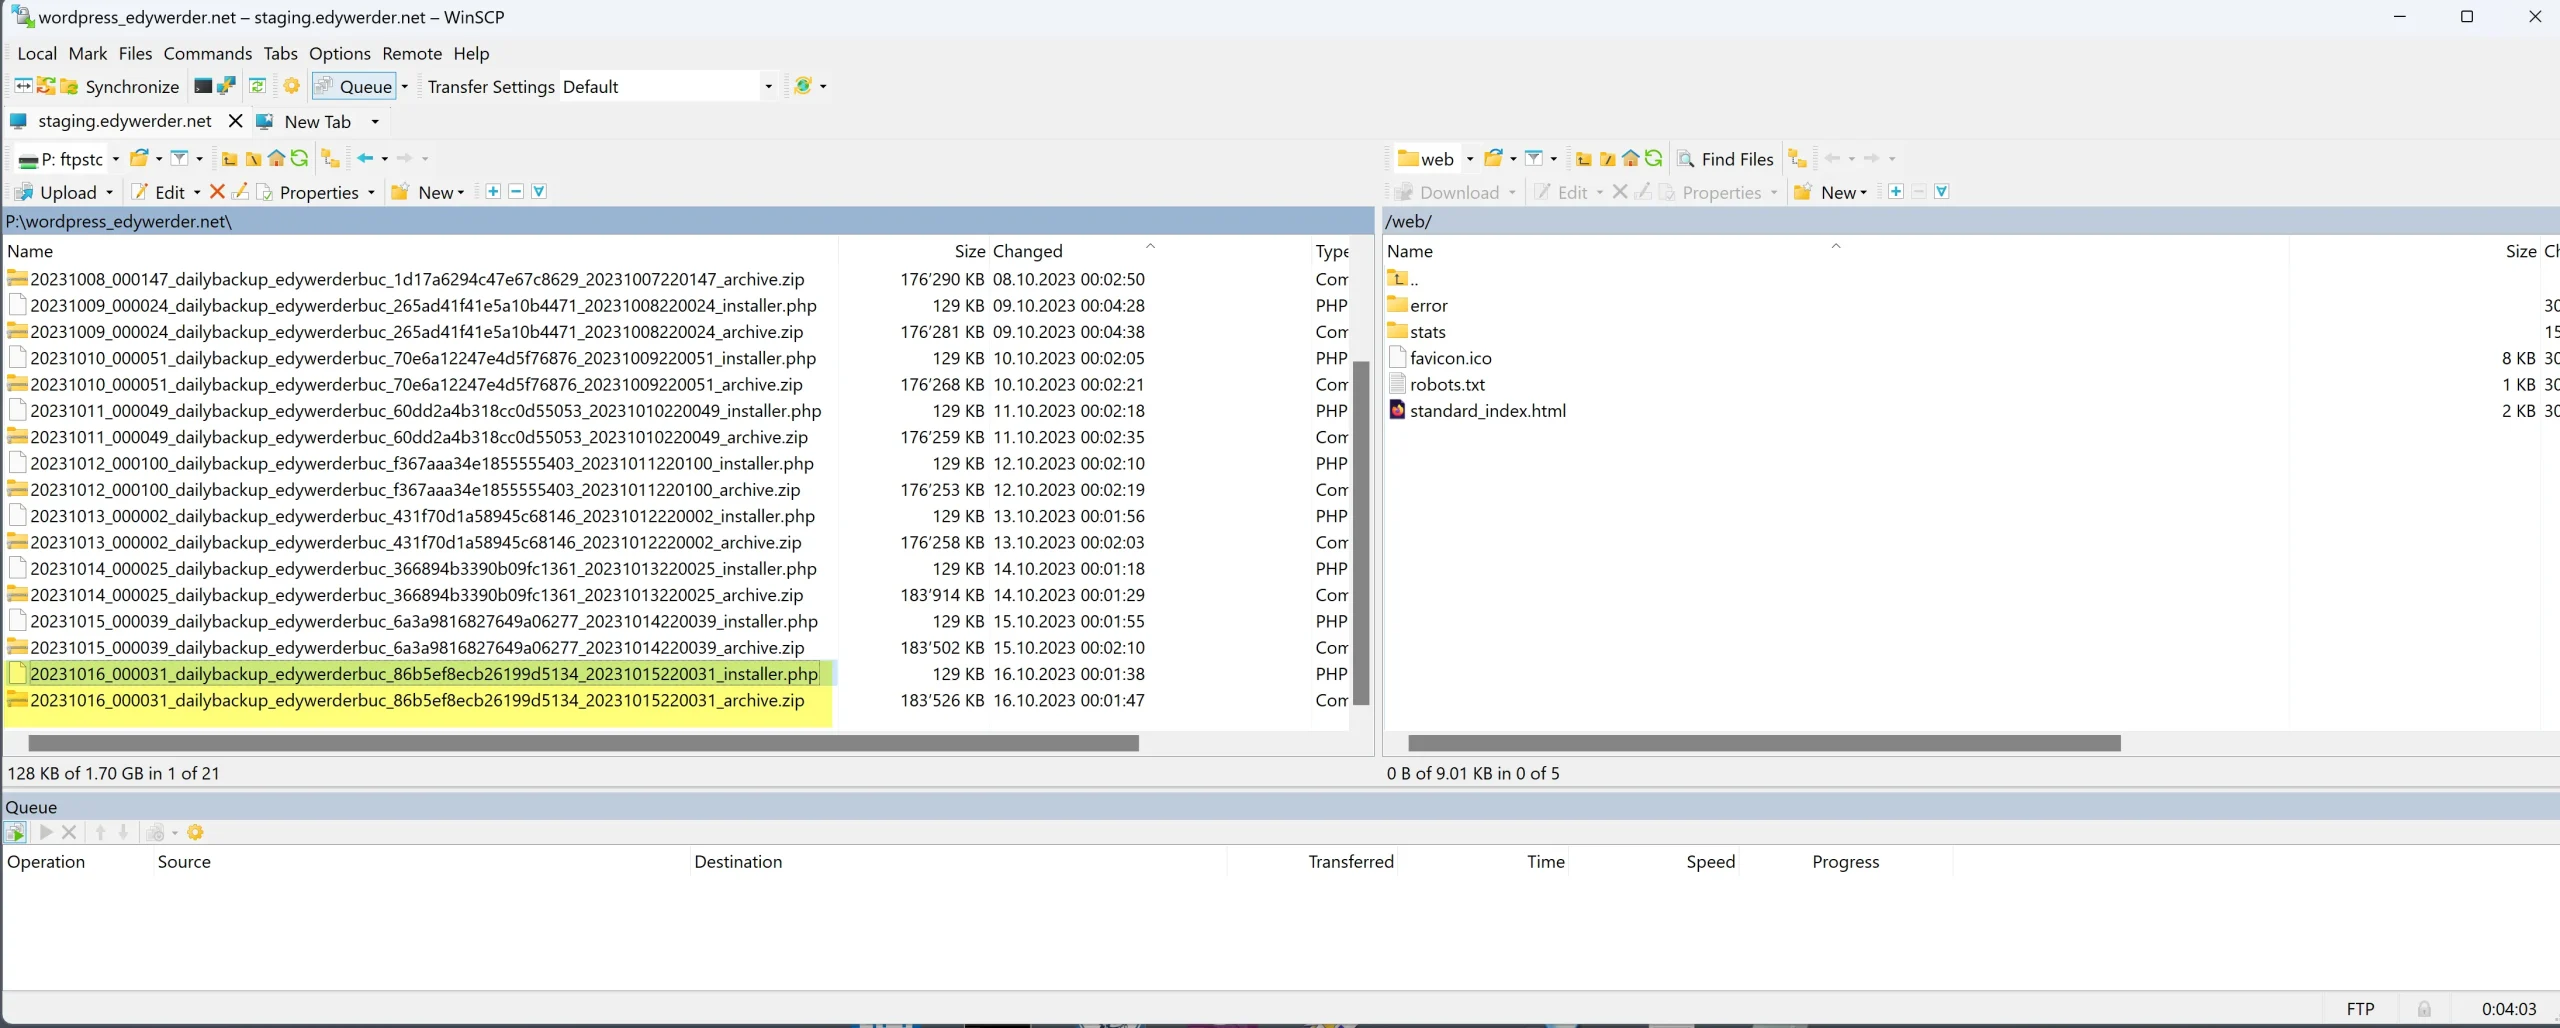
- Use an FTP client like FileZilla (compatible with Windows or MAC) or WinSCP (exclusive to Windows). Log in to your hosting account, remembering that an FTP login is required. You can then copy all the files you want to the secure backup location on your local hard drive.
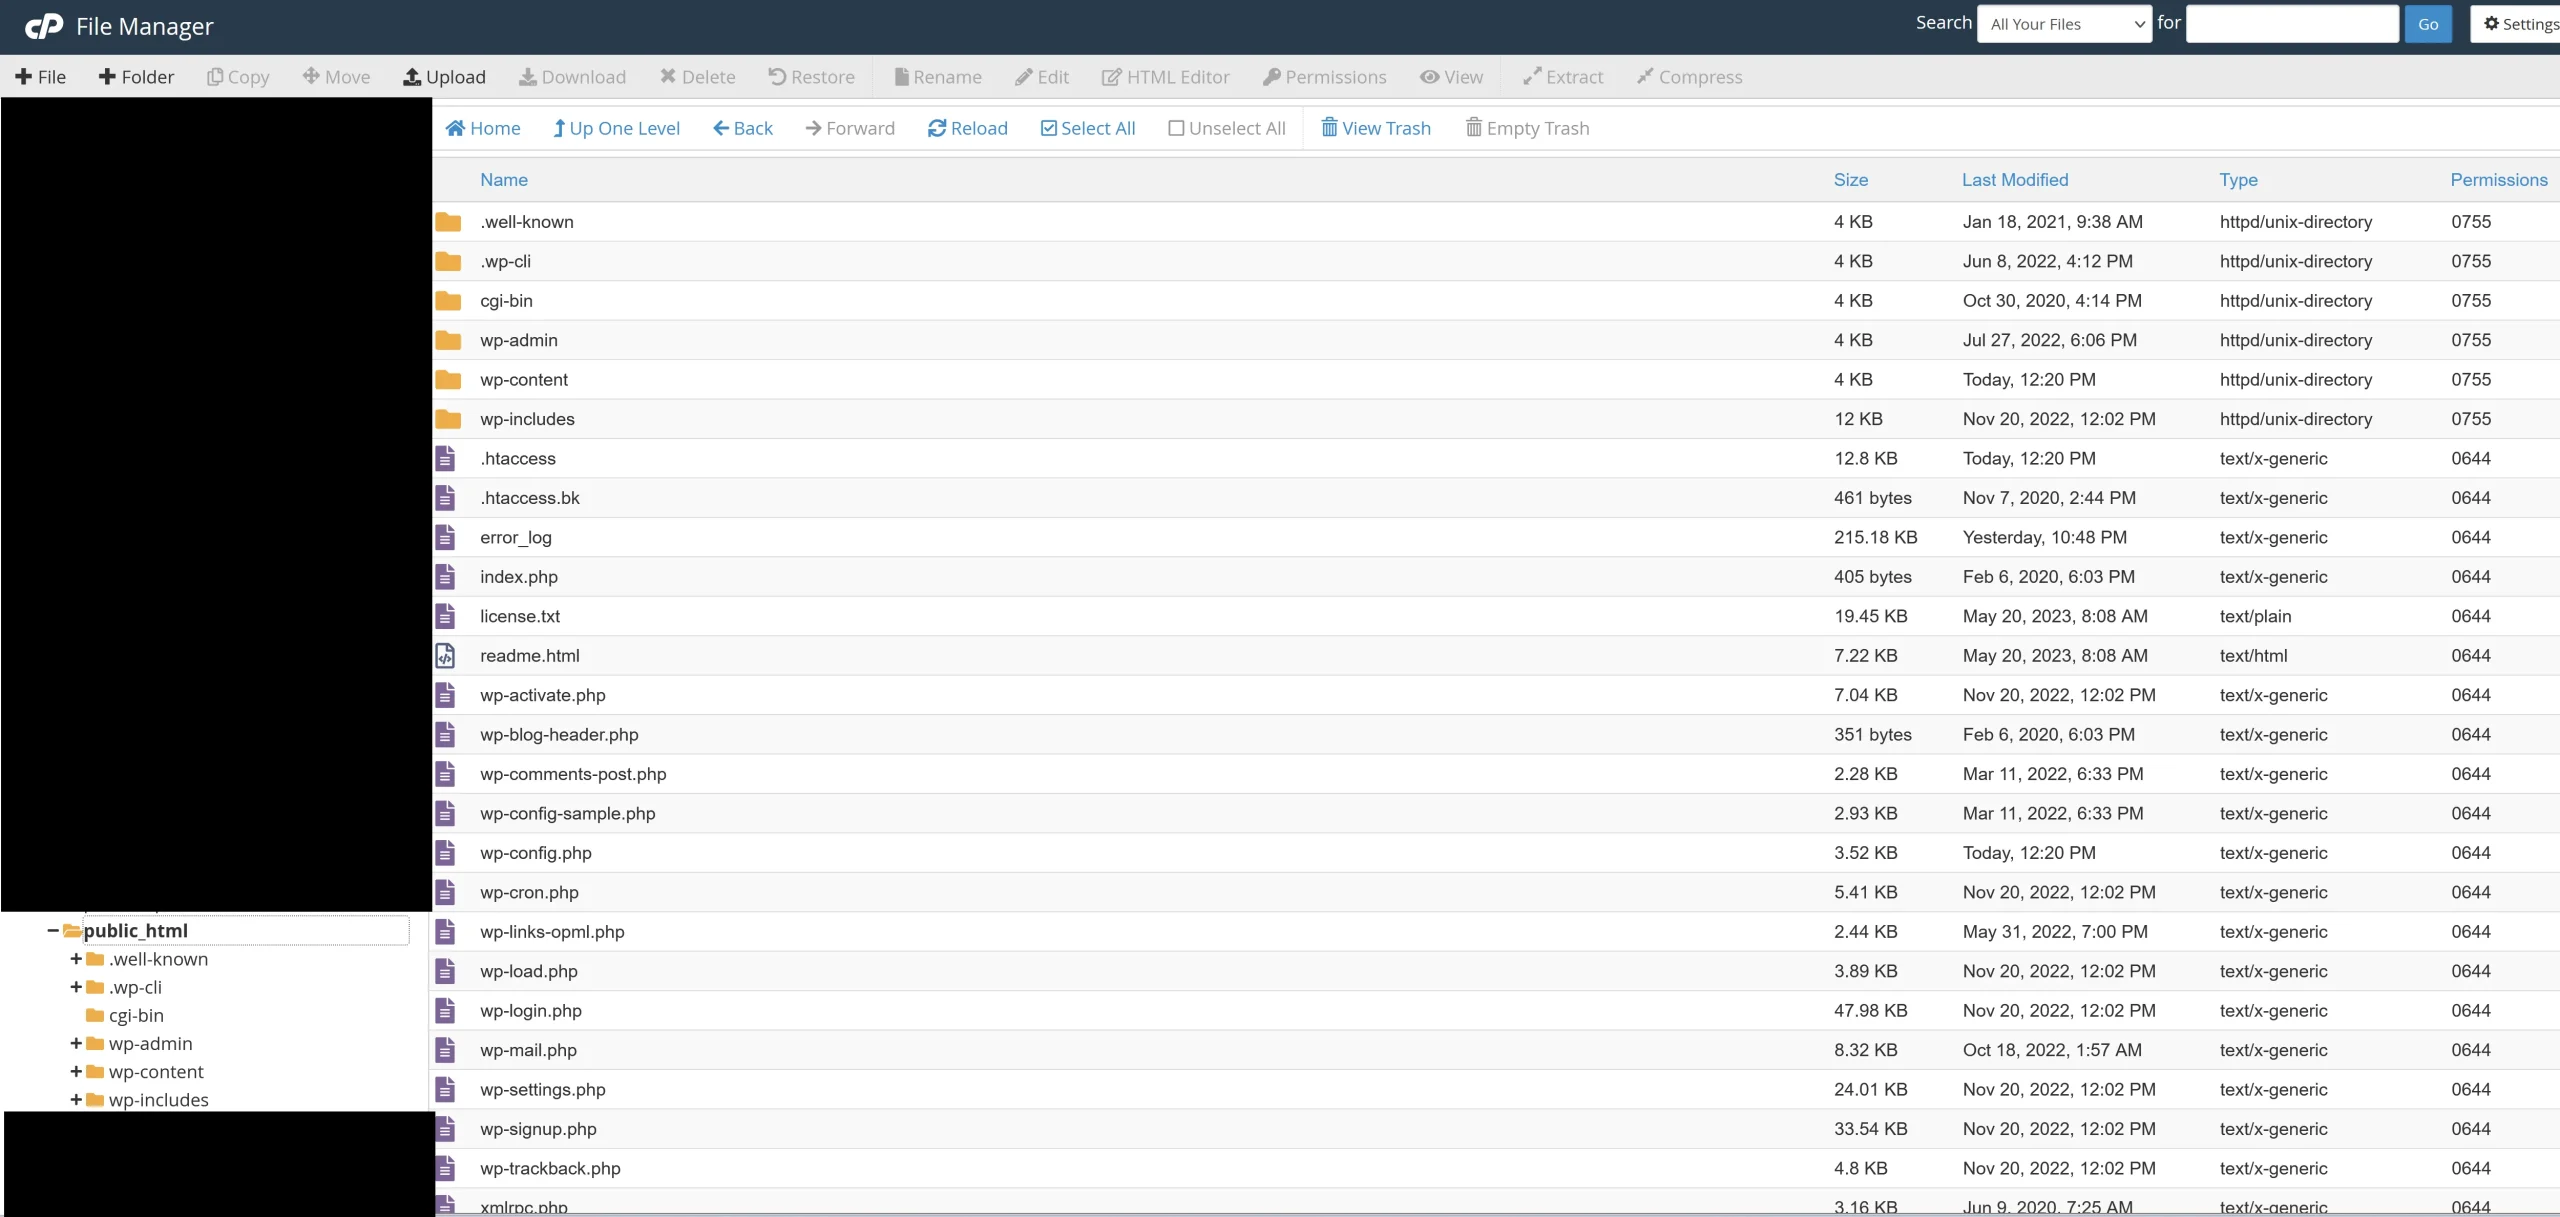
Tip: Create a Structured Folder System:
- When you download your WordPress files manually, it’s easy for things to get messy. To avoid confusion later, create a well-structured folder system on your local computer before you start the download.

Download Database
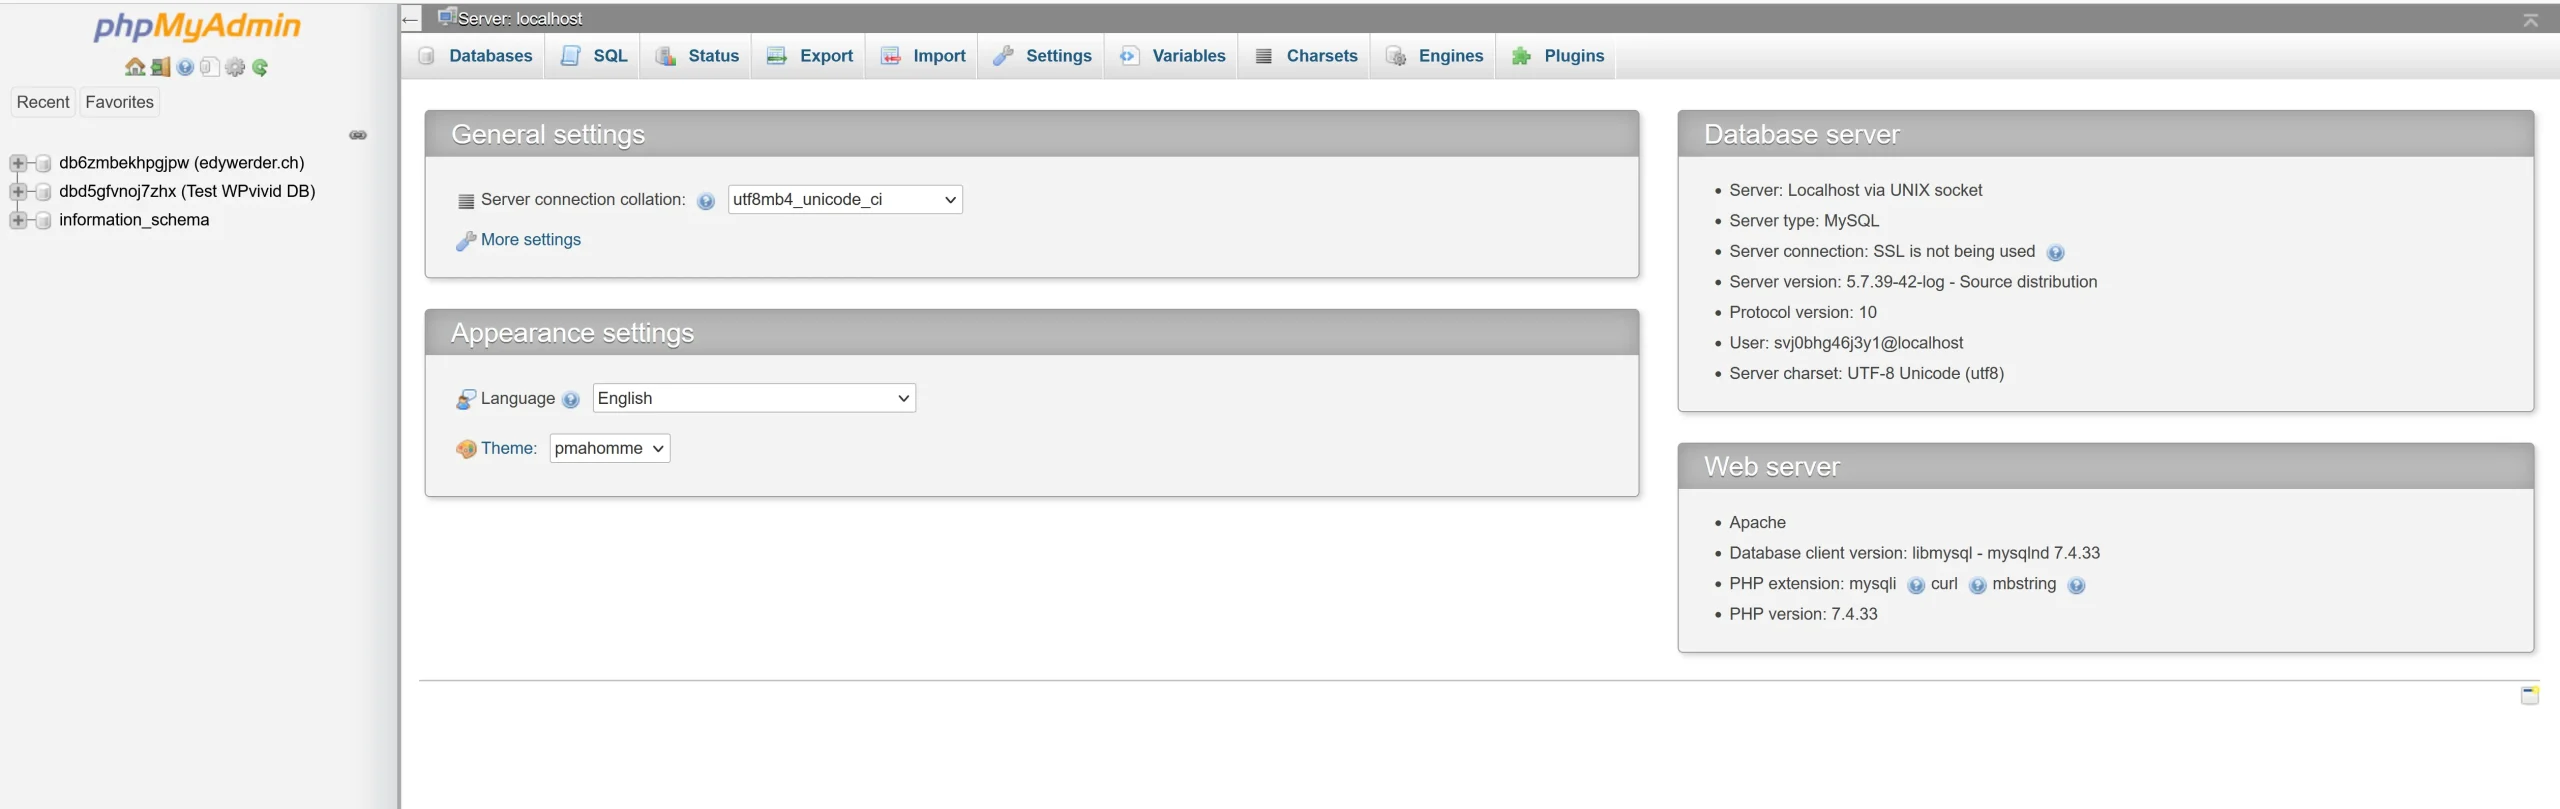
- Go to PHPMyAdmin (under the Database section in CPanel). On the left side of PHPMyAdmin, you see all the databases available.
- Identifying which one belongs to which WordPress installation can be tricky. For this, consider opening the WP-config.php file housed in the root directory of your WordPress.
- In PHPMyAdmin, select the required database on the left side, then look for the ‘Export’ tab on the top bar. Select ‘SQL’ as the format, save it as an ‘SQL file, and click the export button to save it locally.
Method 3: Use the Backup plugin Duplicator Pro
If you don’t want to back up WordPress through your hosting account or manually, you can use a WordPress plugin. This is an excellent option if you want more control over the backup process or need to include specific files. There are many WordPress plugins available, so choose one that fits your needs.
In your WordPress dashboard, go to Plugins, Add new, and type in the search box ‘backup.’ You will notice that there are many backup plugins available.
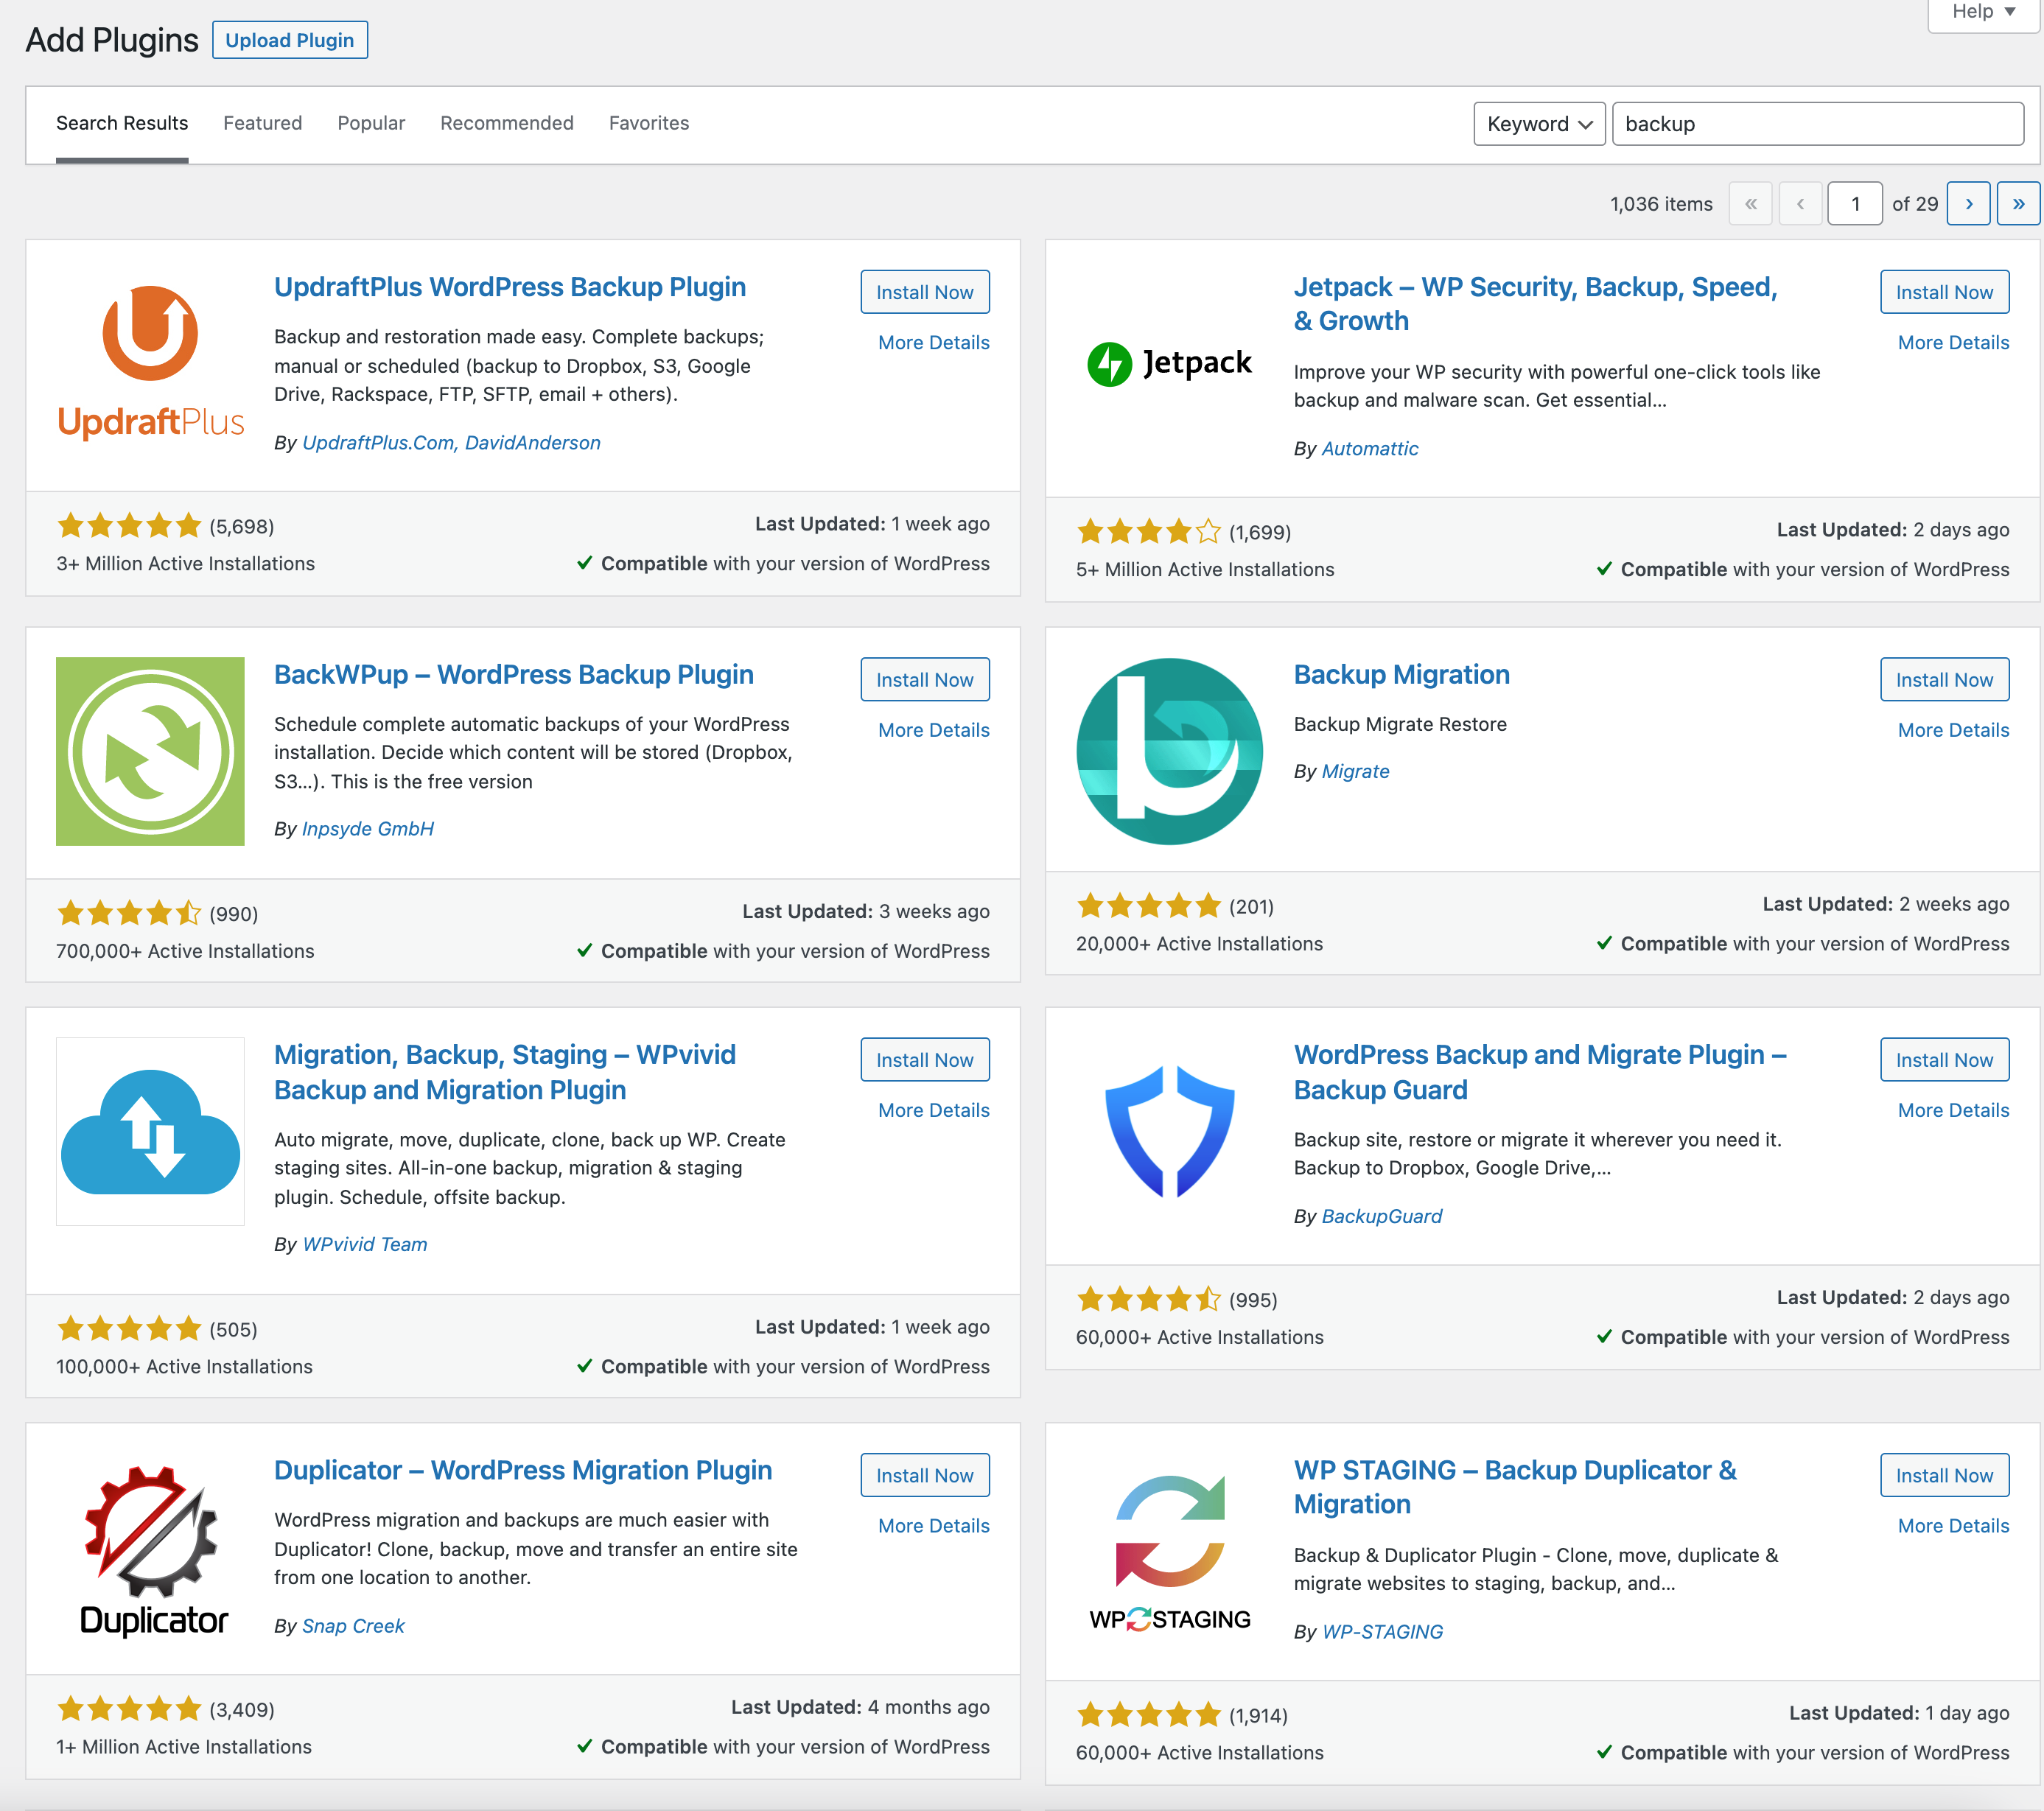
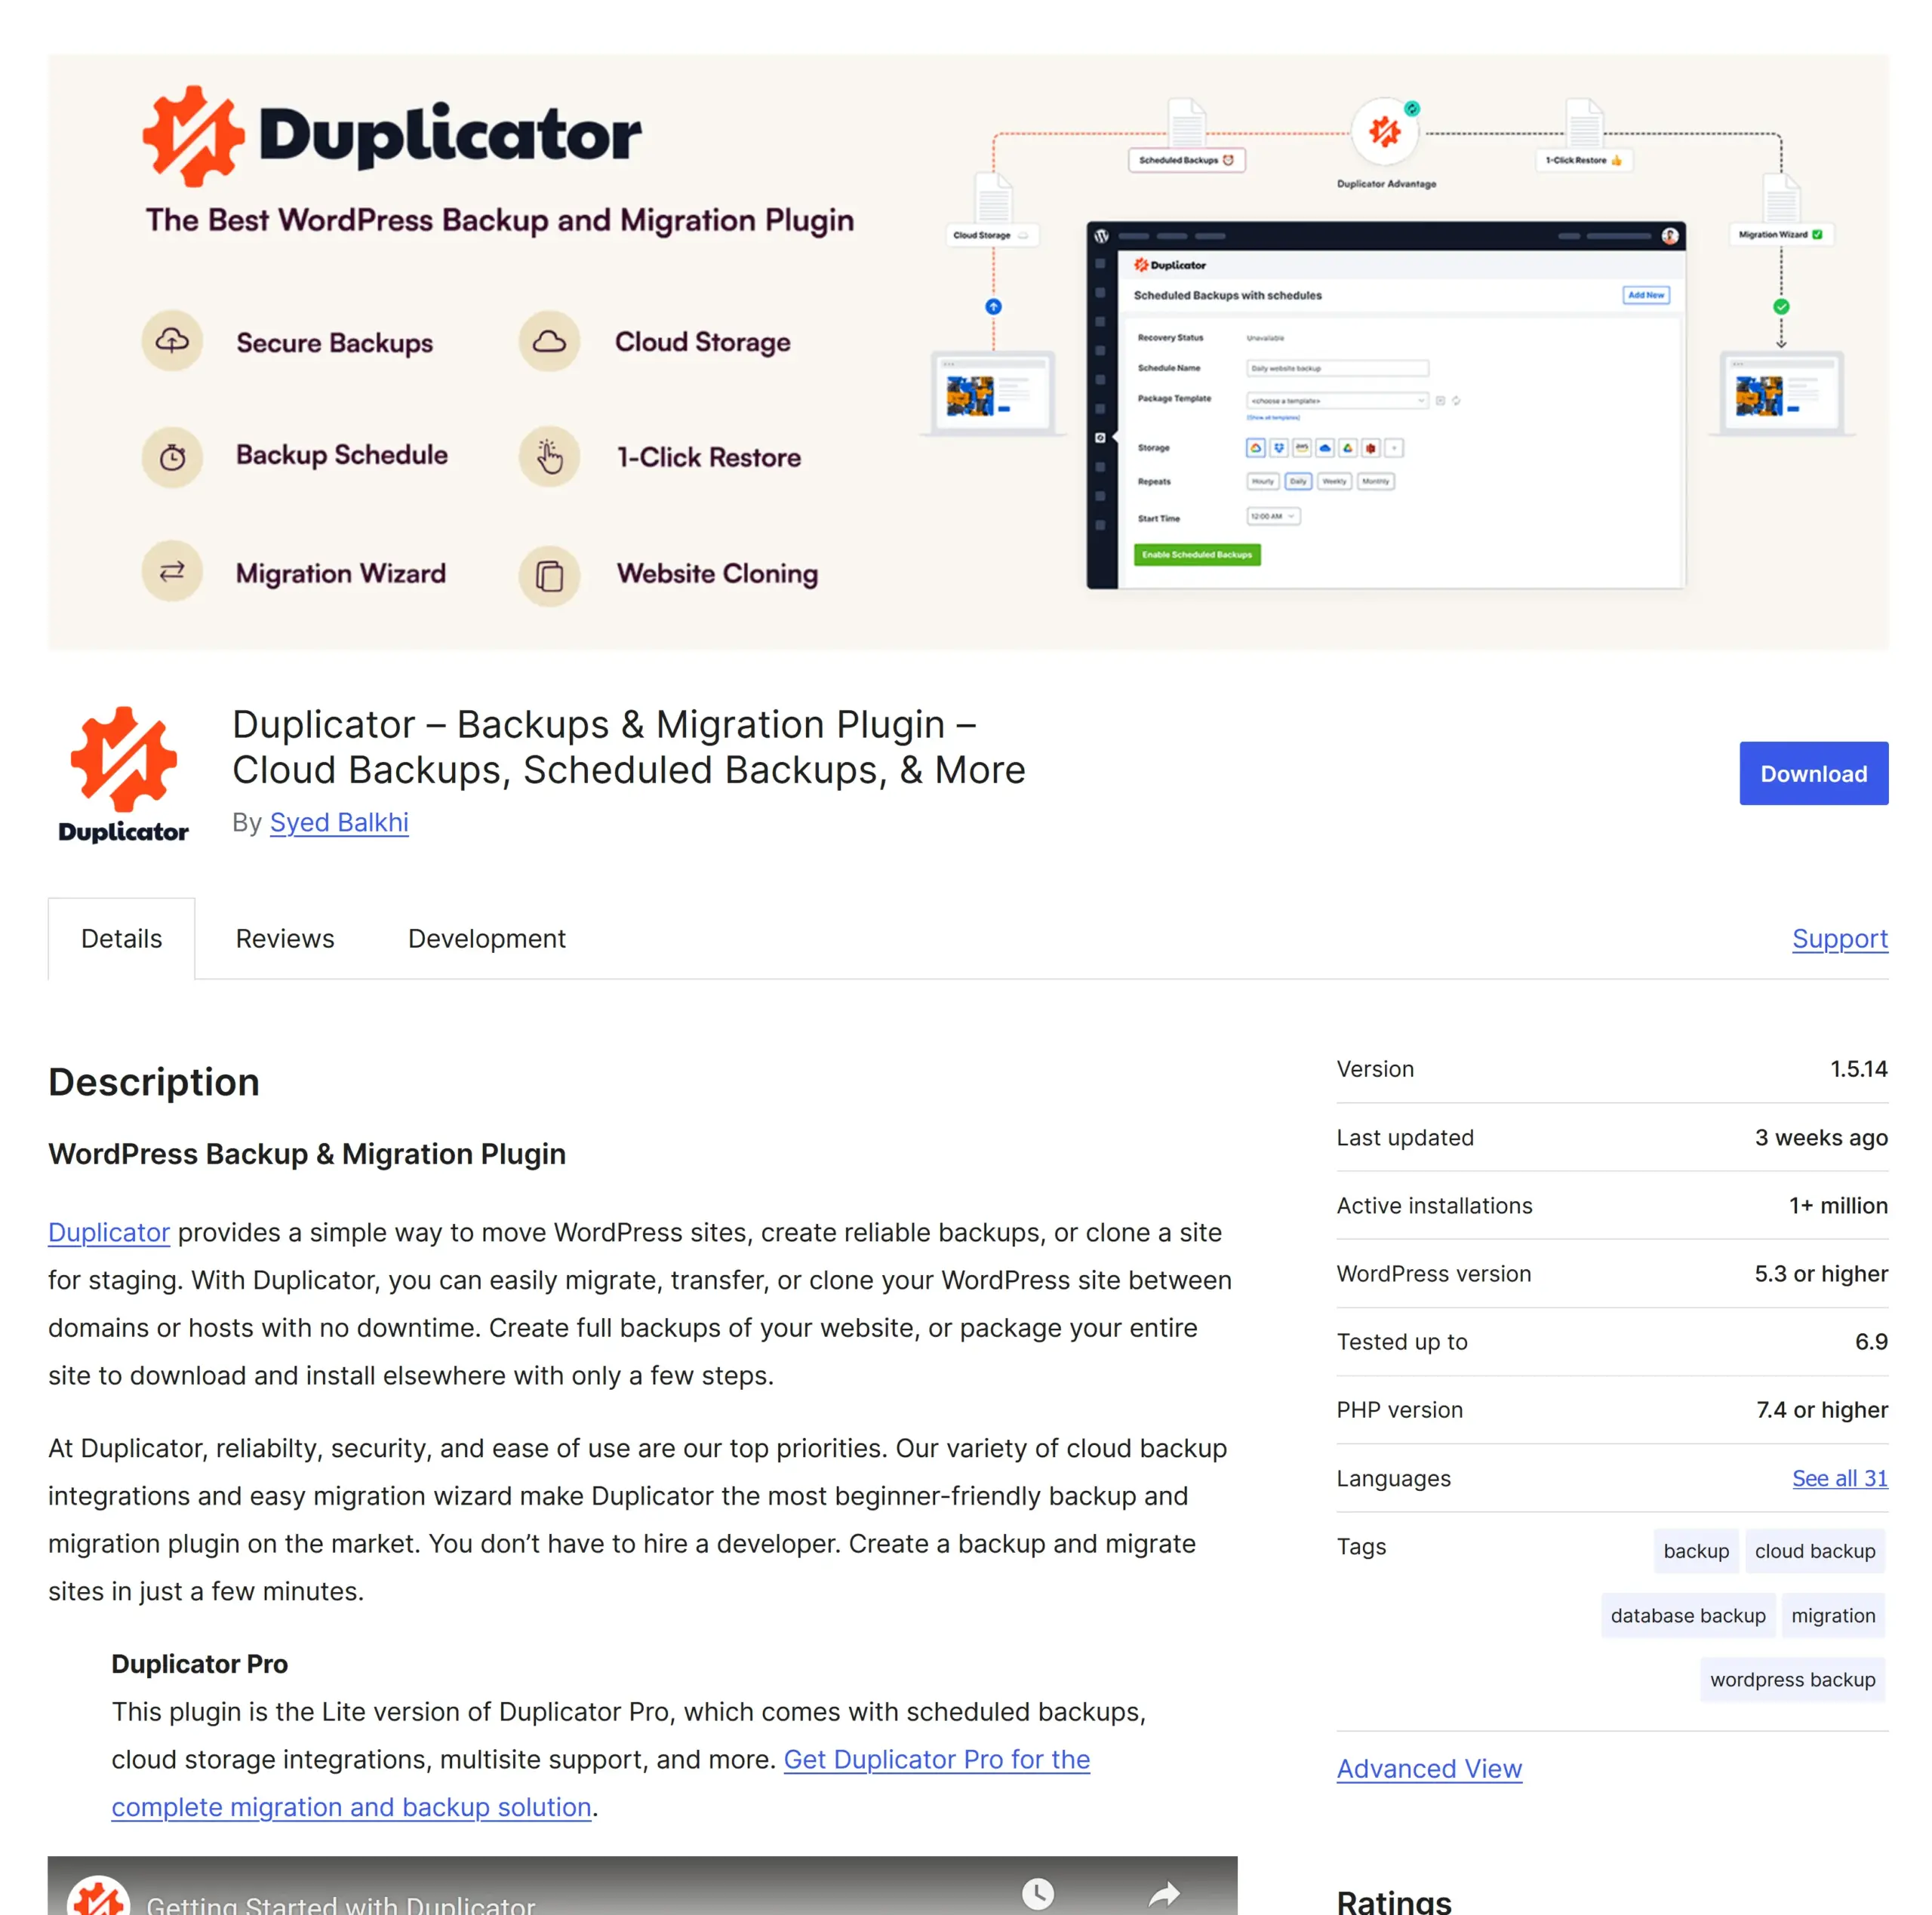
Duplicator Pro is one of the most popular. I use Duplicator Pro on all of my websites. It has two versions: free and paid (PRO). The Pro version includes backup scheduling, Cloud Storage (AWS, Dropbox, Google Drive, FTP, and OneDrive), and support for larger sites with more than 1GB of data.
Duplicator creates two files during the backup process: a PHP file and an archive file. The archive file contains everything in it (All files and the database). In addition, Duplicator includes the WordPress core files in the archive.
PROs:
- schedule automatic backup
- Lots of export methods/integration with cloud storage providers, Dropbox, Google Drive, OneDrive, Amazon S3, FTP/SFTP.
- Back up WordPress core files
- simple package (two files)
- reliable
Cons:
- The interface is not easy to understand
- knowledge necessary to upload files for restoring
A quote from Capterra about the cons.
“Scheduled backups usually fail, and it is necessary to perform them manually.”
I cannot share this, as in my experience automatic backups in Duplicator Pro work very reliably. I seldom see failed scheduled backups.
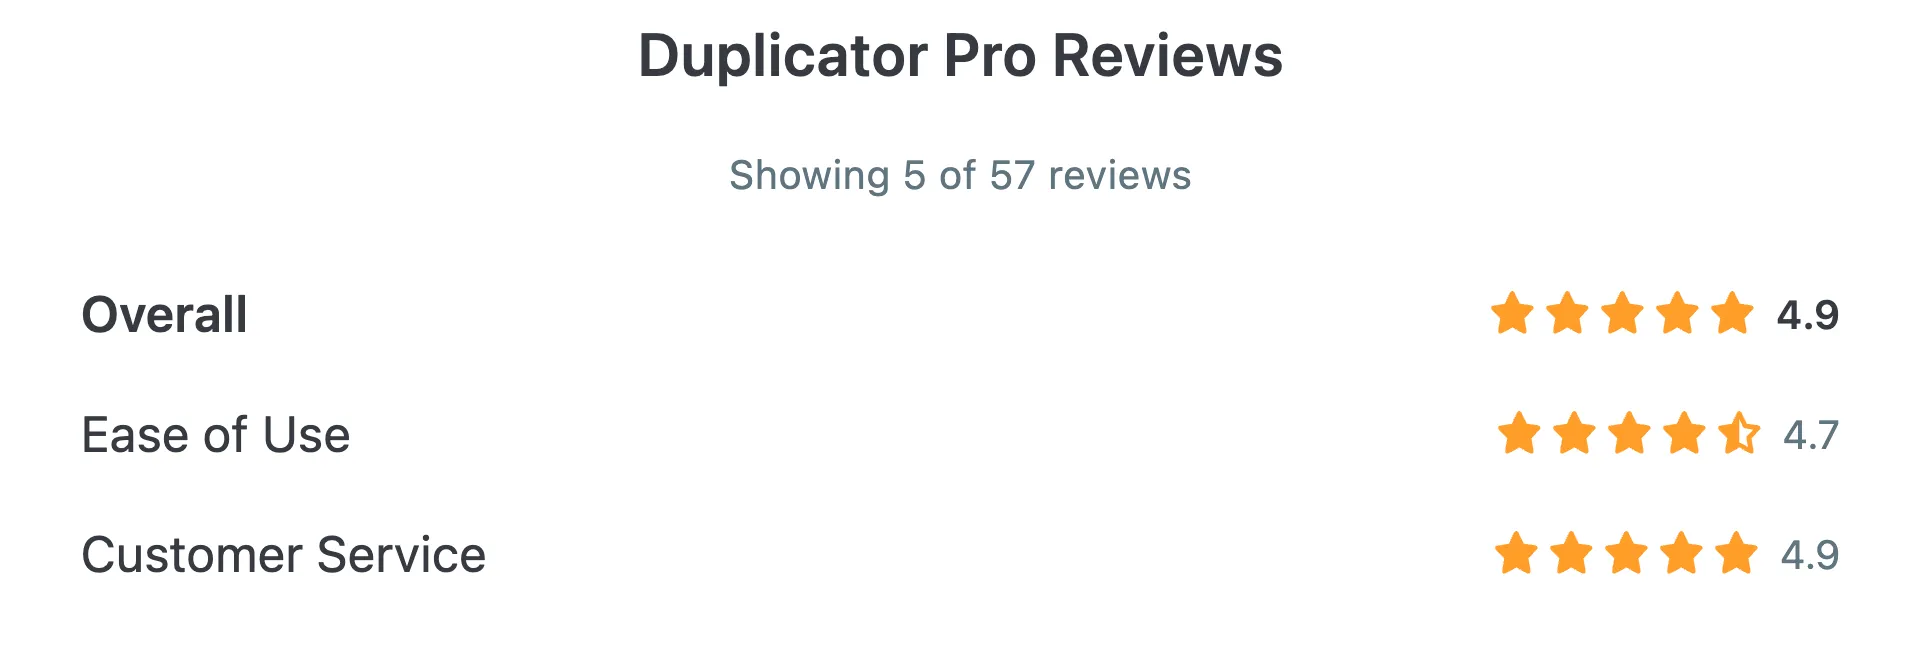
Duplicator Pro: Price and support options
I find that the pricing plans for all WordPress backup plugins are roughly the same. This is generally true, with plugins like the BackWPup, showcased in the range. The pricing/subscription plans differ between the websites one can back up, with the website name used as the reference.
The basic plan, $49/year, allows backup of two websites, and the Plus plan, which allows backup of five websites, costs $99/year. In comparison, UpdraftPlus Premium isn’t as generous as Duplicator, with the lowest tier.
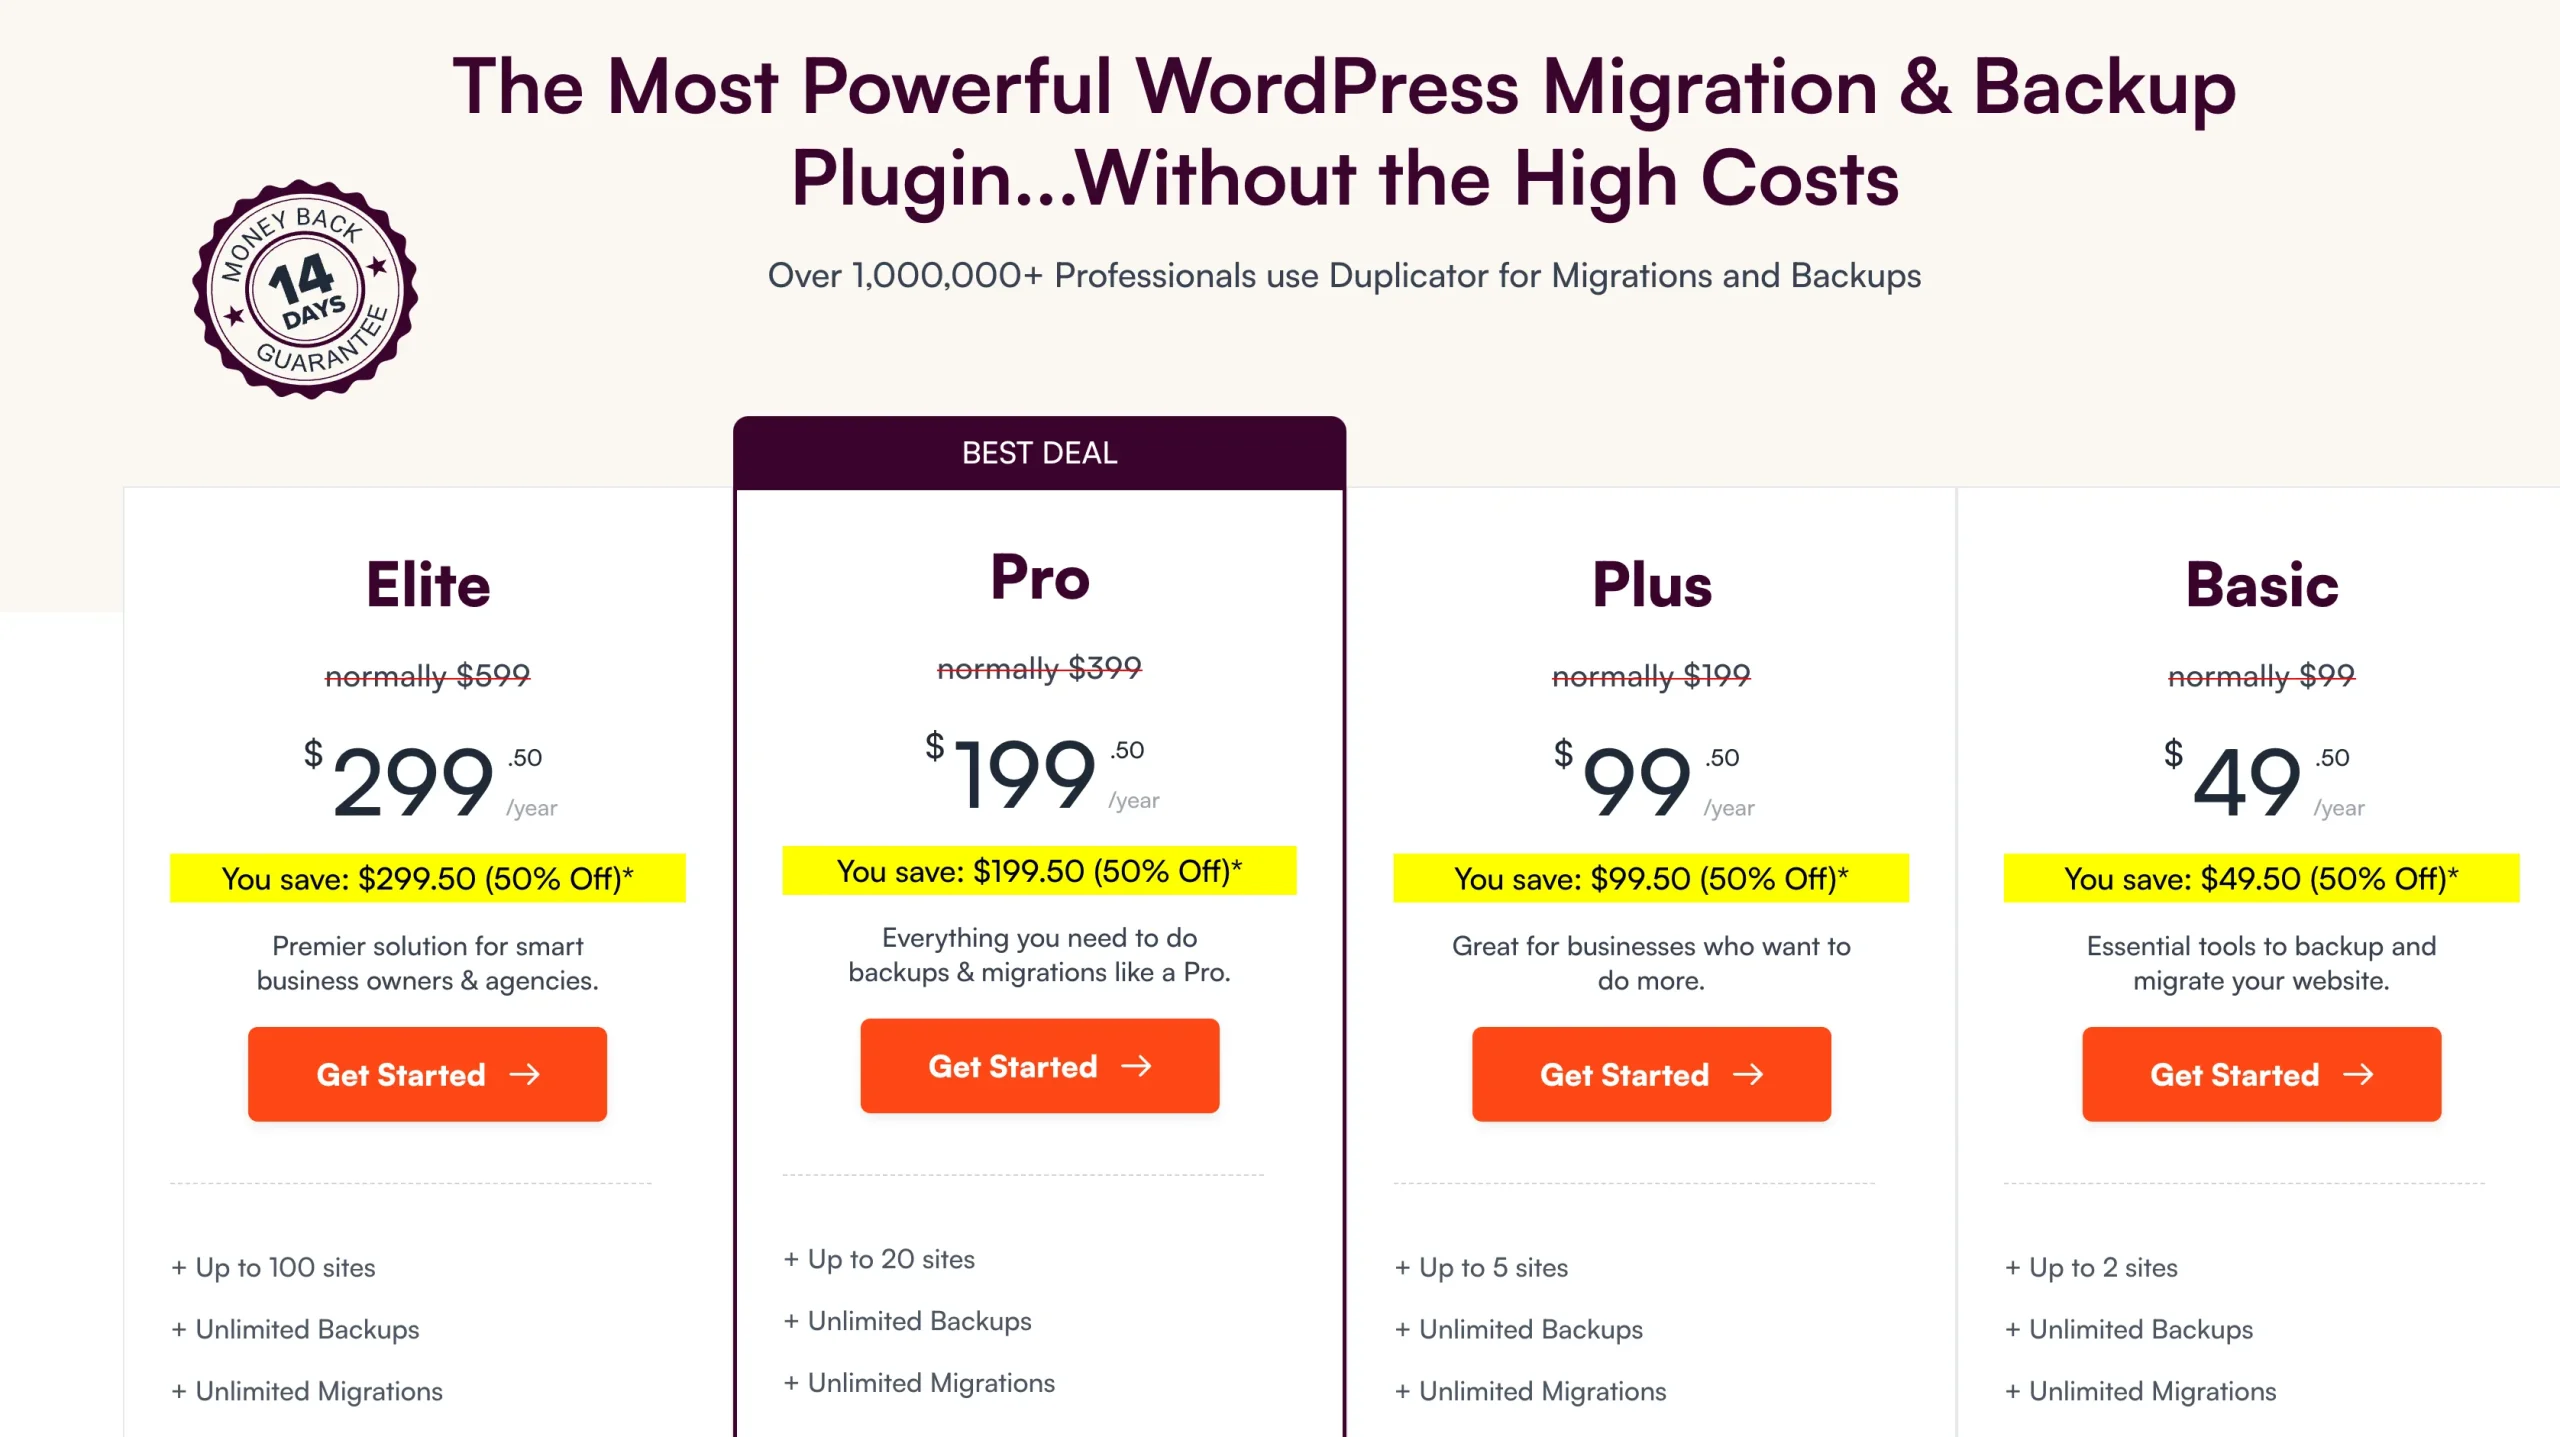
The email support I received so far is excellent. They usually reply within hours with detailed responses, and in all cases, we have found a solution.
You can find Duplicator Free in the WordPress repository. The Free version doesn’t have a scheduling feature crucial for backing up WordPress websites, much like BackWPup’s notable backup scheduling feature. Nevertheless, the Free version can be useful for migrating a website to a different hosting service. In this process, the WordPress core files are included in a Duplicator package, implying there’s no need to install WordPress on the target site.
Method 4: Use the Backup plugin WPvivid
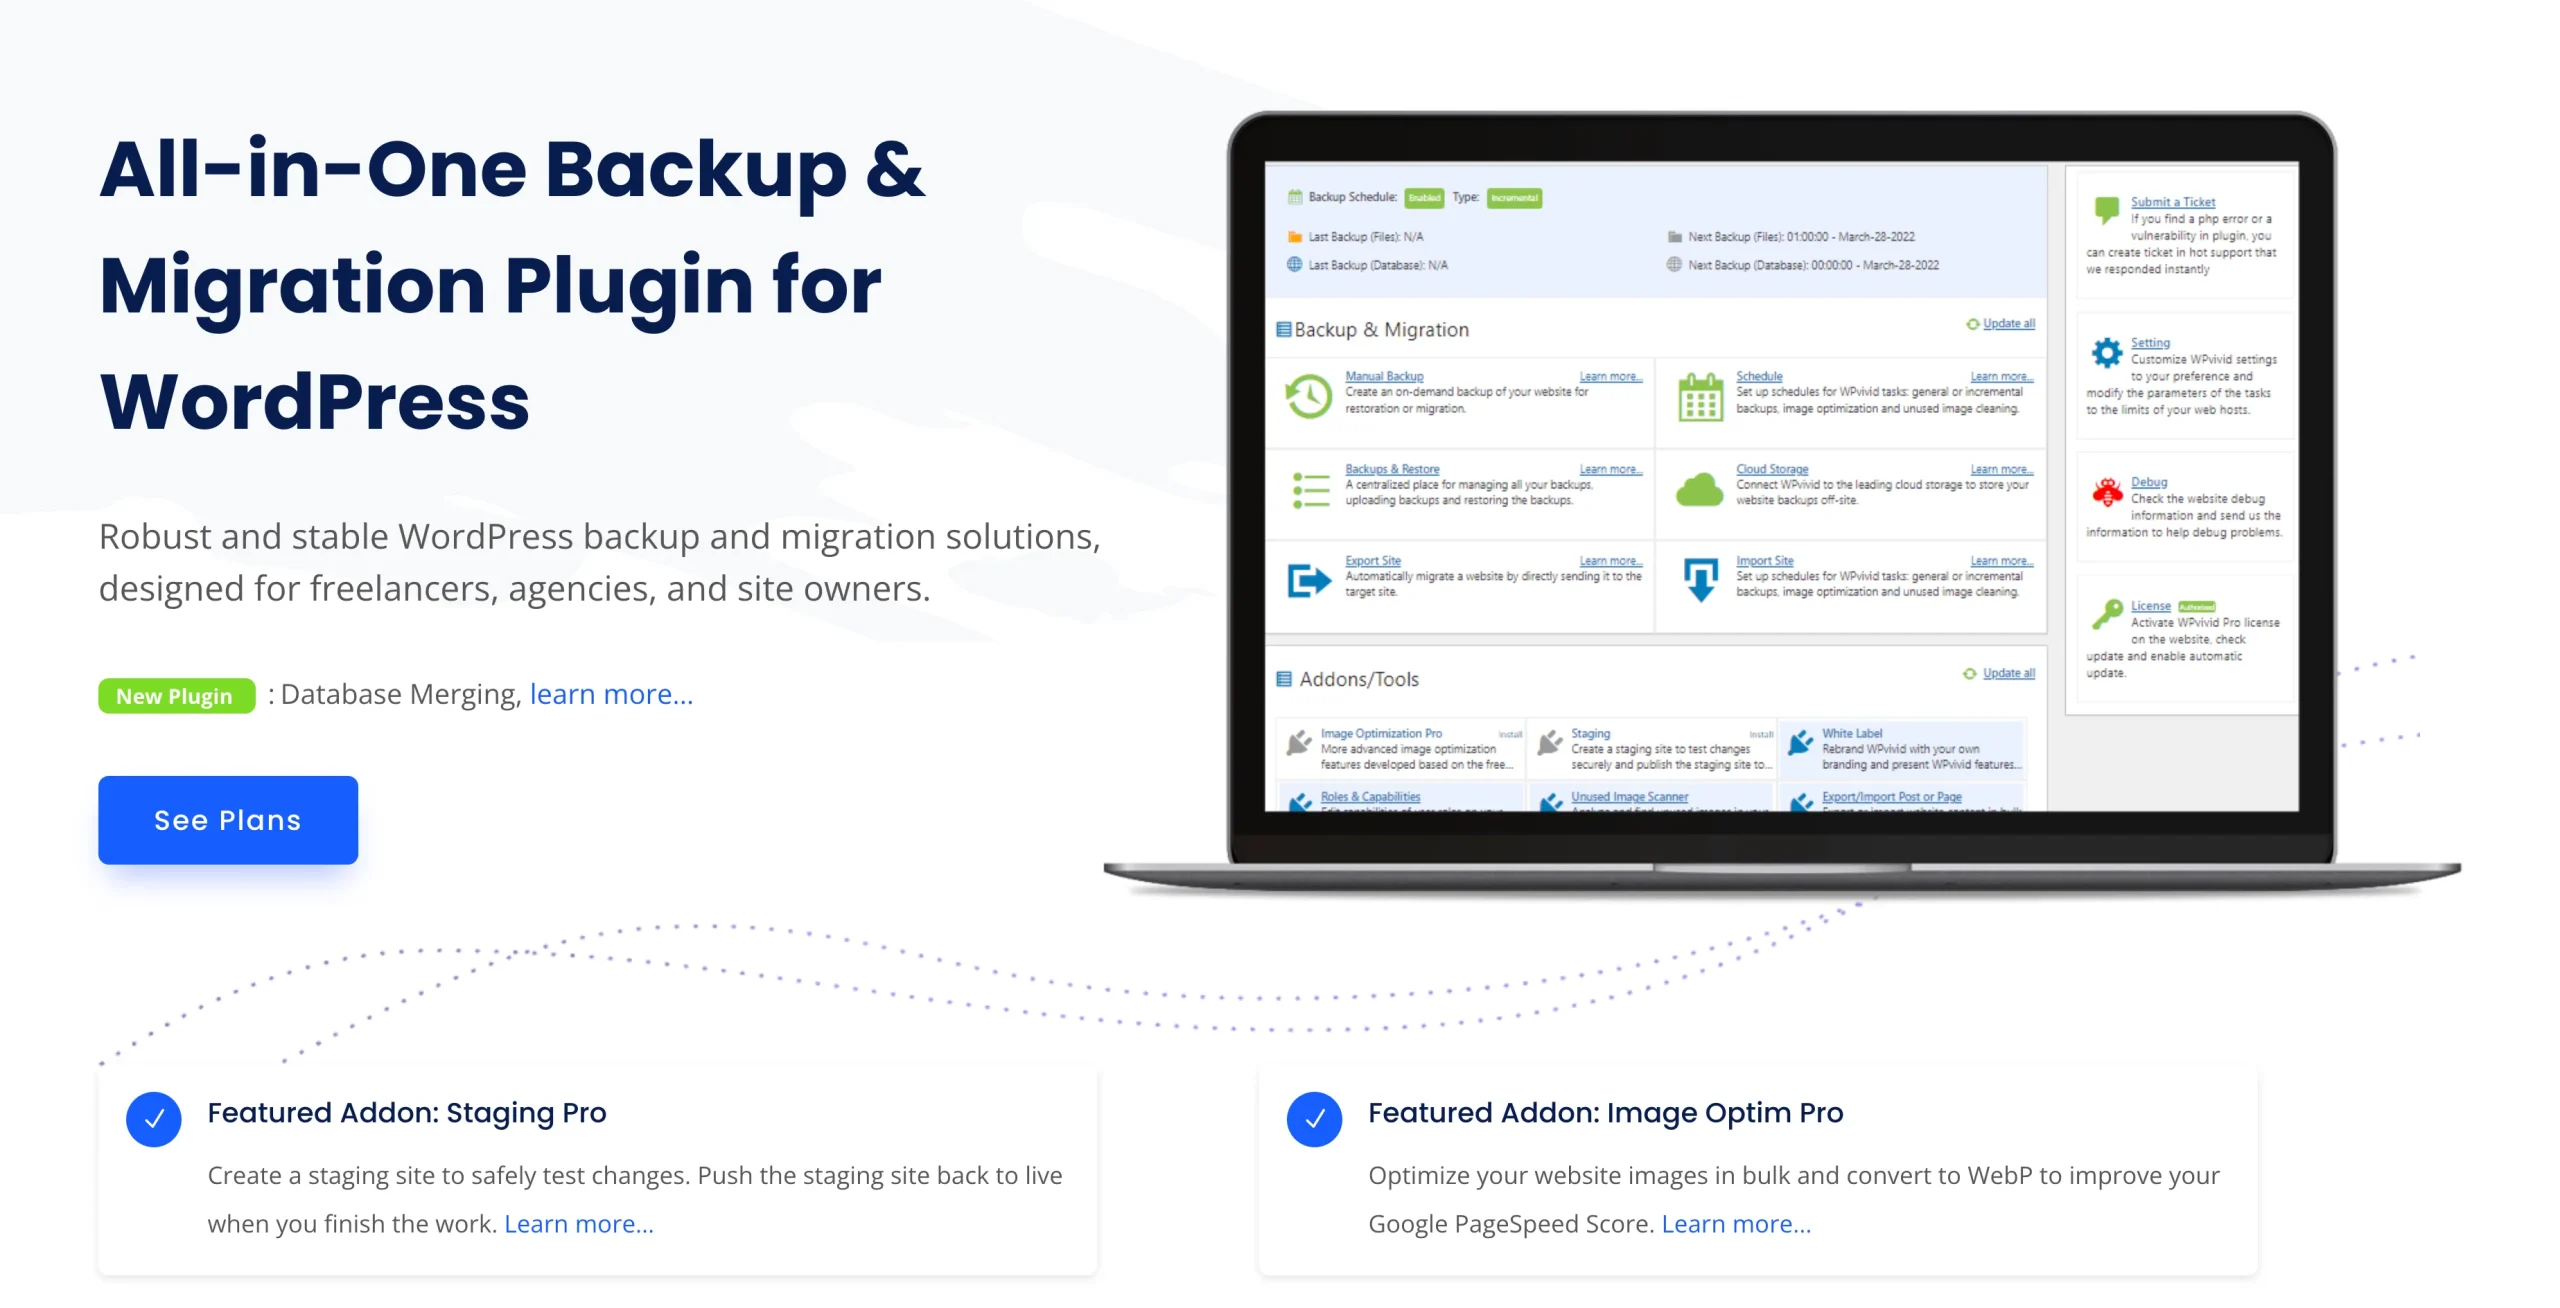
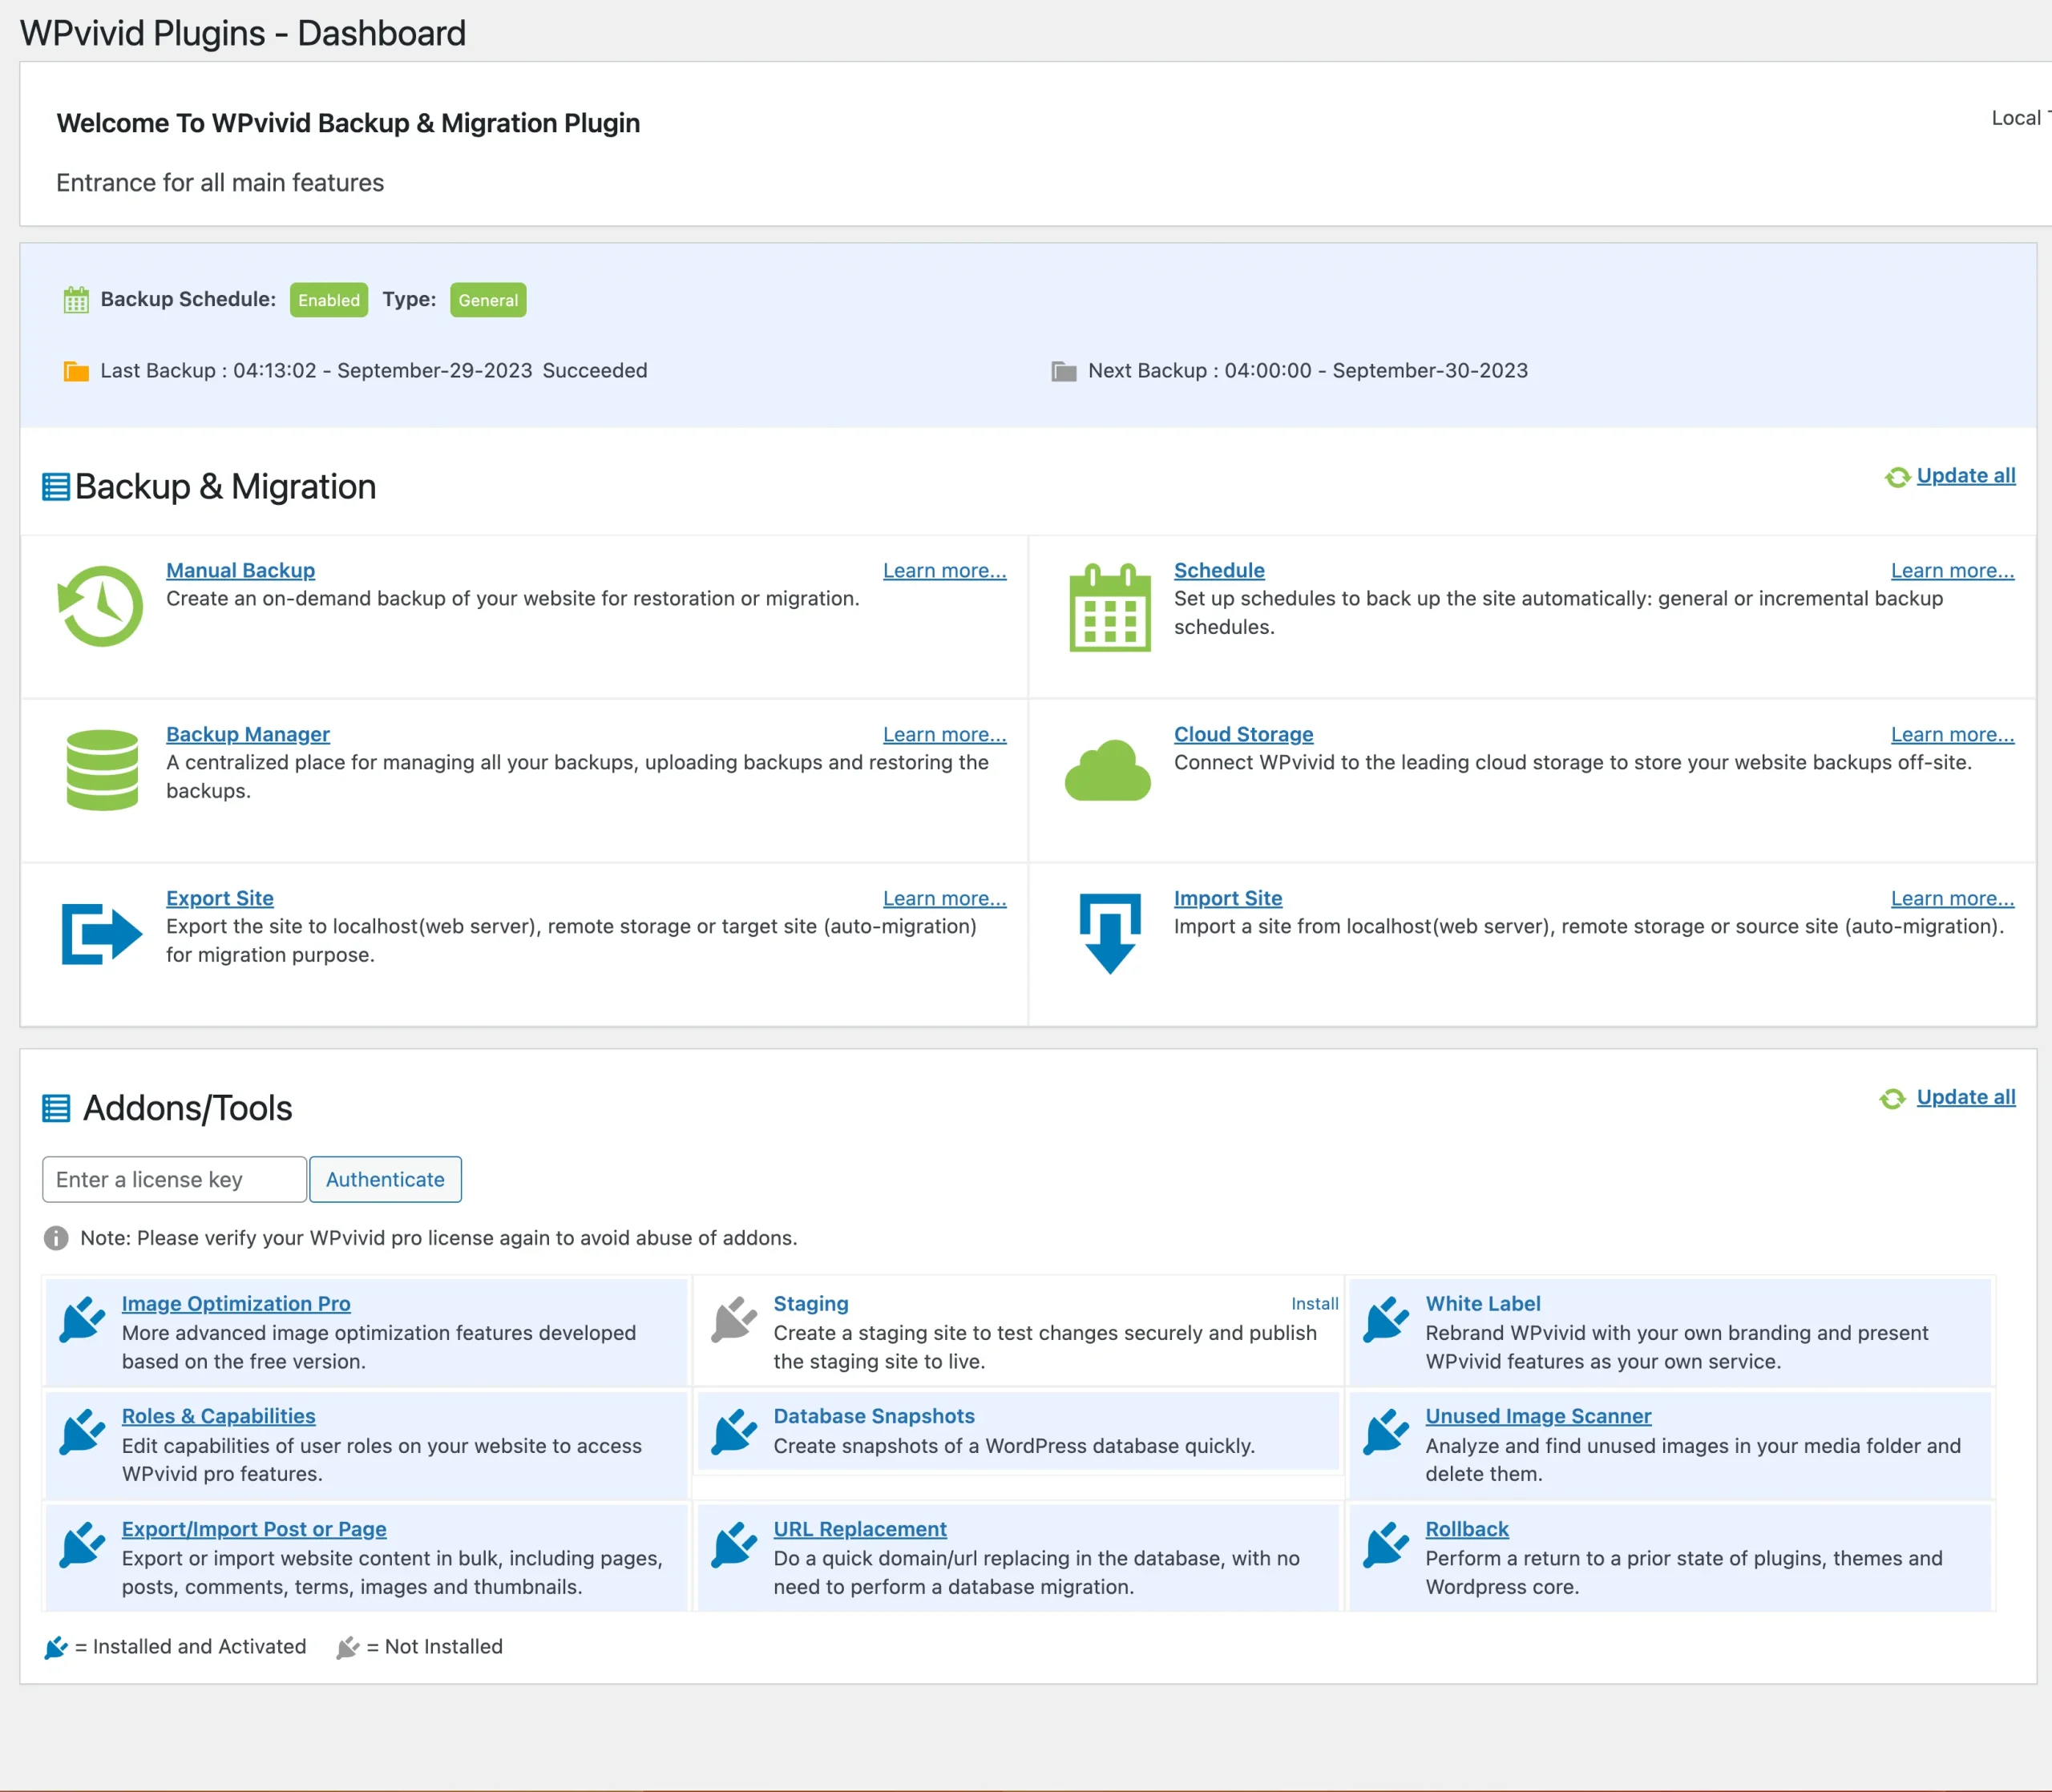
The WPvivid backup plugin has garnered significant attention for its user-friendly approach and ability to cater to everyone from site owners to freelancers and agencies, making it a resounding choice for a wide range of users. The plugin comes with a built-in learning mode, meaning you don’t need to grapple with intricate parameters to successfully back up on shared hosting, as the plugin takes care of it automatically. This sheer ease of use makes backup and restore a hassle-free experience.
The flexibility of WPvivid becomes evident in its powerful custom feature – you have the complete freedom to customize the backup content; whether it’s about including or excluding files or folders or handling databases, the plugin does it all. Moreover, it comes with an ‘Advanced Backup Engine’ designed for those who manage multiple websites, making WPvivid a cost-effective solution.
Furthermore, WPvivid’s compatibility is another cherry on top. It seamlessly fits in with a variety of themes and page builders. What strengthens its credibility is the positive echoes it has received from its users, with over 17,000+ happy customers and high user ratings. Its popularity also extends to the whopping 5M+ downloads, and the ever-available 24/7 ticket support shows its commitment to ensuring smooth user experiences, which is another significant advantage.
In terms of reviews and testimonials, WPvivid boasted much positive feedback. A collection of users highlighted its easy setup, stellar support, and strong functionality, all they needed from a WordPress backup plugin. As such, WPvivid is a beneficial tool that makes backing up your WordPress site a walk in the park.
Pros
- clean and easy-to-understand interface
- rich feature set with staging, image optimization, URL replacement
- Lifetime plan, pay once and use forever
- competent and friendly email support
Cons
- with some hosts backup fails
- documentation on the website seems old,
WPvivid: Price and support options
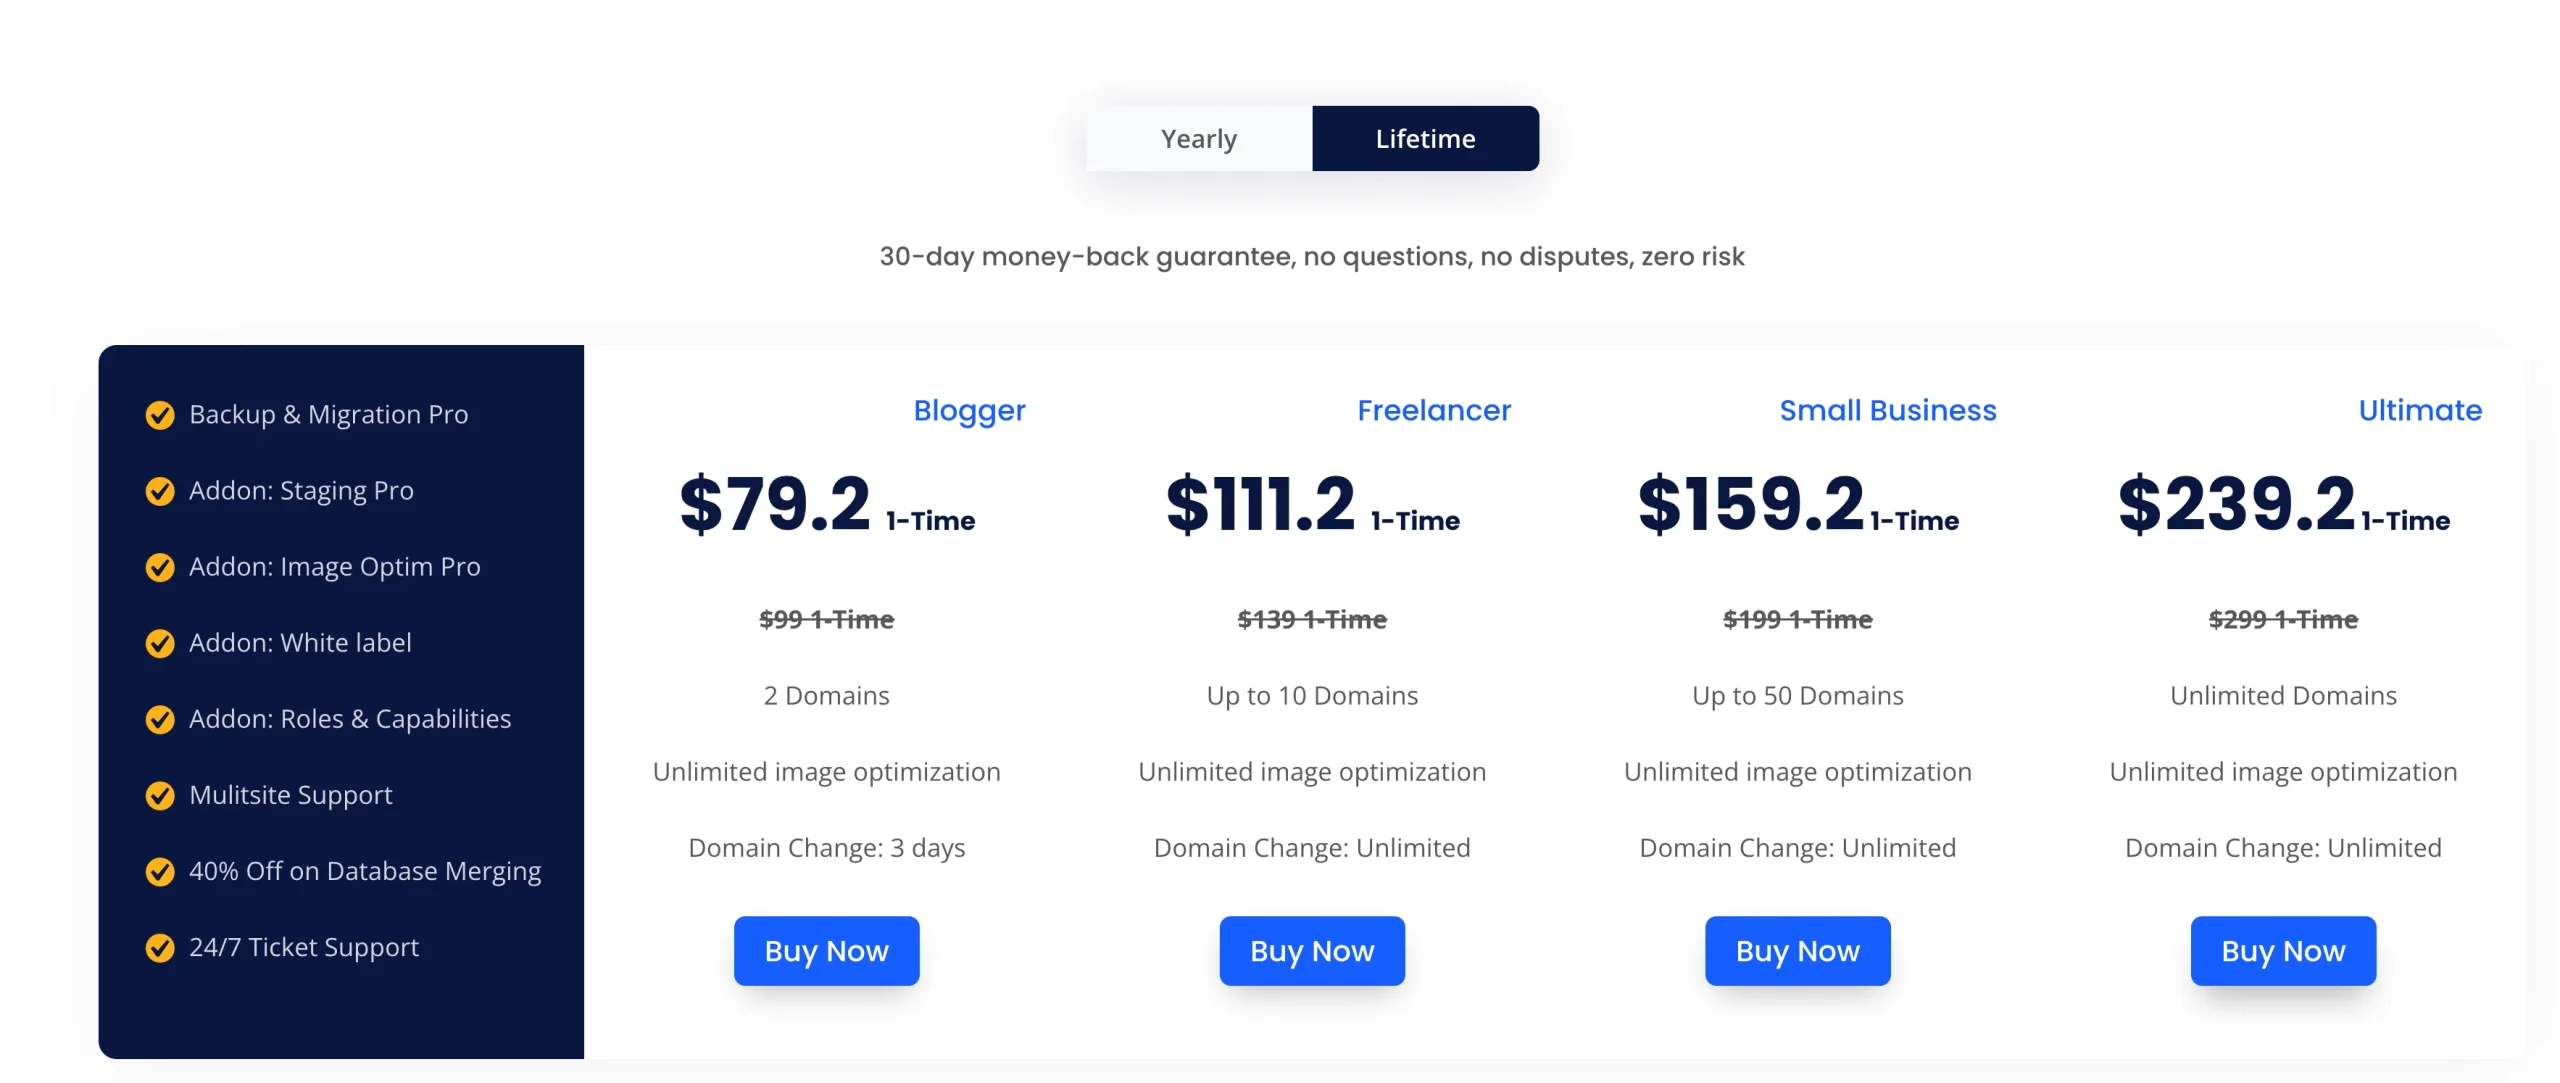
WPvivid offers comprehensive, affordable options for WordPress users who value data security. The WPvivid backup plugin, much like the equally dependable backup, proffers different pricing models: Blogger, Freelancer, Small Business, and Ultimate. All tiers embody a spectrum of features, including 24/7 ticket support, a no-questions-asked 30-day money-back guarantee, multisite support – another trait that backup is popular for – and unlimited image optimization.
The Blogger plan, a one-pay $99 option, supports two website names. If you are looking for a cheaper alternative, a $79.2 one-time payment includes unlimited image optimization for three days. Creators managing more websites, the Freelancer and Small Business, plans support up to 10 and 50 domains—much like other robust backup services—each priced at a one-time of $139 and $199. Both give unlimited domain changes. Their Ultimate plan ticks the affordability box at $299 as a single payment, offering support for unlimited domains and domain changes just as in a tutorial.
Just as you stay abreast with updates via Twitter, WPvivid customer service is top-rated, offering 24/7 ticket support, ensuring the resolution of your issues promptly. Interesting add-ons include the Staging Pro, Image Optim Pro, White Label, and Roles & Capabilities, designed to customize the user experience.
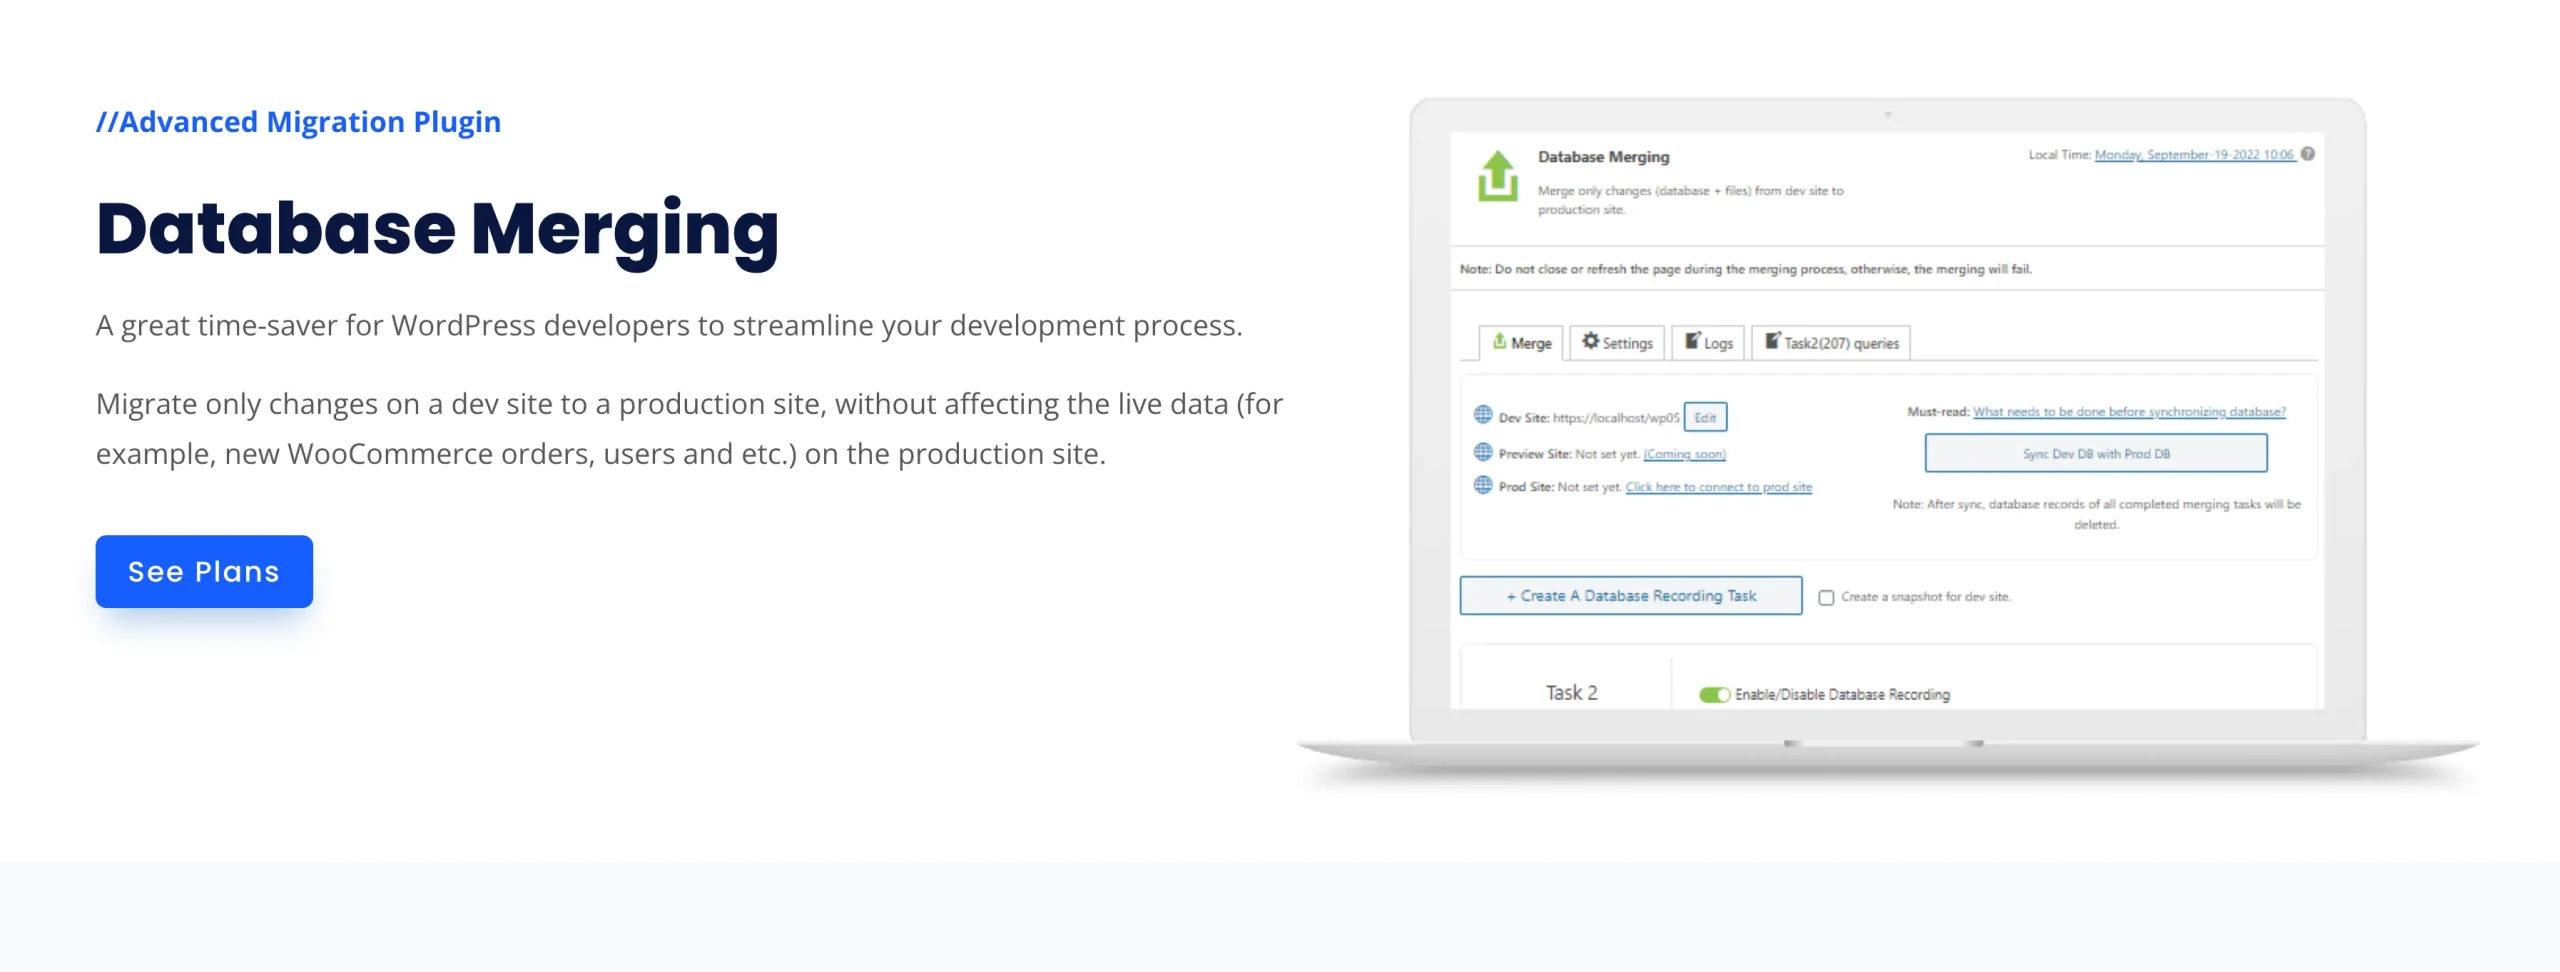
WPvivid offers a tempting 40% off deal for users keen on merging databases, which is a separate purchase and plugin. It is valuable for an e-commerce store that wants to renovate the website on a staging site and later go live. The plugin helps you to merge the new orders to the refreshed website.
What to look for when choosing a WordPress plugin
When selecting a WordPress backup plugin or tool, consider several factors to ensure you make the best choice for your needs. Here’s a breakdown:
Ease of Use
- Explanation: A user-friendly interface is essential, especially if you’re not tech-savvy. The last thing you want is to struggle with complicated settings when you need to restore your site quickly.
- Example: Look for plugins that offer step-by-step guides, FAQs, or even video tutorials. A plugin like UpdraftPlus, for instance, has an intuitive dashboard and extensive documentation to help you navigate the backup process.
Backup Frequency
- Explanation: The frequency with which the plugin backs up your data can be a game-changer. Infrequent backups mean you risk losing more data if something goes wrong.
- Example: Some plugins offer real-time backups, ensuring that every change you make is immediately saved. This is particularly useful for e-commerce sites where transactions happen around the clock.
File Format
- Explanation: The format in which the backup files are saved can impact how easily you can restore your site.
- Example: Plugins that save backups in universal formats like .zip or .tar.gz are generally easier to work with. These formats are widely supported and can be opened with various software.
Storage Options
- Explanation: Where your backups are stored is equally important. On-site storage is risky because if your server fails, you lose both your website and your backups.
- Example: Opt for plugins that offer cloud storage options like Google Drive or Dropbox. Duplicator Pro, for example, allows you to automatically upload your backups to multiple cloud storage services, providing an extra layer of security.
I believe Duplicator Pro and WPvivid meet all these factors.
Case Study: Restoring “Jane’s Travel Blog” After a Malware Attack
The Situation:
Jane is an avid traveler and runs a popular travel blog on WordPress. She had invested years into creating valuable content, building an audience, and optimizing her site for SEO. One unfortunate day, she discovered that her website was redirecting visitors to spammy websites. Her site had fallen victim to a malware attack.
The Challenge:
Google flagged Jane’s website as “unsafe,” and her web hosting provider temporarily suspended her account. She was at risk of losing years of hard work, not to mention the trust of her audience and the potential SEO penalties.
The Solution:
Fortunately, Jane had been using a WordPress backup plugin that automatically backed up her entire website daily and stored it in a secure off-site location. She contacted her hosting provider and was able to clean her hosting environment. Then, she used her backup to restore her website to a version from just before the malware attack.
The Outcome:
Within hours, Jane’s website was back online, functioning as if nothing had happened. She submitted a review to Google to remove the “unsafe” flag, which was done promptly. Her quick recovery minimized the SEO impact, and she sent out a newsletter to her audience explaining the brief downtime and assuring them that the site was now secure.
Lessons Learned:
This incident was a wake-up call for Jane. She realized the invaluable role that regular backups played in her digital life. She now also invests in a security plugin to add an extra layer of protection to her website.
Restoring From a Backup
A backup is then a good backup when the restore process is successful. Test your backups before something happens and lose all your content! Depending on which method (1,2,3, or 4) you’re using to back WordPress up, restoring your WordPress site may be easier or more difficult.
If you’re using a WordPress backup plugin, restoring your WordPress site is as simple as clicking a button to download and restore your site.
Restoring WordPress Backups Using Duplicator
I’ll show you how simple it is to recover a WordPress website from a backup with the Duplicator Pro plugin. In tandem with a reliable cloud server like SiteGround, this recovery process becomes seamless. As we previously discussed, the backup files are composed of a PHP and an archive files (ZIP), both integral parts of the backup package.
The PHP file ends with the.PHP extension and includes the word installer, typically with a lengthy file name. The same applies to the archive file.

Suppose you’re considering switching your hosting company. In that case, you might use a backup from your current host to restore your WordPress website to the new host. Transfer both files to the new hosting company, contingent on the backup location. To upload both files, there are two avenues you can use; either through the Cpanel’s file manager or FTP. Once transferred, navigate to your browser and key in the domain followed by a / and the PHP file name.
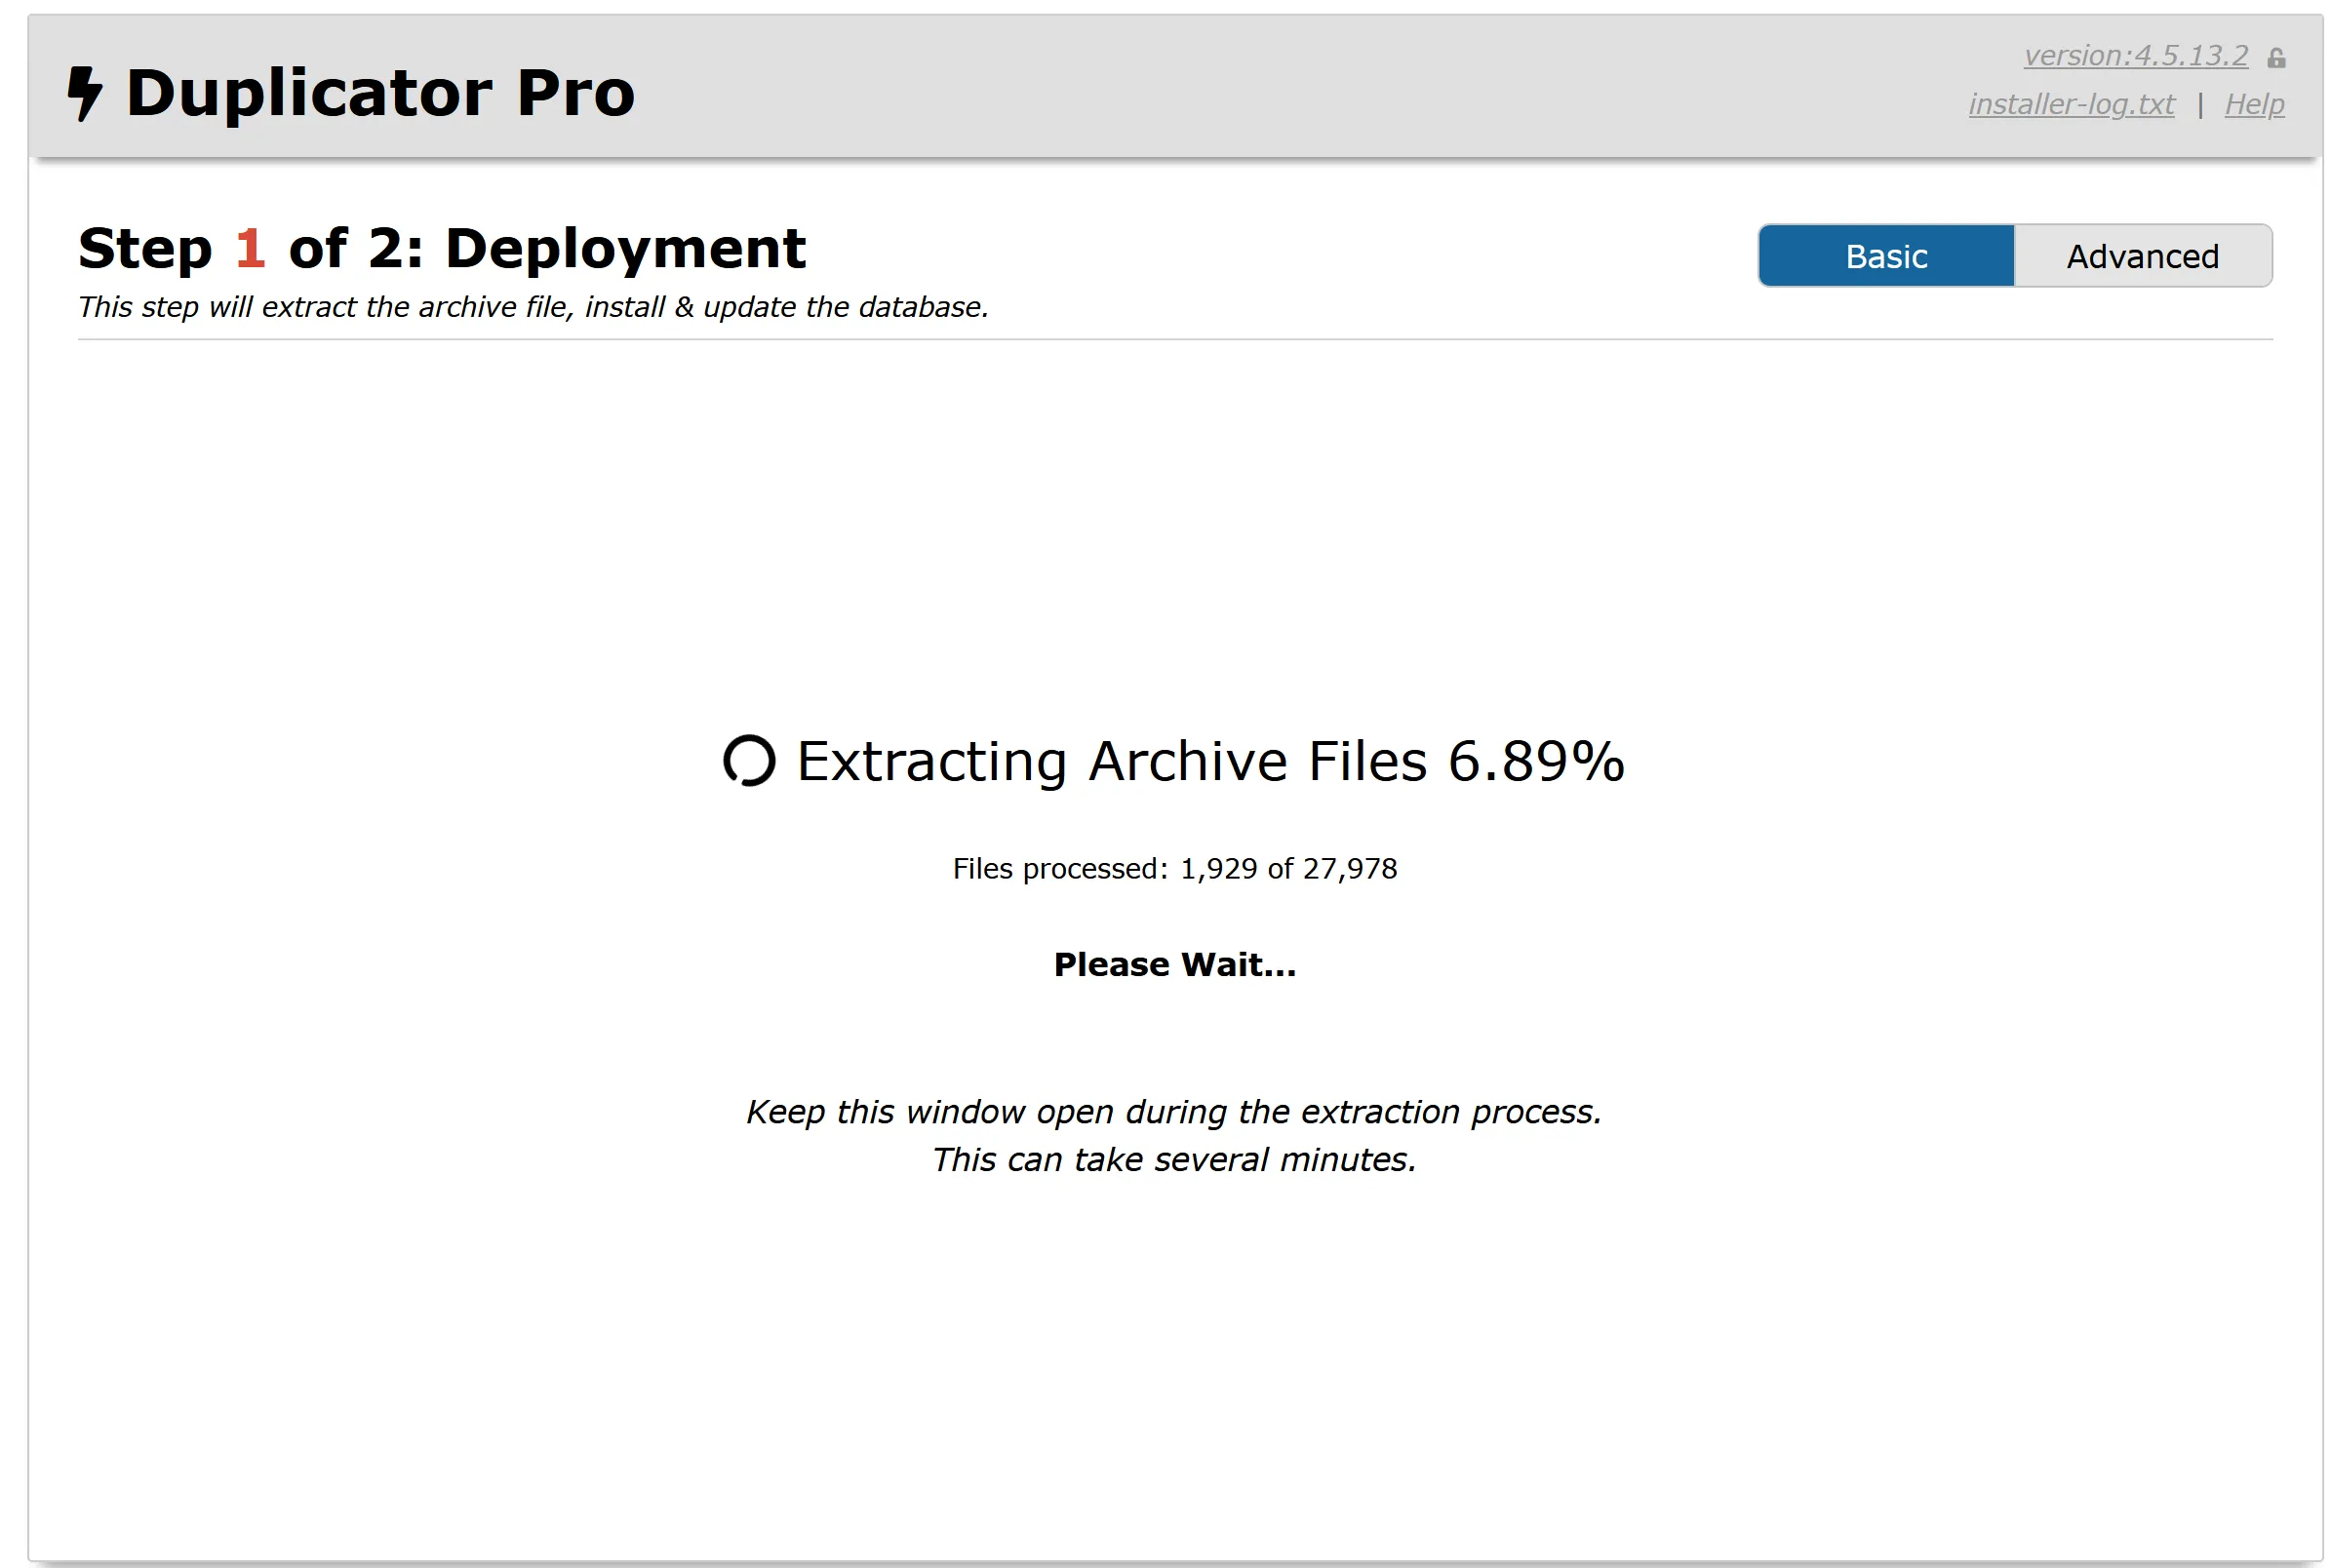
Once you initiate the installation of Duplicator Pro, a wizard will guide you through the process. You must input your database name, SQL file-based user, and password (see screenshot in yellow highlighted). Click the ‘verify’ button, and Duplicator Pro will quickly check your inputs.
Should everything be in order, you may proceed, and Duplicator Pro will install WordPress from the backup. Remember, as you aim to restore directly from a backup, you must first create the MySQL database and user before beginning the restoration process.
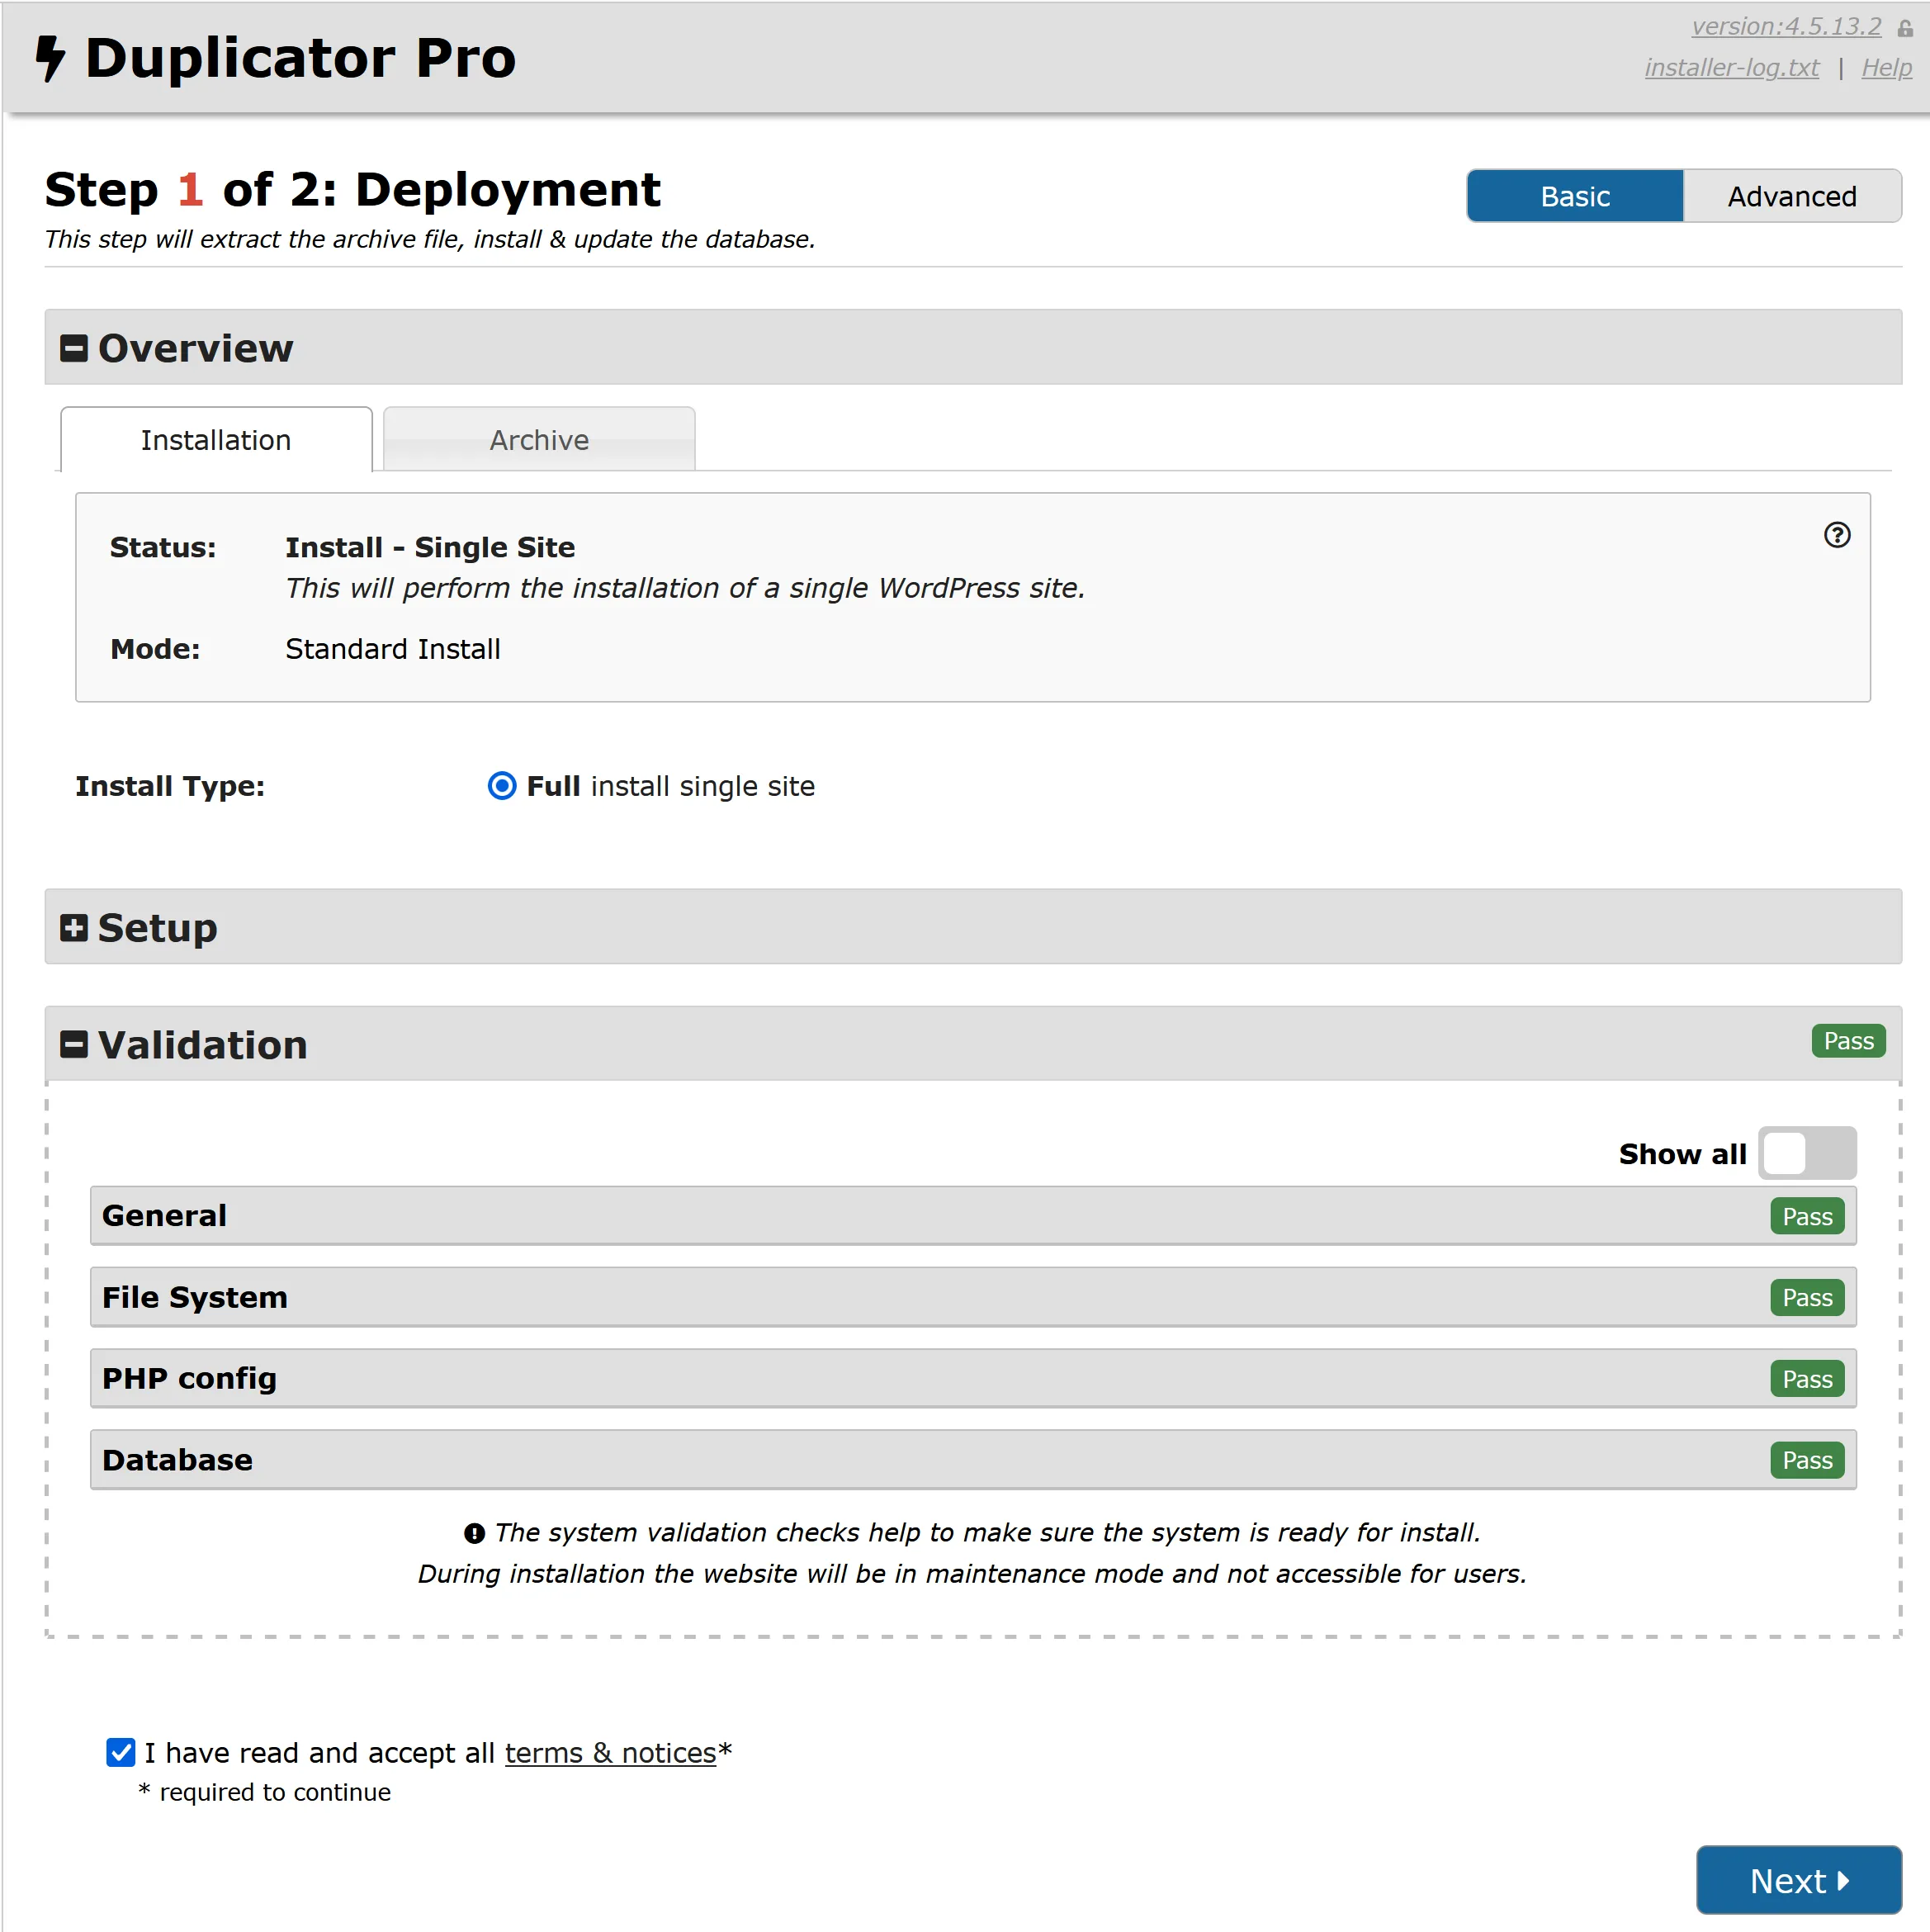
A screenshot of how it looks after the validation process

Now I click next, and Duplicator starts to install the complete WordPress website.
The backup plugin will update all URLs to match the new domain or subdomain if necessary.
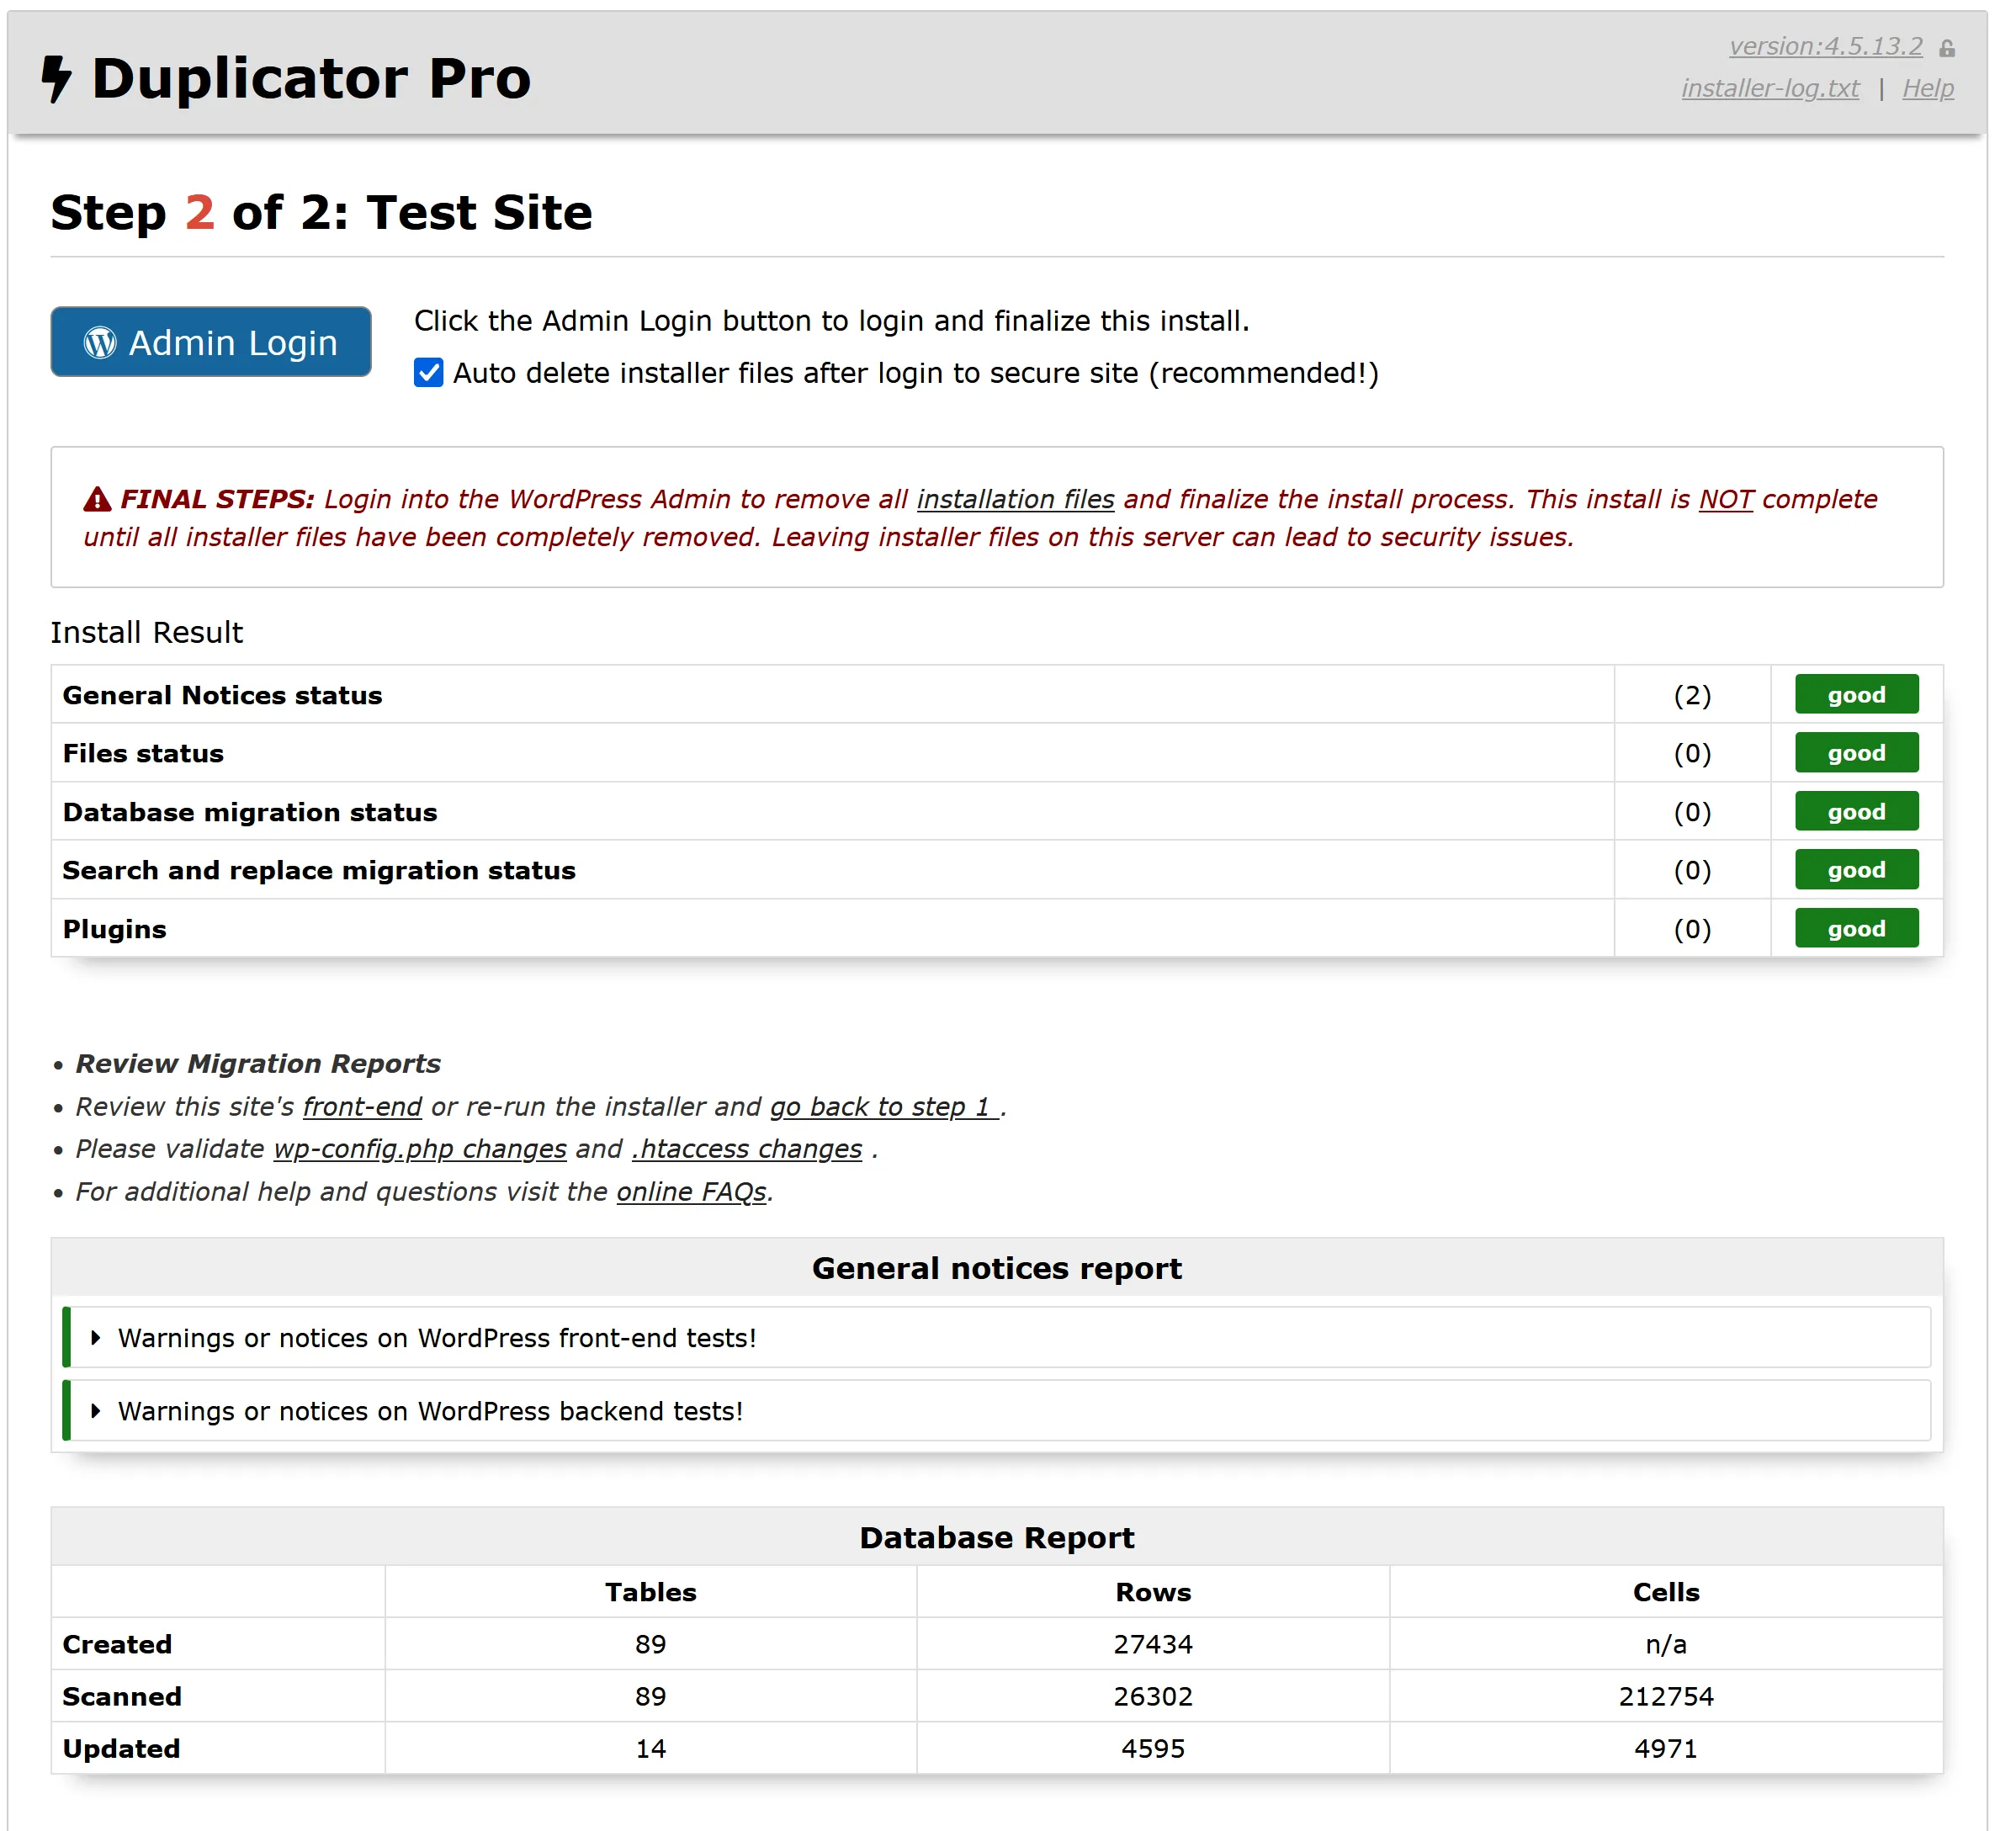
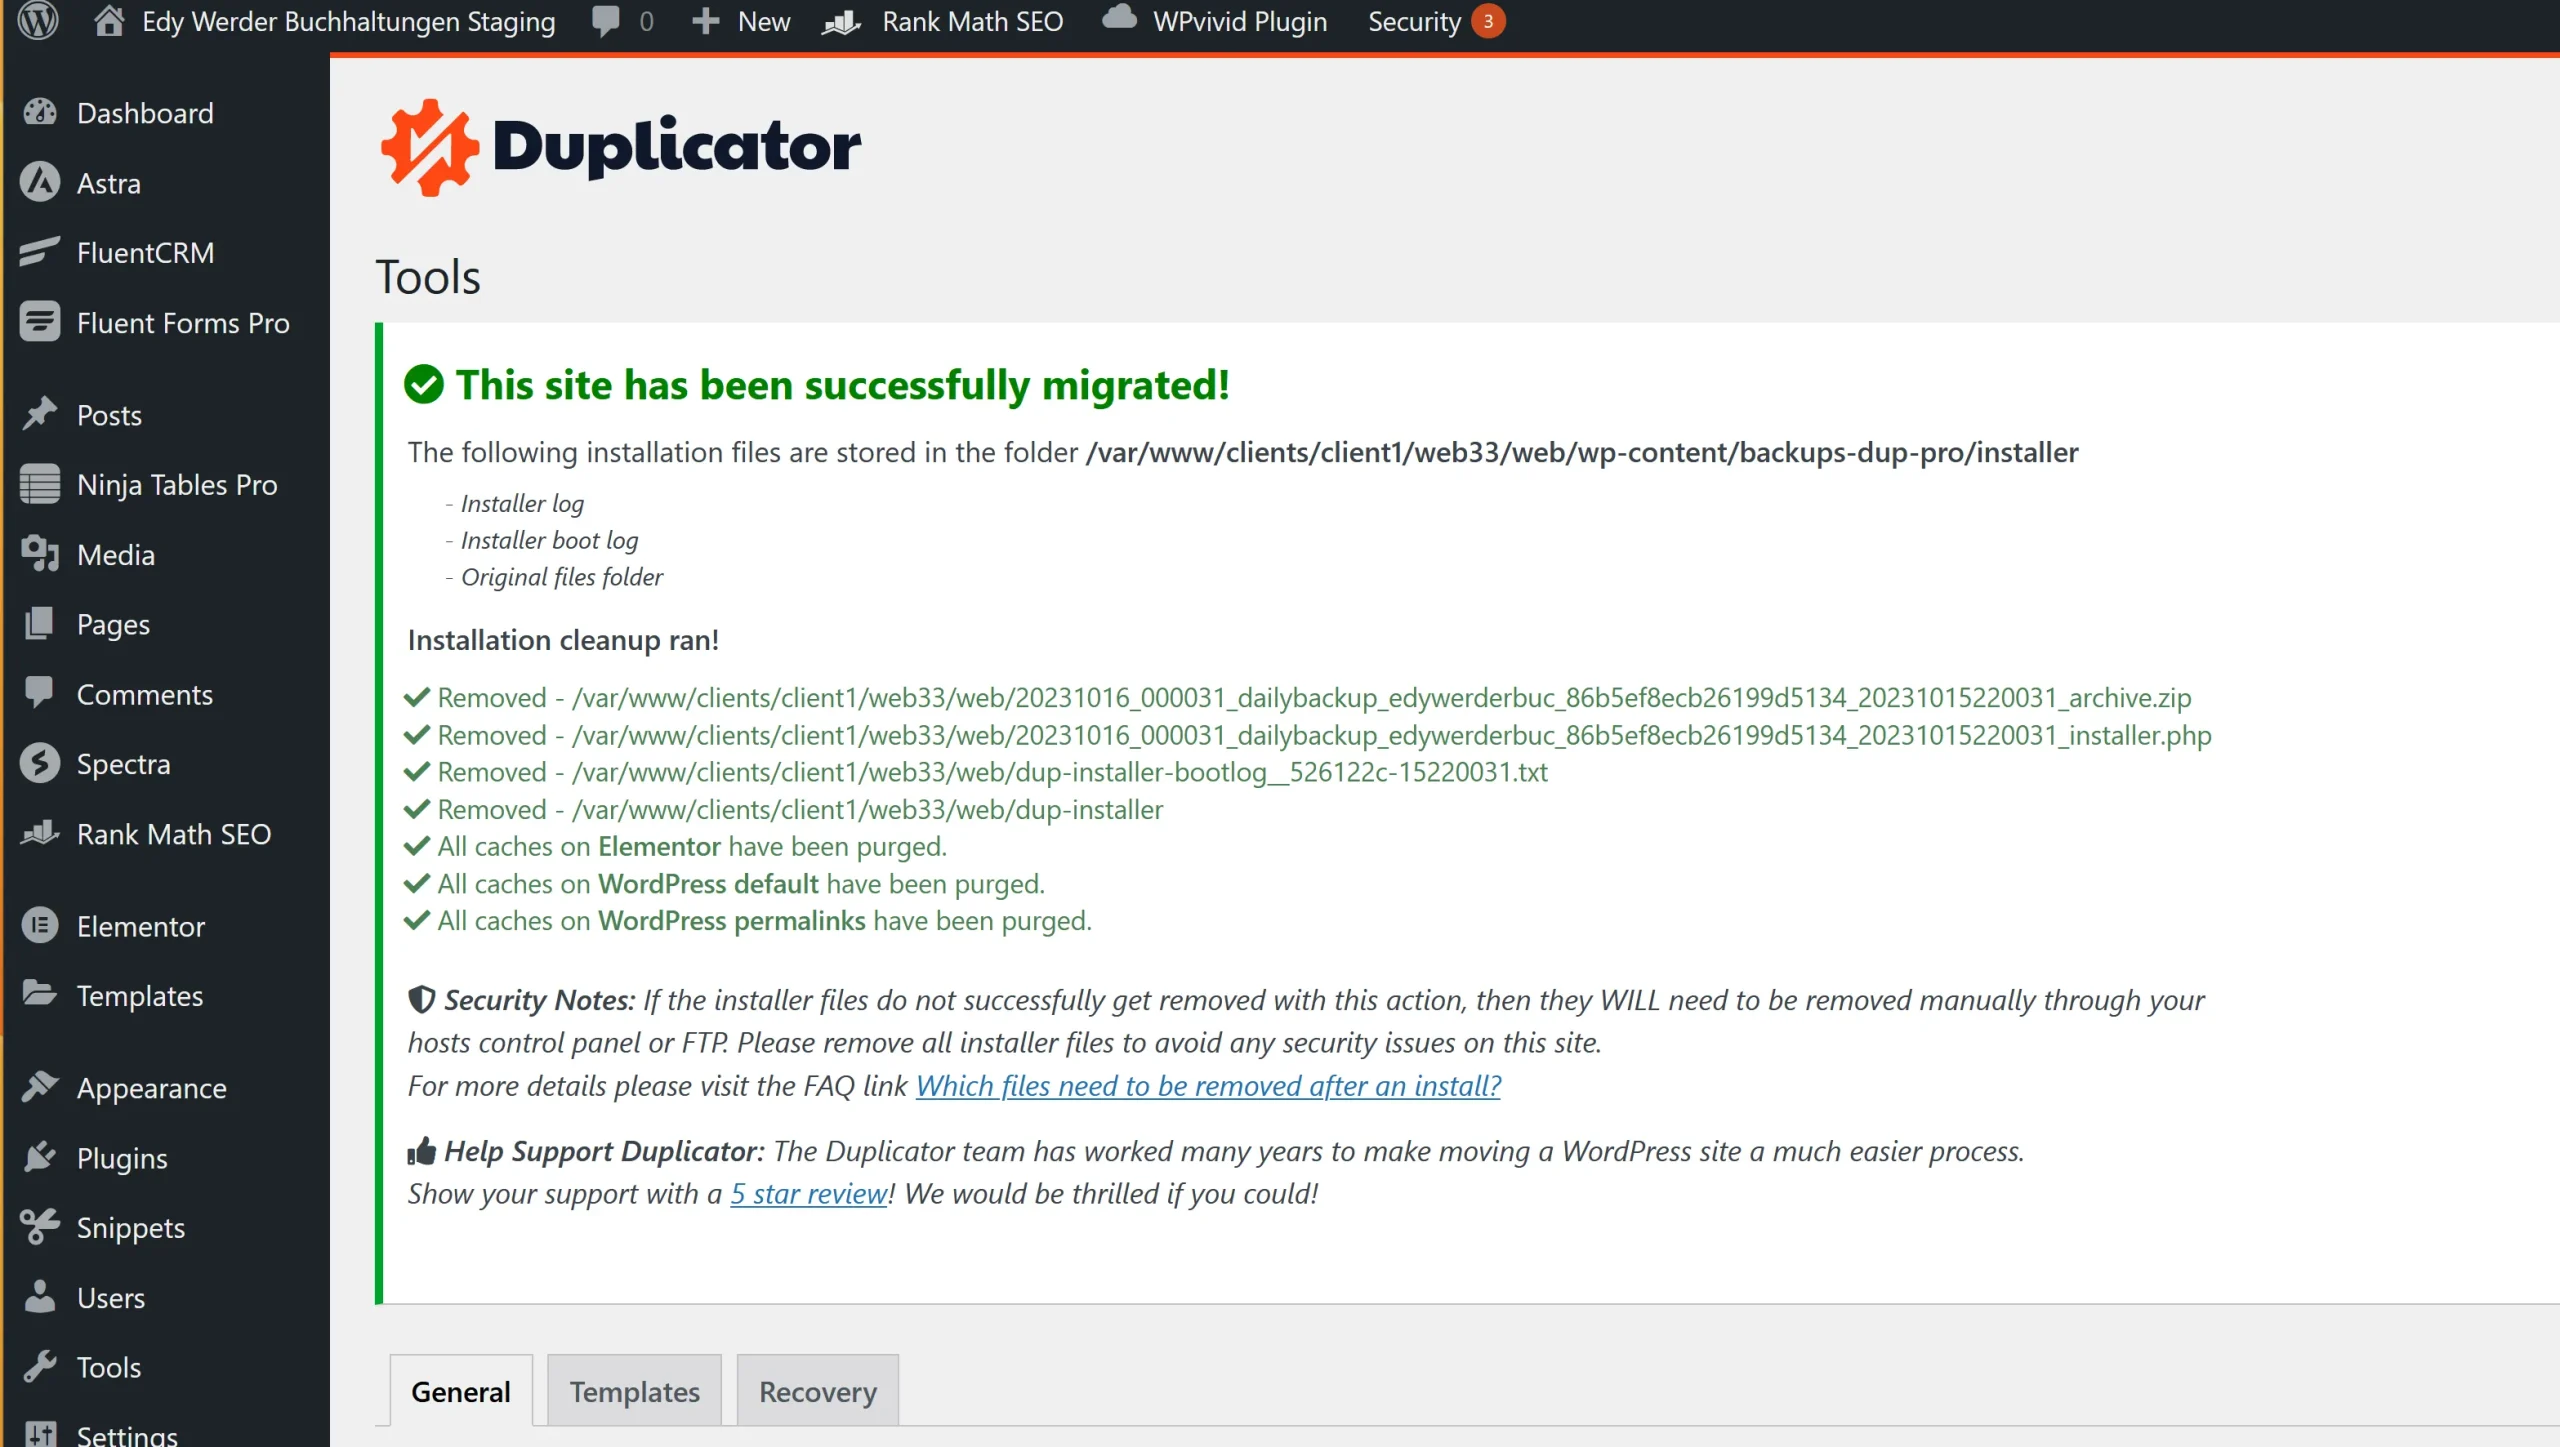
I can now log in to the restored WordPress website with the same credentials and WordPress will greet me with this notice.
Why do I find Duplicator Pro a better backup plugin than WPvivid?
Duplicator Pro stands out among backup plugins because it offers a distinct advantage: it can restore without a WordPress installation. Unlike other popular plugins such as UpdraftPlus or WPvivid, Duplicator Pro eliminates the need to install WordPress or backup software as a prerequisite to restoring your backup. This streamlines the process and saves valuable time, making it a preferred choice for users seeking a hassle-free backup solution.
Even default plugins like BackWPup require installing WordPress and the backup software before initiating the recovery process. By offering this unique feature, Duplicator Pro provides convenience and efficiency to its users.
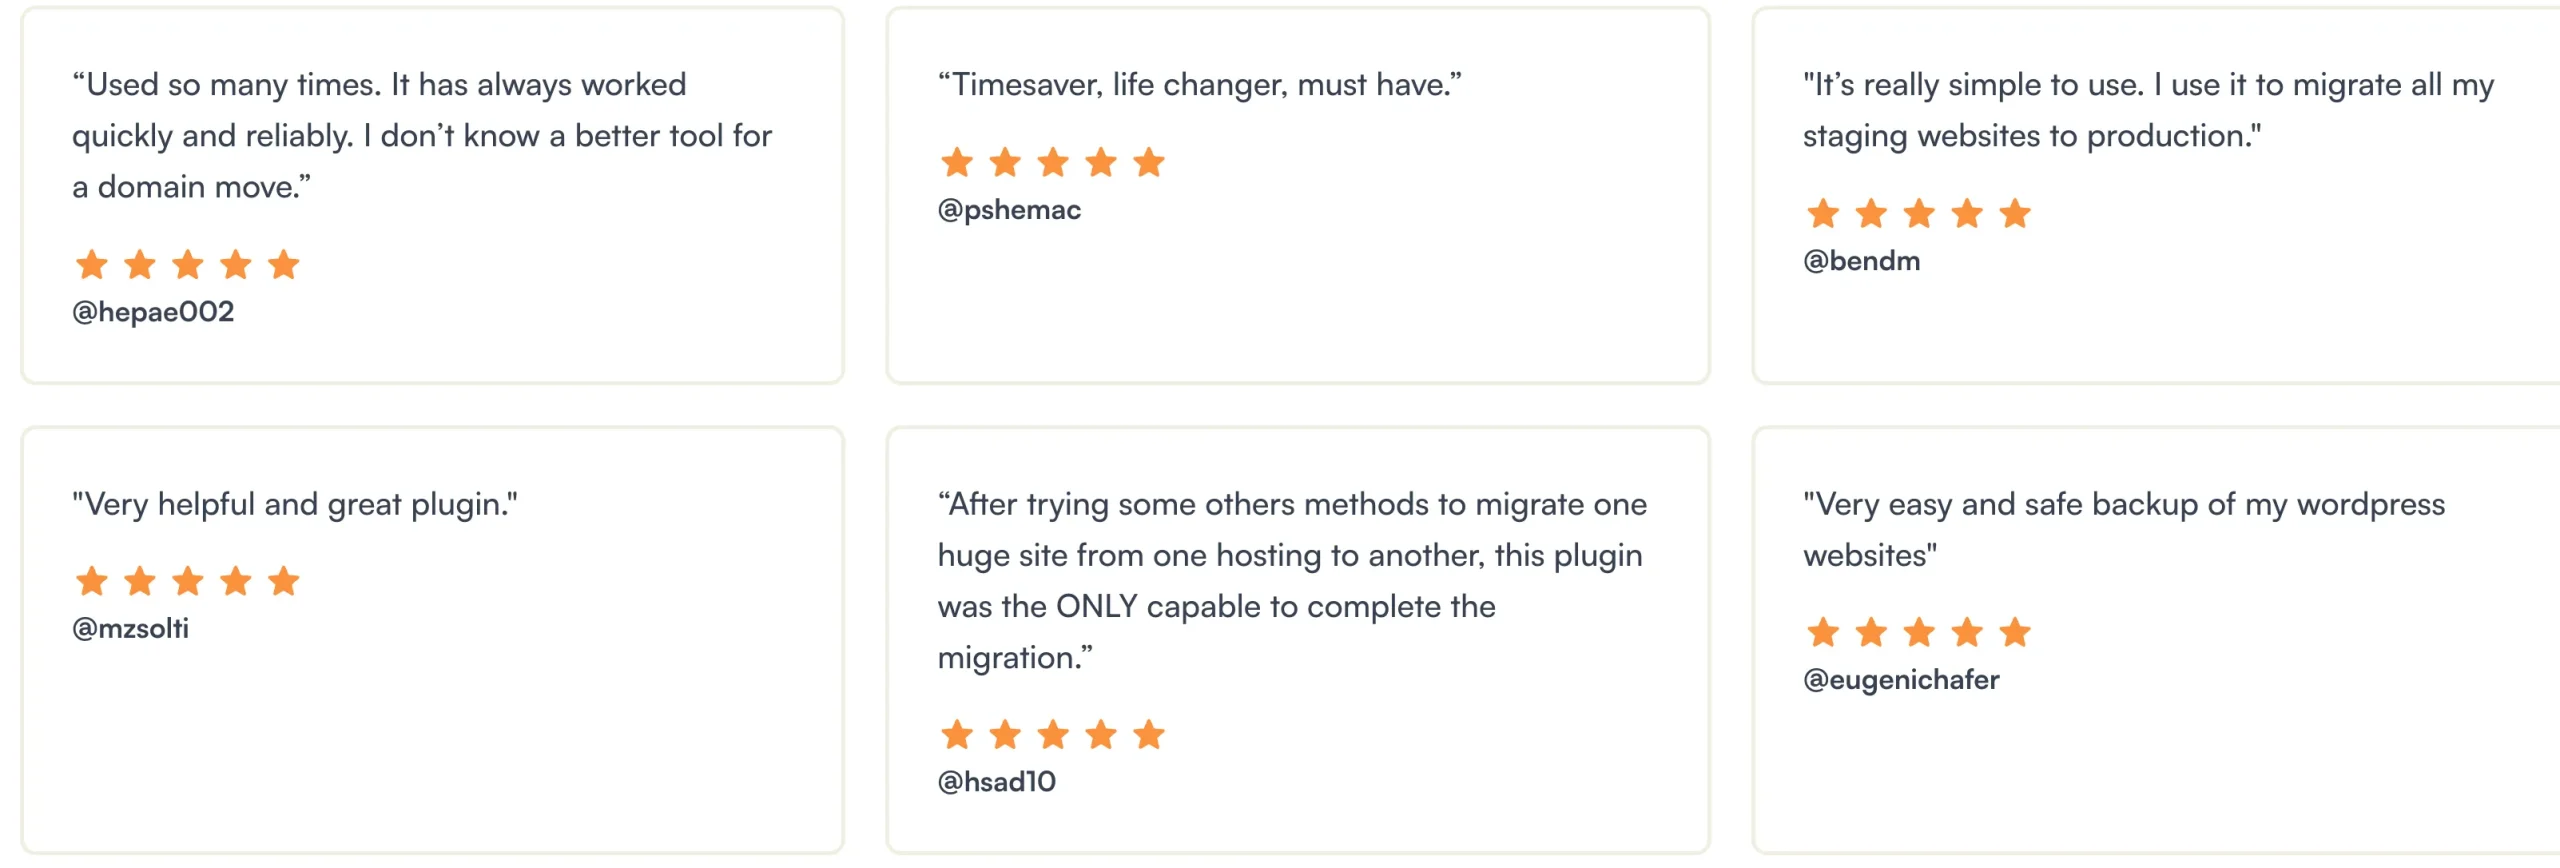
From happy Duplicator users.
Which WordPress backup method is best?
Better safe than sorry. I recommend combining Method 1 and Method 3 or 4 for cloud backups. Opt for a hosting company that incorporates daily backups in its plan, such as SiteGround, which provides daily backups and offers server management for seamless resolution of server issues. Use a backup plugin like Duplicator Pro or WPvivid to back up your website to a cloud server if you have a local NAS, or to a remote server via FTP. With this approach, you have copies locally, too. No prior WordPress installation is required with Duplicator Pro, and you can quickly migrate to another host.
Before you go …
Before you go, if you’re looking for more ways to enhance your WordPress site, take a look at my guide on the Code Snippets Plugin. This plugin lets you easily manage custom code without editing your theme files, making it a great addition to the backup strategies you’ve just learned. It’s a smart way to keep your site flexible and avoid unnecessary risks during updates or customizations. Check it out to streamline your WordPress development process!
Related Articles
About the author
Hi, I’m Edy Werder. I write hands-on guides about Proxmox, homelab servers, NAS, and WordPress, based on real setups I run and document.
No sponsors, no fluff—just real configs and results.
Enjoying the content?
