
By Edy Werder — IT Consultant & Tech Blogger
Are you looking to take control of your data with a private cloud solution but need help figuring out where to start? Setting up NextCloud on Proxmox using Ubuntu 22.04 could be the perfect solution, offering robust functionality without the complexity of Docker.
In this article, I will guide you through the installation of NextCloud on Proxmox with Ubuntu 22.04. While the officially recommended NextCloud installation method involves a Docker with the AIO (All-in-One) installation package, installing directly in a VM or container without a Docker is more efficient.
I asked the Reddit community for opinions about installing NextCloud. The result was that the method without a Docker was acceptable, and there are several ways to install NextCloud. I found a good video on YouTube in German that explains how it works.
Table of Contents
- What is NextCloud?
- How to Install NextCloud on Proxmox Using Ubuntu
- Prerequisites for Installing NextCloud on Proxmox
- Step 1: Create a new container with Ubuntu
- Step 2: Install Apache and PHP
- Step 3: Adjust php.ini
- Step 4: Install MariaDB and create a database for NextCloud
- Step 5: Download the latest NextCloud version
- Step 6: Create a conf file to register Nextcloud for Apache
- Step 7: Create a folder for the NextCloud data
- Step 8: Install an SSL certificate with Letsencrypt
- Step 9 (final step): Configure NextCloud
- Before you go …
- Related Articles
In short the steps involved to install NextCloud:
- Create a new container with Ubuntu.
- Install Apache and PHP
- adjust PHP.ini
- Install MariaDB and create a database for NextCloud.
- Download the latest NextCloud version
- Create a conf file to register NextCloud with Apache
- Create a folder for the NextCloud data.
- Install an SSL certificate with letsencrypt
- Configure NextCloud
In case you are not sure what NextCloud is, here is a short introduction
What is NextCloud?
NextCloud is an open-source software suite that allows you to run your private cloud storage service. It provides a safe, secure, and flexible way to store your files, photos, and documents, all managed under your control. NextCloud isn’t just about file storage; it includes features such as calendars, contacts, email, and file-sharing capabilities. It’s highly customizable through various apps that extend its functionality, making it a robust alternative to public cloud services like Google Drive or Dropbox. Synology also offers Synology Drive, an alternative to NextCloud. I wrote a how-to article
Now that you have a basic understanding of NextCloud let’s explore how to set it up on your Proxmox server using Ubuntu 22.04.
How to Install NextCloud on Proxmox Using Ubuntu
Prerequisites for Installing NextCloud on Proxmox
Before you start installing NextCloud on your Proxmox server using Ubuntu, there are a couple of essential prerequisites you need to ensure:
Domain Name
Having a domain name is crucial as it not only helps you efficiently access your NextCloud installation from the web but also allows you to configure SSL certificates more seamlessly, enhancing the security of your connection.
Public IPv4 Address
If possible, having a public IPv4 address is highly recommended. This facilitates direct Internet access to your NextCloud server, making it accessible from anywhere. This is particularly important if you use NextCloud as a cloud service for multiple users across different locations.
Alternative: Port Forwarding
If you cannot get a public IPv4 address, you can use port forwarding as an alternative. This method allows you to redirect network traffic from a specific port on your router to your NextCloud server within your local network. It’s a practical solution that allows external access to your installation without a dedicated public IP. Remember to configure this setting in your router’s administration panel, directing HTTP traffic on port 80 and HTTPS traffic on port 443 to the internal IP address of your Proxmox server.
Step 1: Create a new container with Ubuntu
I’m not going into the details of installing Ubuntu 22.04 in a Container. My article “Proxmox Containers vs VM: Which is Right for Your Needs?” describes the process. It is very straightforward.
Start the Ubuntu container and update Ubuntu. I prefer to get into the sudo mode with ‘sudo -s’. Therefore, all my commands won’t start with sudo.
apt-get update -y
apt-get upgrade -y
apt-get dist-upgrade -y
Step 2: Install Apache and PHP
First, we install Apache
apt install apache2 -ythen we install PHP
apt install software-properties-common
add-apt-repository ppa:ondrej/php
apt update
and the required PHP modules. As of this writing (April 2024), NextCloud recommends PHP 8.3
apt install php8.3 libapache2-mod-php8.3 php8.3-zip php-dompdf php8.3-xml php8.3-mbstring php8.3-gd php8.3-curl php8.3-imagick libmagickcore-6.q16-6-extra php8.3-intl php8.3-bcmath php8.3-gmp php8.3-cli php8.3-mysql php8.3-zip php8.3-gd php8.3-mbstring php8.3-curl php8.3-xml php-pear unzip nano php8.3-apcu redis-server ufw php8.3-redis php8.3-smbclient php8.3-ldap php8.3-bz2Step 3: Adjust php.ini
We need to change a few settings in the php.ini. I use the nano editor with this command.
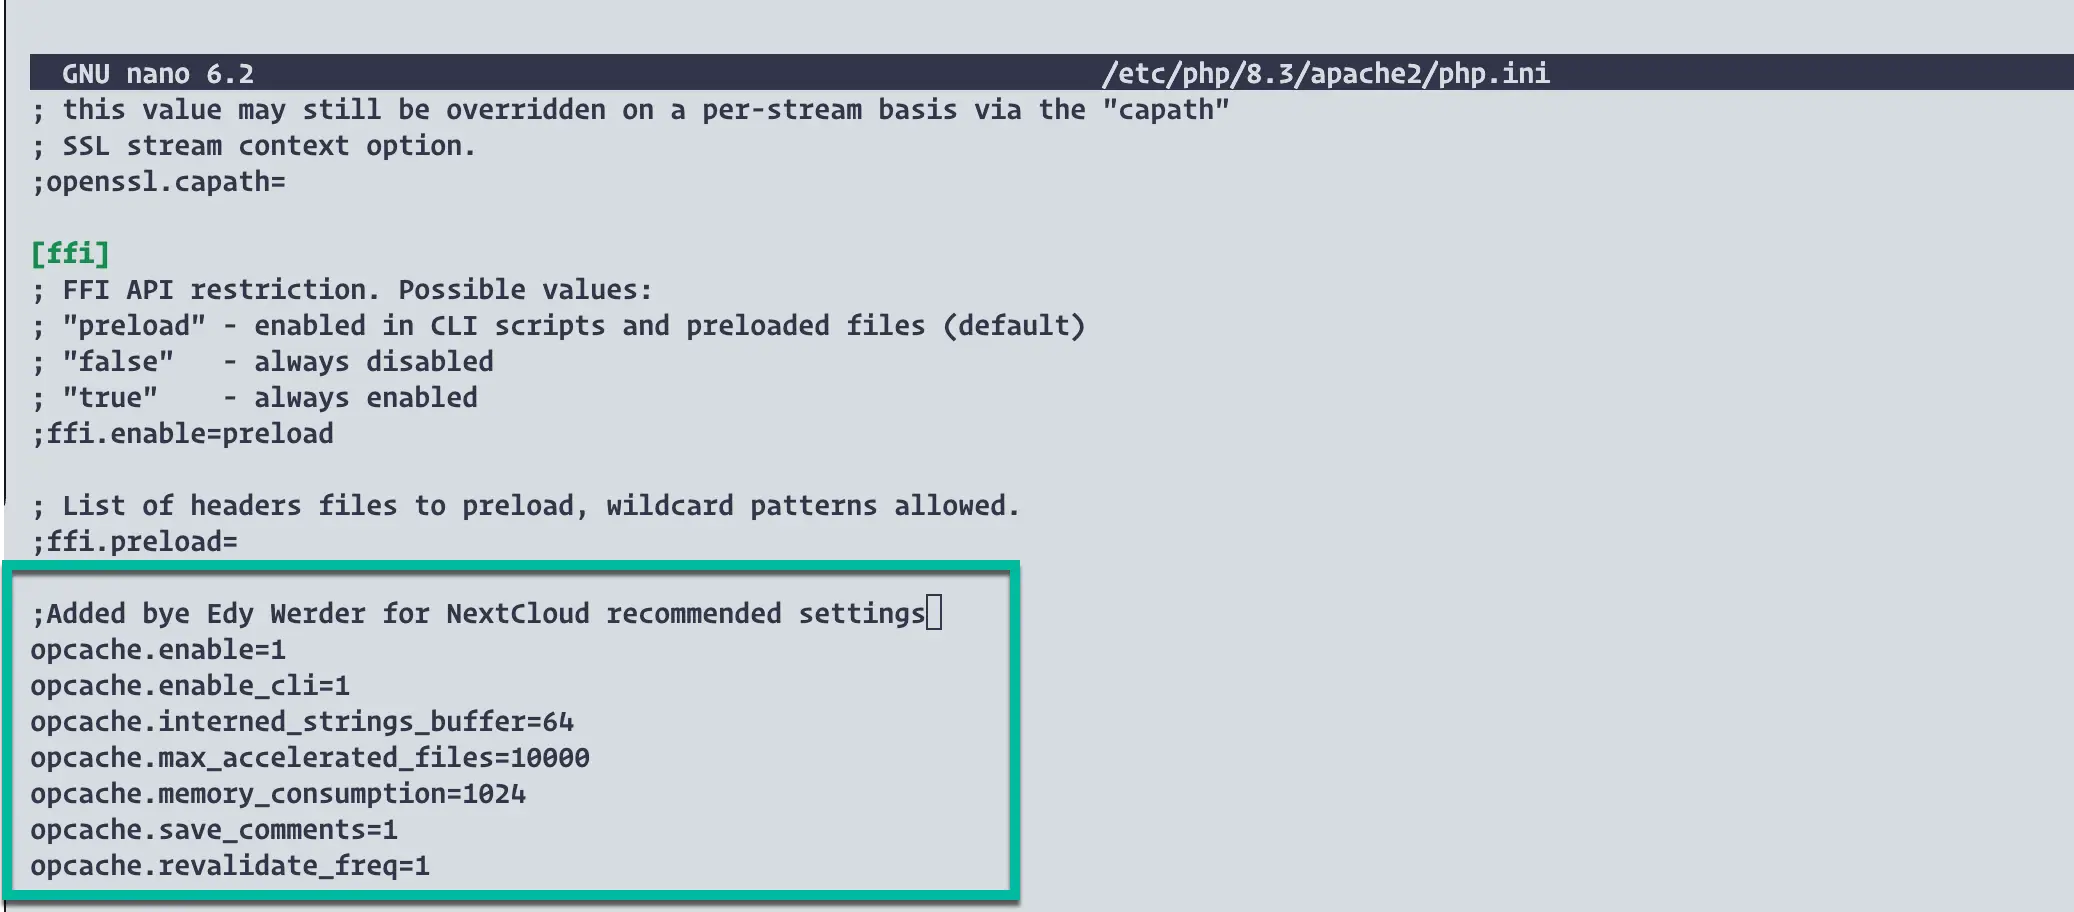
nano /etc/php/8.3/apache2/php.iniHere is the list of what we need to change in the php.ini
If your Ubunut installation has 8GB of RAM, I recommend allocating 50% to PHP, which is 4096. The ‘upload_max_filesize’ and ‘post_max_size’ are essential to define the file sizes allowed in NextCloud.
In the nano editor, you can search for the settings with ‘control+W’ (MAC) or ‘CTRL+W (Windows). To save the settings, press ‘control+O,’ and to exit the editor, press ‘control+X.’ I’m on a MAC
memory_limit = 4096M
upload_max_filesize = 20G
post_max_size = 20G
date.timezone = Europe/Zurich
output_buffering: OFF
opcache.enable=1
opcache.enable_cli=1
opcache.interned_strings_buffer=64
opcache.max_accelerated_files=10000
opcache.memory_consumption=1024
opcache.save_comments=1
opcache.revalidate_freq=1
All the opcache settings are disabled with a ‘;’. Instead of searching for and editing each setting, you can add all opcache settings at the end of the file.
Step 4: Install MariaDB and create a database for NextCloud
Now, let’s install the MariaDB database. I prefer it over MySQL
apt install mariadb-serverFurther, we must secure the database installation with the password for the user’s ‘root’. This is the user for the database and not Ubuntu. Make sure to note the password somewhere. 🙂
mysql_secure_installationOnce installed, we must create a database in MariaDB with a database user and password. This is later needed to configure NextCloud.
mysql
CREATE DATABASE nextcloud;
CREATE USER 'nextclouduser'@'localhost' IDENTIFIED BY 'password_here';
GRANT ALL PRIVILEGES ON nextcloud.* TO 'nextclouduser'@'localhost';
EXIT;
With the command ‘MySQL’ you get in the database mode, each command ends with a ; To exit the database mode, enter ‘exit;’
Step 5: Download the latest NextCloud version
It’s time to download the NextCloud.zip, extract it, and move the nextcloud folder to /var/www
We download it to the tmp folder
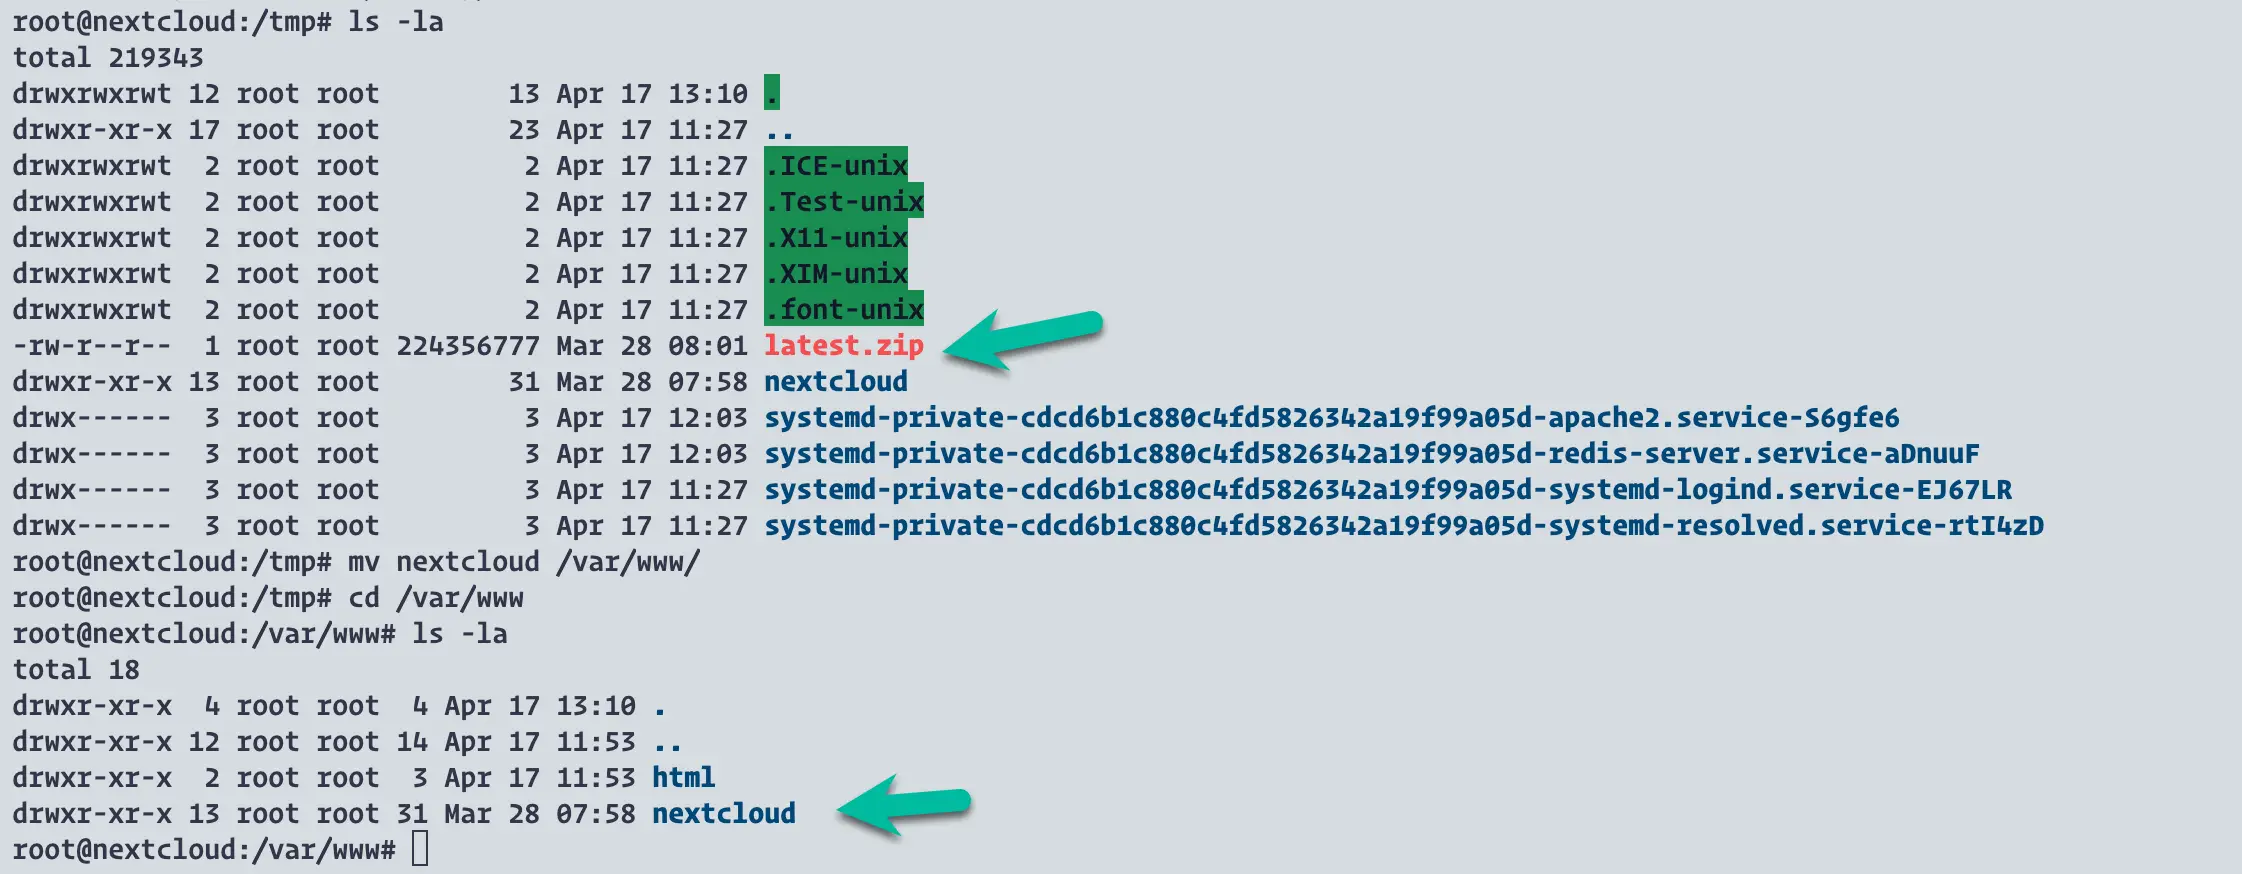
cd /tmp && wget https://download.nextcloud.com/server/releases/latest.zip
unzip latest.zip
mv nextcloud /var/www/
In the screenshot below, you see it was downloaded to the tmp folder as ‘latest.zip’. Once unpacked and moved, there is a ‘nexcloud’ folder in /var/www.
Step 6: Create a conf file to register Nextcloud for Apache
nano /etc/apache2/sites-available/nextcloud.confWe will use nano editor again to insert the information
<VirtualHost *:80>
     ServerAdmin info@edywerder.ch
     DocumentRoot /var/www/nextcloud/
     ServerName zurichclouds.com
     <Directory /var/www/nextcloud/>
        Options +FollowSymlinks
        AllowOverride All
        Require all granted
          <IfModule mod_dav.c>
            Dav off
          </IfModule>
        SetEnv HOME /var/www/nextcloud
        SetEnv HTTP_HOME /var/www/nextcloud
     </Directory>
     ErrorLog ${APACHE_LOG_DIR}/error.log
     CustomLog ${APACHE_LOG_DIR}/access.log combined
</VirtualHost>
Replace the information in red with your Email ID and the FQN name of your server. Ideally, using a public domain or a subdomain would be best.
Again, save the file with ‘control+o’ and exit it nano with ‘control+x’. Then we need to run some command to register it with apache and restart apache
a2ensite nextcloud.conf
a2enmod rewrite
a2enmod headers
a2enmod env
a2enmod dir
a2enmod mime
# restart apache
service apache2 restart
Step 7: Create a folder for the NextCloud data
We are almost ready; let us create a folder in Ubuntu for the NextCloud data. I will name the folder ‘zurichclouds-repo’
mkdir /zurichclouds-repo
chown -R www-data:www-data /zurichclouds-repo
chown -R www-data:www-data /var/www/nextcloud/
chmod -R 755 /var/www/nextcloud/
With the ‘chown’ commands we give for the user ‘www-data’ and for the group ‘www-data’ ownership to the folder, and the ‘chmod’ command set the write permission
My pick
Synology Drive
How to install and run
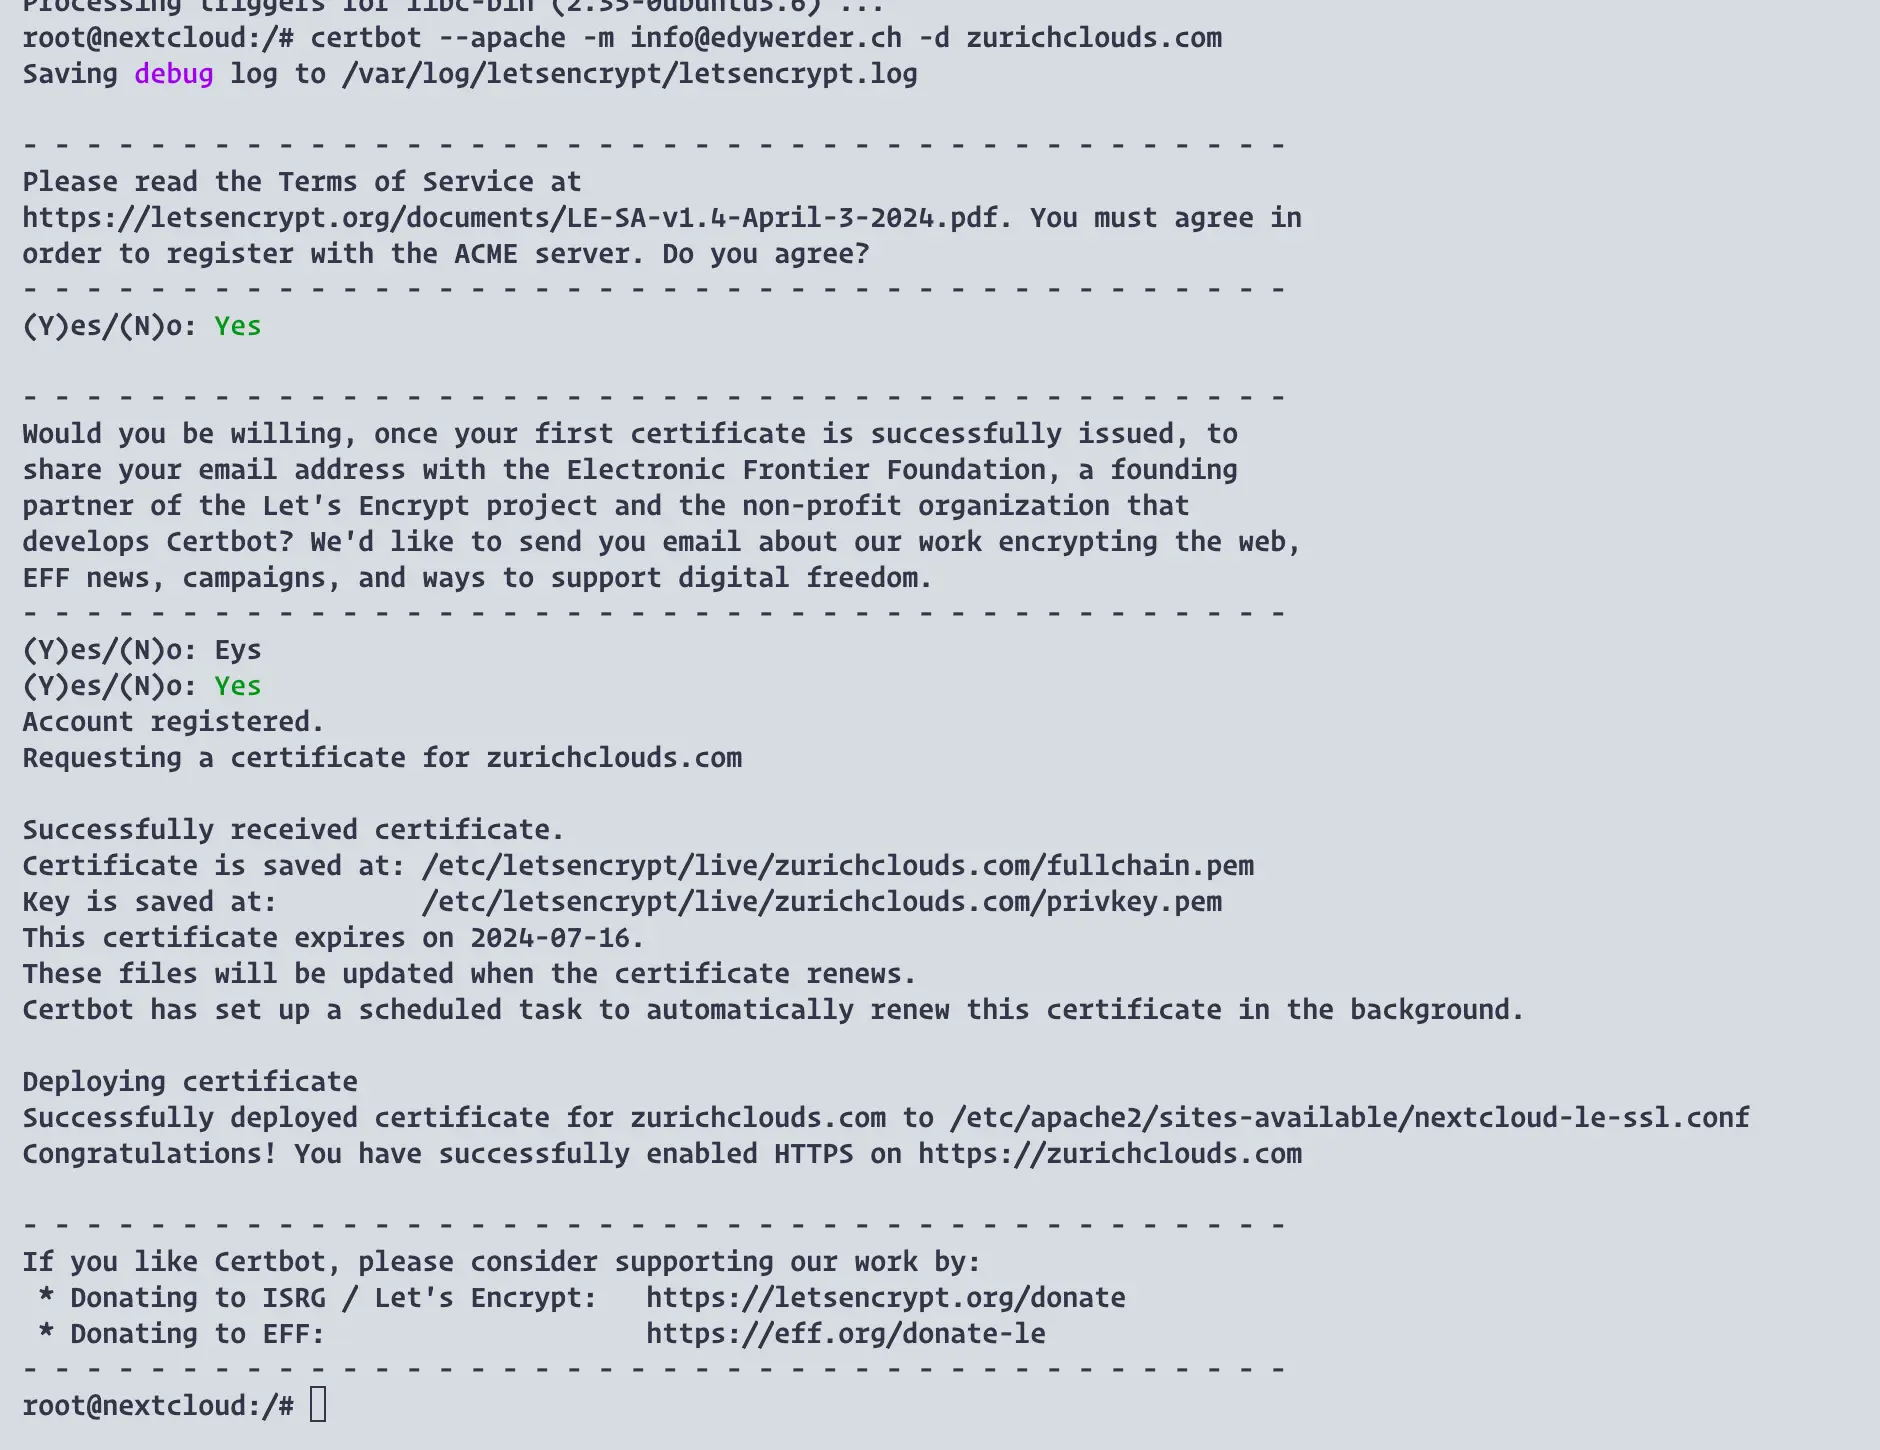
Step 8: Install an SSL certificate with Letsencrypt
Please make sure port 80 is open on your firewall, else the certbot is not able to verify the SSL certificate.
We have to install first the certbot.
apt install certbot python3-certbot-apacheAfter you can obtain the certificate, use your email ID and your domain for the certification process.
certbot --apache -m info@edywerder.ch -d zurichclouds.comSee below how it looks when the certificate is successfully deployed. Letsencrypt certificates are valid for 90 days, but a process is already in place to automatically renew them.
Proxmox server ideas

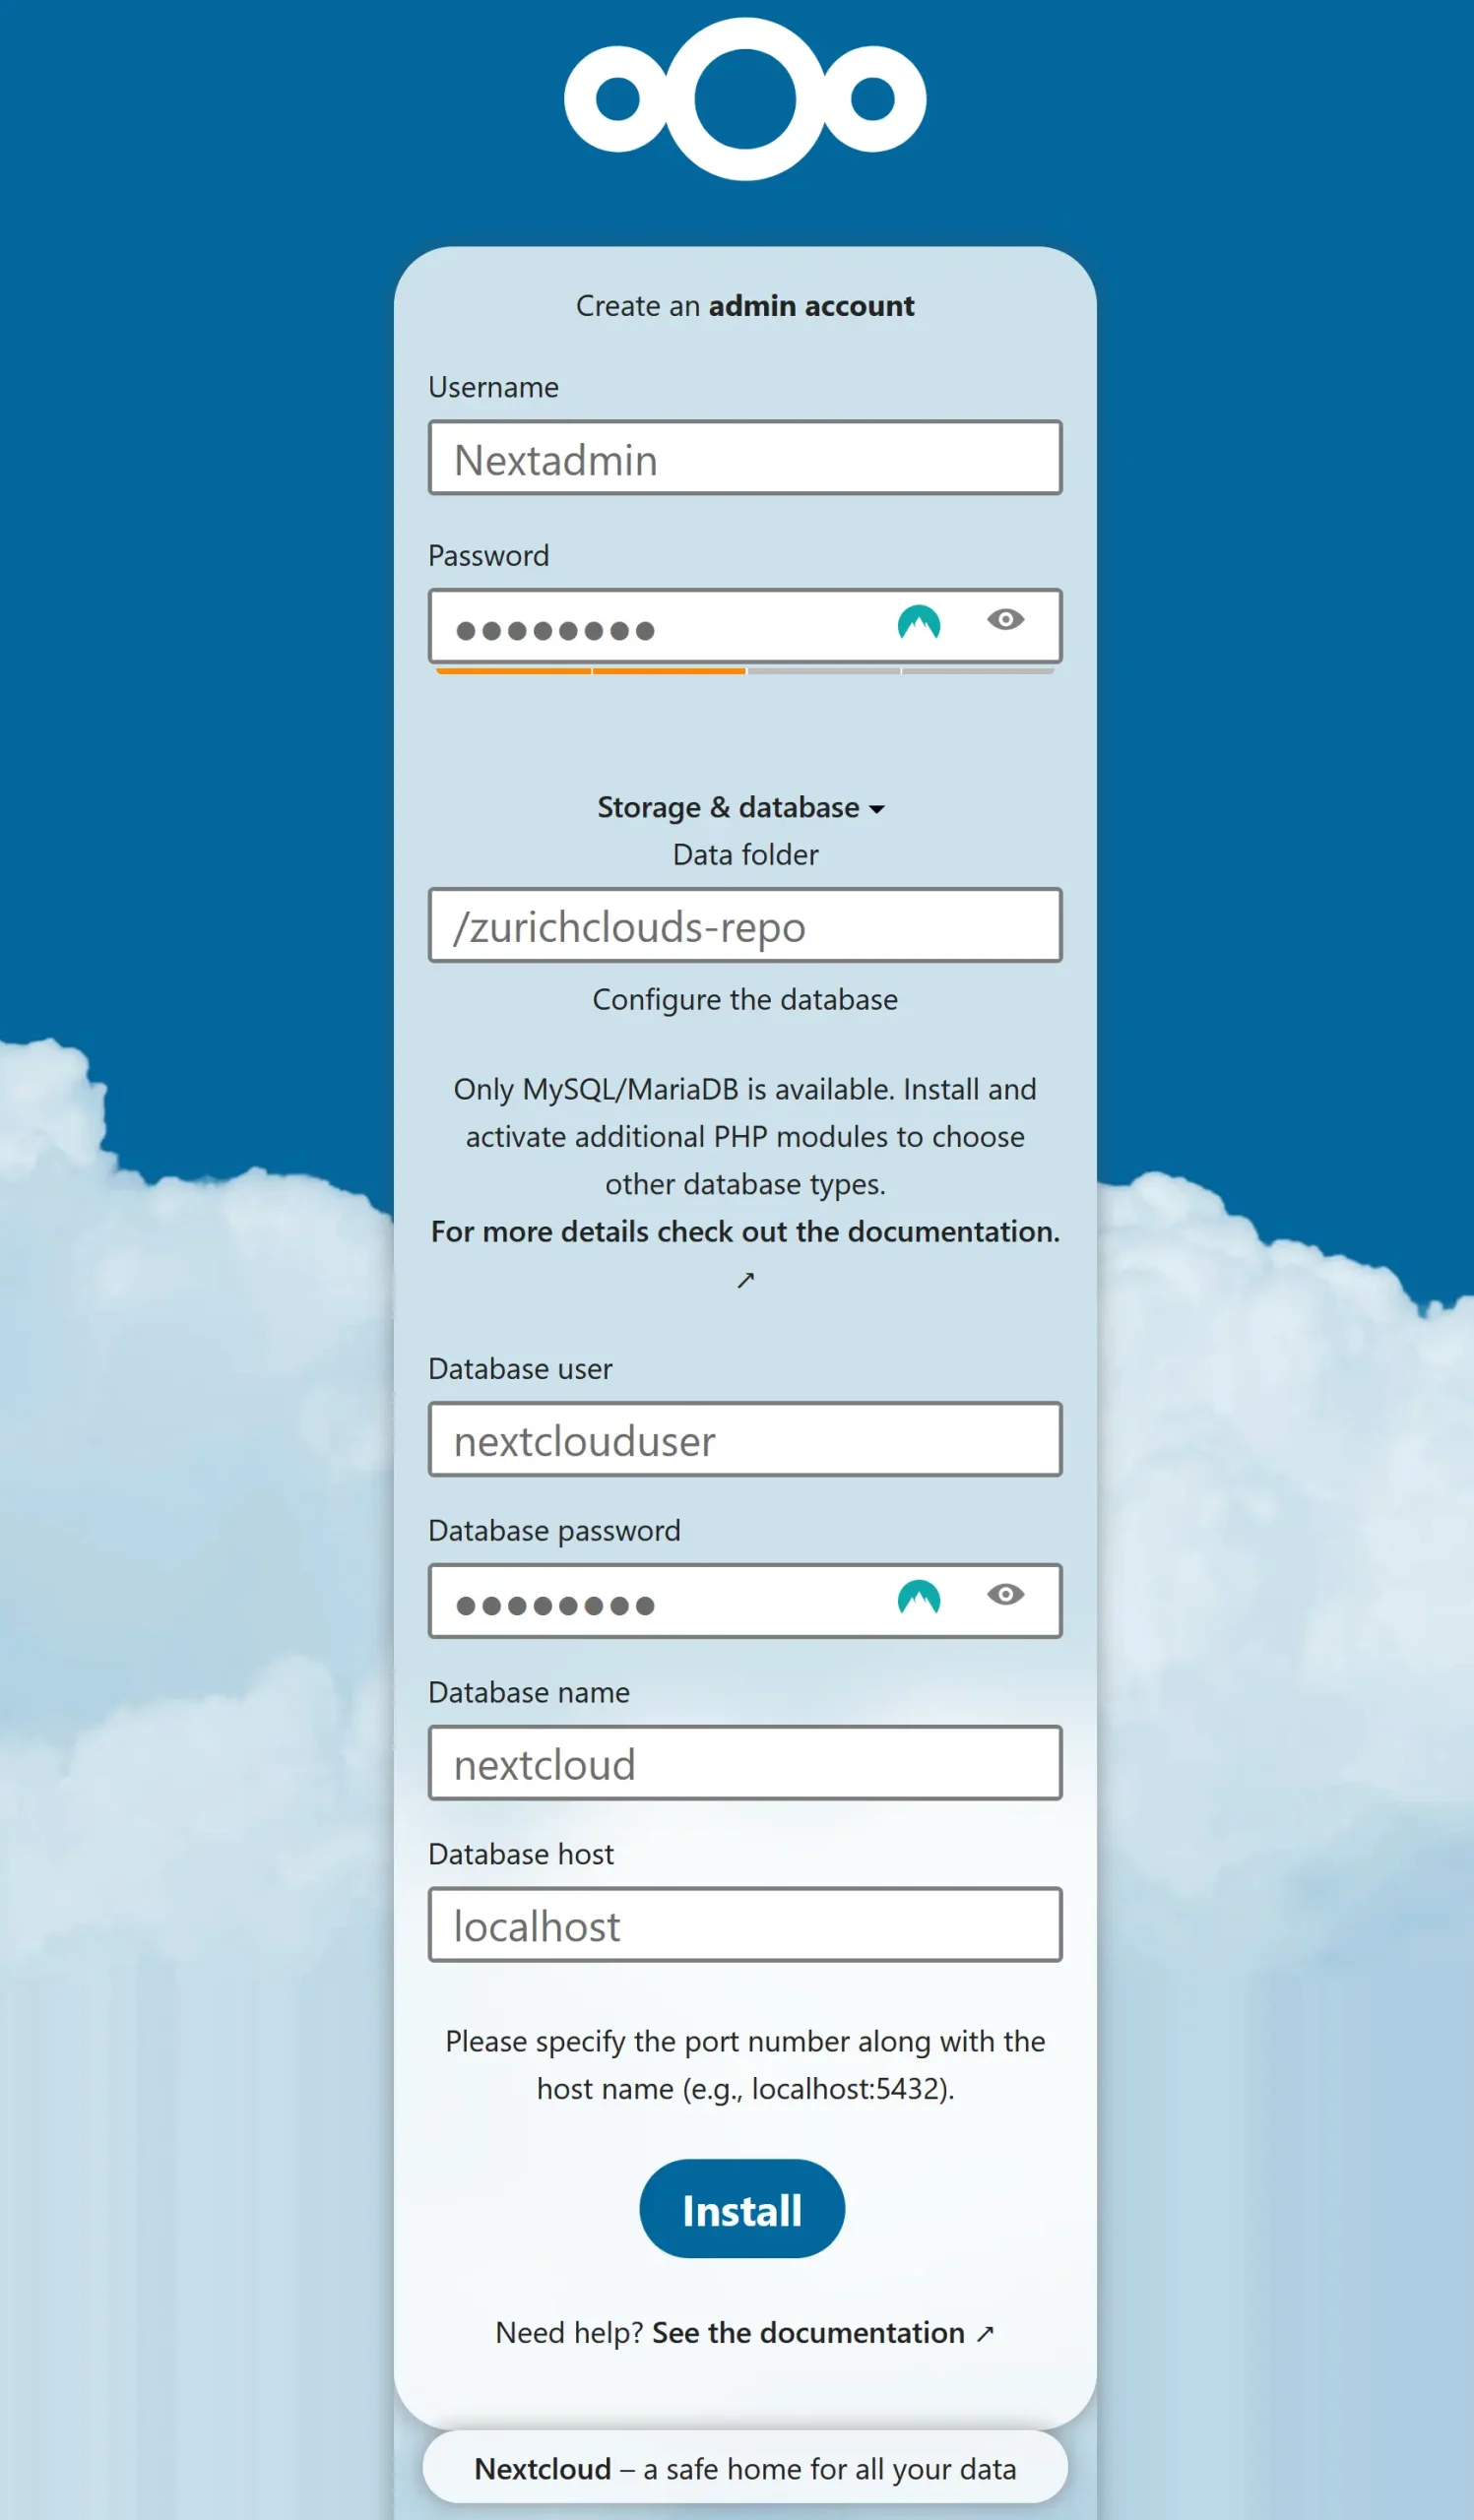
Step 9 (final step): Configure NextCloud
Fire up your browser and enter your domain name; in my case, it is https://zurichclouds.com. NextCloud configuration should greet you for the setup.
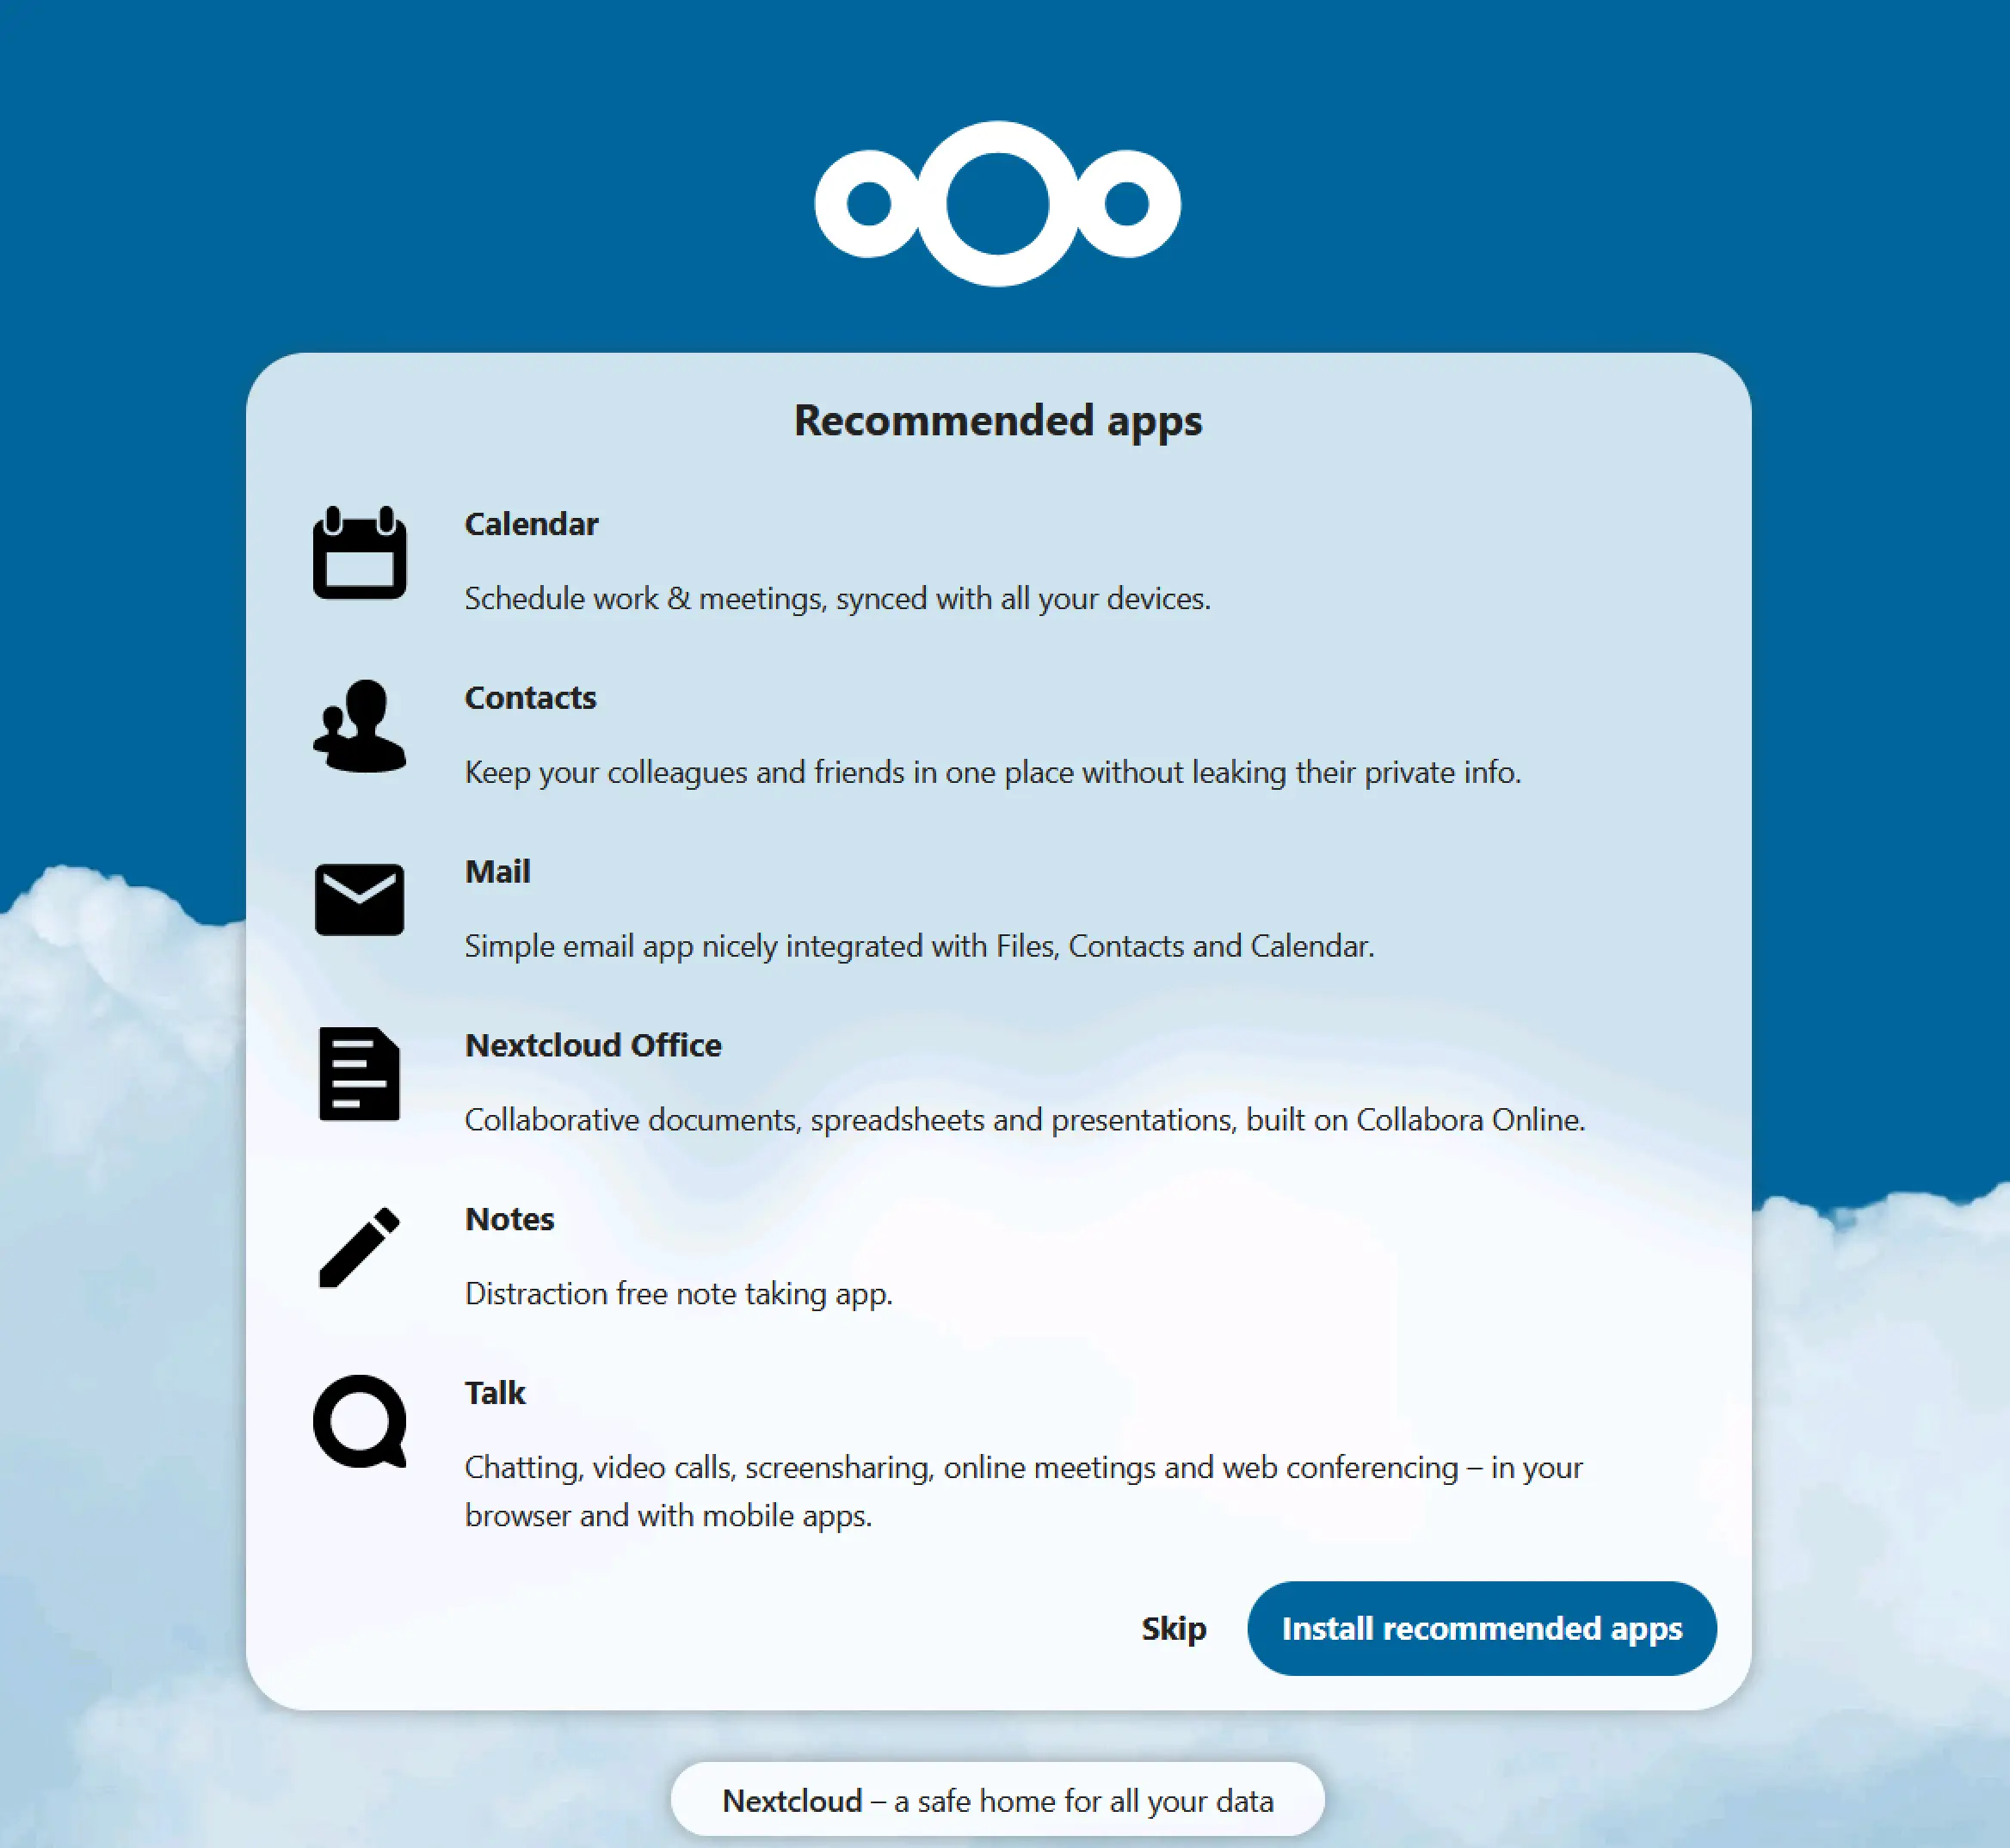
Enter the required information provided in earlier stages and click ‘Install’. Next, you could install the recommended apps.
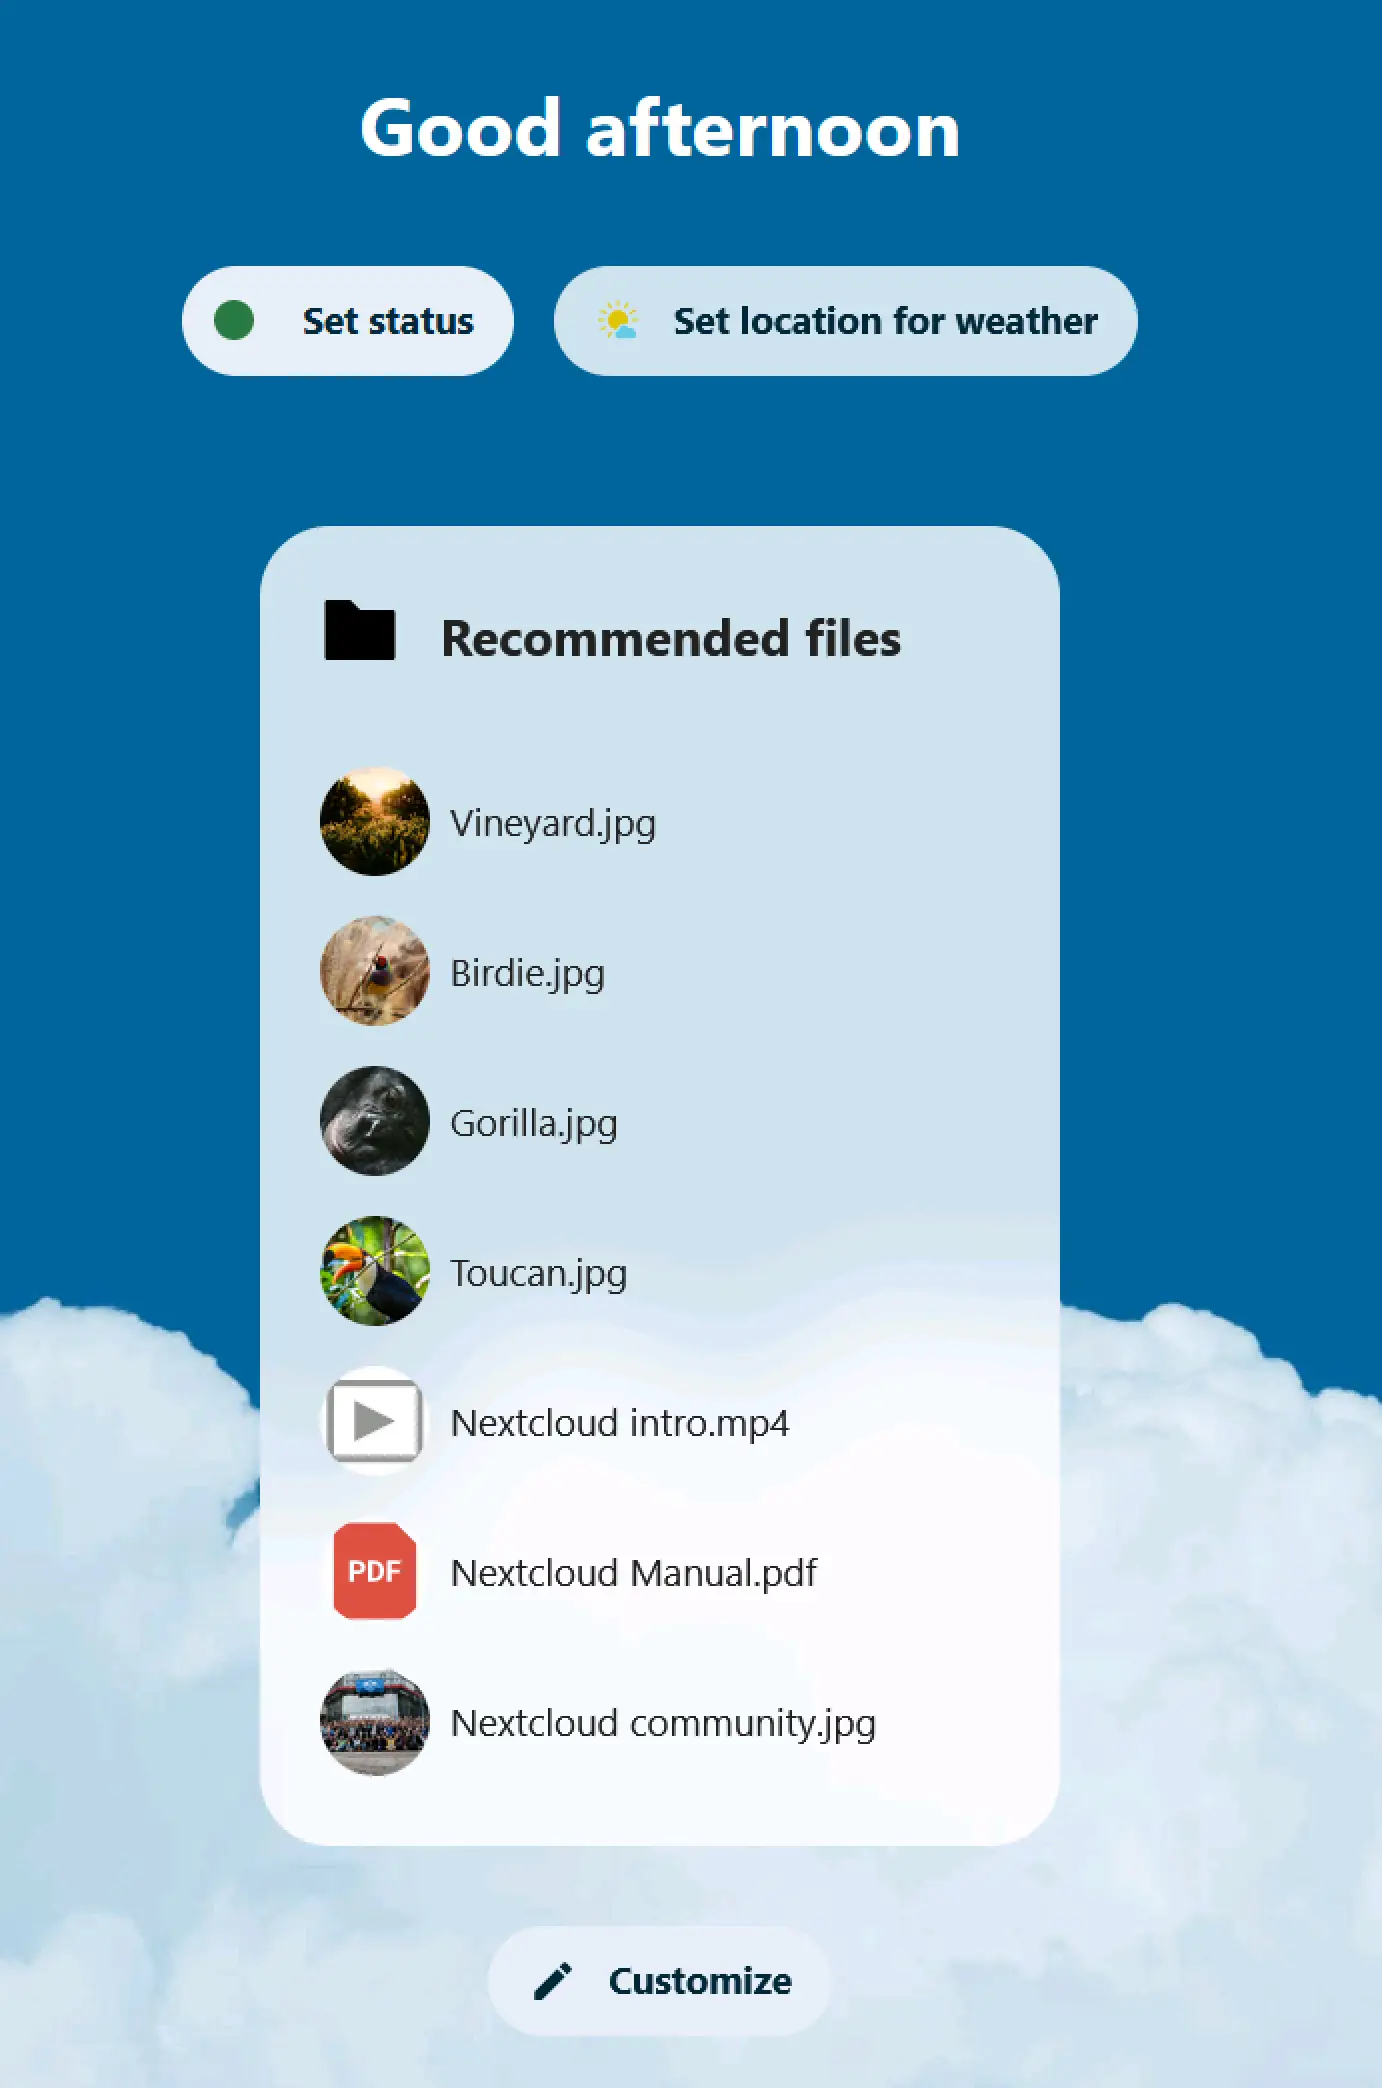
If all went well, you should be logged in. Congratulations! NextCloud is ready!
I’d love to hear from you — was this article helpful? Share your thoughts in the comments below. If you prefer, you can also reach me by email or connect with me on Reddit at Navigatetech.
Before you go …
‘m glad you explored the steps to install Nextcloud on Proxmox using Ubuntu. If you’re now considering setting up your home lab further, you might find it valuable to look into the best server options available for such environments. I recommend checking out this detailed guide on choosing the best server for your home lab. It covers various server types and helps you understand which might best suit your needs, effectively enhancing your home lab setup.
About the author
Hi, I’m Edy Werder. I write hands-on guides about Proxmox, homelab servers, NAS, and WordPress, based on real setups I run and document.
No sponsors, no fluff—just real configs and results.
Enjoying the content?

Hi Edy,
Thanks for your post and sharing! I will follow your steps later to try to set up NextCloud on my Proxmox container with Ubuntu installed.
Before that, are you able to advise me on the storage setup? I have 2 separate pools setup with 1 made up of SSD for App installation, another with HDD mainly (intended) for data storage. In this Nextcloud application, how should i do that? I would like to have all my NextCloud users stored at the HDD drive instead of the App drive.
Hope you can advise me on this.
Great post and great job there!
Hello – Thank you for your question. It’s a great one, yes this is possible. Just add a second drive while creating the container and point it to your pool with HDD. The nice thing of Proxmox Container, Proxmox will mount for you the additional drive automatically.
Then install NextCloud normally to your pool SSD. when you are in the initial setup (step 9 screenshot) you can specify the storage & database folder.
Please let me know how it went and good luck!
Edy
PS: I have another article about Proxmox Containers