
By Edy Werder — IT Consultant & Tech Blogger
Proxmox released version 9 in early August 2025, and it’s the best release yet for home server enthusiasts. In this article, I’ll guide you through the installation process using a Dell PowerEdge server — though the same steps work for most hardware.
Before we jump into the step-by-step guide, let me share a few practical tips to help you avoid common pitfalls when installing Proxmox VE 9 on your own server.
Installation Tips for Home Servers
- Use a clean USB flash drive created with Balena Etcher or Rufus. Tools like Ventoy can cause boot issues with the Proxmox ISO.
- Set your BIOS to UEFI mode and secure boot. This is recommended for later, and Proxmox supports it.
- Avoid installing Proxmox on a USB stick or SD card. Use a reliable SSD or NVMe drive for better performance and durability.
- Pick the right storage layout. ZFS is ideal if you want snapshots and checksumming, but it needs at least 16 GB of RAM. Otherwise, LVM is a good choice for simpler setups.
- Assign a static IP address during installation. This helps avoid surprises with DHCP in your home network.
What is Proxmox VE 9?
Proxmox VE 9 is an open-source server virtualization platform. The Proxmox kernel is based on Debian, which enables you to manage virtual machines (KVM) and lightweight containers (LXC) through a powerful web-based interface. This Proxmox Virtual Environment is ideal for both homelab and production use.
Key Features of Proxmox VE 9
- Open-source solution
- Linux kernel
- Run full VMs and lightweight containers side by side
- User-friendly web interface for all management tasks
- Support file system ZFS, LVM, NFS, iSCSI, and more
- Built-in tools for backup, restore, snapshots, and clustering
- Cluster setup and high availability features
Pros of Using Proxmox VE 9
- Free and open source with an optional subscription model
- Versatile virtualization: supports both KVM and LXC
- ZFS support for snapshots, compression, and data integrity
- Powerful networking with VLAN tagging, bridges, and bonds
- Active community and regular updates
Things to Keep in Mind
- The learning curve is steeper for beginners used to GUI-only tools
- Some error messages still require forum or Reddit research
- No official support for ARM-based systems
- Advanced features like clustering require some Linux knowledge
Looking to compare Proxmox to other hypervisors? Check out my Best Hypervisor for Home Lab in 2025 – I Tested 5 Free & Powerful Options
A step-by-step guide to installing Proxmox VE 9
In this guide, I’ll walk you through installing Proxmox VE 9 on a Dell PowerEdge server using iDRAC, Dell’s remote access controller. It’s one of my go-to servers for homelab setups.
You can also install Proxmox from a bootable USB stick. I recommend using Rufus to create it. A USB flash drive with at least 1 GB of storage is needed to create a bootable USB for Proxmox installation.
Proxmox VE requires a 64-bit CPU with virtualization support, at least 2 GB of RAM, and sufficient storage space for the OS and virtual machines.
If you’re looking for a smaller and quieter option, I also run Proxmox on a Minisforum MS-01, which I consider one of the best mini-PCs for a home server. Here’s my full review.

Step 1: Download Proxmox VE Installation medium / ISO image
Download the Proxmox VE ISO image from the official Proxmox downloads page. The official Proxmox download page can be found at https://www.proxmox.com/en/downloads.
To verify the integrity of the downloaded Proxmox ISO, the SHA256 checksum should be checked against the one provided on the download page.

Step 2: Run Proxmox Setup GUI Installer
Boot the server from the installation medium with the Proxmox ISO image to start the installation process.
In my case, I mounted the ISO to Dell iDRAC and booted the server directly from the virtual CD. It works very well with Dell PowerEdge servers and also with HP ProLiant servers.
Once it is booted, you should be greeted with this first Proxmox installer screen.
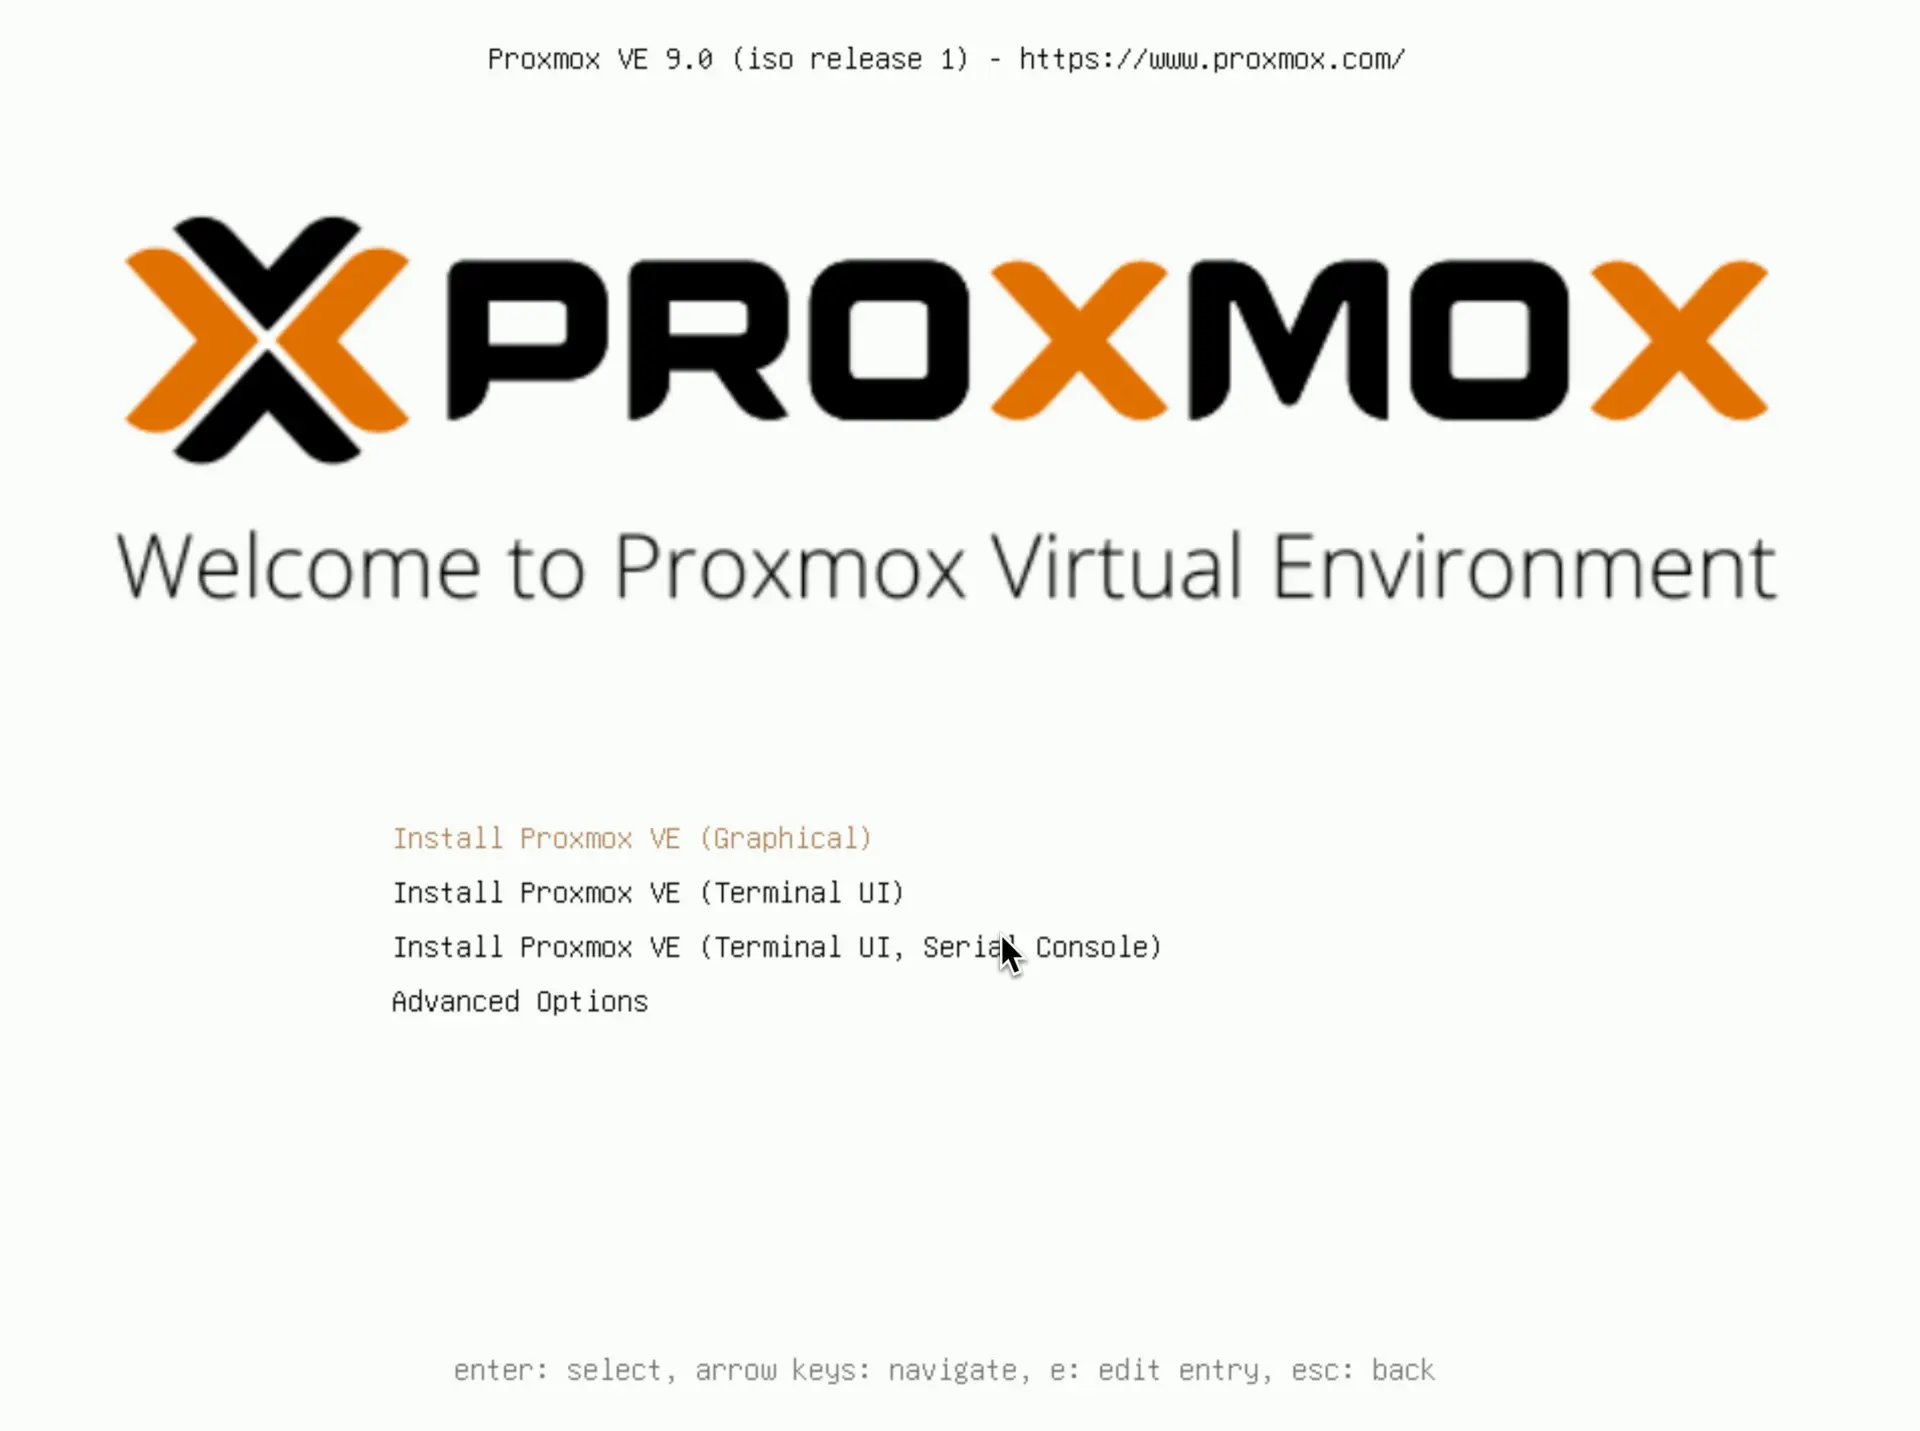
Here you can choose how you want to install Proxmox Server 9. This tutorial is for the graphical interface, so I selected the first option
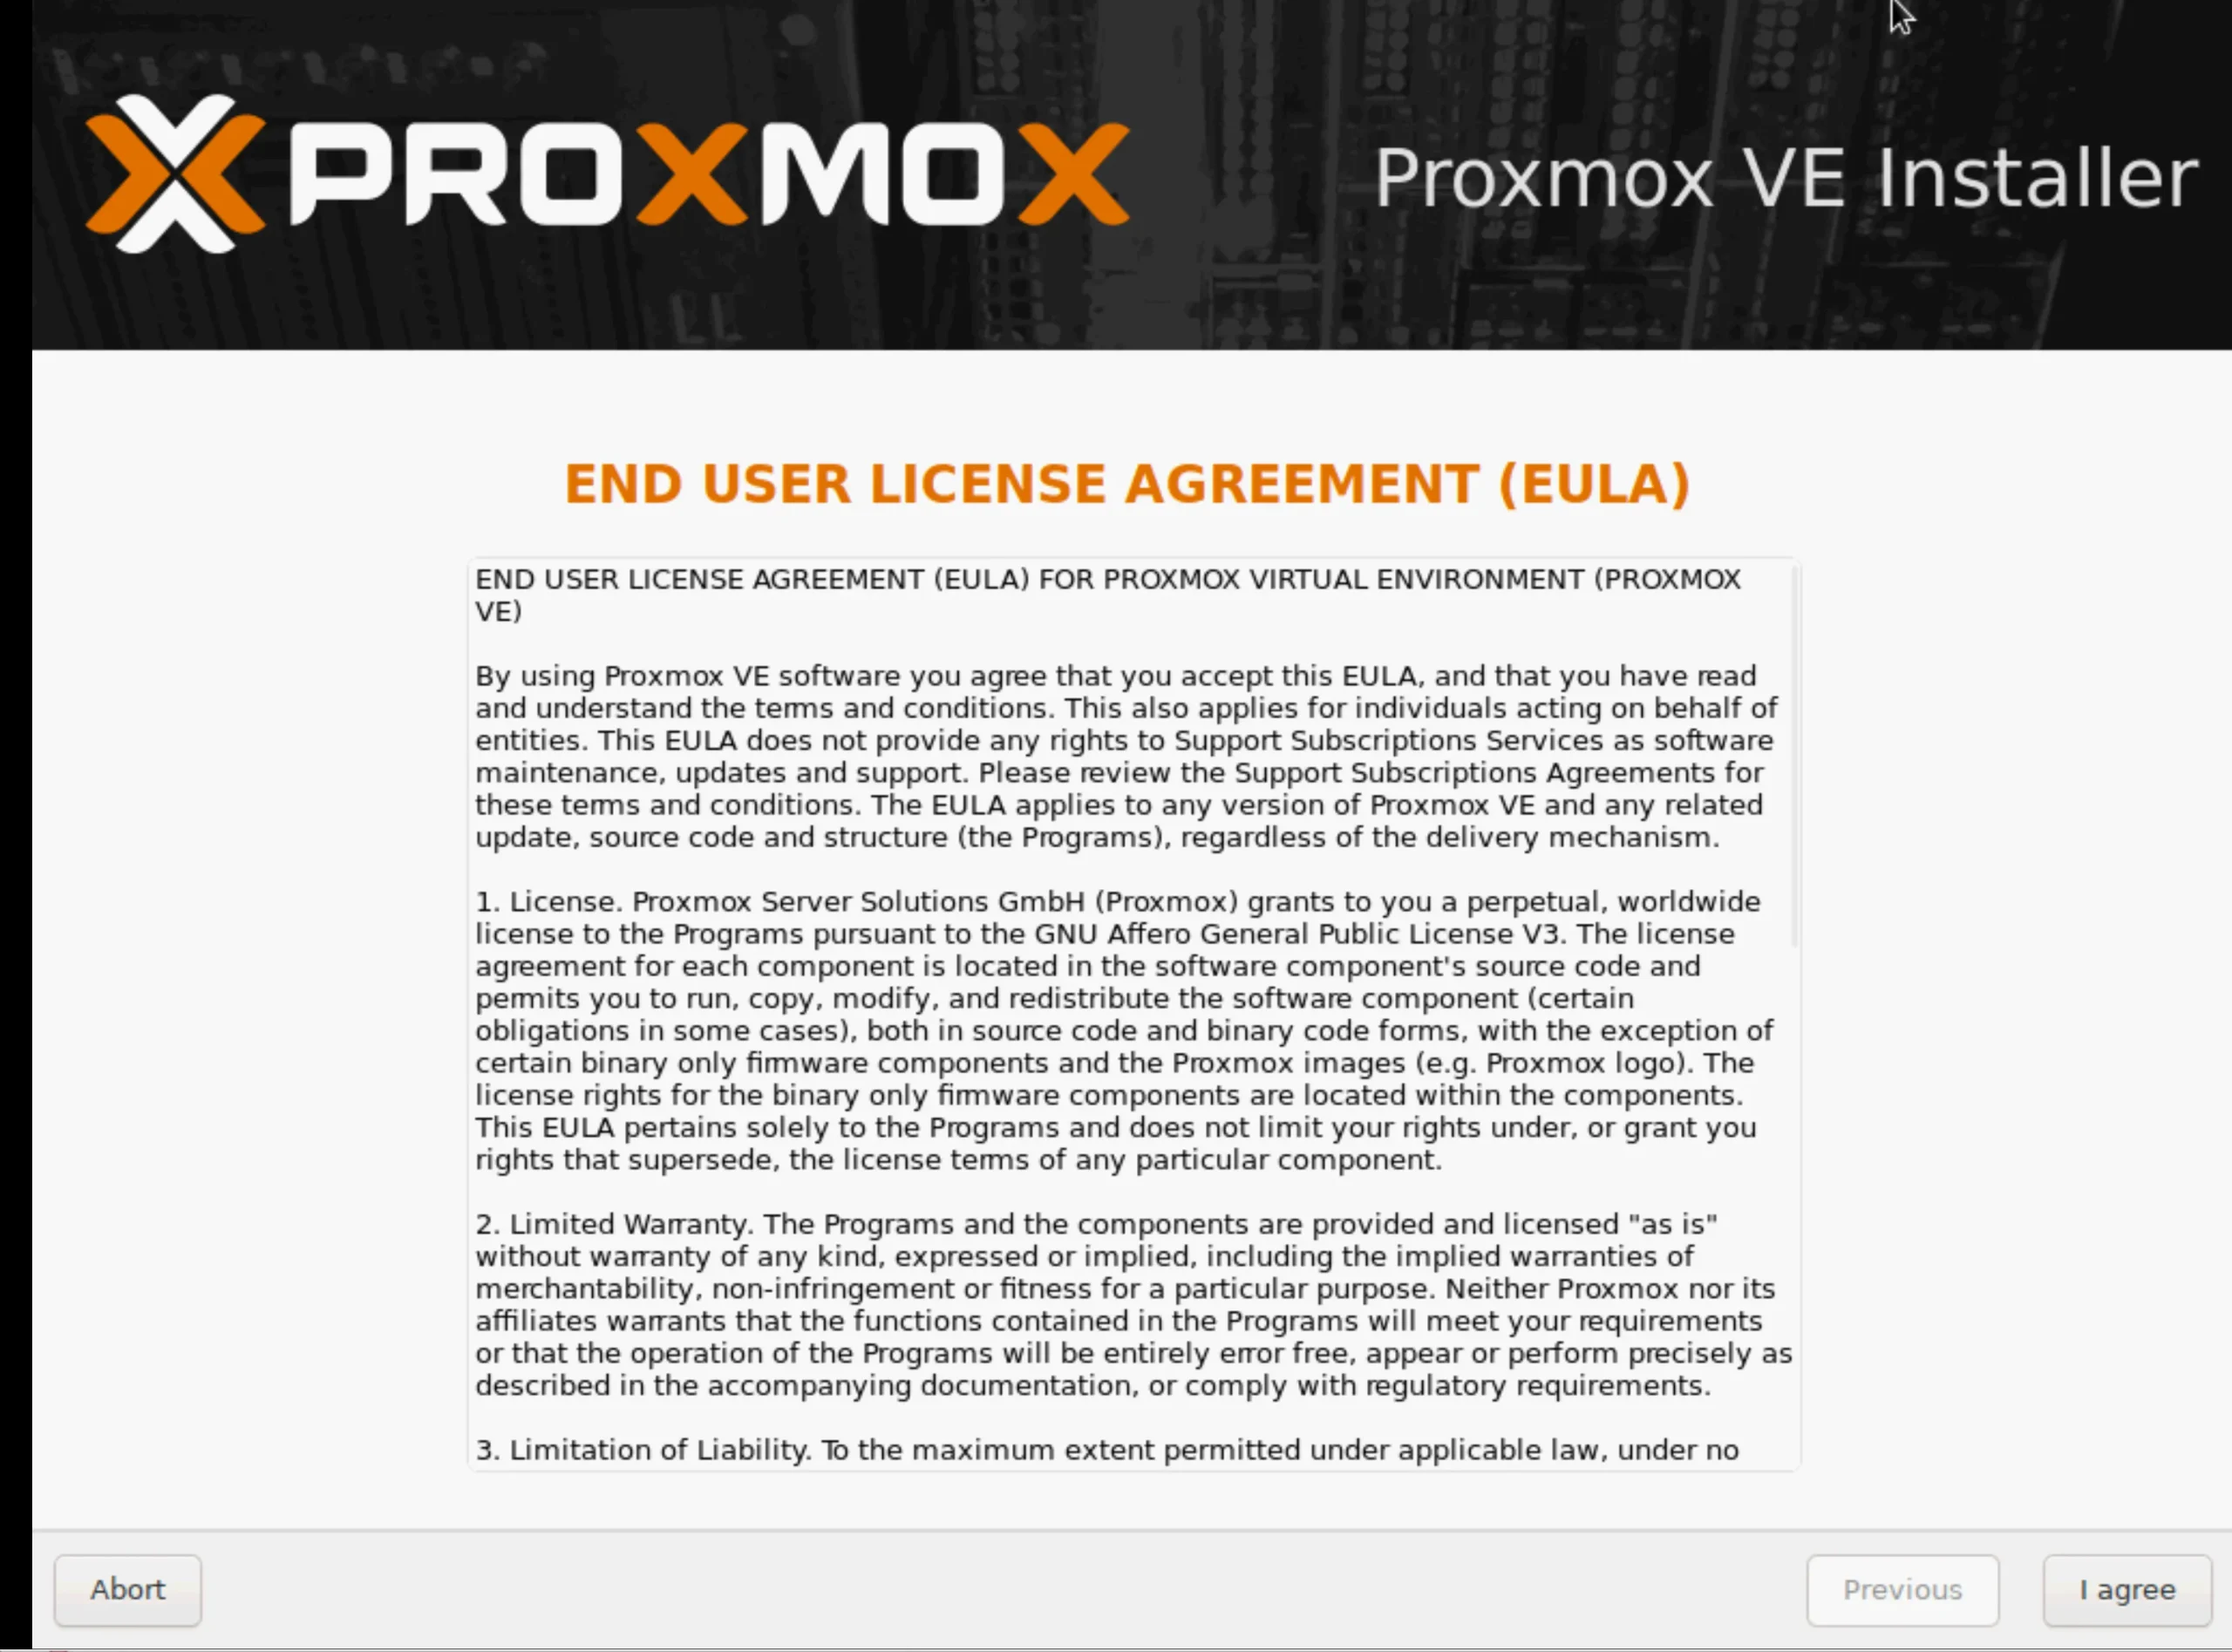
, as always, you need to accept the end user license agreement first.
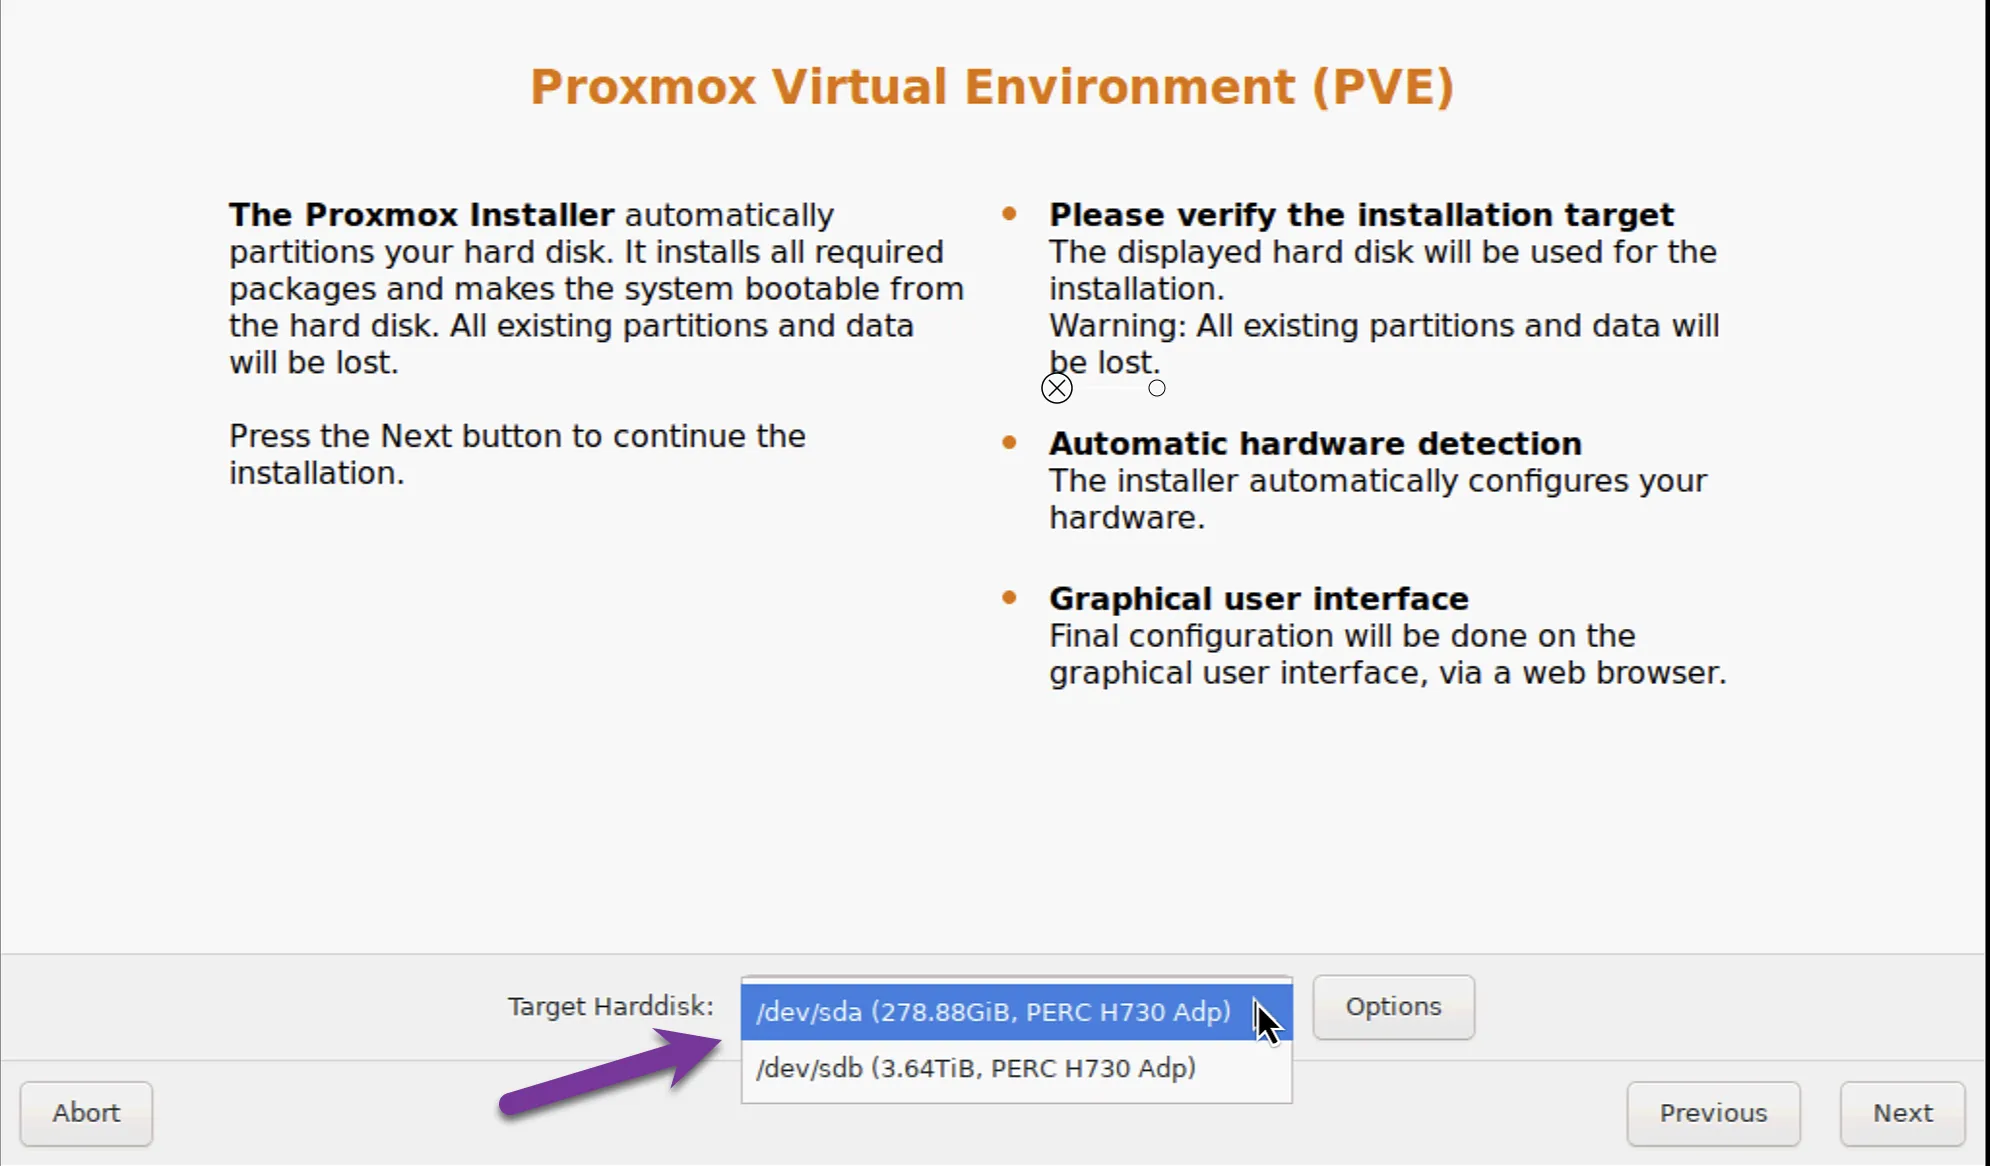
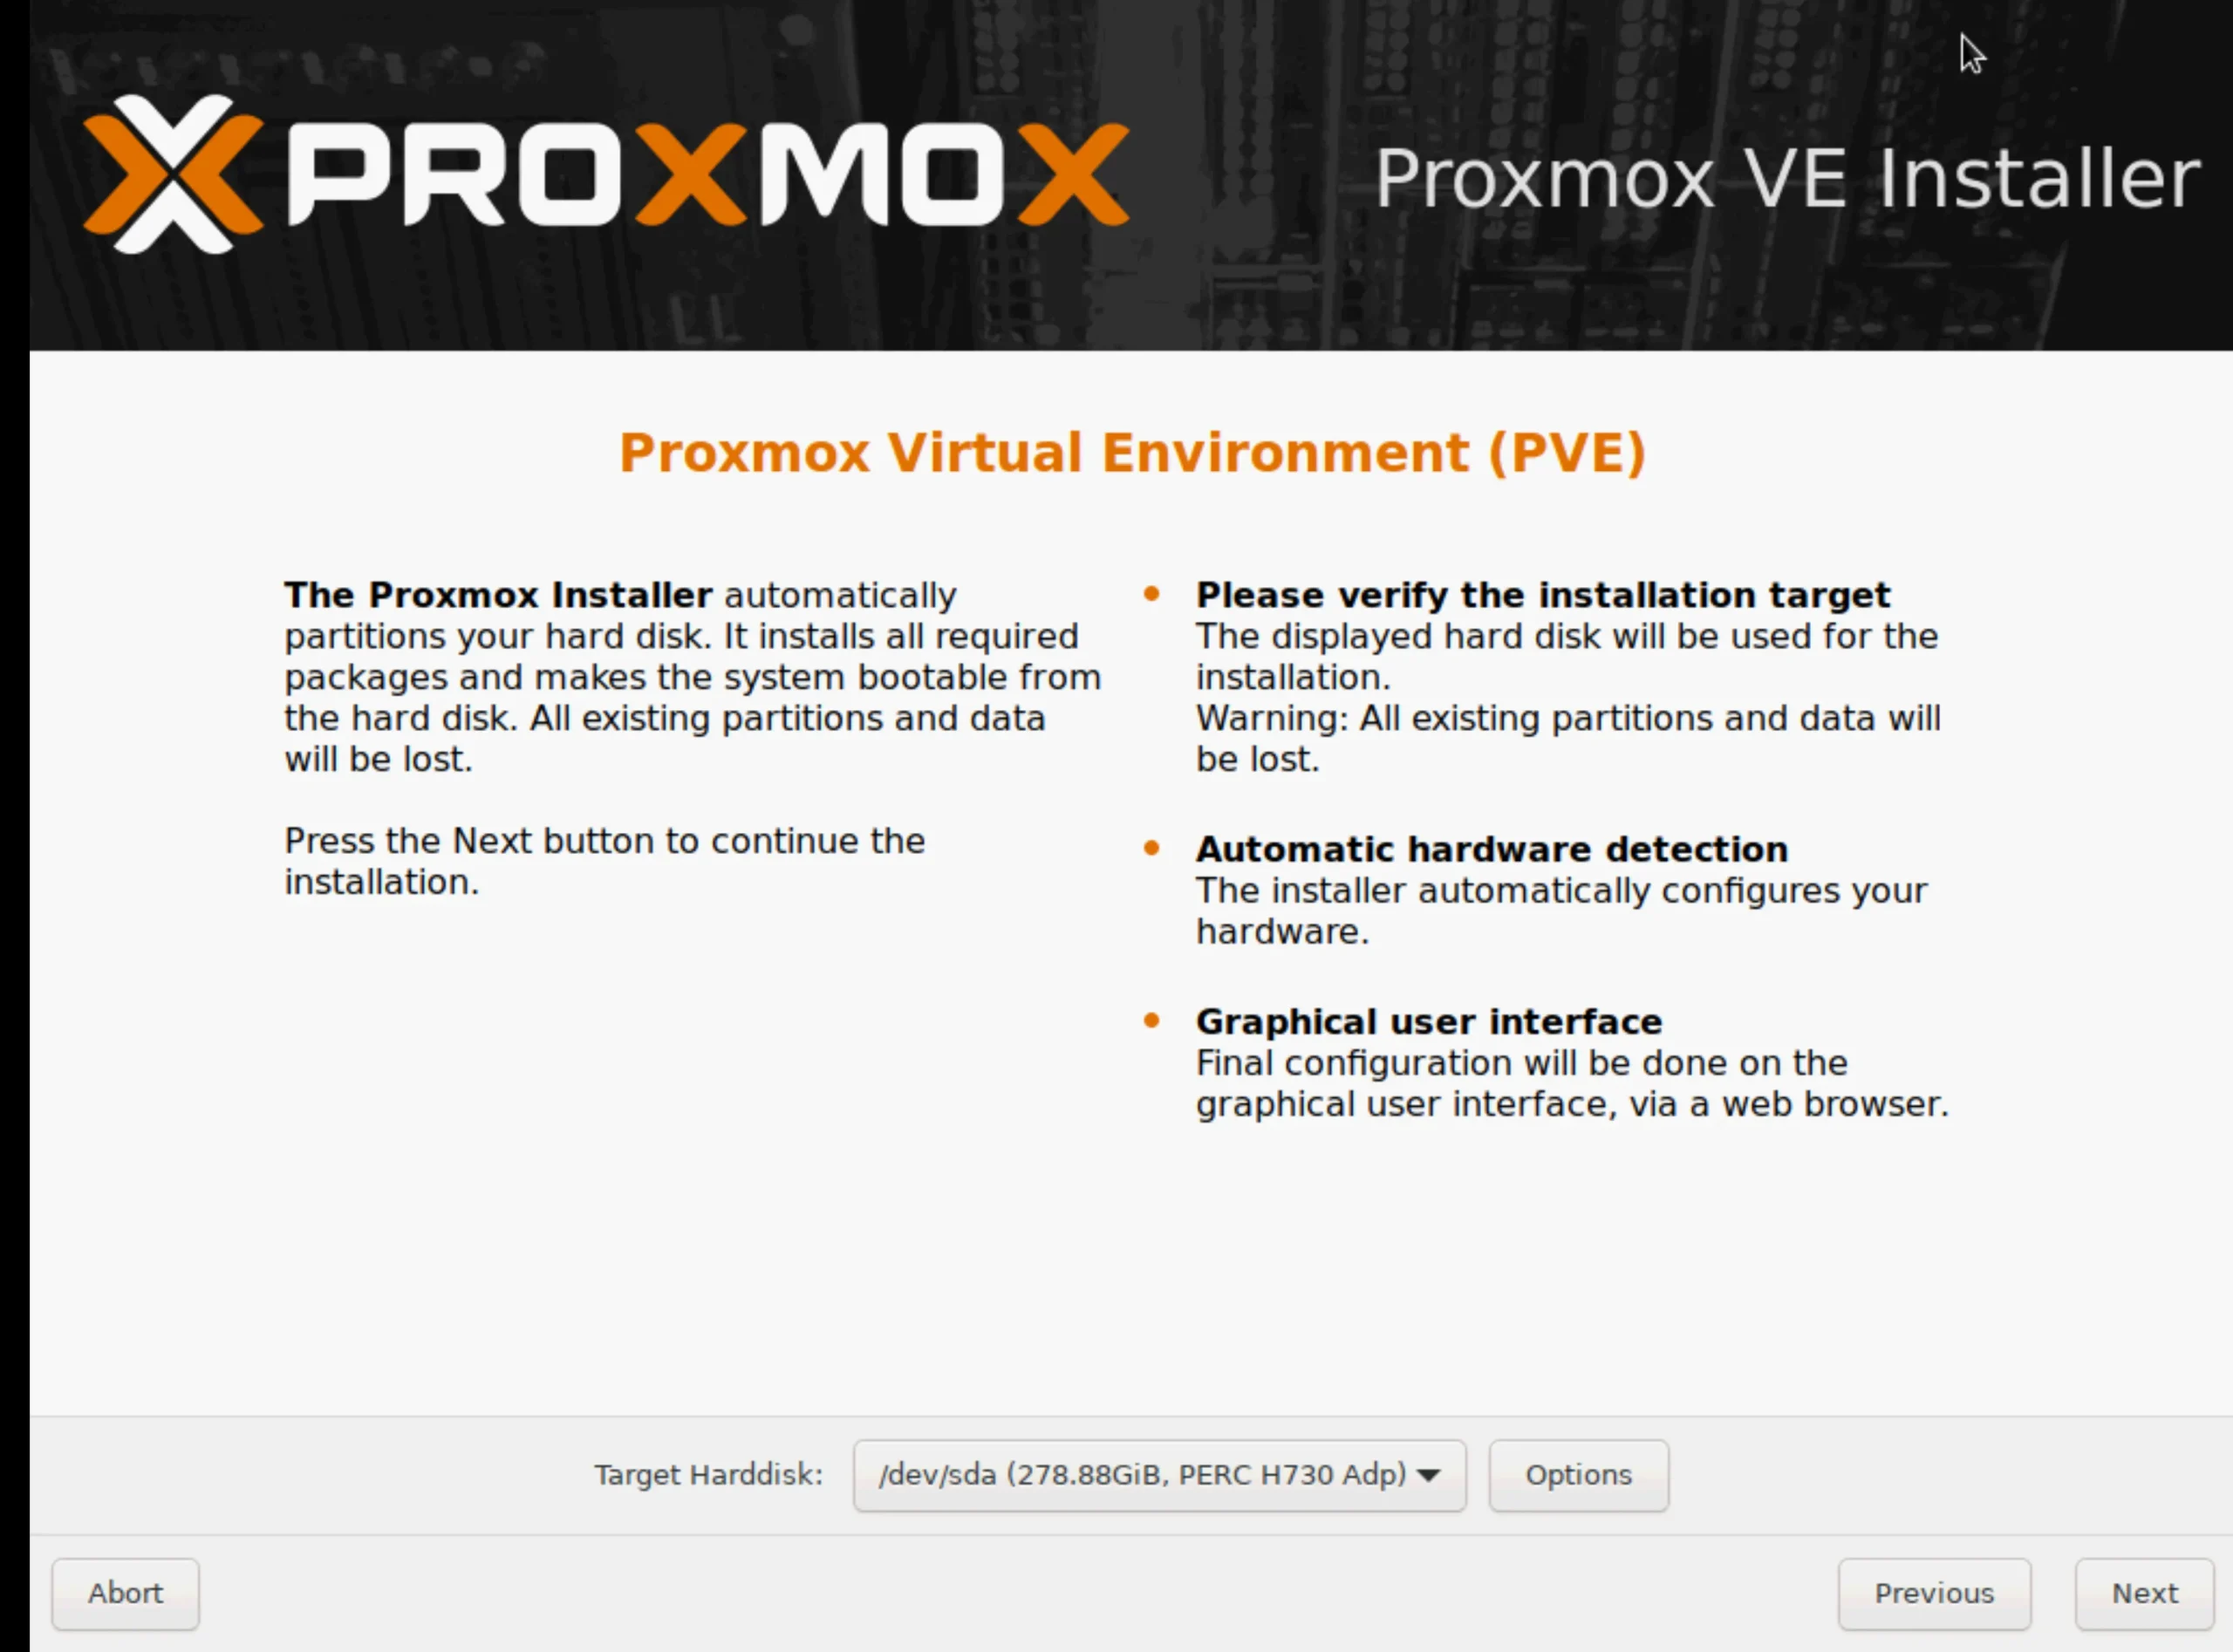
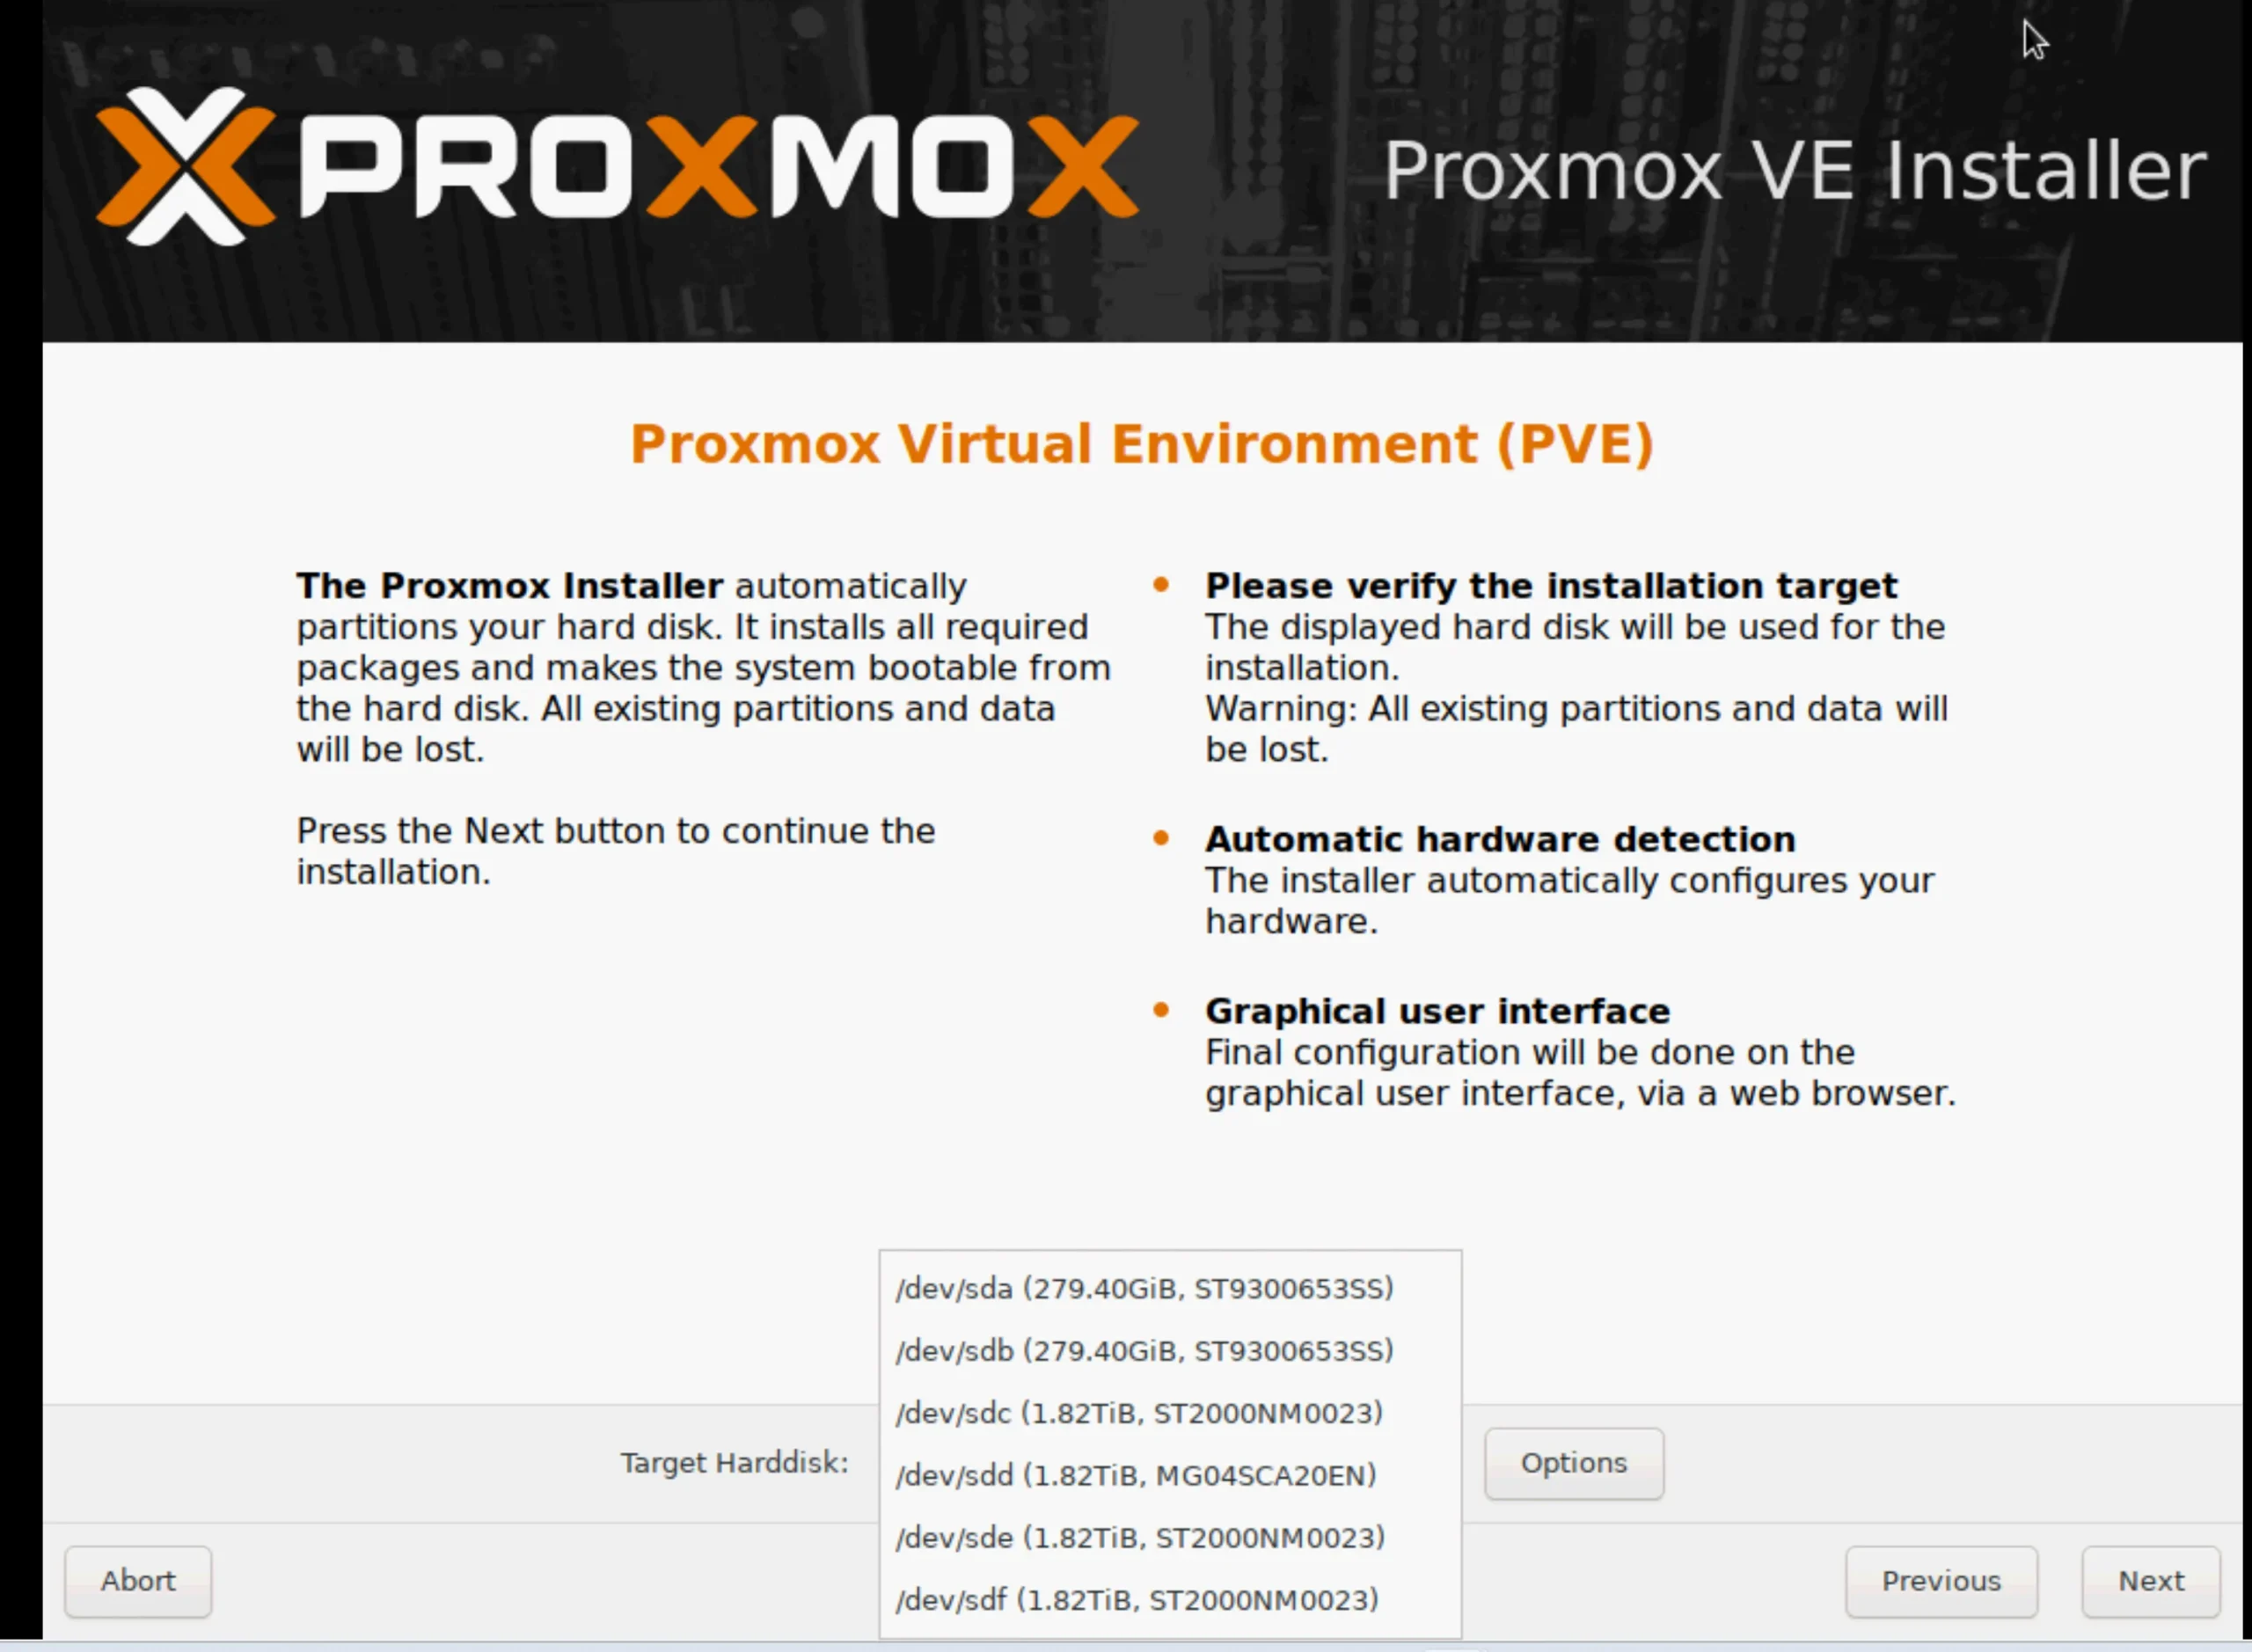
The next screen is for choosing the target disk. I will describe two scenarios.
- Scenario 1: Install with a RAID controller card.
You have a RAID controller card in this scenario, and all the HDs are attached. - Scenario 2: Install without a RAID controller card (Software Raid).
In this scenario, all HDs are directly attached to the mainboard or not in a virtual disk group.
I wrote a separate article RAID Controller Explained, which you can find here.
My Dell PowerEdge server has a PERC RAID controller organized in two disk groups:
- 2x 1TB SAS Disk (RAID1)
- 4x 2TB SAS Disk (RAID5)
The Proxmox installer recognizes both disk groups and mounts them as
- SDA
- SDB
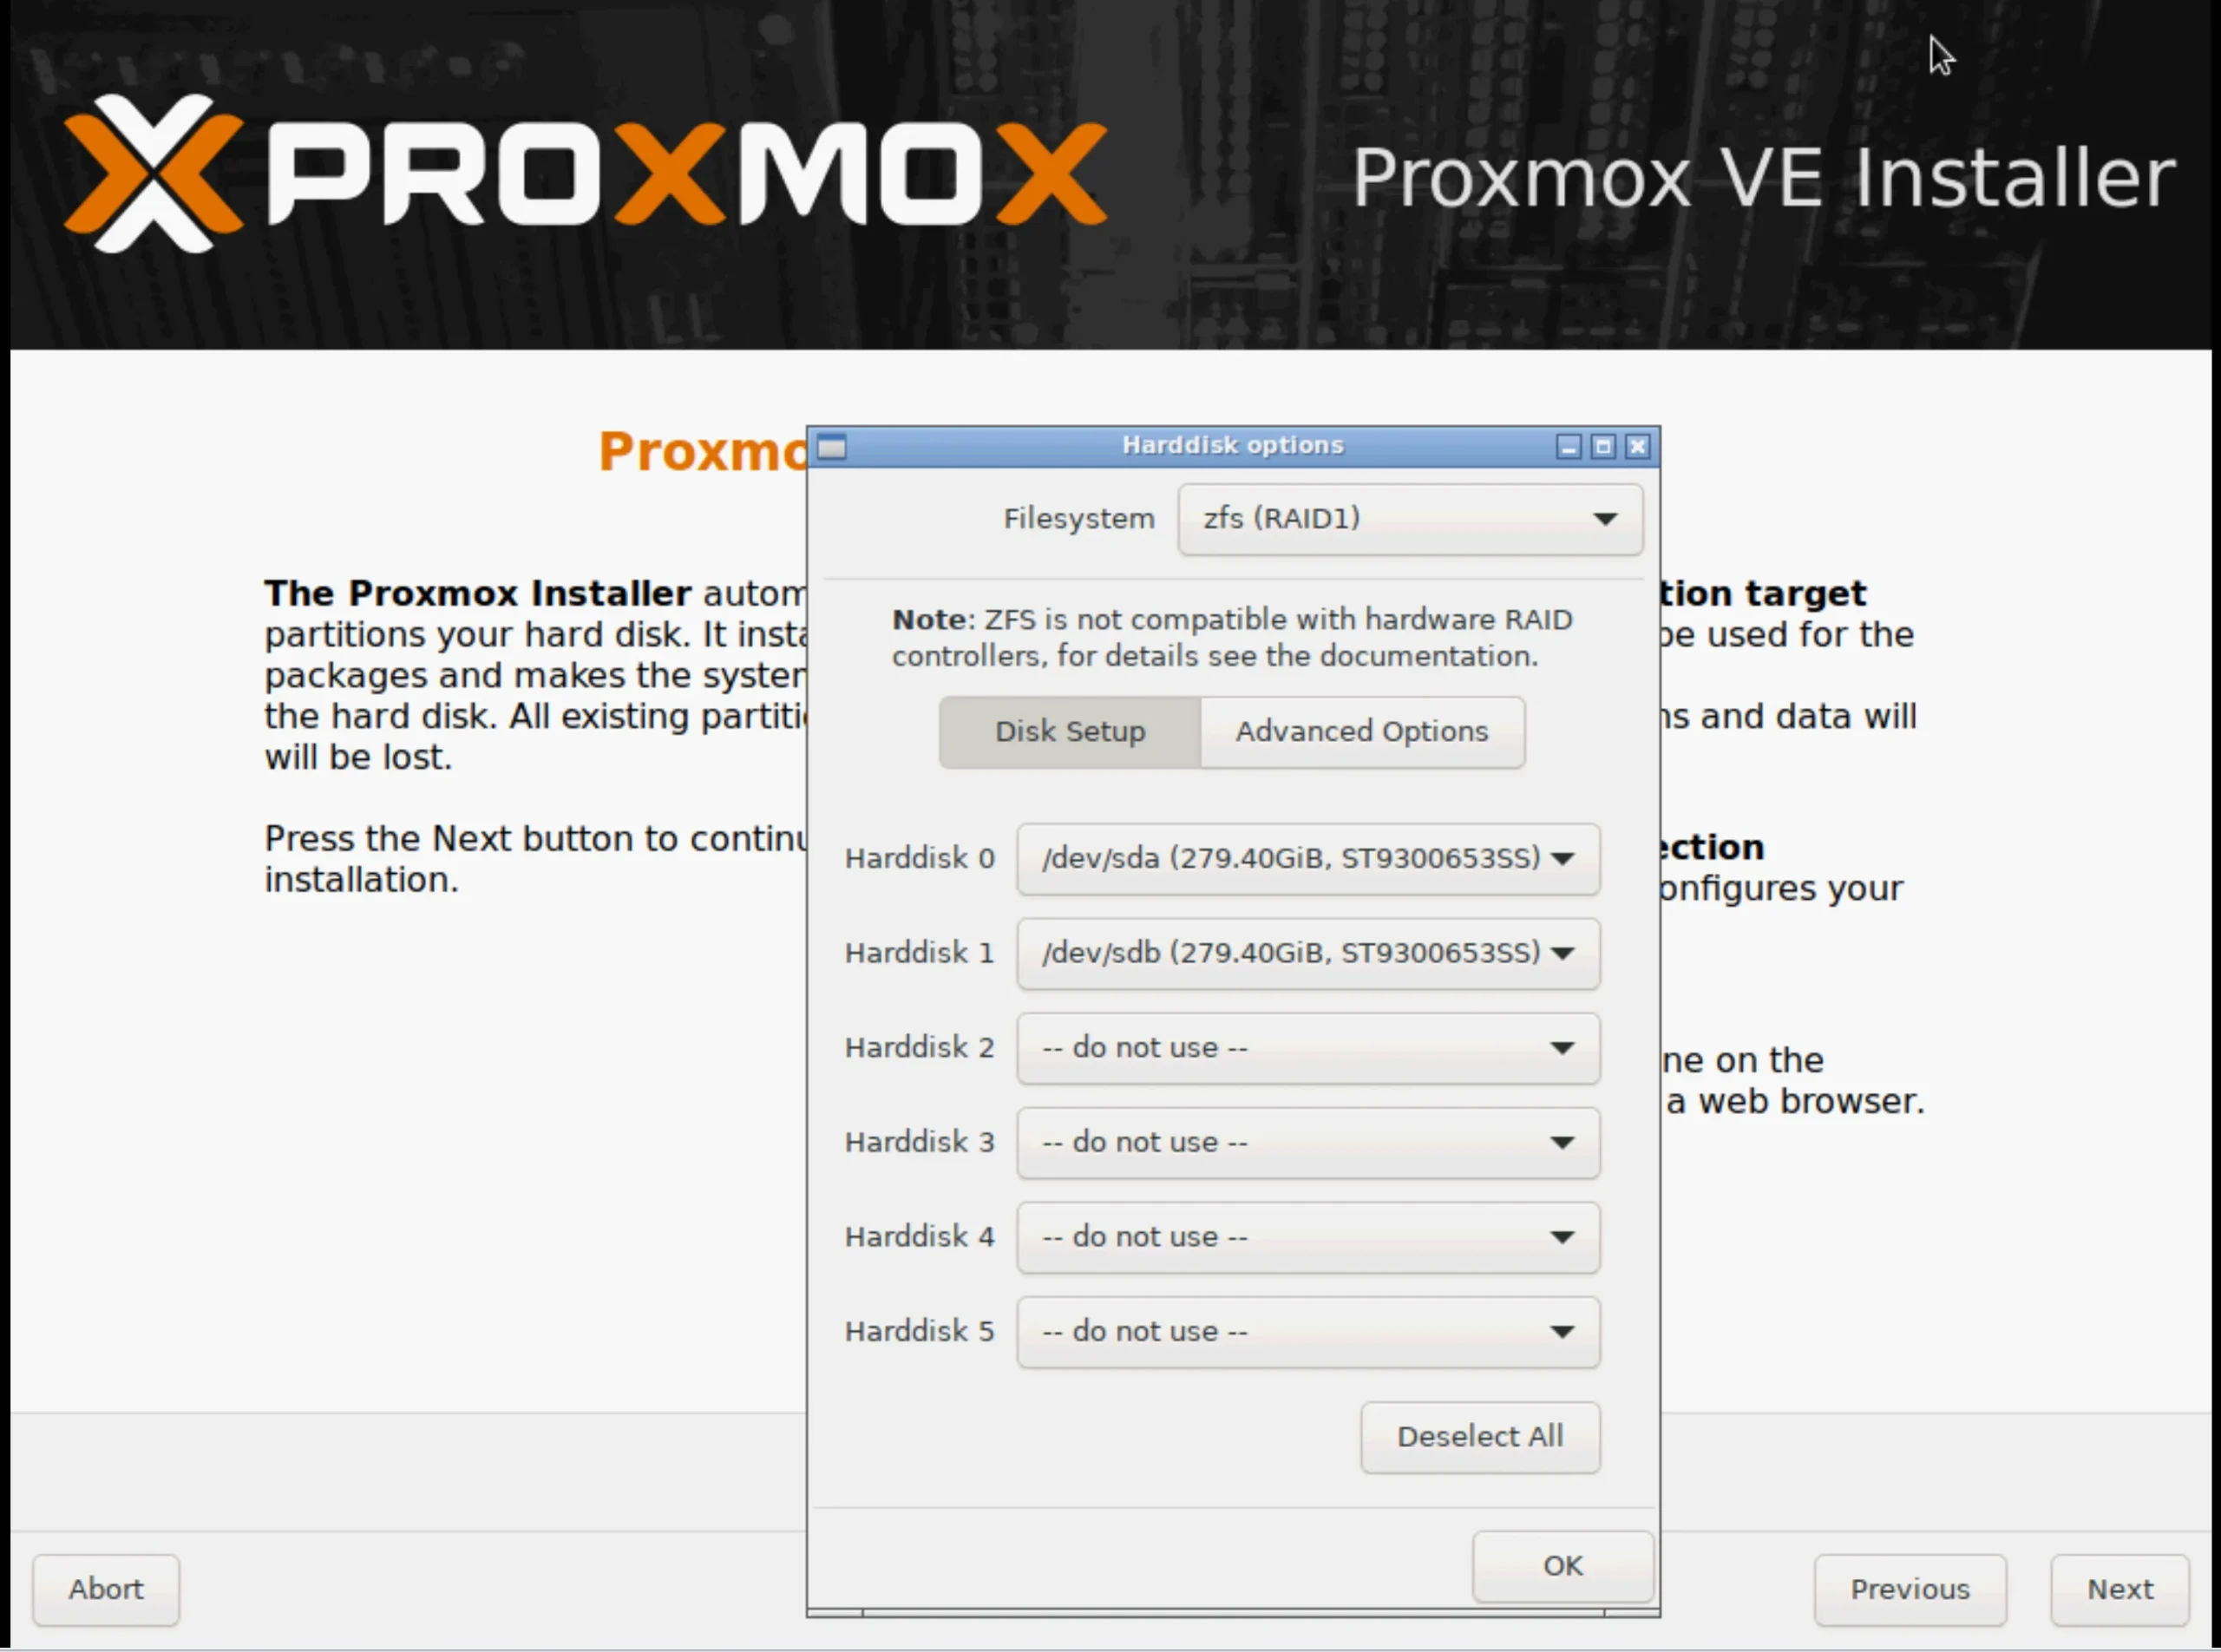
If you click the Options button, you see this screen
Where you can choose the Proxmox filesystems
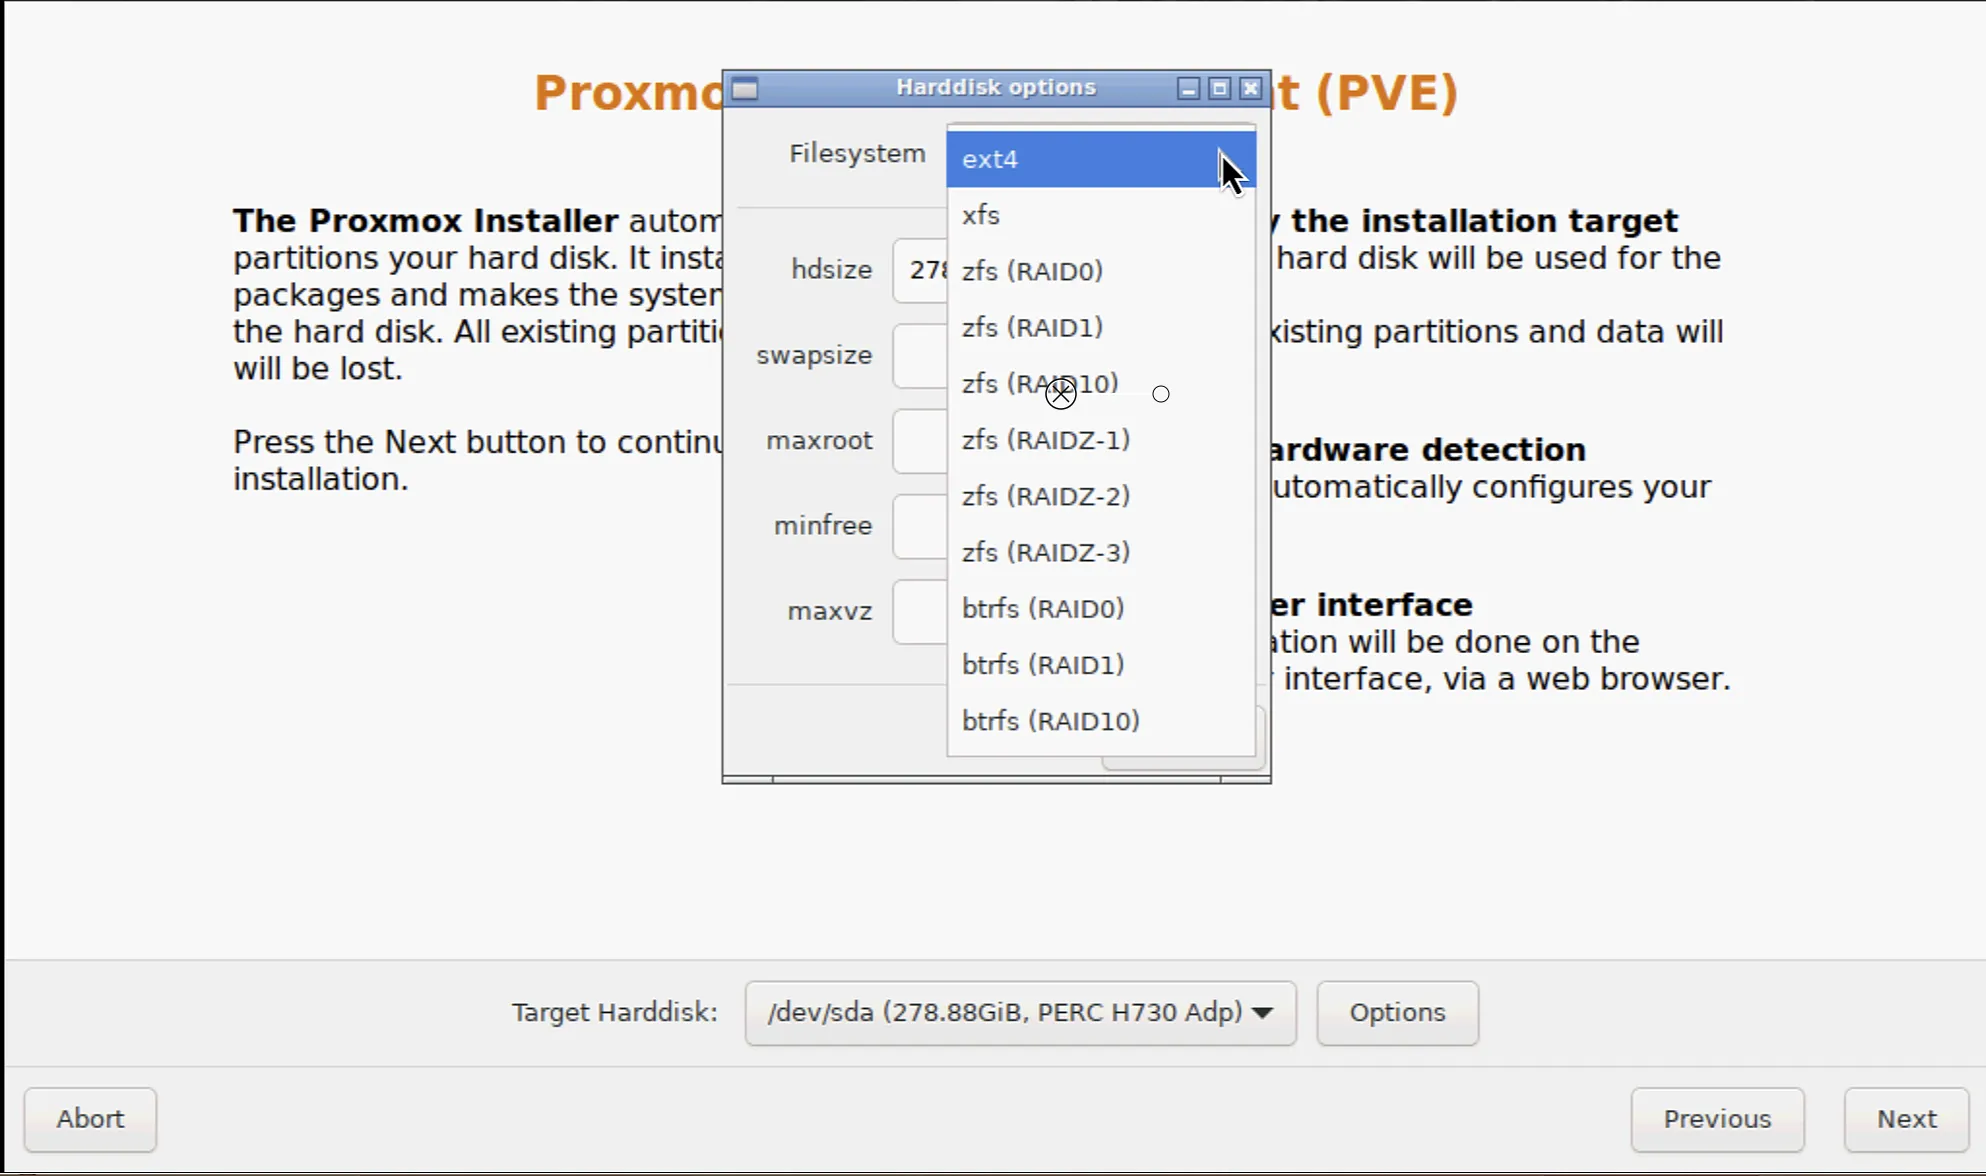
Depending on your choice, assign the disk
ZFS is not recommended with a hardware RAID. Best use ext4 filesystems.
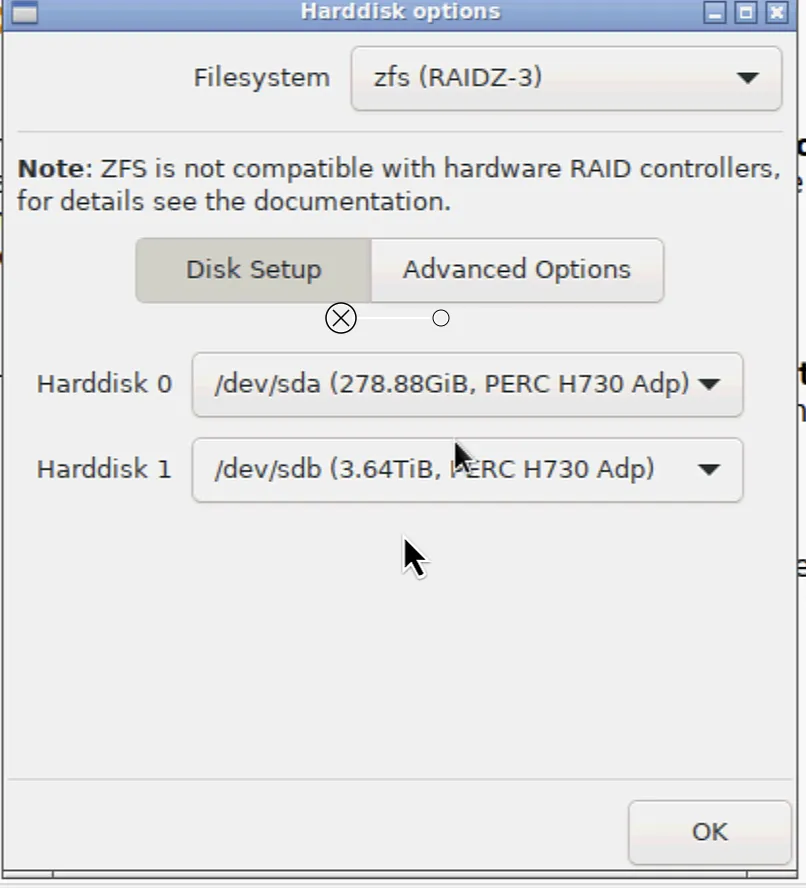
The Proxmox installer recognizes all physical disks. I set my RAID controller in HBA mode.
I will install Proxmox with ZFS. It’s the recommended filesystem for software raid.
Click the ‘Options” button, and here you can select the filesystem. I decided to install the base system to ZFS Raid1 with two disks and not assign the others. Later in the WebGUI, you can create disk groups as well.
After choosing the target hard disk, we continue with the installation.
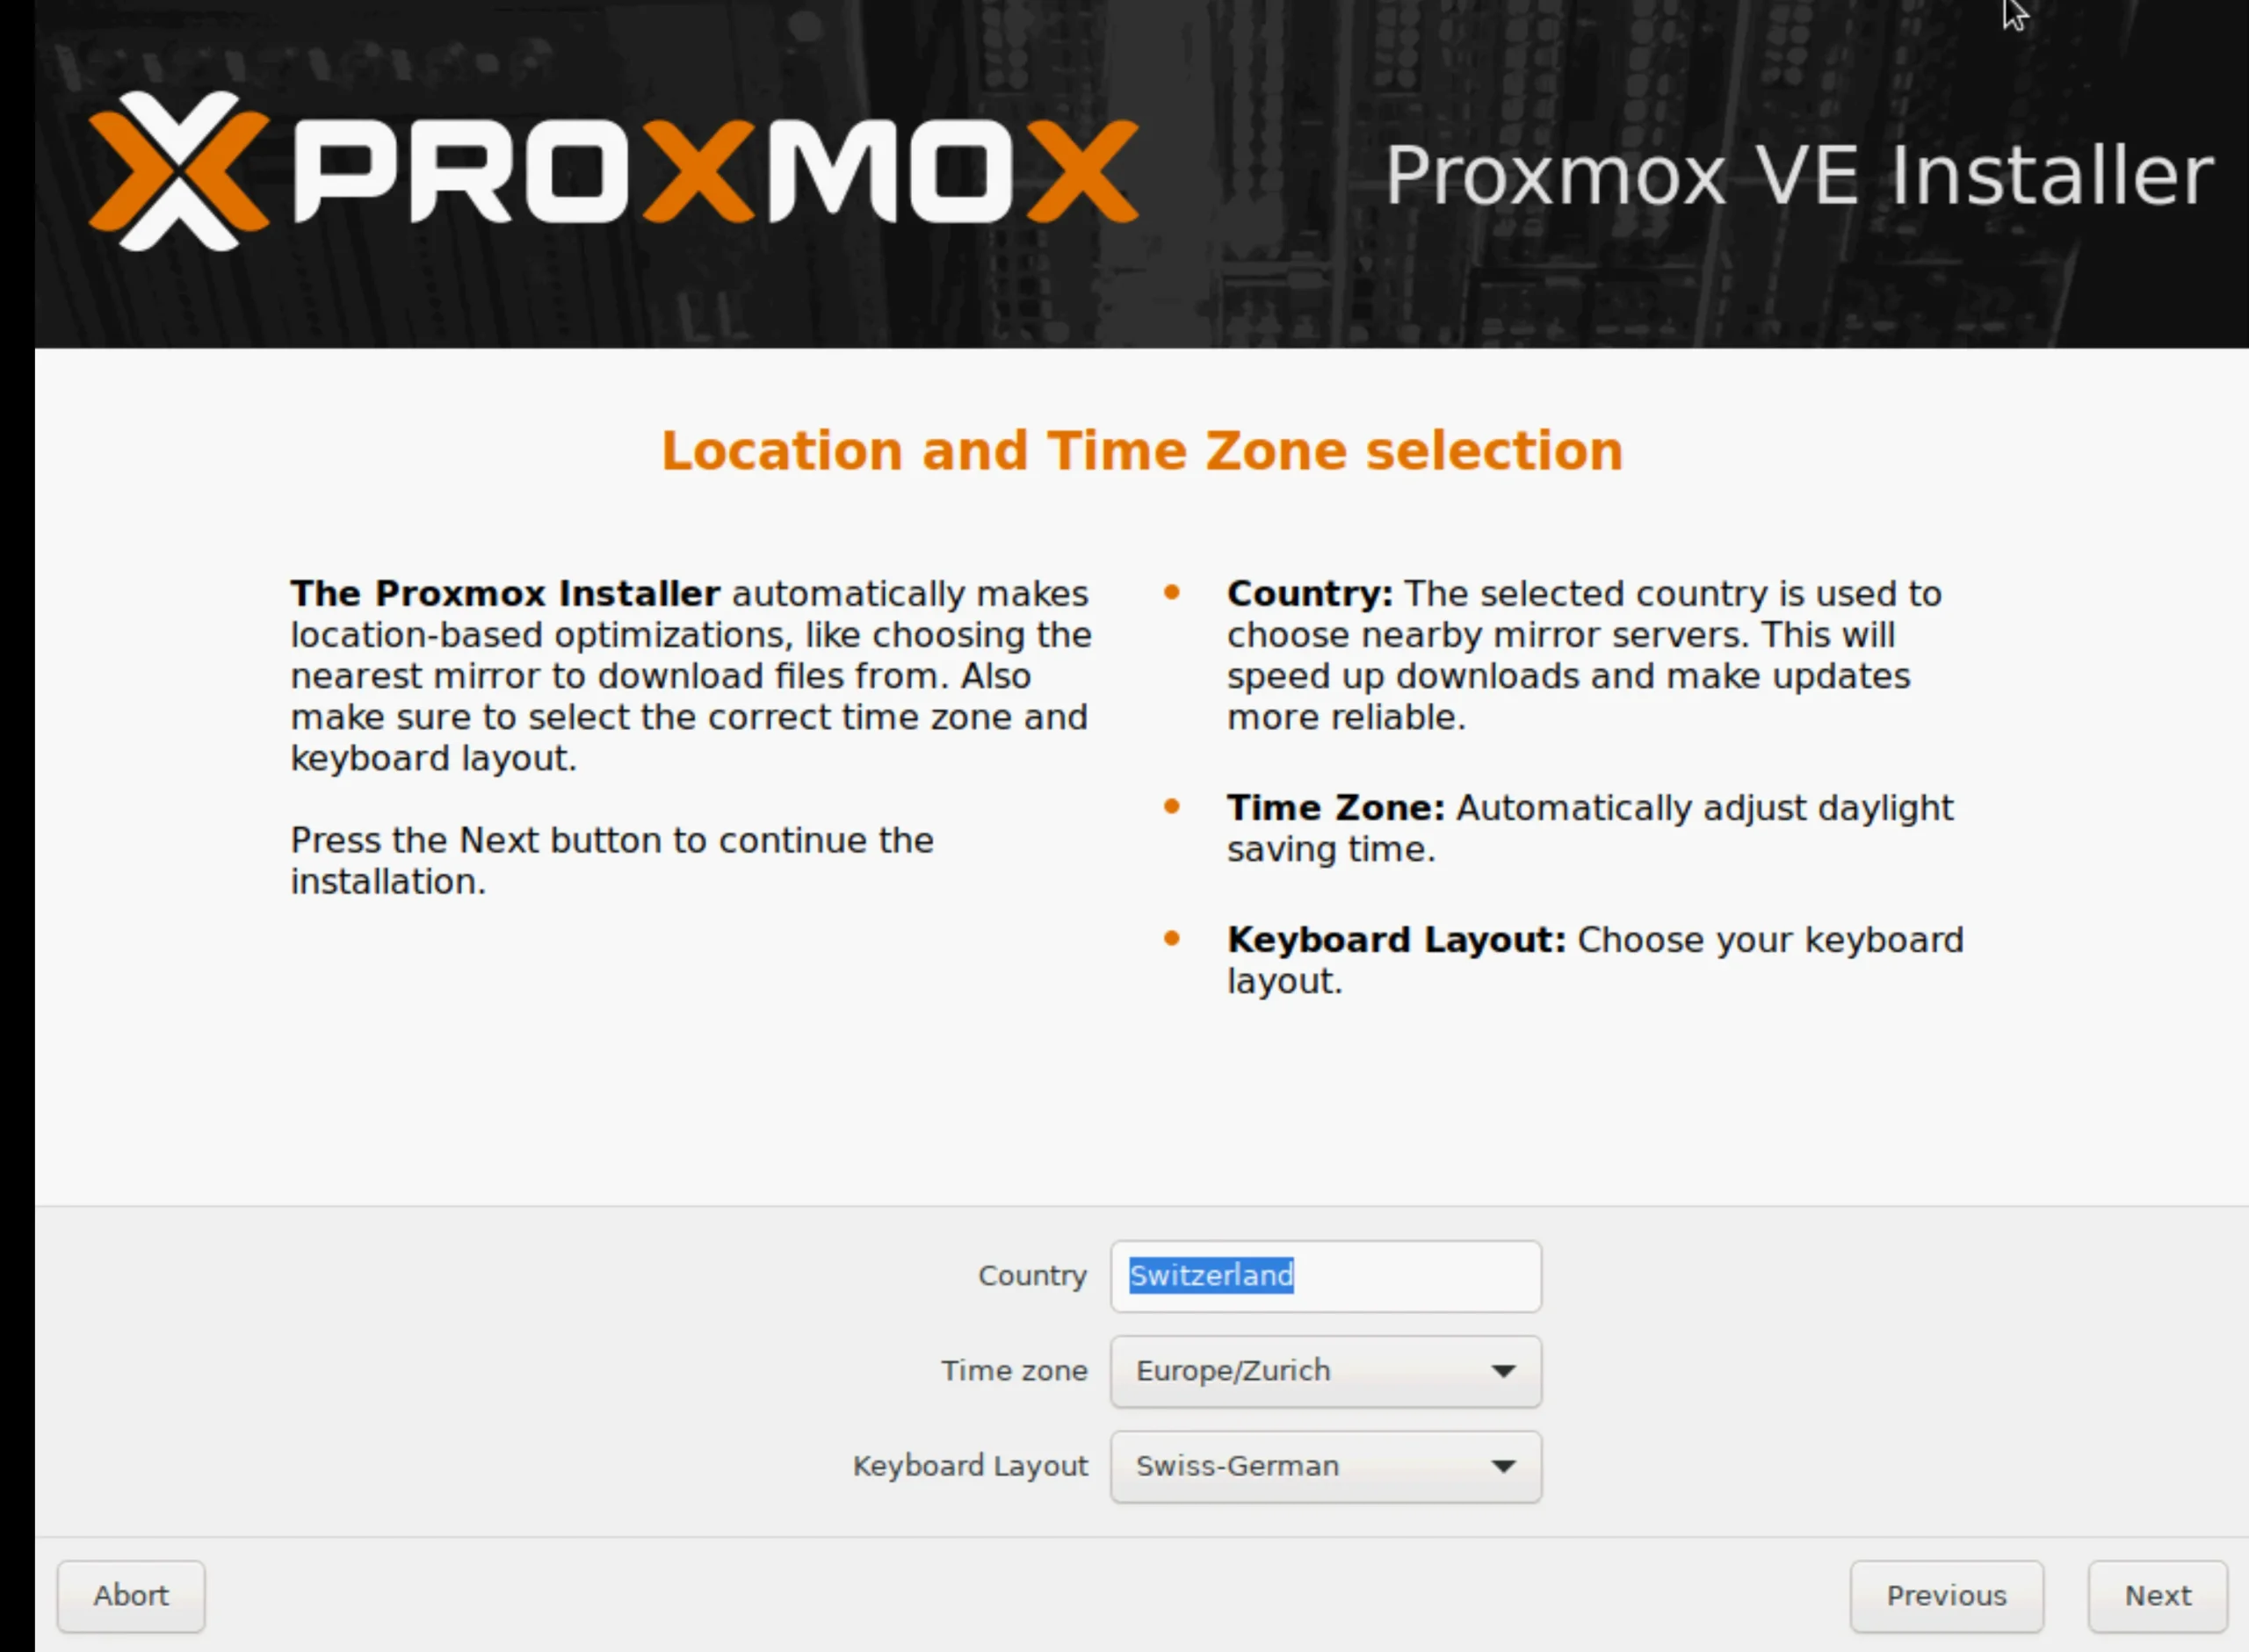
Here, type the first letter of your country, and it should appear. Once the time zone and keyboard layout are selected, they should match as well.
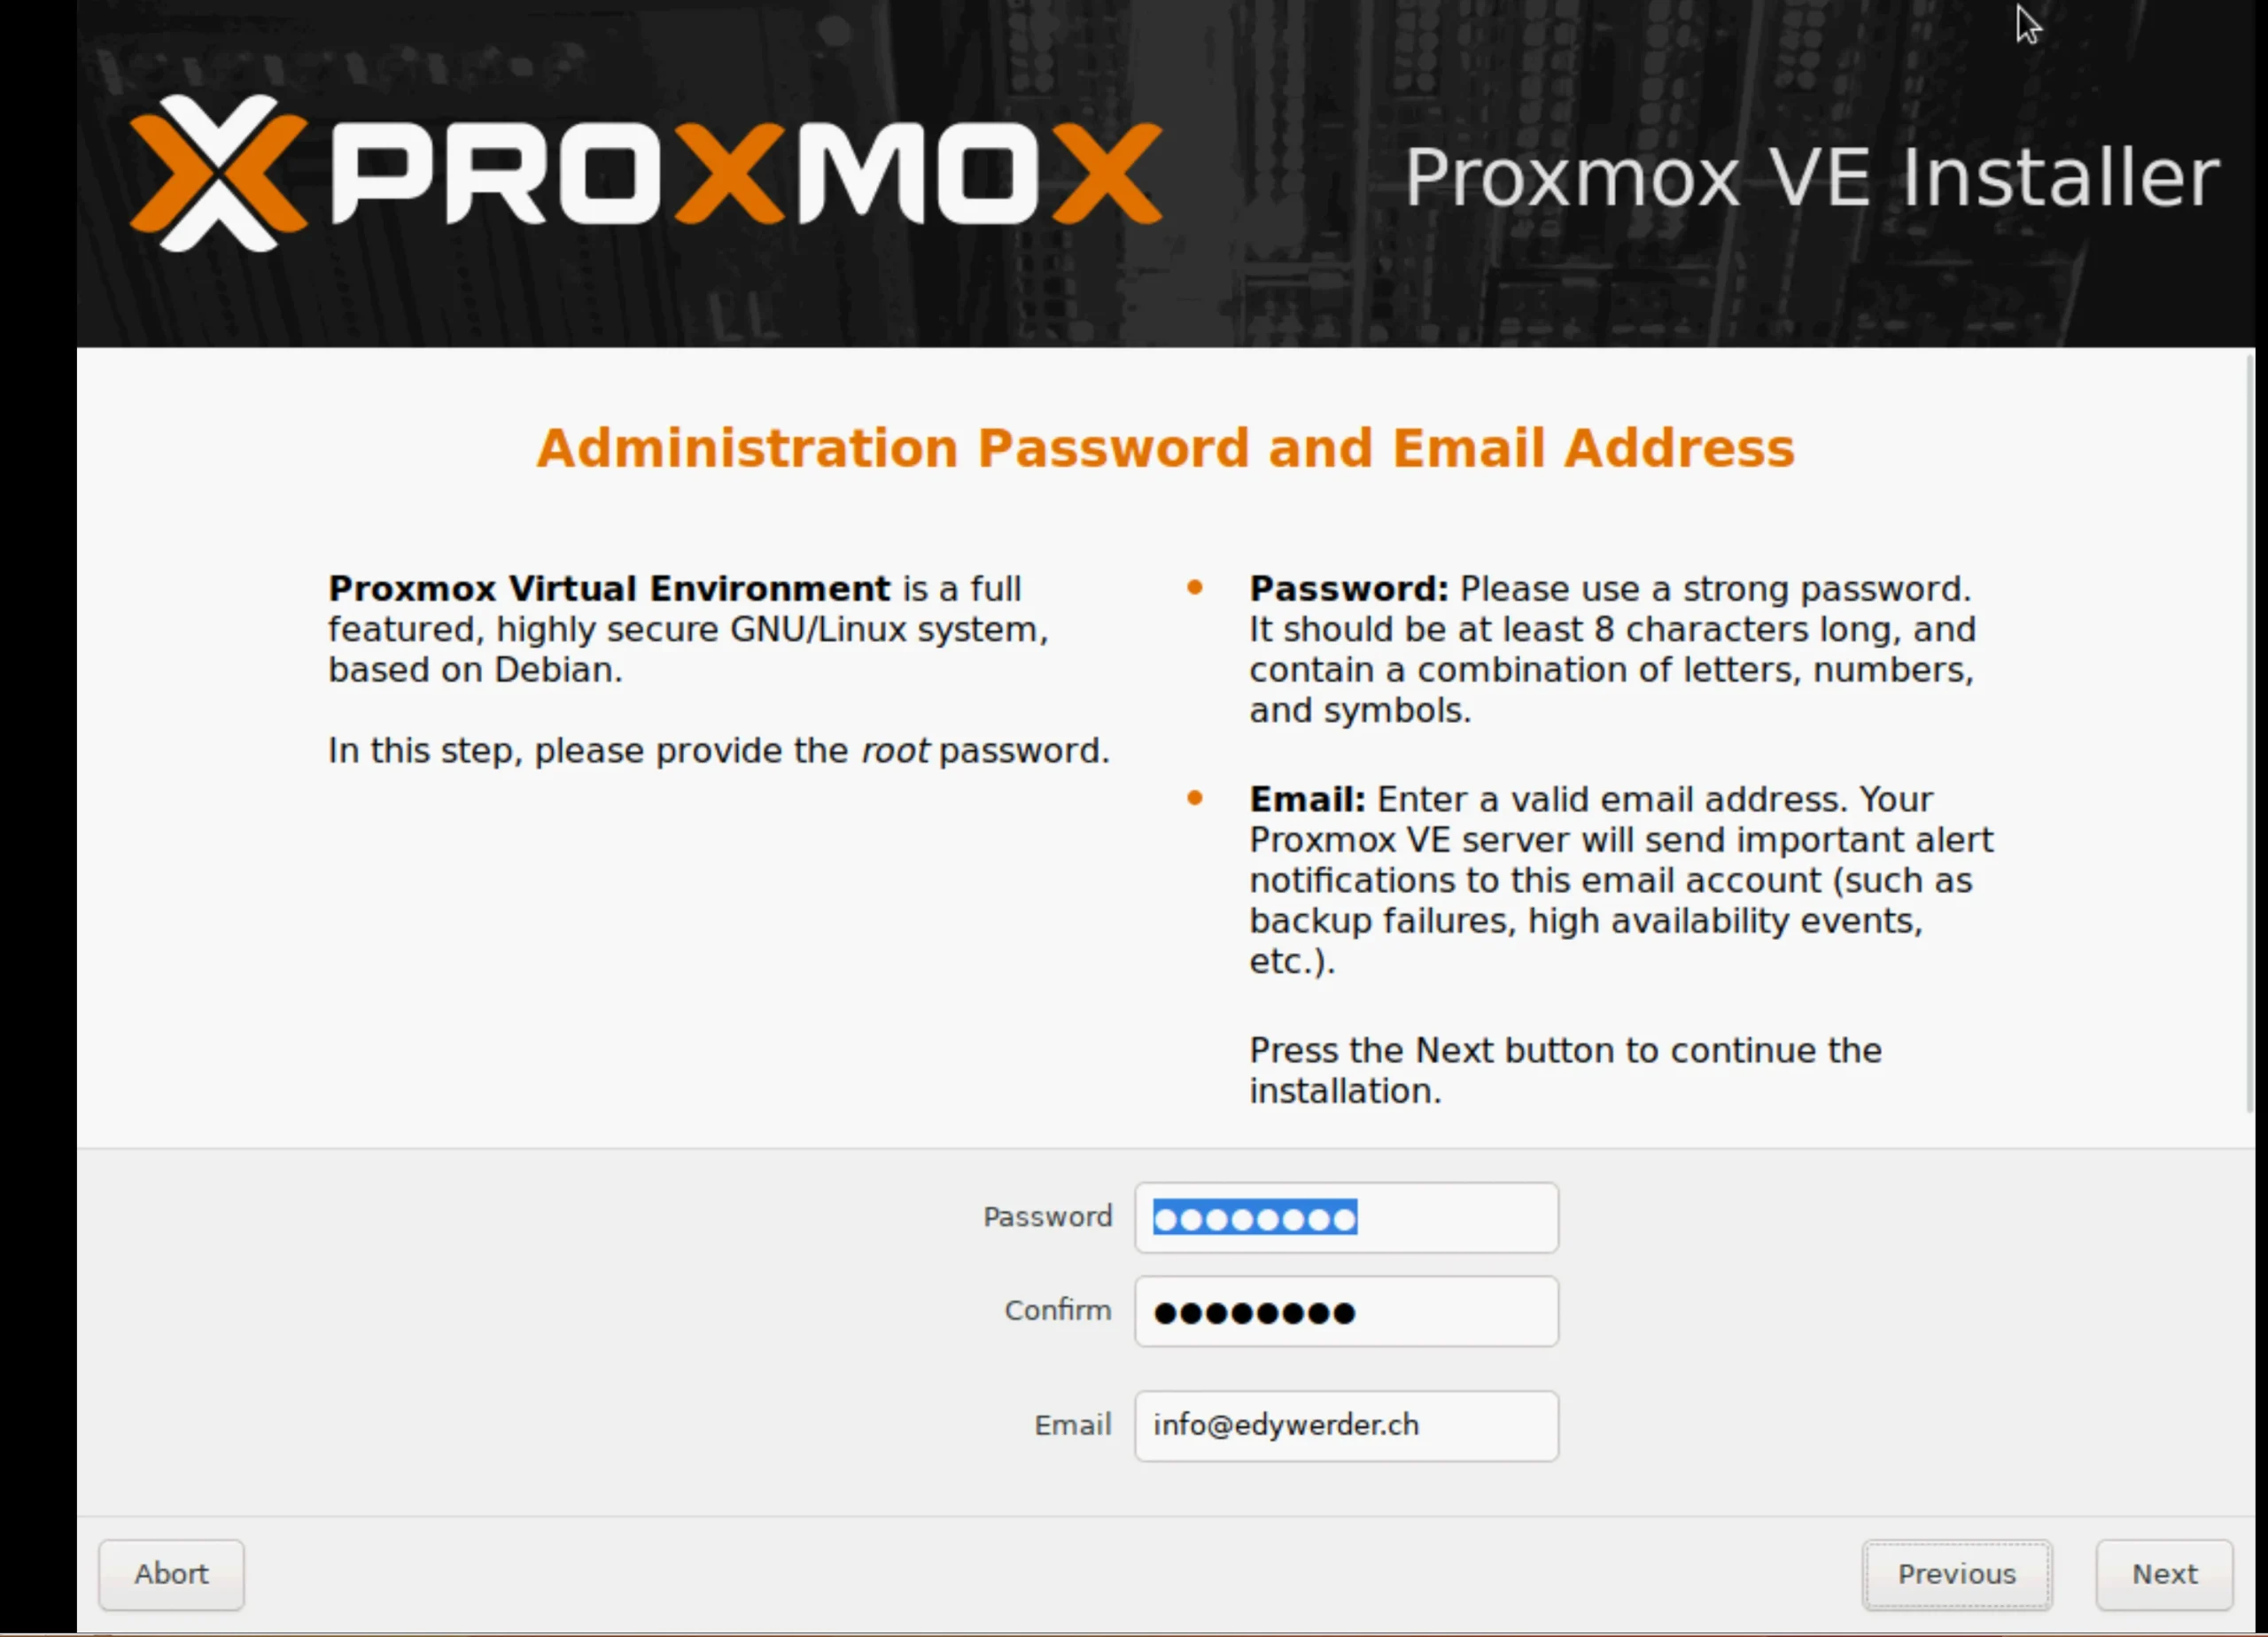
The next screen asks for the root password. A strong password for the root user must be set during the Proxmox installation process.
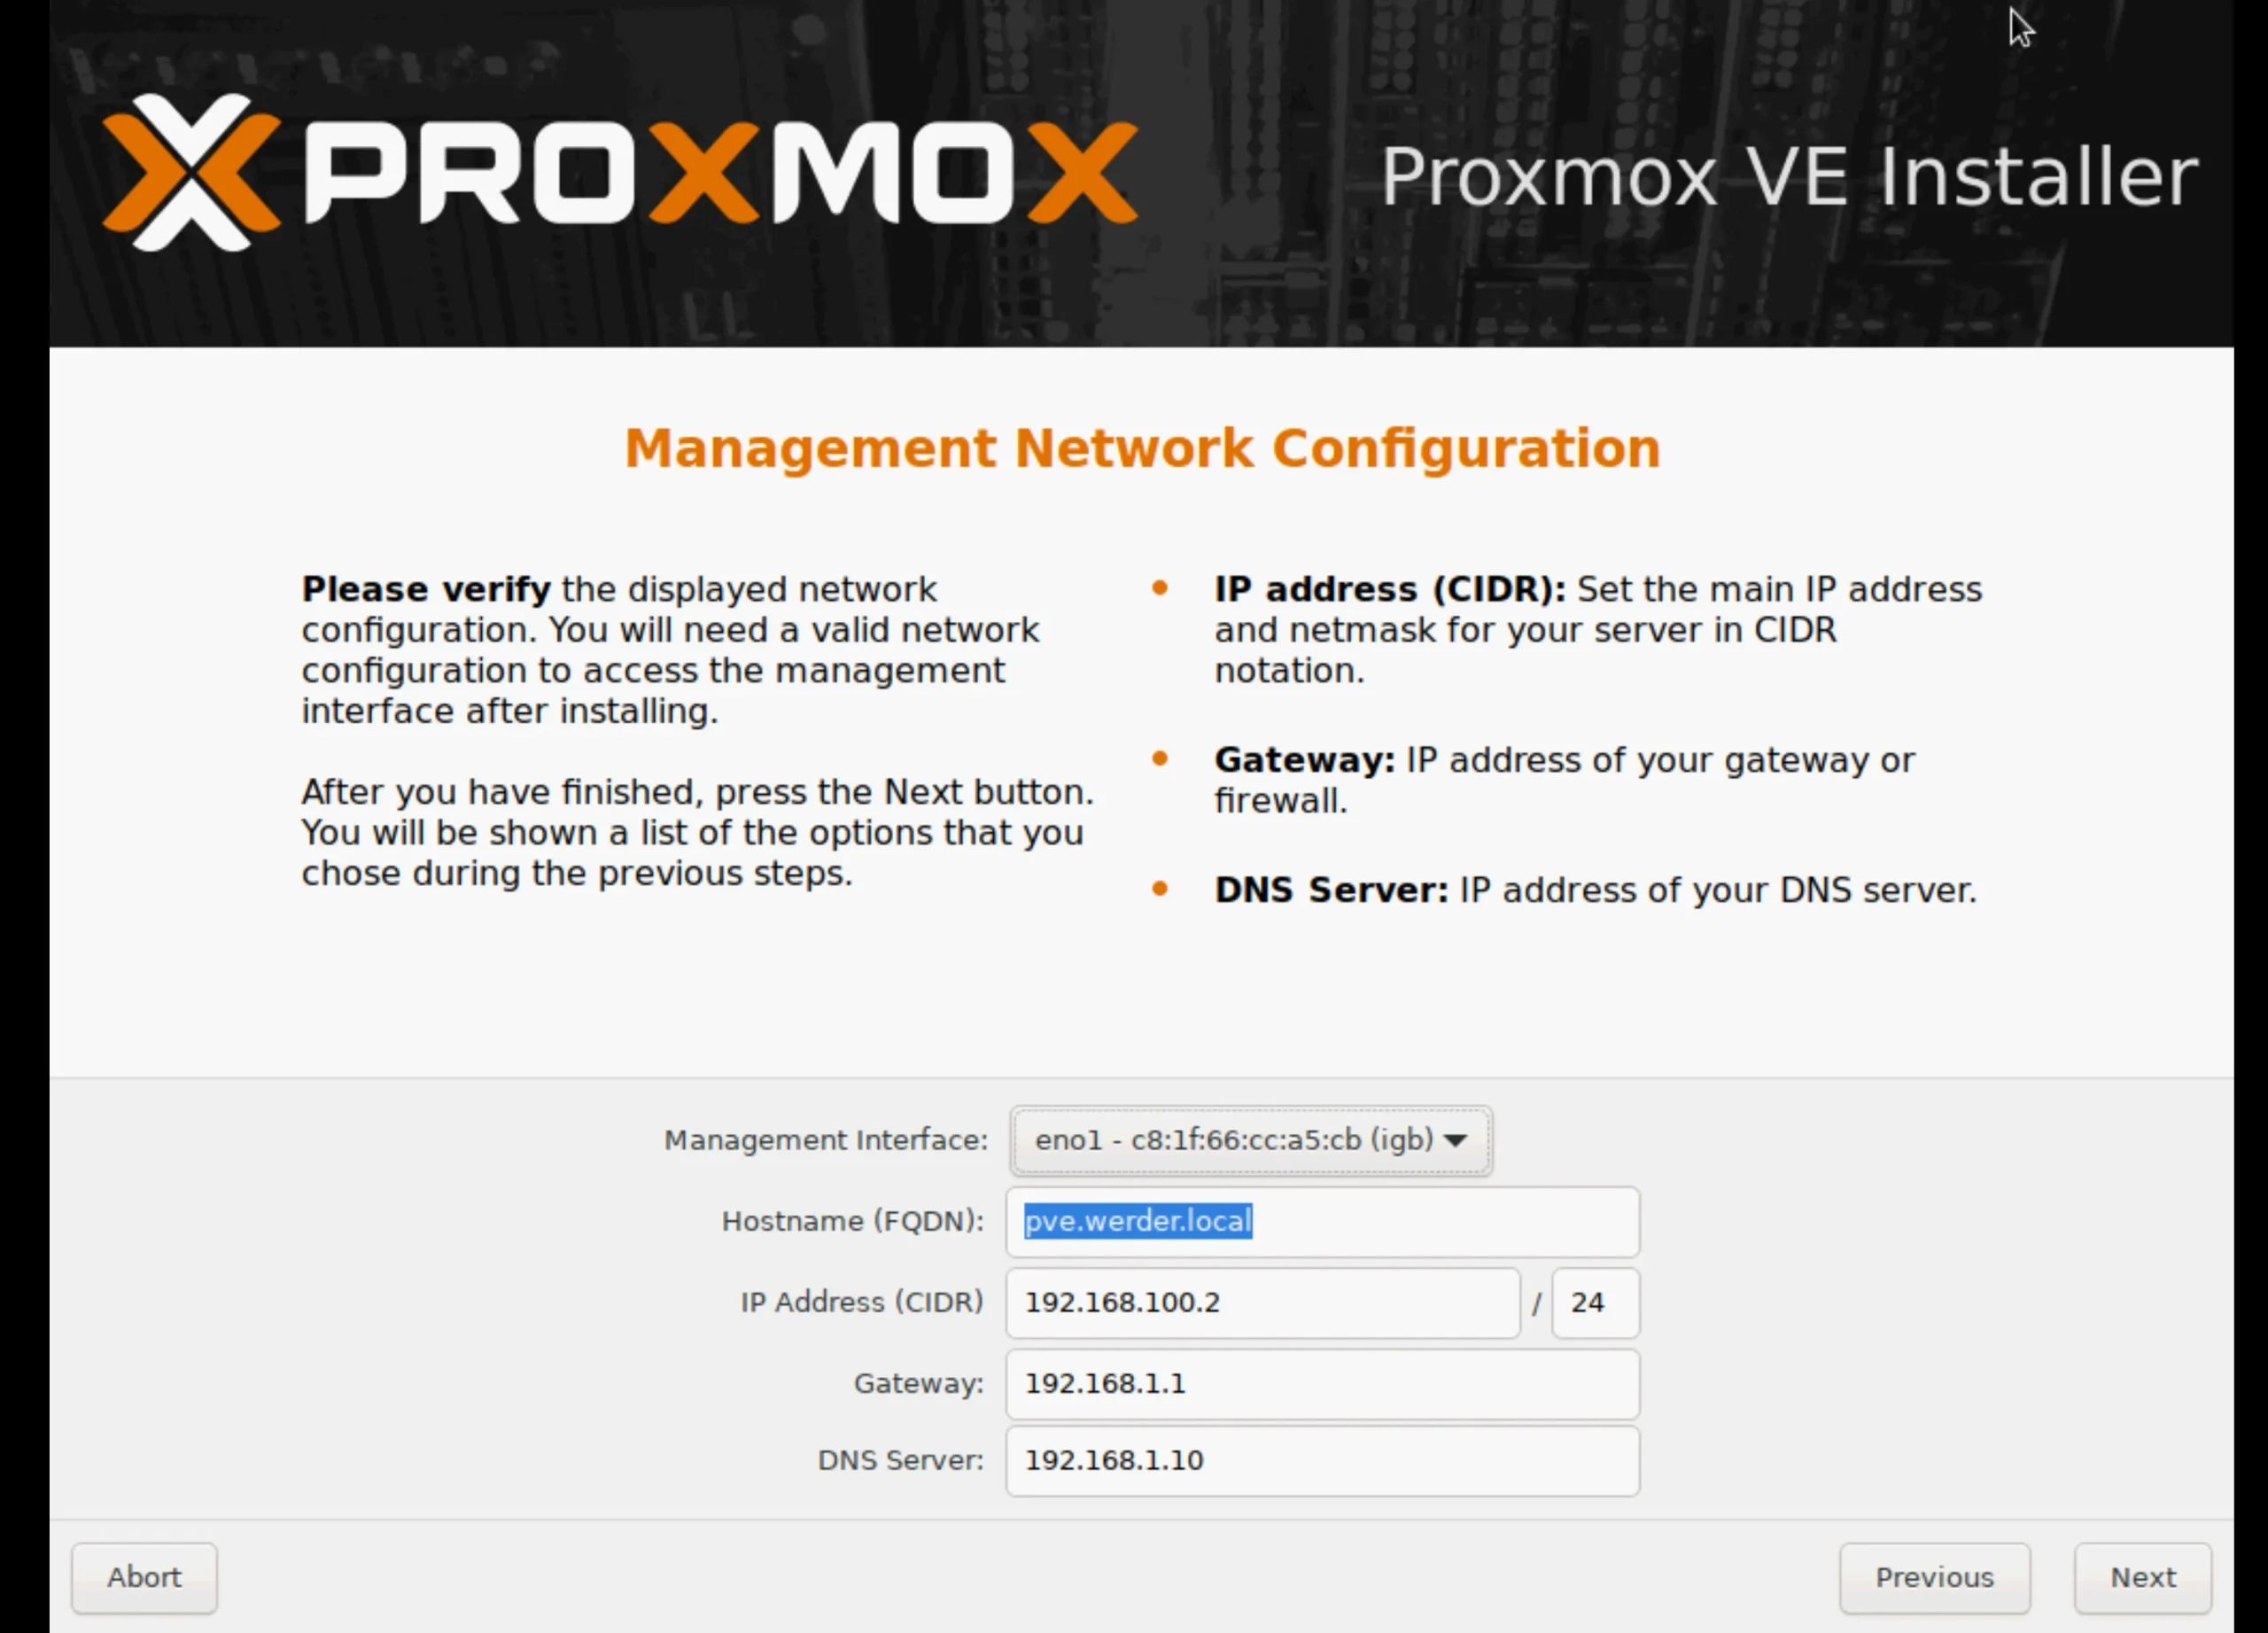
Set up network configuration during installation by selecting the management interface, hostname, IP address, and gateway. Later, you need this IP address to connect to the web GUI.
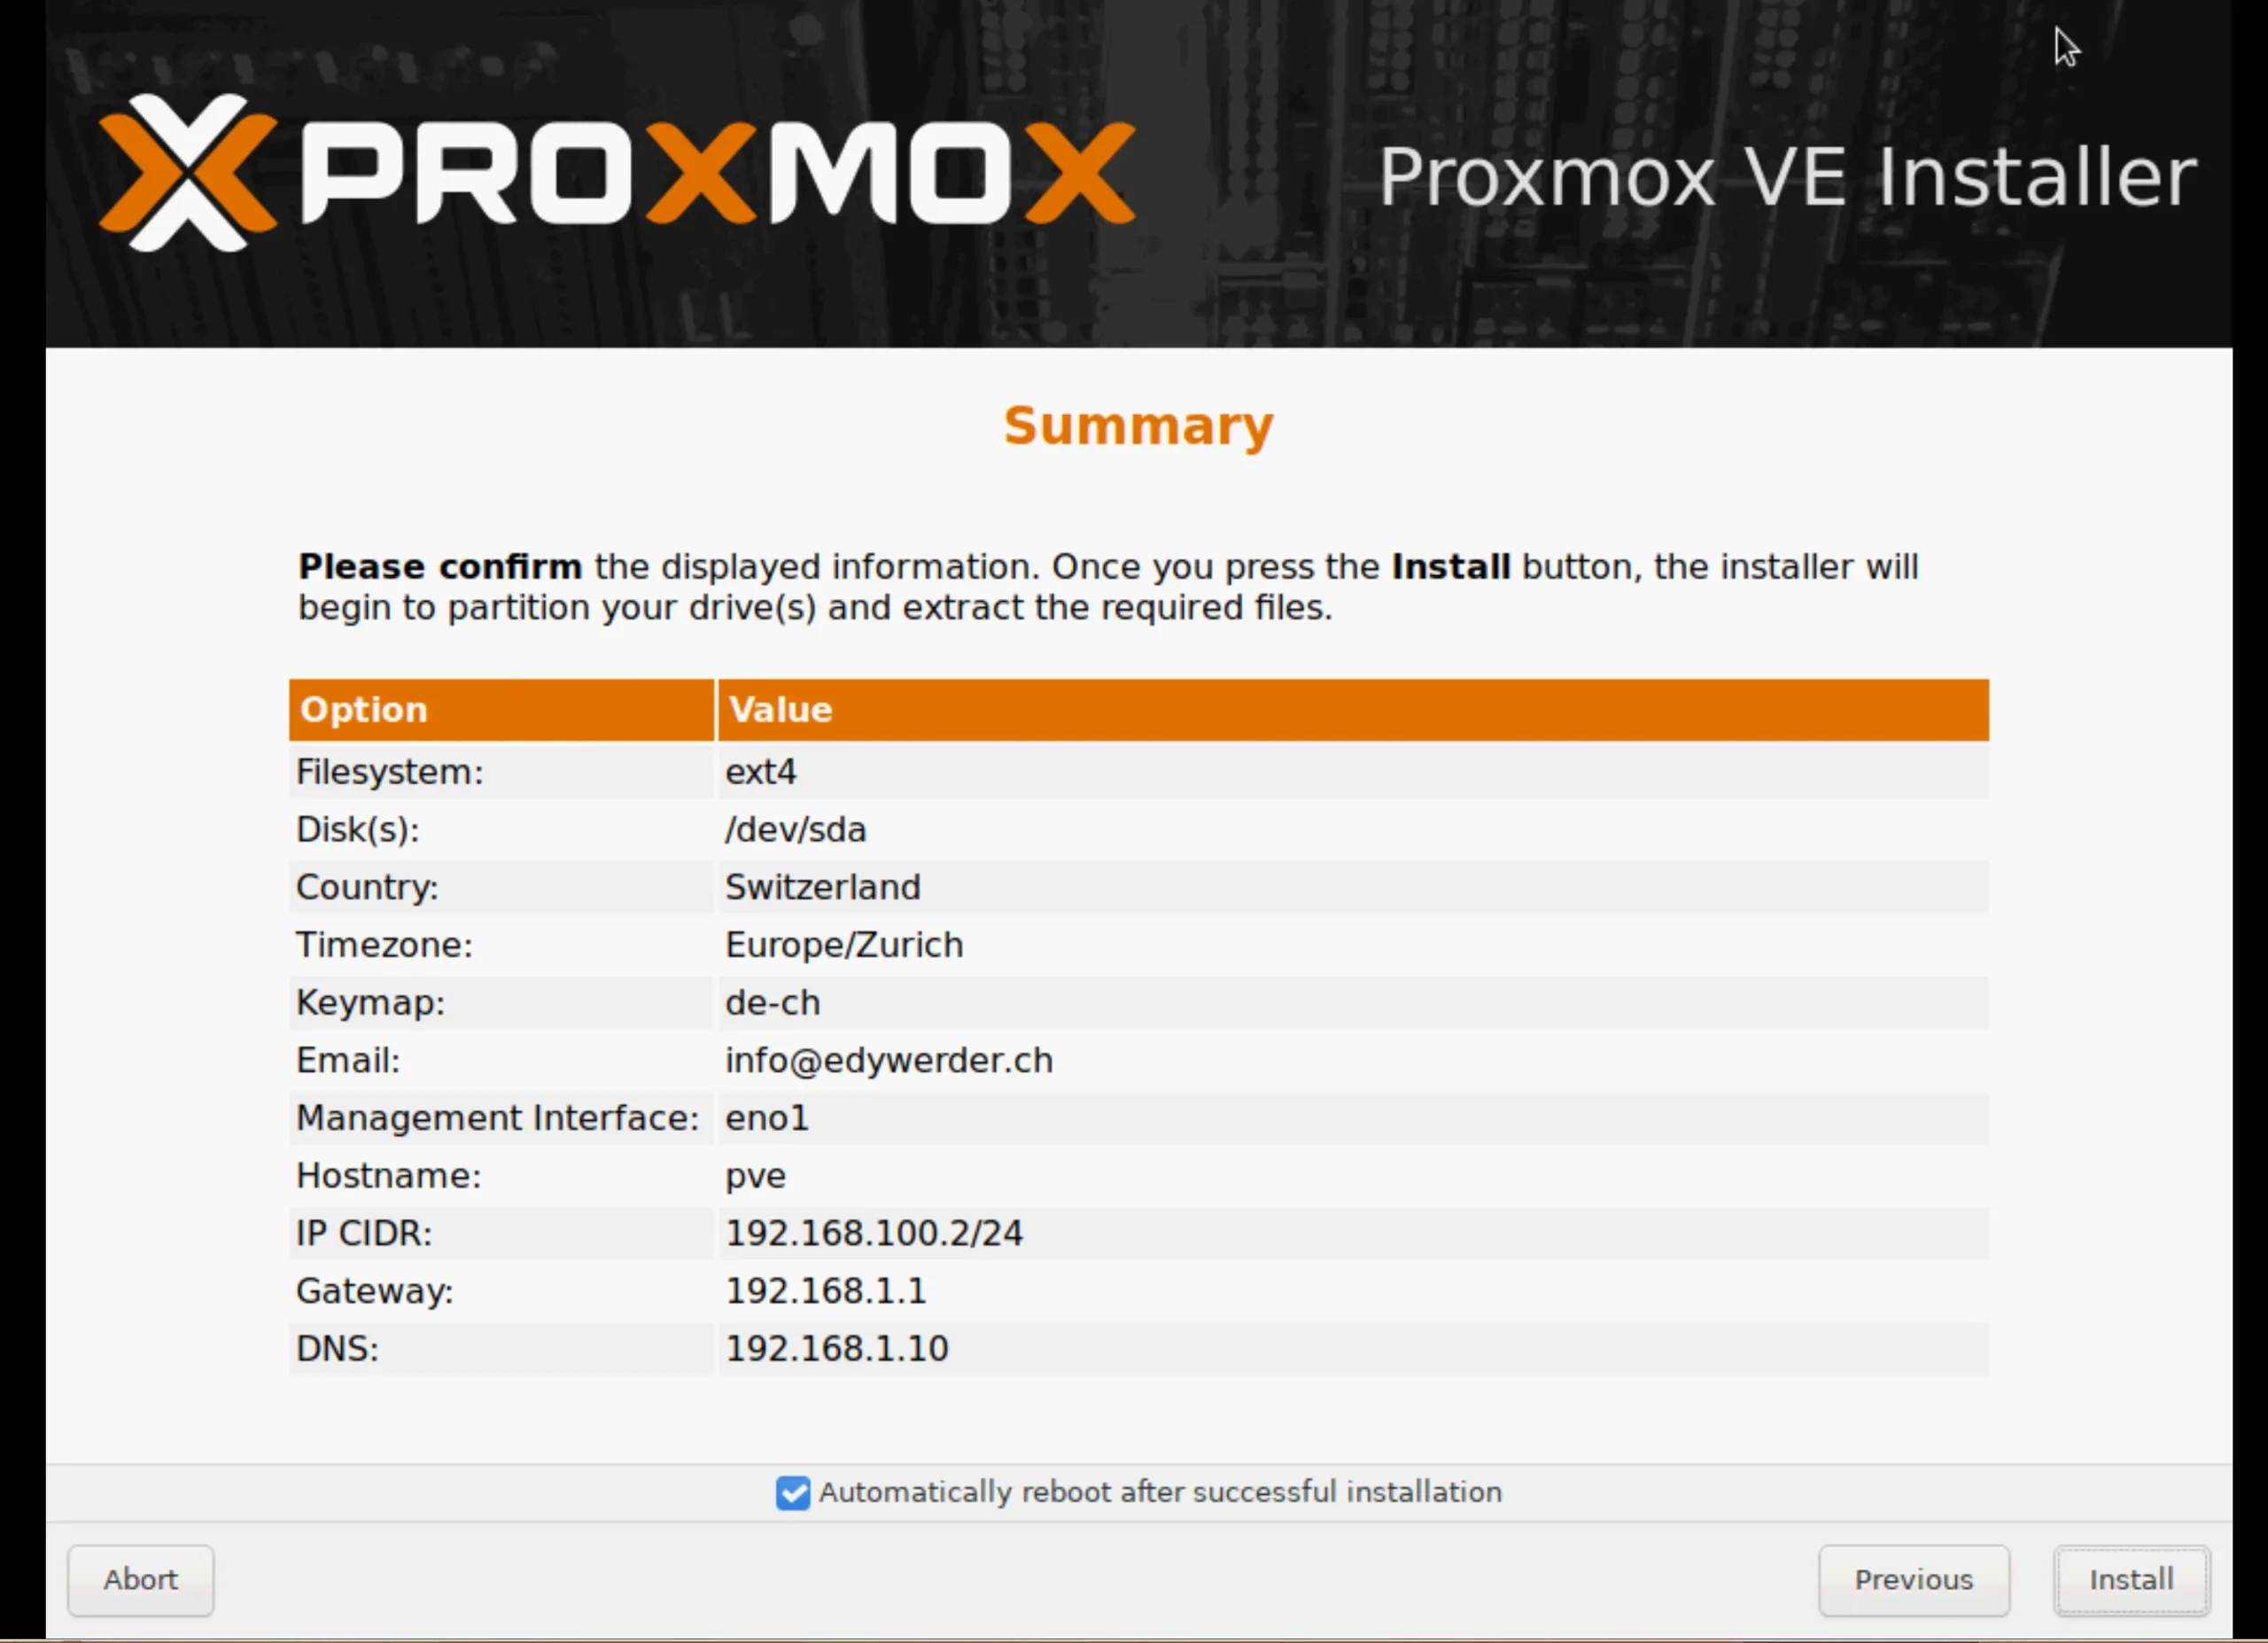
The installer is ready to install the Proxmox server. Here, you see a summary. You can still go back and adapt the configuration.
It is recommended to use a static IP address for the management interface during Proxmox installation.
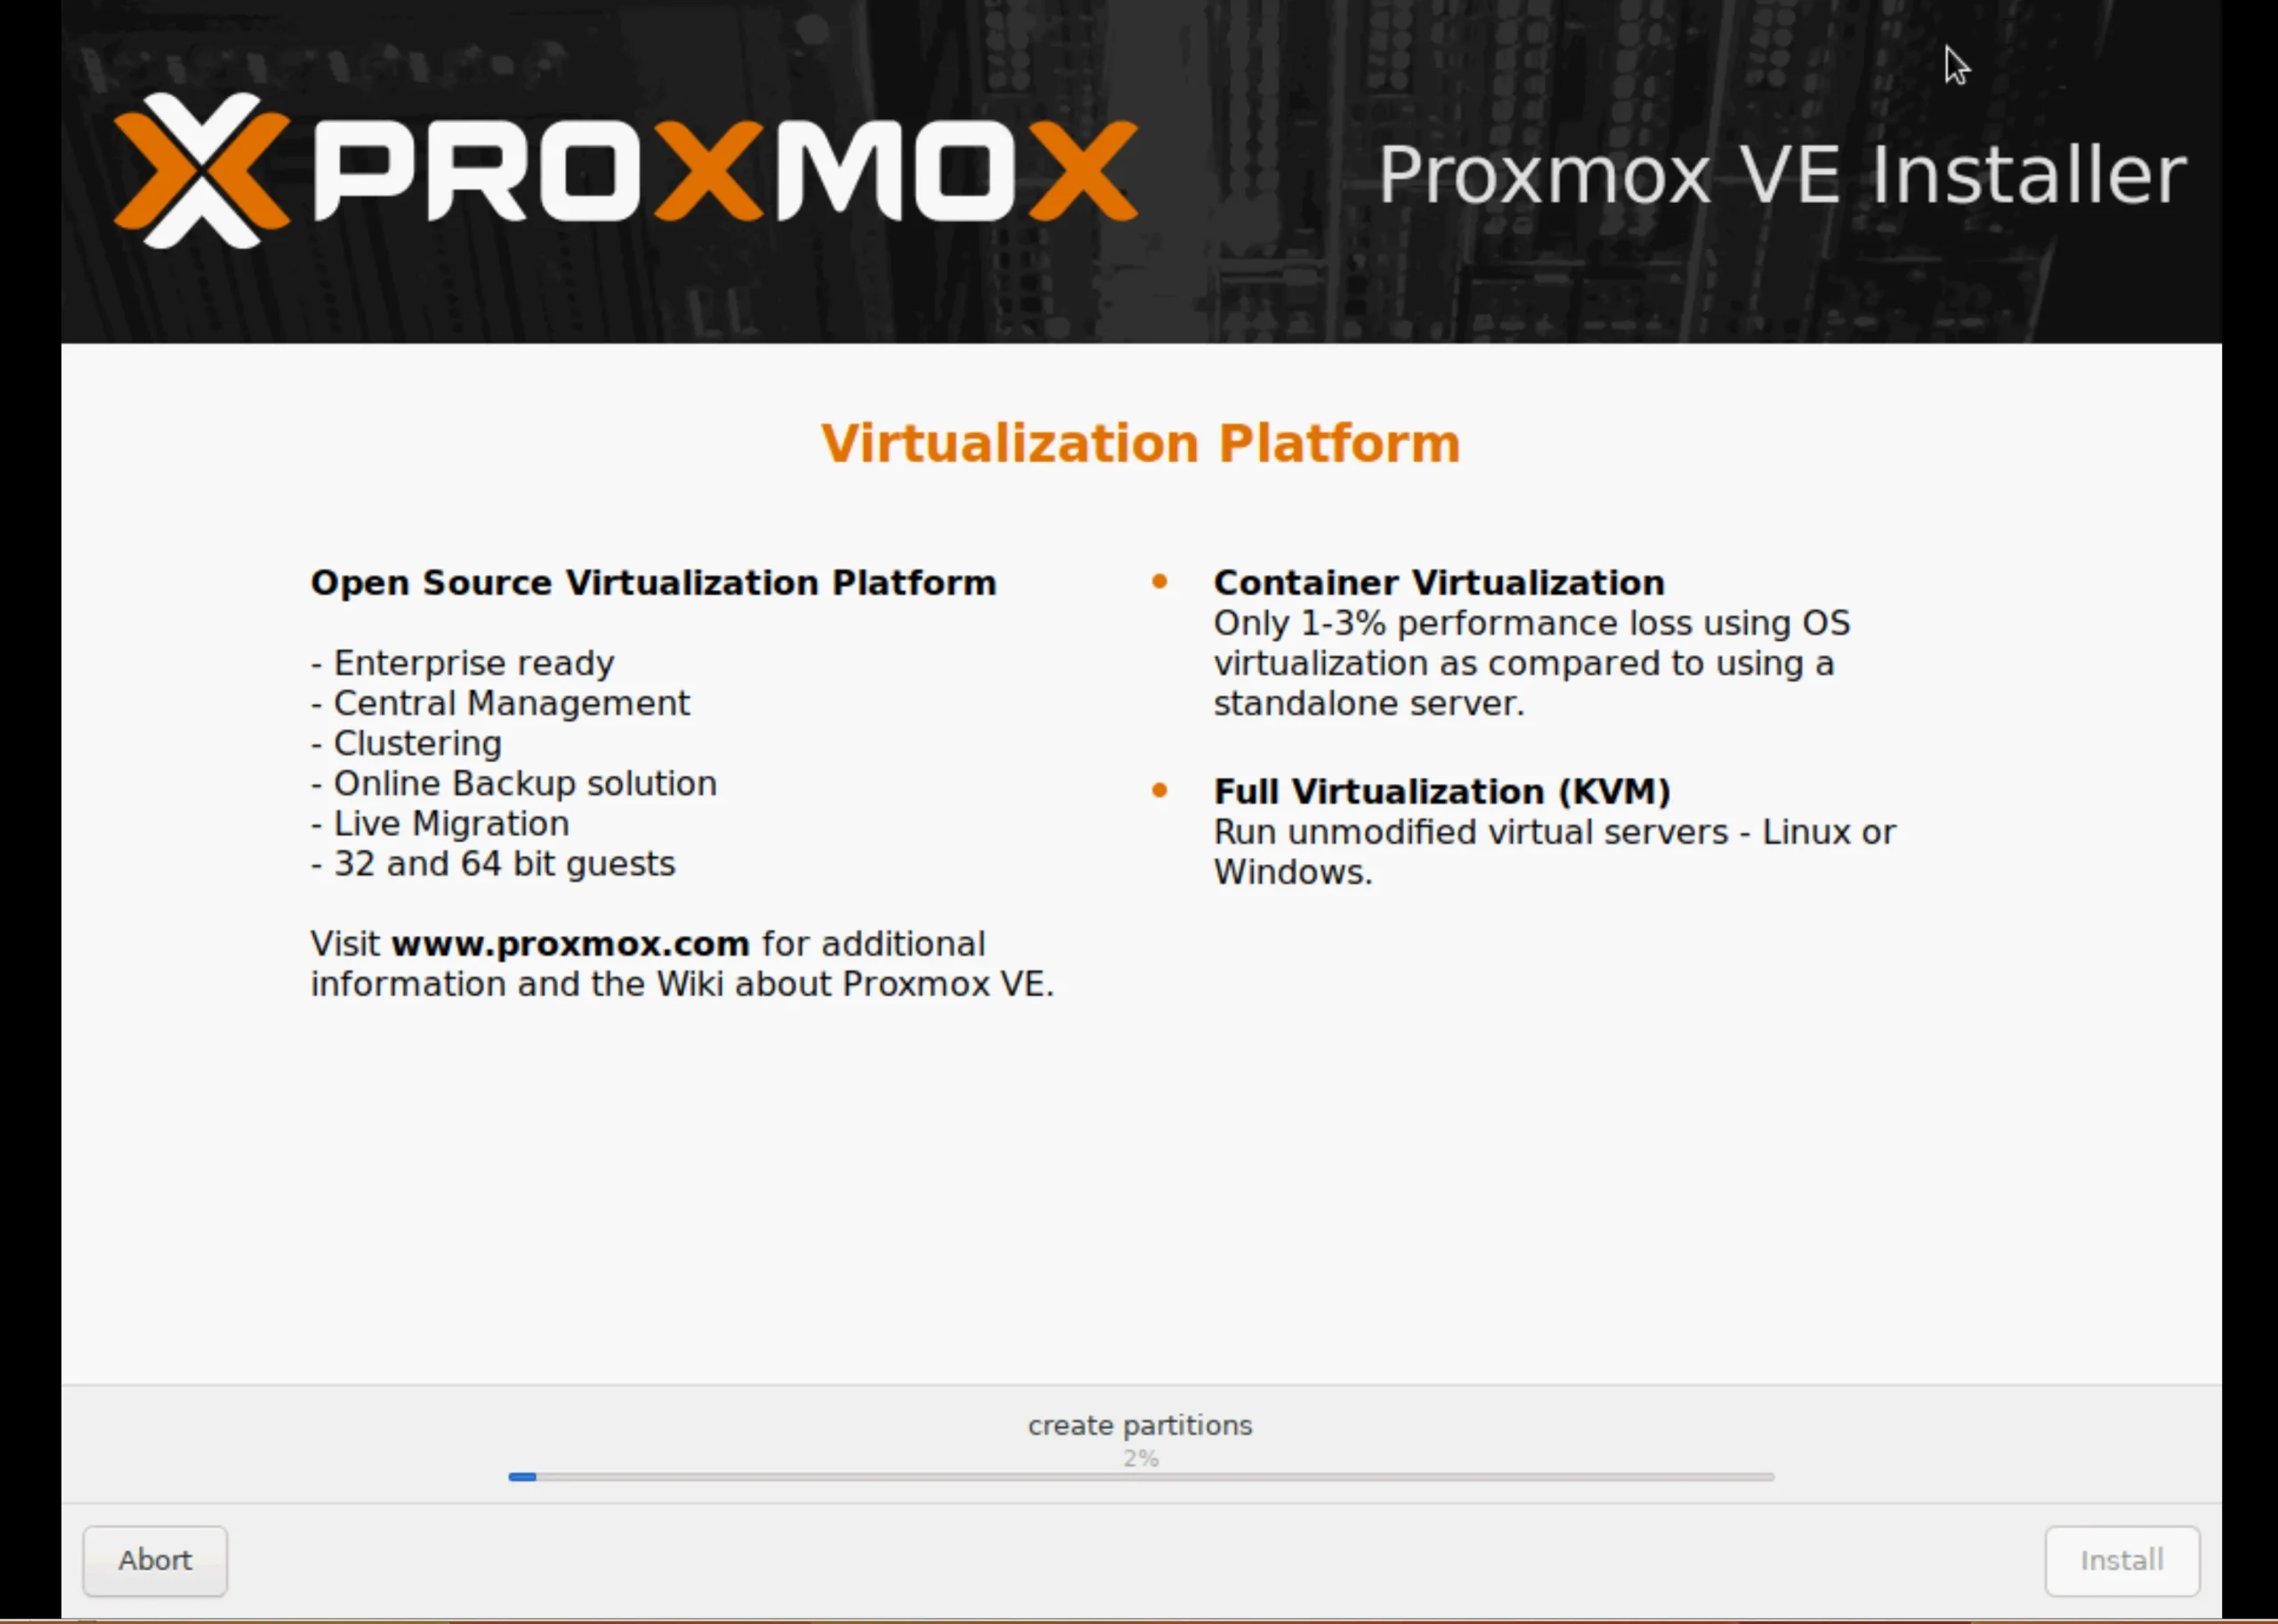
The installation takes 5 to 10 minutes.
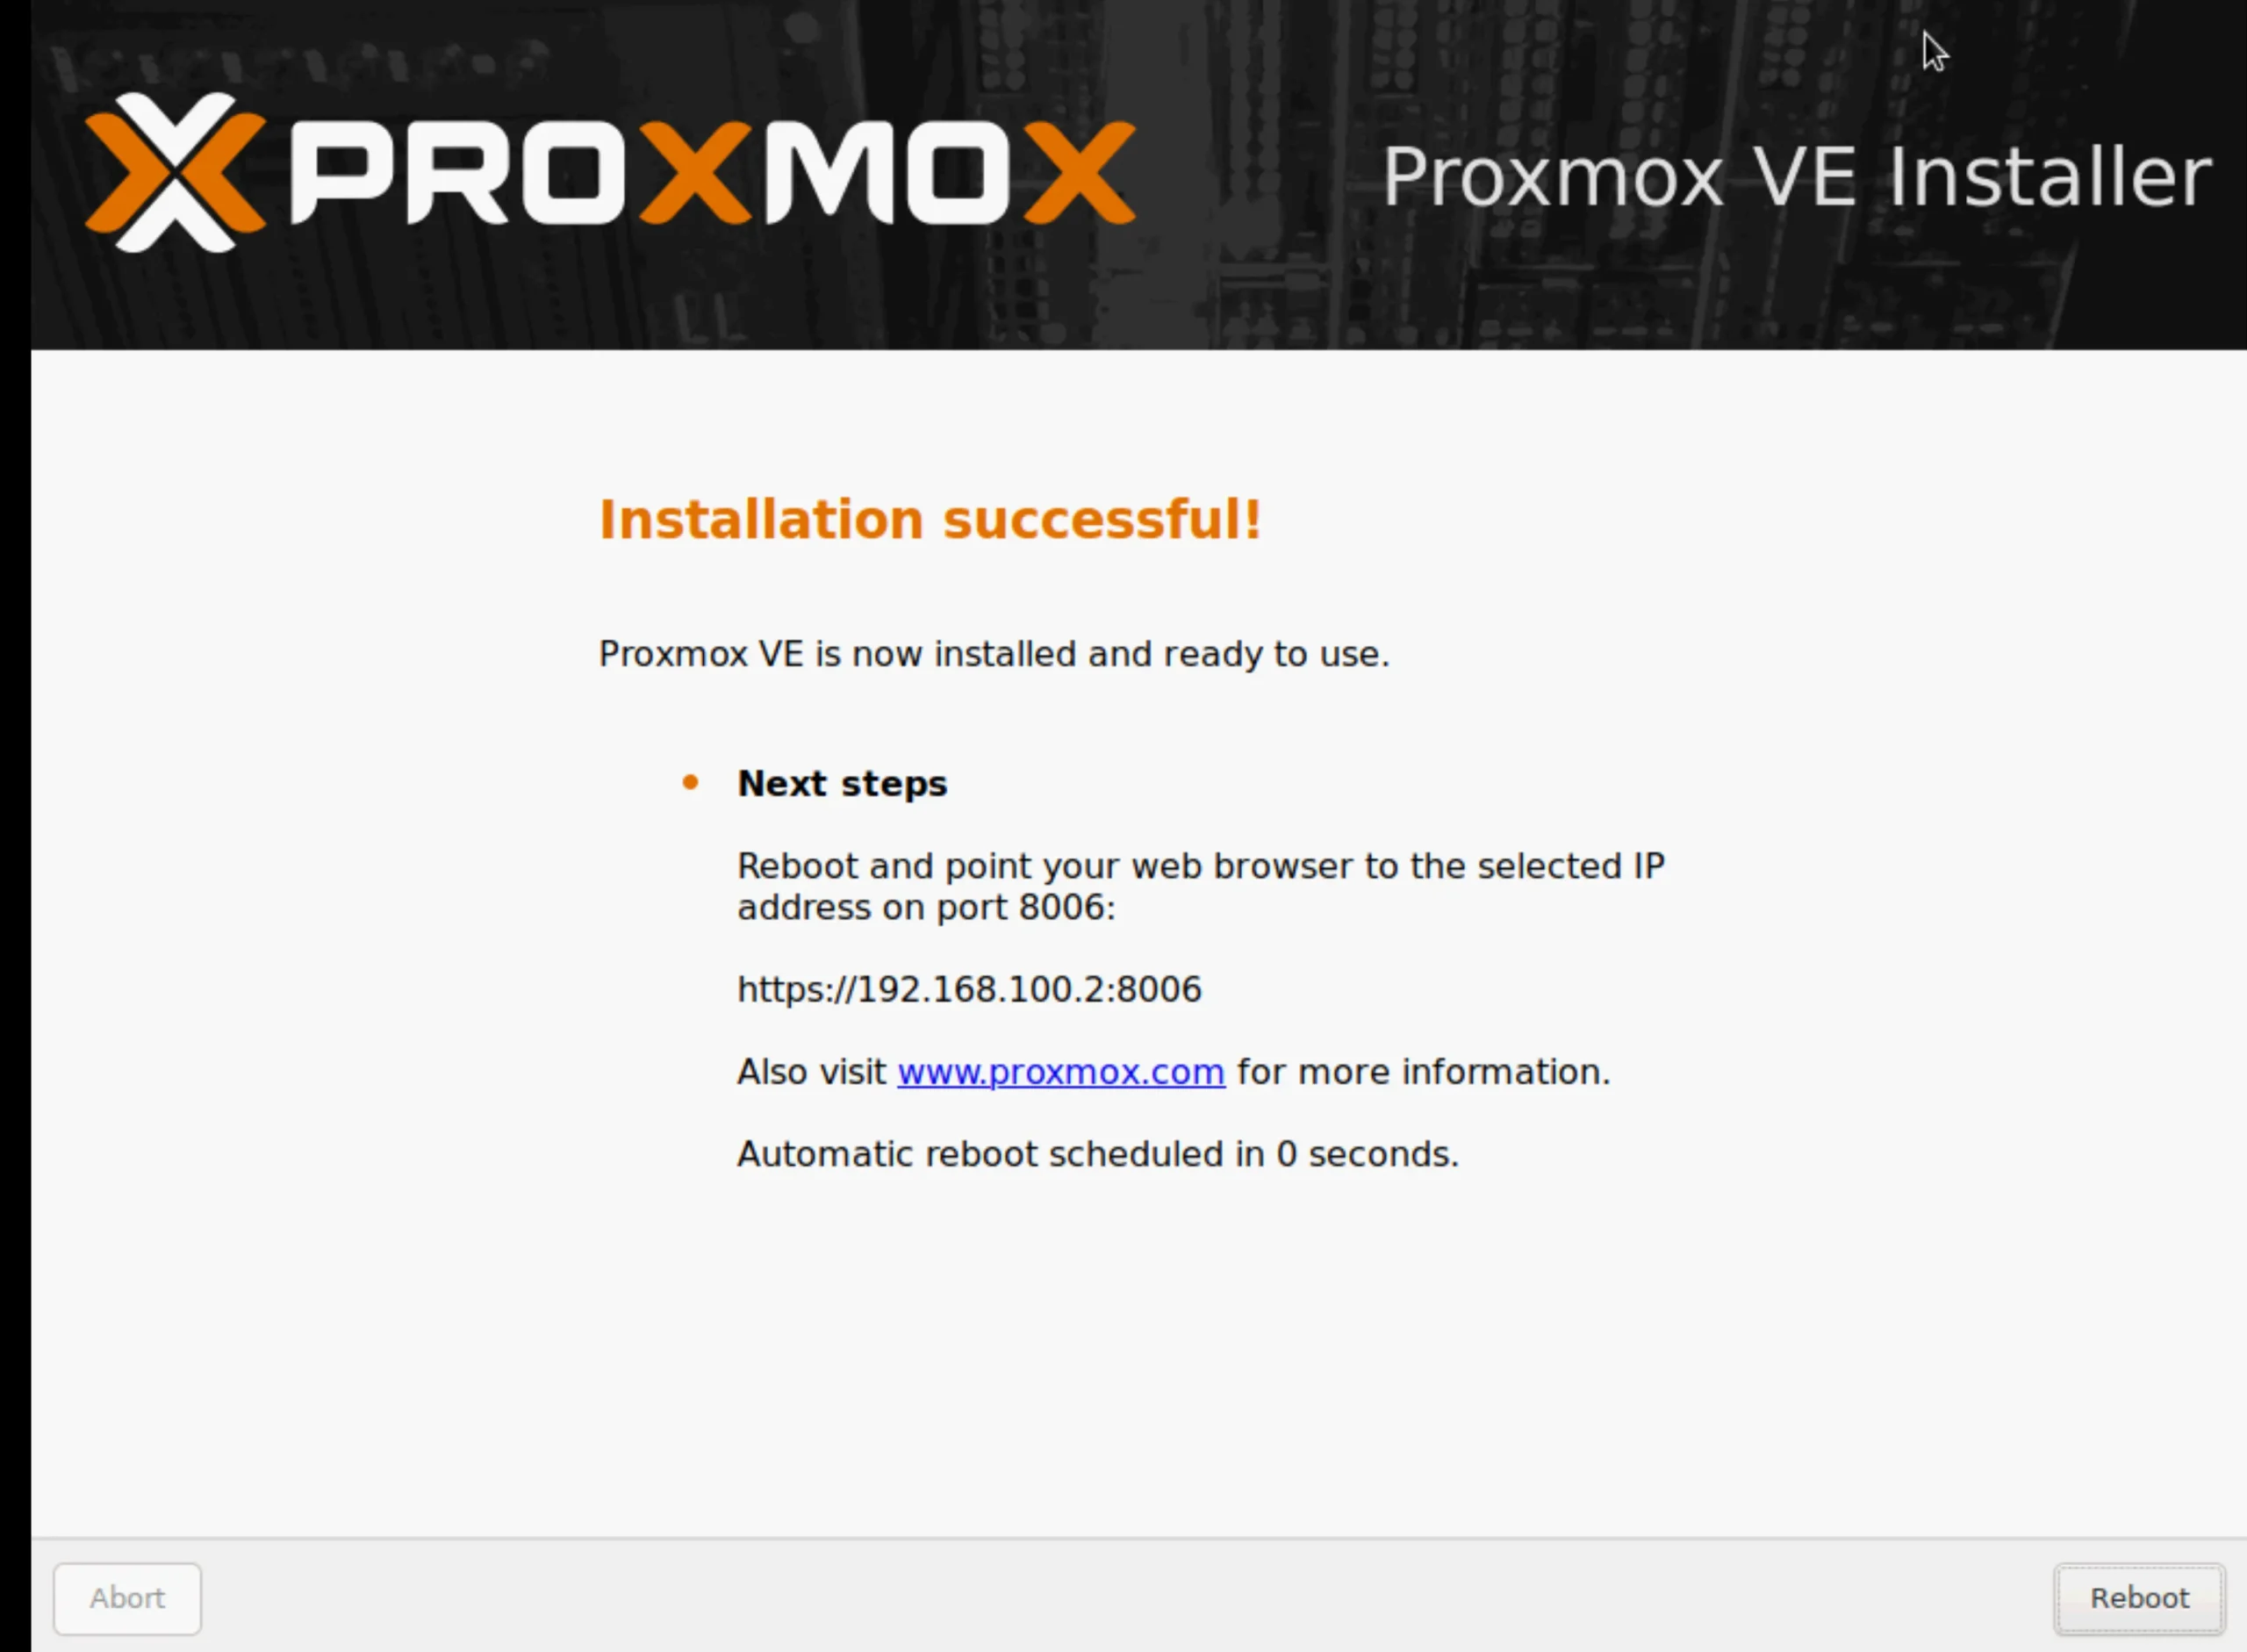
Let’s initiate a server reboot. Please remove any bootable media or disconnect the virtual CD.
Step 3: Log in to the WebGUI
Log in to the Proxmox web interface with the root credentials set during installation. The Proxmox WebGUI is using port 8006.
The same credentials apply when logging in through the terminal console (SSH).
Congratulations, you’re now in the dashboard! You can start exploring by creating virtual machines and tweaking Proxmox configurations.
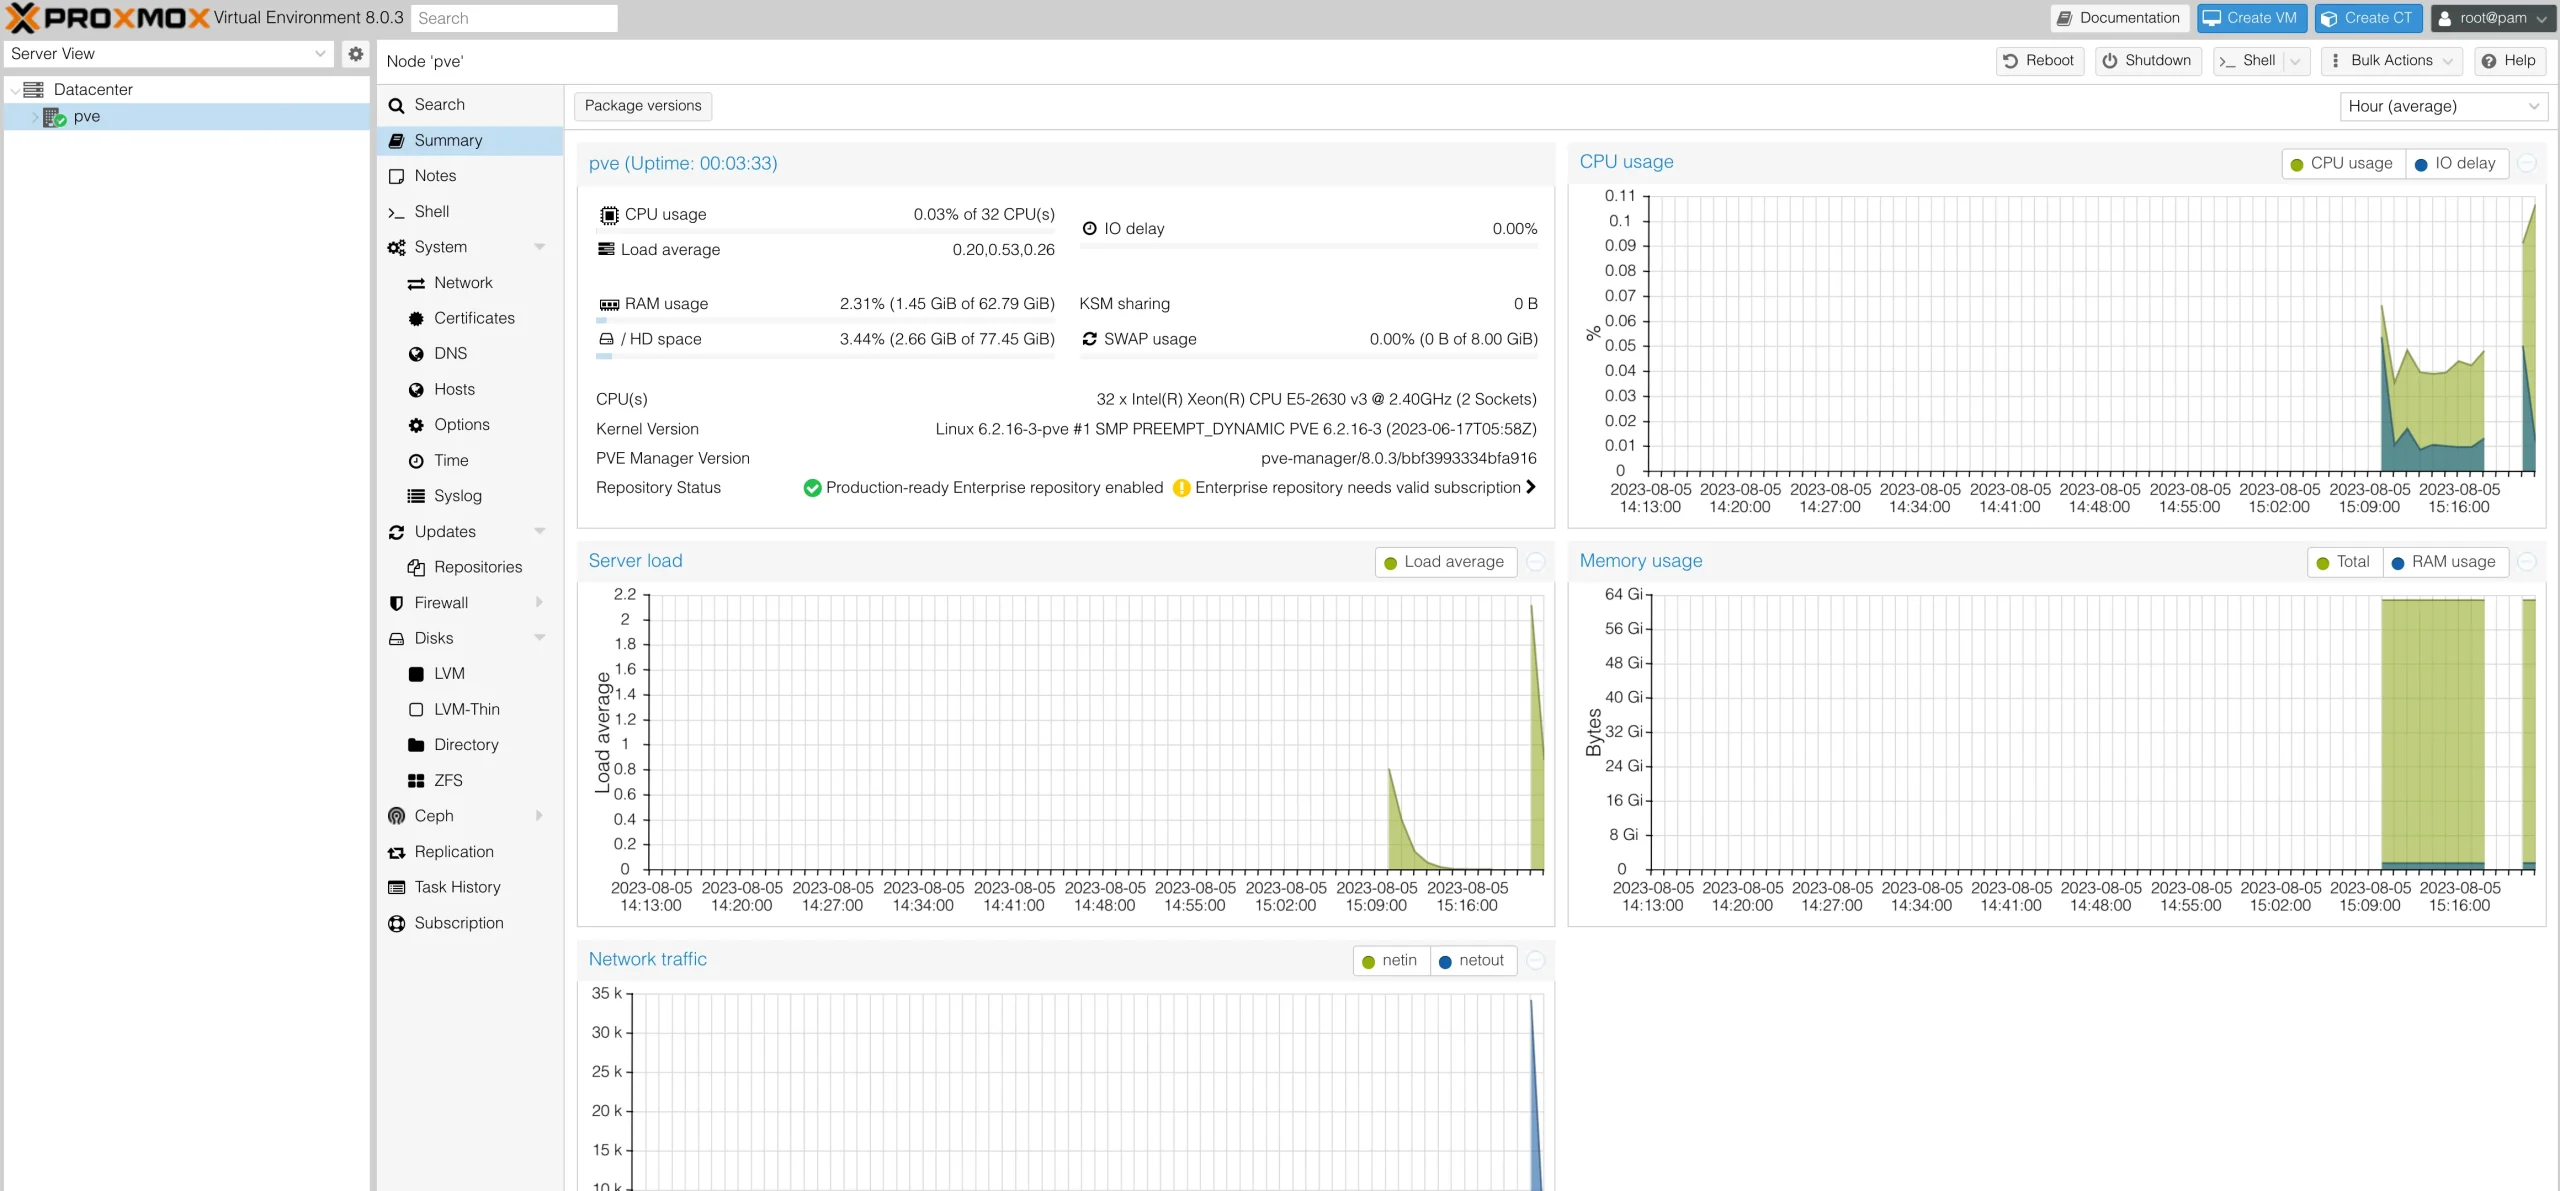
Expert tip: Familiarize yourself with the “Create VM” button at the web interface’s right corner. This is your gateway to create and manage as many virtual machines as you need.
I have written an article detailing how to convert a VMware virtual machine to Proxmox.
Curious what hardware I run Proxmox on?
I created an Amazon storefront with all the gear I use and recommend.
Check out the table below for great deals on servers available on Amazon.
| Product Name | View on Amazon |
|---|---|
| Dell PowerEdge Dell R630 Server | 2X E5-2690 v4 = 28 Cores | 128GB RAM | 2X 1TB SSD (Renewed) | View on Amazon |
| Dell PowerEdge R730 Server 2X E5-2680v4 2.40Ghz 28-Core 128GB 8X 4TB 12G H730P (Renewed) | View on Amazon |
| ProLiant MicroServer Gen11 Tower Server w/one Intel Xeon E-2434, 3.4GHz 4-core 1P 32GB-U VROC 4LFF‑NHP 4TB HDD iLO KIT 180W External PS (HPE Smart Choice P74440-005) | View on Amazon |
| HPE ProLiant DL20 Gen11 Rack Server w/one Intel Xeon E-2436 Processor, 2.9GHz 6‑core 1P 32GB‑DR MR408i‑o 4SFF 2x500W RPS | View on Amazon |
| Dell PowerEdge R830 Server 2.20Ghz 56-Core 128GB 16x 300GB 15K H730P Rails (Renewed) | View on Amazon |
| Dell PowerEdge R440 Server 2X Gold 6126 2.60Ghz 24-Core 96GB 960GB SSD + 3.6TB (Renewed) | View on Amazon |
| HPE ProLiant DL380 Gen9 2U RackMount 64-bit Server + 2×8-Core E5-2640v3 Xeon 2.6GHz CPUs + 64GB PC4-2133P RAM + 8×600GB 10K SAS SFF HDD, P440ar RAID, 4×GigaBit NIC, 2×Power Supplies, NO OS | View on Amazon |
| HPE Proliant DL380 Gen10 8B SFF 2U Server, 2X Intel Xeon Gold 6126 2.6Ghz (24-cores Total), 192GB DDR4 RAM, 8X 1.2TB 2.5” 10K SAS 12Gbps, P408i-a SR 2GB RAID, No Operating System | View on Amazon |
Conclusion: Install Proxmox Server
Installing Proxmox VE 9 is a great way to take control of your home server. It provides a powerful platform for managing virtual machines and containers, with support for ZFS, snapshots, and advanced networking.
While it may seem complex at first, the web interface and community resources make it easier than you’d expect. Whether you’re just starting out or already have experience with virtualization, Proxmox is a solid choice for any homelab setup.
If you haven’t tried it yet, now’s the perfect time to give it a shot.
Once your server is up and running, the next step is keeping it current. Here is how to update Proxmox manually.
I’d love to hear from you — was this article helpful? Share your thoughts in the comments below. If you prefer, you can also reach me by email or connect with me on Reddit at Navigatetech.
Before you go …
If you’ve just walked through installing your Proxmox server and are wondering what’s next, delving into the file systems used by Proxmox could be your next move. Understanding Proxmox file systems is crucial for efficient storage management and optimization of your virtual environments. I recommend reading “Proxmox Filesystems” next. This article will guide you through the different file systems supported by Proxmox, their advantages, and how to choose the right one for your needs. It’s a great way to ensure your server is set up for optimal performance and scalability.
Related Articles
About the author
Hi, I’m Edy Werder. I write hands-on guides about Proxmox, homelab servers, NAS, and WordPress, based on real setups I run and document.
No sponsors, no fluff—just real configs and results.
Enjoying the content?
