
By Edy Werder — IT Consultant & Tech Blogger
Have you ever wondered if your Synology NAS is truly secure? You’re not alone. Many Synology users overlook a powerful built-in security tool: the Synology Firewall. While it’s a crucial first line of defense for your NAS, simply turning it on isn’t enough.
Properly configuring the Synology Firewall requires careful consideration and a step-by-step approach. It’s not just about flipping a switch – it’s about creating well-thought-out rules that protect your data while allowing necessary access.
In this guide, I’ll walk you through effectively setting up your Synology Firewall. I cover everything from understanding how the firewall works to creating and ordering rules that suit your needs.
Whether you’re a home user or managing a small business NAS, this information will help you enhance your device’s security.
Before you start, you need to know how the Synology Firewall works
The Synology Firewall operates slightly differently from what you might expect, and it’s essential to understand this before configuring it.
Here’s the key thing to remember: When you first turn on the Synology Firewall, it doesn’t automatically block any traffic. This might seem counterintuitive, but it’s designed to prevent you from accidentally locking yourself out of your NAS.
So how does it work?
- By default, the Synology Firewall allows all traffic.
- It only starts protecting your NAS when you set up specific “deny” rules.
- These rules tell the firewall what types of traffic or connections to block.
Think of it like this: You’ve installed a new security door but haven’t locked it yet. The door (firewall) is there, but it’s not doing much until you turn the key (set up rules).
This approach gives you control and flexibility but also means you must be proactive in setting up your rules. Don’t worry, though – I’ll guide you through this process step by step.
Remember, your NAS is still open to all traffic until you set up your first “deny” rule, just like before you enabled the firewall. Understanding and correctly setting up your firewall rules is so important.
What’s the added benefit of enabling Synology Firewall?
You might think, “I already have a firewall on my ISP router. Isn’t that enough?” It’s a great question, and here’s why the Synology Firewall offers additional, valuable protection:
- It acts as a critical security layer for forwarded ports.
- You can create specific rules to control access to these ports.
- This allows you to enjoy remote access while still maintaining strong security.
For example, if you’ve forwarded ports for Plex or your file station, the Synology Firewall lets you add extra security measures like limiting access to specific IP addresses or setting up more complex rules to protect these entry points. Remember, traffic coming through these forwarded ports would have direct, unfiltered access to your NAS without the Synology Firewall. The Synology Firewall ensures this traffic is scrutinized and controlled, significantly enhancing your NAS’s security.
- Application-Level Filtering: Synology Firewall can control access based on specific applications running on your NAS, a feature typically unavailable on standard router firewalls.
- Monitoring and Logs: The Synology Firewall provides detailed logs of connection attempts, giving you visibility into potential security issues specific to your NAS.
Think of it this way: Your router’s firewall is like the security guard at the entrance of a building, while the Synology Firewall is the keycard system controlling access to a specific, important room inside that building. Both are valuable and work together to create a more secure environment for your data.
Understanding the Importance of Defining Clear Rules
Clear firewall rules are like giving precise instructions to a security guard for your NAS. They determine what traffic gets in and what stays out. Here’s why they’re crucial:
- Precision in Protection: Clear rules specify exactly what to allow or block.
- Prevent Accidental Lockouts: Well-defined rules help you avoid blocking your access.
- Balance Security and Usability: They help you keep your NAS secure yet accessible.
- Easier Troubleshooting: Clear rules make it simpler to identify and fix issues.
- Adaptability: As your NAS usage changes, clear rules are easier to modify.
When creating your rules, think about:
- What services need to be accessible from outside your network?
- Which devices or IP addresses should have access to specific services?
- Are there any types of traffic you want to block entirely?
Remember, the goal is to create rules that protect your NAS comprehensively yet remain simple enough for you to manage and understand. In the next section, we’ll follow a step-by-step guide to help you set up these rules effectively.
My pick
My Synology NAS recommendations
Step-by-Step Guide to the Synology Firewall Setup
Setting up your Synology Firewall correctly is crucial for security. Follow these steps for a safe and effective configuration:
- Access the Synology DSM:
- Open a web browser and enter your Synology NAS’s IP address or QuickConnect ID.
- Log in with your admin credentials.
- Open the Control Panel:
- Click on the “Main Menu” icon (usually in the top-left corner).
- Select “Control Panel” from the menu.
- Navigate to Security Settings:
- In the Control Panel, find and click on “Security.”
- Then, click on “Firewall” in the top menu.
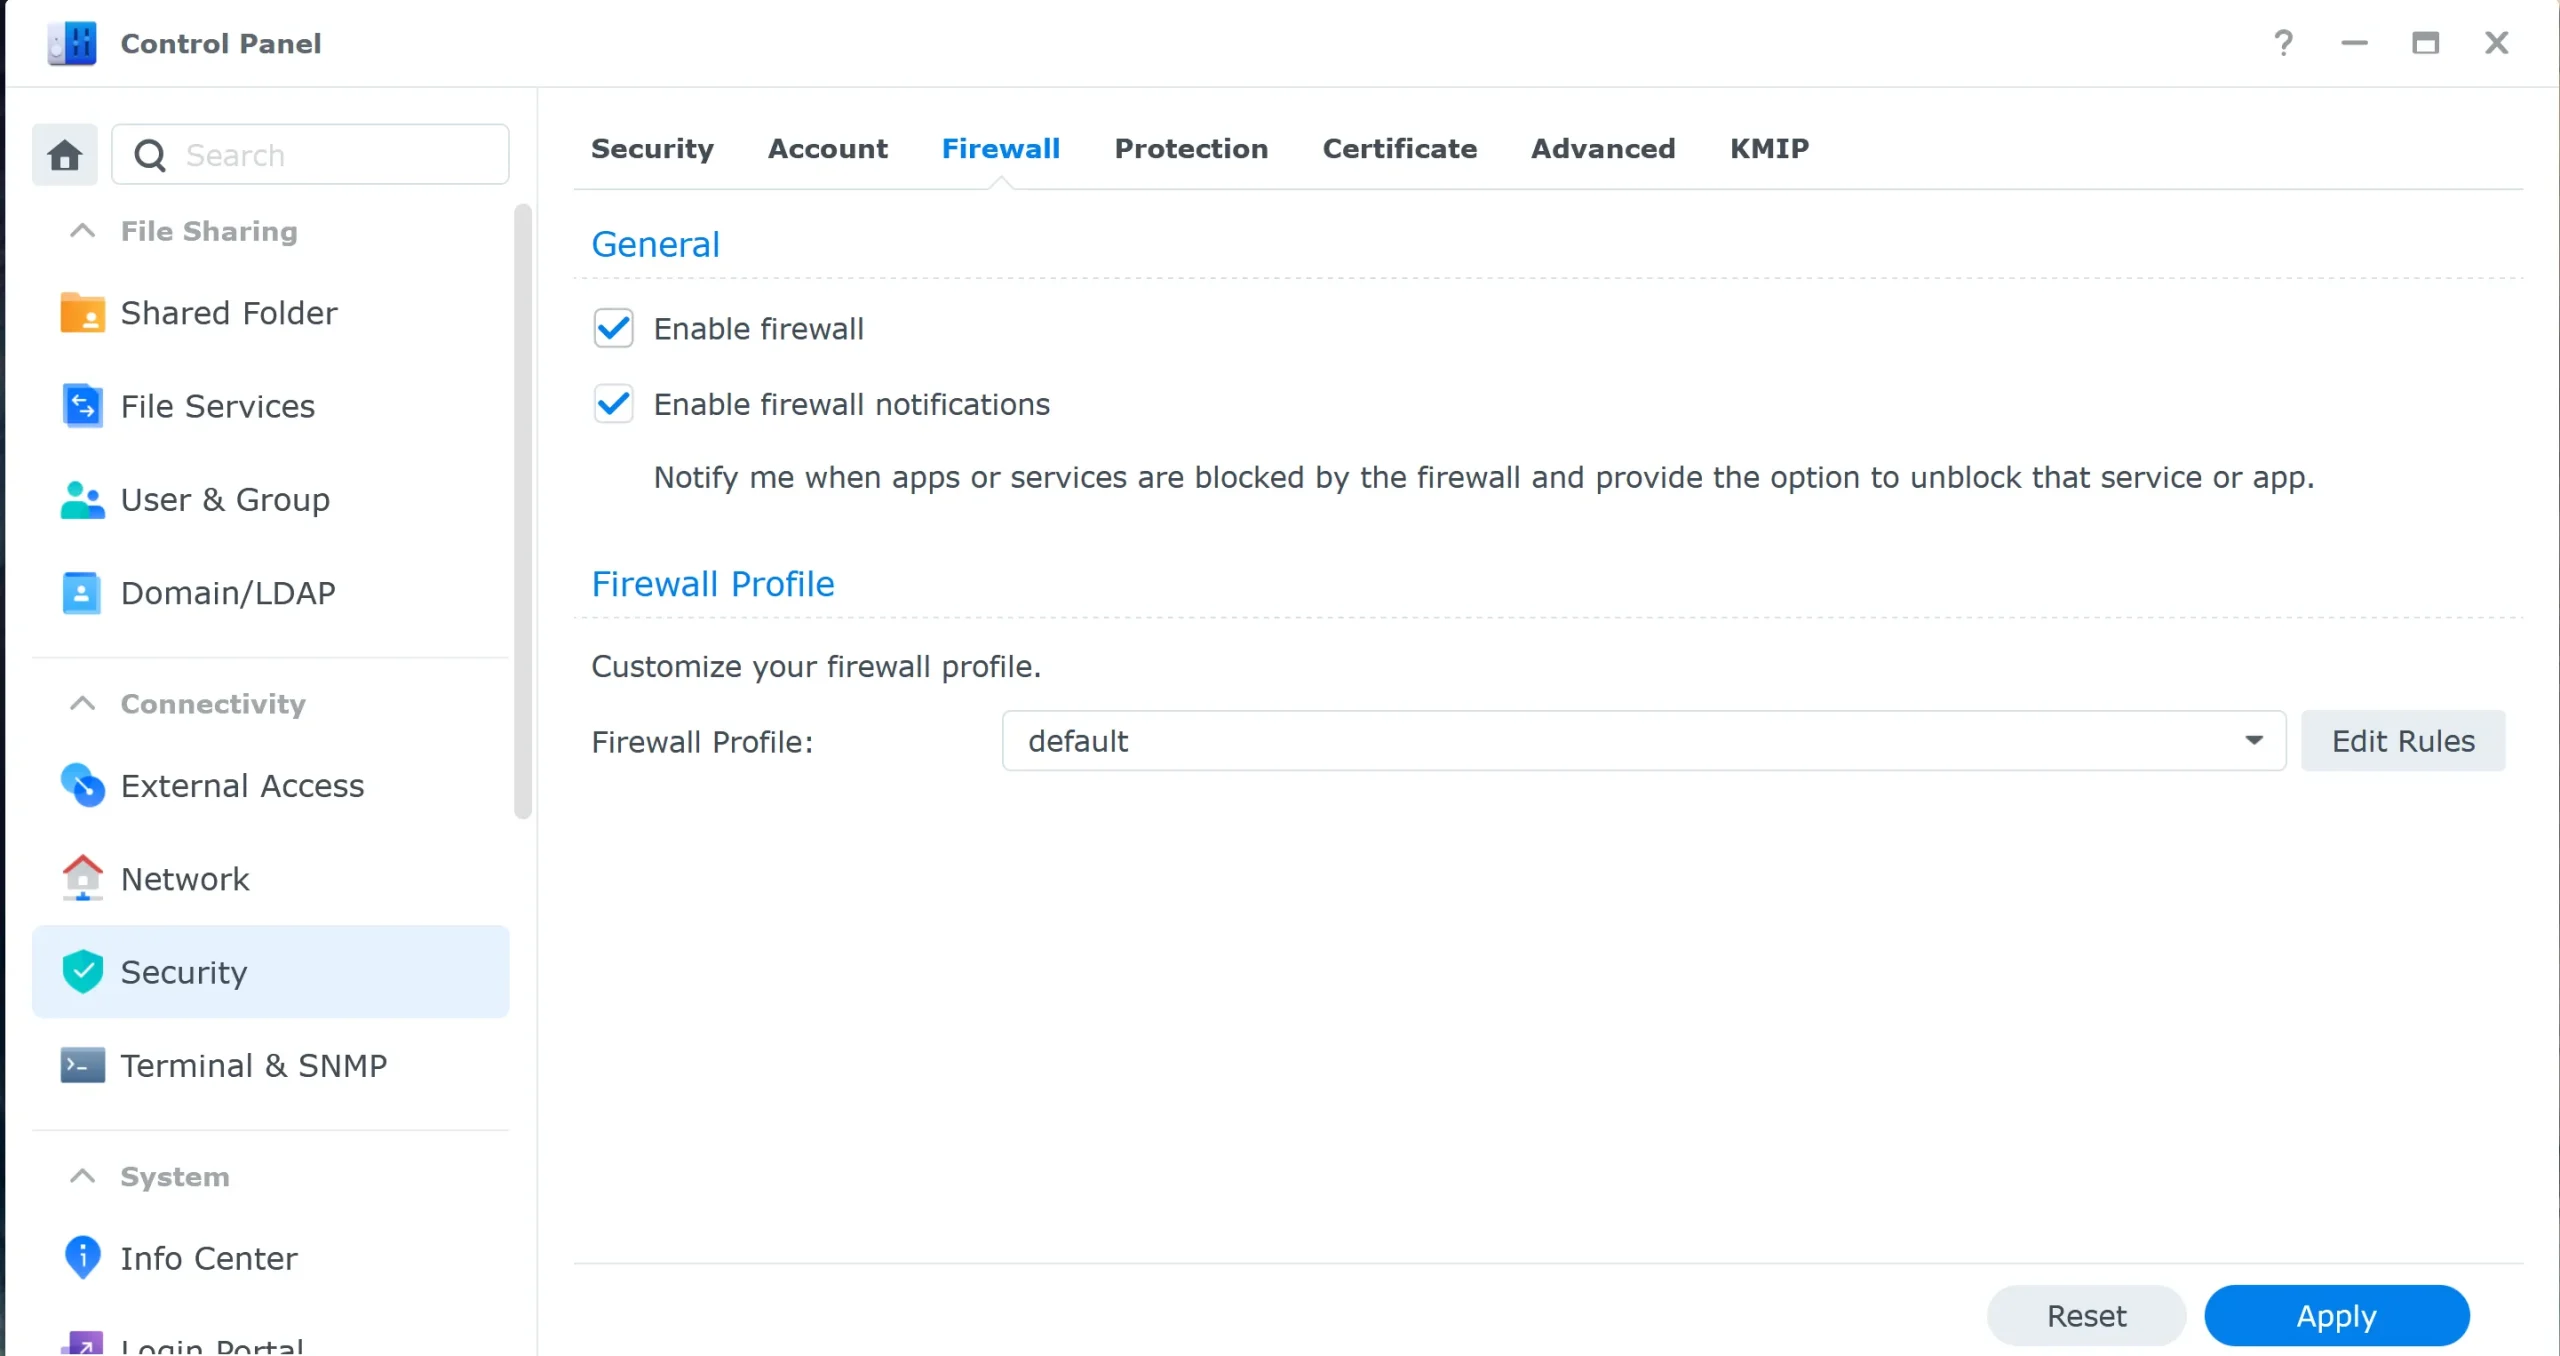
- Enable the Firewall:
- Check the box next to “Enable firewall.” I would also enable “Enable firewall notifications.”
- Synology maintains Firewall profiles; there is already a “default” profile. You can create a new profile by clicking the arrow button and clicking “Manage Firewall Profile.” In most cases, you are okay with the default profile,
- Click “Apply” to save this change.
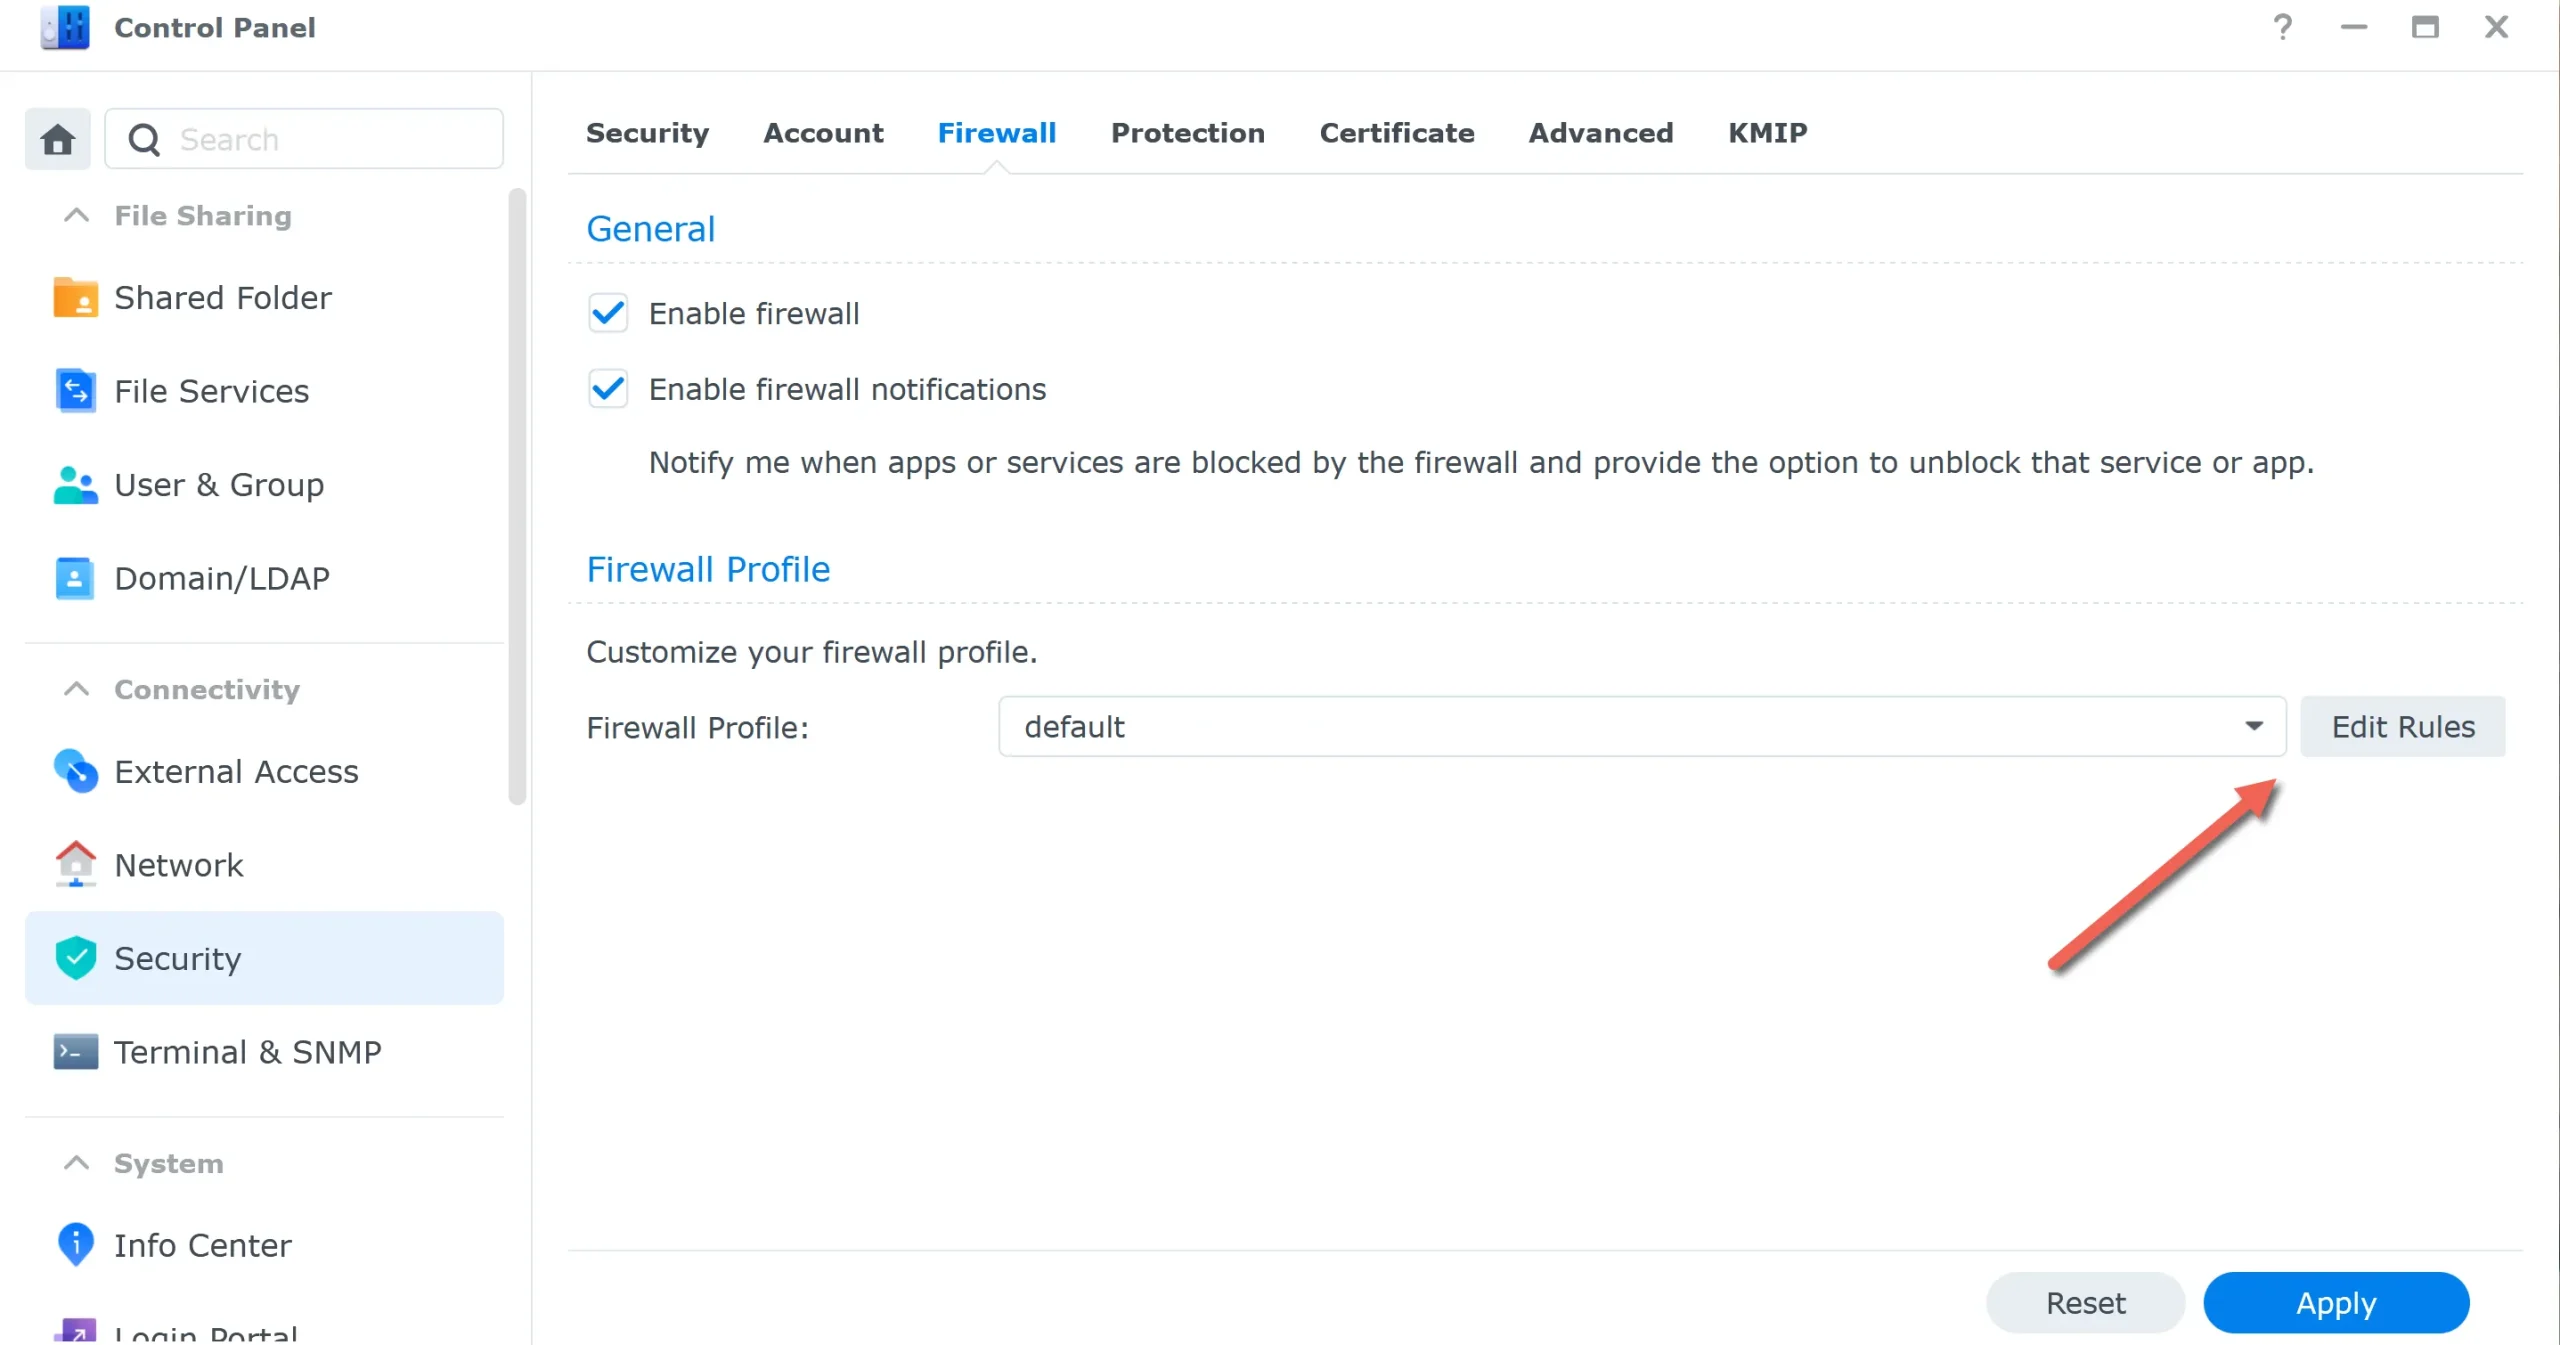
Click “Edit Rules”
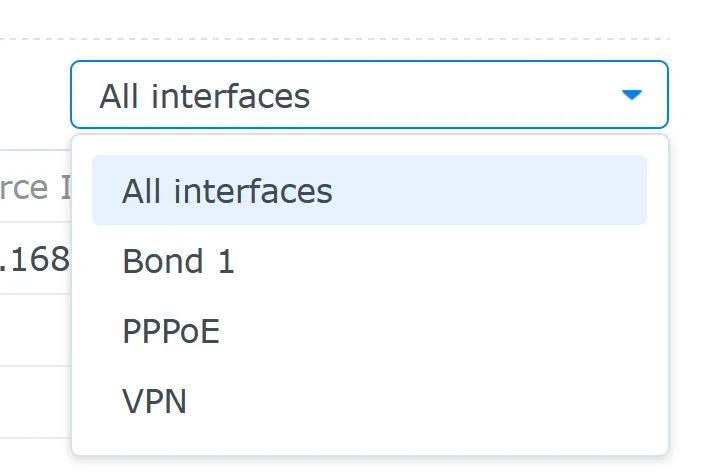
The Synology firewall allows you to create rules per interface. Here are my interfaces. I recommend creating rules for “All interfaces” only.
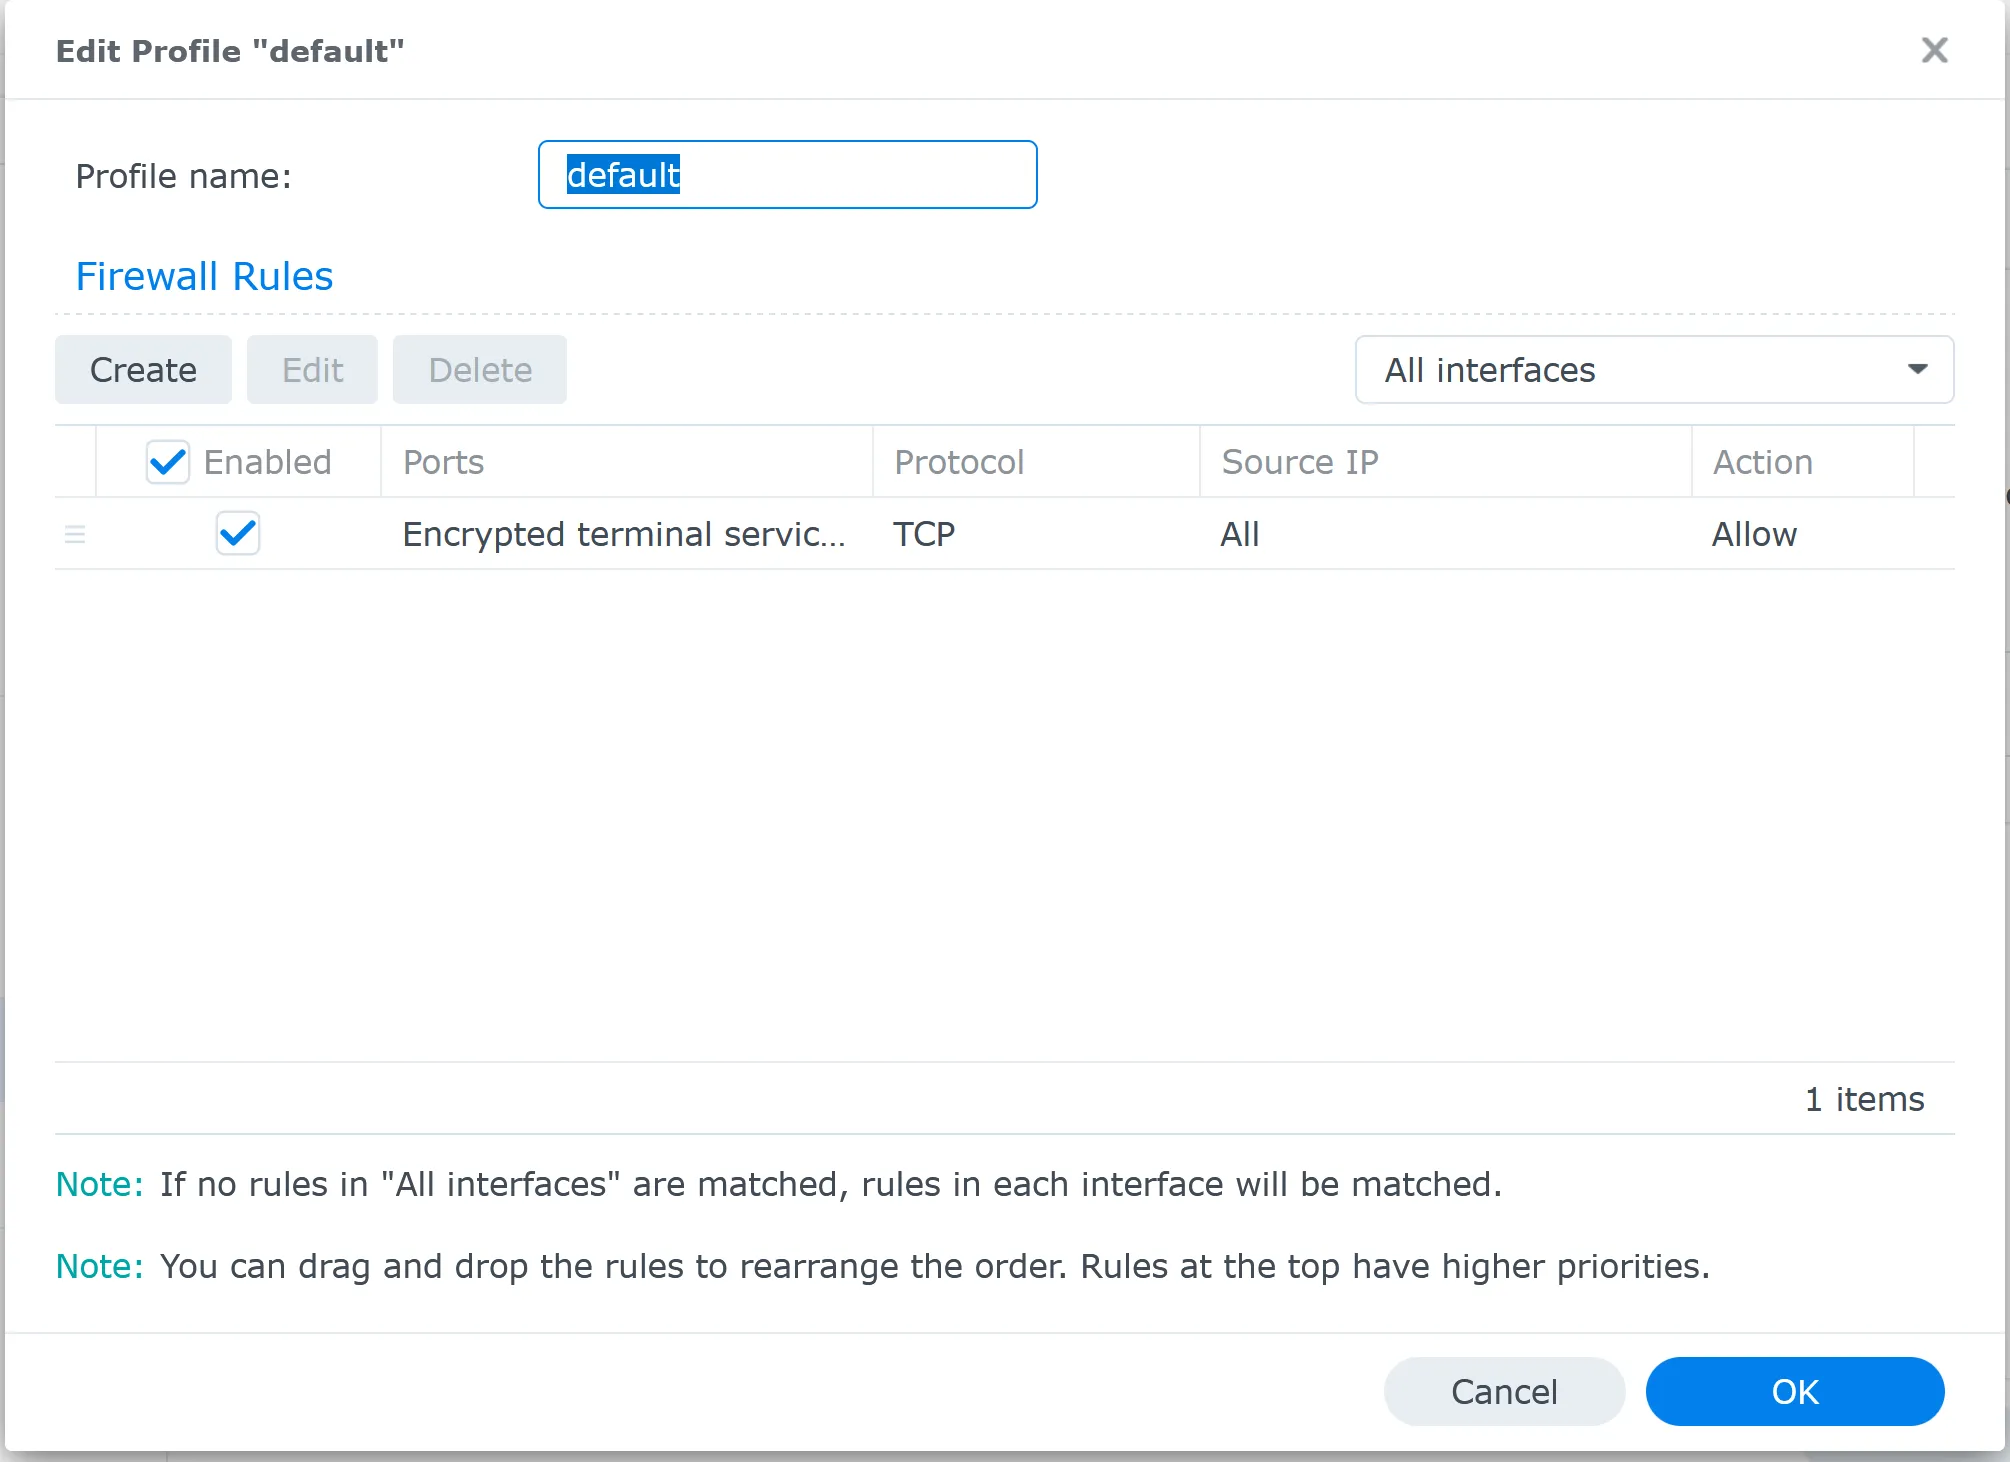
- Create the first Rule to Allow Internal Network Access:
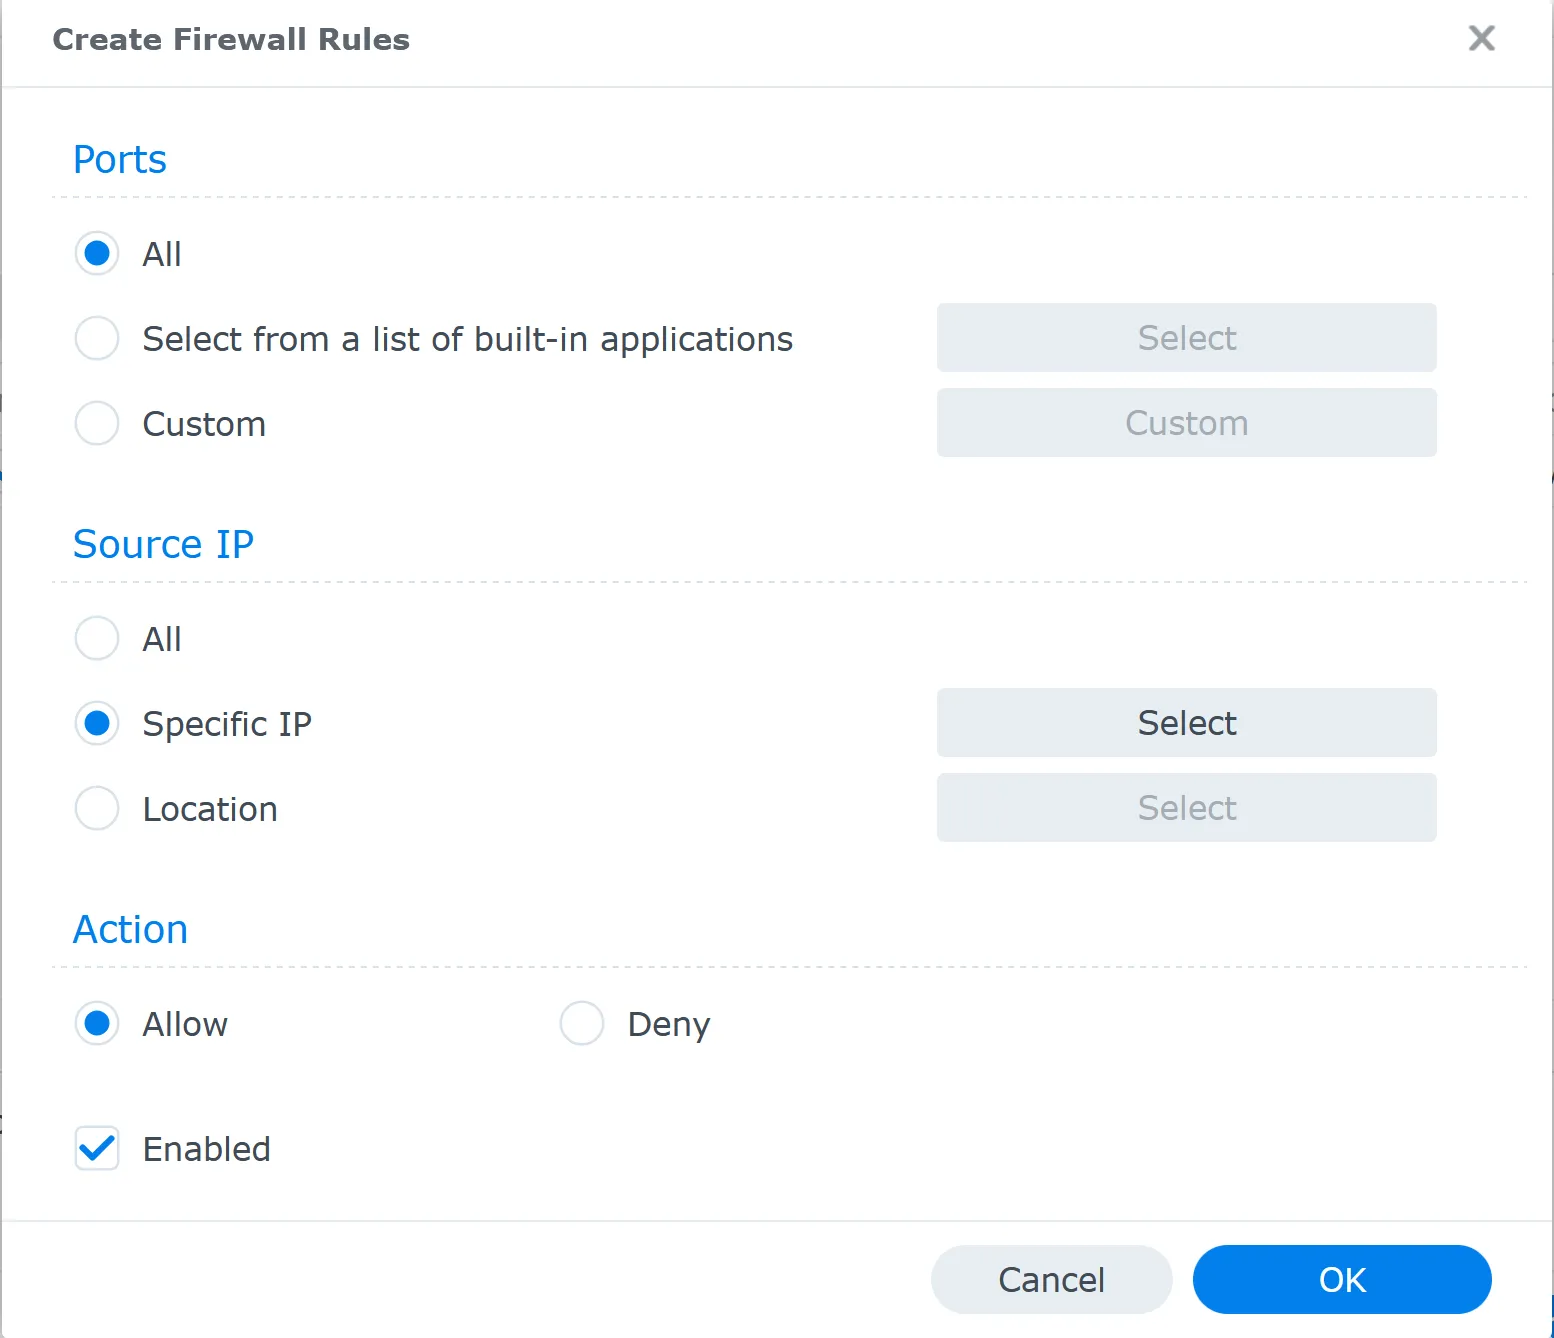
- Click “Create” to add a new rule.
- Set “Action” to “Allow.”
- Set “Ports” to “All.”
- Set “Source IP” to “Specific IP”, then we select “Subnet” your local subnet (e.g., 192.168.1.0/24). If unsure, check your router settings; you can also select “iP range.”
- Click “OK” to save this rule.

- Apply and Test:
- Click “Apply” to activate this rule.
- Test access to your NAS from a device on your local network to ensure it’s still reachable.
- Create Rules for Remote Access (if needed):
- For each application like FileStation, Synology Drive or Synology Photo that needs remote access:
- Click “Create” to add a new rule.
- Set “Action” to “Allow.”
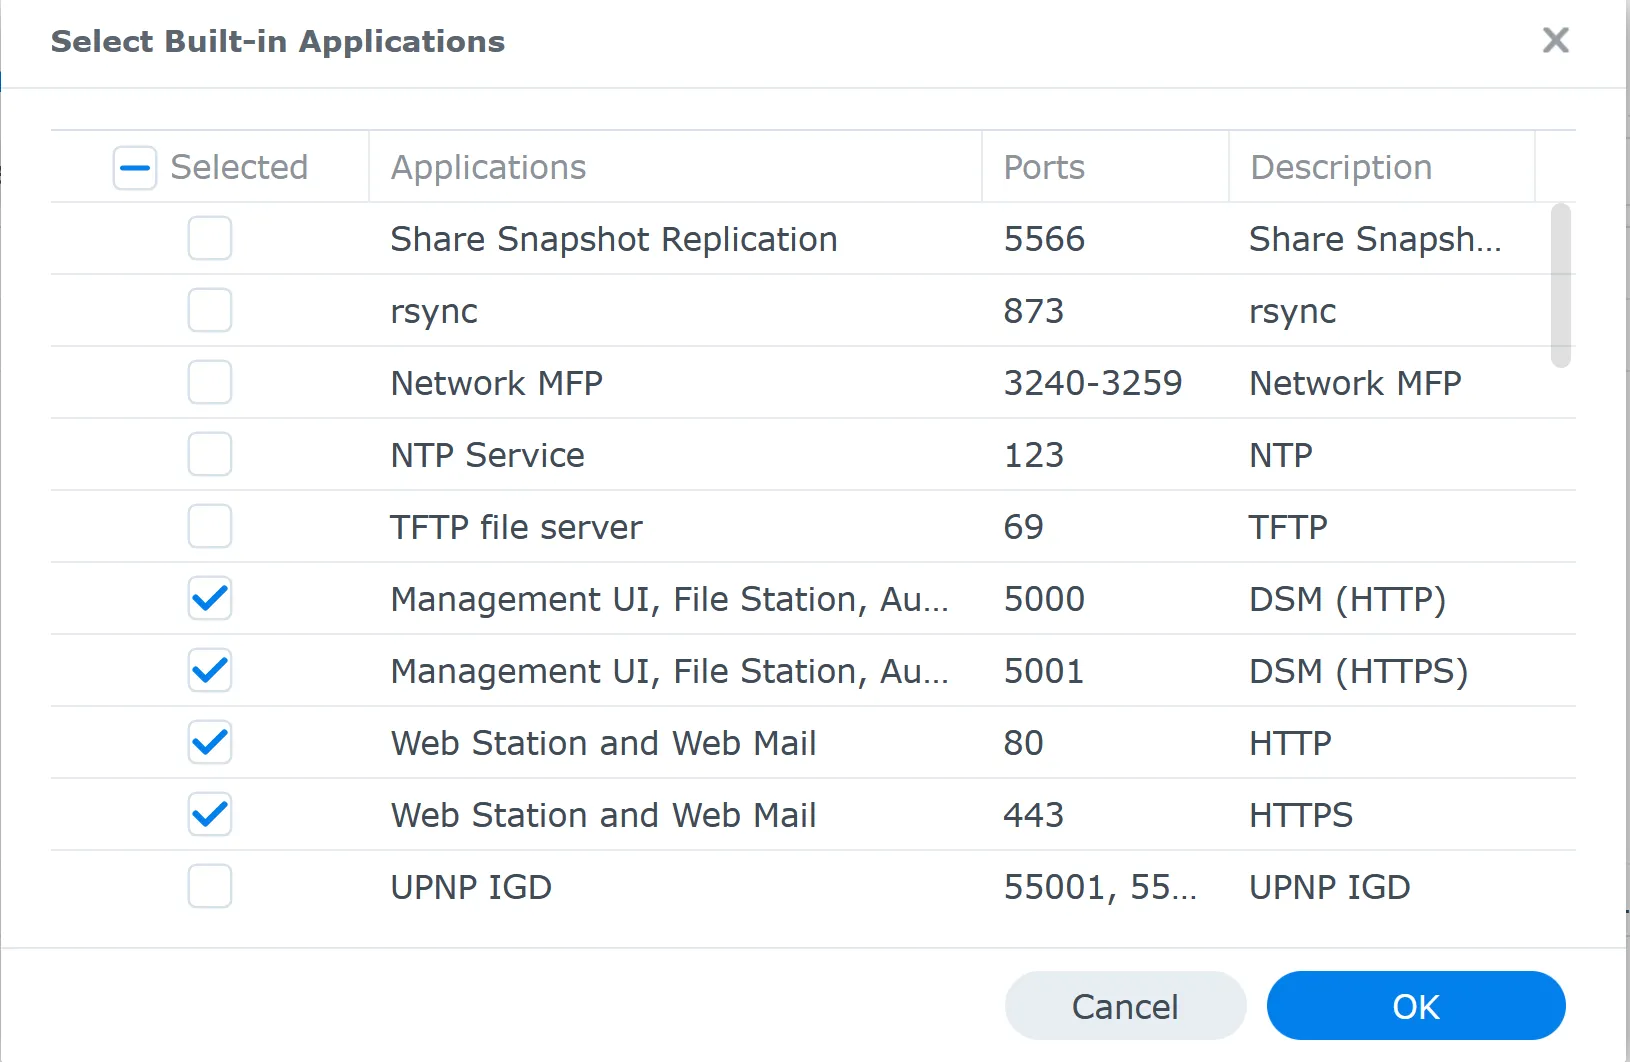
- Set “Ports” to “Select from a list of built-in applications (see image below)
- Set “Source IP” to “All” (or to particular IP addresses for more security).
- Click “OK” to save each rule.
- For each application like FileStation, Synology Drive or Synology Photo that needs remote access:
Select all the applications that require remote access. In my case, I use Synology Drive, Web Station (WordPress on Synology), FTP, and SSH.
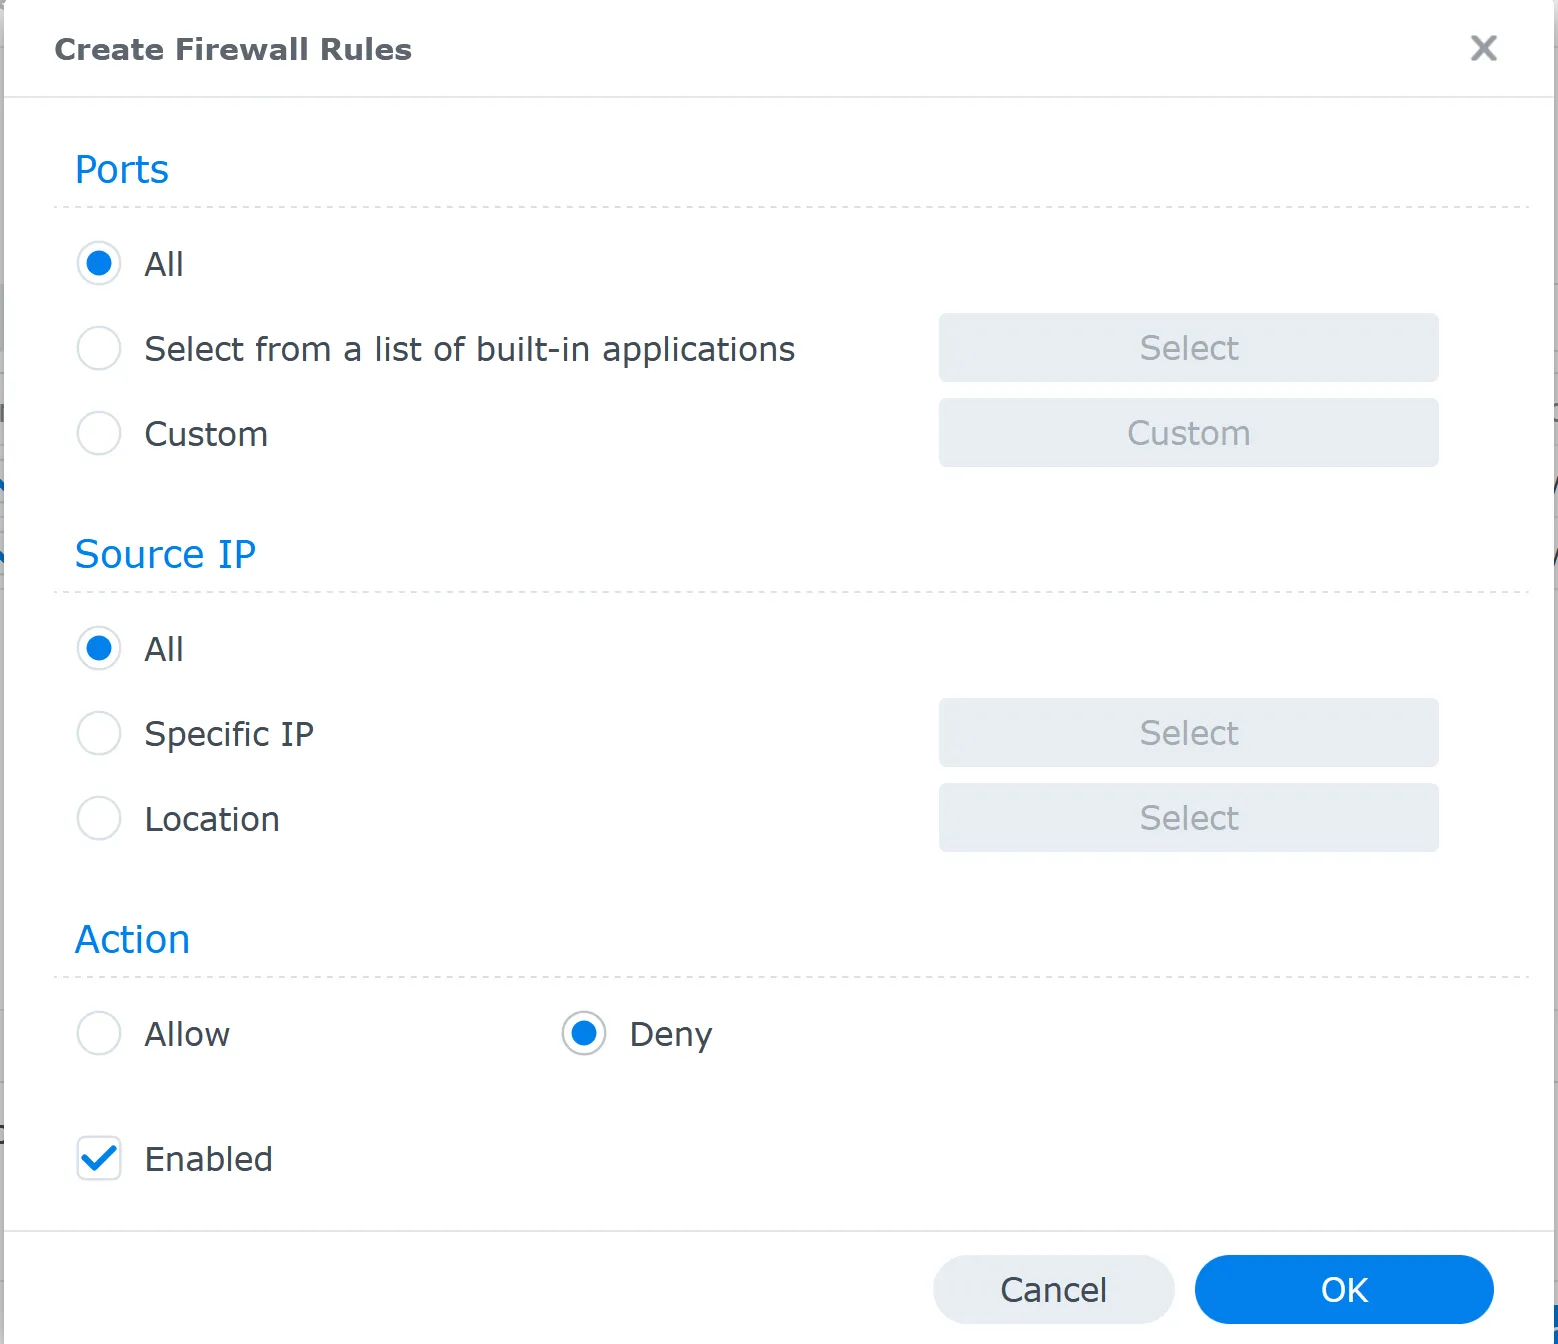
- Create a Deny All Rule (very important):
- Click “Create” to add a new rule.
- Set “Action” to “Deny.”
- Set “Ports” to “All.”
- Set “Source IP” to “All.”
- Click “OK” to save the rule.
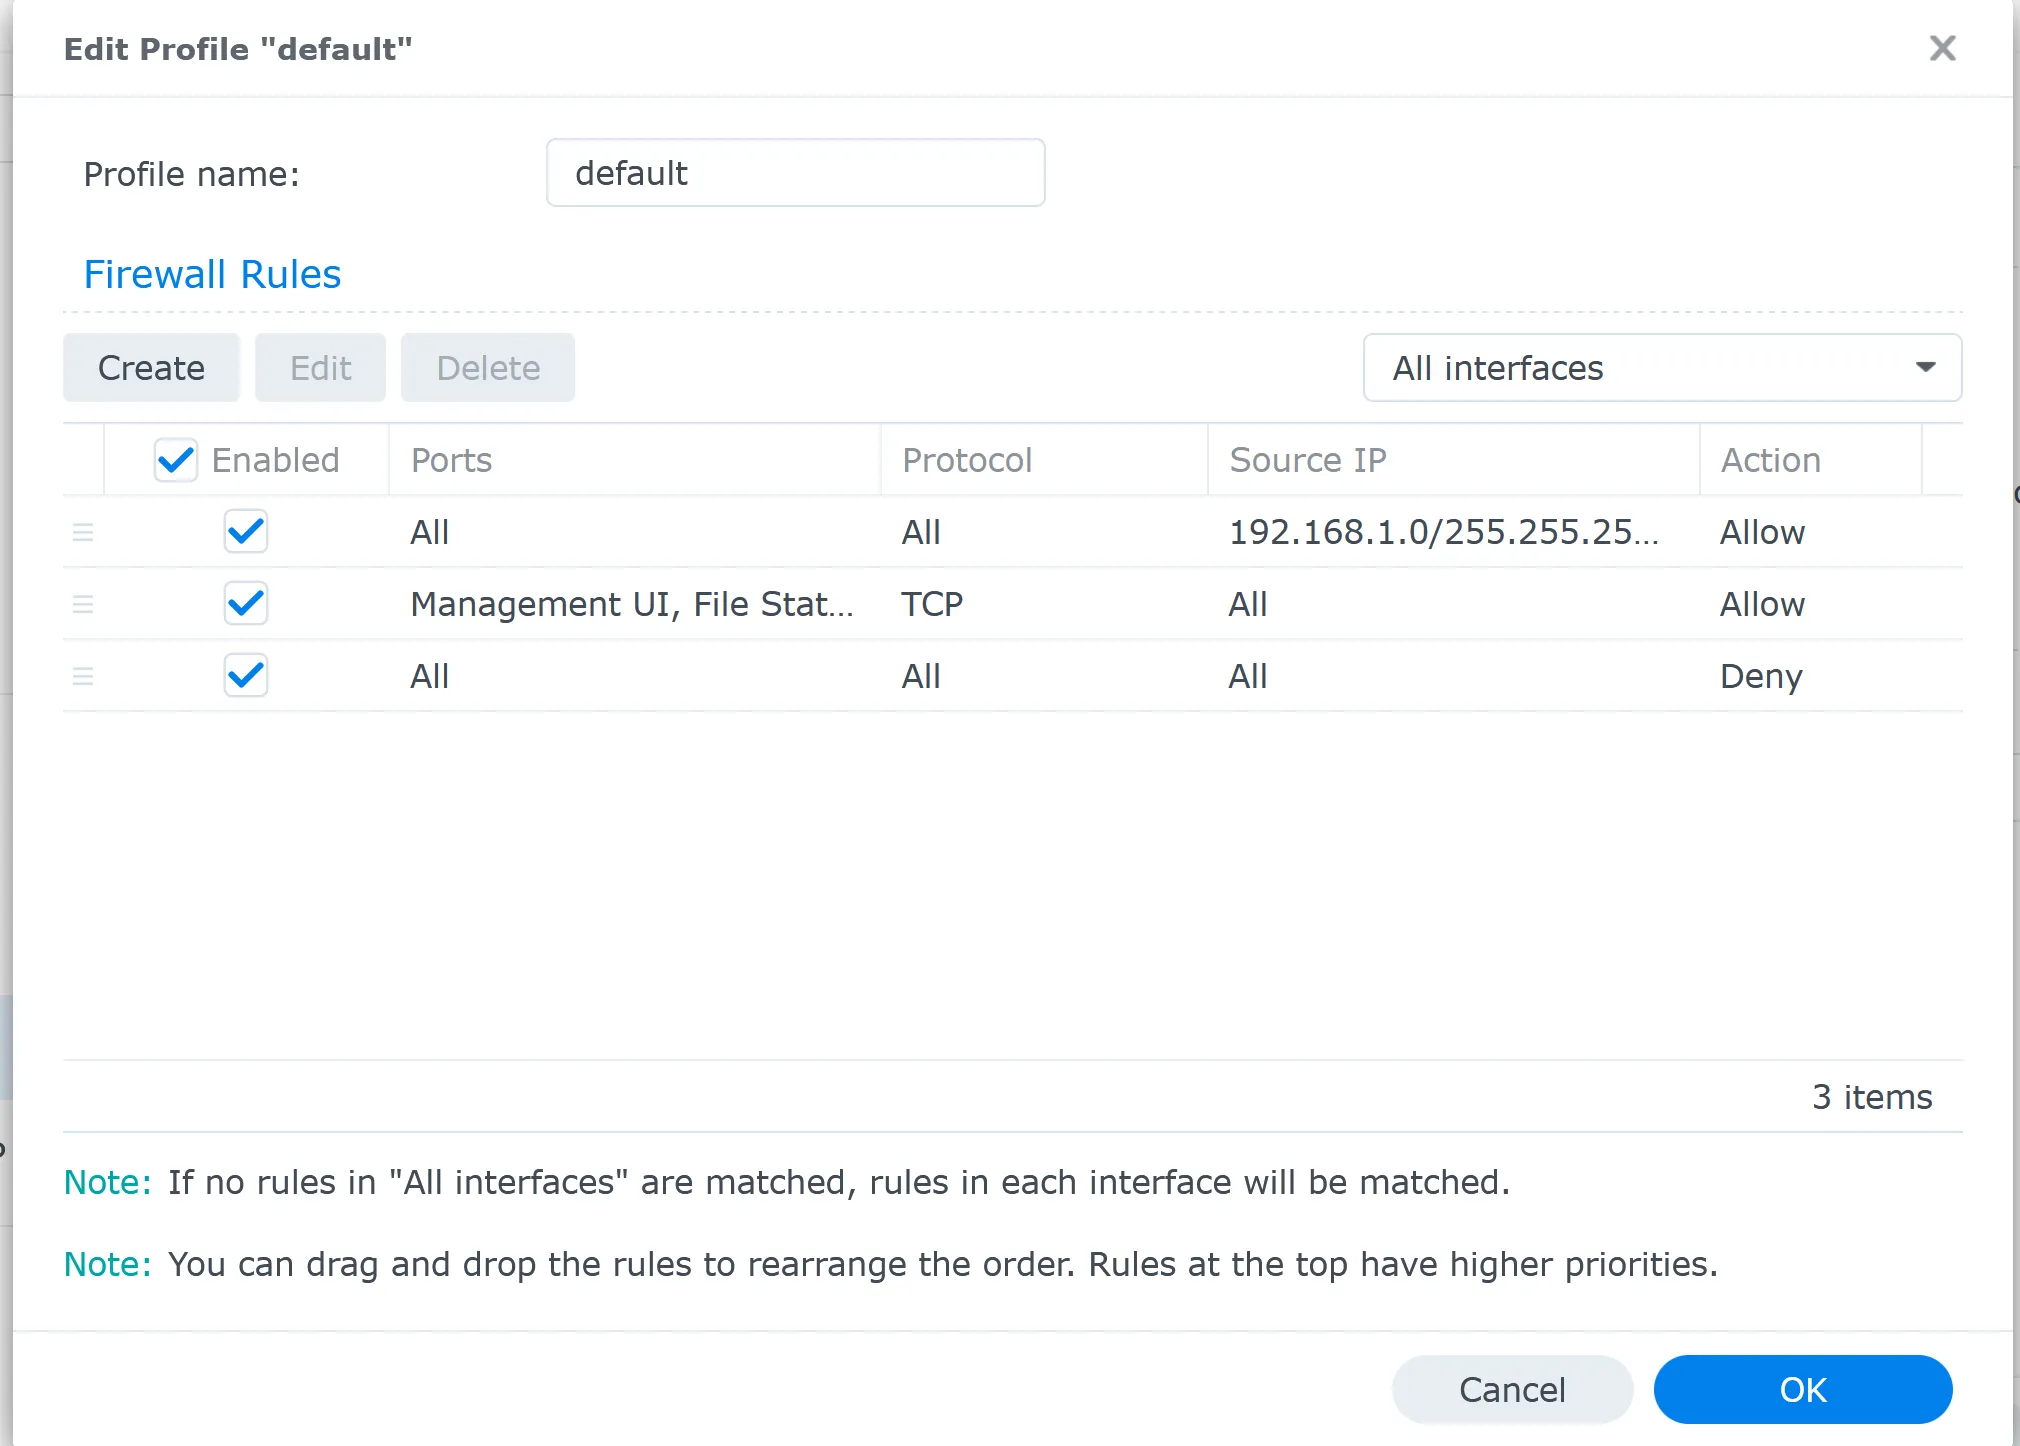
- Arrange Your Rules:
- Ensure the “Allow Local Access” rule is at the top.
- Place specific “Allow” rules for remote access next.
- Keep the “Deny All” rule at the bottom.
- Apply Your Changes:
- Click “Apply” to activate all your firewall rules.
- Click “Apply” to activate all your firewall rules.
- Final Testing:
- Verify local access is still working.
- Test these from outside your network if you’ve set up remote access rules.
Remember, rule order is crucial. The firewall processes rules from top to bottom, stopping at the first match. By placing the “Allow Local Access” rule first and “Deny All” last, you ensure local network access while blocking unwanted traffic.
Always make changes cautiously. If you accidentally lock yourself out, you can still disable the firewall by logging in directly to the NAS.
Using Geographical Restrictions in Synology Firewall
The Synology Firewall offers a powerful feature that allows you to restrict or allow traffic based on geographical locations. This can be particularly useful for enhancing your NAS security. Here’s what you need to know:
How it works: Synology’s firewall can identify the country of origin for incoming traffic based on IP addresses. You can use this to create rules that block or allow access from specific countries.
Best practice: Using geographical restrictions to deny rules rather than allow them is generally recommended. This means you should focus on blocking traffic from countries you don’t expect legitimate access from rather than trying to allow traffic only from specific countries.
Why use deny rules? Deny rules for specific countries are more flexible and less likely to accidentally block legitimate traffic. They allow you to maintain broader access while still protecting against threats from high-risk regions.
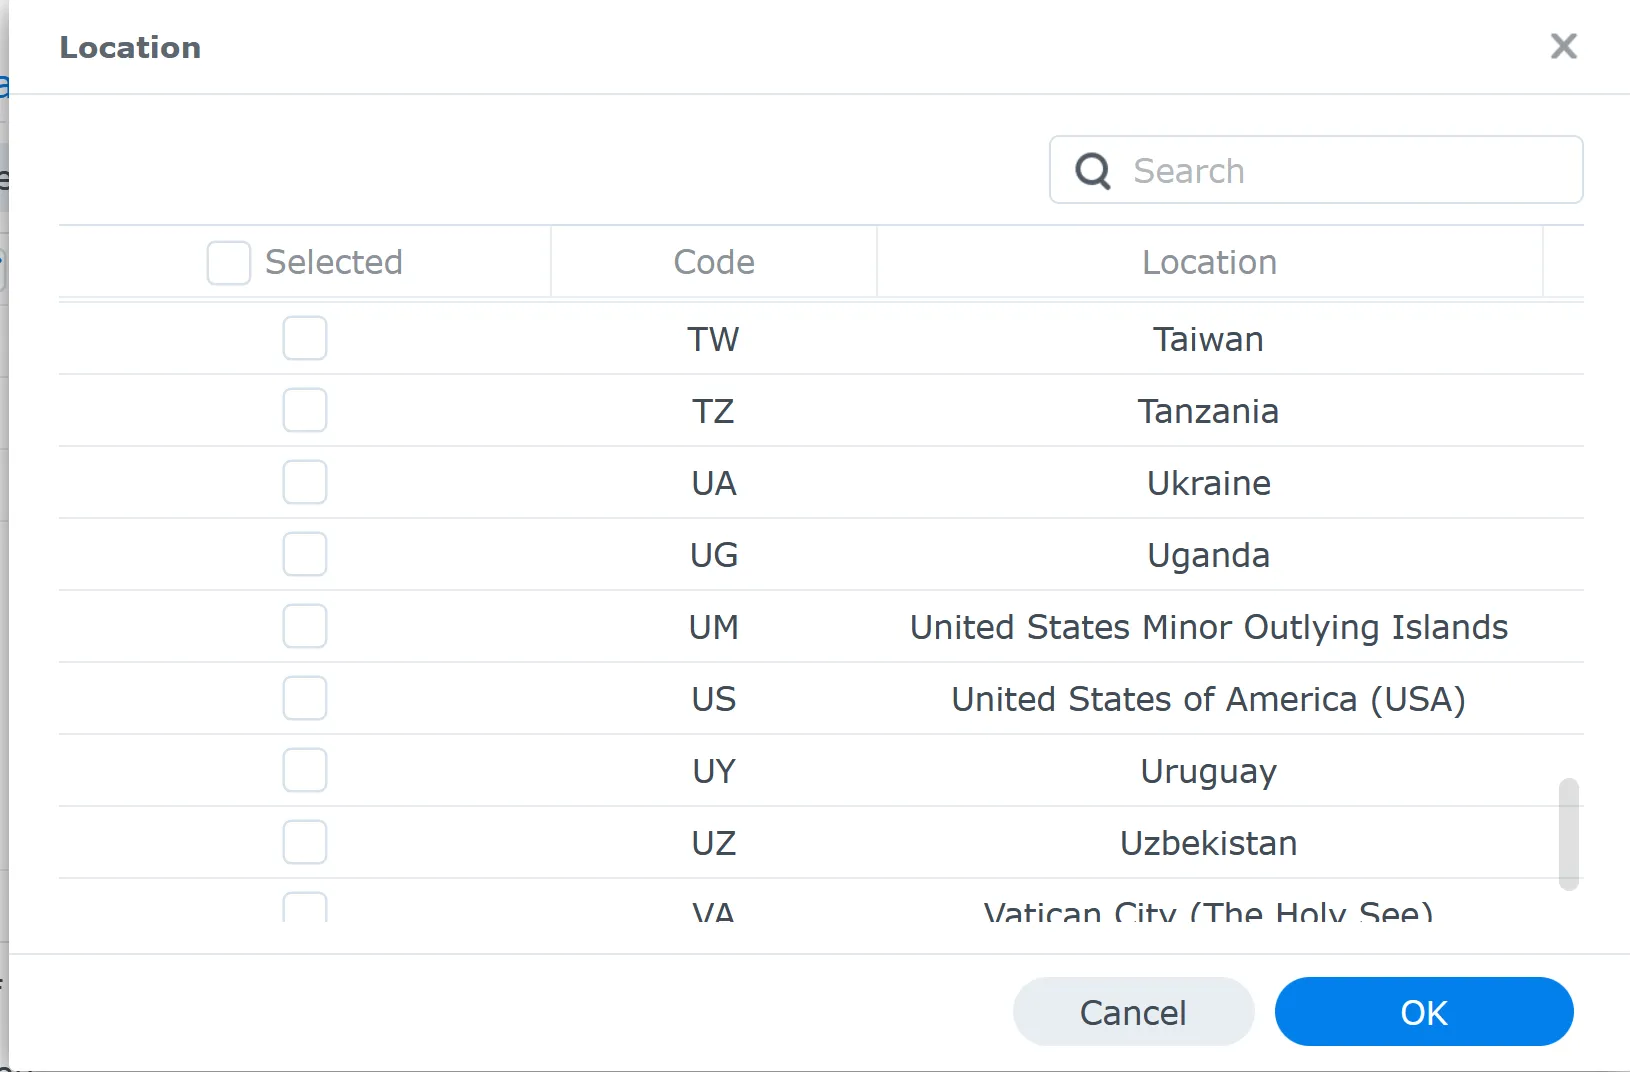
Setting up a country-based deny rule:
- In the firewall settings, create a new rule.
- Set the action to “Deny”.
- Instead of specifying ports or IP addresses, choose the “Location” option.
- Select the countries you want to block traffic from the “Select” button.
Rule Order is Critical: Place your geographical deny rule below your rule, allowing internal network access before any rules allowing access for specific applications or ports. This order ensures that:
- Your local network always has access.
- Unwanted traffic from specific countries is blocked early.
- Allowed external access (like for remote applications) is only evaluated after passing the geographical filter.
How to Regain Access to Your NAS When Locked Out
If you’ve accidentally locked yourself out due to firewall misconfiguration, here are the correct steps to regain access:
- Local Network Access:
- If you’re on the same local network as your NAS, try accessing it via its local IP address.
- Even with strict firewall rules, local access is often possible if you haven’t explicitly blocked it.
- Synology Assistant Method:
- While Synology Assistant can’t bypass the firewall, it can help you locate your NAS on the network.
- Use it to find the current IP address of your NAS if you’re unsure.
- Once you have the IP, access the DSM interface directly through a web browser.
- Reset Network Settings:
- You can reset the network settings, including the firewall, as a last resort.
- Locate the reset button on your NAS (usually a tiny pinhole on the back or side).
- Use a paperclip to press and hold the reset button.
- You’ll hear a beep after about 4 seconds. Release the button.
- This resets network settings to default, including disabling the firewall, without erasing your data.
- Note: The exact reset procedure may vary slightly between models, so check your NAS’s manual for specific instructions.
- SSH Access (if enabled before lockout):
- If you had enabled SSH access before the lockout, you might be able to connect via SSH and manually adjust firewall settings.
- This requires command-line knowledge and should be done cautiously.
FAQ
Does a NAS need a Firewall?
Yes, a NAS server definitely needs a firewall. A firewall is crucial for protecting the valuable data stored on the NAS from unauthorized access, especially if it is accessible from the internet. It helps control which services are accessible and from where reducing your NAS’s vulnerability to potential threats. While your router likely has a firewall, the NAS firewall provides an additional, more specific layer of protection. Think of it as an extra lock on the door to your digital valuables.
What are the most critical firewall rules to set up on a Synology NAS?
The most critical firewall rule for a Synology NAS is allowing all traffic from your local network while denying all incoming traffic by default. This ensures you can always access your NAS from within your home or office while blocking potential threats from the internet. If you need remote access, create specific rules only for the necessary services, like HTTPS protocol (website) on port 443, rather than opening all ports. It’s also crucial to protect administration ports, like 5000 for DSM, by restricting them to local access only. Remember, the key is to start restrictive and then carefully allow only what’s absolutely necessary for your needs.
I’d love to hear from you — was this article helpful? Share your thoughts in the comments below. If you prefer, you can also reach me by email or connect with me on Reddit at Navigatetech.
Before you go …
Before you go, if you’re interested in maximizing the utility of your Synology NAS, you’ll want to check out How to Set Up and Use Synology QuickConnect. This guide will show you how to securely access your NAS from anywhere, enhancing your remote connectivity. It’s a perfect next step after configuring your firewall. Dive into it to ensure your Synology experience is both secure and convenient!
Related Articles
About the author
Hi, I’m Edy Werder. I write hands-on guides about Proxmox, homelab servers, NAS, and WordPress, based on real setups I run and document.
No sponsors, no fluff—just real configs and results.
Enjoying the content?
