
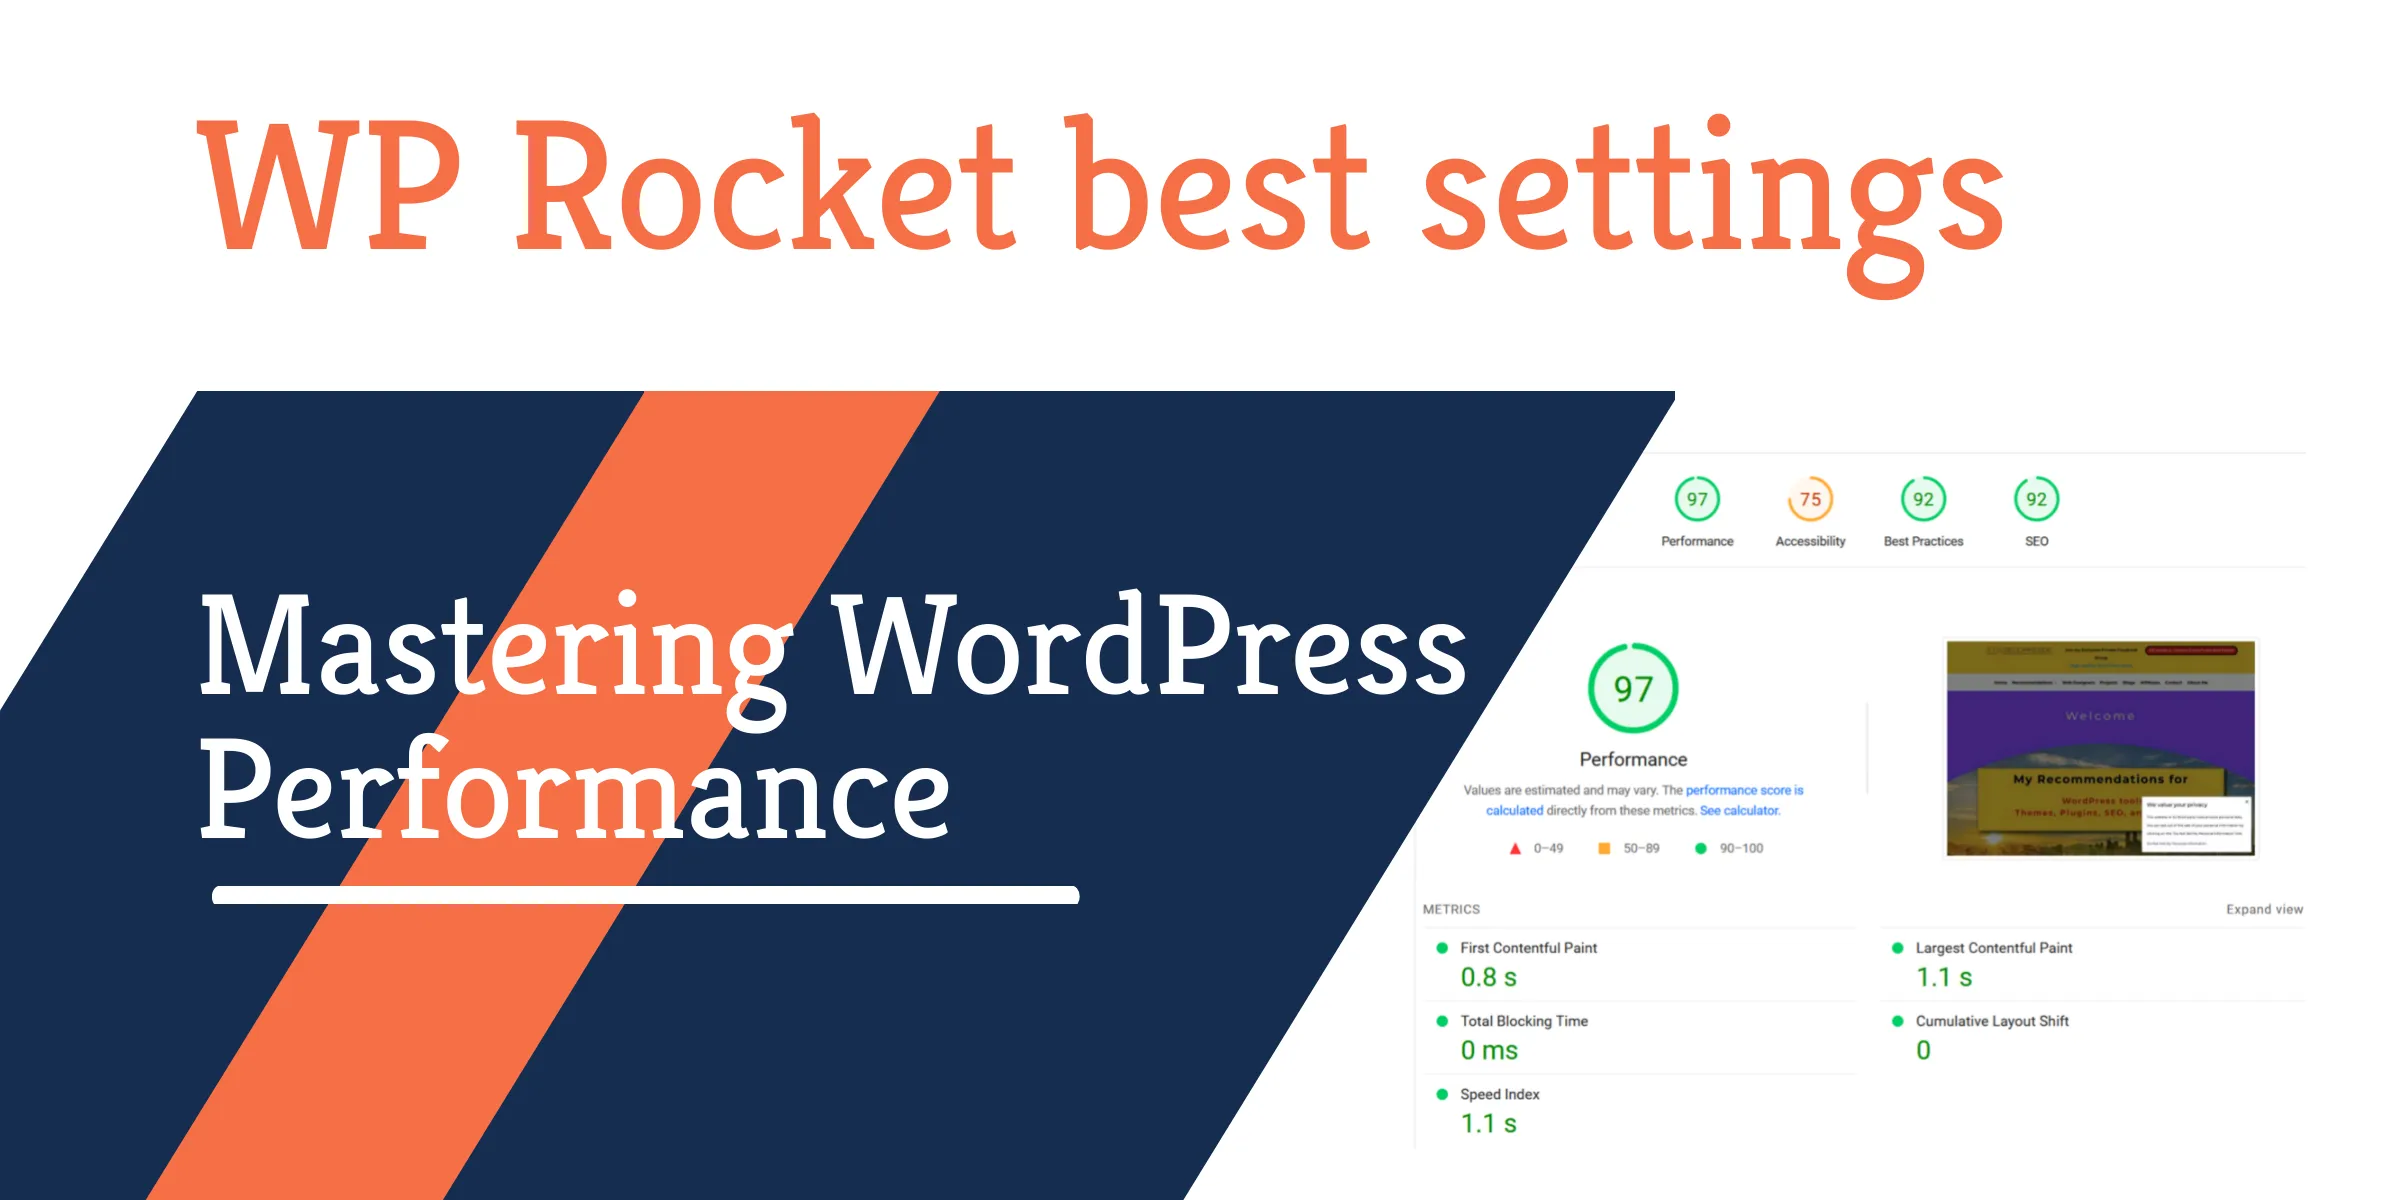
By Edy Werder — IT Consultant & Tech Blogger
(with screenshot for latest version 3.14 (June 2023)
Navigating the digital labyrinth of website performance can often seem daunting. When it comes to WordPress, however, one solution consistently stands out – WP Rocket. Yet, as many seasoned developers will tell you, mastering WP Rocket involves more than flipping switches or ticking boxes.
You’ve likely heard the term “WP Rocket best settings” thrown around quite a bit, and while it might seem straightforward, the reality is a bit more nuanced. Strictly speaking, there is no one-size-fits-all for these settings because your optimal configuration depends on various factors.
What works best for one site may be less effective for another. So how do you navigate this complex landscape and find the best settings for your site? Don’t worry,
In this article, I will guide you through the ins and outs of WP Rocket’s various settings, explaining the settings and helping you optimize your WordPress site for its best performance. Get ready to boost your website speed and improve your user experience like never before.
What is WP Rocket?
In short, It’s a speed optimization plugin that helps reduce your website’s loading time by optimizing CSS, HTML, and JavaScript files.
But it’s far more than just a simple optimization tool. This powerful plugin is a comprehensive solution designed to significantly enhance your website’s performance and improve its ranking on search engine results pages.
WP Rocket operates by leveraging a multitude of performance optimization techniques. For starters, it employs page caching. It stores a static version of your website in the visitor’s browser, eliminating the need for the server to generate the page each time it’s requested, resulting in quicker load times.
Moreover, WP Rocket has built-in features for GZIP compression and browser caching. GZIP compression shrinks your webpages’ size before sending them to the user’s browser, speeding up download times. Browser caching, on the other hand, stores some of your website’s files on the visitor’s device, so their browser doesn’t have to download them each time they visit your website.
Beyond that, WP Rocket also provides a user-friendly interface for handling advanced optimization techniques such as lazy loading of images and videos, minifying and concatenating CSS and JavaScript files, DNS prefetching, and more. These optimizations can lead to dramatic performance improvements, but they often require technical knowledge to implement manually. WP Rocket simplifies the process, making these advanced techniques accessible even to less technical users.
How to set up WP Rocket?
Setting up WP Rocket on your WordPress site is surprisingly simple, even for those who may not consider themselves tech-savvy.
Once you’ve purchased a license, you can download the WP Rocket plugin from your account on the WP Rocket website.
Next, navigate to the plugins section of your WordPress dashboard, click on ‘Add New,’ and then ‘Upload Plugin.’ Choose the WP Rocket zip file you downloaded and click ‘Install Now.’
After the installation, activate the plugin, and voila, WP Rocket is now set up on your site.
The default settings are designed to boost your site’s performance right out of the gate.
Remember, the ‘WP Rocket best settings’ depend on your site and its requirements.
How to test the WP Rocket best settings?
I exclusively test with Google page speed metrics. It is the best way since you get scores for mobile and desktop, and the score of Google ultimately matters. From my experience, GTmetrix tests use a different technology that can sometimes draw false conclusions. Getting a high score on GTmetrix may seem easy, but it can be misleading.
Now let’s dive in and go over each option WP Rocket has. As mentioned earlier, as of June 2023, screenshots and recommendations are based on version 3.14.
WP Rocket best settings illustrated
Cache
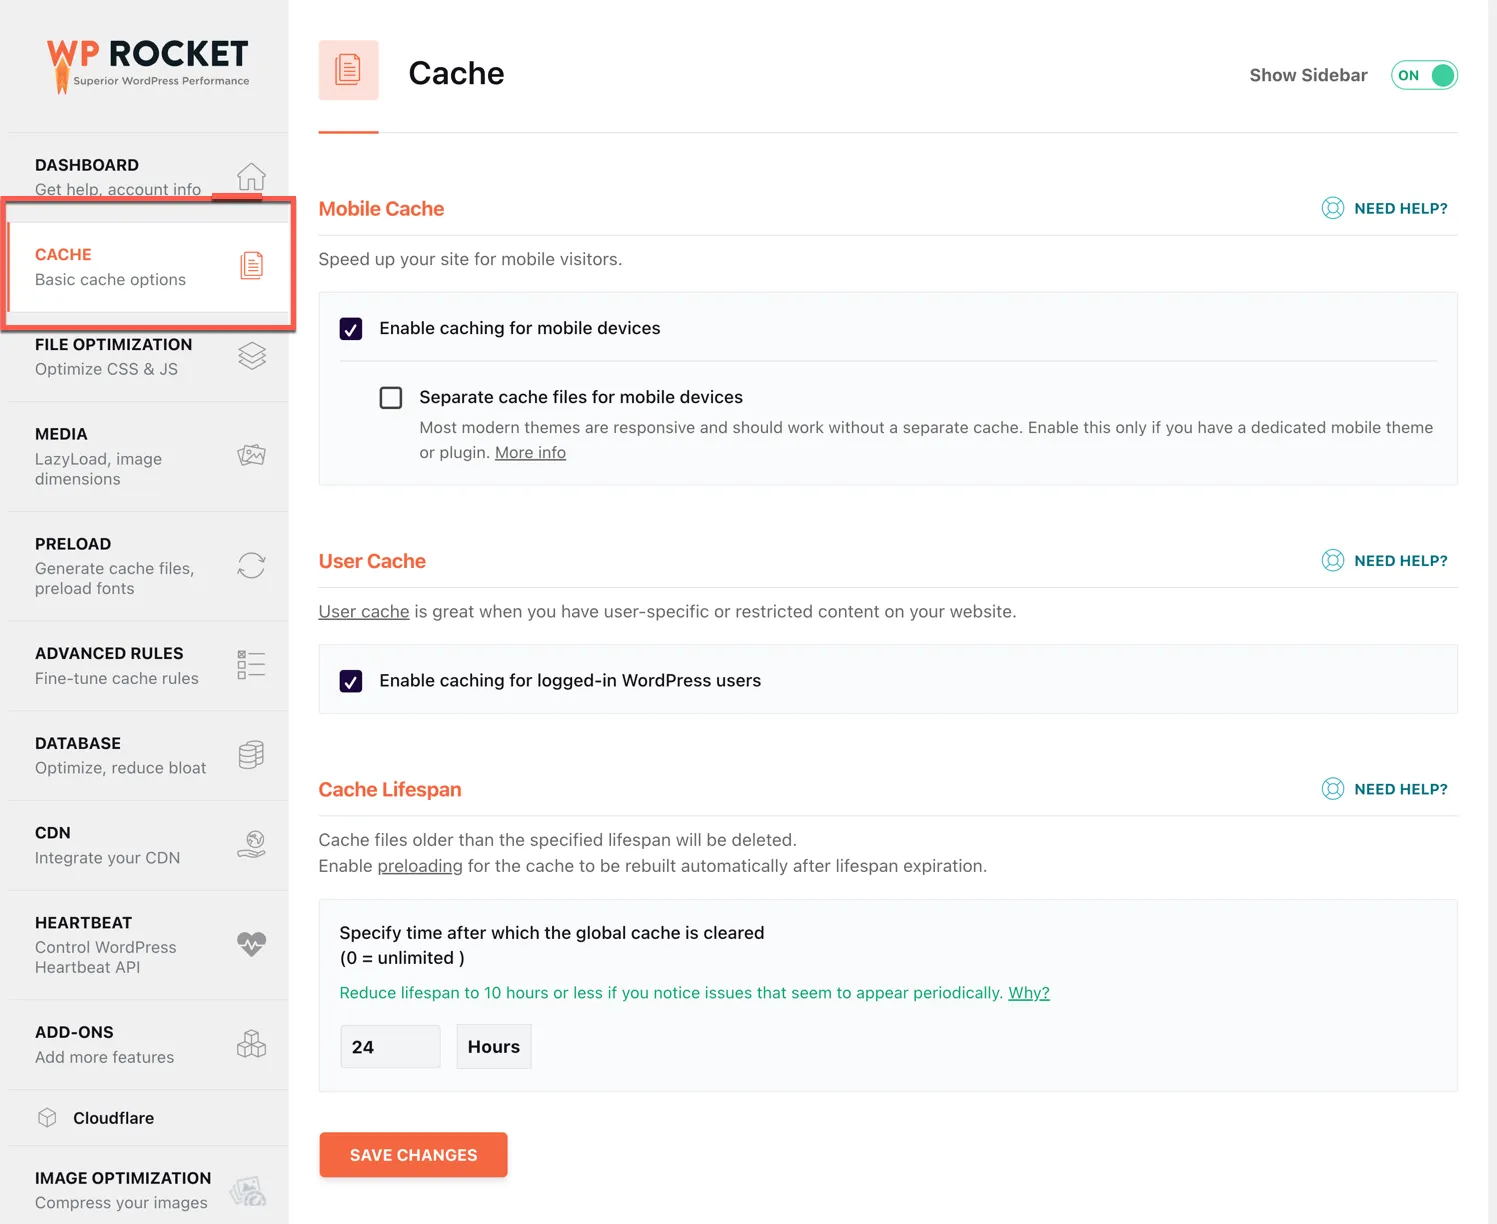
Enabling caching for mobile devices is generally recommended. However, it should only be ticked if your website is responsive and can adjust to smaller screens.
Enabling this option in WP Rocket generates a dedicated cache file for mobile devices unique from the ones used for tablets or desktops. This ensures that every cached document is served its respective file optimized for size and device constraints, promoting faster loading times.
Once User Cache is activated, WP Rocket generates a unique set of cache files dedicated to every logged-in WordPress user.
This feature comes in handy when you have user-specific content on your website. Standard caching is applied for visitors who are not logged in, whereas logged-in users enjoy personalized caching with individual files designated for each user.
Sets the time to clear the cache. The default is 10 hours.
Don’t forget to hit the ‘save changes button at the bottom.
The screenshots are my WP Rocket best settings for the website edyrecommends.com. My website is at Siteground, and I use the Cloudflare network. I use the Divi theme builder.
File Optimization
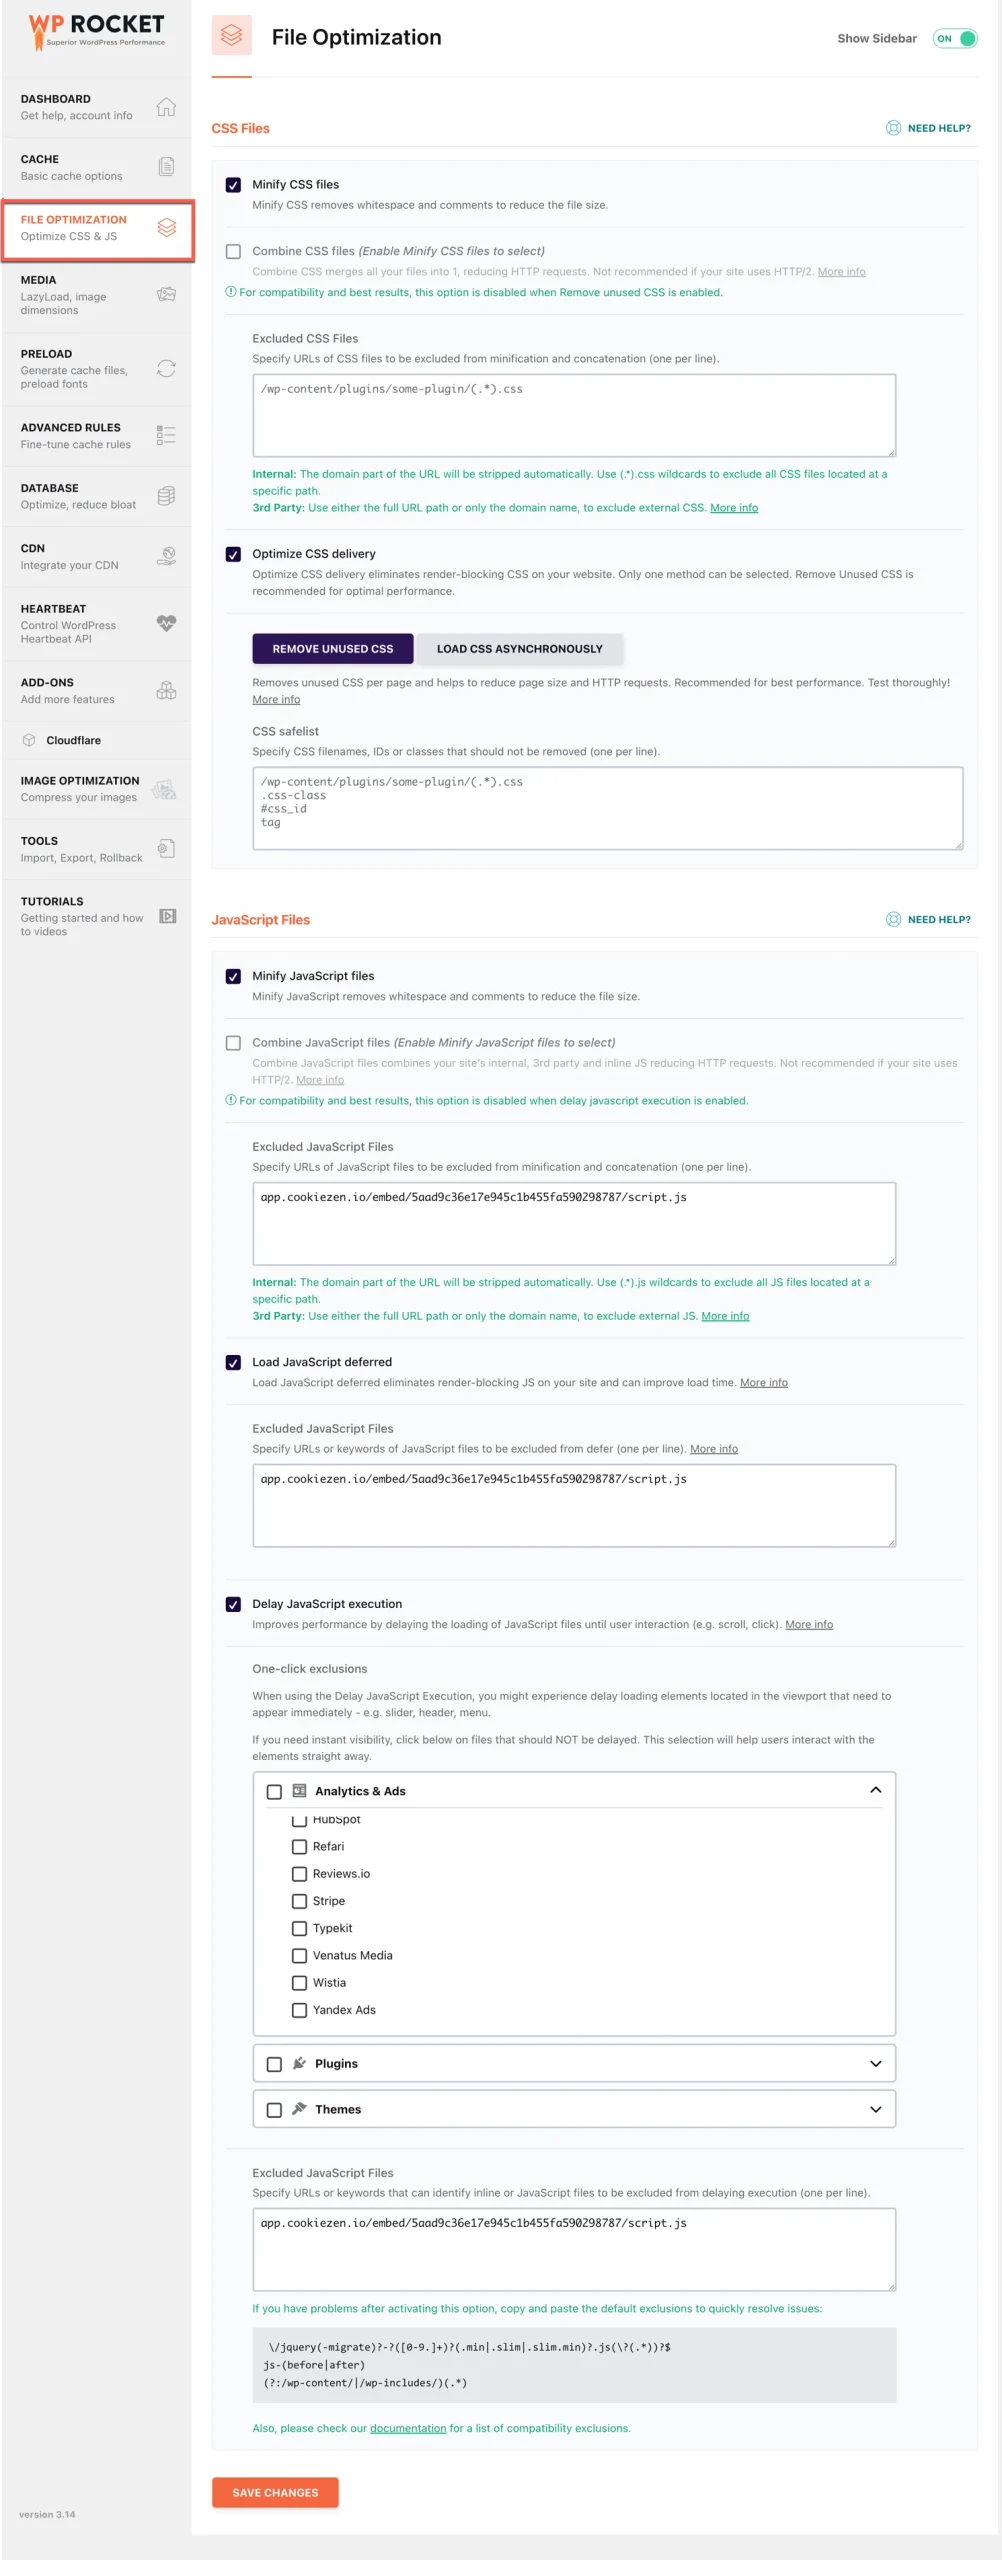
CSS Files
Minification refers to eliminating white space and comments from code to reduce file size and increase download speed. However, it’s important to note that minification alone doesn’t reduce the number of HTTP requests on your site.
Enabling the Combine CSS feature consolidates all CSS files into one file, diminishing the number of HTTP requests on your site – an ideal way to reduce load times on HTTP/1 websites. However, this isn’t necessary for websites running on HTTP/2 or HTTP/3
The ‘Remove Unused CSS’ feature cleans up your code by removing any unnecessary CSS and redundant stylesheets, that aren’t being used. This ensures that each page retains only the CSS it needs, optimizing performance and enhancing website speed.
JavaScripts Files
It’s the same process as minify CSS Files
Here again same process as combining CSS Files. Not needed for websites running HTTP/2 or HTTP3.
When the Load JavaScript deferred feature is turned on, the page is rendered first and the scripts are loaded later, improving performance.
WP Rocket’s most powerful JavaScript optimization is Delay JavaScript execution. This feature prioritizes site rendering by delaying script execution.
You notice there is also an exclude box. There you can exclude CSS files or JavaScript files from the option.
It goes without saying when you exclude JavaScript, the page score will decrease, especially for mobile. In my case, the cookie banner would not load properly.
WP Rocket simplifies JavaScript delay, making it effortless to implement.
In Version 3.13, WP Rocket introduced a powerful tool. Like many others, you have been in a situation where you enabled JavaScript delay and then discovered that an element on your website doesn’t load properly.
Do you know how to fix it? You probably have a guess, but you must know which JavaScript to fix it. WP Rocket recognizes most, not all, plugins on your website and gives you the option to exclude them from delayed loading.
Media

LazyLoad is an image loading technique that defers the loading of images on your website until users scroll down the page and actually need to see them. This enhances your website’s loading speed, provides a better user experience, and saves bandwidth; all while serving the same imagery users crave!
Lazy delays the loading of iframes on your website until necessary. Specifically, it waits until a user scrolls down to the relevant section, allowing for quicker load times and improving the overall user experience.
I have not enabled any settings in the Media tab. I uploaded all my images in WebP format. WebP is the recommended media format for all your images.
Preload
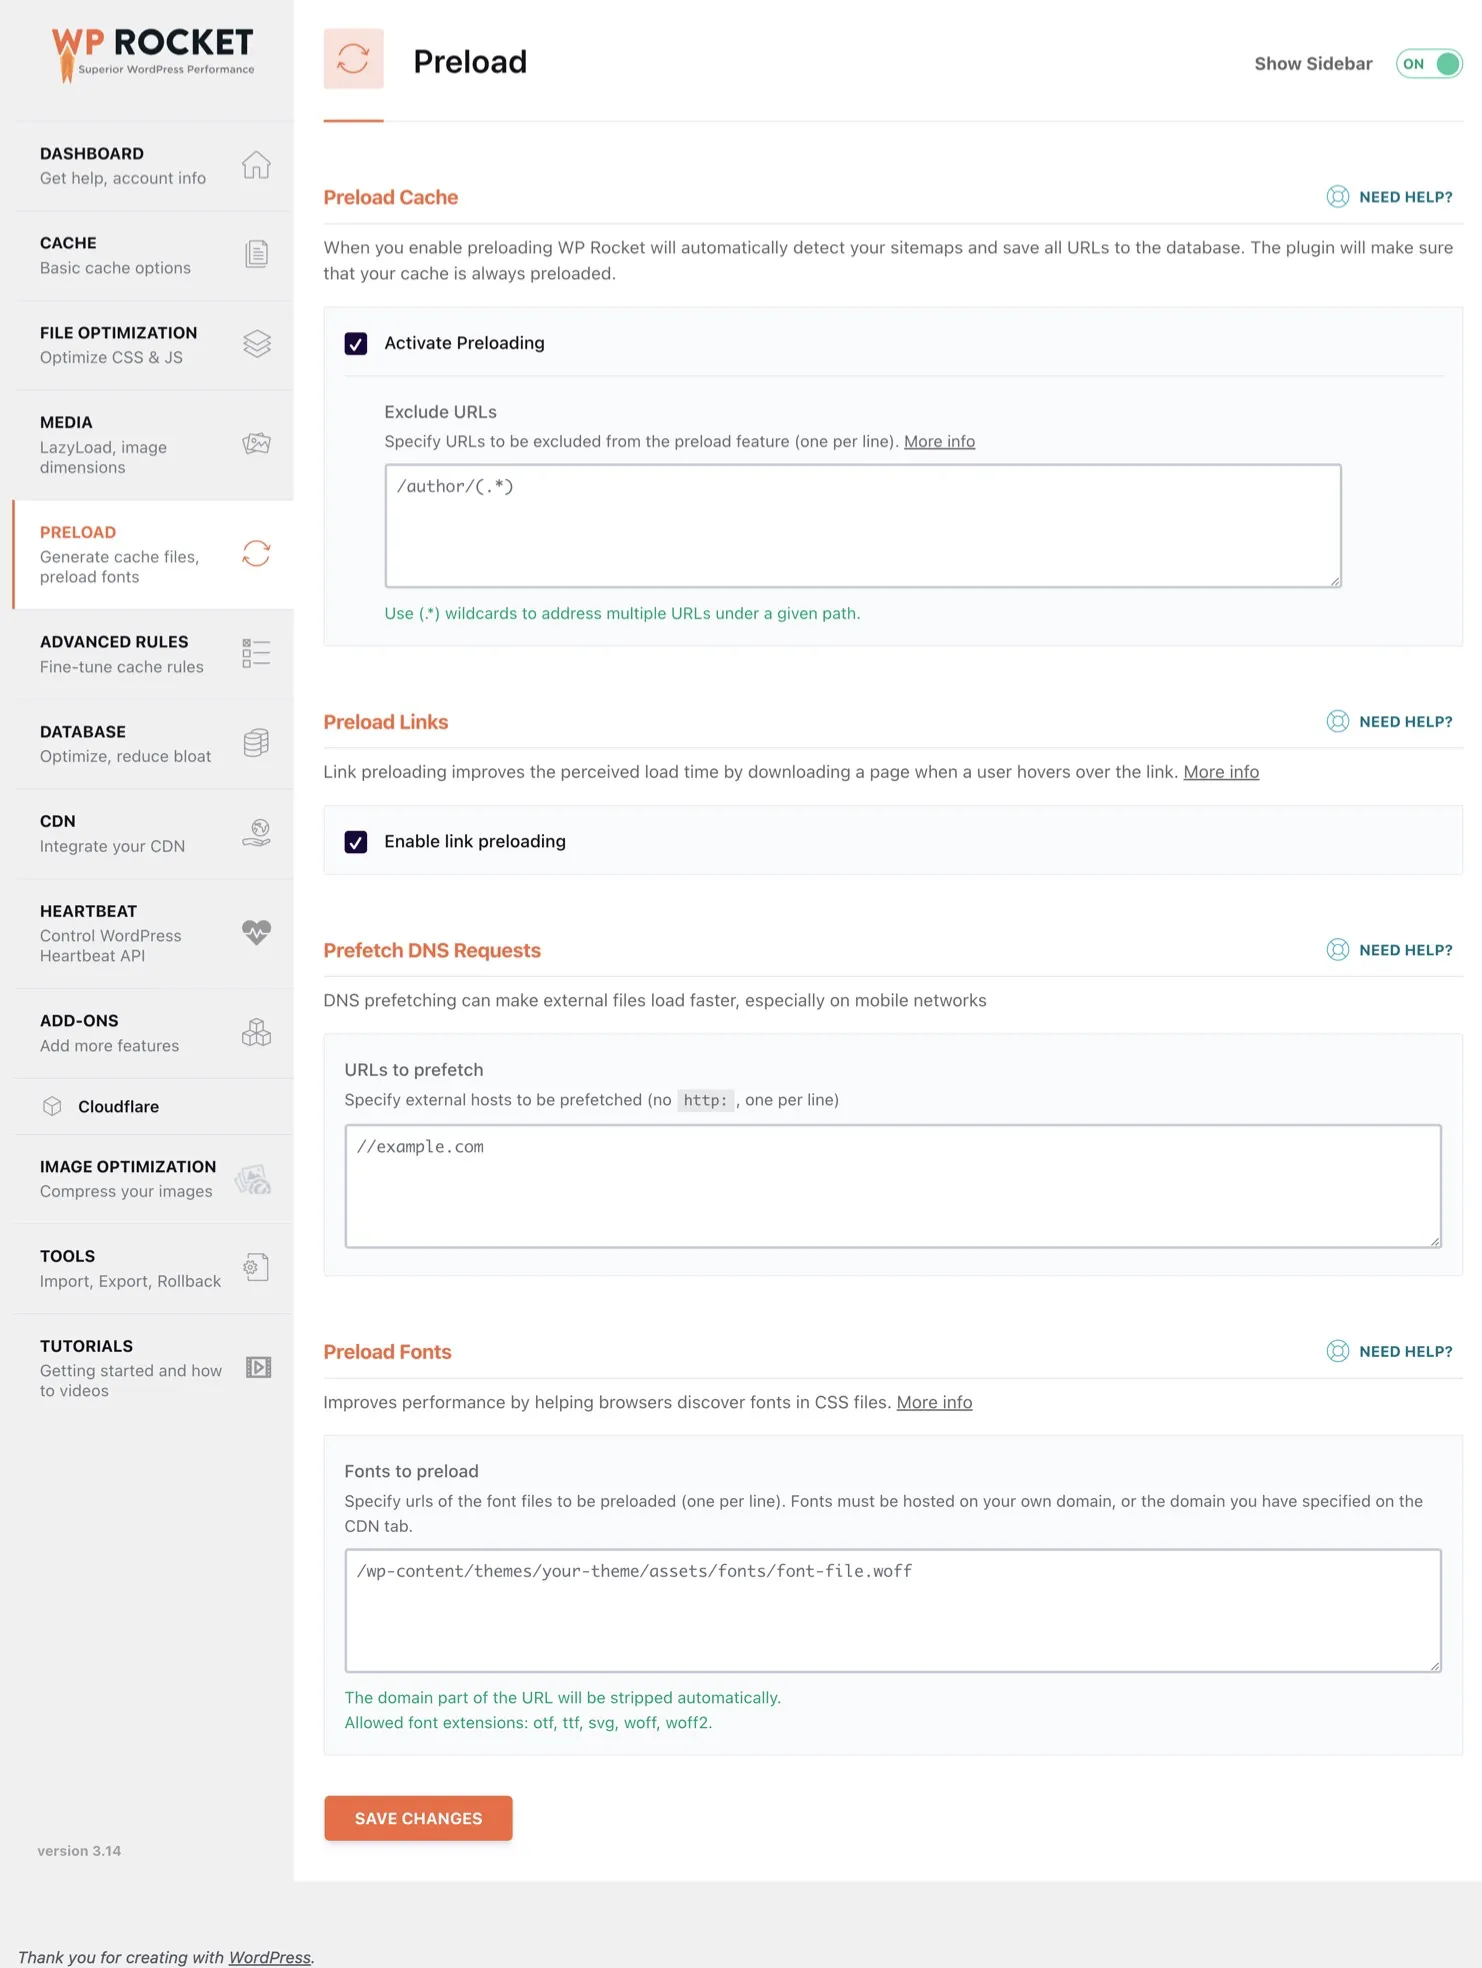
The Preload Cache feature is a powerful tool that simulates a visit to your site’s pages, creating cache files that bring blazing-fast speeds to your website. Enabled by default upon plugin installation, you no longer have to wait for real visitors to your site before starting to serve cache files. Consequently, your pages open quickly right from the very first visit. The Preload feature will use the Sitemap
By preloading links, the sensed loading time of pages is enhanced for a user navigating your website. If a user hovers or touches a link for at least 100ms, the HTML of the linked page will be fetched in the background. This means the page loads almost immediately when they click the link!
While this option enhances user experience and perceived load time, it won’t affect your PageSpeed score
Loading content from domains beyond your own forces the visitor’s browser to retrieve the file(s) from elsewhere. The browser performs DNS resolution by connecting to that domain during this process. To expedite this process, DNS prefetching instructs the browser to establish this connection preemptively. As a result, when the file is requested, it has already been retrieved and is ready to display.
Using the Preload Fonts feature, a web developer can direct a browser to download fonts earlier than it normally detects. This is often necessary when a font is referred to via a CSS file. This optimizes loading time and leads to better user experience.
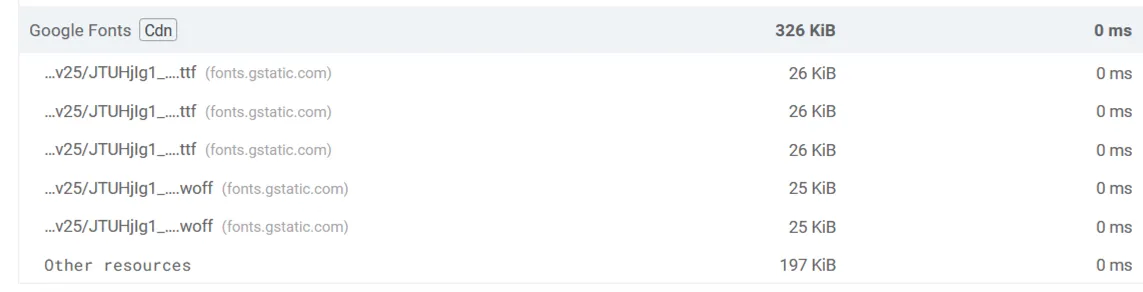
You can identify the Fonts to Preload using Google Page Speed Insights. Open the section “Reduce the impact of third-party code.” Highlight each font and right-click and copy the link. The font must be hosted locally or on your CDN.
Read here in the WP Rocket documentation to get more insight information about font preloading. I recommend using Code Snippets instead of the Head & Footer plugin.
Advanced Rules
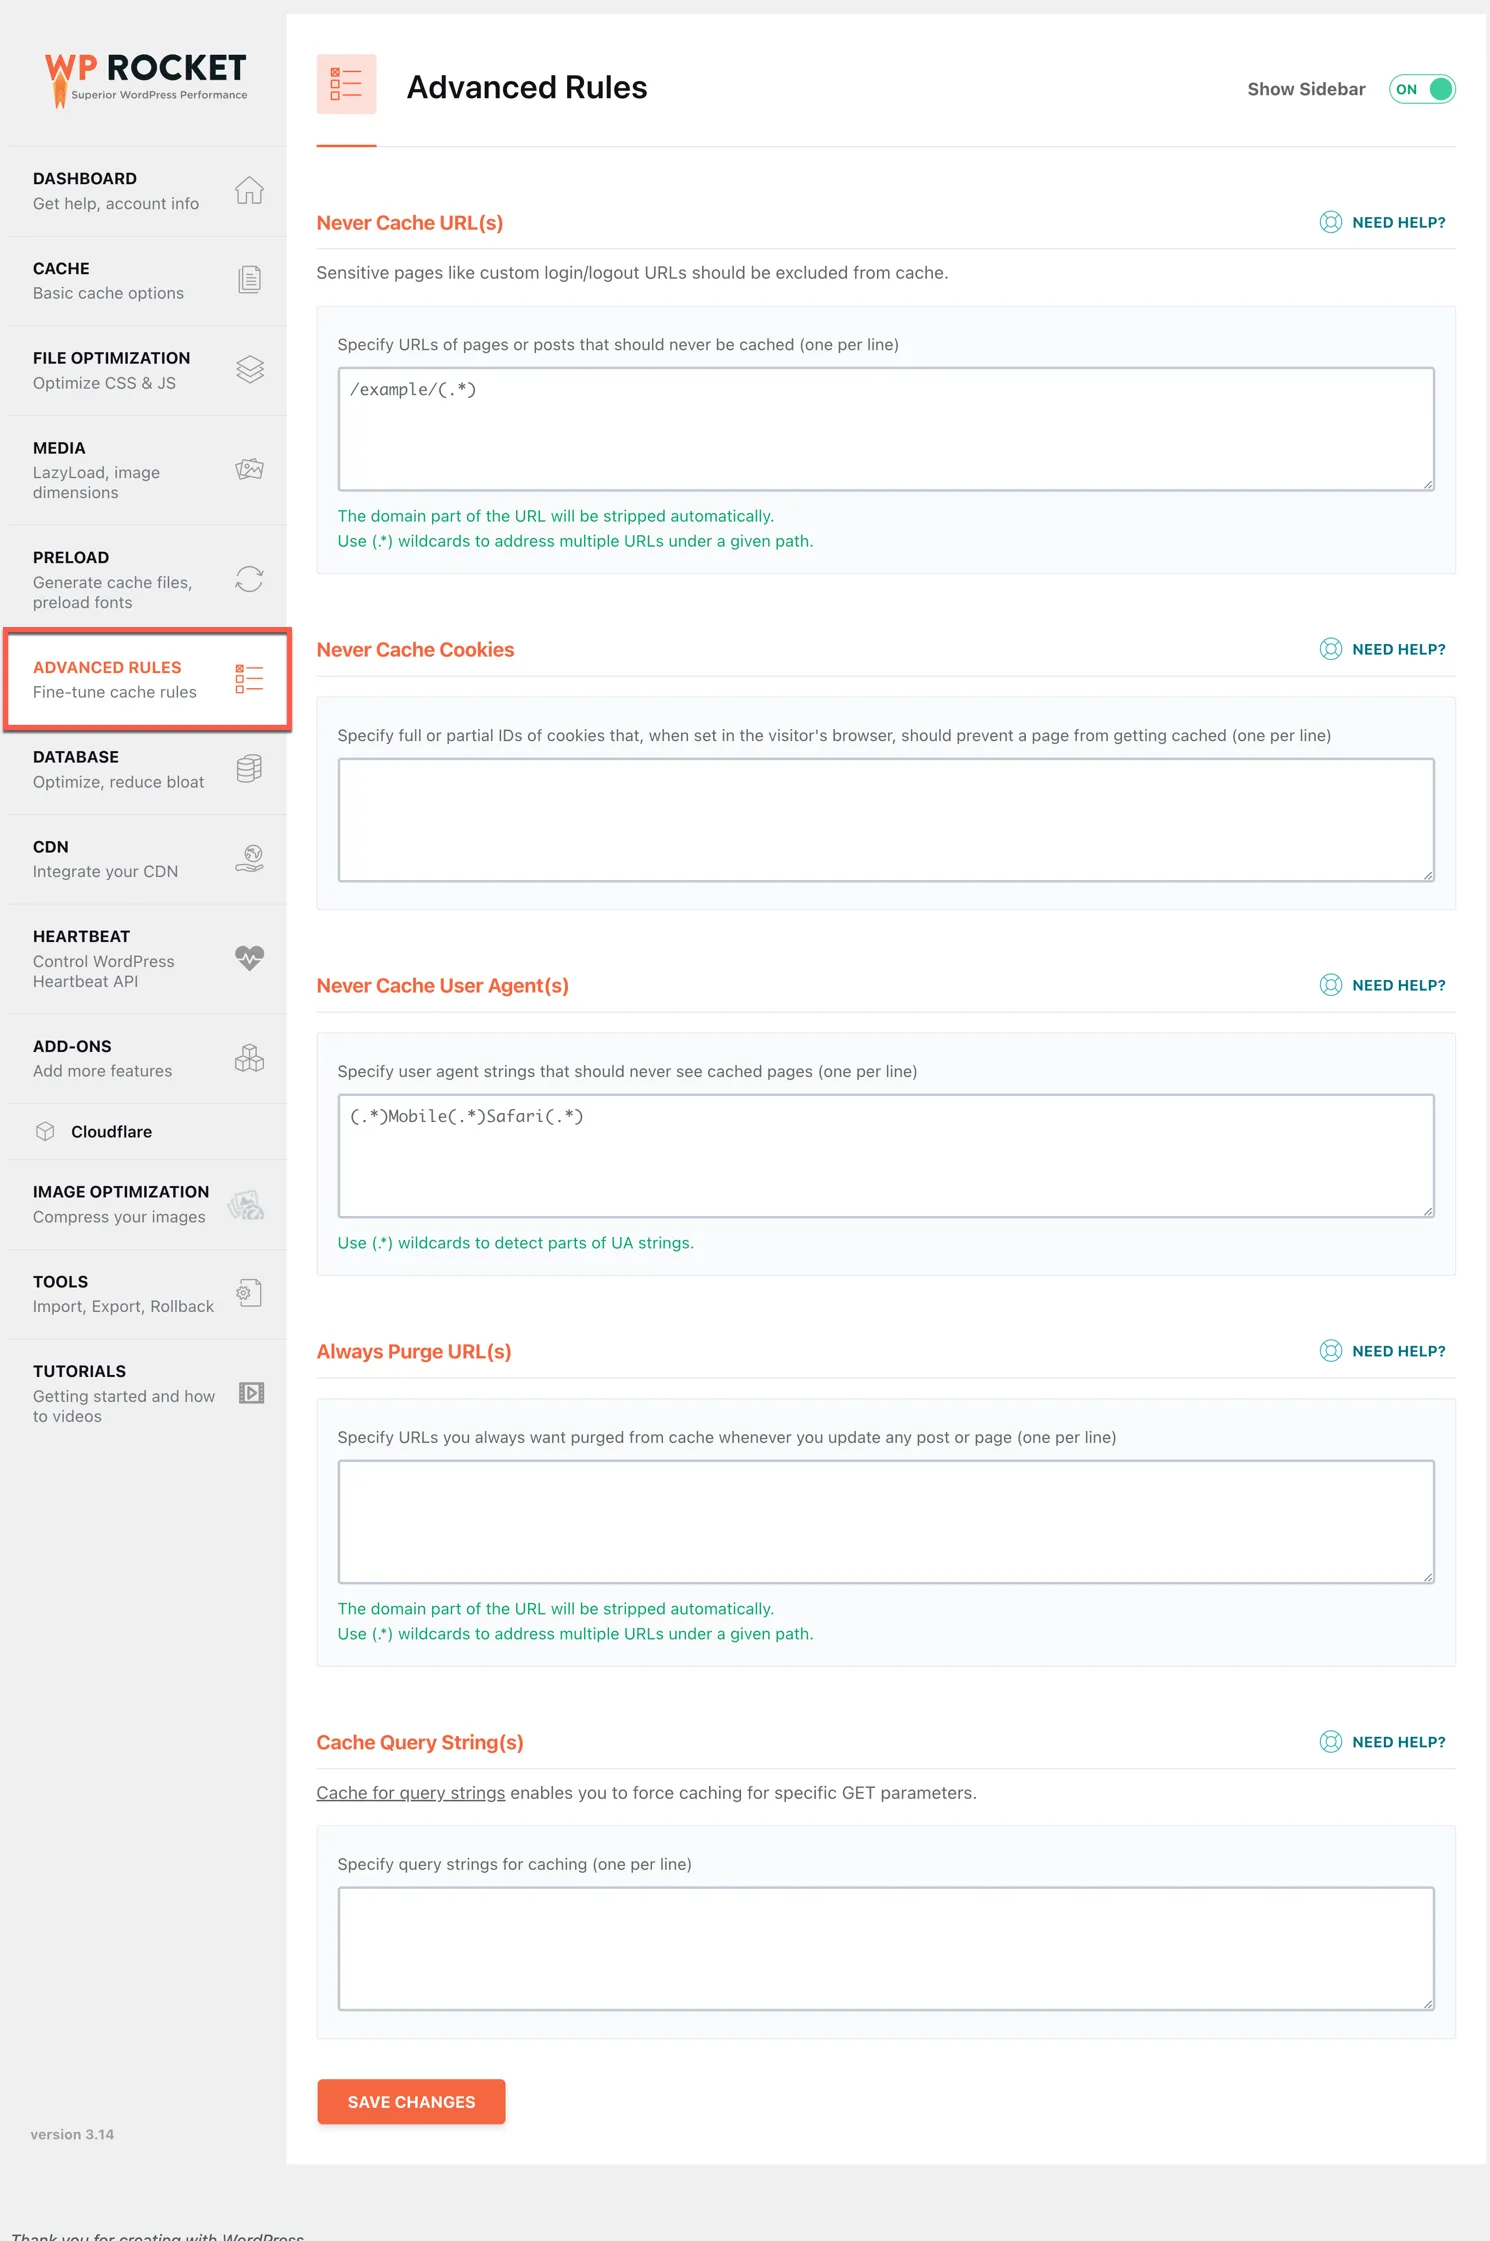
Although I personally don’t utilize the Advanced Rules section, it affords you the capability to exclude specific uncachable pages and more. It can be used effectively if you seek to optimize your caching needs further.
Database
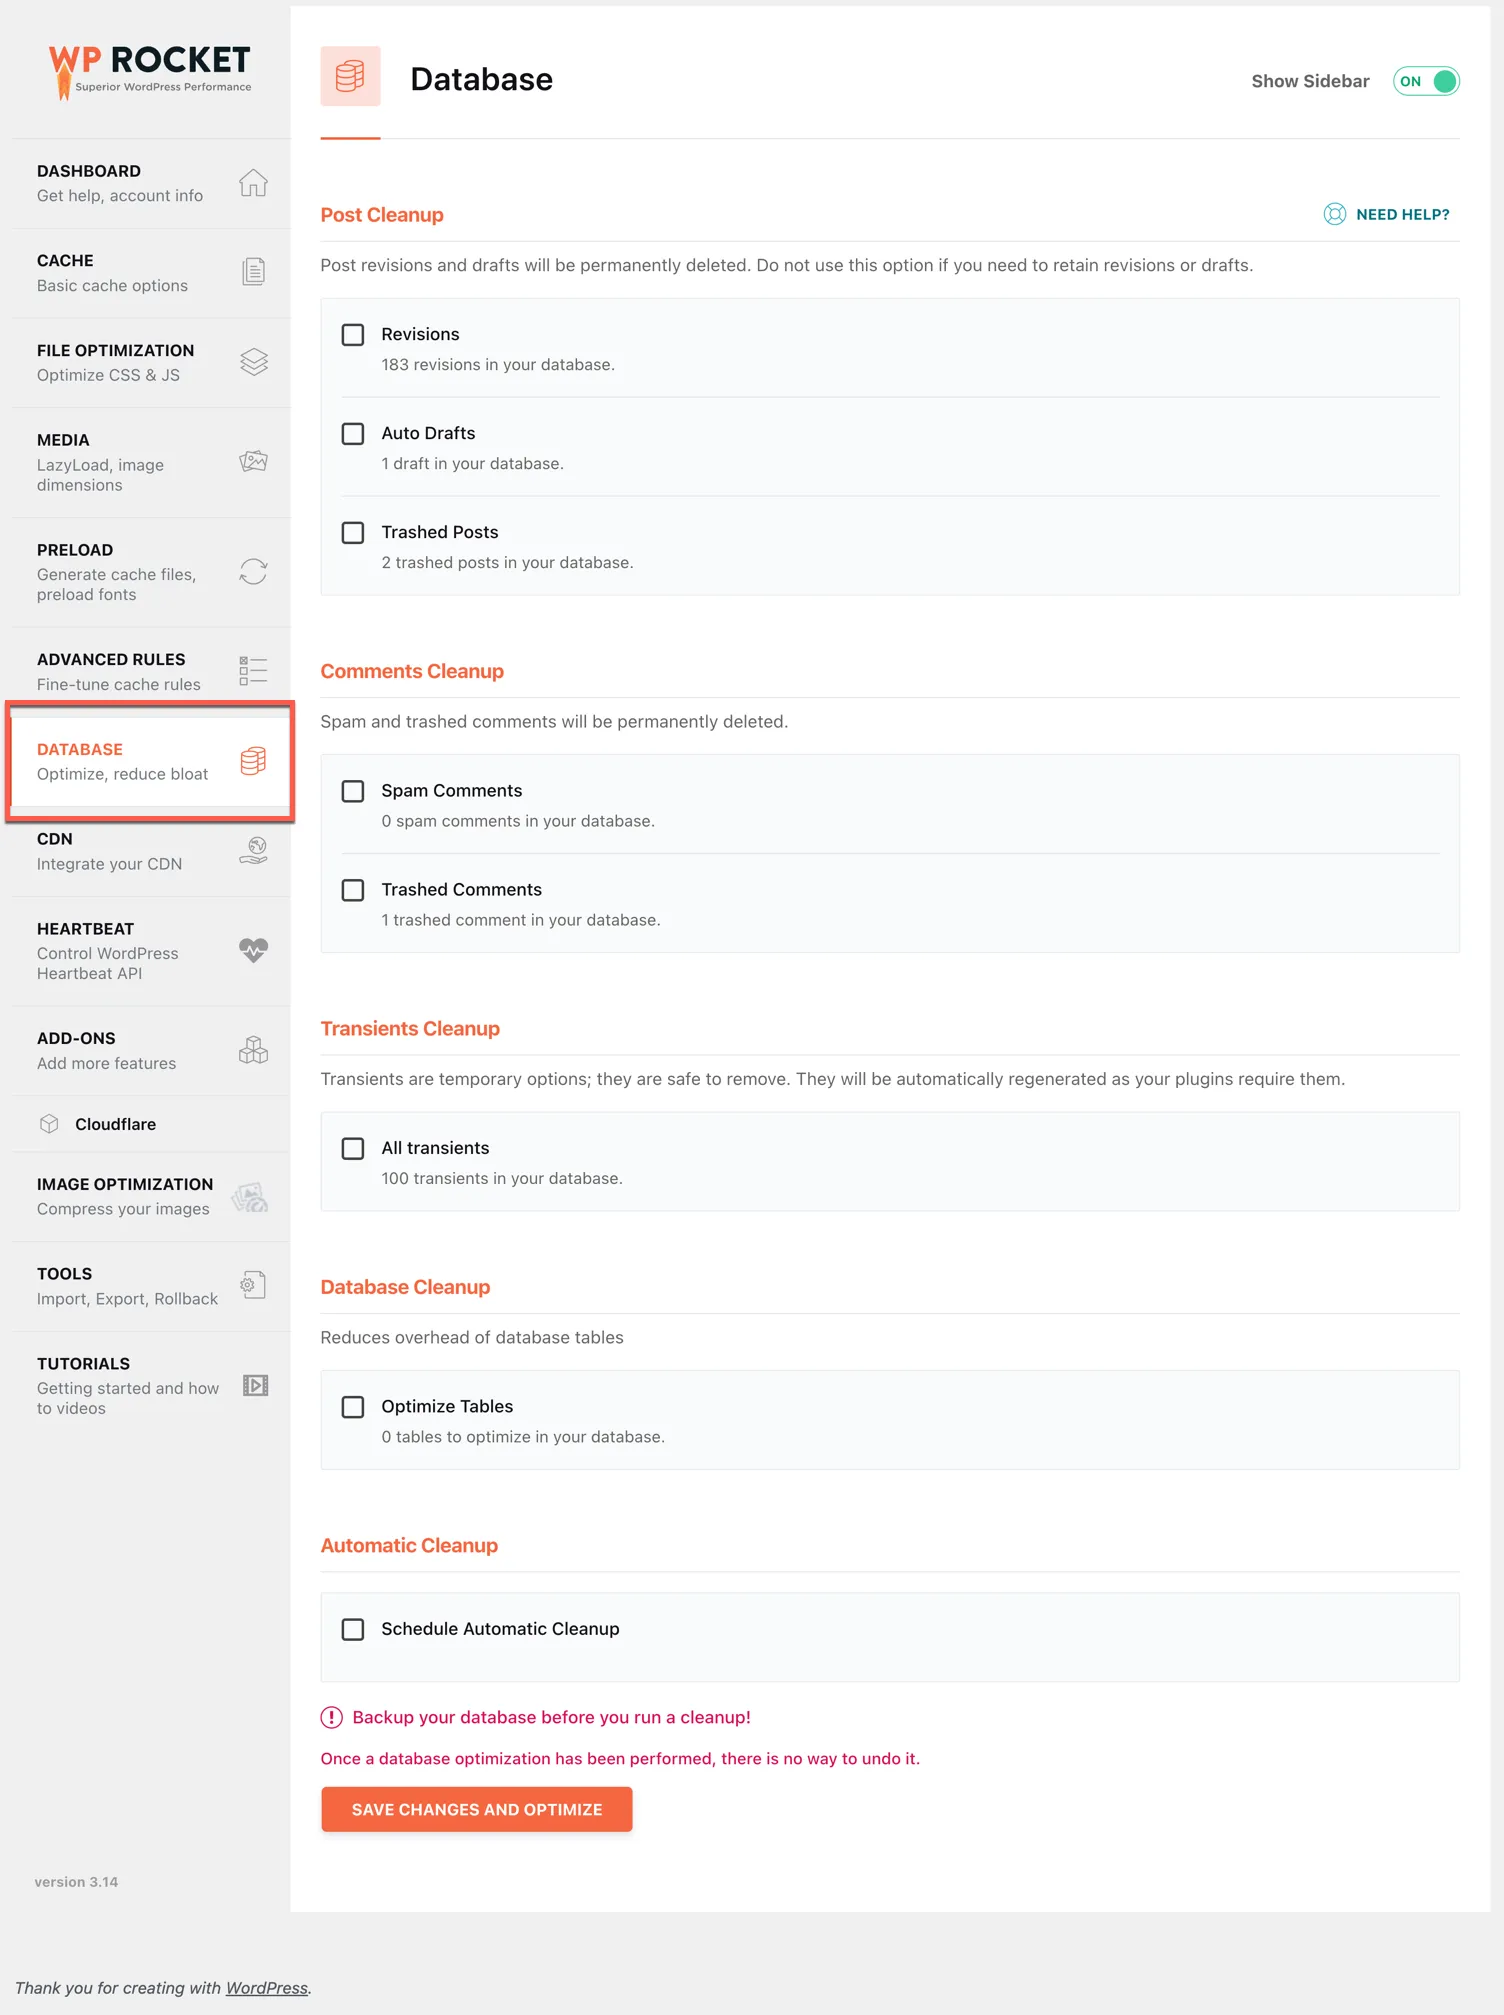
WP Rocket will analyze your database periodically, and you can check various items you want to optimize. I recommend visiting this tab sporadically and cleaning up the database. WordPress stores many post revisions you only need to keep for a while.
CDN
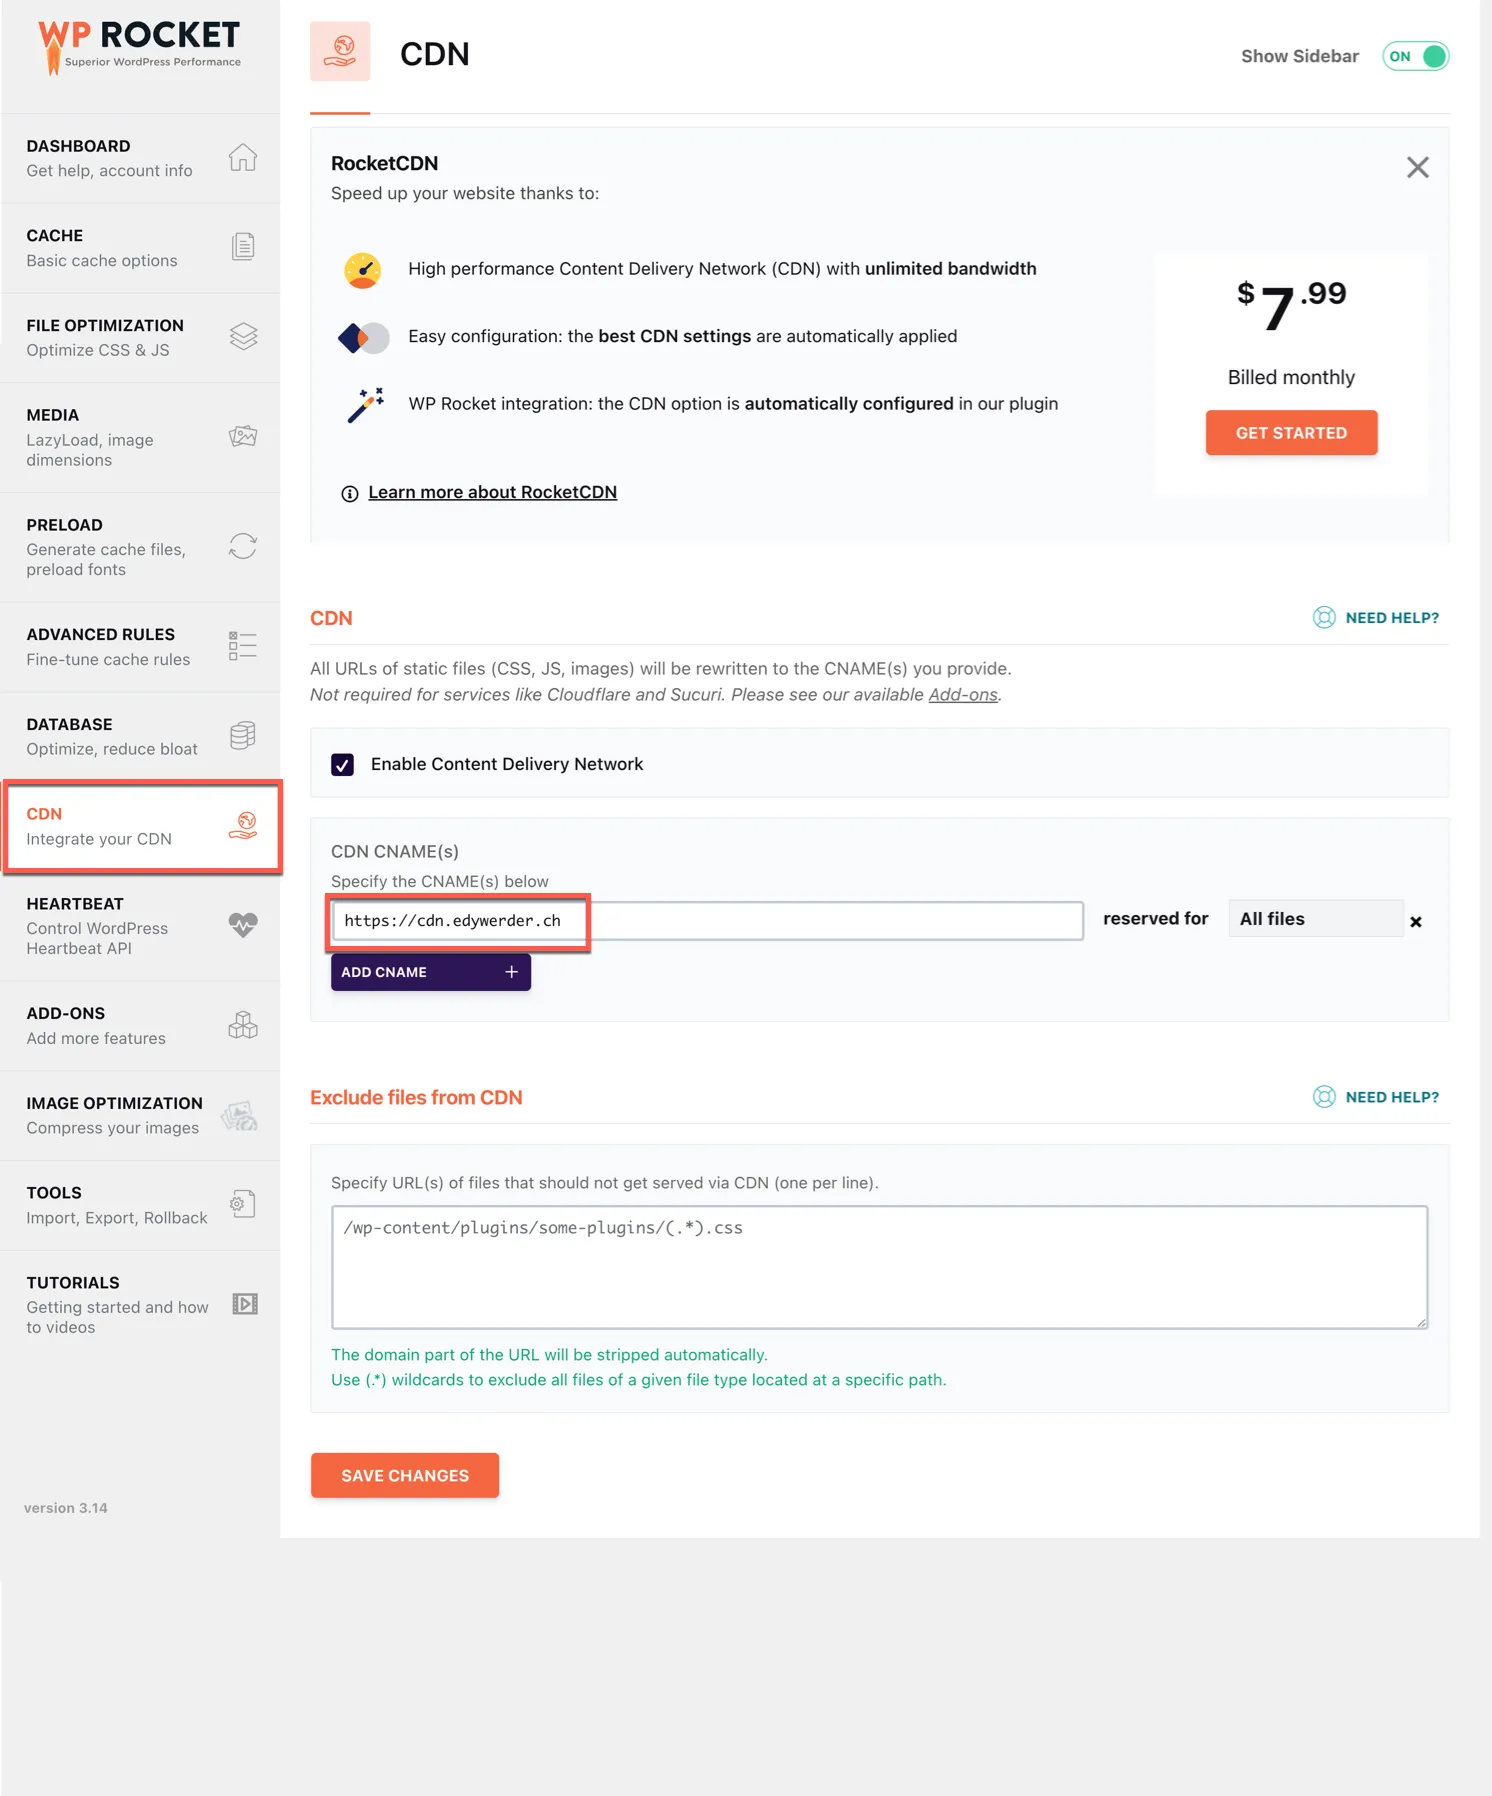
WP Rocket offers its own CDN service RocketCDN. I haven’t used it, and the review I read are mixed. I use the Cloudflare network for this website, and for another website, I use the BunnyCDN service.
Enable this if you are using another CDN service. Enter the CNAME URL. For Cloudflare, don’t use this. Cloudflare is an Add-ONS.
In the screenshot above, I use the CNAME for BunnyCDN.
Heartbeat
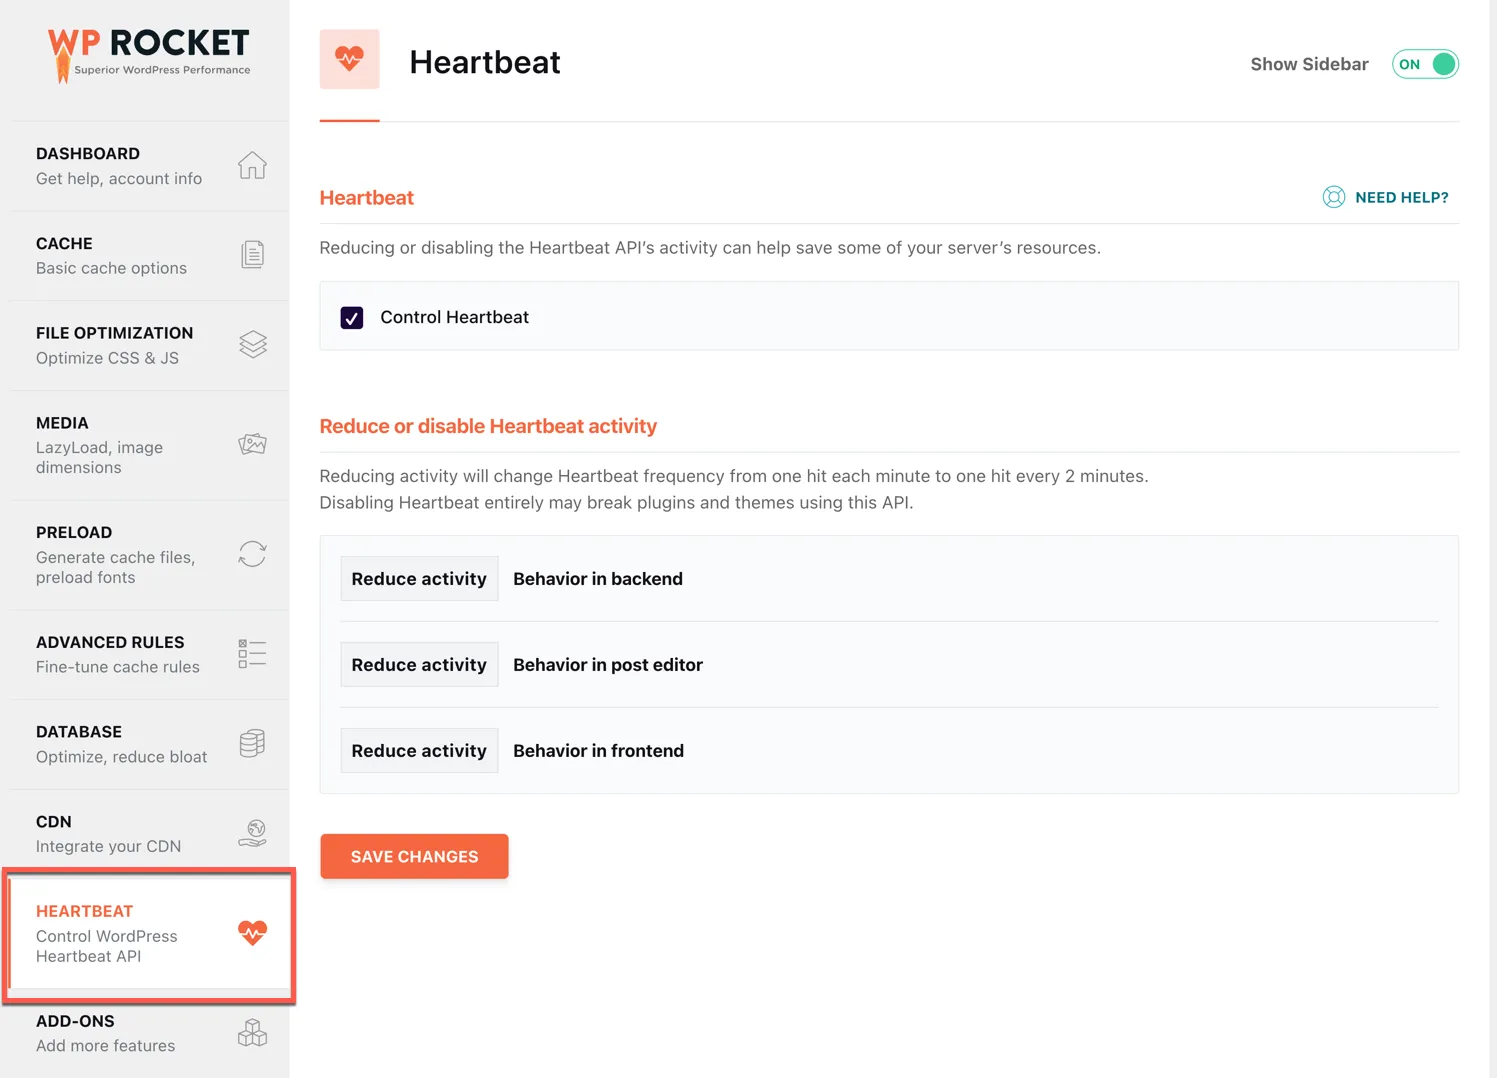
Reducing or disabling the Heartbeat API’s activity can help save some of your server’s resources.
Limiting or disabling activity from the Heartbeat API can conserve server resources..
For each Heartbeat, there are three settings,
- reduce Heartbeat
- Do not limit
- Disable
I don’t recommend disabling Heartbeat.
ADD-ONS
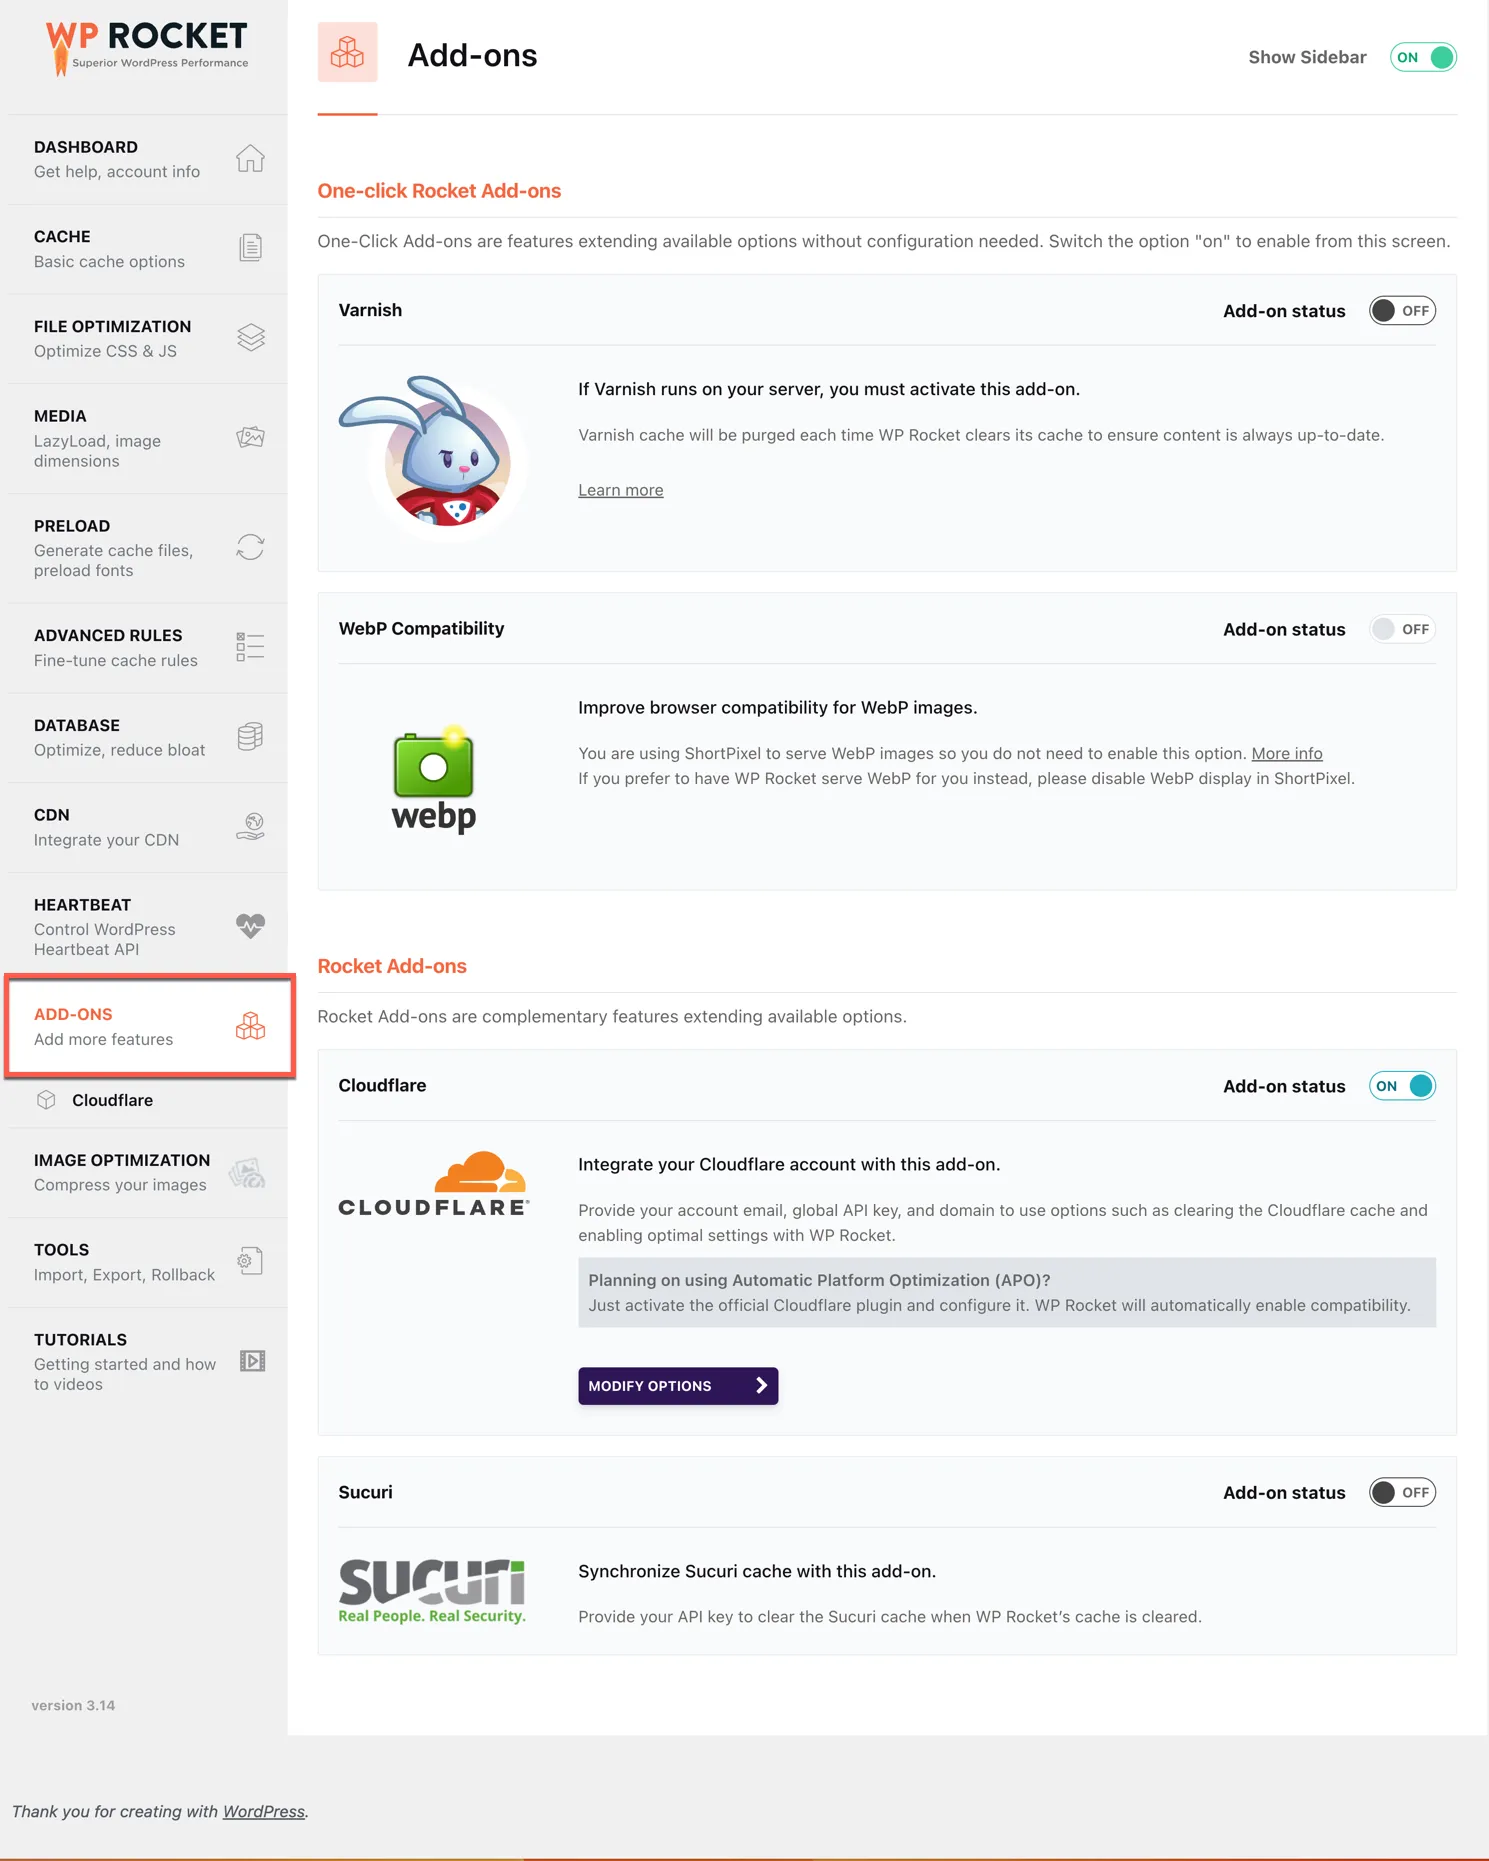
- Varnish Cache
If you are hosting your website with a hosting company using Varnish cache, you can turn this option on. WP-Rocket will then ensure that the Varnish cache is purged each time you purge the WP Rocket cache. - WebP compatibility
In most cases, you don’t need WebP compatibility. Especially if you use a plugin to convert images to WebP, using a CDN service like Cloudflare is also unnecessary. WP Rockets detects certain image plugins automatically and handles them. Here is a link to the WP Rocket docs. - Cloudflare
If you use Cloudflare, WP Rocket offers a convenient method to control some settings directly, including purging. There is no need to install the official Cloudflare plugin. However, since Version 3.14 WP Rocket is compatible with the service Cloudflare AP (not free). In this case, you would need to install the Cloudflare plugin.
Check the WP Rocket documentation for more insights. - Sucuri
By enabling the caching feature on Sucuri Website Firewall, it is advisable to activate the WP Rocket Sucuri add-on to keep the caches in sync. As a result, your visitors always see the latest content on your site. And when WP Rocket clears its cache, the Sucuri cache follows suit, minimizing the need for manual intervention.
Image Optimization
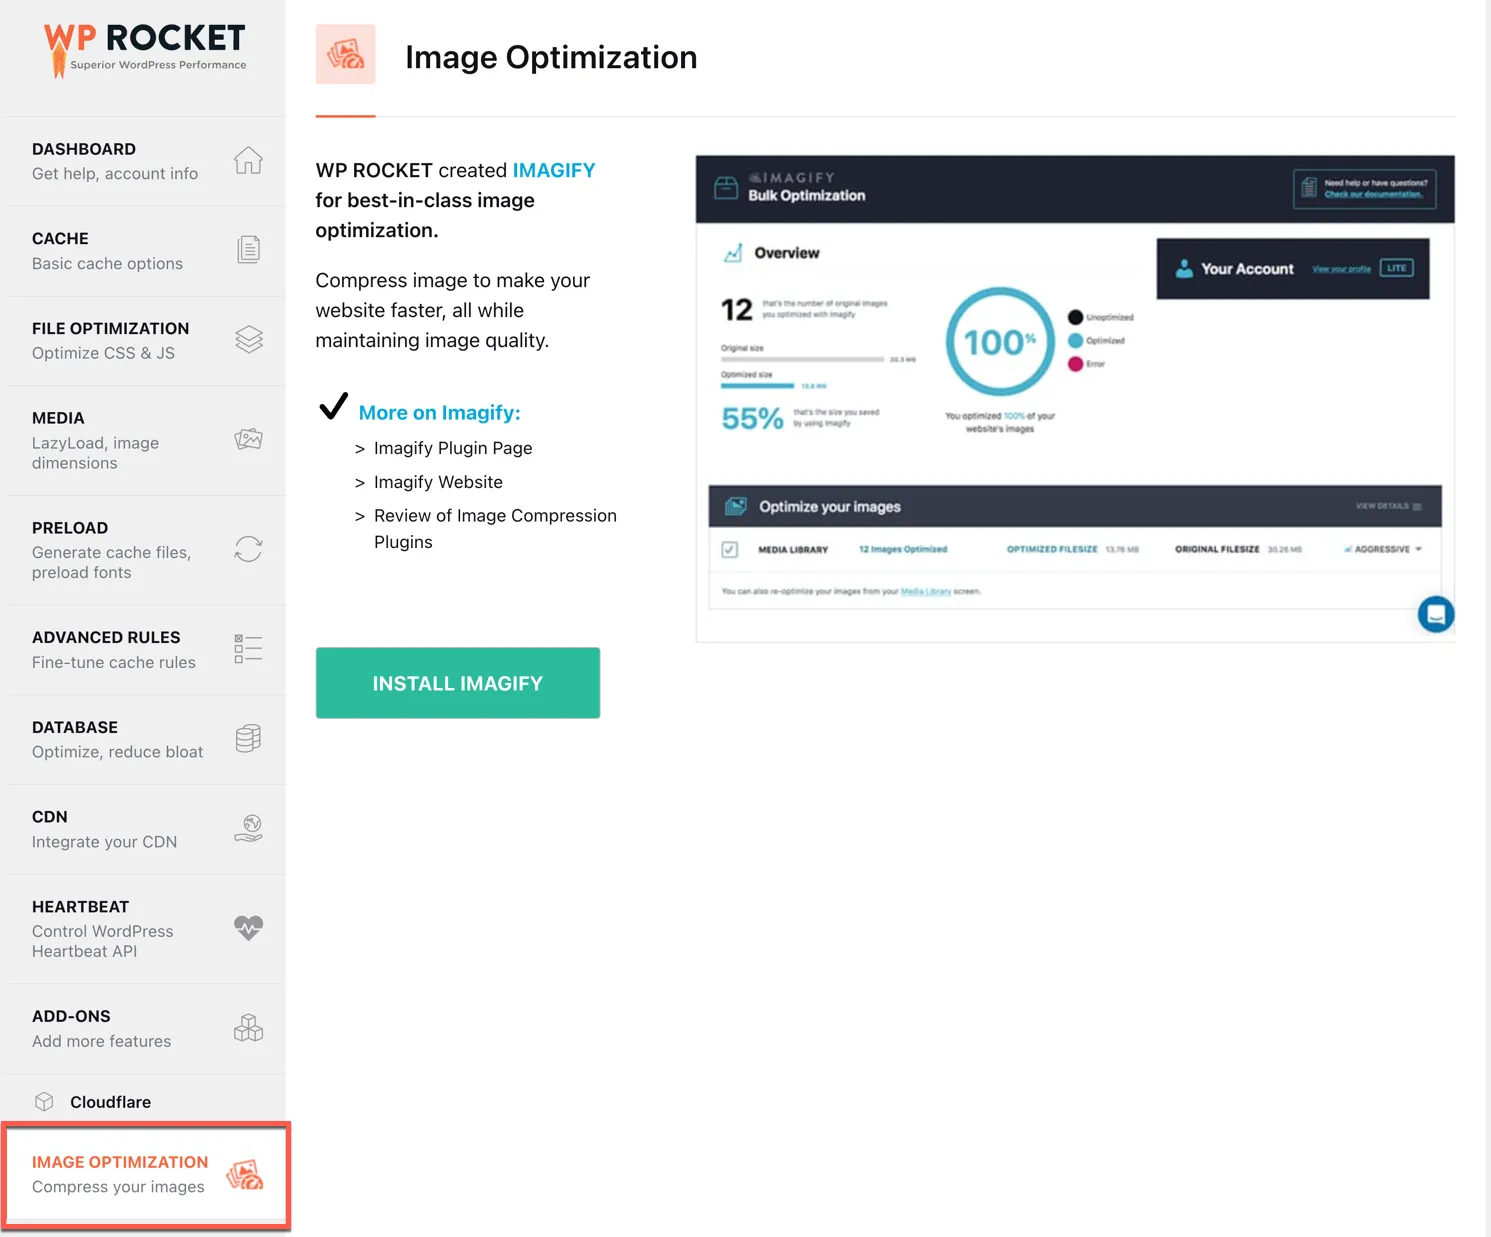
WP Rocket has its own image optimization plugin Imagify. I don’t use this plugin. I prefer uploading my images to WordPress already converted to WebP format. With a click on the button you can install the Imagify plugin. However it is not free.
Tools
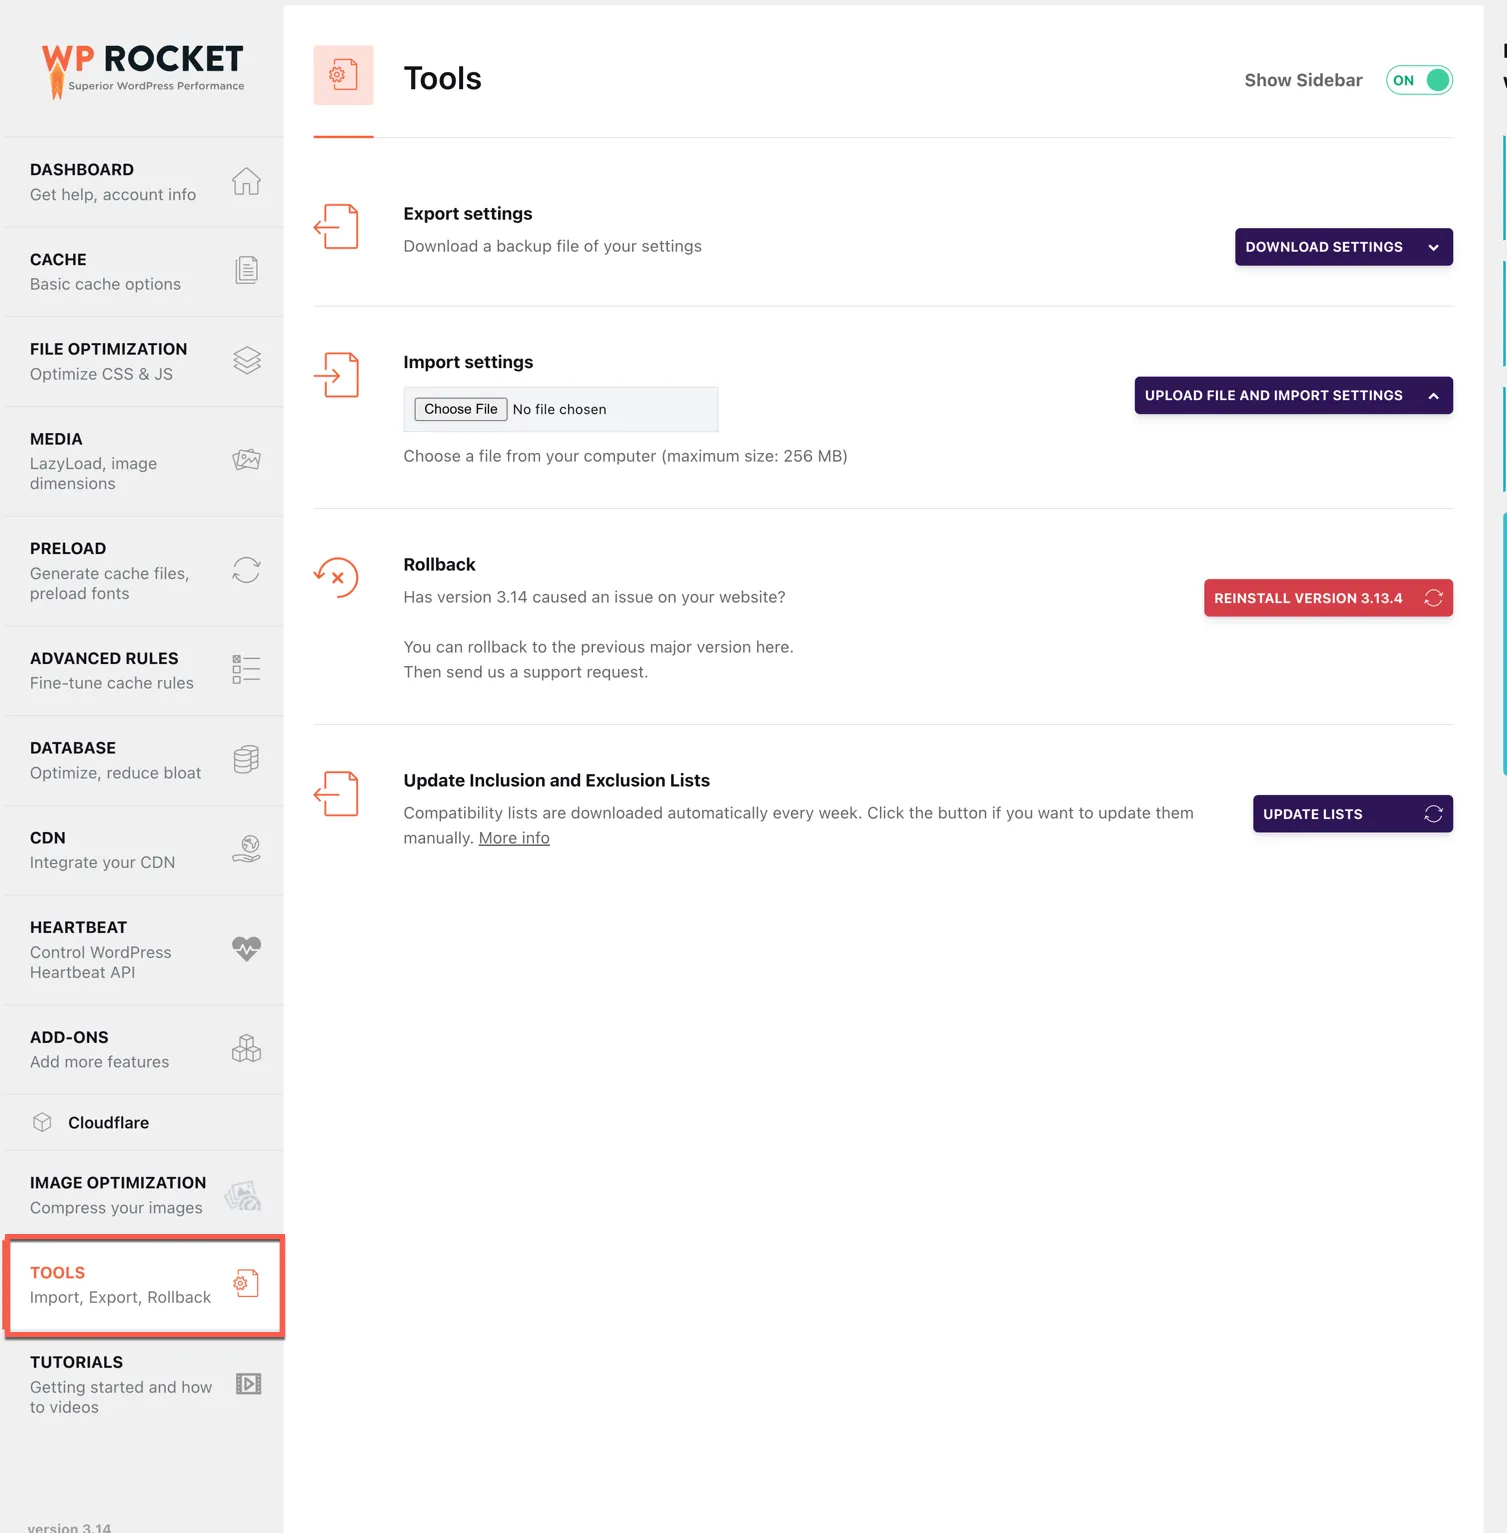
Under Tools you find some handy features like export the WP Rocket best settings, which you can import to another website to save some time.
Conclusion: for WP Rocket best settings
My WP Rocket best settings might not be your best settings. However I hope with this article I was helpful to explain the meaning of each settings and what they do. WP Rocket has some excellent tutorial video and documenations. The plugin has a higher price tag than other cache plugins. Some are even free.
However I think WP Rocket is worth the price and does an excellent job and is hard at work to improve the compatibility with hosting provider and well know plugins.
Please let me know in the comments section below what are your experience with WP Rocket?.
About the author
Hi, I’m Edy Werder. I write hands-on guides about Proxmox, homelab servers, NAS, and WordPress, based on real setups I run and document.
No sponsors, no fluff—just real configs and results.
Enjoying the content?
