
By Edy Werder — IT Consultant & Tech Blogger
Running WordPress on a Synology NAS gives you full control over your site without recurring hosting costs. In this guide, I walk you through the complete installation process, step by step, including SSL setup and how to fix the most common problems you may encounter.
How do you install WordPress on a Synology NAS? Open the Package Center in DSM, search for WordPress and click Install. The installer automatically sets up Apache, PHP, MariaDB, and Web Station. Follow the setup wizard to set your MariaDB password and database credentials. Once installed, access your WordPress site at http://[NAS-name]/wordpress.
This guide covers the Package Center method. If you are wondering how it compares to a manual install from WordPress.org, I cover the key differences further down in this article.
If you own a Synology NAS, you already have everything you need to get started. There are a few things worth checking first, though.
To make your WordPress site accessible from the internet, you need a registered domain name and port forwarding enabled for ports 80 and 443 on your router or firewall. I highly recommend running a dedicated firewall in front of your Synology if you plan to expose it publicly.
For hardware, I recommend at least a two-bay NAS with RAID 1 set up. Running WordPress on a single disk is not a good idea. My pick is the DS725+. It has an AMD Ryzen R1600 CPU, 4 GB of RAM, and a free slot for up to 32 GB of RAM. SSDs will deliver noticeably better performance than HDDs for web hosting.
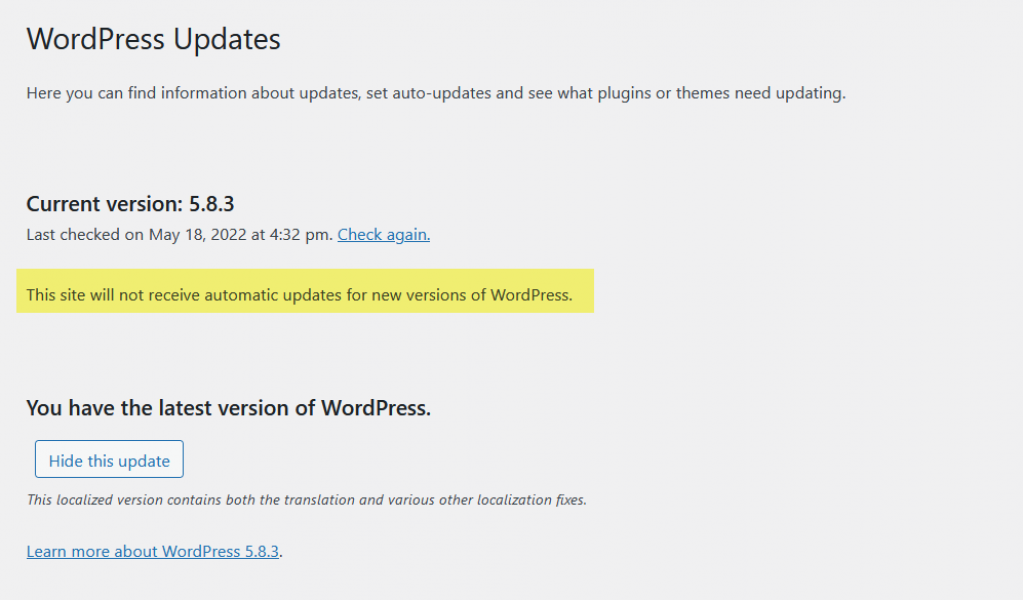
One thing to be aware of: the WordPress package in the Synology Package Center is not always the latest version. I cover how to handle updates further down in this guide.

There are several different ways to install WordPress on Synology NAS. This guide will show you how to use the Package Center to install it.
So, it is time to log in to your Synology and go to the package center. A good practice is to check beforehand if a new DSM update is available.
I log in with the username ‘Admin’ in this example for easier understanding. However, Synology recommends disabling the default admin user and using another username for security.
Unfortunately, the WordPress package in the Synology distro is not the latest version.
Click the ‘Install’ button
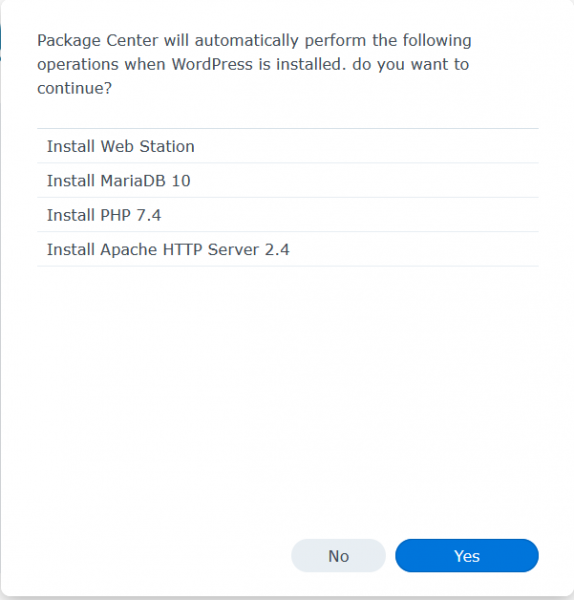
The installer will also install all the required packages it needs to run.
Now, a few necessary steps will follow, and you must enter some login information.
Please note them down. It’s crucial in case later you need to access the database.
Click ‘YES’
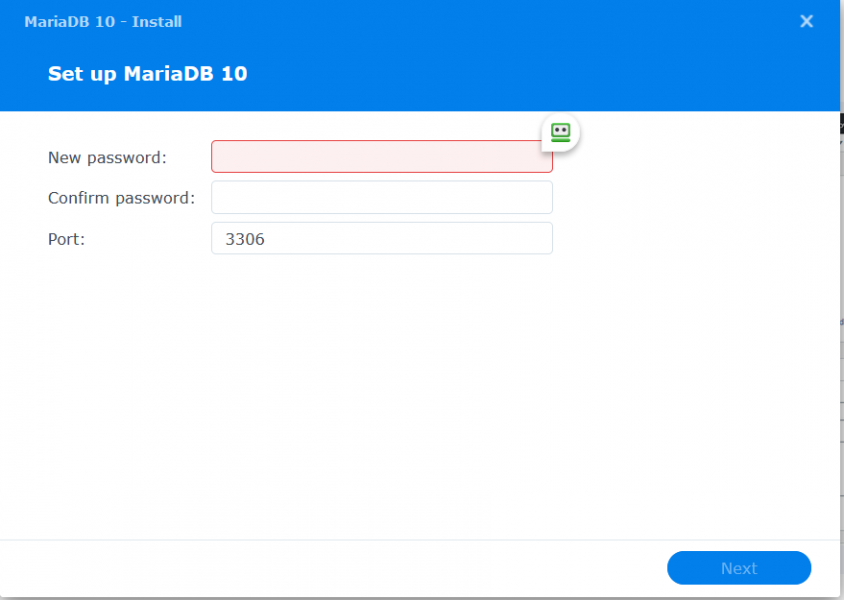
Set a password for MariaDB. I would leave the port as it is.
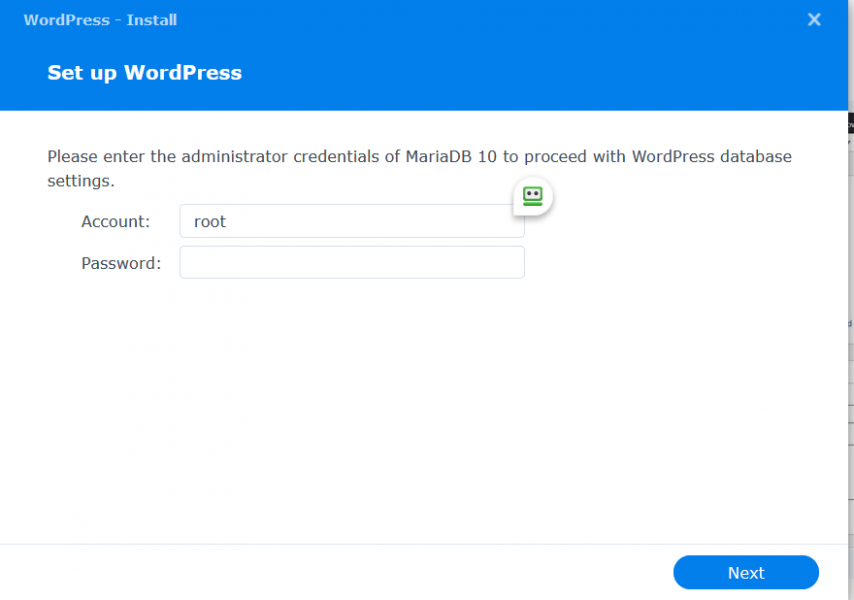
Set up WordPress: For the database connection, enter the MariaDB credentials for the user ‘root’. You will later use these credentials for PHPmyadmin to access all your WordPress databases. In theory, you could use another username here.
However, I don’t recommend it. Instead of changing the username ‘root,’ I recommend setting up another user for MariaDB later.
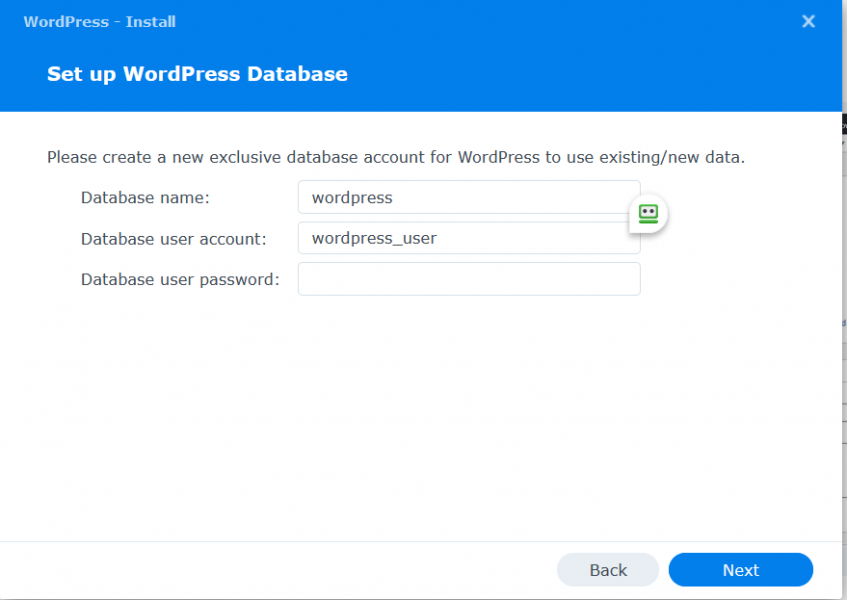
Enter the credentials for your database installation. The installer will set up a database on MariaDB for WordPress.
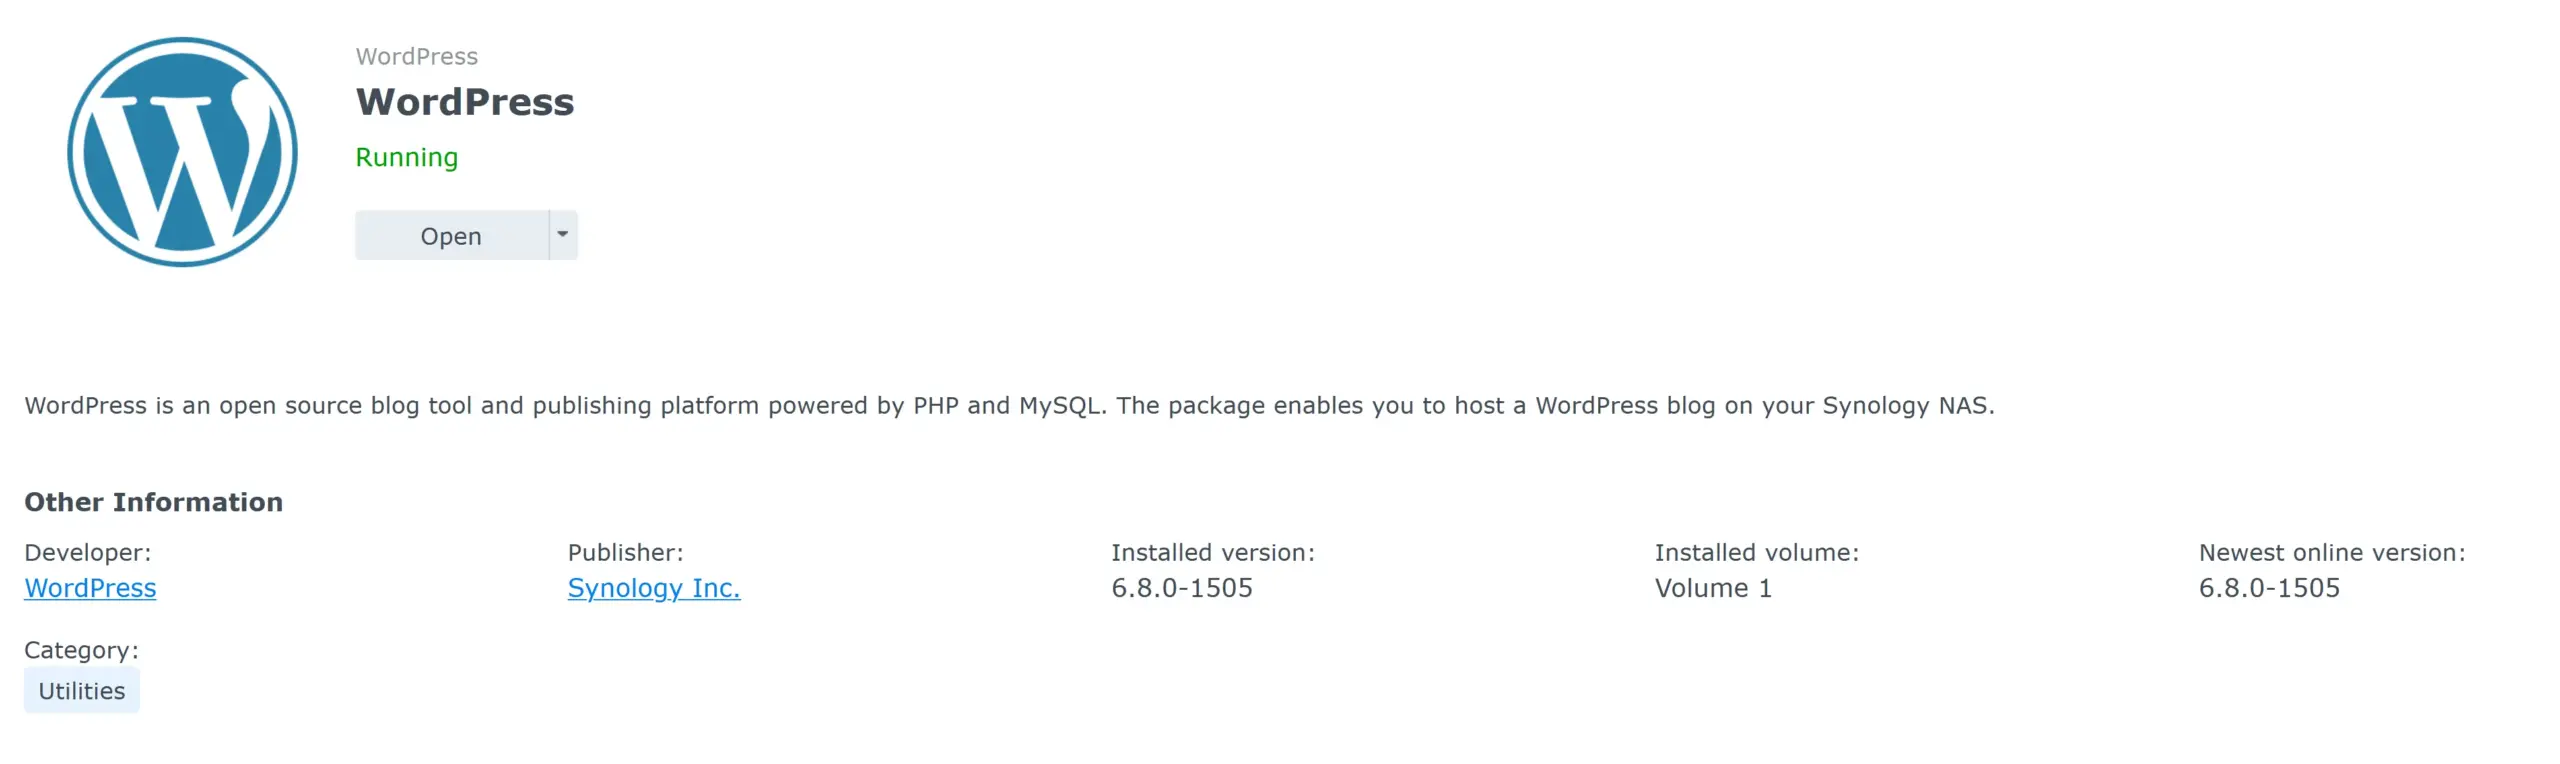
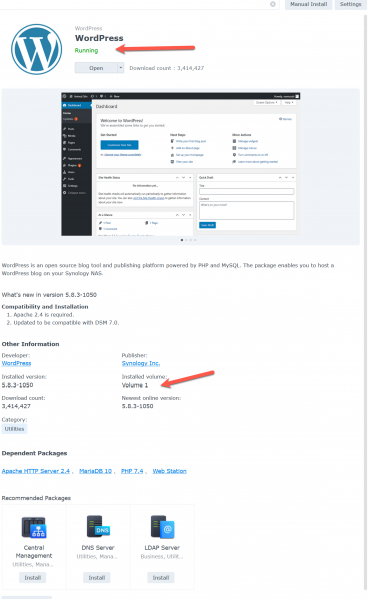
WordPress is now installed!
If you go to the package center, you can see that WordPress is running and which volume it is installed on. In my case, I installed WordPress on Volume 1.
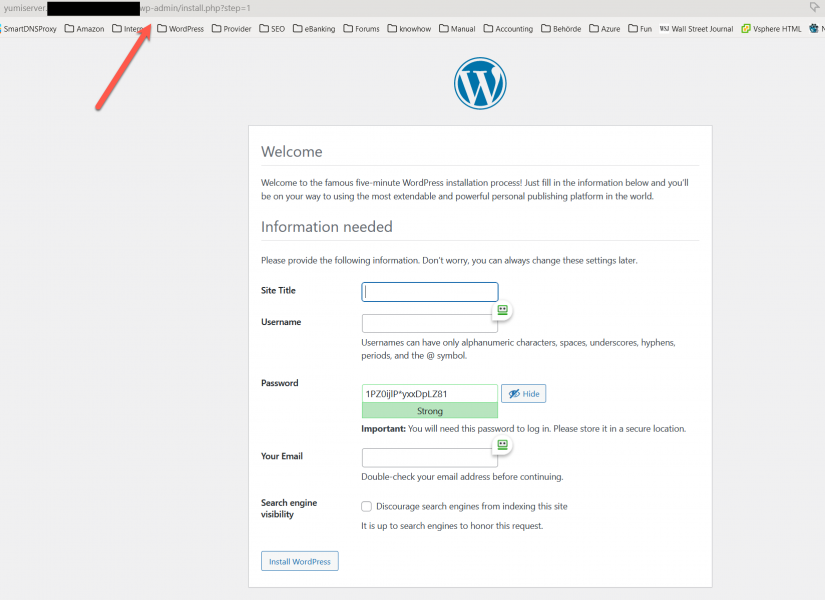
It’s time to fire up WordPress and login to the backend dashboard.
usually, it is the address http://name of your NAS/wordpress/wp-admin
Synology creates a web folder ‘wordpress’
Fill in the information, as for the username please do not use ‘admin’ or ‘administrator’ and also use a strong password. See my article Harden WordPress.
I recommend ticking ‘discourage search engines from indexing this site. I would untick it when you are ready to present your website to the world.
WordPress is installed and ready. Enjoy!! 🙂
You can now manage your WordPress site directly from your Synology NAS. Install any plugin you want from the WordPress repository, or customize your site with themes and plugins from third-party sources.
I love the Kadence or Astra theme together with the Elementor page builder.
There are two ways to install WordPress on a Synology NAS. The Package Center method is what this guide covers. It is the easiest option and sets everything up automatically. The trade-off is that you are limited to whatever version Synology packages, updates are delayed, and you can only run one WordPress instance on the NAS.
The manual install method means downloading WordPress directly from WordPress.org and setting it up yourself via Web Station and phpMyAdmin. It takes more effort but gives you full control. You can install the latest version immediately, run multiple WordPress sites on the same NAS, and manage updates on your own schedule.
For most home users and small sites, the Package Center method is perfectly fine. If you need multiple sites or want to stay current with every WordPress release, the manual install is worth the extra steps
Synology makes it straightforward to get a free SSL certificate from Let’s Encrypt. I have a dedicated guide that walks you through the full process: Synology SSL certificate.
A few things to keep in mind. Let’s Encrypt uses port 80 to verify your domain, so make sure it is open on your firewall before you start. Once the certificate is issued, go to Control Panel > Security > Certificates and assign it as the system default.
Finally, open your WordPress dashboard, go to Settings, General and make sure both the WordPress Address URL and Site Address URL are set to https. Synology handles automatic renewal, so you do not need to worry about the certificate expiring.
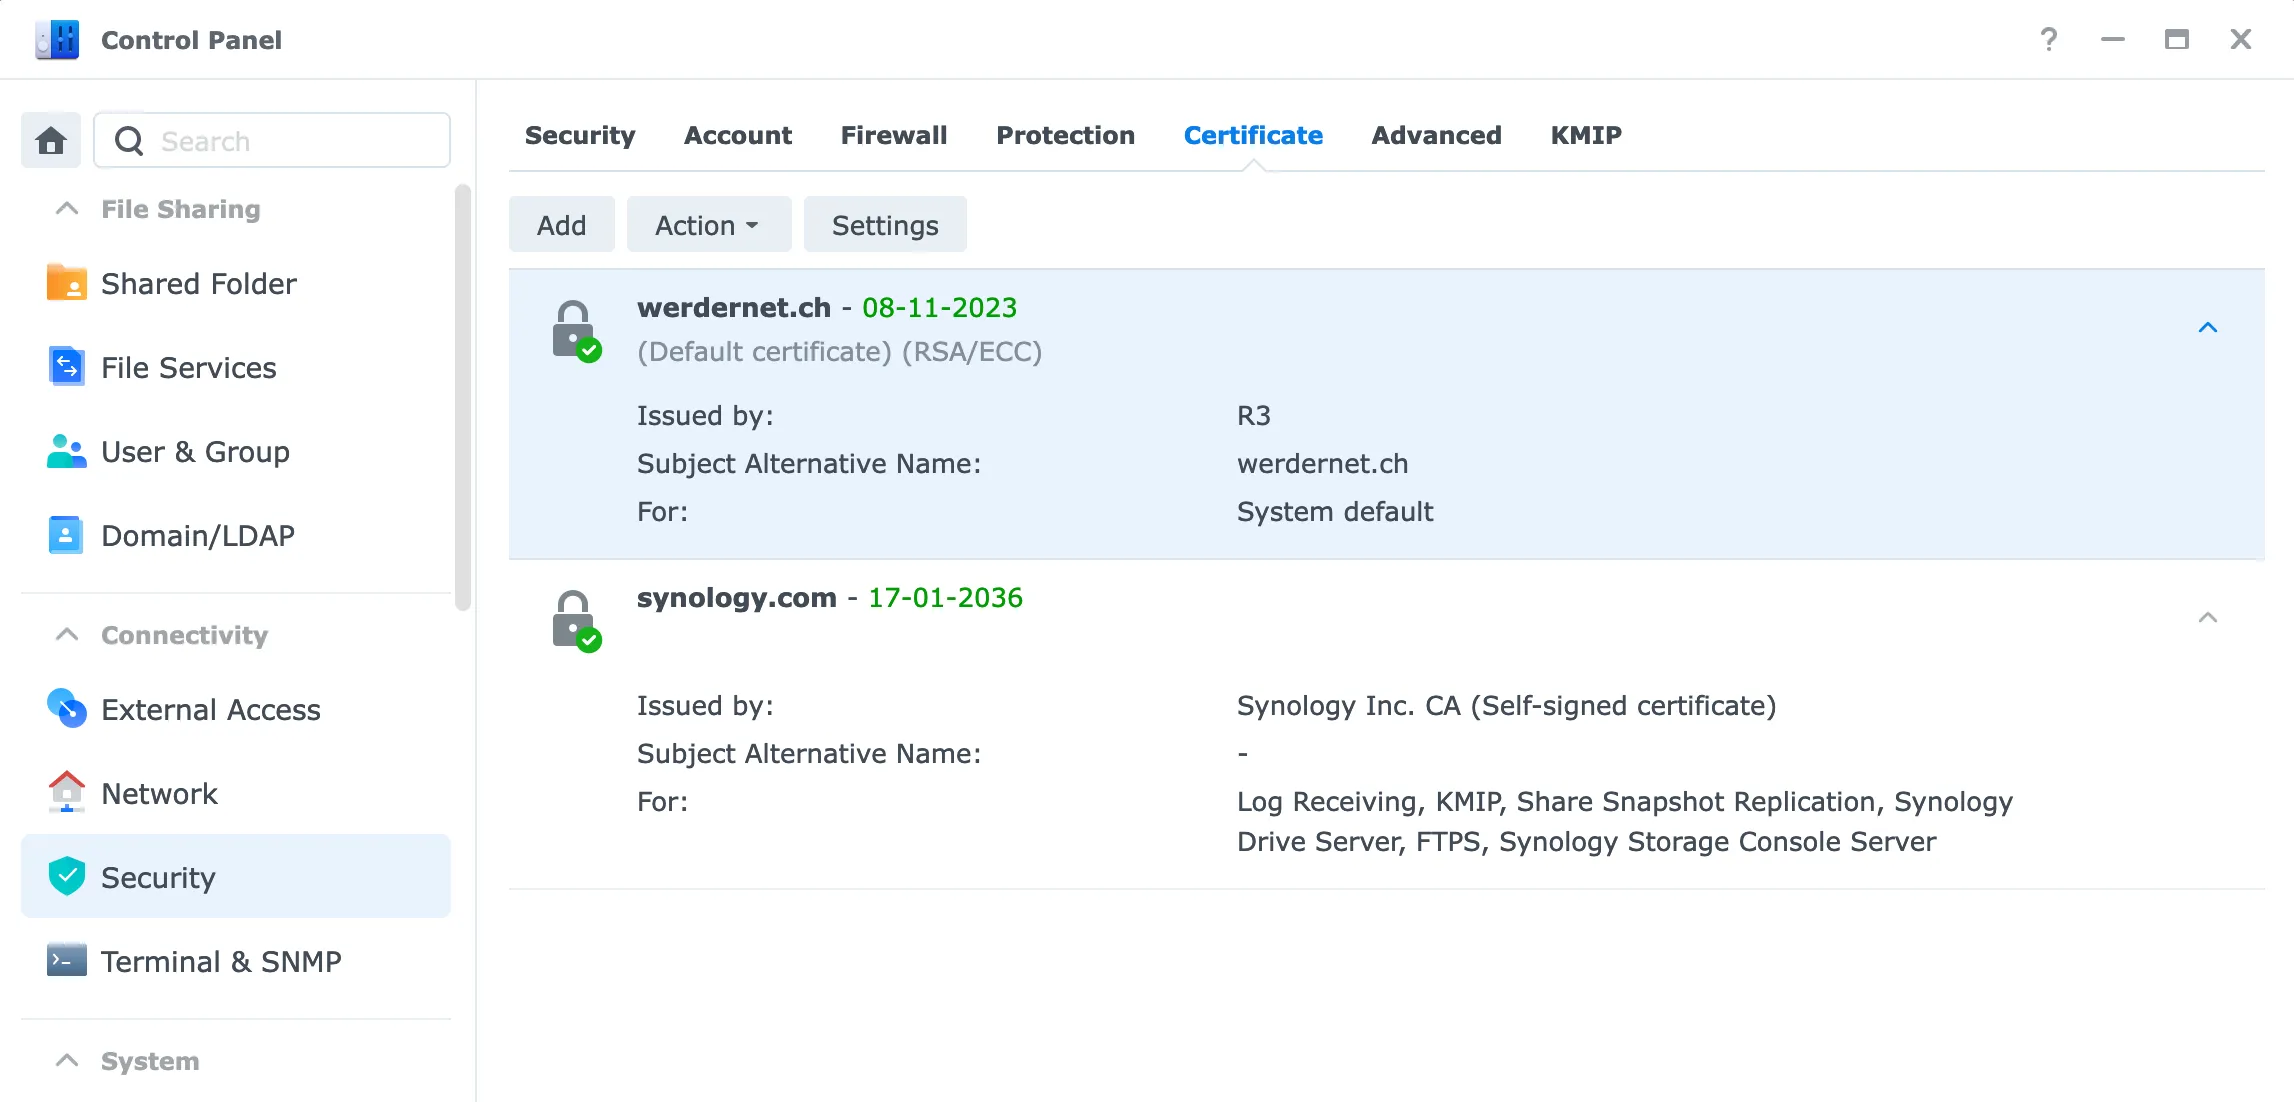
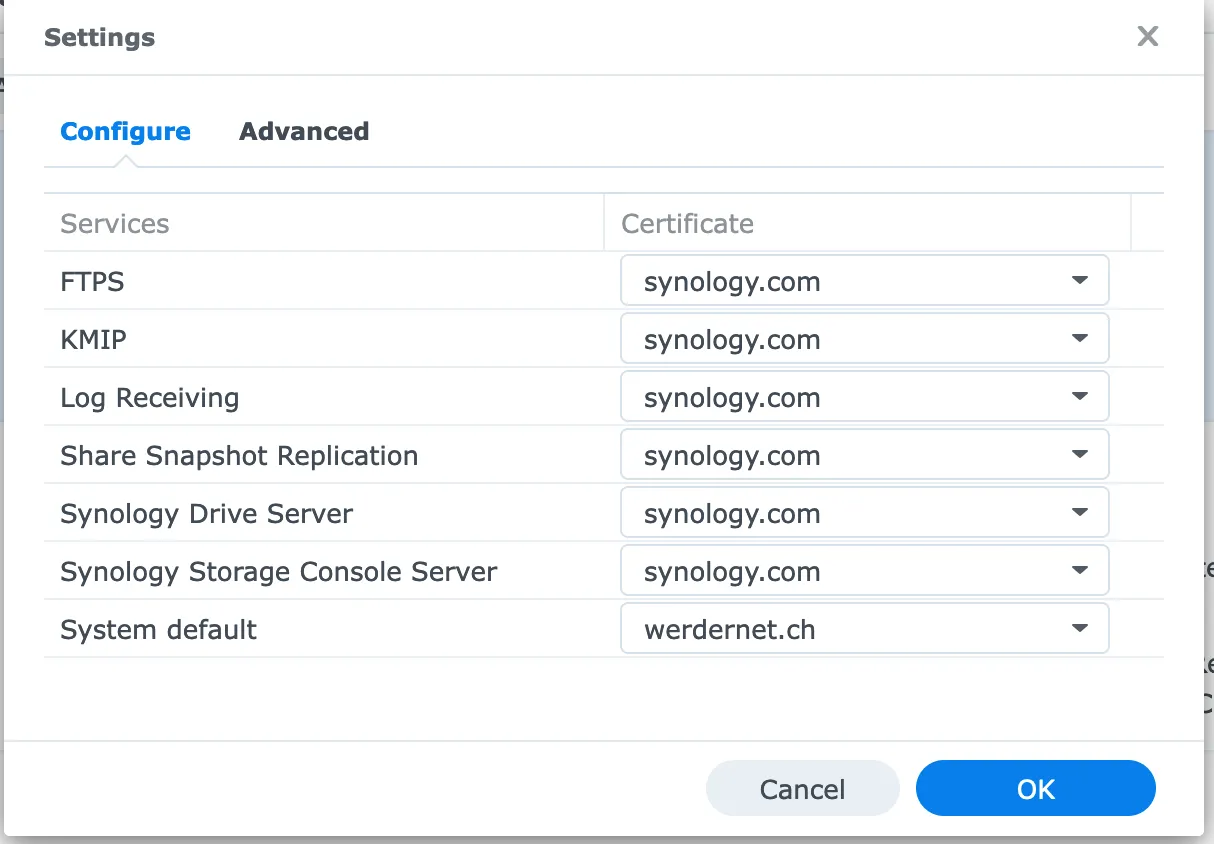
Go then to Settings, and assign the SSL certificate to the system default
Lastly, go to your WordPress Dashboard and ensure the WordPress Address URL and Site Address URL are set to https.
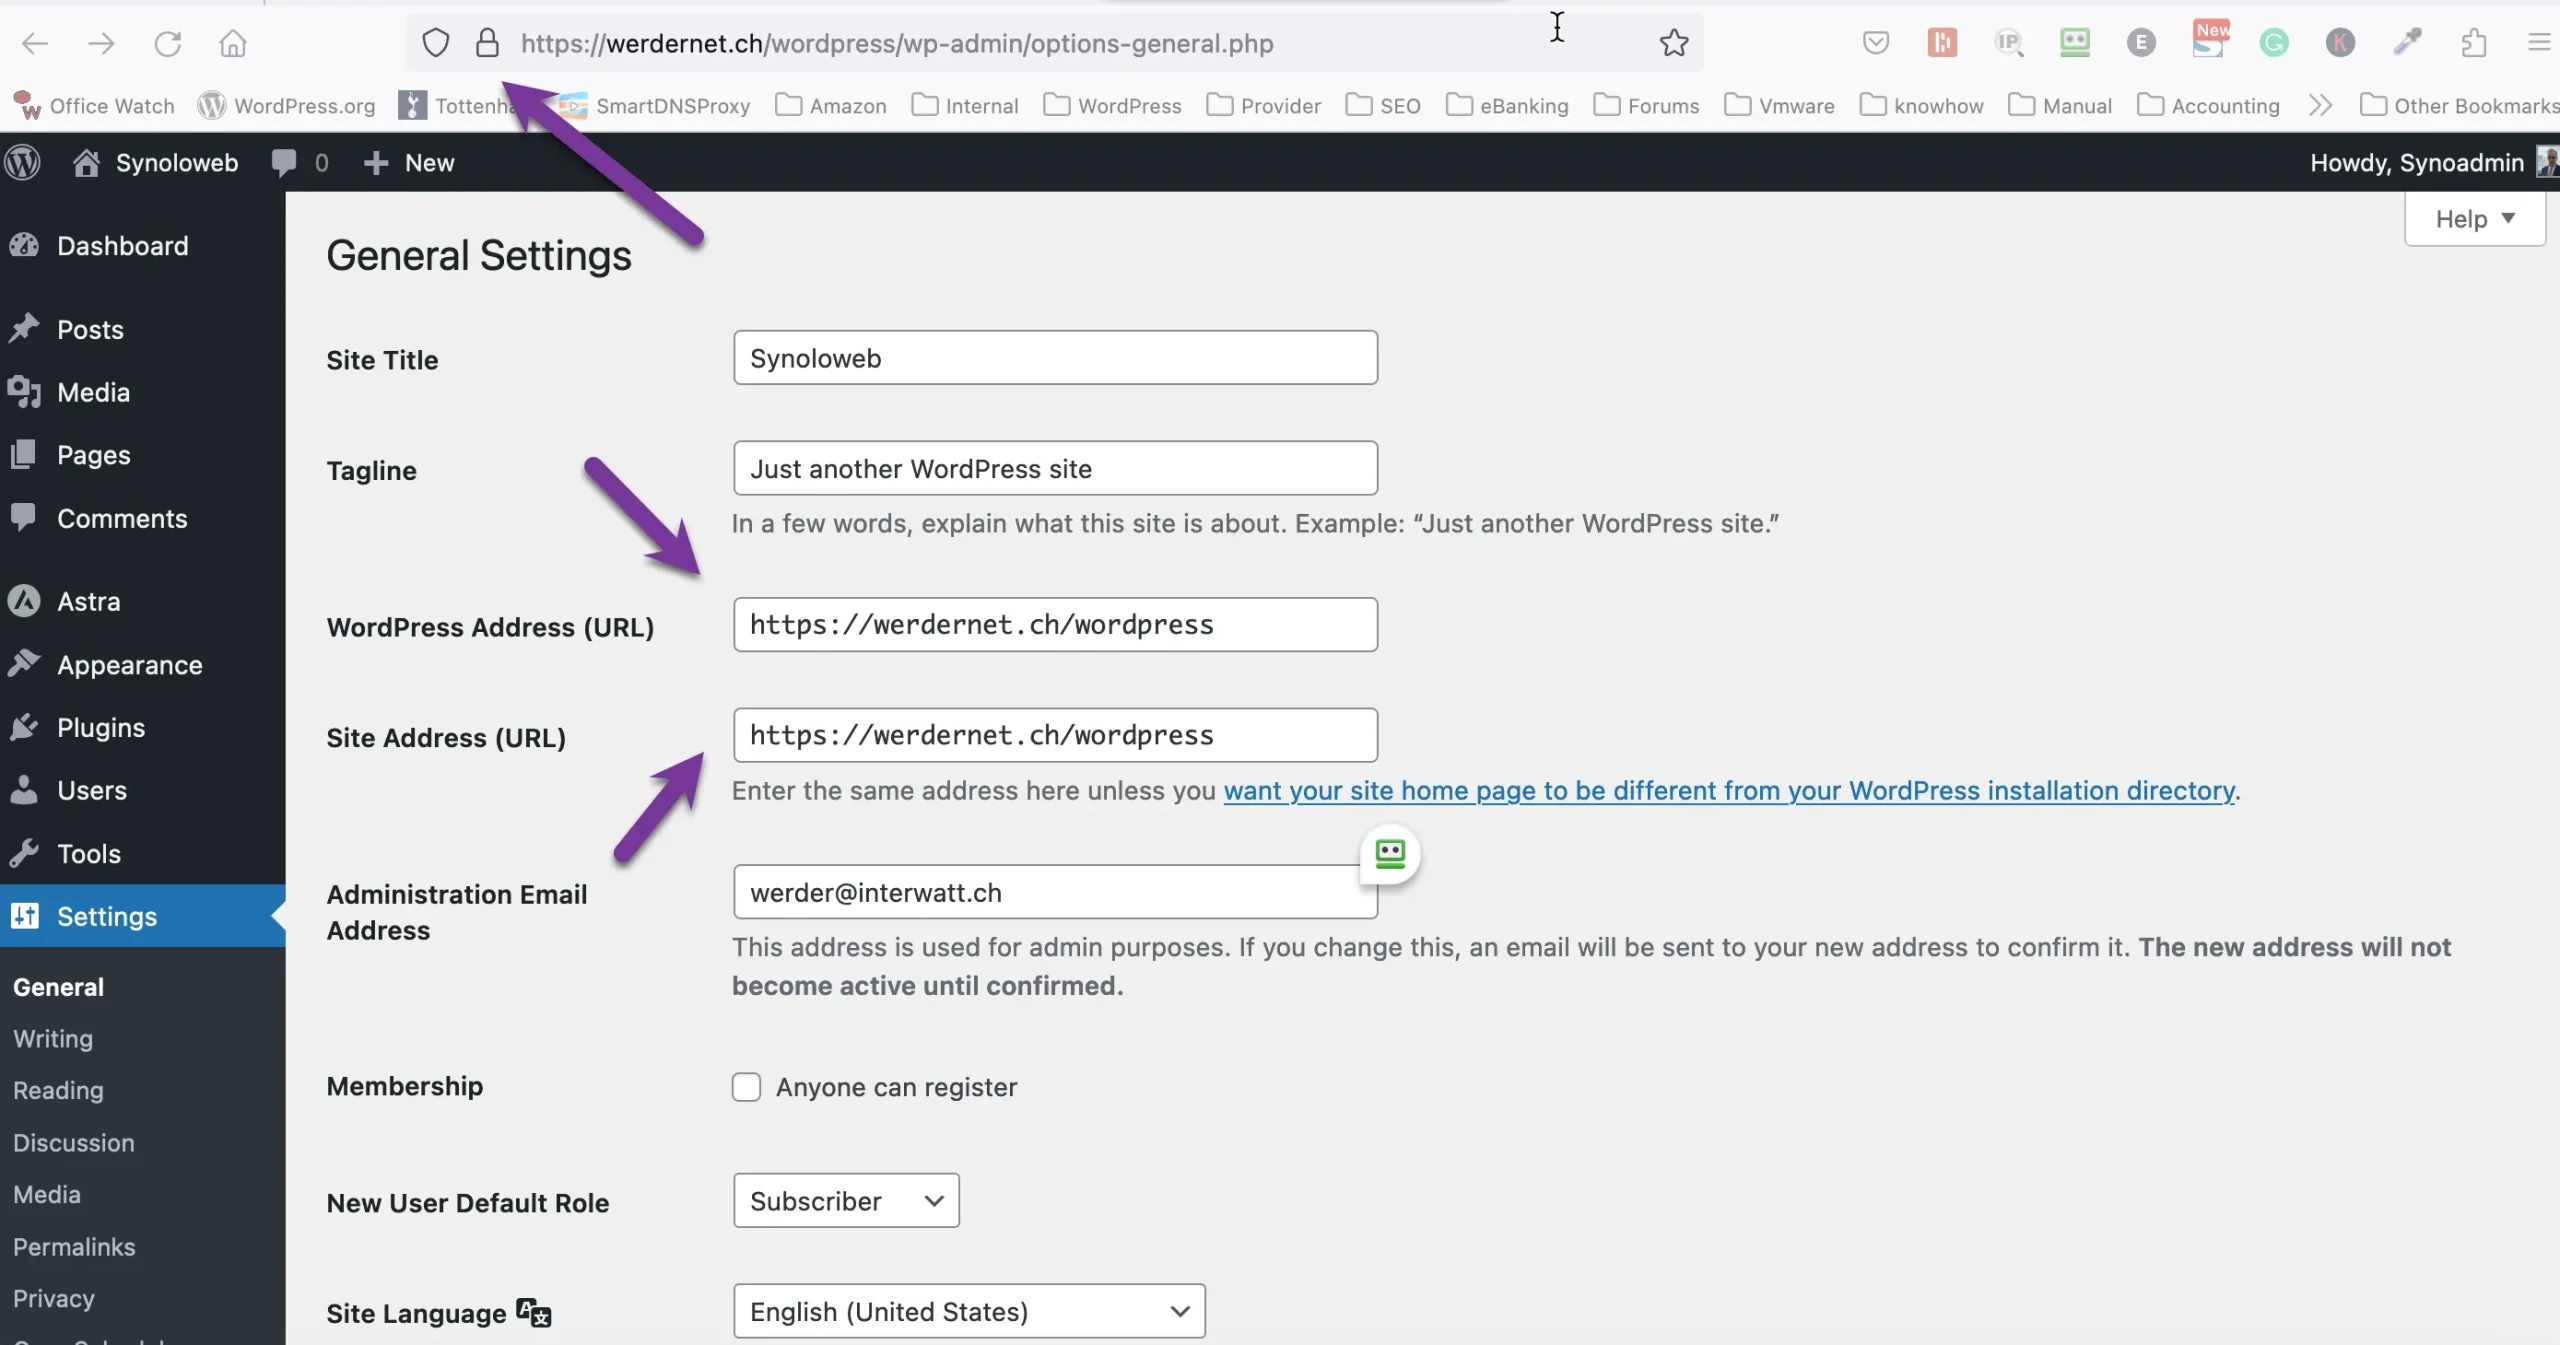
You should see a padlock in the browser address bar if all goes well. Synology will automatically renew the Letsencrypt certificate.
phpMyAdmin is not required, but I recommend installing it. It provides a web-based GUI for managing and modifying your MariaDB database, useful for troubleshooting or manual changes.
You find it in the Package Center. Search for phpMyAdmin and click Install. There is no setup wizard to follow.
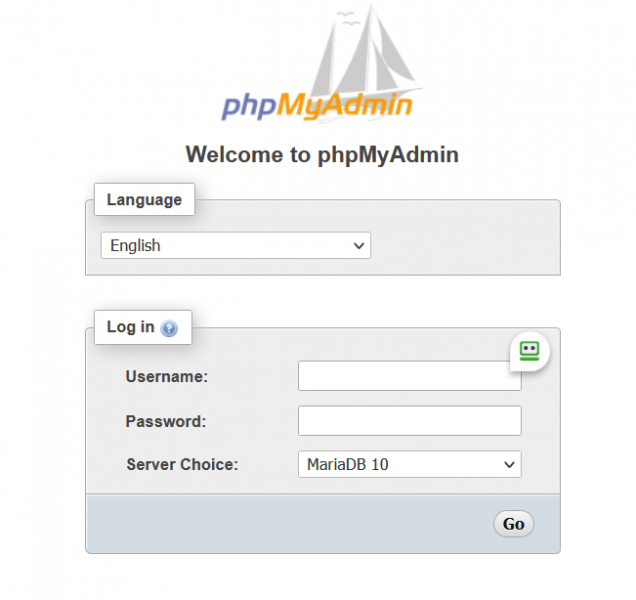
Once installed, access it at http://[NAS-name]/phpmyadmin and log in with the MariaDB credentials you set in Step 2.
I use this Synology for WordPress.

The main advantage is cost. Once you own the NAS, there are no recurring hosting fees. You also have full control over your data, your PHP settings, and your server environment.
If you already use your Synology for other tasks like backups or file sharing, adding WordPress keeps everything in one place. Synology Hyper Backup can cover your WordPress files and database as part of your existing backup routine.
There are a few honest limitations worth knowing before you start.
Performance is the biggest one. A Synology NAS is not optimized for web serving. Compared to a VPS or managed WordPress host, you will notice slower response times under any real traffic load.
WordPress installs in a subdirectory by default, so your site runs at yourdomain.com/wordpress instead of the root. I cover how to handle this in my Optimize WordPress on Synology article.
Security is entirely your responsibility. Synology does not provide support for your WordPress installation. If something breaks or gets compromised, you are on your own.
Updates are also limited. You cannot update WordPress from the dashboard. You have to wait for Synology to release an updated package, which does not always happen quickly after a new WordPress version drops. I explain how to work around this in the troubleshooting section below.
Yes, you can install WordPress on your Synology NAS using Docker. This method gives you more control over the setup, such as selecting a specific WordPress or PHP version, adding custom extensions, or running multiple isolated WordPress instances. It can be a good choice for developers or advanced users who need a tailored environment.
For most users, however, Docker is unnecessary. Synology’s built-in WordPress package in the Package Center is easier to install, integrates smoothly with Synology’s management tools, and requires far less manual configuration. If you don’t have special requirements, the Package Center method will be quicker and more straightforward.
Please also read my separate article, “Optimize WordPress on Synology” I look at some aspects for a better WordPress experience (performance, security, access) on Synology.
In the next part, we will explore more technical aspects and discuss how you can adjust WordPress on Synology for an even better experience and eliminate some of the mentioned drawbacks.
I have no idea why Synology decided to disable upgrade possibilities. So let us find out what the reason is. Let’s go to the File Station (on the Synology dashboard), web-packages, folder ‘WordPress’, and look for the file ‘wp-config.php. right-click and open it with the text editor – I use the text editor from the package center – We are looking for this in ‘wp-config-php’
define( ‘AUTOMATIC_UPDATER_DISABLED’, true );
It’s not there, so weird why we cannot upgrade WordPress from the dashboard. But wait, in ‘wp-config-php’, there is a reference to another file.
require_once DIR . ‘/syno-wp-config-custom.php’;
Right, a file ‘syno-wp-config-custom.php’ exists too. Open it with the text editor, and there you will see updates are disabled.
If we are trying to modify the line from ‘true’ to ‘false’ and save the file, we get the message
Sorry, the user account was not assigned the proper privileges to perform this action.
Well, in most cases, we are logged in to Synology NAS with an admin account. We need to investigate further what’s going on. Right-click the folder ‘WordPress’ in File Station and click on properties
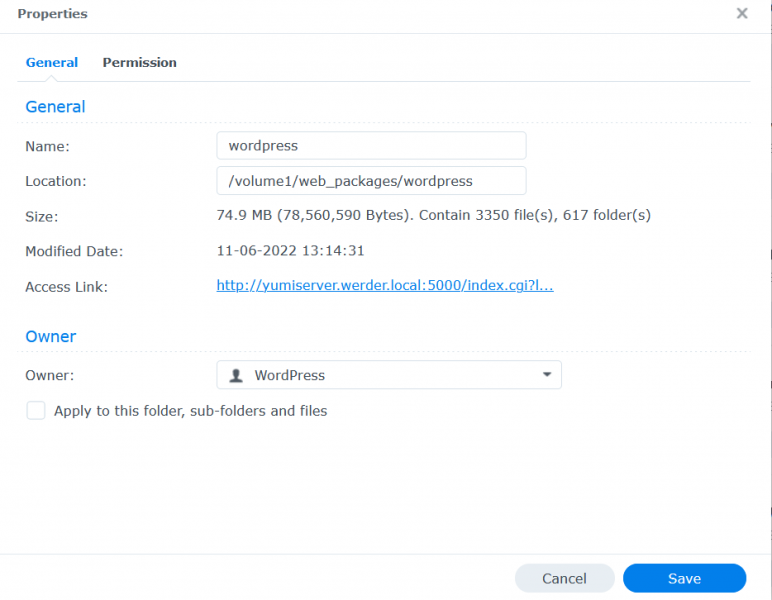
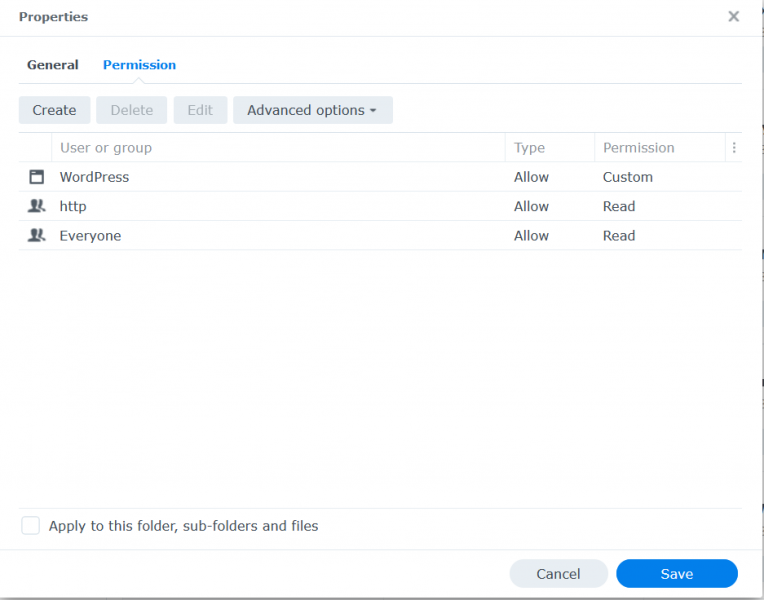
We notice the owner is a new user called ‘WordPress’. Unfortunately, it is not so simple, and we could add our account and give us write permission. The permissions you see here are only for the application ‘File Station’. In addition, when you go to the Control Panel, Users & Group, you will not see a new user called ‘WordPress’
We have to ssh now to the Synology NAS and look under the hood. I use Putty for Windows or Termius for MacOS. (see my article on how to use ssh)
Type in the below command, and the Synology NAS will list all users. We noticed, indeed a user ‘WordPress’ was created.
cat /etc/passwd
We can do the same for groups
cat /etc/group
Interesting a group ‘WordPress’ was set up too.
Next, we navigate to the WordPress folder and have a look at which user and group is the owner of the folder ‘WordPress’
cd /volume1/web_packages
Please note: WordPress is installed in my case on volume1. This might be different in your case.
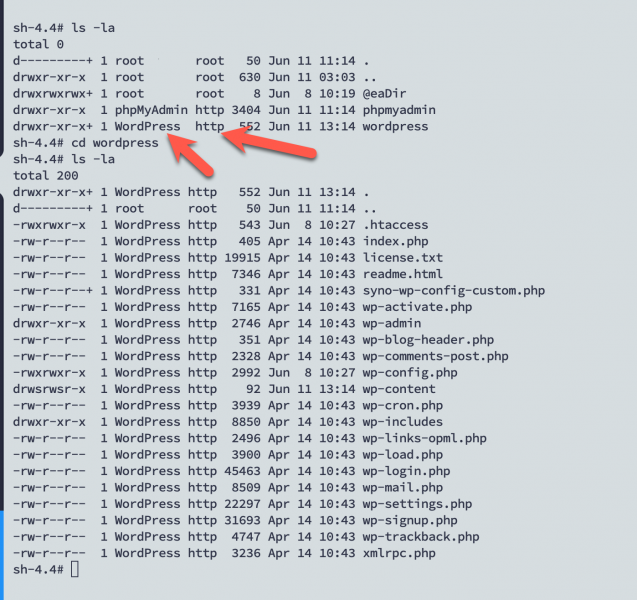
The owner of the main folder ‘WordPress’ and each subfolder and file is the user ‘WordPress,” and the group is ‘HTTP’. Looking at the permission, we noticed that all others have only ‘read’ permissions.
This is the answer to why we cannot edit the WordPress files.
I refer you to my articles about Users & Groups, and file permissions.
Please make sure to obtain sudo rights. sudo – s with your admin account
The easiest way is to
The command below adds the user ‘Admin’ to the http group
synogroup –add http Admin
The next step is to edit the file ‘syno-wp-config-custom.php’ with the vi editor
vi syno-wp-config-custom.php
We need to amend ‘false’ to ‘true’ and also delete the line highlighted in yellow.
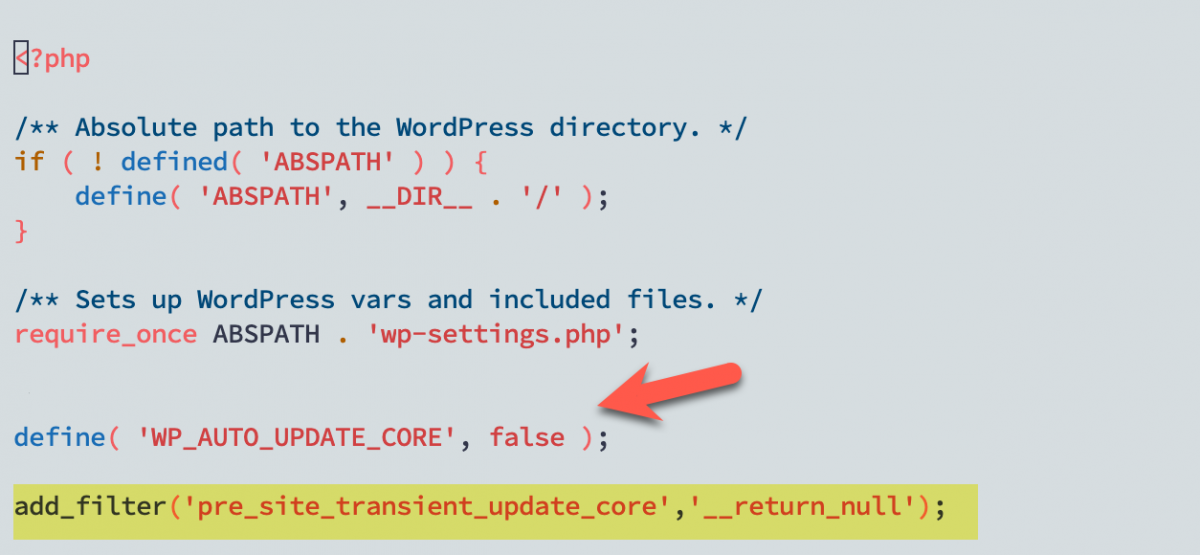
Press the letter i to change to insert mode to make the changes. When you are finished, press the ESC key followed by:wq. That’s the command to save the changes and exit the vi editor.
Go back to your WordPress dashboard, and now it should change. Automatic updates are enabled and scheduled.
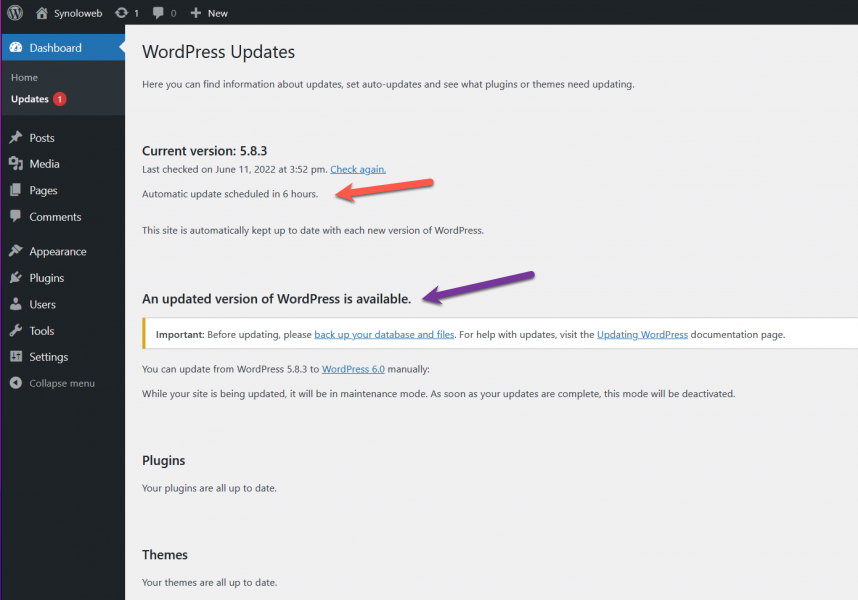
WordPress on Synology will update to the latest version automatically.
A word of caution: Don’t update the WordPress package on Synology later, in case a new one is released. If you do, it will overwrite the settings you just changed and revert them!
In this article, I have walked you through installing WordPress on Synology, shown you how to install phpMyAdmin as an additional package, and weighed the pros and cons of doing so. Following my instructions, you should now be able to install WordPress on Synology and automatically update to the latest version.
Thanks for reading! Questions or comments? Let me know in the comments below or email me at info@edywerder.ch


Hi, I’m Edy Werder. I write hands-on guides about Proxmox, homelab servers, NAS, and WordPress, based on real setups I run and document.
No sponsors, no fluff—just real configs and results.
Enjoying the content?

Guys, there is a much, much easier way to edit the php file.
Go to your DSM, open File Station and navigate to the folder (usually it’s in “web_packages\wordpress\syno-wp-config-custom.php”)
Click ‘Action’ -> ‘Download’
* on Windows: open Notepad –> open the downloaded php-file
* on Mac: open TextEdit –> open the downloaded php-file
Make the necessary changes in the file, follow the guide from Edy on what you need to change.
Save the file.
Back to DSM-environment: rename “syno-wp-config-custom.php” to, for example, “syno-wp-config-custom backup.php”
Click on ‘Upload’ –> ‘Upload – Skip’
Select the file, and upload.
DONE!
How do I get a redirect to happen automatically so that when someone goes to my domain (of course after I get this all working), say http://www.xyz.com that they don’t get the Synology generic default text:
“Your website is not set up yet. Web Station has been enabled. To learn more about hosting a website, refer to the “Web Station” section of DSM Help.”
and instead have the WordPress site load up. I don’t want users to be redirected to a subdirectory, ie http://www.xyz.com/wordpress (though I can’t quite figure that out either!)
I’m trying to self host this site now that I was hosting remotely but they’re wanting to quadruple my rate per year! I would also love some insight if you have any on how to import a backup from a cPanel/WordPress site (bluehost). I have the full backup file, just not sure what to do with it! Thanks for the instructive tutorial though, I’m way farther than I would have been on my own!! 🙂
Tried to add user Admin to synogroup as described. This results in -sh: /usr/syno/sbin/synogroup: Permission denied.
Sorry even if you are logged in as an administrator you need to obtain sudo rights first with sudo -s. You should get a prompt to enter the password. After that you should be able to add the admin user to the group. Linux is case-sensitive admin or Admin is not the same. 🙂 – I have amended the article. Thanks for letting me know!