
By Edy Werder — IT Consultant & Tech Blogger
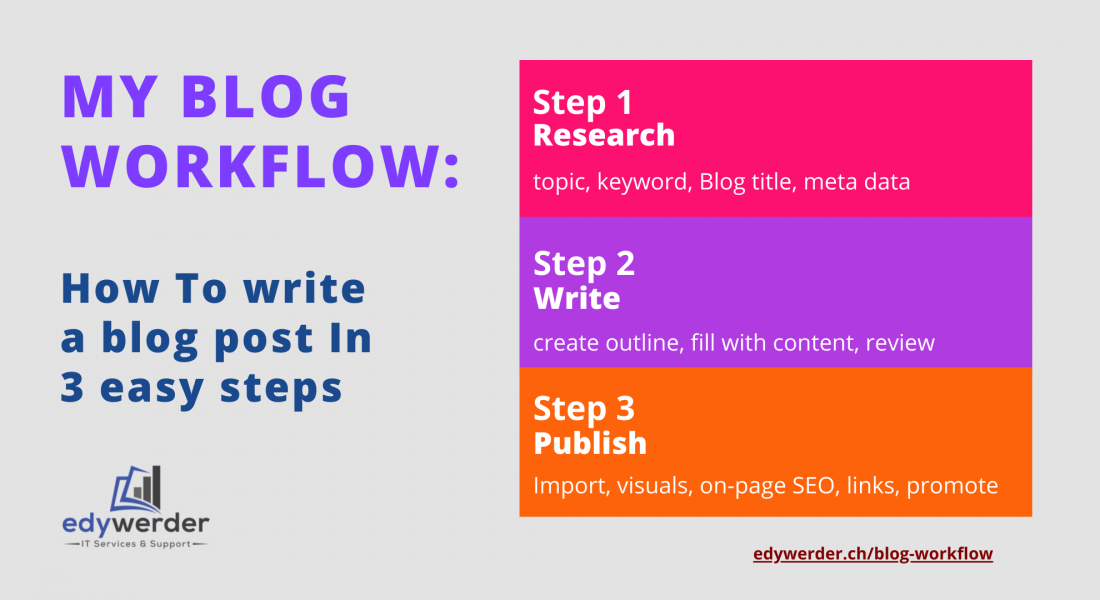
Mastering Your Blog Workflow
Creating a blog post can seem overwhelming, but with a streamlined workflow, it becomes a breeze. Let’s dive into mastering your blog workflow with three essential steps: researching, writing, and publishing.
First, gather your ideas and perform keyword research to ensure your content hits the mark. Next, craft your post with a clear outline and engaging writing. Finally, publish your polished WordPress content with eye-catching visuals and SEO optimization.
With this efficient approach, you’ll produce high-quality content consistently and manage your blogging tasks effortlessly. Ready to transform your blogging process? Let’s get started!
In this article, I recommend tools for keyword research and SEO content writing to assist you. I mostly use these tools and have tested many of them.
Step 1: Research
Start with finding blog topic ideas
The first step is to generate blog topic ideas. I usually do this by brainstorming and searching for blog post ideas online.
Brainstorming can be done in many ways, such as writing down a list of topics or coming up with ideas sparked by other ideas.
Another great way to find blog post ideas is to Google. Type in keywords related to your topic and see what comes up. You can also go to Reddit and see what people are discussing in your niche.
The section you should also check in Google search is “People also ask” and the related search.
There are also SaaS apps that can help you find topic ideas. I use Writzerzen.
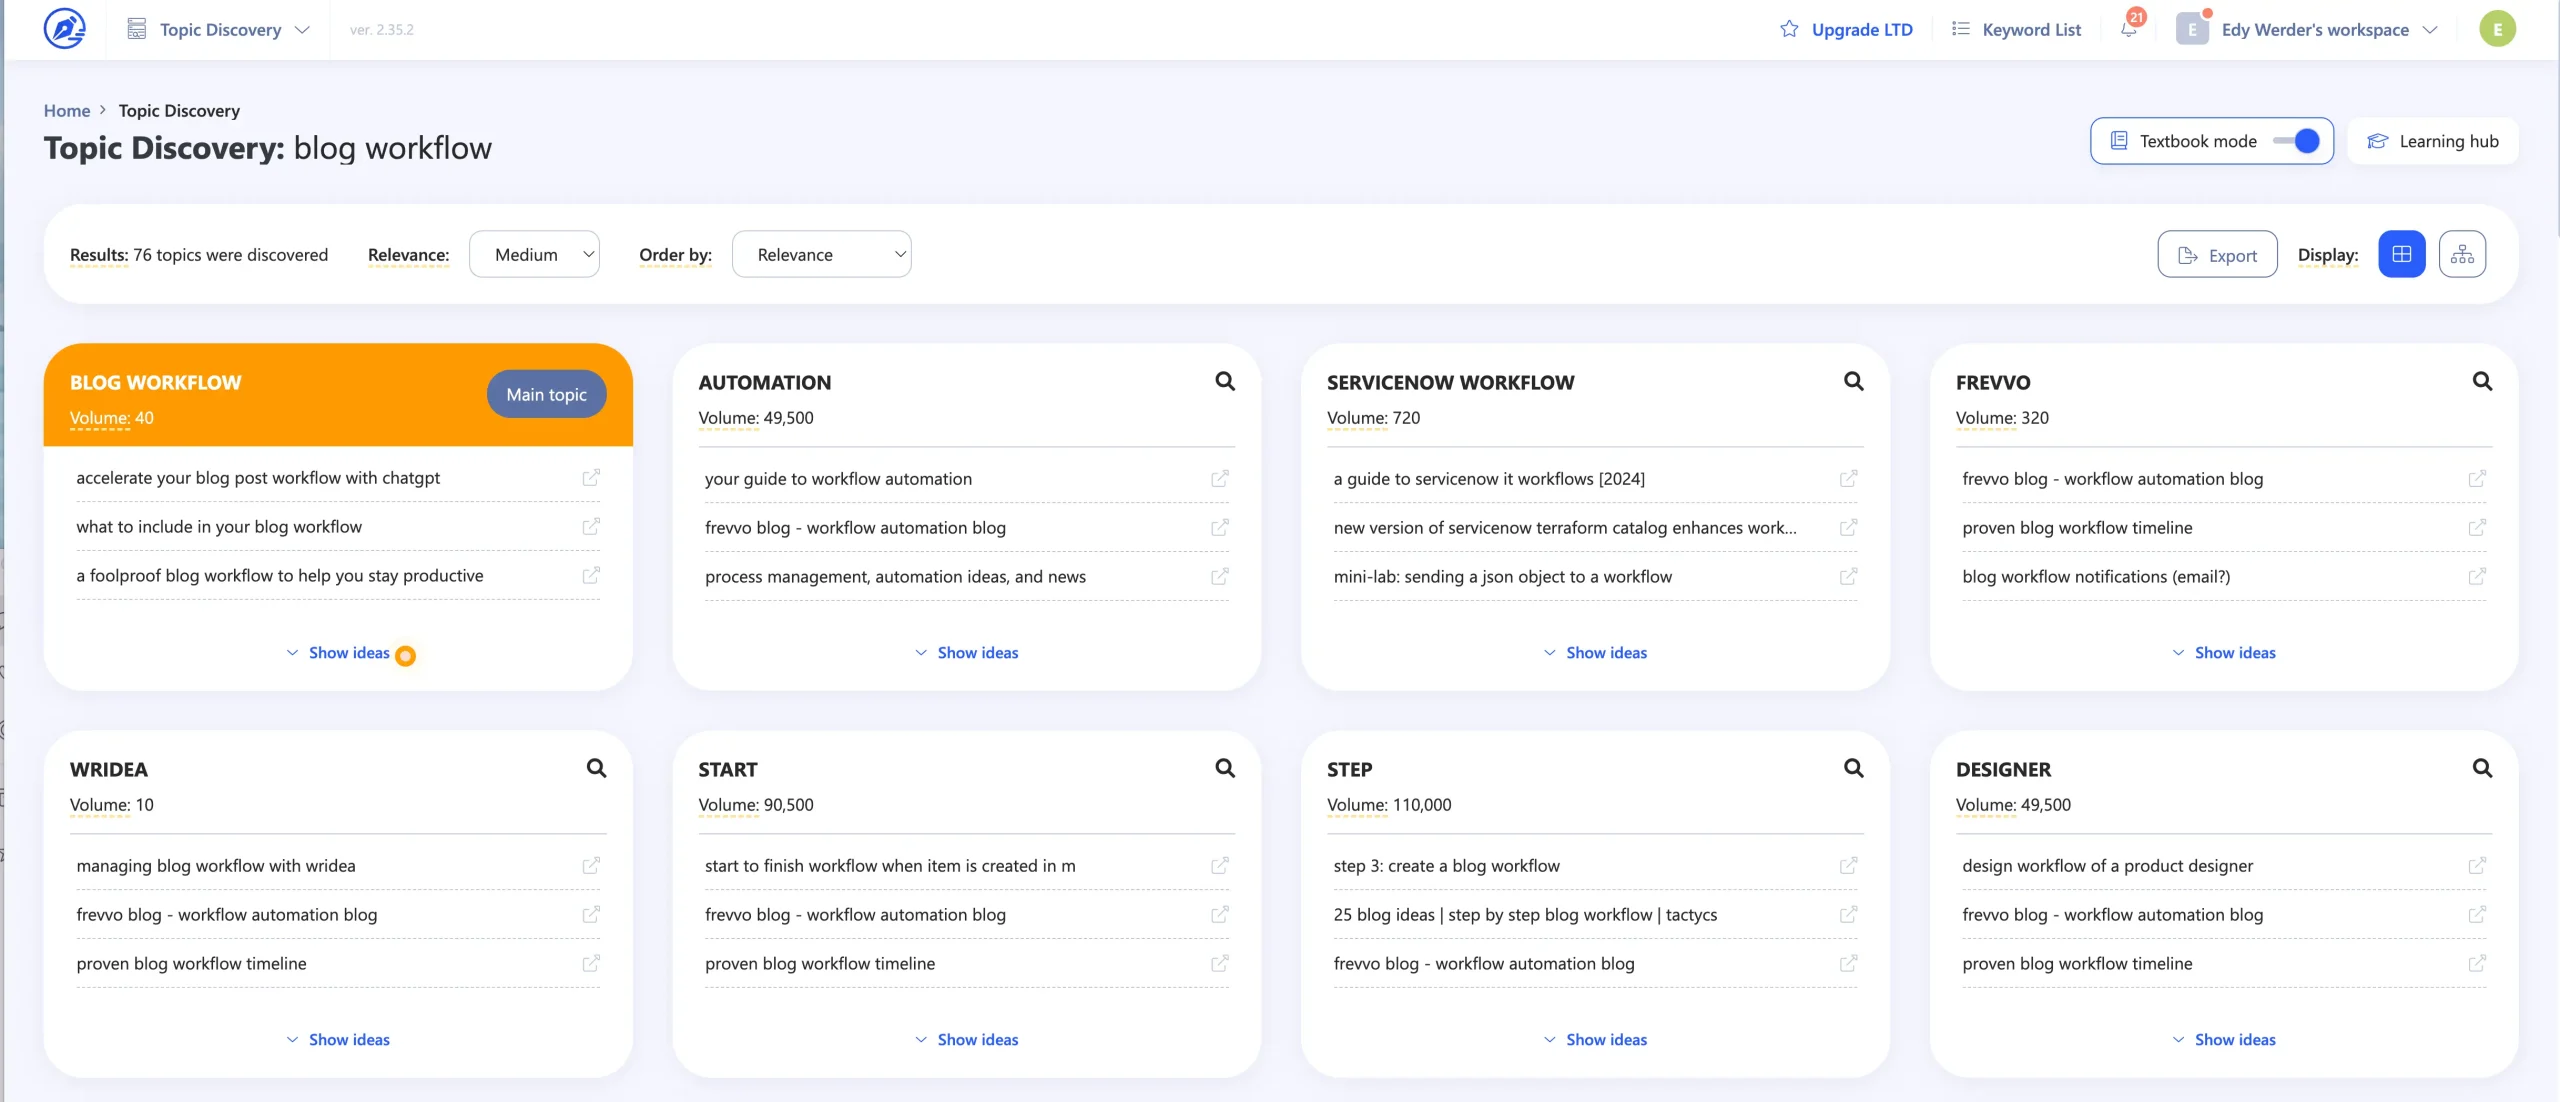
Another tool I use is the Mangools Suite. It’s more of a keyword research tool, but when you have an idea, you can find some good keyword ideas using Mangools.
I’m blogging in the tech business and WordPress niche. Some of the best blogs I wrote have solutions to my problems. I couldn’t find the answer online, or it was poorly explained, so I wrote a blog to describe it better.

Keyword Research
Once you have a topic in mind, it’s time to do keyword research. It will help you determine what keywords to include in your blog post.
There are several ways to do keyword research, but one of the easiest is to use Google AdWords Keyword Planner. This tool will help you find keywords related to your topic and estimate how many monthly searches they receive.
Another great way to find keywords is by using the Google search engine. Type in a keyword and see what comes up.
I use the Chrome extension SurferSEO. Type in a keyword and SurferSEO will show the volume and some ideas for related keywords on the sidebar. You will get an idea of whether you want to target the keyword. The SurferSEO Chrome extension is free and allows you to select the target country.
You should also examine the search results for your keyword. If Google displays blog results on the first page, there’s a strong possibility that your blog could also achieve a high ranking.

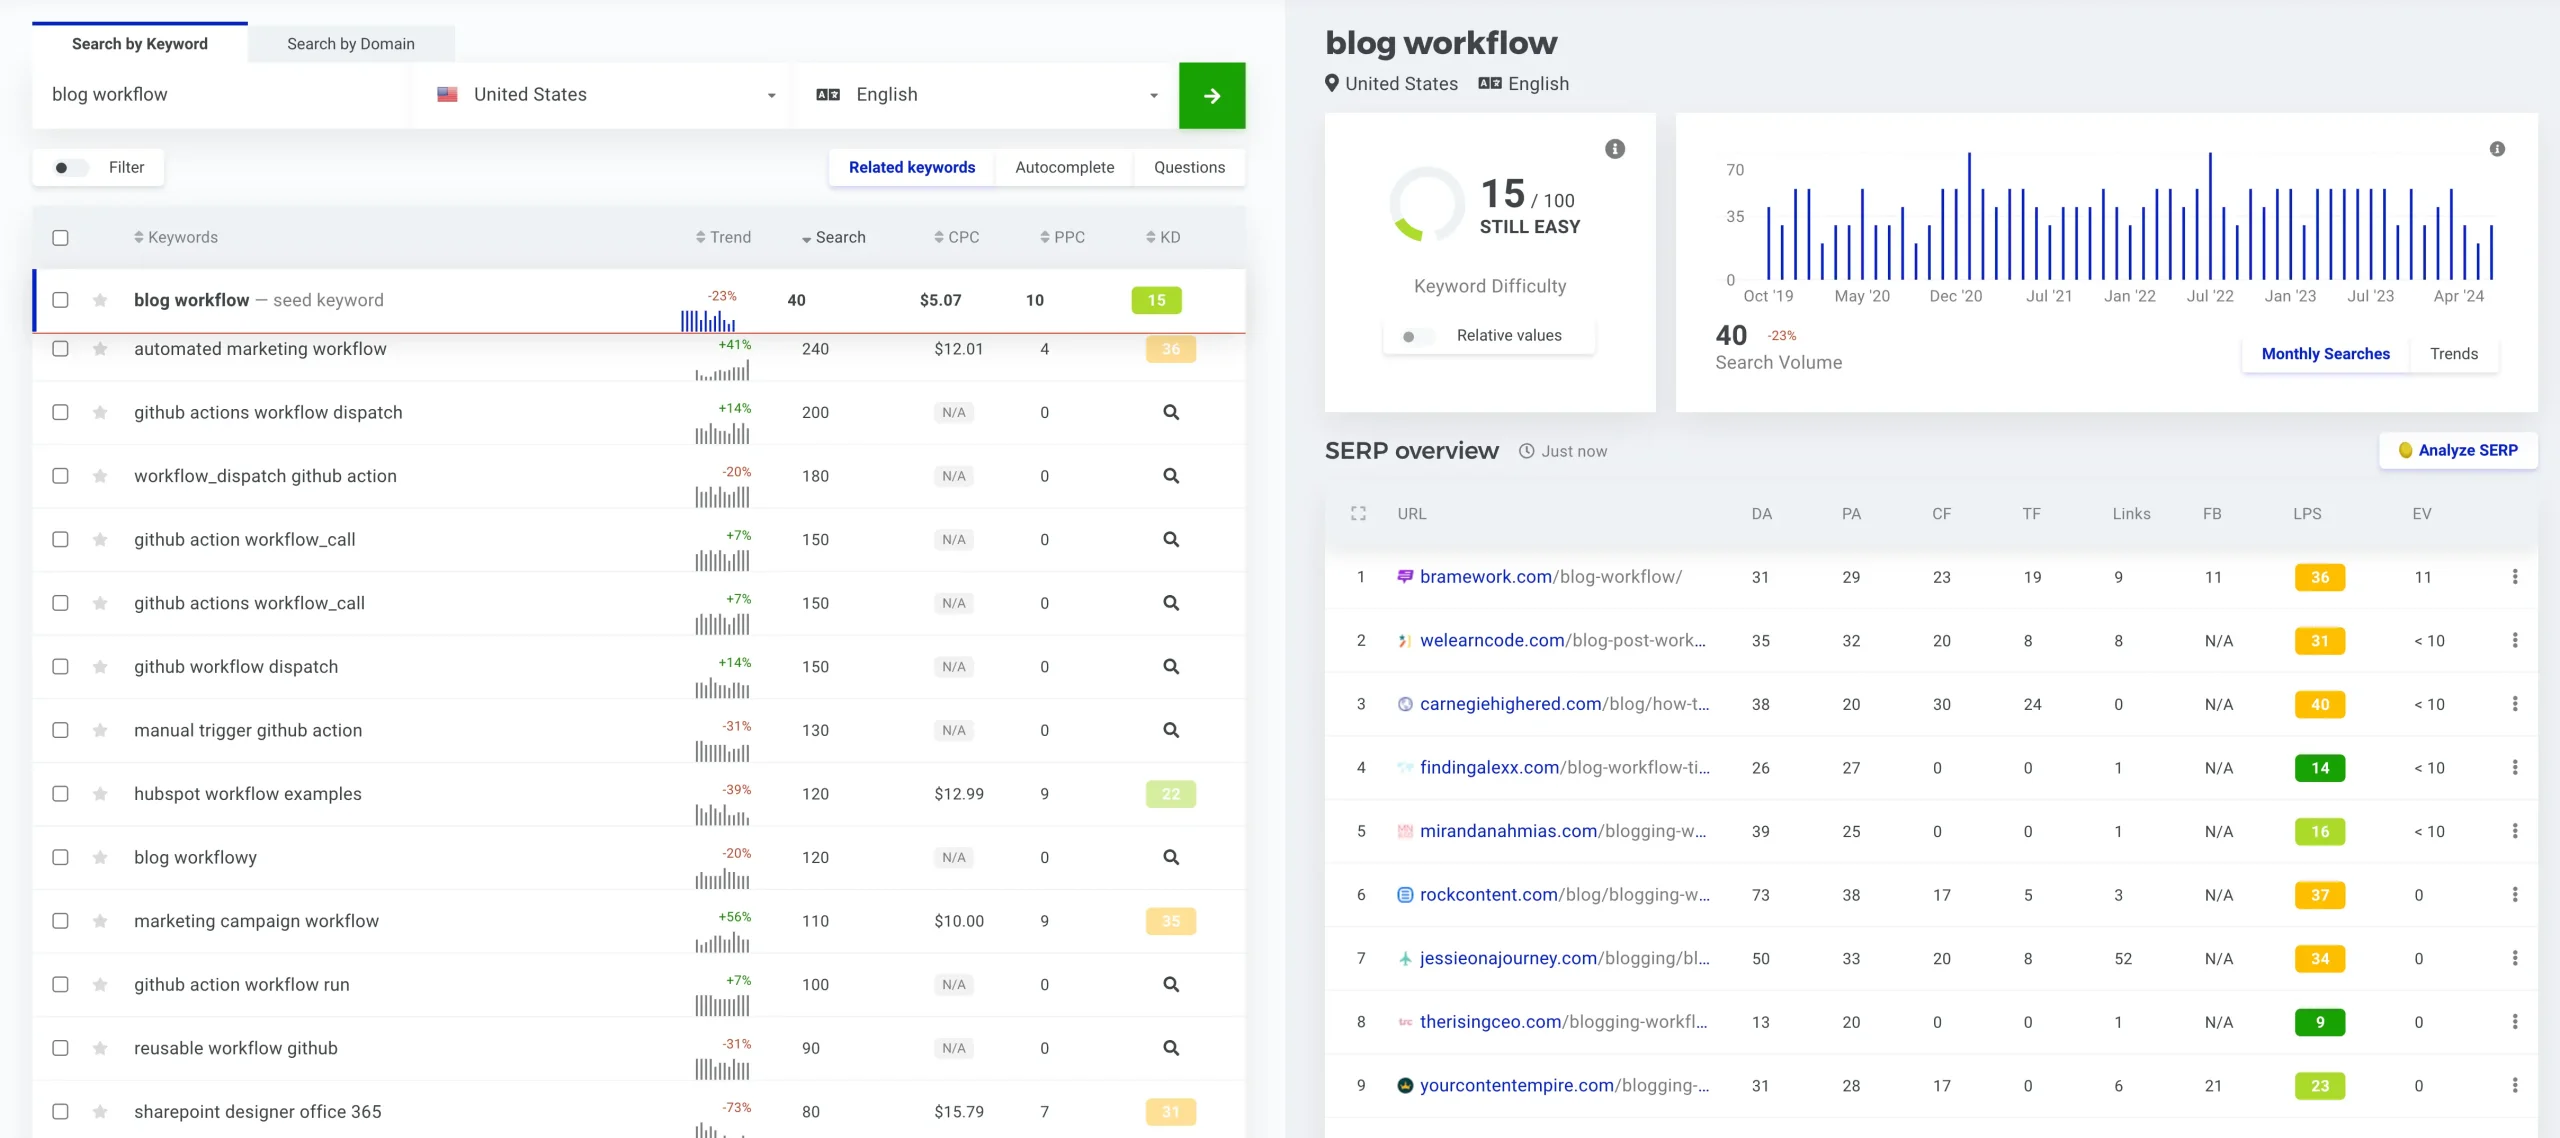
If you want to get more metrics about your keyword, you need to buy a keyword research tool. I use Mangools tools, which provide more data. My website DA (Domain Authority) is not high, so I target keywords with low KW difficulties.
Based on my experience, Mangools KW difficulties are a reliable metric. Unfortunately it is a bit pricey – more affordable than Semrush/Ahrefs – sometimes they run some specials with Lifetime discounts.
Writerzen offers Keyword Explorer and Keyword Planner with a nice feature for Keyword clustering to target more keywords.
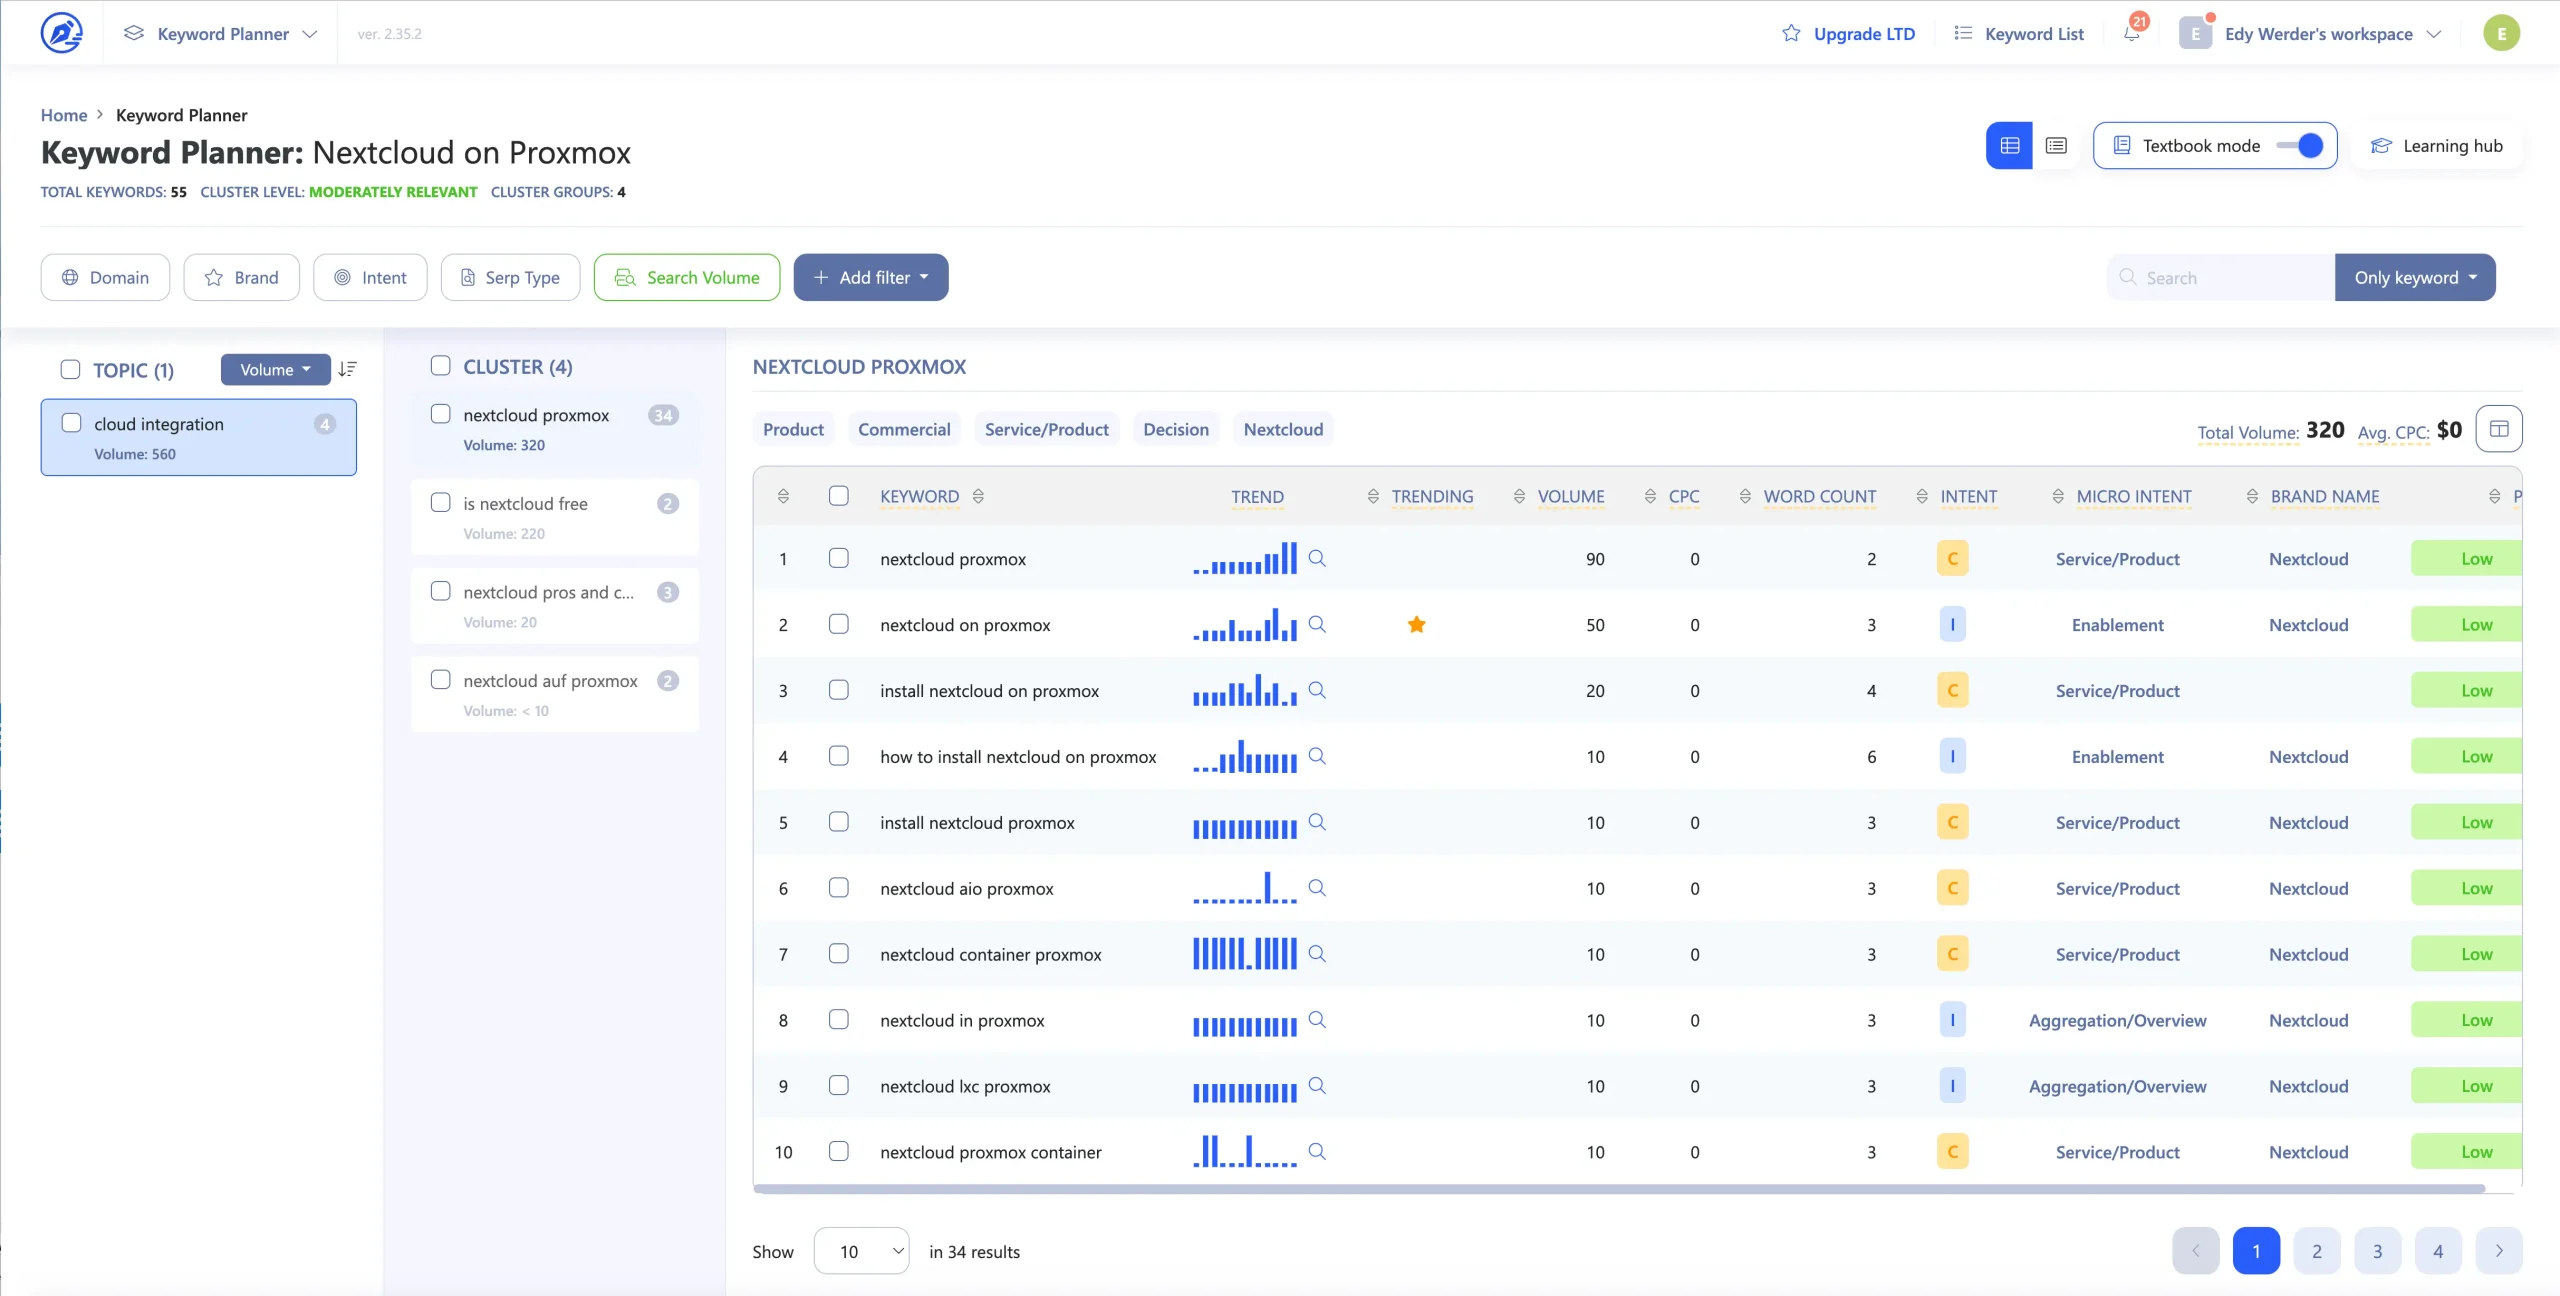
What is keyword clustering?
“Keyword clustering is the process of grouping keywords that are semantically linked to target a page. Back in the early days of the Internet, search engines such as Google were simple, and you could individually target keywords such as “red apples” and “green apples.”
Other keyword research tools are:
- Lowfruits
- Ahrefs
- Semrush
- Ubersuggest (tip: use a VPN to India for best price LTD deals)
Sometimes there are good deals on Appsumo for topics or keyword research tools.
Step 2: Write
Blog Title
- Importance: The blog title is the first thing readers see and is a primary factor in attracting traffic. It sets the expectation and theme of your content.
- Tips:
- Keep it Engaging: Use power words or emotional triggers that engage the reader’s curiosity or address a specific problem they might have.
- SEO-Friendly: Include the focus keyword naturally to improve SEO rankings.
- Clarity and Brevity: Ensure the title is clear and to the point, ideally under 60 characters, to avoid being cut off in search results.
Meta Title
- Importance: The meta title is critical for search engines and appears in search results. It can be similar to the blog title but optimized for search rankings.
- Tips:
- Include Keywords: Position your primary keyword towards the beginning of the meta title.
- Brand Mention: To boost recognition, include your brand name at the end of the meta title if space allows.
- Character Limit: Keep the meta title under 60 characters to ensure it displays fully in search results.
Meta Description
- Importance: This summary of your blog post appears under the meta title in search results. It’s your chance to market content to potential readers.
- Tips:
- Compelling Summary: Write a concise summary highlighting your blog post’s value and what readers will gain from it.
- Use of Keywords: Incorporate the focus keyword naturally, as this can also highlight the relevance of your content in search results.
- Call to Action: Include a call to action, encouraging users to read more or click through.
- Character Limit: Aim for about 155 characters, as longer descriptions might be truncated in search results
Understanding Google E-E-A-T and Audience Engagement:
Before crafting your blog article, it’s crucial to understand Google’s E-E-A-T principles—Expertise, Experience, Authoritativeness, and Trustworthiness—which significantly influence how search engines perceive and rank your content. Demonstrating these qualities in your blog posts can boost your site’s credibility and search engine ranking. Additionally, writing in the second person singular engages your readers directly, making your content more relatable and persuasive.
This approach enhances reader engagement and aligns with the best practices of creating user-centered content that speaks directly to your audience’s needs and expectations.
Blog post outline creation
An outline is a great way to organize your thoughts and ensure your blog post flows well. It can also help you stay on track while writing your blog post.
- Introduction
When writing an introduction, it’s essential to hook your readers and introduce them to the topic of your blog post. You can use a story, statistics, or a question.
Once you have hooked your readers, introduce them to the main points of your blog post.
- Body
It is crucial to include all relevant information related to your topic in the body of your blog post, including facts, statistics, examples, and stories.
It’s also important to use keywords throughout the body of your blog post. It will help you rank higher on search engine results pages.
- Conclusion
In the conclusion of your blog post, it’s essential to summarize the main points of your blog post and leave your reader with a call to action.
You can also include a link to additional resources related to your blog post.
A well-structured outline with H2 and H3 tags makes filling the sections with text easy. It’s like a job almost finished.
Blog content edits
If you use an AI assistant writer, you must fact-check it and make it sound like you wrote it. I always write some sentences independently and do not rely only on AI suggestions. Sometimes, the AI does not get the context or makes a silly mistake.
What Google’s position on AI?
“Google has made it clear that using AI in the content creation process is not against its policies. In its guidance about AI-generated content, it says that the “Appropriate use of AI or automation is not against our guidelines.”
Proofreading
You can also use an online grammar tool like Grammarly or HemingwayApp to help with your blog post.
Review
To correctly complete the writing review, read it aloud. This might help you find any mistakes that you might have missed.
Tools I use for the Outline and writing.
I use Outranking and Frase to build the Outline based on the keywords. Both analyze the top results of the SERPs, which you can use to make your Outline.
Outranking also suggests using related keywords and Google NLP terms to rank for other keywords. It is also good to use Google PAA in the section outline. PAA stands for People also asks.
I find Outranking’s outline tool outstanding. It’s very good and intuitive to use. For example, you could use Outranking for the outline only and then write the article with ChatGPT or any other AI tool.
NeuronWriter is another great tool for content writing. The app is still available on Appsumo; you should buy at least three codes to get all its features.
I perform the review and proofreading part with Grammarly Premium. There, I make the final edits until the document is ready to publish.
Another interesting tool is writing your article in one go according to input parameters. These are good for a first draft, but you should adapt them and add your personal touch.
II suggest trying out some AI content writing tools and then sticking to 2-3 of them. Sometimes, I use Outranking just to outline the article, write the content with ChatGPT Plus, and optimize it with Neuronwriter. I find Agility Writer and SEOwriting.ai interesting, but after testing both, I realized that the monthly cost is too high for my needs.
SEO content writing tools I use mostly are:
- Mangools Tools
- Outranking
- Frase
- Neuronwriter
- ChatGPT Plus
- Grammarly Premium
Step 3. Publish
Now that you have written your blog post, it’s time to publish it.
Import to WordPress
WordPress is the platform I use for all my websites. To write my blogs, I use the Gutenberg editor. Rank Math Pro is my SEO plugin. There is no easy way to import text from Grammarly Premium, so I do it traditionally, using cut and paste. However, there is a way to paste it in one go. Just use the H2 and H3 formatting in Grammarly Premium and hit enter before any H2 and H3 tags. Gutenberg will recognize the tag and create the paragraph block.
Alternatively, if you use Outranking.io, you could use their WordPress plugin to import it. It does the job, fine. What’s nice about the Outranking WordPress plugin is to optimize an existing article. Export it to the Outranking editor, improve it, and then in the WordPress editor, you can import it again.
Create Visuals
If you want to add visuals to your blog post, you can create them using a tool like Canva, Crello, or Glorify.
Canva is a free online tool for creating visuals for your blog posts. You can create infographics, charts, and other visuals.
Use my link to get the Glorify Lifetime deal.
Use the correct dimensions for your pictures. 1920x1080px is fine for the hero banner and 1200x628px for the WordPress-featured image.
I mostly use Glorify for my visuals. For screenshots, I use Snagit. Hoverify is the perfect Chrome extension for downloading visuals from other websites. For example, if you are an affiliate, you can download some images or videos with Hoverify from the publisher.
Add internal and external links
- Internal Links
It’s important to include internal links in your blog posts. This will keep your readers on your website and improve your SEO.
You can add internal links by adding anchor text to your images or hyperlinks to text.
- External Links
In addition to internal links, external links are also important for SEO. They help you build links to other websites and help your readers learn more about the topic you are writing about.
You can add external links by adding a hyperlink to text or an image with a hyperlink.
Promotion – Social media content
You can generate more traffic by sharing your blog posts on social media. Create a tweet or Facebook post to promote your blog post and include a link. Alternatively, you can create an infographic or chart summarizing the information in your blog post. I have discovered that it supports getting indexed faster when I tweet my latest article just after publishing it.
My tool is Publer for posting to social channels.
If you want to speed up indexing, read this article I wrote.

FAQ
Conclusion: Streamlining Your Blog Workflow for Modern SEO
A streamlined blog workflow is essential in today’s ever-evolving SEO landscape. By focusing on thorough research, targeted writing, and careful publishing, you ensure your content is engaging and optimized for search engines.
Remember, effective blogging is not just about pleasing algorithms but delivering valuable content that resonates with your audience. Stay updated with SEO trends and continuously refine your approach to keep your blog relevant and authoritative.
I’d love to hear from you — was this article helpful? Share your thoughts in the comments below. If you prefer, you can also reach me by email or connect with me on Reddit at Navigatetech.
Before you go …
If you found the insights on enhancing your blog workflow valuable, you might be interested in exploring tools to further streamline your content creation process. I recommend checking out my Elementor review, where I delve into how this popular WordPress page builder can transform your blogging efficiency and design flexibility. This review could be particularly useful if you’re looking to elevate the aesthetic and functional aspects of your blog.
About the author
Hi, I’m Edy Werder. I write hands-on guides about Proxmox, homelab servers, NAS, and WordPress, based on real setups I run and document.
No sponsors, no fluff—just real configs and results.
Enjoying the content?
