
By Edy Werder — IT Consultant & Tech Blogger
What is the equivalent of VMware Tools in Proxmox?
If you’ve just migrated from VMware to Proxmox, you might be wondering what to install instead of VMware Tools. In VMware ESXi, this package is essential because it includes both drivers and a guest agent that improve performance and integration. While you cannot directly install VMware Tools in Proxmox, you can achieve similar functionality by installing VirtIO drivers and the QEMU Guest Agent, which together provide the features you get when you install VMware Tools on a VMware guest OS.
So the short answer: Proxmox doesn’t use VMware Tools. Instead, you need to install two components:
- VirtIO drivers → for storage, network, and memory ballooning
- QEMU Guest Agent → for integration with the Proxmox host
Together, these provide the functionality you’re used to in VMware. In this guide, I’ll show you exactly how to install them on Windows and Linux.
What Are VMware Tools in Proxmox?
VMware Tools in Proxmox enhance the performance of guest operating systems in virtual machines.
VMware Tools is a bundle of two things:
- Device drivers (network, storage, graphics, mouse integration)
- Guest agent (shutdown, time sync, freeze/thaw for backups)
In Proxmox, this is split into separate components:
- VirtIO Drivers → high-performance drivers for disk and NIC, plus the VirtIO balloon driver for RAM optimization. These provide near-native performance.
- QEMU Guest Agent → The QEMU Guest Agent enables advanced features such as graceful shutdown and time synchronization between the guest and host in Proxmox.
If you’re in the process fron moving from VMware ESXi host, make sure VirtIO drivers are installed before migration for better performance. I highly recommend it. I cover in detail in my VMware to Proxmox migration guide.
VMware Tools vs. Proxmox Equivalent
Here’s a quick side-by-side look:
Feature | VMware Tools | Proxmox Equivalent |
|---|---|---|
Storage Drivers | ✔ PVSCSI | VirtIO Block/SCSI |
Network Drivers | ✔ VMXNET3 | VirtIO NIC |
Guest Agent (shutdown, time sync, freeze/thaw) | ✔ | QEMU Guest Agent |
Memory Ballooning | ✔ | VirtIO Balloon Driver |
Graphics / Mouse Integration | ✔ | Limited (basic drivers) |
Installing VirtIO Drivers and QEMU Guest Agent on Windows
If you just installed or migrated a Windows VM, you’ll likely need to install both VirtIO drivers and the QEMU agent. You will find the both tools on the same ISO file
If you are starting from scratch, I also wrote a step-by-step guide to installing Windows Server on Proxmox with VirtIO drivers.
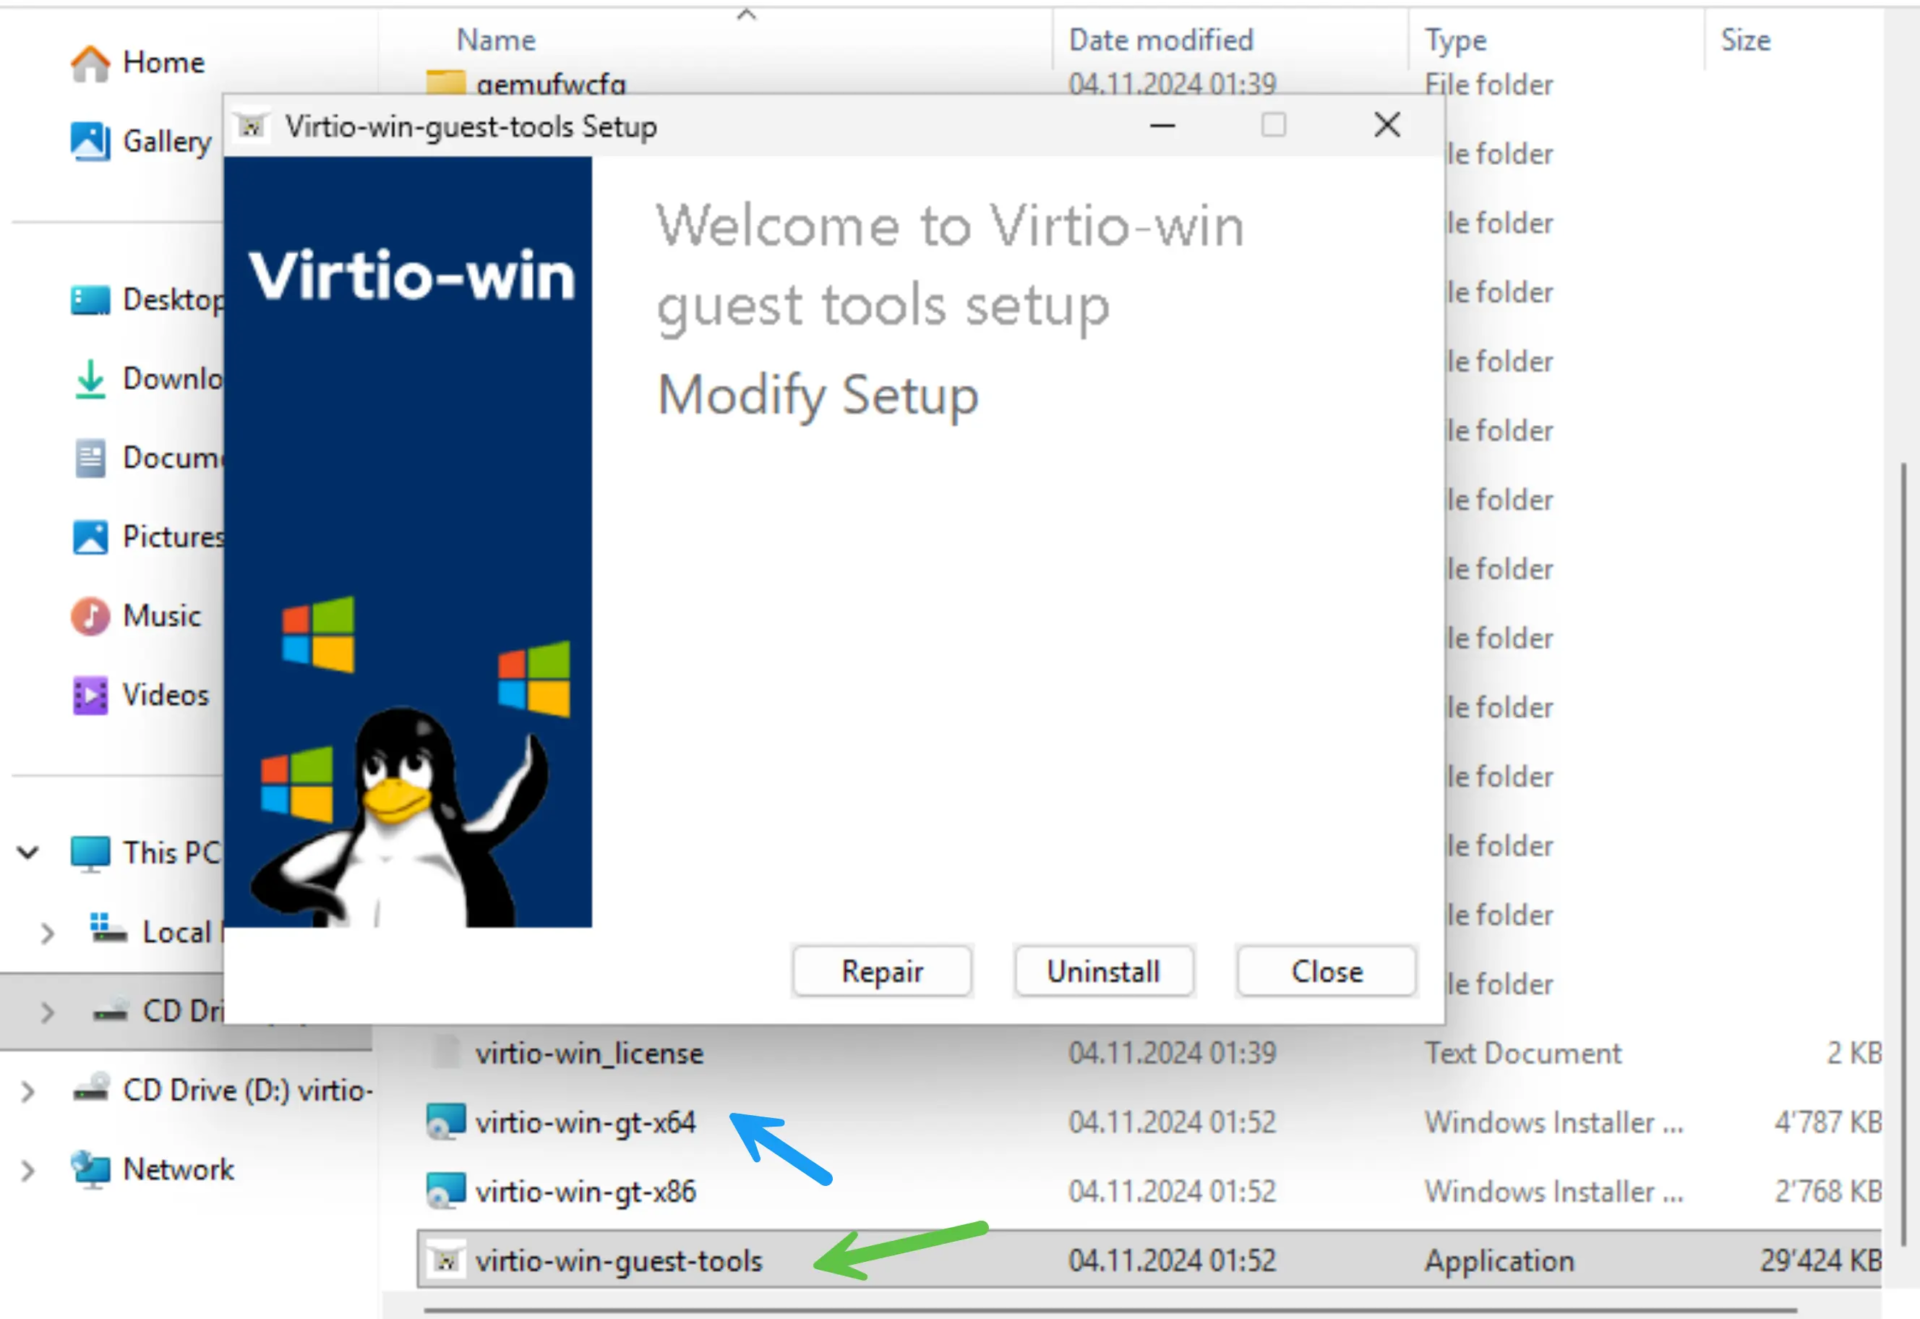
See the picture below of the VirtiO ISO file
- marked blue arrow: VirtiO driver for 64bit
- marked green arrow: QEMU Windows guest tools
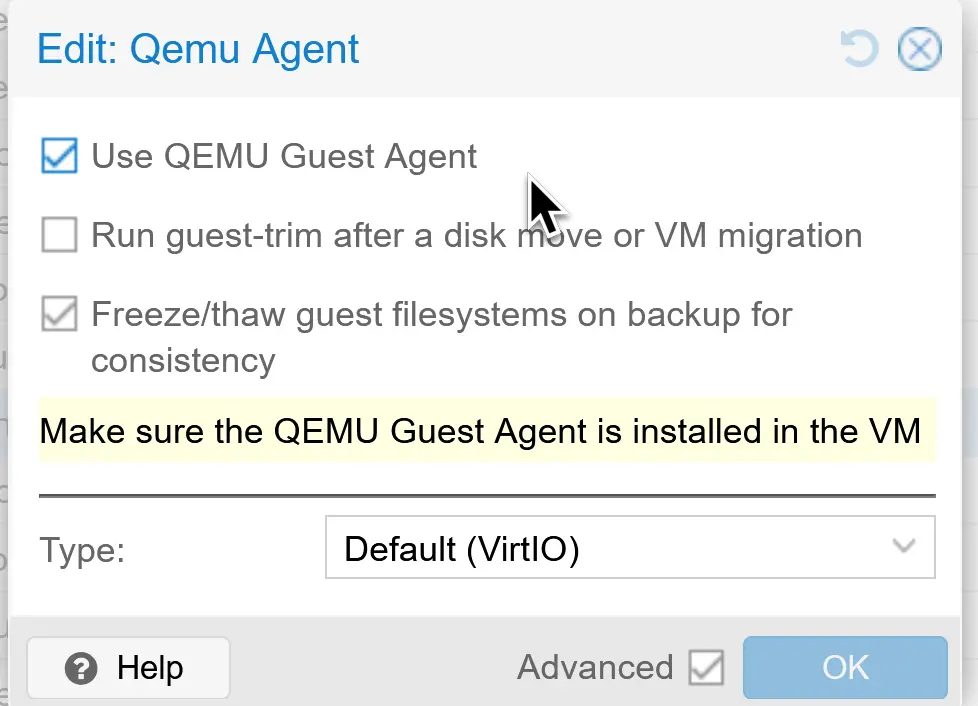
Step 1 – Enable QEMU Guest Agent in Proxmox
- Go to VM → Options → QEMU Guest Agent → Enable.
Step 2 – Mount VirtIO ISO
- Download the latest virtio-win ISO from the official Proxmox website and upload it to your Proxmox environment. I have a separate article explaining how to upload and ISO image.
- Mount the ISO to your VM via the Proxmox GUI.
Step 3 – Install VirtIO Drivers
- Inside Windows, open the mounted ISO.
- Install virtio-win-gt-x64.msi (64bit) or virtio-win-gt-x86.msi (32bit)
- This will install all the necessary packages for the Windows vm guest operating system.
Step 4 – Install QEMU Guest Agent
- From the the same ISO,
- Run virtio-win-guest-tools.exe
- Complete the installer.
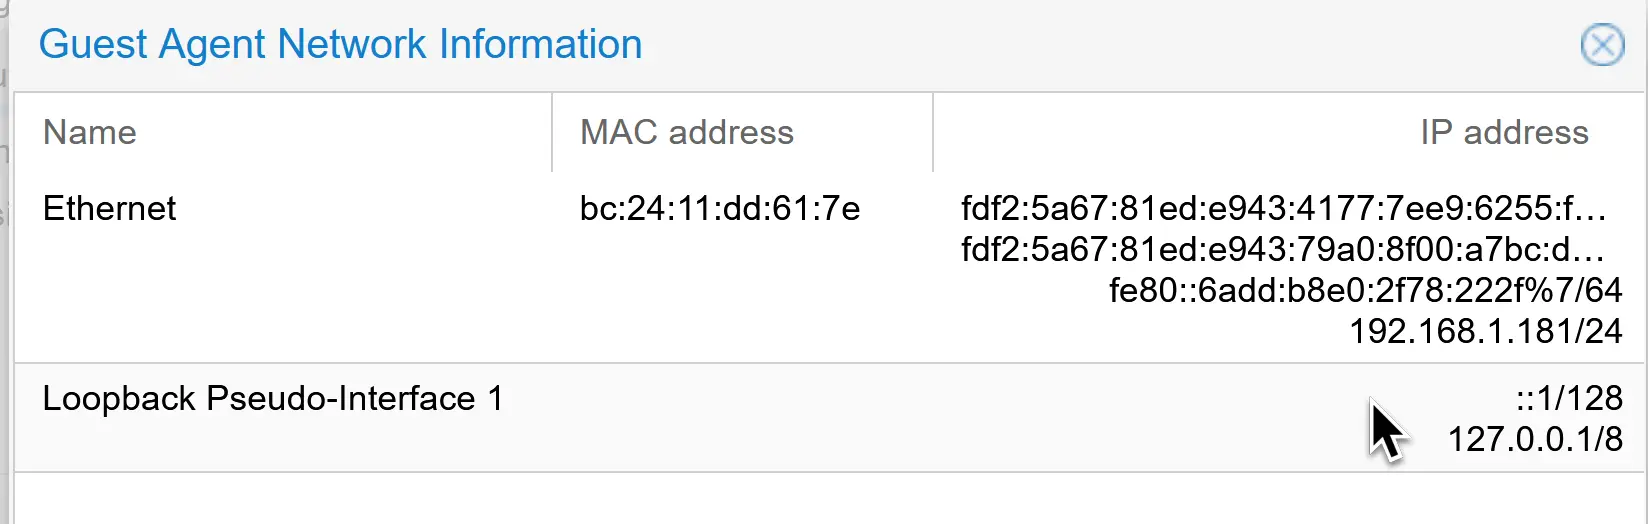
Step 5 – Verify Installation
- Open Services.msc and confirm “QEMU Guest Agent” is running.
- In Proxmox, check the Summary tab of the VM — the IP address should now show up correctly.

After installing Open VM Tools, the guest operating system may require a restart to apply changes.
Installing QEMU Guest Agent on Linux
Linux makes this much easier, since VirtIO drivers are built-in. You only need the QEMU Guest Agent. For Linux it is important that you enable the QEMU Agent first – see above Step 1 – before installing it on Linux Debian / Ubuntu
Debian / Ubuntu
sudo apt update
sudo apt install qemu-guest-agent -y
Verify the service
systemctl is-enabled qemu-guest-agent
systemctl status qemu-guest-agent
Then in Proxmox, check the Summary tab for the guest IP.
Verifying Integration in Proxmox
Once installed, you can test the agent directly:
qm agent <VMID> ping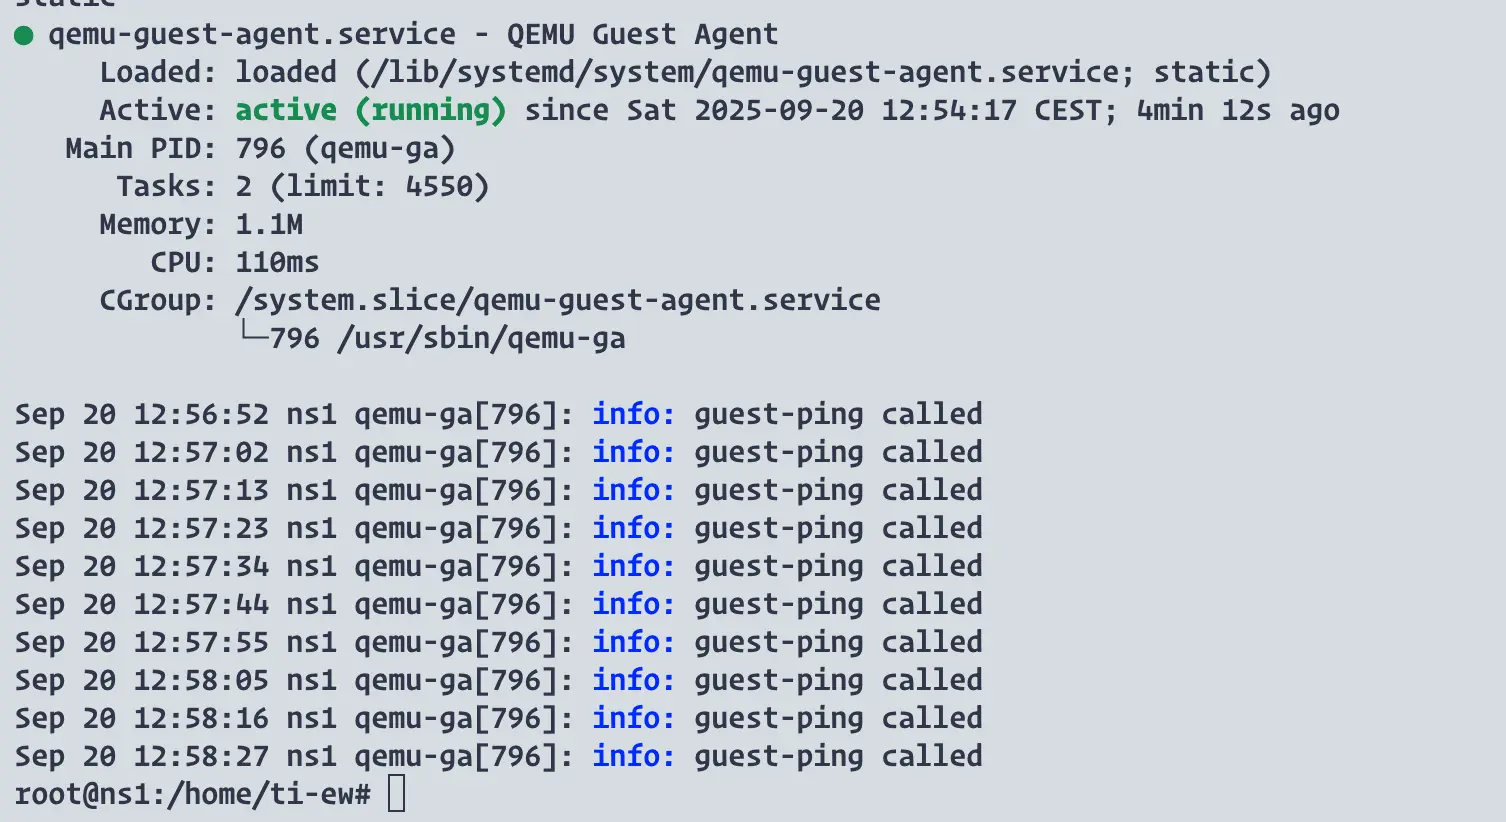
Other ways to confirm:
- Shut down the VM from the Proxmox GUI → it should gracefully power off.
- Check if the IP address shows under the VM Summary.
- Run a backup → Proxmox should use freeze/thaw hooks from the agent.
If you’re setting up Proxmox in a homelab, a mini-PC like the Minisforum MS-01 is a solid choice.
Best Mini-PC to run Proxmox

Common Issues and Fixes
Even though installing the QEMU Guest Agent and VirtIO drivers is usually straightforward, there are a few common problems you might run into:
1. No IP address showing in Proxmox
- Ensure the QEMU Guest Agent is enabled in the VM options and installed/running inside the guest. (NIC model doesn’t matter. If you changed to a VirtIO NIC on Windows, also install the VirtIO NIC driver so networking works.)
- Fix: mount the VirtIO ISO, install the network driver, then reboot the VM.
2. QEMU Guest Agent not running
- On Linux, check with:
- If it shows as inactive, start it with sudo systemctl start qemu-guest-agent.
- On Windows, open services.msc and verify the QEMU Guest Agent service is running and set to Automatic.
3. Driver signing issues on Windows
- Older VirtIO ISO builds sometimes throw driver signing errors during installation.
- Fix: always download the latest stable VirtIO ISO from the official Fedora project. That ensures the drivers are properly signed and compatible.
Backups failing or not consistent
- If you notice snapshot backups failing or not freezing the filesystem, it usually means the QEMU Guest Agent isn’t fully integrated.
- Fix: make sure you’ve both enabled the Guest Agent in the Proxmox VM options and installed it inside the VM. A reboot after installation often helps.
5. Service won’t enable on Linux
- Some Linux distributions use socket activation, so you may see an error when running systemctl enable. This doesn’t mean the agent is broken.
- Fix: enable the socket instead:
By double-checking these points, you’ll avoid the most common pitfalls and ensure your VM integrates properly with Proxmox.
| Product Name | View on Amazon |
|---|---|
| Dell PowerEdge Dell R630 Server | 2X E5-2690 v4 = 28 Cores | 128GB RAM | 2X 1TB SSD (Renewed) | View on Amazon |
| Dell PowerEdge R730 Server 2X E5-2680v4 2.40Ghz 28-Core 128GB 8X 4TB 12G H730P (Renewed) | View on Amazon |
| ProLiant MicroServer Gen11 Tower Server w/one Intel Xeon E-2434, 3.4GHz 4-core 1P 32GB-U VROC 4LFF‑NHP 4TB HDD iLO KIT 180W External PS (HPE Smart Choice P74440-005) | View on Amazon |
| HPE ProLiant DL20 Gen11 Rack Server w/one Intel Xeon E-2436 Processor, 2.9GHz 6‑core 1P 32GB‑DR MR408i‑o 4SFF 2x500W RPS | View on Amazon |
| Dell PowerEdge R830 Server 2.20Ghz 56-Core 128GB 16x 300GB 15K H730P Rails (Renewed) | View on Amazon |
| Dell PowerEdge R440 Server 2X Gold 6126 2.60Ghz 24-Core 96GB 960GB SSD + 3.6TB (Renewed) | View on Amazon |
| HPE ProLiant DL380 Gen9 2U RackMount 64-bit Server + 2×8-Core E5-2640v3 Xeon 2.6GHz CPUs + 64GB PC4-2133P RAM + 8×600GB 10K SAS SFF HDD, P440ar RAID, 4×GigaBit NIC, 2×Power Supplies, NO OS | View on Amazon |
| HPE Proliant DL380 Gen10 8B SFF 2U Server, 2X Intel Xeon Gold 6126 2.6Ghz (24-cores Total), 192GB DDR4 RAM, 8X 1.2TB 2.5” 10K SAS 12Gbps, P408i-a SR 2GB RAID, No Operating System | View on Amazon |
Wrap-Up
If you’re searching for “Proxmox VMware Tools”, the answer is simple: For a deeper understanding of the QEMU Guest Agent, the official documentation is available here.
- VirtIO Drivers = performance (disk, NIC, memory balloon).
- QEMU Guest Agent = integration (shutdown, time sync, IP reporting).
Install both after migrating to Proxmox, and your VMs will behave just like they did with VMware Tools — sometimes even faster.
Haven’t migrated yet? Check out my article to install Proxmox virtual environment and how to migrate from VMWare.
Before you go …
I want to draw your attention to another insightful blog post of mine. If you found the information on Proxmox VMVware Tools helpful, you might also be interested in a comparison I made between Proxmox and ESXi.
This post delves into their respective features, performance, and overall efficiency. Whether you’re trying to decide between the two for your homelab or looking for a more environment-friendly option, this blog post provides a comprehensive analysis that could help you make an informed decision.
Related Articles
About the author
Hi, I’m Edy Werder. I write hands-on guides about Proxmox, homelab servers, NAS, and WordPress, based on real setups I run and document.
No sponsors, no fluff—just real configs and results.
Enjoying the content?
