
By Edy Werder — IT Consultant & Tech Blogger
Do you know that Synology NAS supports Active Directory? Correct install the Synology Directory Server package from the package center and set up your Windows Domain.
It’s an ideal solution for small-to-medium businesses and home offices: low complexity, cost-effective, and a practical alternative to a full Microsoft Active Directory deployment. It combines the file server role; the Synology NAS offers both options. A Windows Server license usually costs around $1000 with CALs (Client Access Licenses).
The Synology Directory Server is a free package that turns your Synology NAS into a Windows Domain Controller. It supports Active Directory features including user accounts, group memberships, Group Policies, and account lockout policies, all without a Windows Server license and CALs.
Note that it requires a compatible NAS with sufficient processing power, as not every Synology model supports it.
In this article, I will walk you through how to set up the Synology Directory Server.
Hardware requirements for the Synology Active Directory Server
Your Synology NAS needs to run DSM 7.2 or later. The current Synology DSM version is 7.3, and I recommend always running the latest release.
Check the hardware requirements for the Synology Directory Server package and make sure your NAS model is listed. A low-powered Synology processor won’t be able to run the Directory Server package.
Not sure which Synology NAS is right for you? Check out my Synology NAS buying guide for a full model comparison.
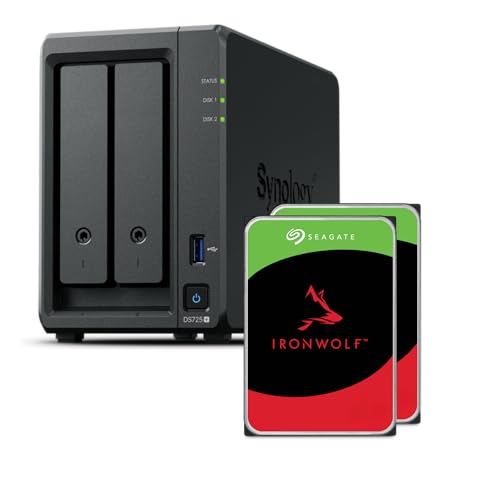
I recommend the Synology NAS model DS725+, available without disks or as a bundle with 2x4TB disks.

Features and limitations of the Synology Directory Server package
- Supports roaming profile and home folder
- Supports group-based access controls too.
- Supports Group Policies
- Supports the Windows RSAT tools (install it on a Windows 10 or Windows 11 machine)
- Supports a single domain only
- Support one domain controller only
- Supports primary controller or secondary controller
- DFS is not supported
- The Active Directory module for Windows PowerShell is not supported
- Supports a maximum of 100,000 objects, depending on your Synology NAS model.
Please also see the official Synology Directory Server page
Some tips before the installation
- Give your Synology NAS a meaningful hostname. The hostname becomes part of your domain identity, so choose something that makes sense for your network.
- Set a fixed IP address. A static IP ensures your clients can always find the domain controller. A changing IP will break domain joining for Windows machines.
- Choose your domain name carefully. Once you create a new domain, changing it later is painful. Use a private domain name like company.local or company.lan.
- The Synology NAS should not already be a domain member. If it is, the package installation will fail.
How to install Synology Active Directory Server
Installing the Synology Directory Server requires two prerequisites before the actual package setup: the DNS Server and a correctly configured DNS forwarder. Once those are in place, the installation wizard takes care of the rest.
Step 1: Install the DNS Server package
The DNS Server package is a prerequisite for the Synology Directory Server. Install it first from Package Center before touching the Directory Server package. Active Directory relies on DNS to locate domain services, so it needs to be in place before the wizard runs.
If you are new to the Synology DNS Server, I have a complete setup guide that walks you through the installation and configuration.
Step 2: Configure the DNS forwarder
Once the DNS Server is installed, open it from the main menu and navigate to the Resolution tab. Enable forwarding and add at least one external DNS server as the forwarder. I recommend using Google’s 8.8.8.8 or Cloudflare’s 1.1.1.1.
This ensures your clients can resolve both internal domain names and external internet addresses.
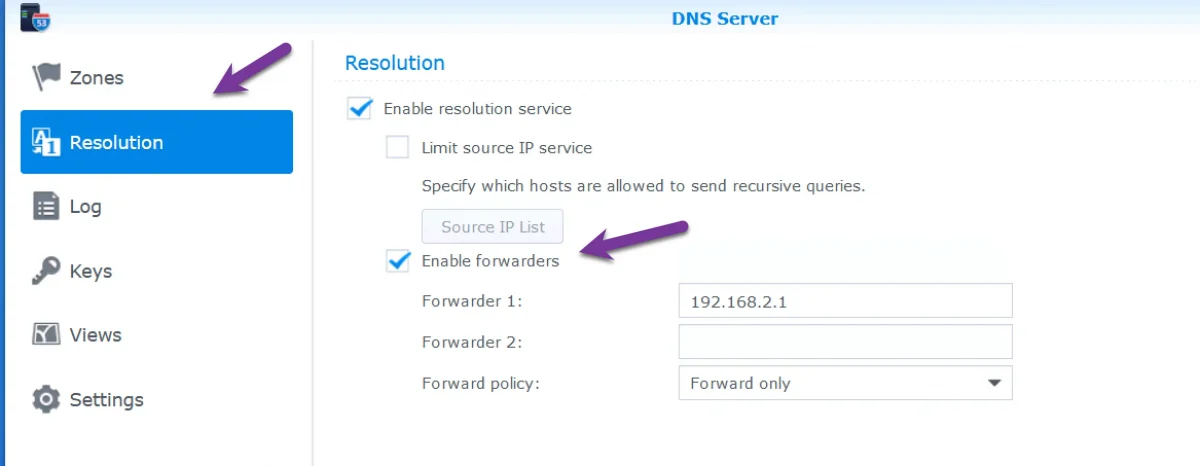
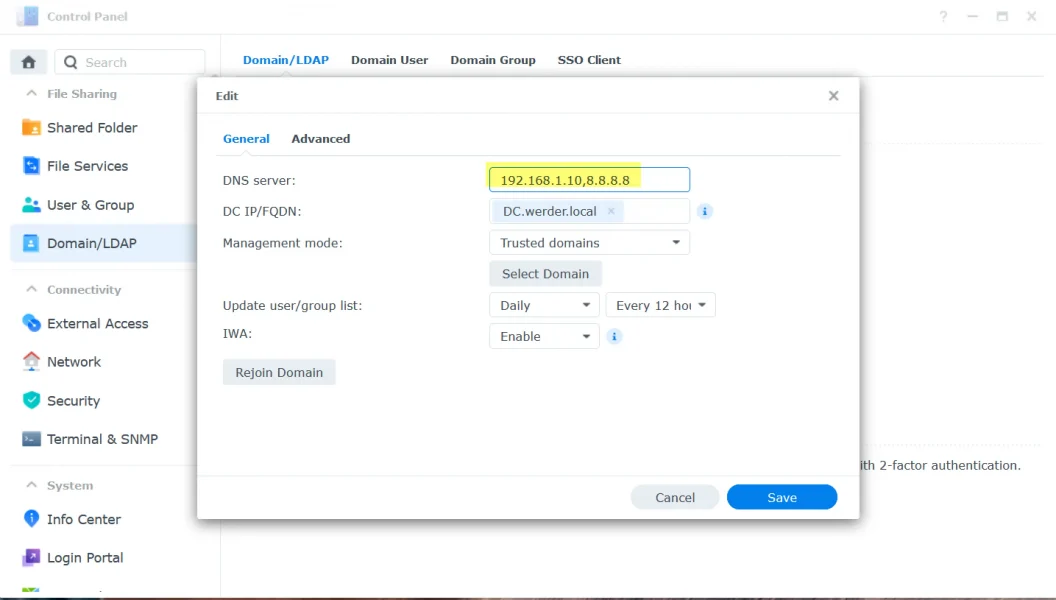
Reader tip: Adding an external DNS server to the Domain/LDAP setting in Control Panel also works. Add an additional DNS server separated by a comma.
Step 3: Install the Directory Server package
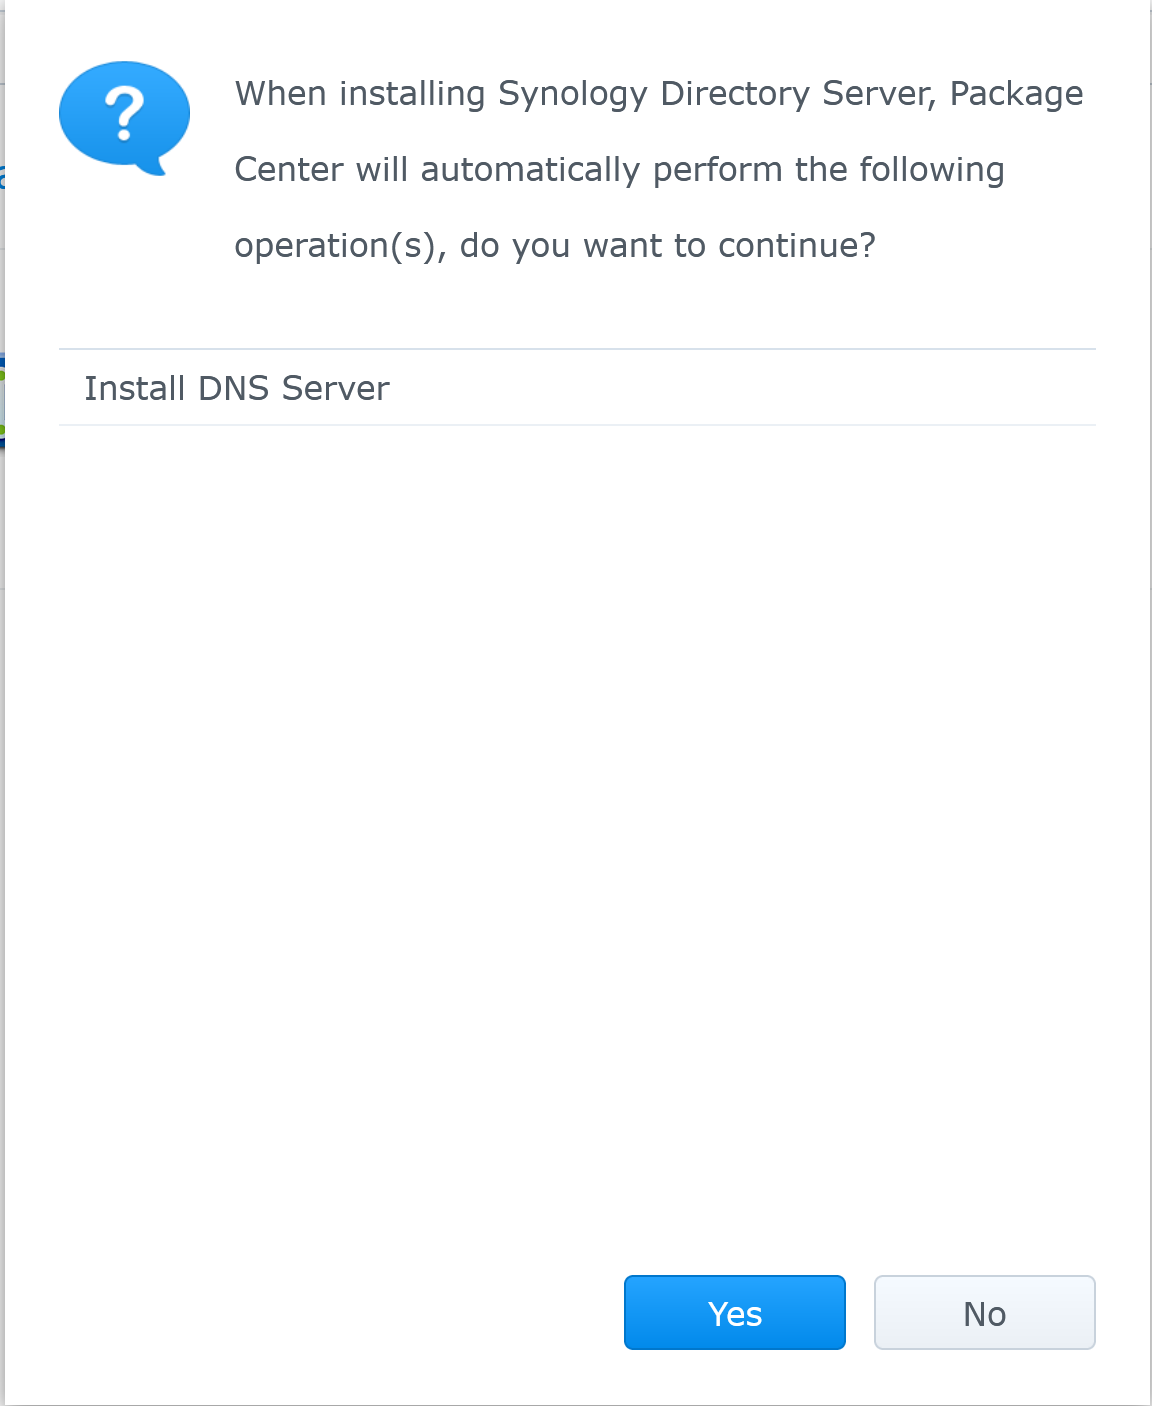
Open Package Center and search for “Synology Directory Server.” Click Install. If you haven’t installed the DNS Server yet, Package Center will install it automatically as a dependency.
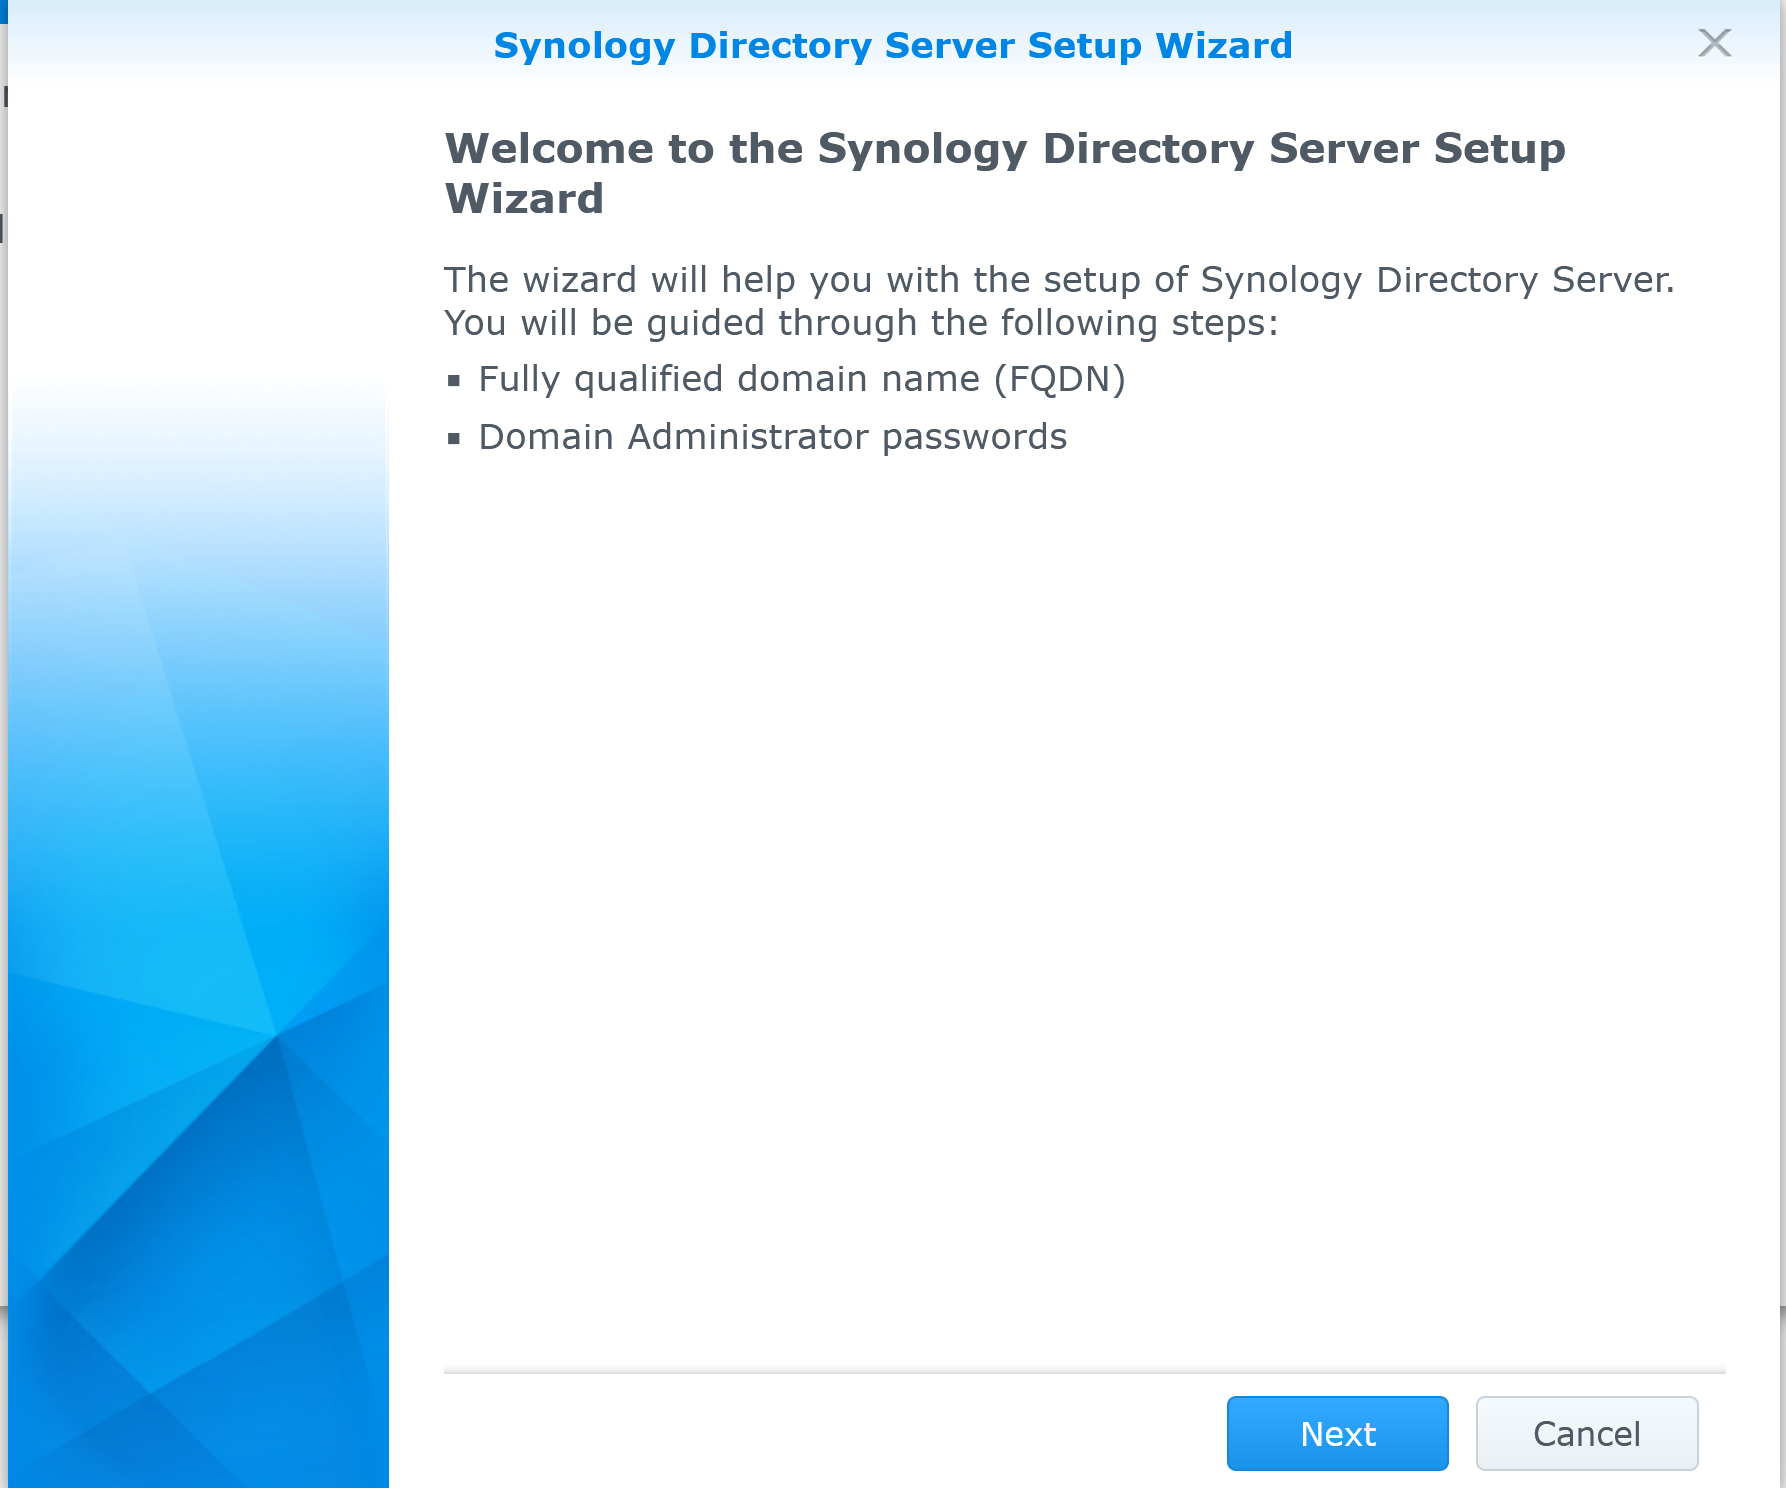
Step 4: Run the setup wizard
Once installed, open the Directory Server from the main menu. The setup wizard launches automatically and guides you through two steps: the fully qualified domain name (FQDN) and the Domain Administrator password.
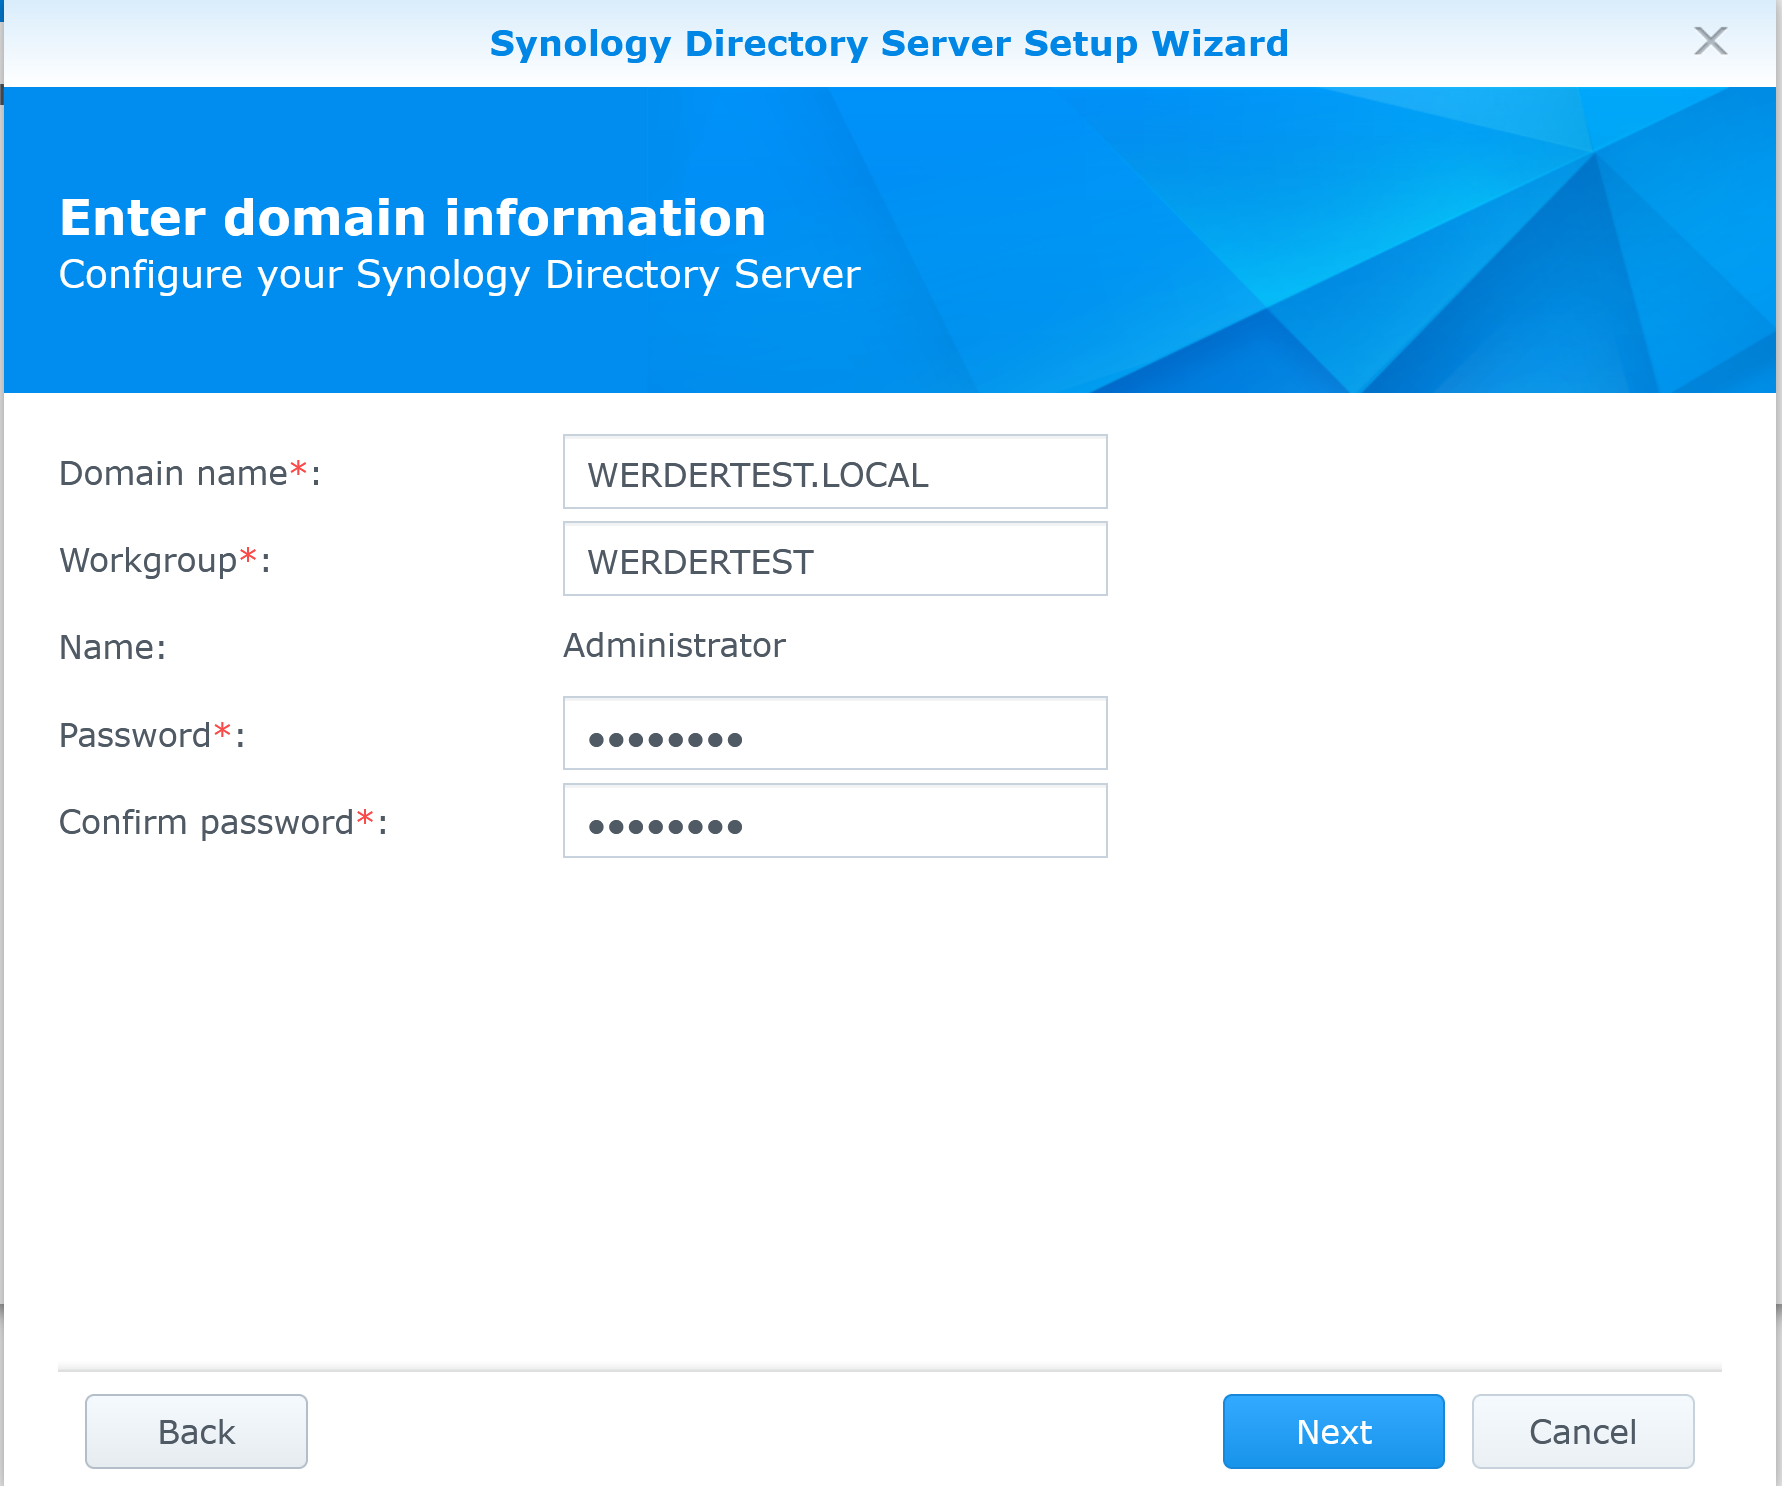
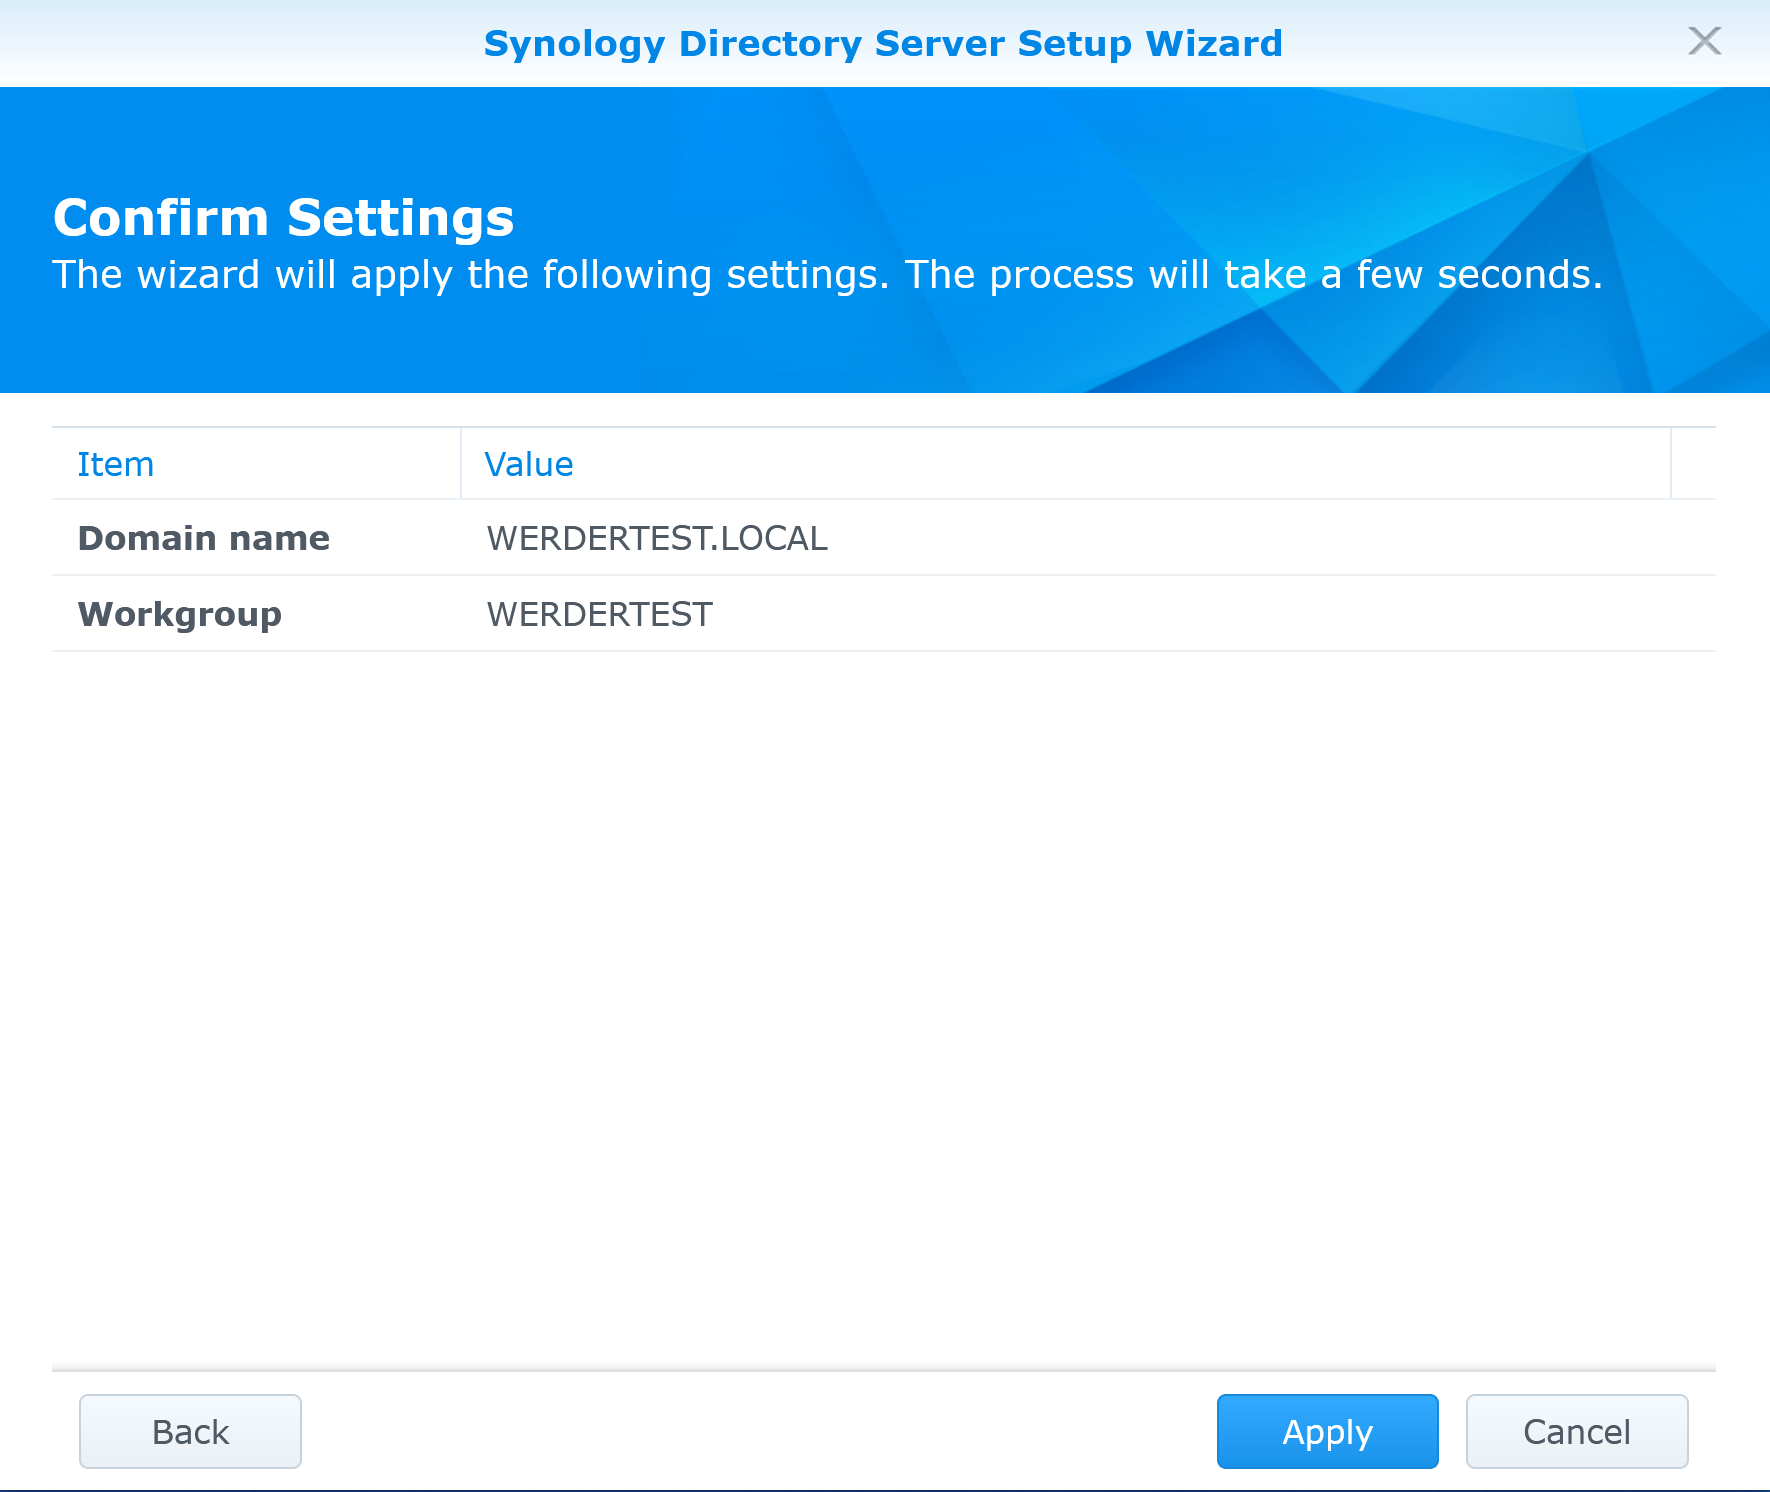
Enter your domain name and set a strong Administrator password. Use a private domain name that is not publicly registered, for example company.local or company.lan. The workgroup name is generated automatically from your domain name. Take time to choose your domain name carefully, as changing it later requires a full rebuild.
Click Next, review the summary screen, then click Apply.
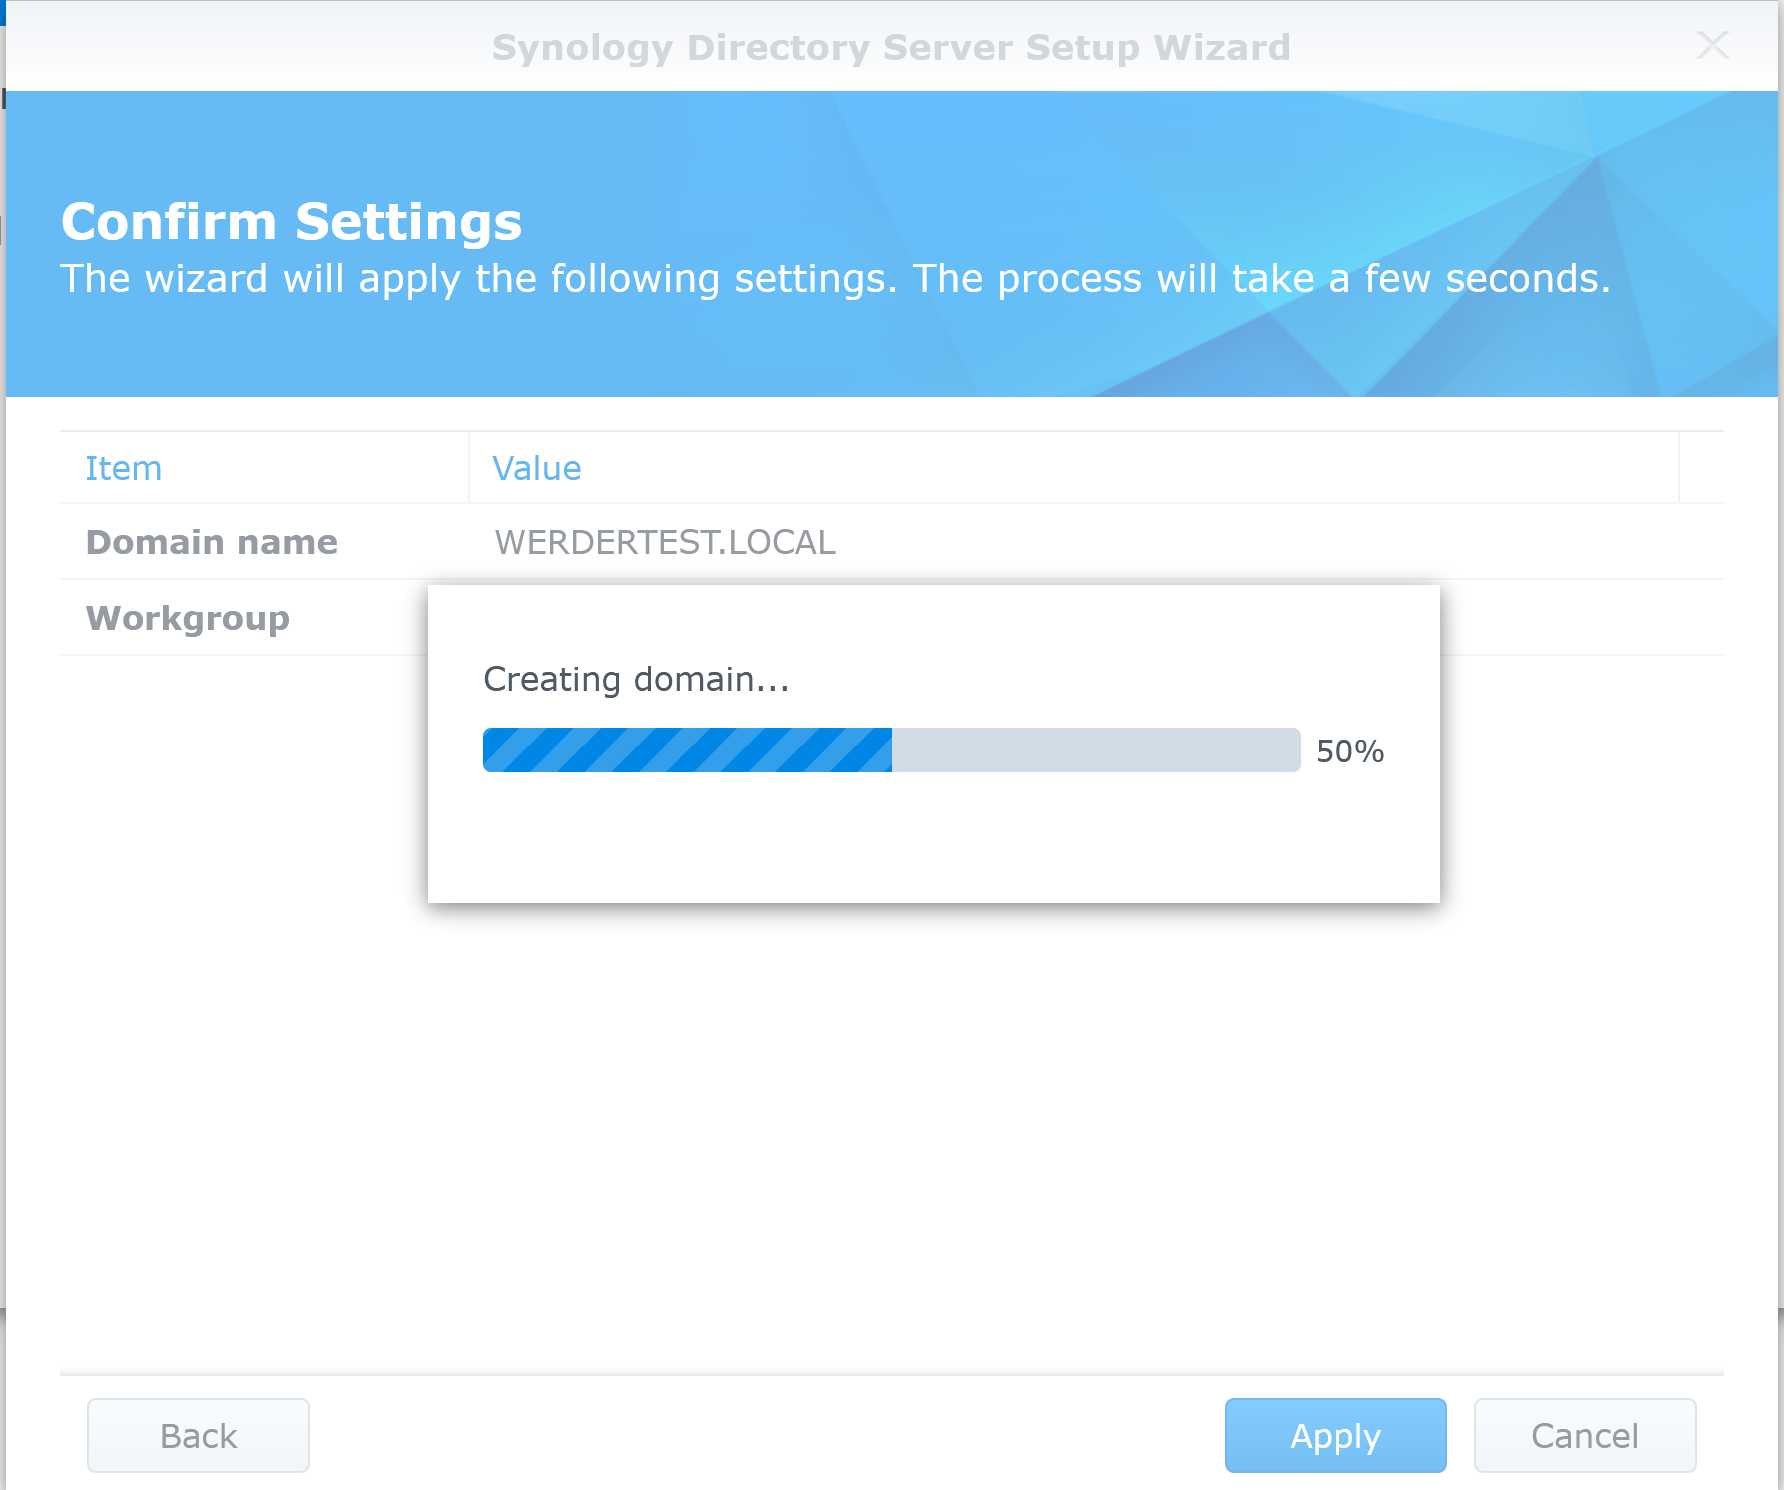
Creating the domain takes a few minutes, depending on your NAS model.
Step 5: Verify the installation
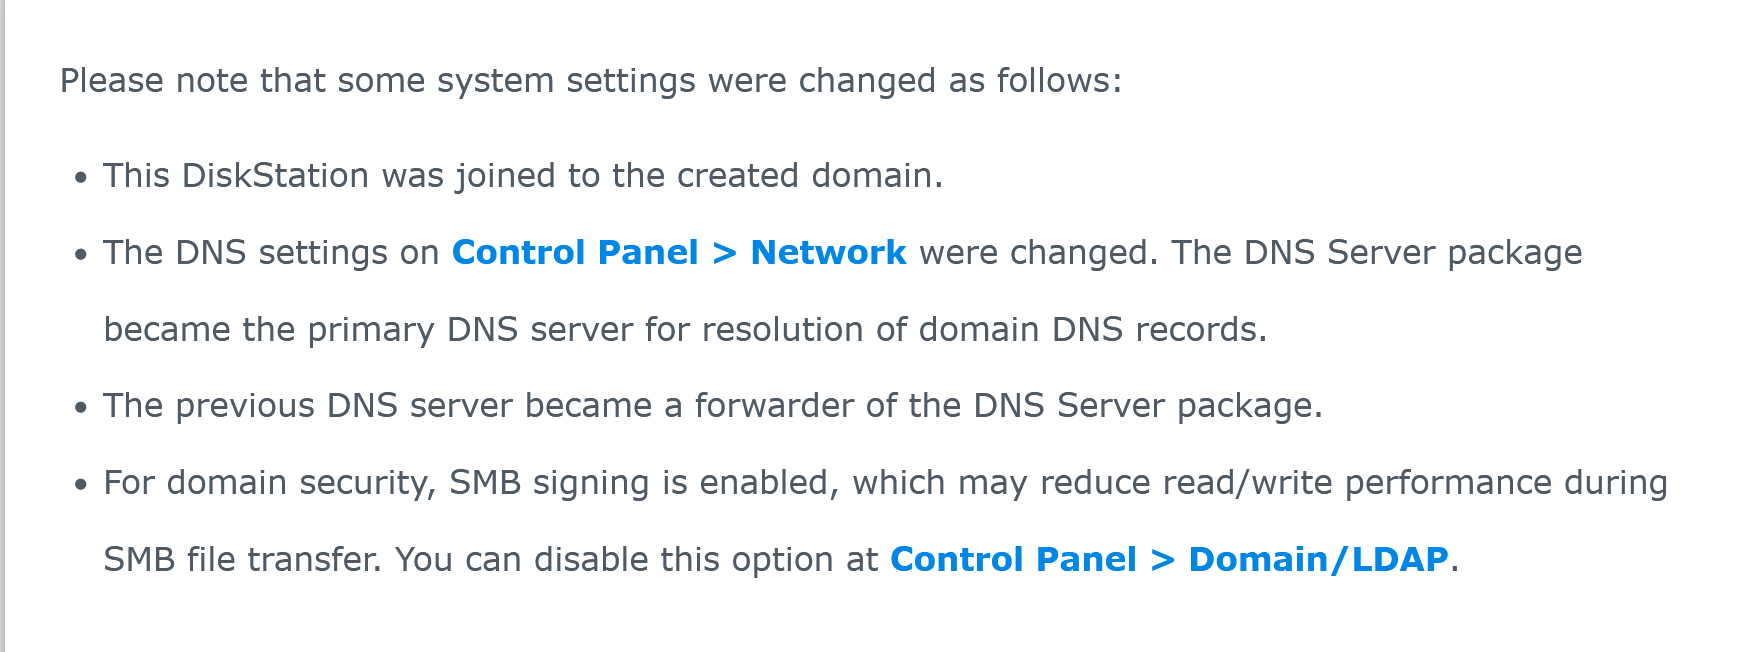
Once complete, the wizard shows a summary of what changed on your system. Your NAS is now joined to the new domain, the DNS Server package became the primary DNS server for domain resolution, and SMB signing is enabled for domain security.
Open the Directory Server from the main menu. The Status tab confirms your domain name and NetBIOS name. A zero in the “records which may need updates” field means everything is healthy.

Manage the Synology Active Directory Server
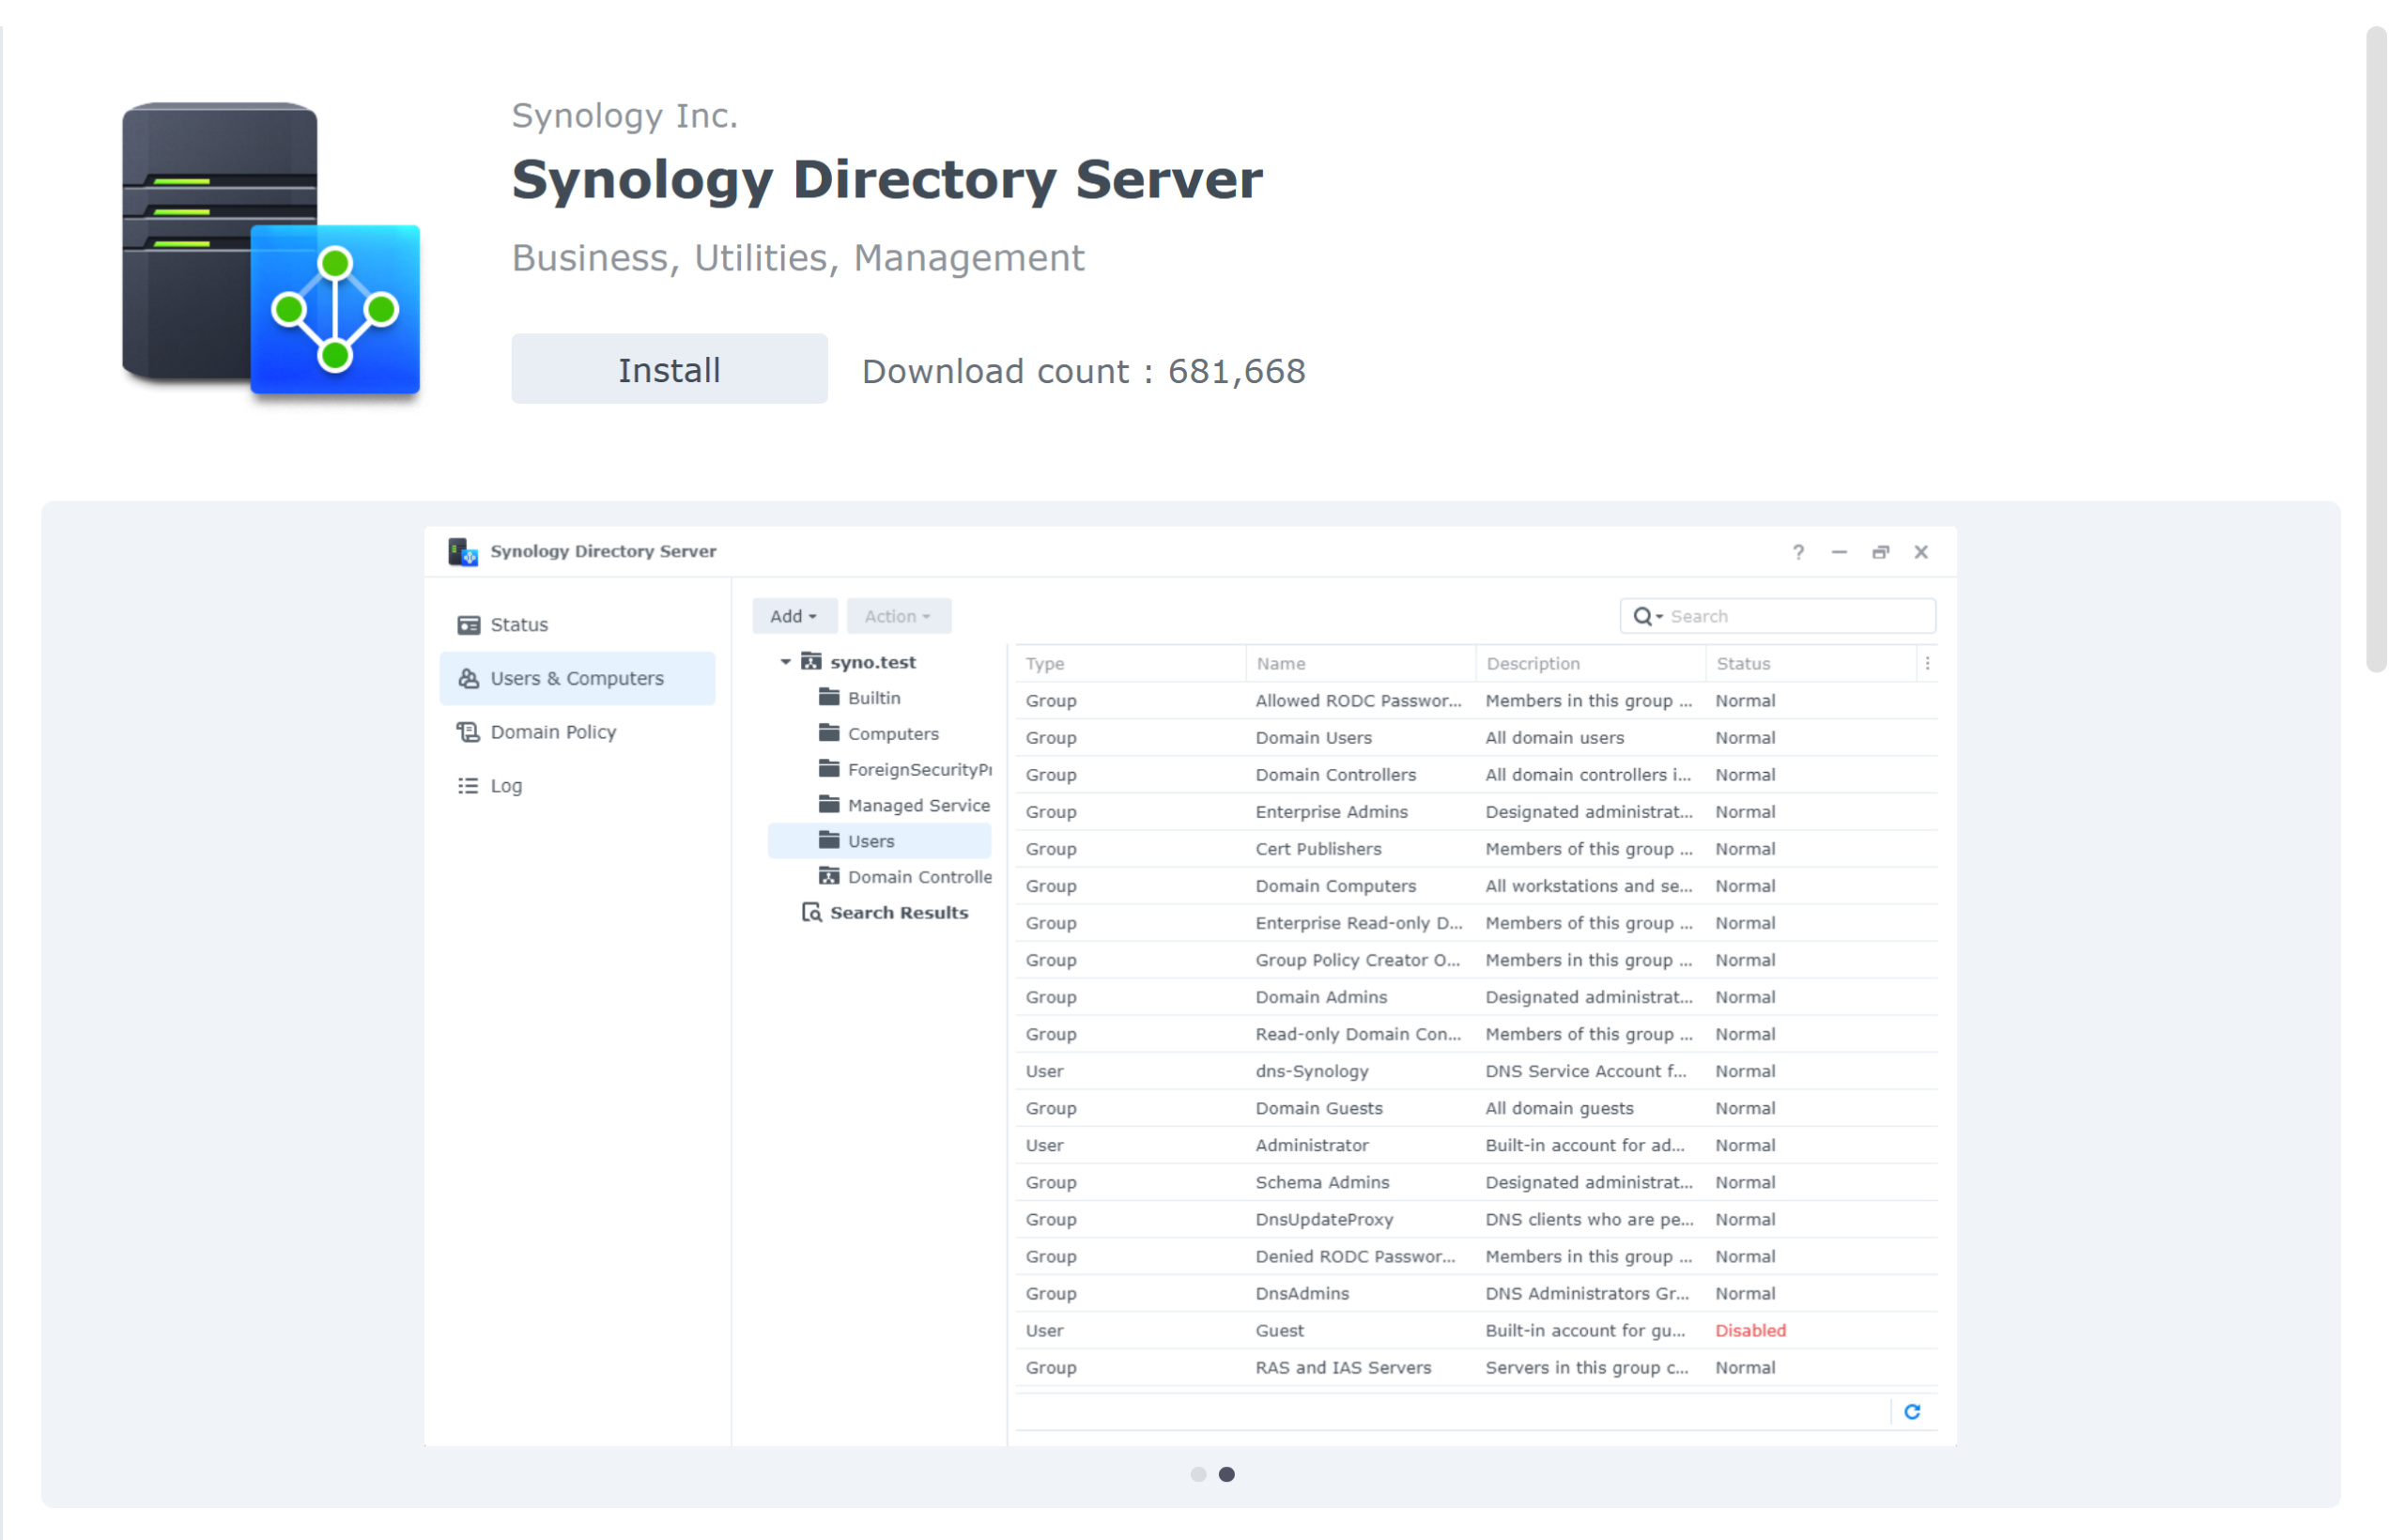
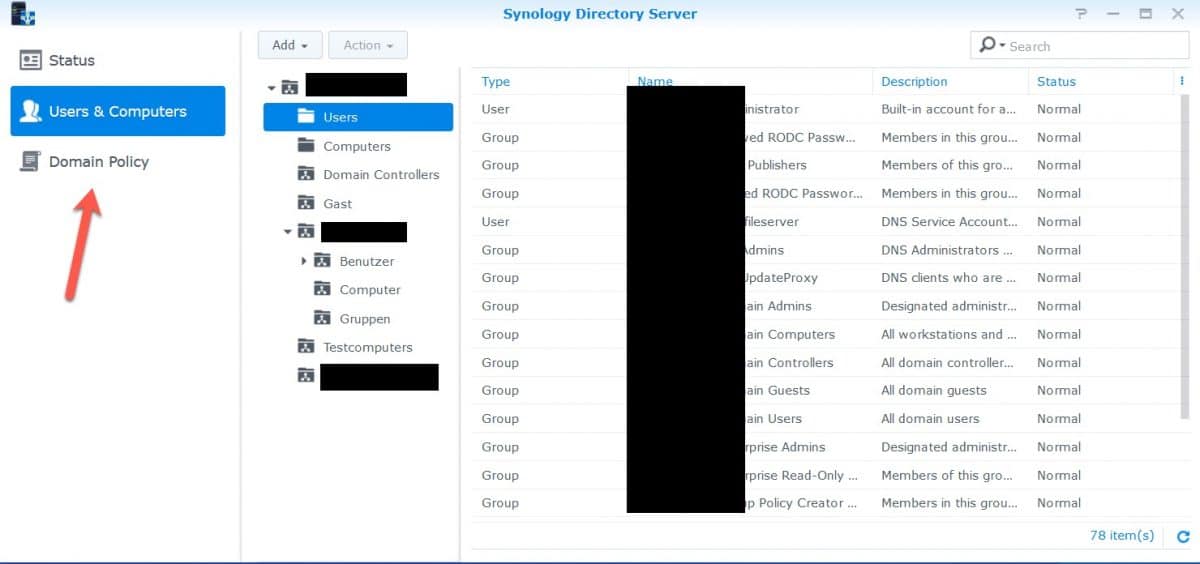
The Directory Server has three tabs on the left: Status, Users & Computers, and Domain Policy. The Users & Computers tab shows your Active Directory structure — the same layout you’d recognize from a Windows domain. From there you can create and manage user accounts, group memberships, computers, and OUs using the Add button.
I recommend managing your Active Directory from a Windows 10 or Windows 11 machine using the RSAT tools. RSAT is built into both — on Windows 11 go to Settings, System, Optional Features.
IT administrators can manage user accounts, deploy software, and push system updates to all domain computers from a single interface.
Make sure you join the Windows machine to the domain first before using RSAT.
Folder shares
I would create folder shares with the Synology NAS. To do that, go Control Panel, Shared Folder. New in the permission tab, you can choose Domain Users and Domain Groups from the drop-down. As you recognize, there are still Local Users and Local Groups. They are the local accounts from the Synology NAS, and if you have created some accounts, they remain untouched after installing the Synology Directory Server.
Group Policy
There is no option in the Synology NAS to use Group Policy. However, you can use the Windows “Group Policy Management” tool from RSAT. It works the same way, and I haven’t yet discovered a problem with the Synology Active Directory Server. It’s an excellent tool for small businesses to set up folder redirection, roaming policy, or drive mapping. Even for a shop with 20 or fewer computers, it makes perfect sense to organize your network and provide a consistent experience to your users.
Some tips
I discovered that the tick “User must change password at next logon” does not work when using the Windows tool Active Directory for Users and Computers (ADUC). You will get a weird error message. If you want to use this option, set it in the Synology NAS.
In theory, you could still use other packages from the package manager. But I advise you not to use them or to use them as little as possible. Use the Synology NAS as “your Windows Server” only. It’s better to buy a second NAS.
Backup
Don’t overlook backup for your domain controller. Follow the 3-2-1 rule: one production copy and two backups, with at least one offsite. I have a complete Hyper Backup guide that walks you through setting it up.
Q&A Section
How do I join my Windows PC to Active Directory hosted on Synology NAS?
The process for domain joining a Windows machine to the Synology Directory Server is identical to joining a standard Windows domain. You need the domain name and a domain account with administrator rights. On Windows 11 go to Settings, System, About, and click “Join a domain.”
What is the difference between Synology Directory Server and LDAP Server?
Both are available in Package Center but they serve different purposes. The Directory Server is designed for Windows domain environments and supports Windows clients out of the box. The LDAP Server is based on OpenLDAP and offers more flexibility but requires more expertise to manage and does not support Windows clients natively.
Note that the two packages cannot coexist on the same DiskStation. For most small businesses running Windows, the Directory Server is the right choice. One more thing worth knowing: the functional level of the Synology Directory Server is equivalent to Windows Server 2008 R2, which limits some advanced Active Directory features compared to a full Windows Server deployment.
Can I use the Synology Directory Server as a secondary domain controller?
Yes. If you already have a Windows domain, you can install the Directory Server package and join it to your existing domain as a secondary domain controller. This gives you redundancy: if your primary controller goes down, the Synology NAS keeps the domain running. One important note: avoid running both domain controllers on the same physical Synology NAS. If the hardware fails, both controllers go down with it. Use a second NAS for the secondary controller.
I’d love to hear from you — was this article helpful? Share your thoughts in the comments below. If you prefer, you can also reach me by email or connect with me on Reddit at Navigatetech.
Related Articles
About the author
Hi, I’m Edy Werder. I write hands-on guides about Proxmox, homelab servers, NAS, and WordPress, based on real setups I run and document.
No sponsors, no fluff—just real configs and results.
Enjoying the content?

Hi Edy –
Thanks very much for the post. Is there a way (doesn’t seem to be one in the UI) to force an update of the AD information? I’ve tried the Update Domain Data button as well as the Test button(s) in the Domain/LDAP Control Panel in DSM with no joy. I had a user change his password in the last few hours, and my RADIUS server on the Synology isn’t picking up the new password. If it isn’t too much trouble, is there a way to change the frequency of the update(s)? TIA!
Greetings Great review, I learned a lot from your guide. I just completed a Domain Controller / Active Directory / DHCP / DNS migration from an old Dell PowerEdge server running Windows Server 2008 R2 to a new Windows Server 2016 running as a Virtual Machine in Synology Virtual Machine Manager on my DS1821+ with 64 GB of total physical memory.
The Windows Server 2016 Virtual Machine inside Synology Virtual Machine Manager is running on a two drive SSD volume. Configured with virtual 8 GB memory, 4 CPU(s), 2 Reserved CPU Threads and 40 GB virtual disk.
I have been testing all day and the 20 computers on the local network connected to this new Windows Server 2016 VM. The Host CPU percentage in Synology Virtual Machine Manager reaches a maximum of 16% but at idle stays at only 3%.
So far so good, so my question for you is the following: In your Q&A Section you state “However, if you already have a licensed Windows Server, I would not switch your Domain to a Synology NAS”. This is my situation, so do you recommend to join my Synology Directory Server to my existing Windows domain so the Synology acts as a secondary domain controller instead? I need to transfer some folders and files shares off the old Windows 2008 Server and I think making the Synology act as a secondary domain controller will help me.
Thanks in advance for your help
Hello Enrique – Thanks for your comment and your question. I understand that you virtualize your Windows Domain Controller as a guest on the Synology NAS. Synology will not act as a secondary domain controller if you just join the Synology server to your existing domain on the virtualized Windows Server. You need to install the package Directory Server, and then you can use Synology as a secondary domain controller. However, having two domain controllers on the same Synology (hardware) is not something I recommend. If Synology crashes, the domain will be down. Instead, use a second Synology NAS and install the Directory Server. Then you have redundancy. I hope this helps.