
By Edy Werder — IT Consultant & Tech Blogger
If you want to install Windows Server on Proxmox, I recommend using VirtIO drivers from the beginning. This gives your virtual machine better storage and network performance than using older default options.
In this guide, I show how I create a Windows Server virtual machine in Proxmox VE, attach the VirtIO ISO, and load the storage driver during the Windows installer. I also explain one practical detail from my own testing. For me, Windows setup was smoother when I loaded only the VirtIO storage driver during setup and installed the network driver later inside Windows.
The process works well for Windows Server 2025 and Windows Server 2022. So even if your environment isn’t ready for the latest Microsoft release yet, you can still follow the same general steps.
How do you install Windows Server on Proxmox with VirtIO drivers?
Create a virtual machine in Proxmox VE, attach the Windows Server ISO and the VirtIO ISO, use VirtIO SCSI single with a SCSI disk and a VirtIO network adapter, then load the VirtIO SCSI pass-through controller driver from the vioscsi folder during Windows setup so the disk appears. After Windows Server is installed, install the network driver and the QEMU guest agent in the guest OS.
What you need before you start
Before I begin, I make sure these three things are ready:
- a Windows Server ISO
- a VirtIO ISO (Download page)
- a working Proxmox VE 8 host installation
I need both ISO files during the installation, because the Windows installer does not include the VirtIO storage driver by default. If you have not yet uploaded the ISO files to Proxmox, I recommend doing that first so the setup goes smoothly.
Official document from Proxmox Windows 2025 guest best practices.
Create the Windows Server virtual machine in Proxmox
I recorded the full VM creation process in the video below. If you want to follow the exact settings I used, watch the video first, then use the screenshots and written steps below as a reference.

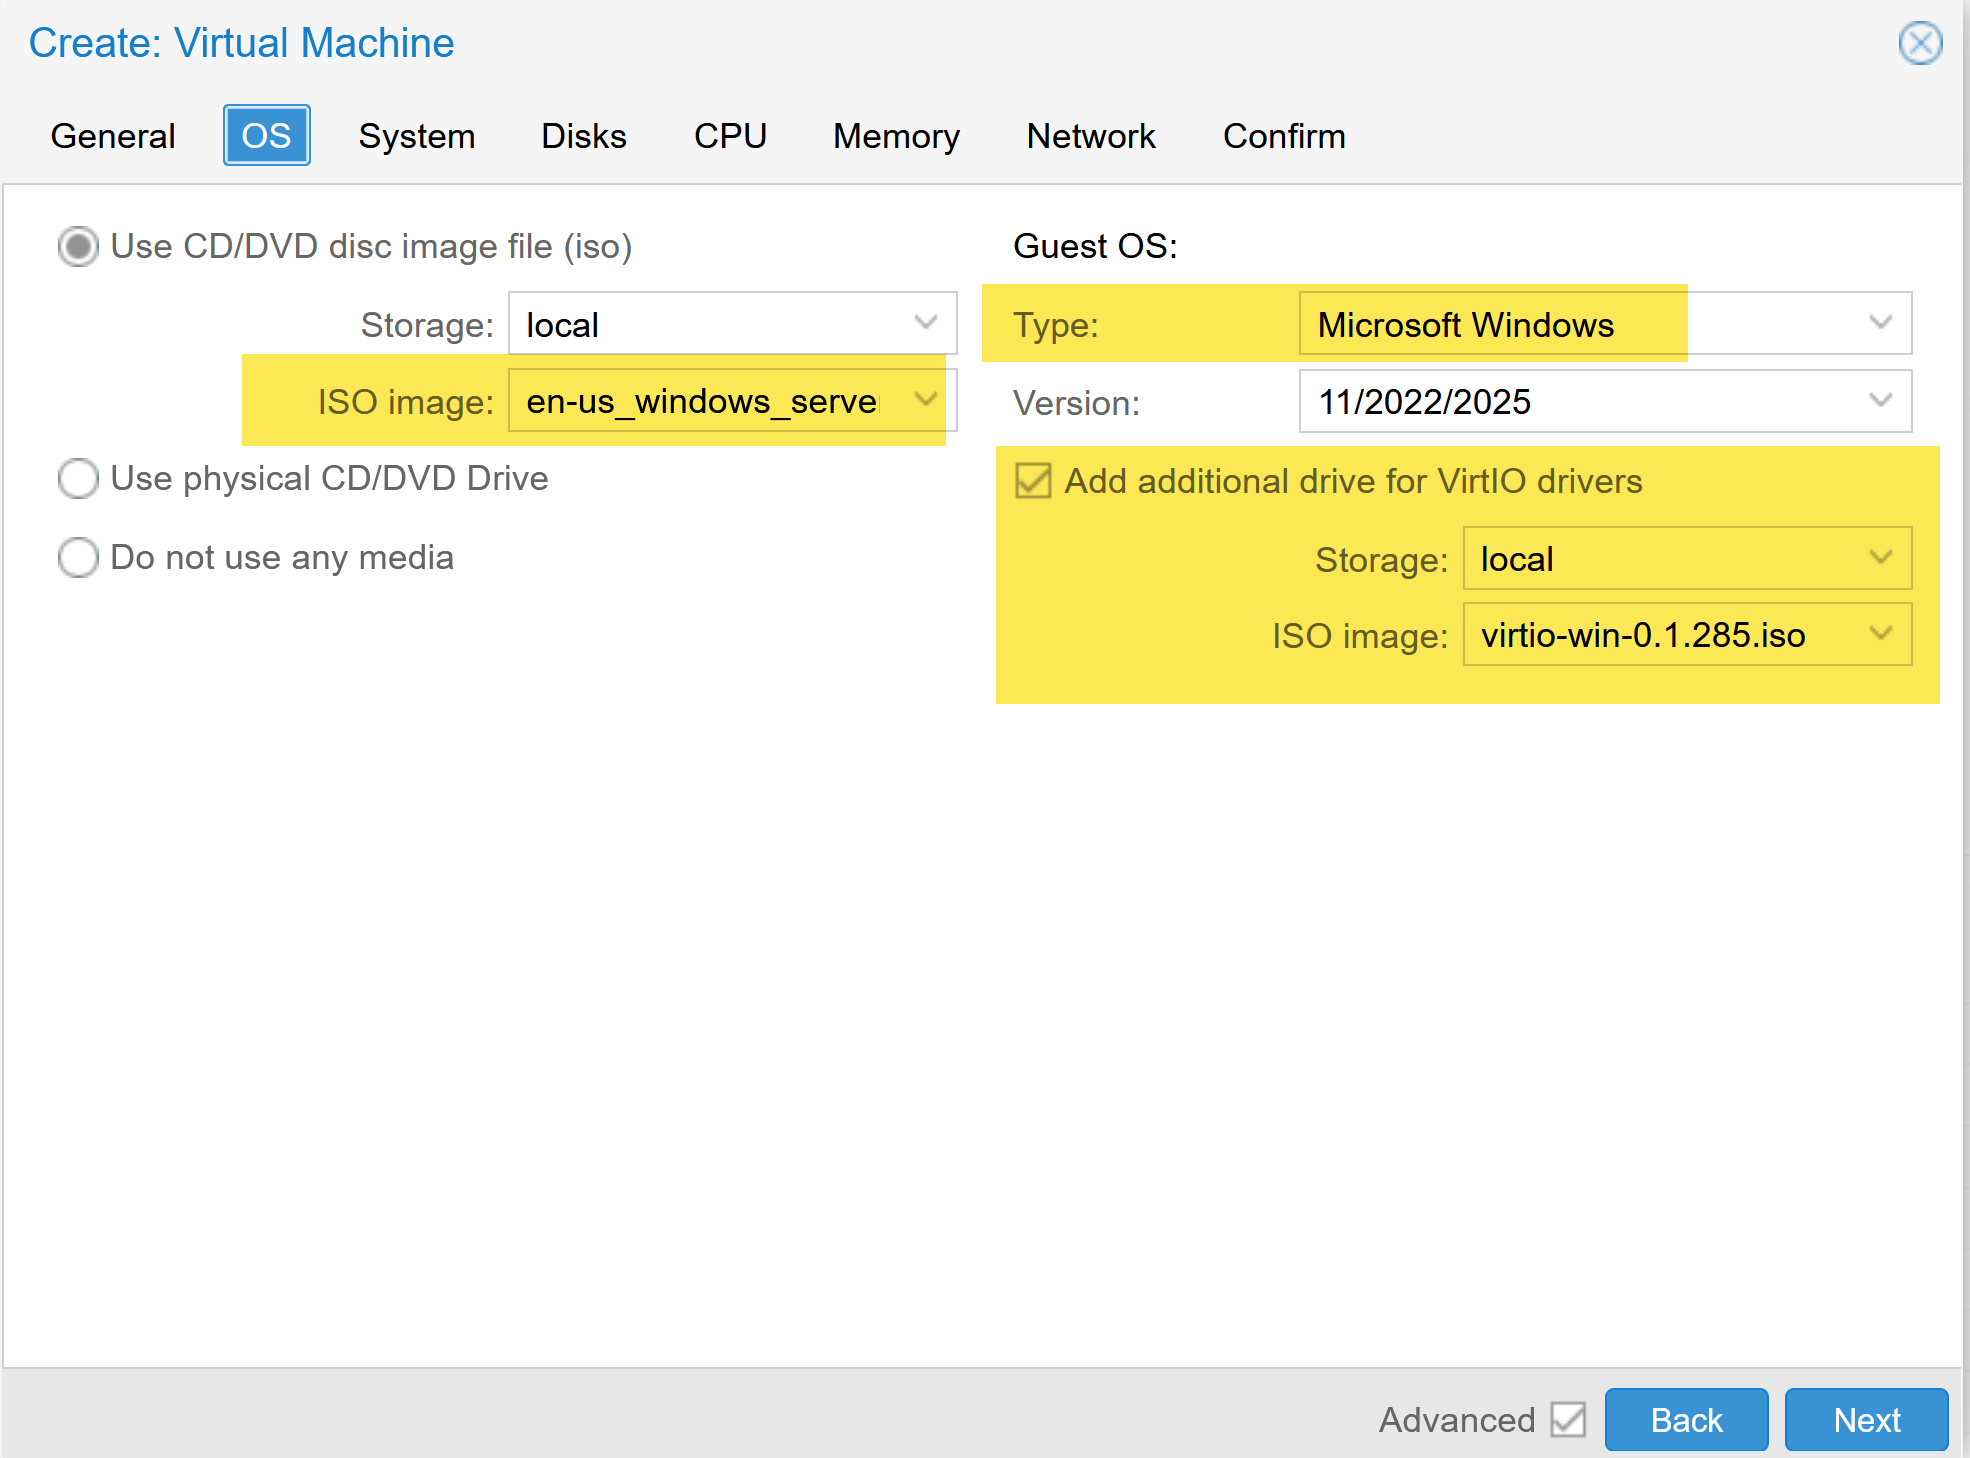
I start by creating a new virtual machine in Proxmox VE and selecting the Windows Server ISO in the OS tab. In the same step, I also mount the VirtIO ISO as an additional driver CD. This is important because the Windows installer does not include the VirtIO storage driver by default.
For the guest OS, I select Microsoft Windows and then choose the matching version. In my example, I use Windows Server 2025, but the same setup also works for Windows Server 2022.
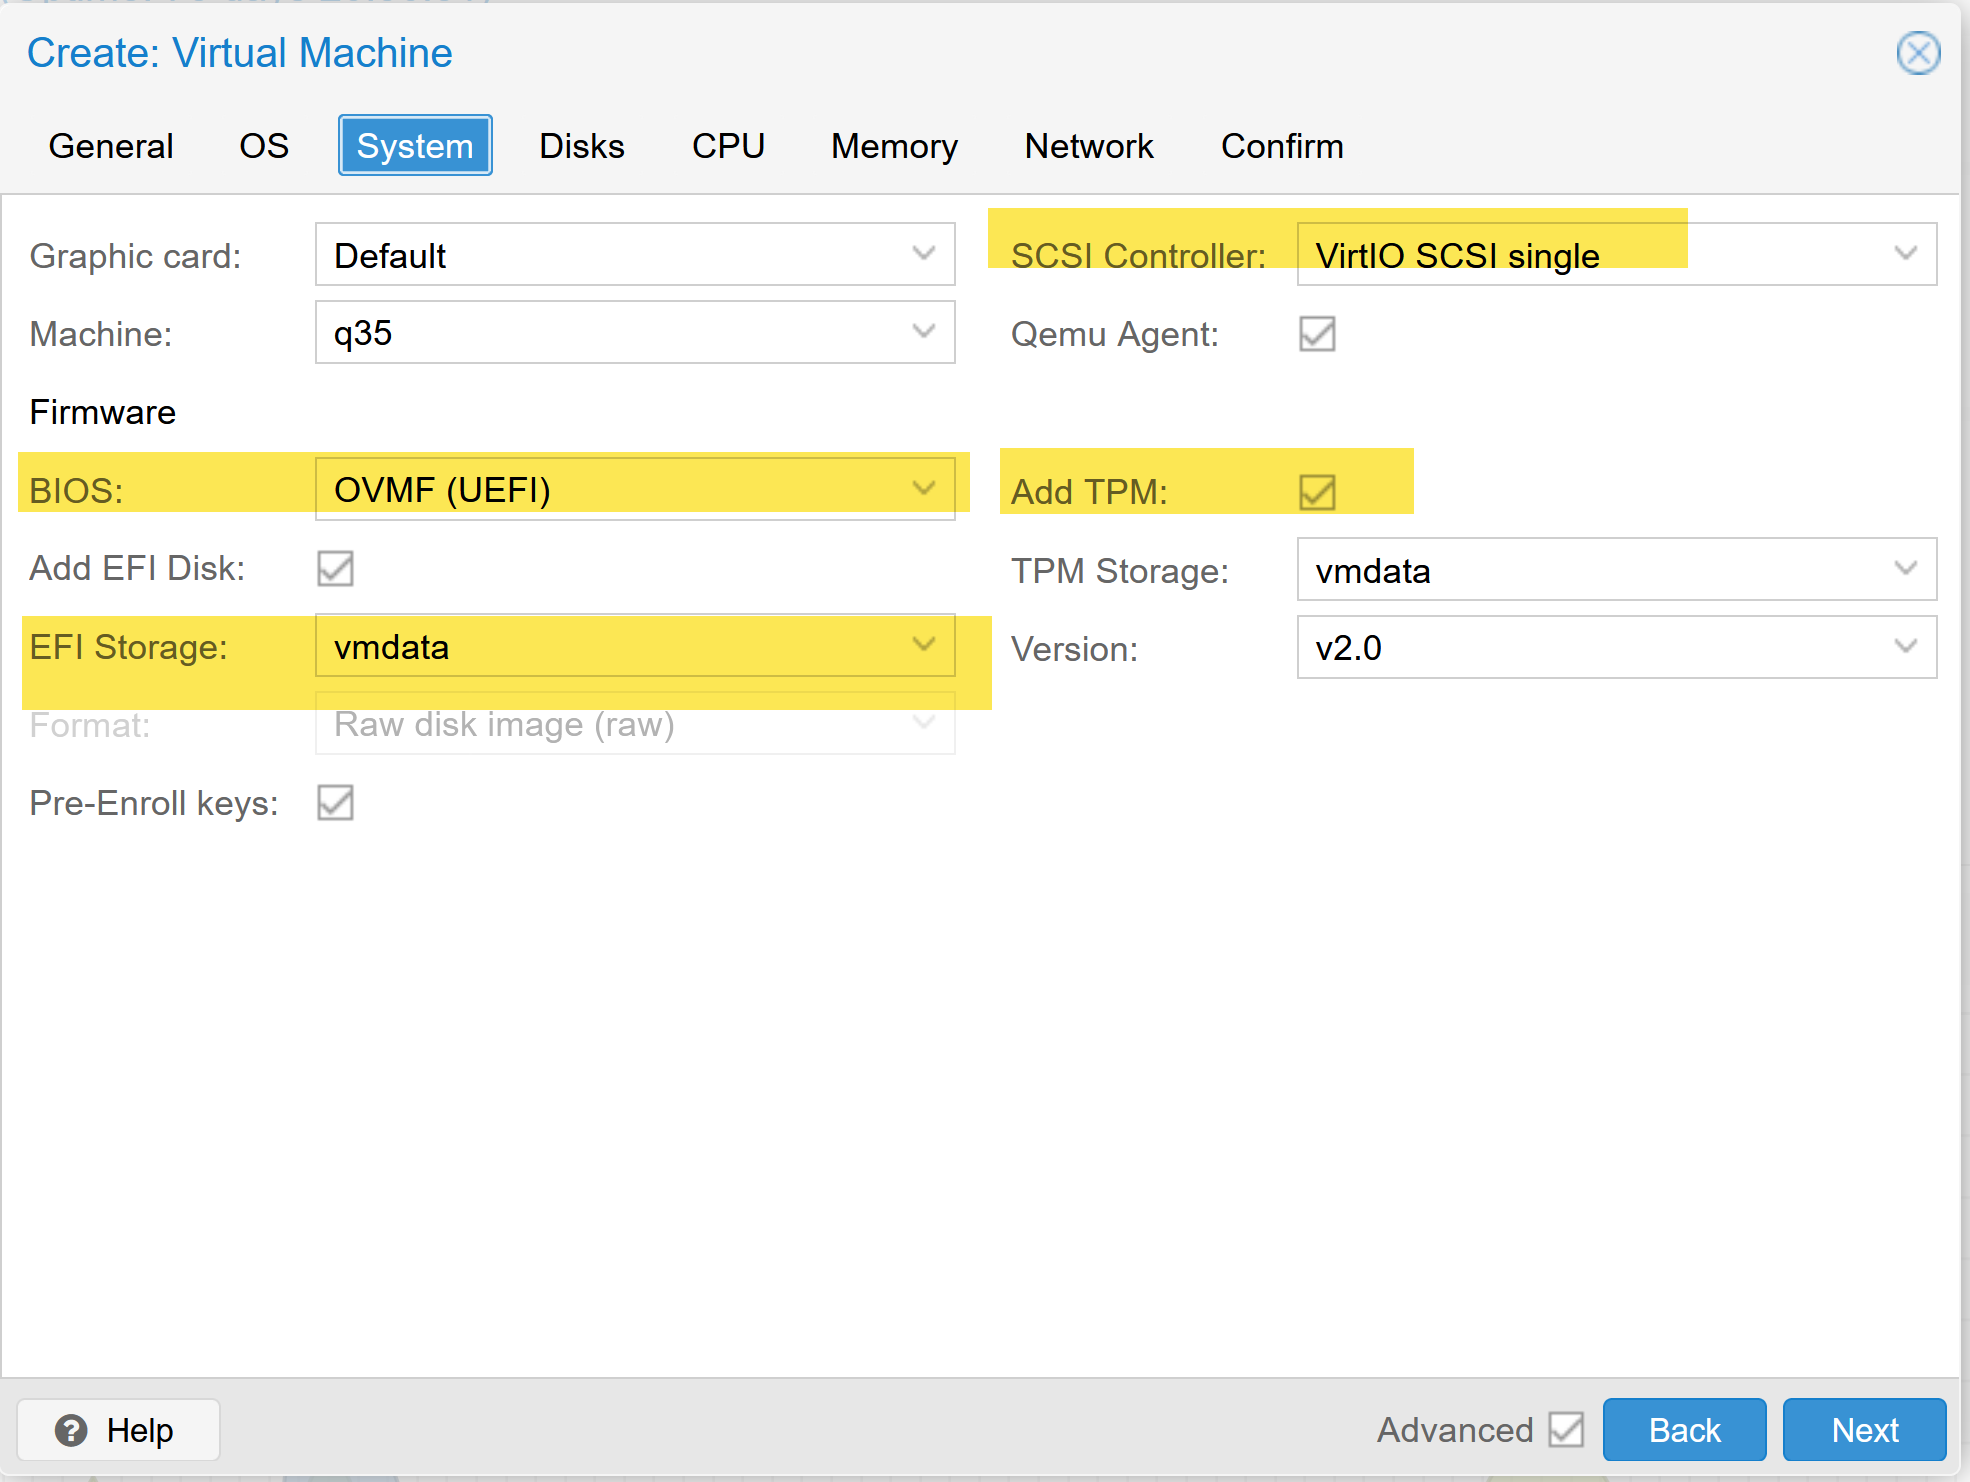
In the System tab, I use q35 as the machine type and OVMF (UEFI) as the firmware. I also keep the EFI disk enabled and add a TPM. For the SCSI controller, I use VirtIO SCSI single. This is the setup I prefer for a modern Windows Server virtual machine on Proxmox.
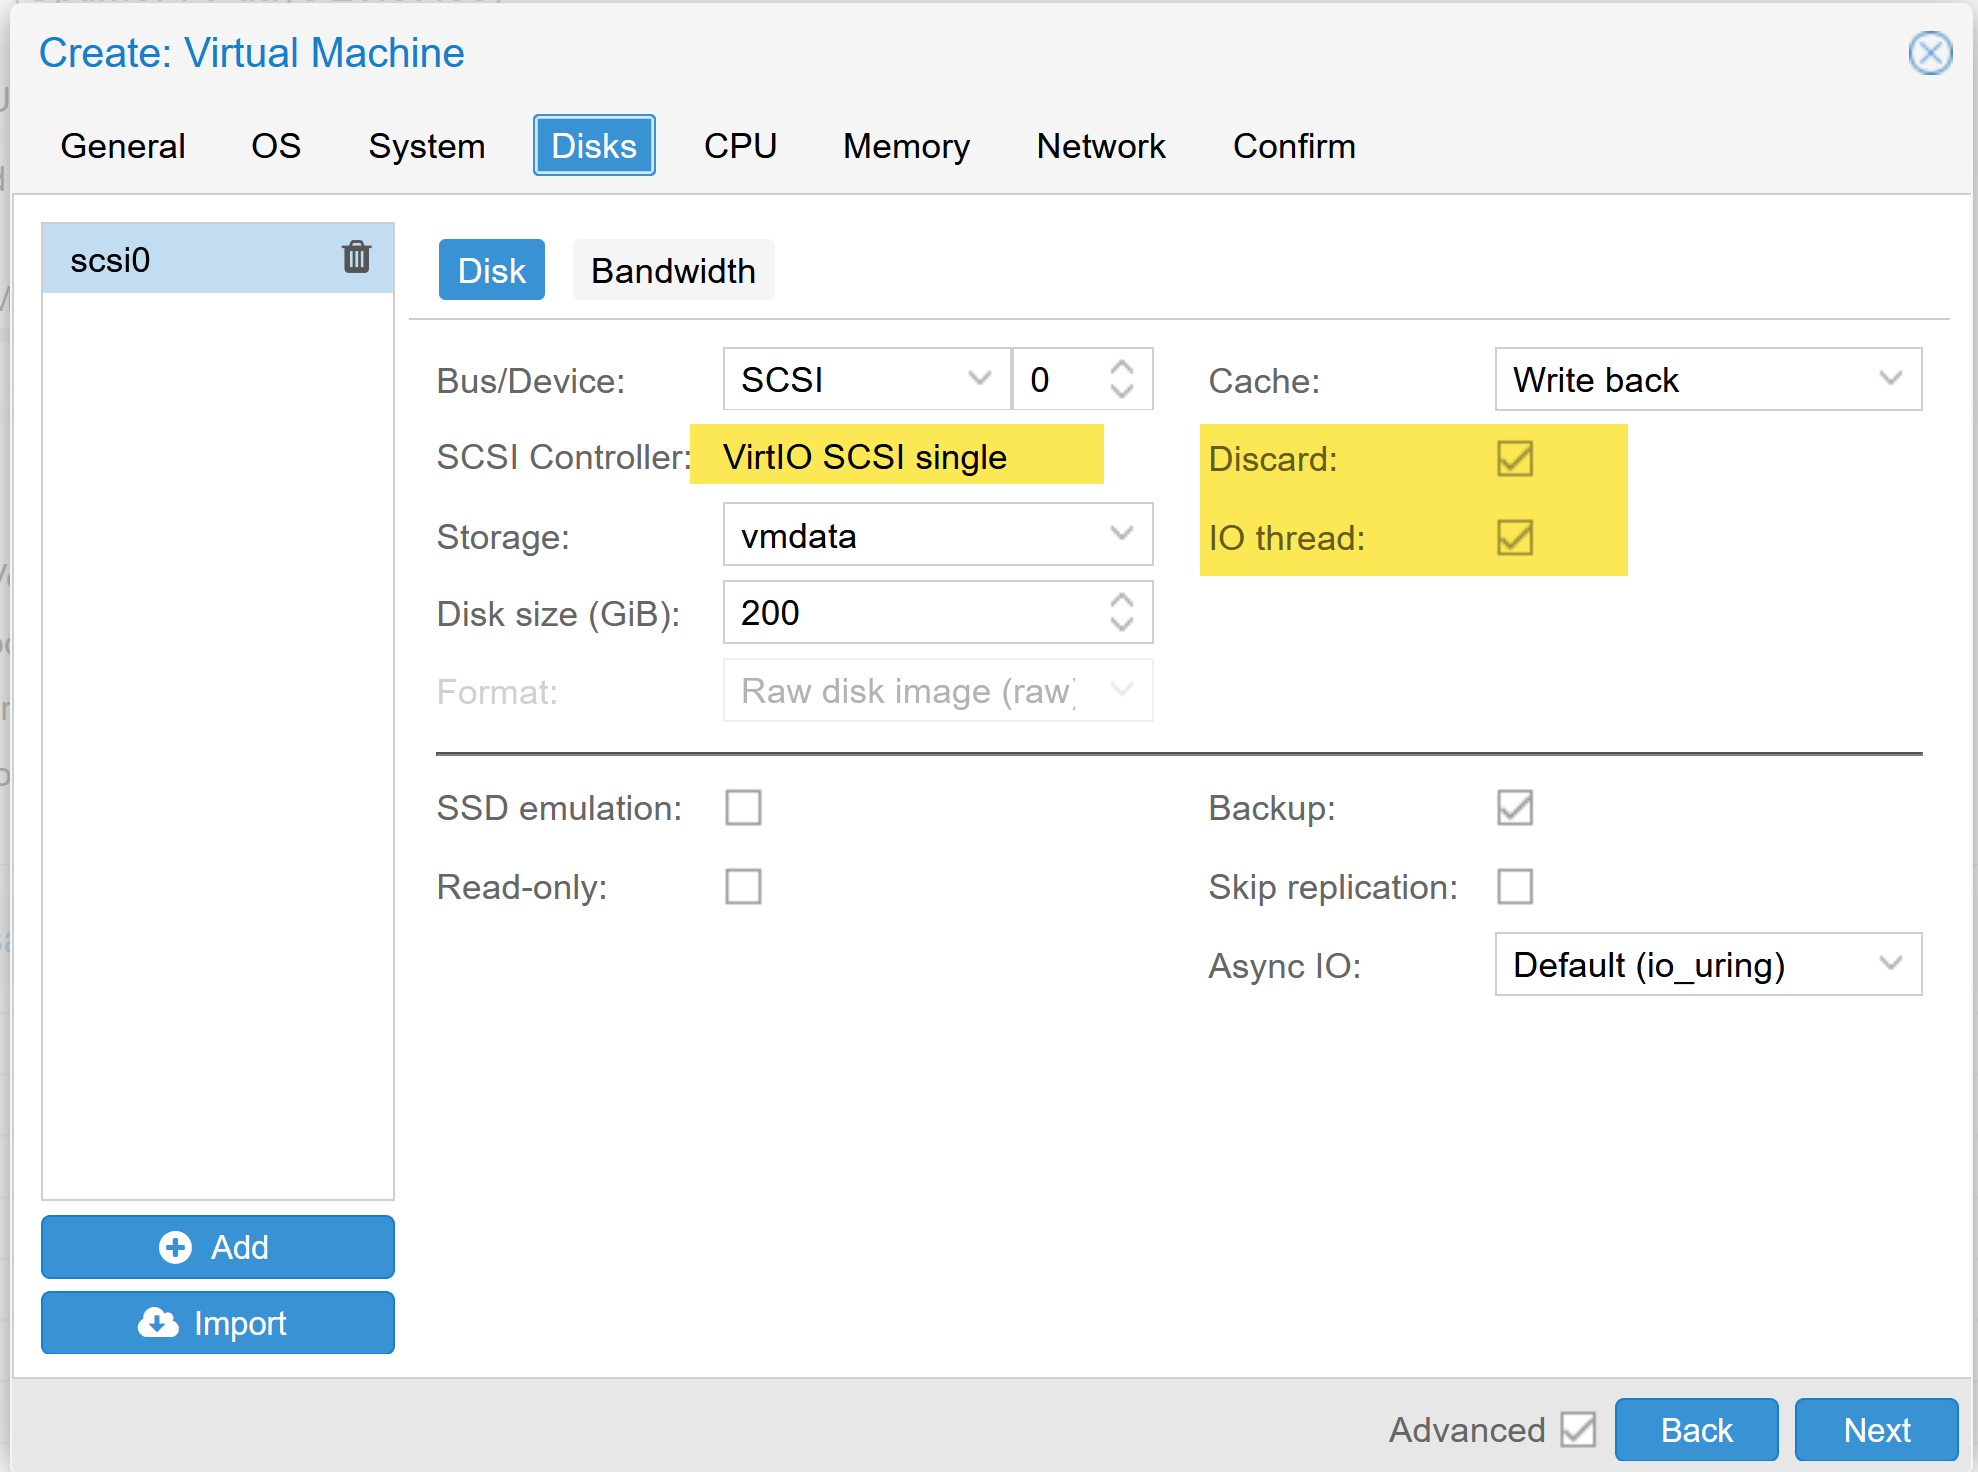
For the disk configuration, I choose a SCSI disk and keep the VirtIO SCSI single controller. I also enable Discard and IO thread. For my test VM, I assigned 200 GB of disk space, which is more than enough for Windows Server, updates, and some lab testing, but you can always increase the VM disk size later in Proxmox if your storage needs grow.
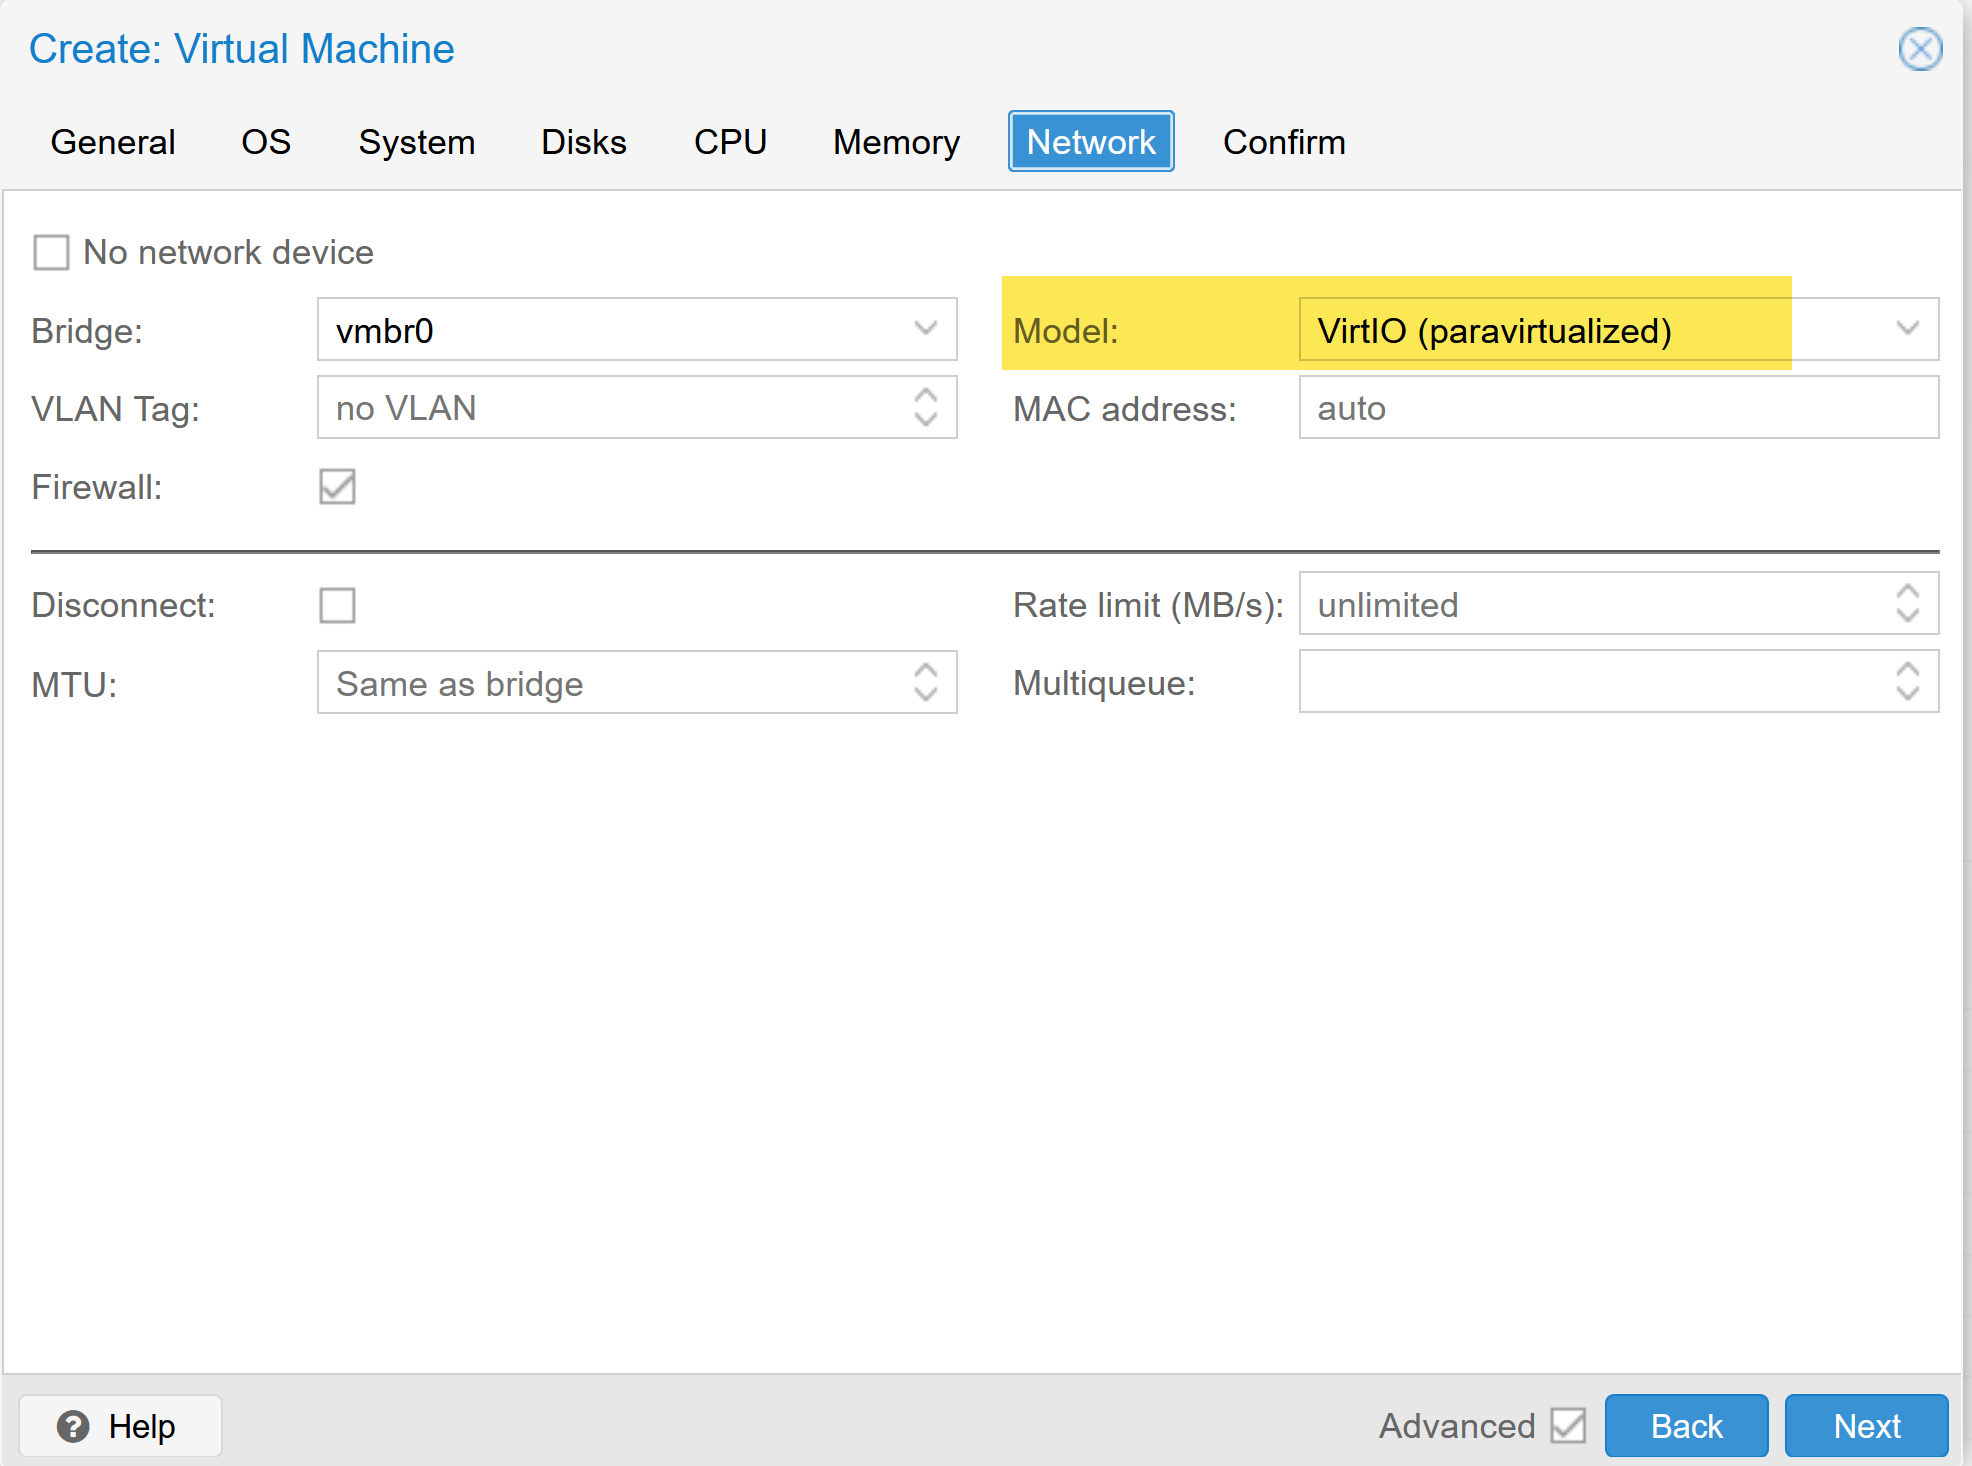
In the Network tab, I select VirtIO (paravirtualized) as the network model. That gives better performance than older emulated adapters, but it also means Windows needs the matching driver software later.
At this point, the base server configuration is ready and I can finish the VM creation process and boot the Windows installer.
Boot the Windows installer and complete the VirtIO driver setup
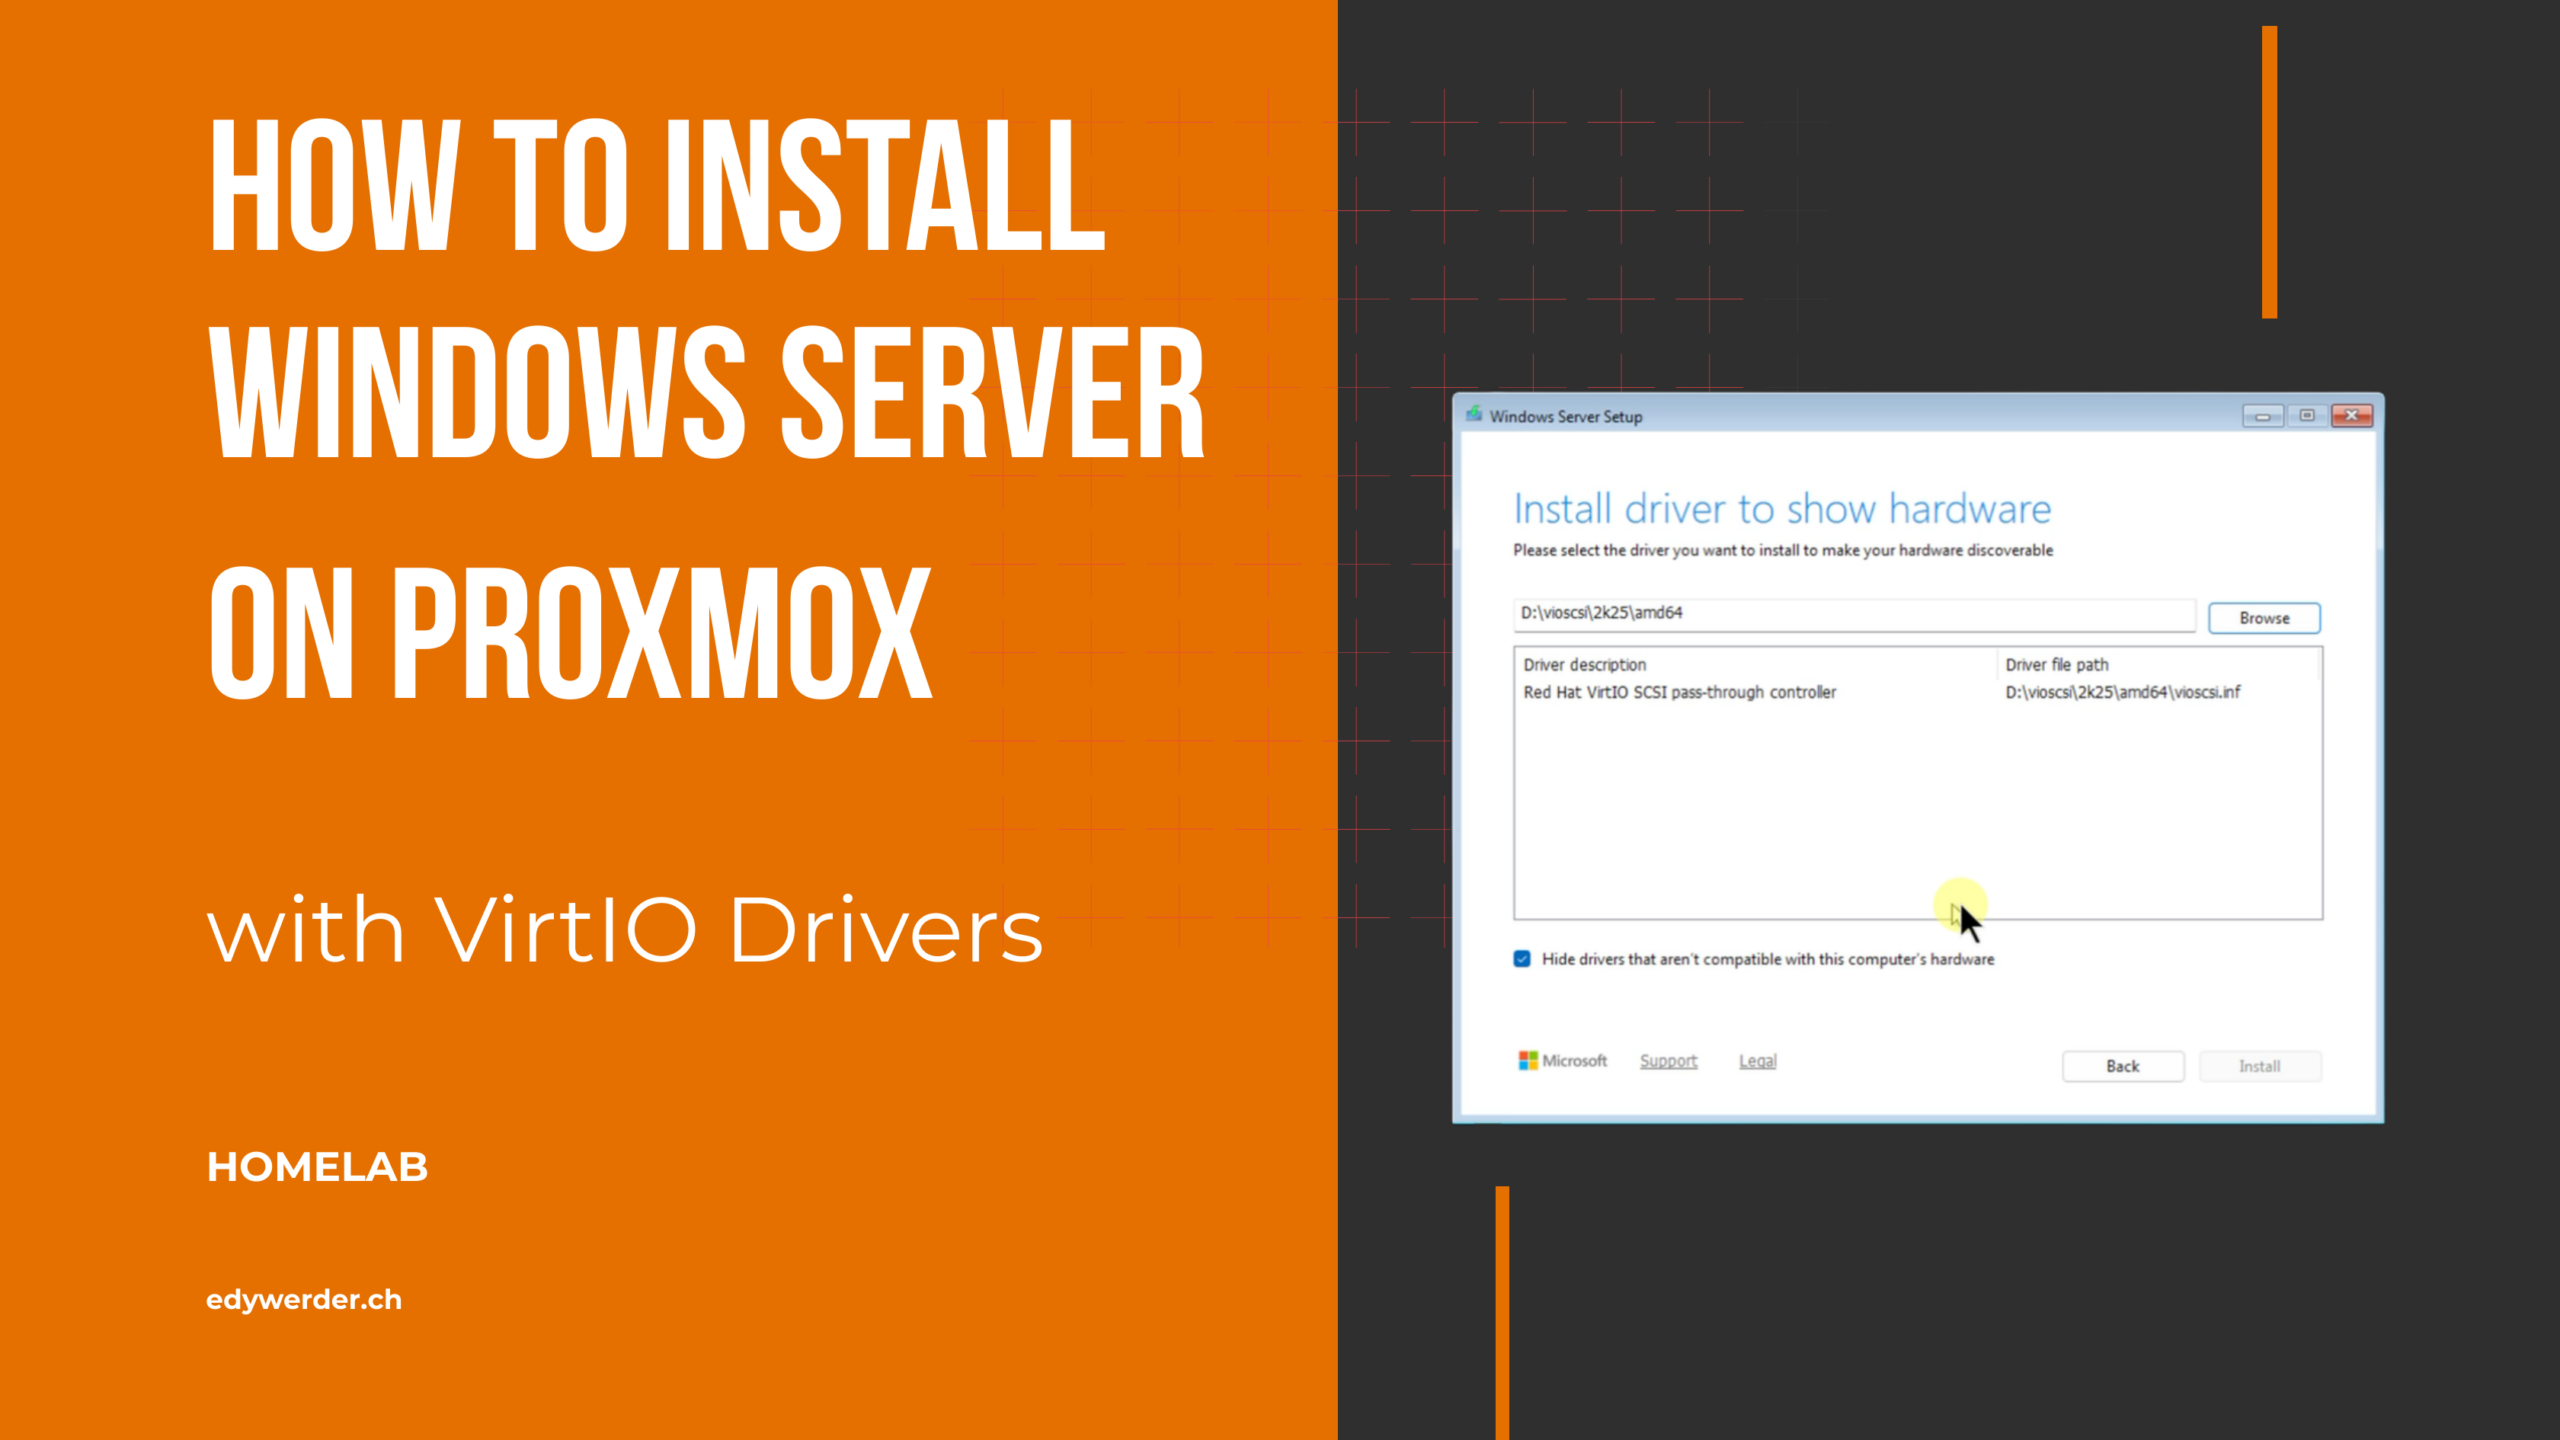
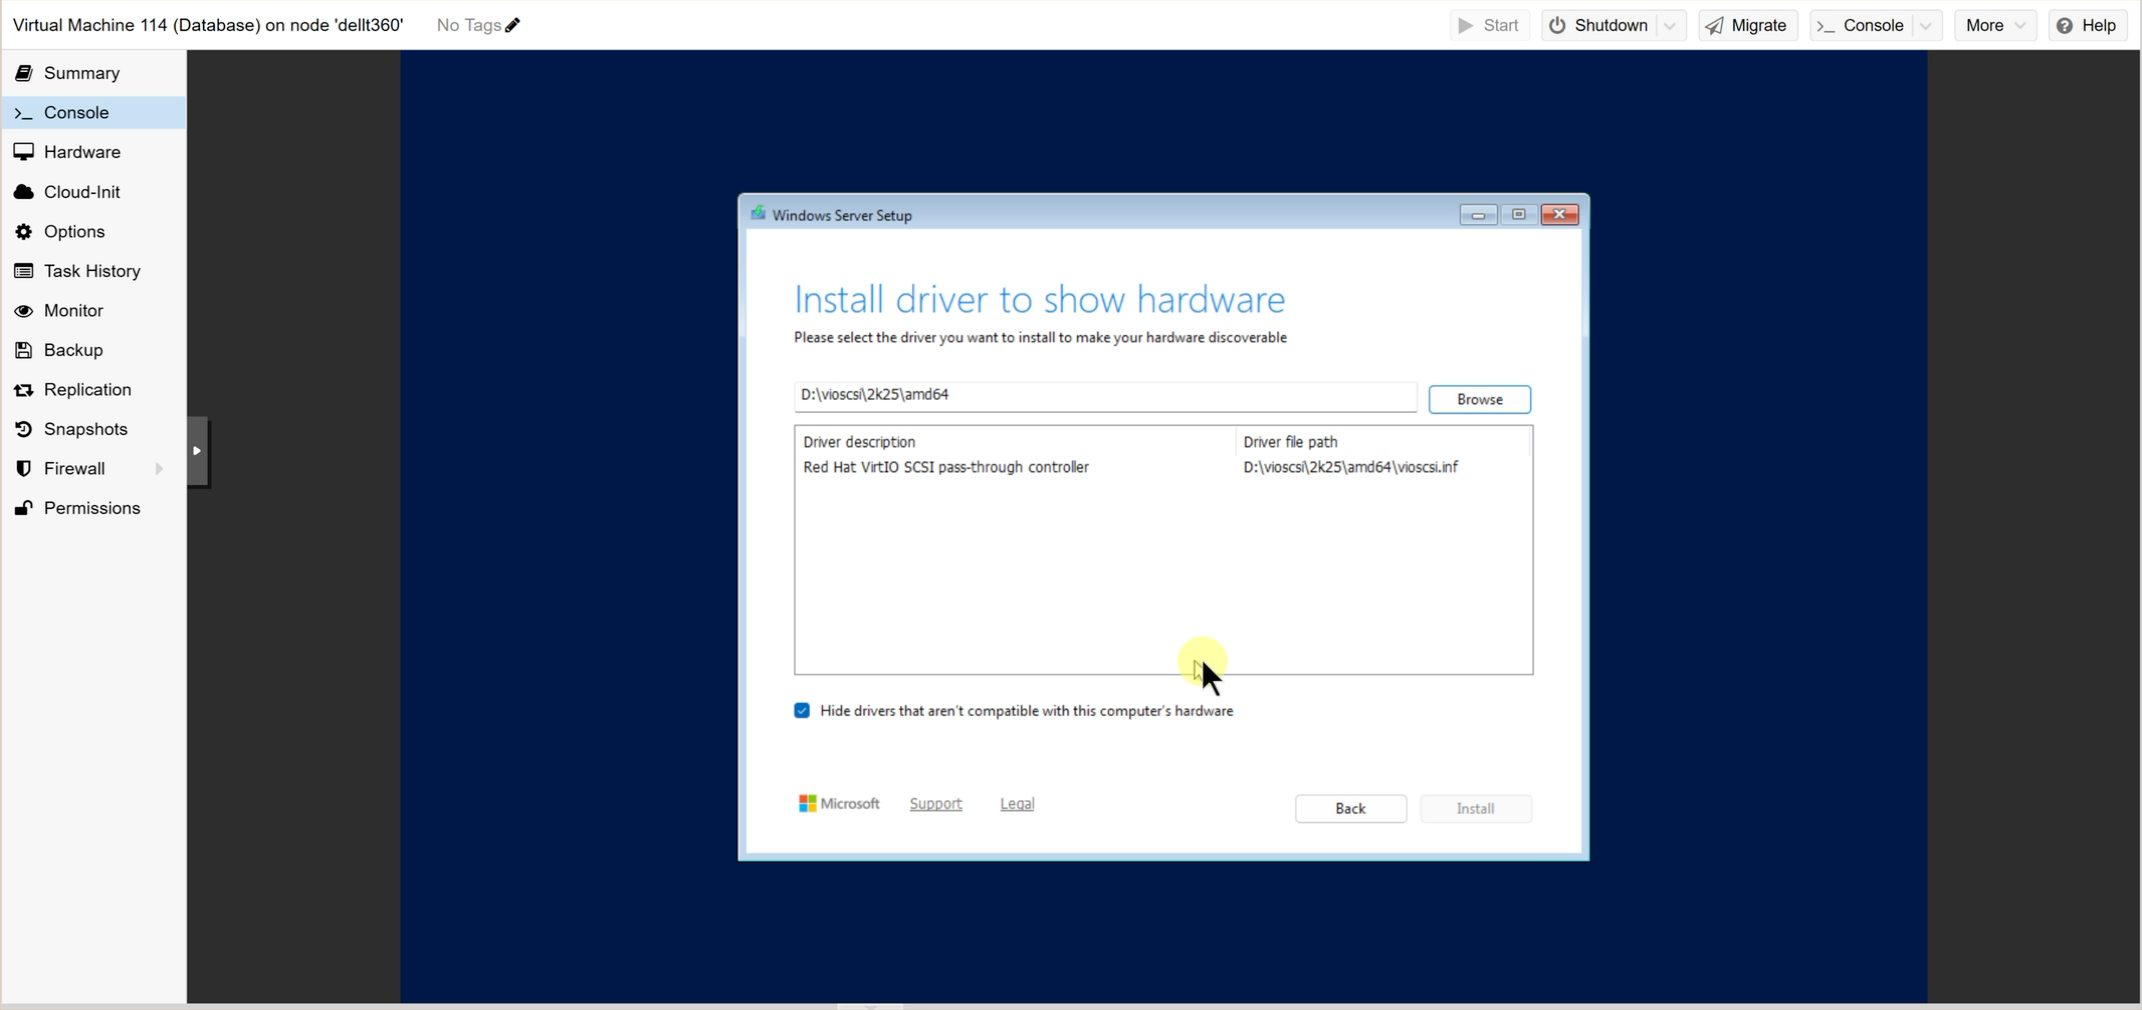
in the video below. I show the Windows installer steps on the virtual machine. The key part here is loading the VirtIO SCSI pass-through controller driver from the vioscsi folder on the mounted VirtIO ISO, because otherwise Windows Server will not detect the disk.

Once the driver is loaded, the disk space becomes visible and I can continue the installation. After the first boot into Windows, I also install the VirtIO network driver and the QEMU guest agent so the virtual machine is fully ready to use in Proxmox VE.
Install the VirtIO network driver and QEMU guest agent in Windows
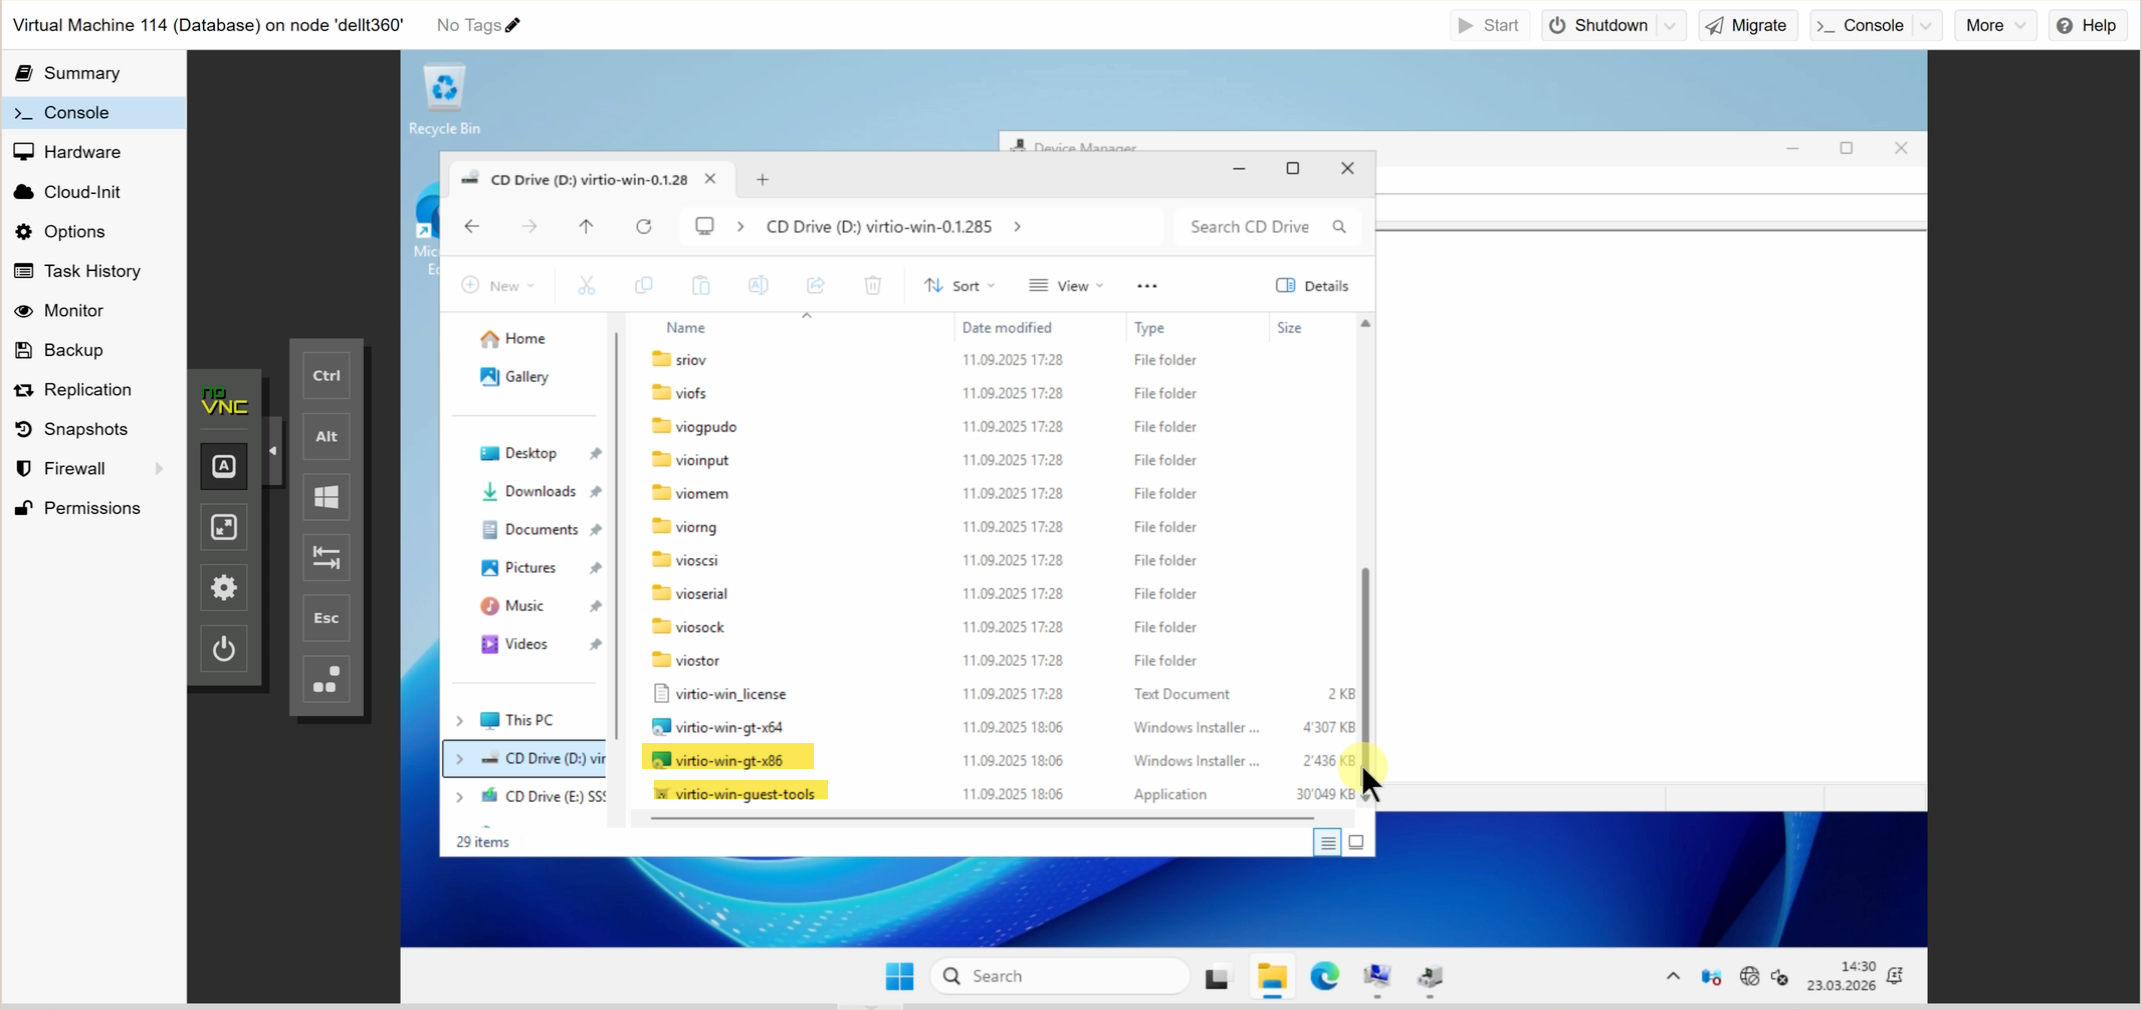
After the first boot, Windows Server is installed, but the virtual machine is not fully ready yet. I use the mounted VirtIO ISO to install the remaining drivers directly inside Windows.
For the network driver, I do not go through Device Manager in this setup. I install it directly from the ISO, which is quicker and simpler. Once that is done, the virtual machine gets network access and I can continue with the rest of the server configuration.
During VM creation, I ensured the QEMU agent was enabled in the system tab. Now, it’s important to install the QEMU Guest Agent inside Windows. This helps your Windows server work better with Proxmox by allowing smoother communication, cleaner shutdowns, and more accurate status updates in the Proxmox interface.
If you are coming from VMware, my Proxmox VMware Tools guide explains how VirtIO drivers and the QEMU guest agent replace VMware Tools.
Open Device Manager to check for any missing drivers after installation.
At this point, the Windows Server virtual machine is ready for updates and the next configuration steps.
Why I recommend installing Windows Server on Proxmox with VirtIO from the start
One thing that can confuse Proxmox beginners is that the Windows installer does not see the disk right away when the VM uses VirtIO SCSI single. It is easy to think something is broken and switch to SATA instead.
I would not recommend that. If you want a clean Windows Server virtual machine with good performance on Proxmox VE, it is better to configure the VM correctly from the start. Changing the storage controller later is possible, but it is more work than simply loading the correct driver during setup.
This also lines up with what several Proxmox users recently shared in the community. The strongest pattern was a clear preference for a VirtIO SCSI single controller with SCSI disks for Windows guests, rather than using a virtio controller and disks.
If you plan to migrate virtual machines from VMware to Proxmox with the import wizard in the future, my article could be helpful.
About the author
Hi, I’m Edy Werder. I write hands-on guides about Proxmox, homelab servers, NAS, and WordPress, based on real setups I run and document.
No sponsors, no fluff—just real configs and results.
Enjoying the content?
