
By Edy Werder — IT Consultant & Tech Blogger
When my new Minisforum MS-01 arrived, the first essential task on my to-do list was to perform a BIOS update. As any tech enthusiast would, I began by conducting a thorough Google search and delving into Reddit posts to gather insights and prepare for the process.
Editor’s Note: This article was updated on January 12 to include a quick summary box.
However, I quickly discovered that updating the Minisforum BIOS is not as straightforward as one might expect. The process involves several nuanced steps, including navigating BIOS menus, configuring secure boot, and using UEFI and EFI shell environments. Understanding these technical aspects is crucial to avoiding common pitfalls such as boot failures or update interruptions.
In this guide, I will walk you through everything you need to know about the BIOS update process for the Minisforum MS-01. From preparing a bootable USB drive formatted with FAT32, disabling secure boot, to executing firmware flashing commands in the UEFI shell.
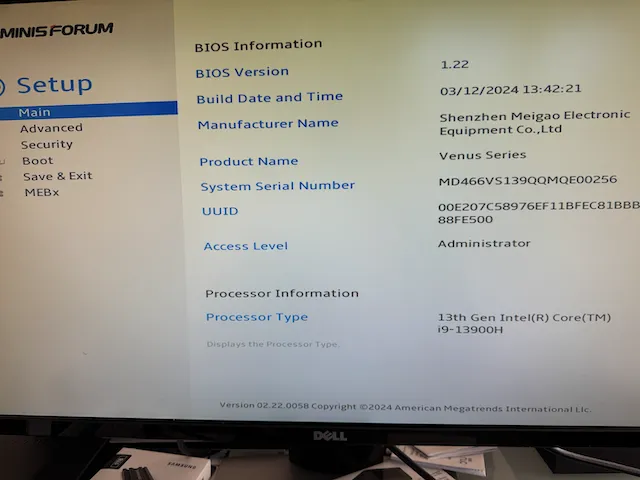
My Minisforum MS-01 arrived with the BIOS version 1.22
Some instructions suggested creating a bootable flash drive and extracting the downloaded Minisforum BIOS on the flash drive. Here is the location where you can download the latest BIOS. Further, it was mentioned to disable secure boot.
As you can see in the BIOS menu (image below), Secure Boot was enabled in the BIOS, but the option to disable it was greyed out. I couldn’t figure out why I could not change this setting, which puzzled me.
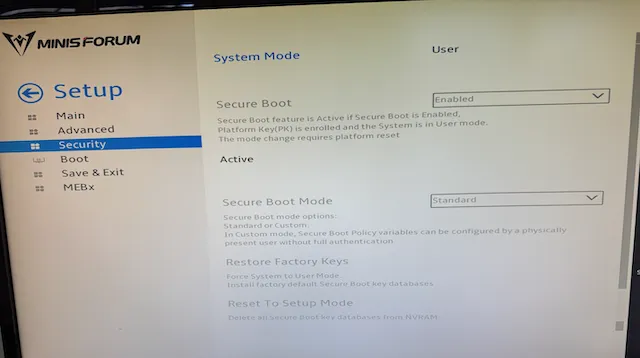
Some online suggestions pointed to setting both an administrator BIOS password and a user BIOS password, but even after trying that, I still couldn’t modify the Secure Boot setting.
Then it hit me: why not install Windows 11? Since Windows 11 requires Secure Boot, this might unlock the ability to manage the setting. My Minisforum MS-01 had arrived without an operating system, as I planned to use it for Proxmox. However, before diving into Proxmox, I wanted to upgrade the Minisforum BIOS.
After installing Windows 11, I revisited the BIOS and to my relief, I could finally change the Secure Boot setting.
I followed Brandon Lee’s instructions on using Diskpart to prepare the USB disk drive.
diskpartnlist disknselect disk X # Replace X with the number of the disk you want to formatncleanncreate partition primarynformat fs=fat32 quickUnfortunately, using this method and extracting the downloaded BIOS file on the USB drive, I could not boot from the Minisform MS-01 using legacy bios or UEFI. I also needed shell.efi from here (credit to the post from Avamader in the STH community). I downloaded the ShellBinPkg.zip, extracted it and copied the shell.efi from this location D:BIOSShellBinPkgShellBinPkgUefiShellX64 to my USB drive.
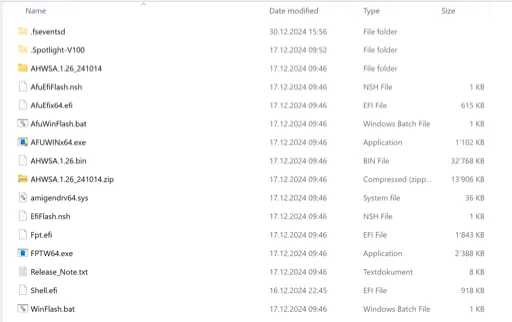
Here is a screenshot of the USB drive prepared with Diskpart
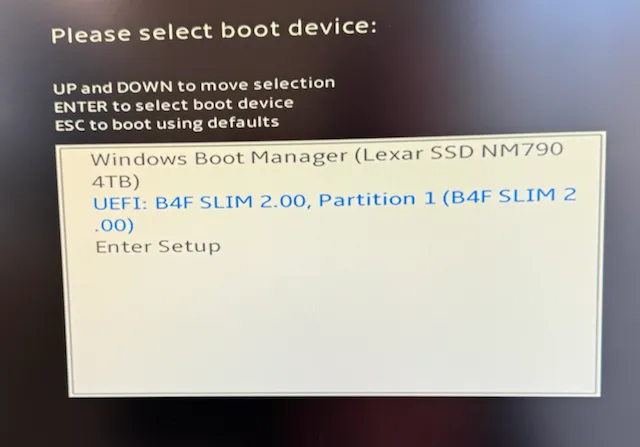
Now, I was able to boot from the flash drive, getting the boot screen
After figuring out how to boot from the USB drive, upgrading the Minisforum BIOS was straightforward.
First, you need to find the Bios Udisk
type FS0: (zero) or FS1 or FS2. nIn my case FSO: workednshow with ls the directory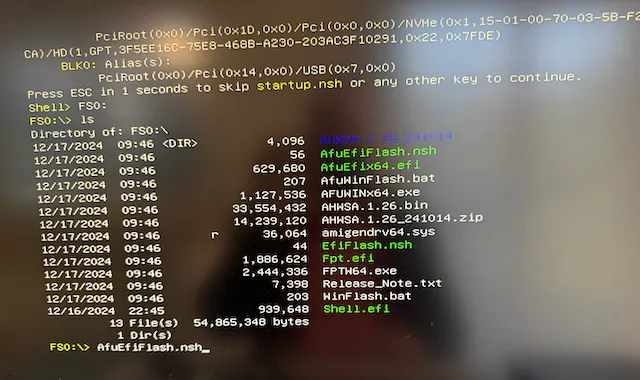
Now you are ready to upgrade the Minisforum MS-01 BIOS. Type
AfuEfiFlash.nshThe update process has started and will take a few minutes.
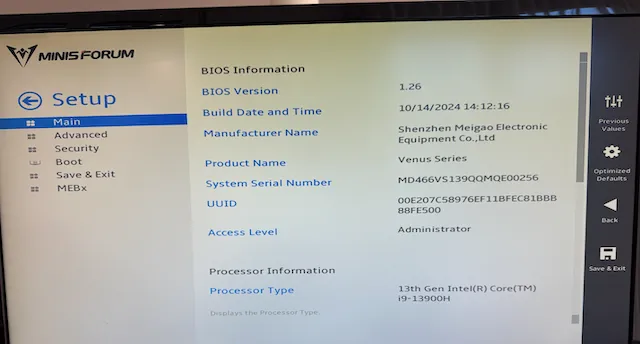
Success! The computer firmware update to BIOS version 1.26 completed successfully. This process enhances system stability and resolves kernel panic issues for Proxmox systems, delivering a smoother user experience.
I hope this article helps you upgrade the Minisforum BIOS faster than I did. It’s a little dream machine.
Please also check out my in-depth review of the Minisforum MS-01 and some polling results I gathered from my readers.
The Minisforum MS-01 is also available new or used on eBay.
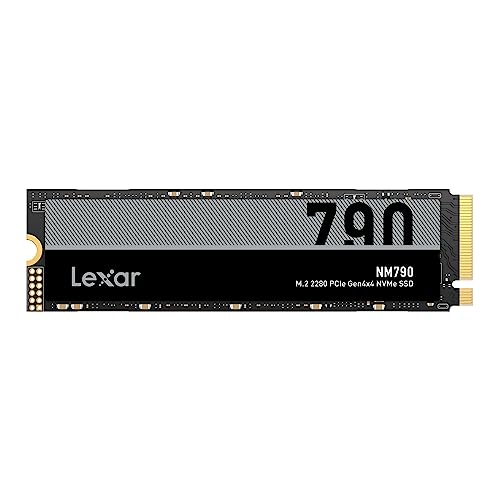
The Crucial memory is perfect for the Minisforum MS-01, allowing both slots to be equipped with 48GB. The Minisforum has three M.2 HD slots, which I utilize for a Proxmox ZFS setup. Lexar or Samsung are excellent options.


Minisforum has released a new version 1.27 after publishing this article. According to the bios release notice, it’s not mandatory to flush it. The release 1.26 was more significant with updated Microde and c-state
1.Add Turbo Ratio Limit Options form
2.BIOS disables the execution of the UEFI storage Option ROM by default
3.The PCIE SLOT supports speed control
4.Set PL1 to 55W and PL2 to 80W for the 12800H
5.Set PL1 to 60W and PL2 to 80W for the 270H
6.Update GOP version to 21.0.1066
I’d love to hear from you. Was this article helpful? Share your thoughts in the comments below. If you prefer, you can also reach me by email or connect with me on Reddit at Navigatetech.
Now that you’ve updated your Minisforum BIOS, you might be considering the next steps for optimizing your setup. If you’re exploring Mini PCs for specific purposes, I recommend reading about the best Mini PC for a home server. This guide highlights top choices for creating a reliable and efficient home server, perfect for enthusiasts looking to maximize functionality. It’s a natural progression from your BIOS update, helping you get the most out of your Mini PC
Hi, I’m Edy Werder. I write hands-on guides about Proxmox, homelab servers, NAS, and WordPress, based on real setups I run and document.
No sponsors, no fluff—just real configs and results.
Enjoying the content?

If you have Windows 11 installed, you can run AfuWinFlash.bat as an administrator in Windows and it will do the update automatically without having to enter the BIOS at all.