
By Edy Werder — IT Consultant & Tech Blogger
Divi 5 design variables let you define colors, fonts, spacing, text, URLs, and more in one place and reuse them across your entire site. They are a new feature and a core part of the Divi 5 design system. Change a single variable once, and everything using it updates automatically. I have been setting them up on a real project. Here is what I found.
What Are Design Variables?
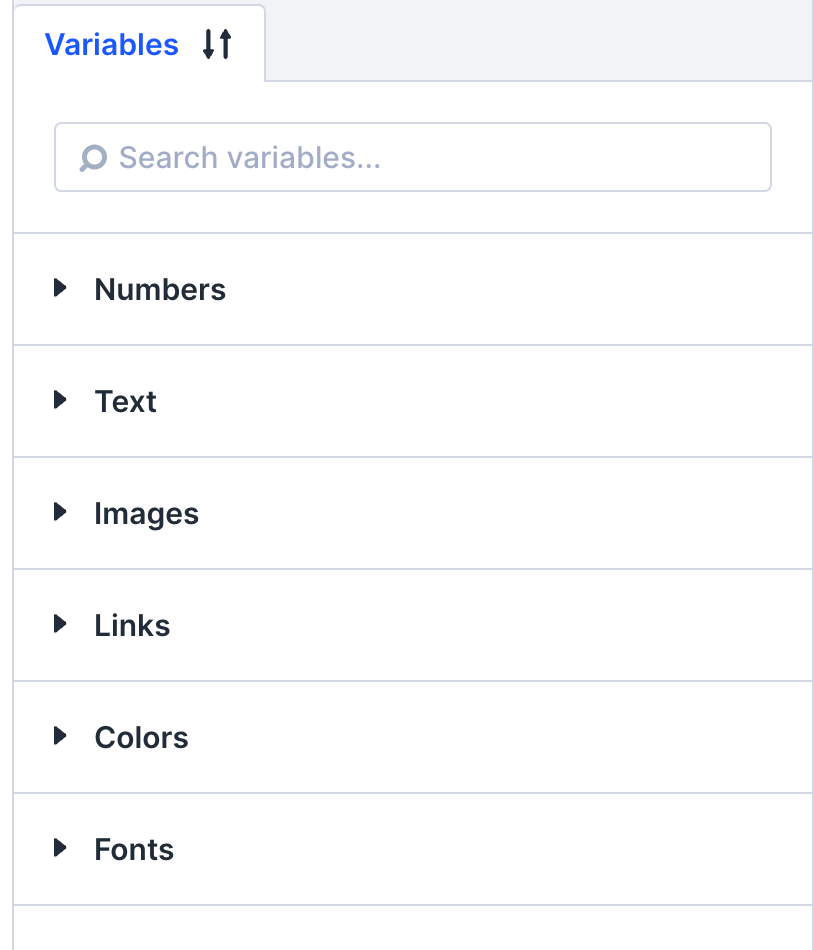
Design variables in Divi 5 are reusable values you manage through the Variable Manager icon in the Divi 5 left sidebar. Divi 5 supports six variable types: colors, fonts, numbers, images, text, and links. You can create variables for anything you reuse, such as line heights, border-radius values, container widths, font sizes, and more.
Think of them as design tokens. Instead of entering the same hex code or font size in dozens of Divi elements, you reference a variable. When you need to change a value later, you update it in one place. This concept exists in other builders too through CSS custom properties and global design controls, as you see when you manage font and color settings in Elementor, but Divi 5 makes it accessible without writing code.
You can apply variables directly through Divi’s native input fields. Click any supported field and you see a list of available variables to choose from. This keeps your design process fast and helps you stay consistent across the entire site.
You can create variables for anything you reuse.” A good article created by the Divi 5 team is Using Design Variables With Presets In Divi 5
How Presets and Variables Work Together
Variables and presets are two separate tools, but they are designed to work as a pair. Variables store the values. Presets apply them to Divi elements consistently.
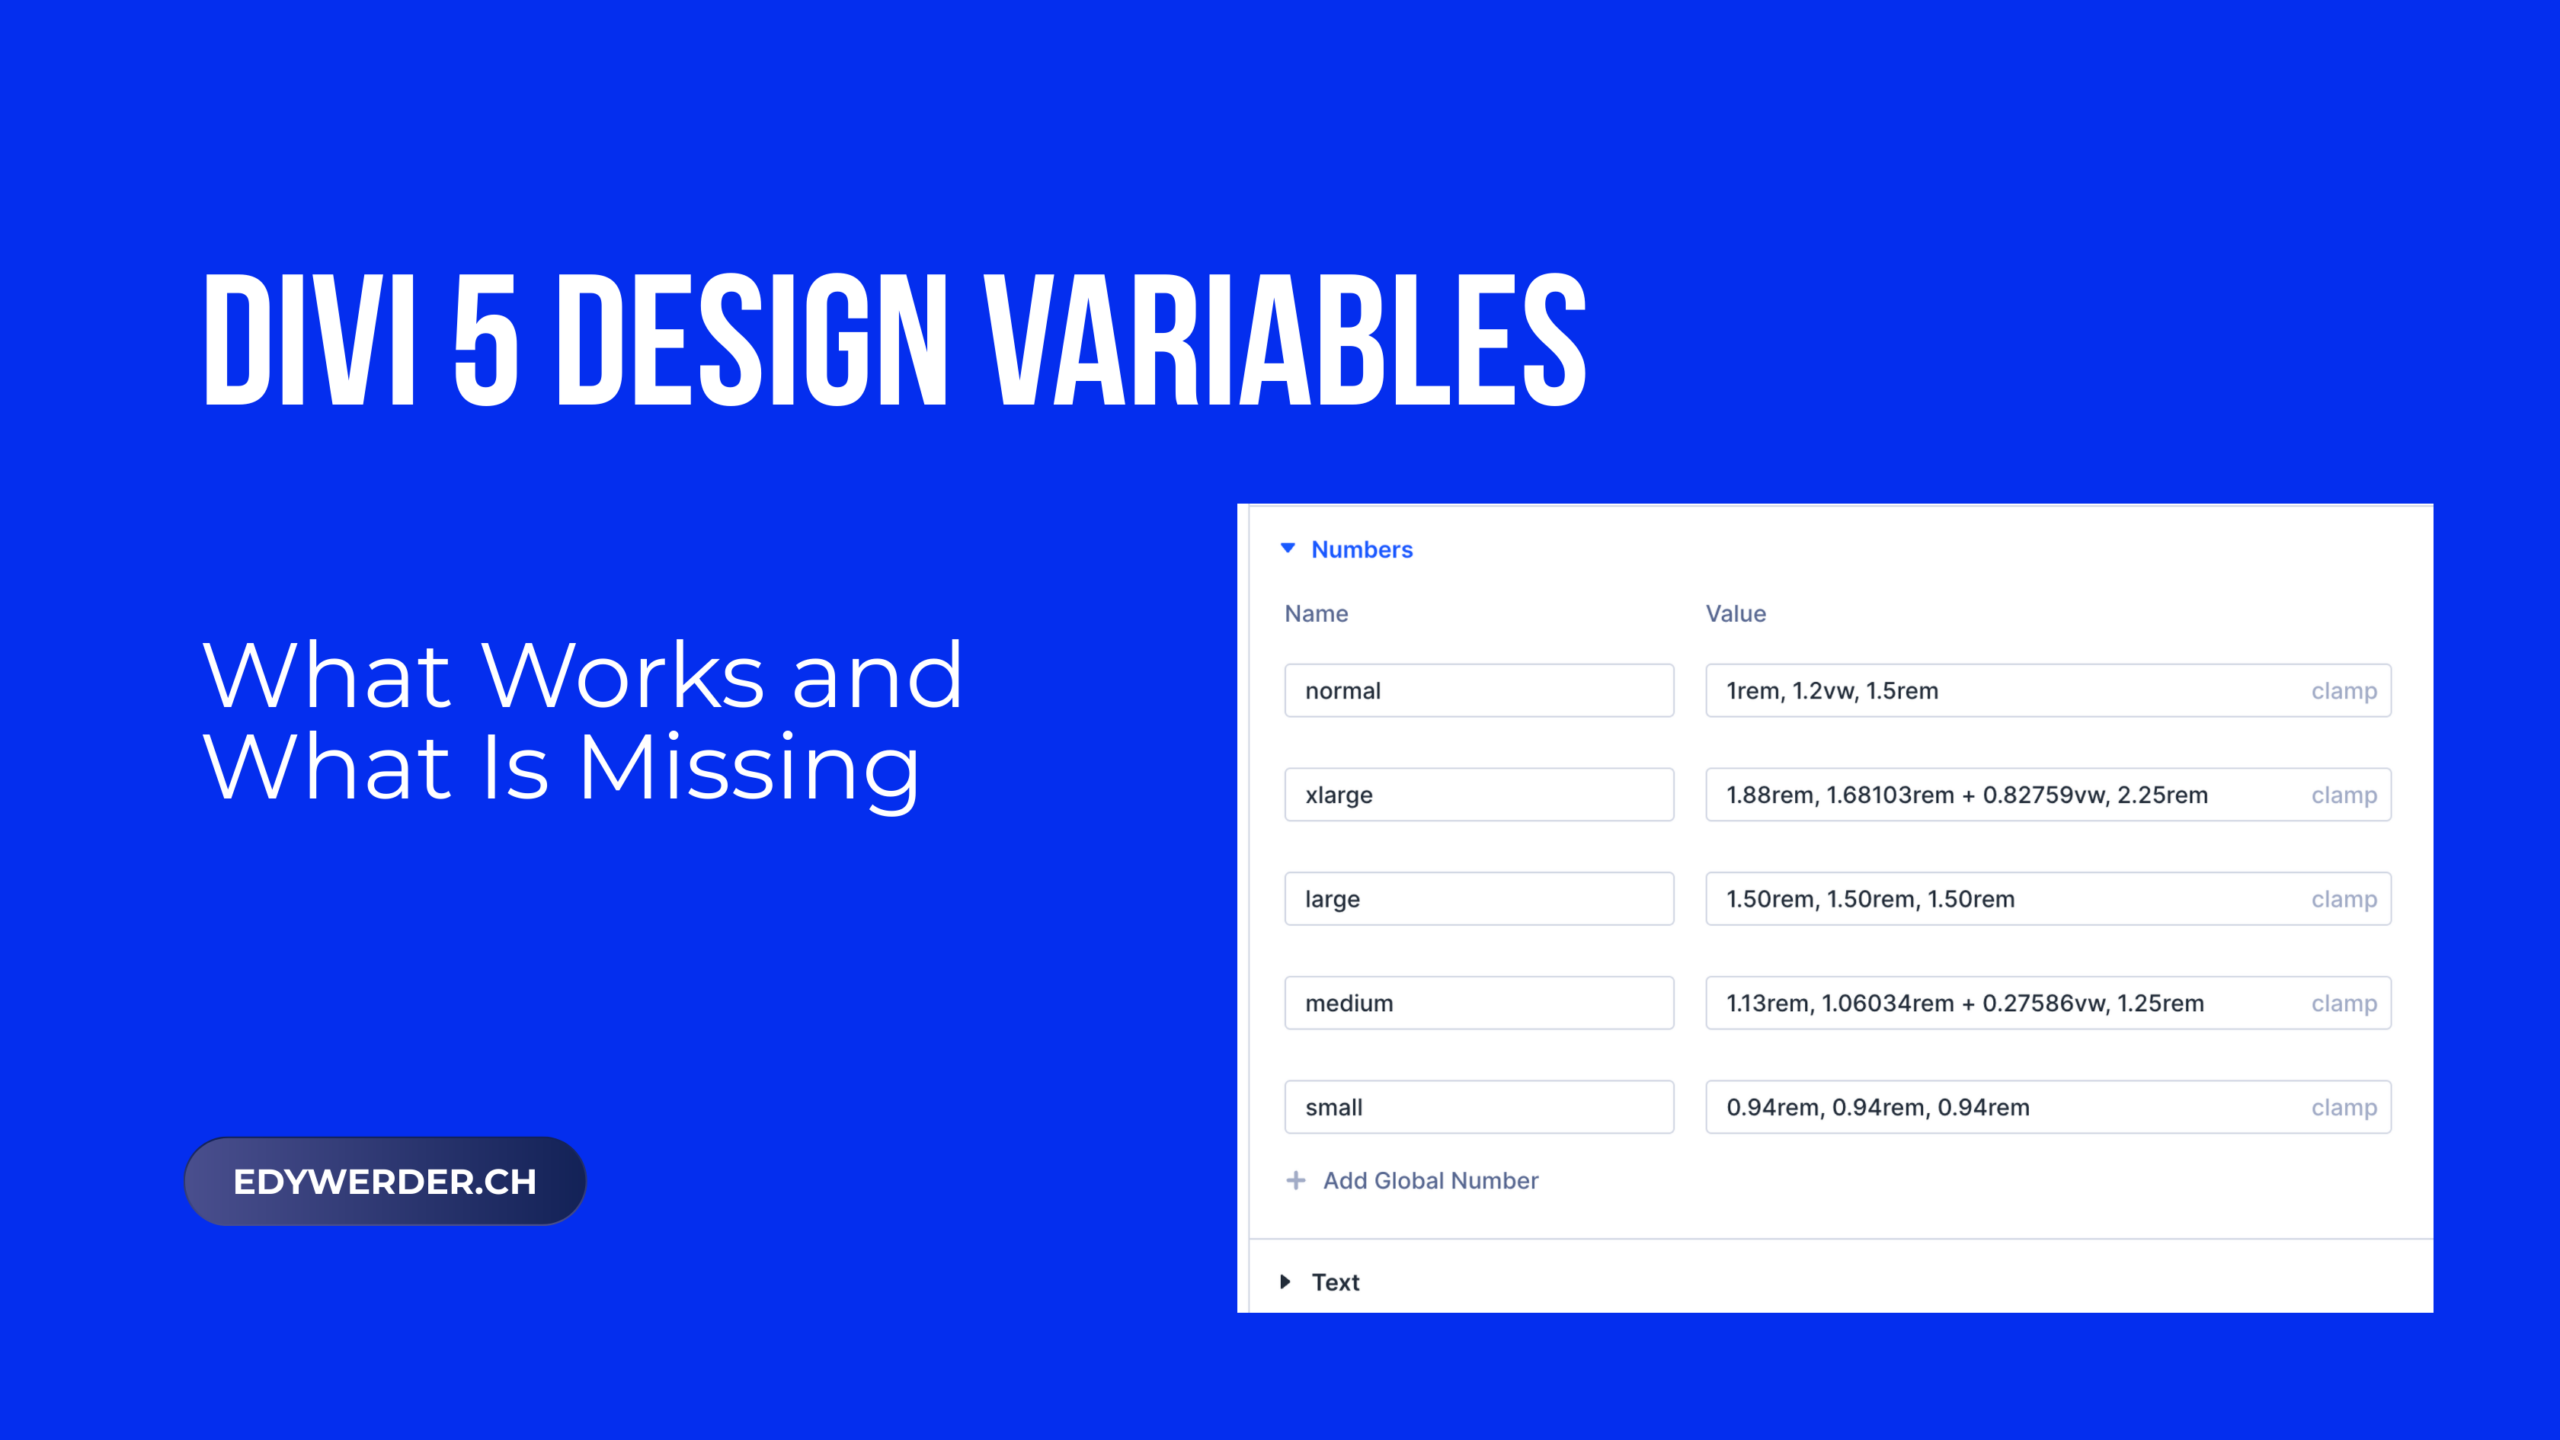
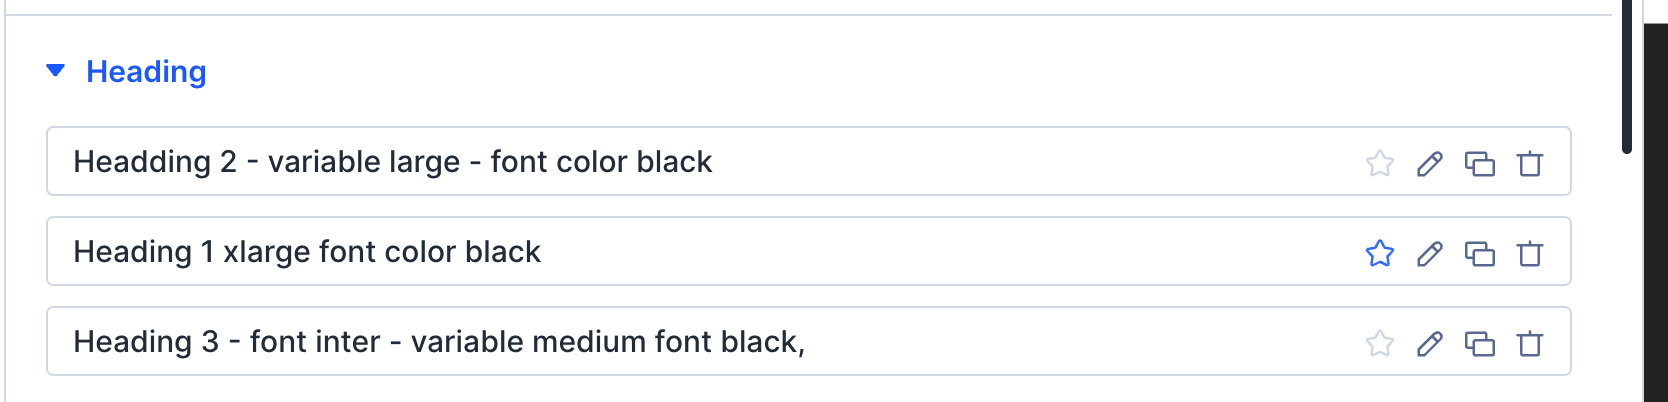
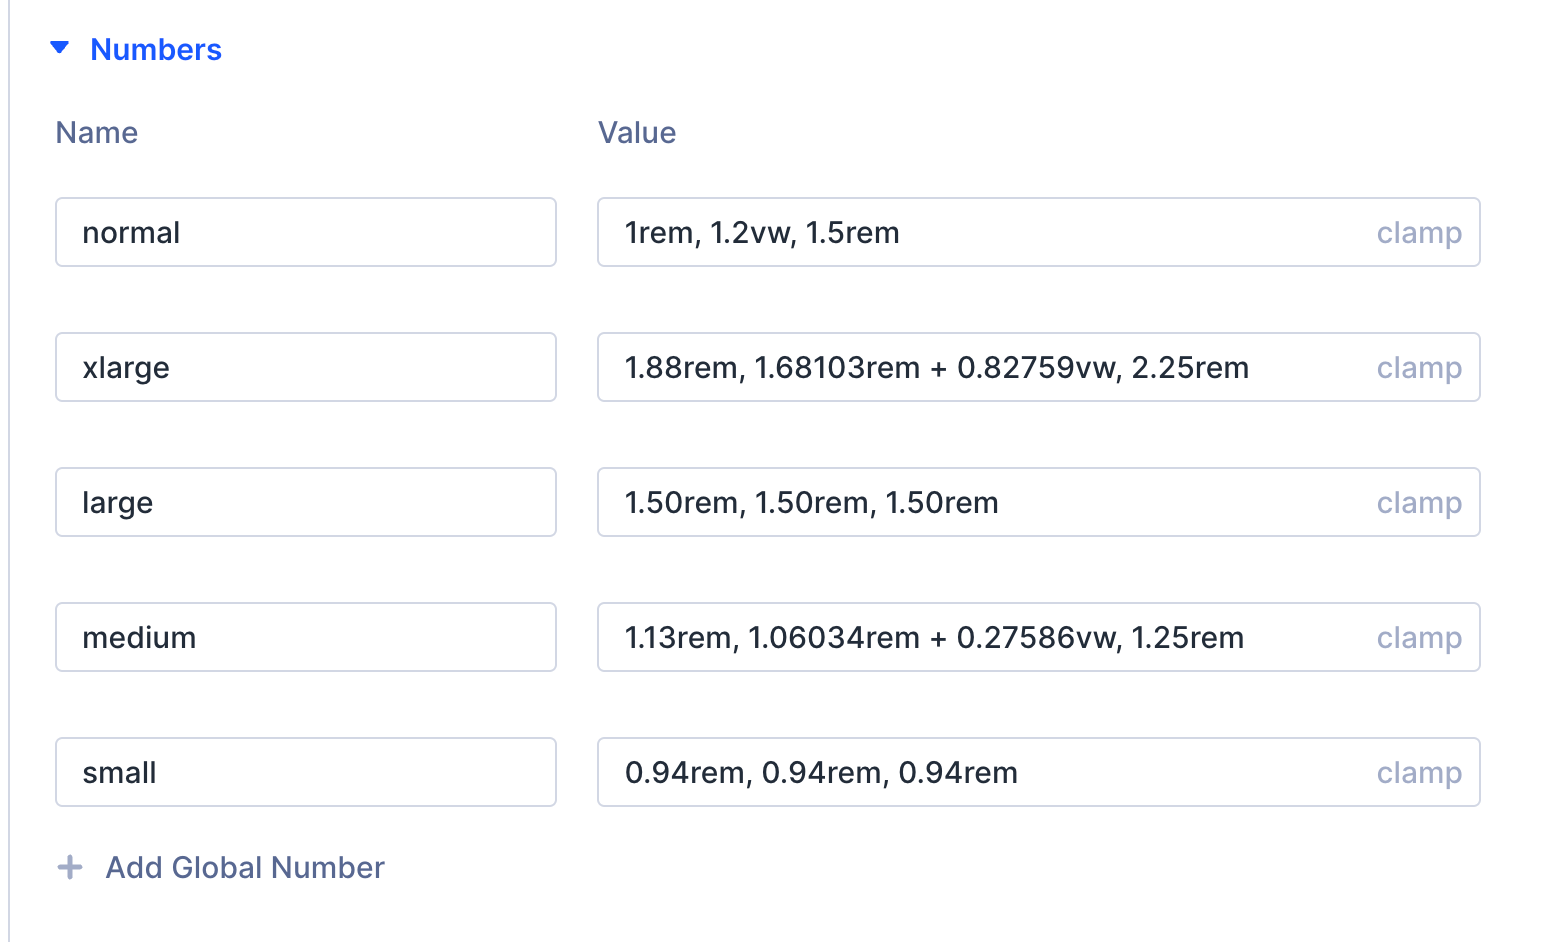
For example, I created number variables for my font sizes: xlarge, large, medium, normal, and small. Each uses a clamp() value for fluid typography that scales between screen sizes. Then I created heading presets (Heading 1, Heading 2, Heading 3) that reference those variables.
The result: if I want to adjust my heading sizes across the entire site, I change the variable. Every preset using that variable updates instantly. No need to open individual modules. This saves hours on larger projects.
If you are starting a new Divi 5 project, set up your variables first, then build your presets on top of them. This order matters. Presets without variables still work, but you lose the ability to make global changes from a single place.
What exactly gets saved in a preset?
A preset is scoped to the Design tab. That is the rule. If a setting lives in the Content tab or the Advanced tab, it will not be part of a preset. That is why an icon is excluded (Content tab) and CSS class names are excluded (Advanced tab).
Within the Design tab, settings are organized into option groups. The most common ones are Layout, Dividers, Sizing, Spacing, Border, Box Shadow, Filters, Transform, and Animation. But there are more. Text and Heading Text are two that matter a lot in practice, because that is where you define font family, size, weight, and line height.
Each option group can be saved as its own preset, but only one at a time. So if you want to save both Spacing and Sizing for a Section module, you need two separate presets.
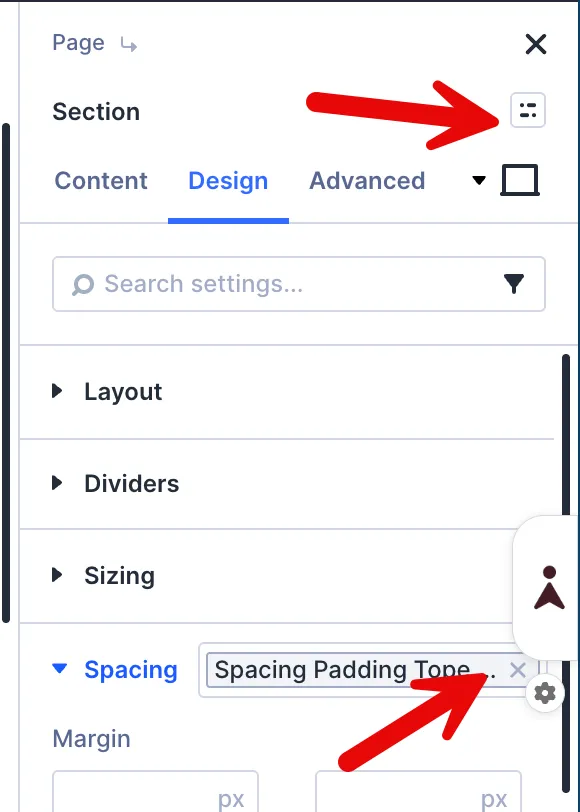
There are two ways to create a preset, and the difference matters. If you create it at the module level, it only applies to that module type. If you create it at the option group level by clicking the preset icon directly next to the option group name, it works across any module that shares the same option group. Spacing is the classic example: a preset created at the Spacing option group level applies to Sections, Rows, and any other module that has Spacing.
According to the documentation, this cross-module behavior is by design, and I confirmed it works correctly after testing. Note that text alignment in the Text module is currently not rendering correctly on the canvas, even when set in the panel. That appears to be a bug in version 5.0.3.
How to organize your presets
Once you understand option group presets, the next question is how to name them so your design system stays manageable.
Role-based naming is the approach that works best. Name the preset after what it does, not how it looks. A few examples:
- Text H1, Text H2, Text Paragraph
- Spacing Section, Spacing Card
- Border Card, Border Button
- Primary Button, Secondary Button
When you come back to a project weeks later, the name tells the whole story. No guessing, no opening every preset to figure out what it does.
The broader workflow layers naturally on top of this. Start with global variables for colors, fonts, and spacing. Then create option group presets that reference those variables.
Finally, build element presets for reusable components like a hero section or a card, which can pull in multiple option group presets. I posted this question in r/Divi and a community member shared this exact three-step approach, which resonated with a lot of people.
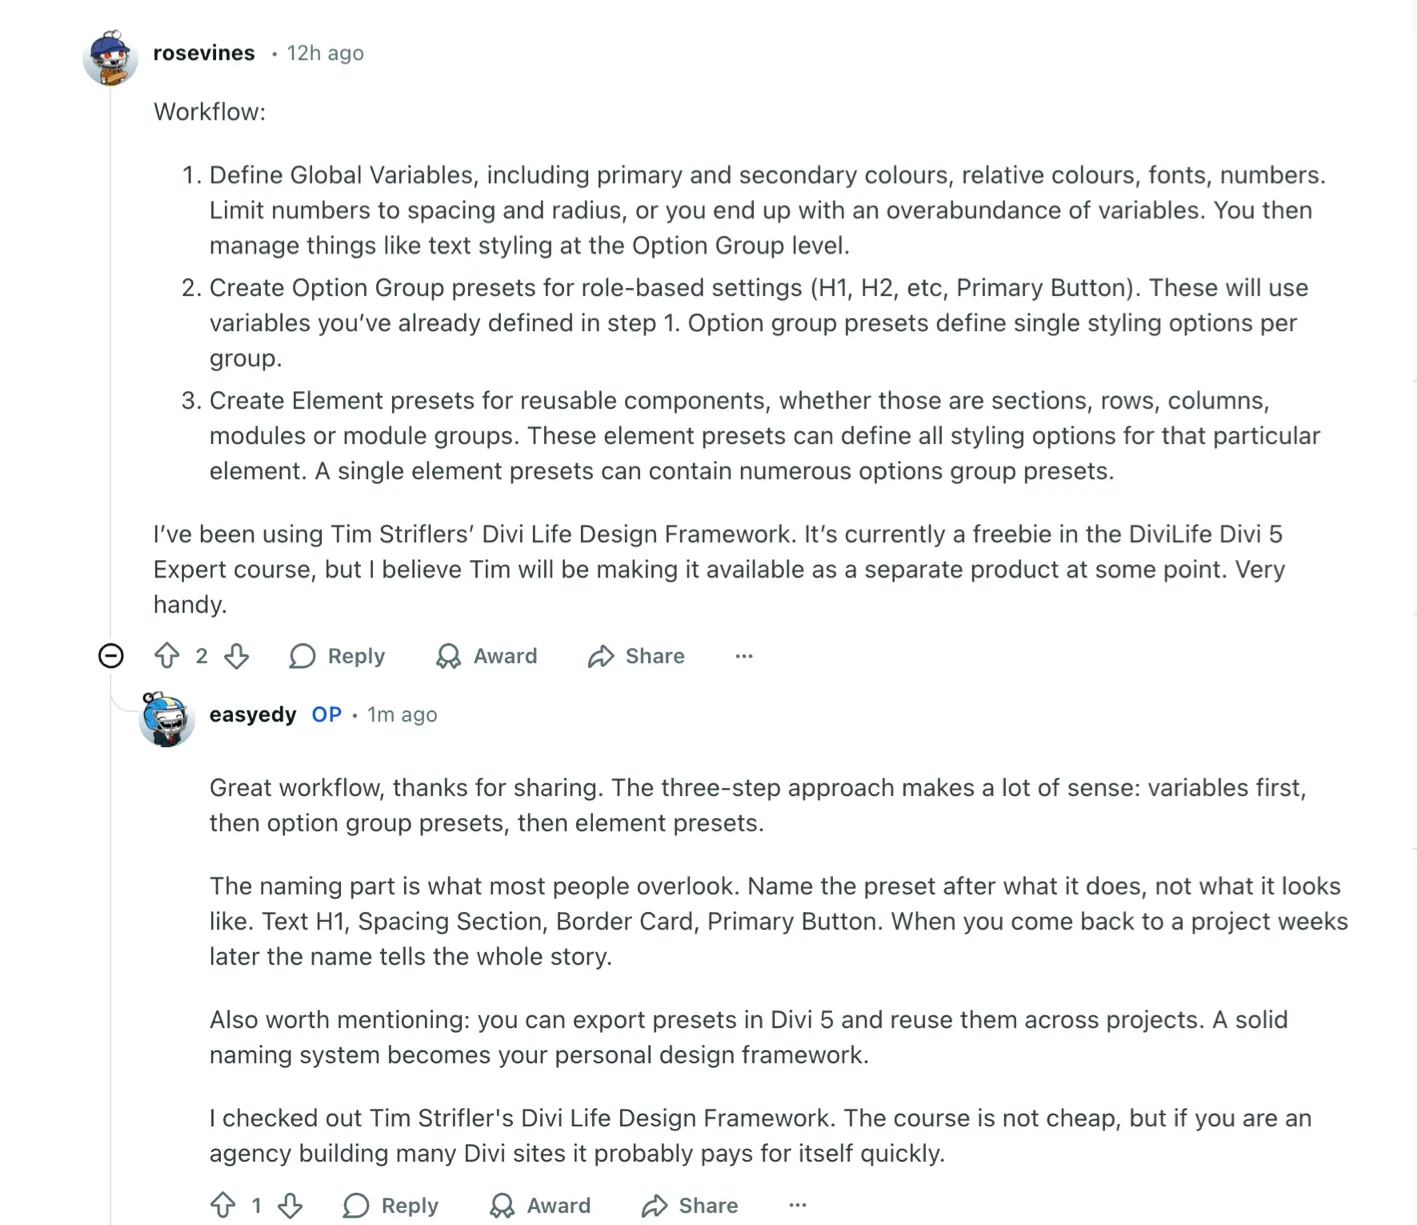
One more thing worth knowing: you can export presets in Divi 5 and import them into another project. A solid naming system and a clean set of presets become your personal design framework that travels with you across every site you build.
Real Examples from My Build
Why I Use Clamp() for Font Sizes
All my font size variables use clamp() values. Clamp defines a minimum size, a preferred size, and a maximum size in one line. The browser picks the right value depending on the viewport width. This means my typography scales smoothly from mobile to desktop without separate breakpoint overrides.
For example, my “xlarge” variable uses a clamp value that starts at 1.88rem and scales up to 1.68rem based on viewport width. This keeps headings readable on small screens without being oversized on large ones.
I use a font clamp calculation, which is available as a WordPress code snippet as well.
Why I Name Variables by Size, Not by HTML Tag
I named my font size variables xlarge, large, medium, normal, and small. The obvious alternative would be to name them H1, H2, H3, H4, and so on. I deliberately chose not to do that.
The reason: not every H1 needs to be the largest font size on the page. A landing page hero might use xlarge for its H1, but a blog post might use large for its H1. If I named the variable “H1” I would be locked into one size for all H1 headings across the site. Size-based naming gives you more creative freedom to assign any size to any heading level depending on the context.
This is a small decision, but it makes a real difference when you manage multiple page types.
Variables vs. Custom CSS Classes
In some situations, a custom CSS class works better than a new variable or preset. I discovered this when styling a specific button that needed a gradient background, custom padding, and a box shadow. I could have created a preset for it, but the style was a one-off. It did not need to be reusable across the site.
Instead, I added a custom CSS class via the Attributes panel in the button module’s Advanced tab and wrote the styles in Theme Options > Custom CSS. This kept my preset library clean and gave me full control over that specific element.
My rule of thumb: if a style will be reused, make it a preset driven by variables. If it is a one-off, use a CSS class.
Text Variables for Business Information
One of the most practical uses of design variables for Divi 5 is storing business information as text variables. Your company name, phone number, email address, or office location can each be a variable. Text variables work like dynamic content that you control globally. Use them in your footer, contact page, header, theme builder templates, or anywhere else.
When the information changes, you update the variable once. Every instance across the site updates with it. For Divi users and designers managing multiple client sites, this alone is worth adopting the variable system.
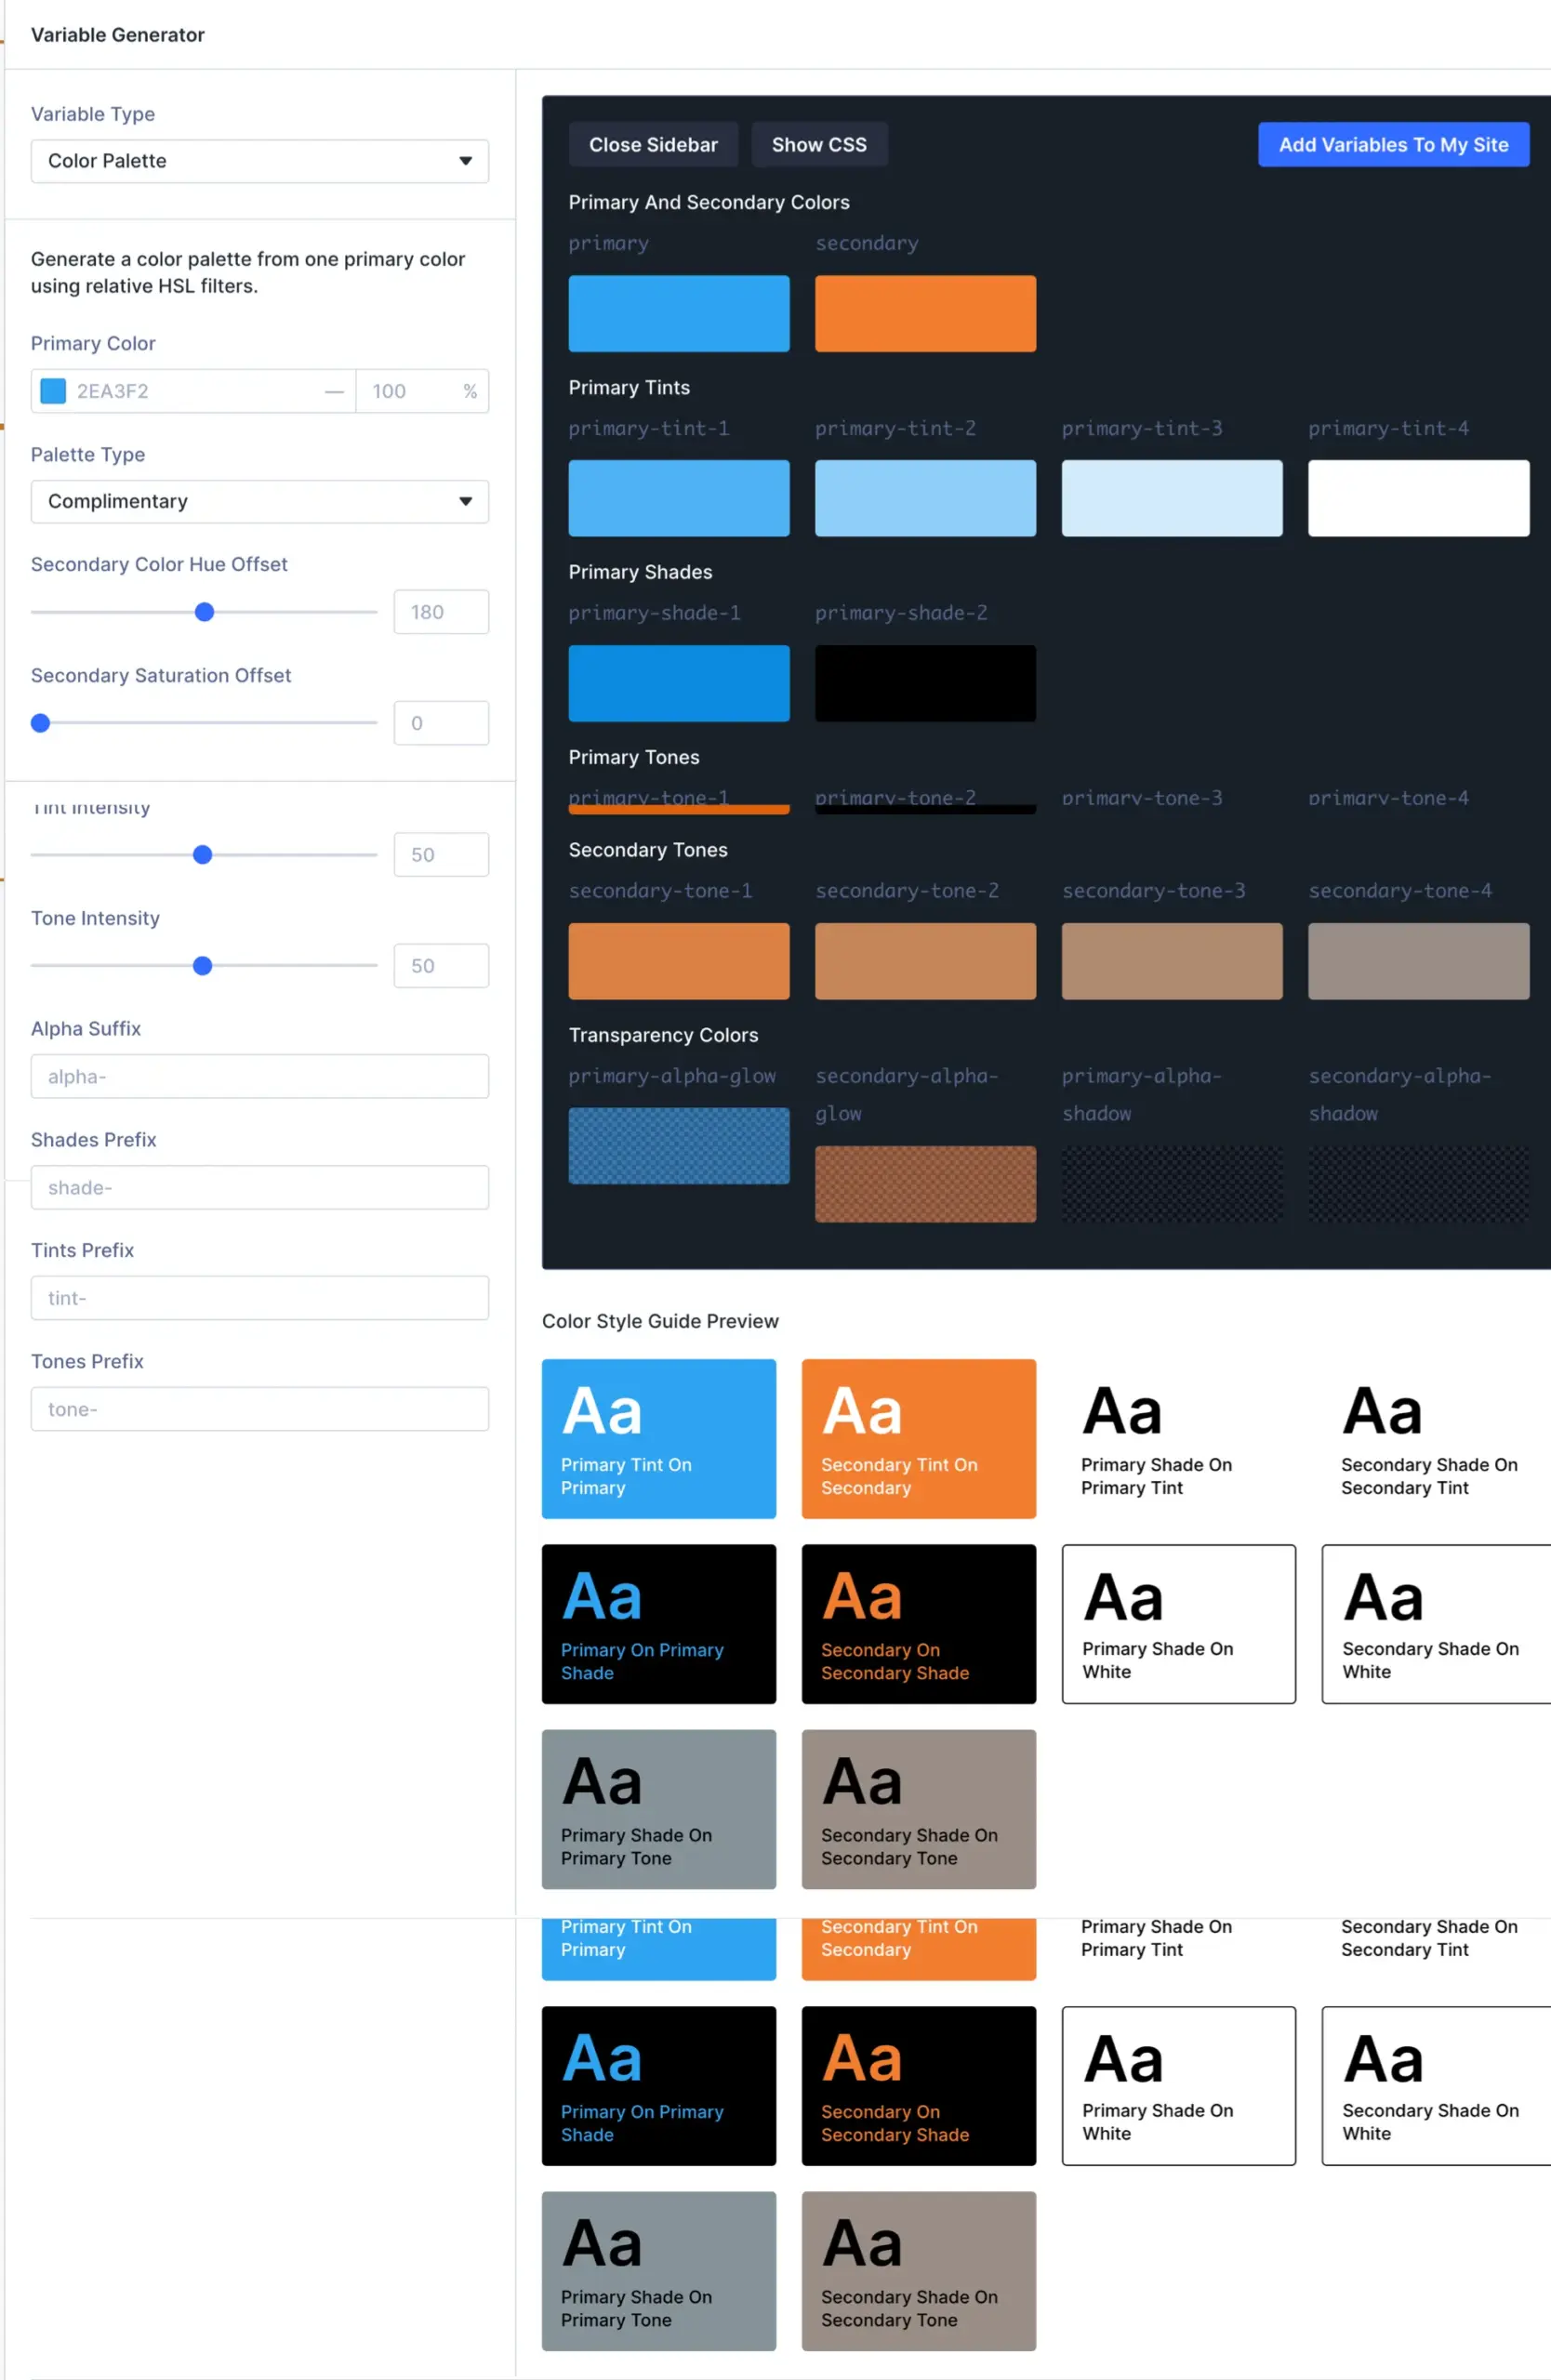
Update May 2026: Elegant Themes released the Variable Generator, which can auto-generate fluid sizing variables with clamp() and color palette systems in a few clicks. It is a great way to get inspired and understand how a sizing or color system can be structured.
However, in my experience, the generator generates many variables, more than most projects need. You can adjust the output, but in some cases, it is more efficient to create your own variables manually with only the values you actually use. I set up my variables by hand before this feature existed and still prefer that approach for smaller projects.
What Is Missing
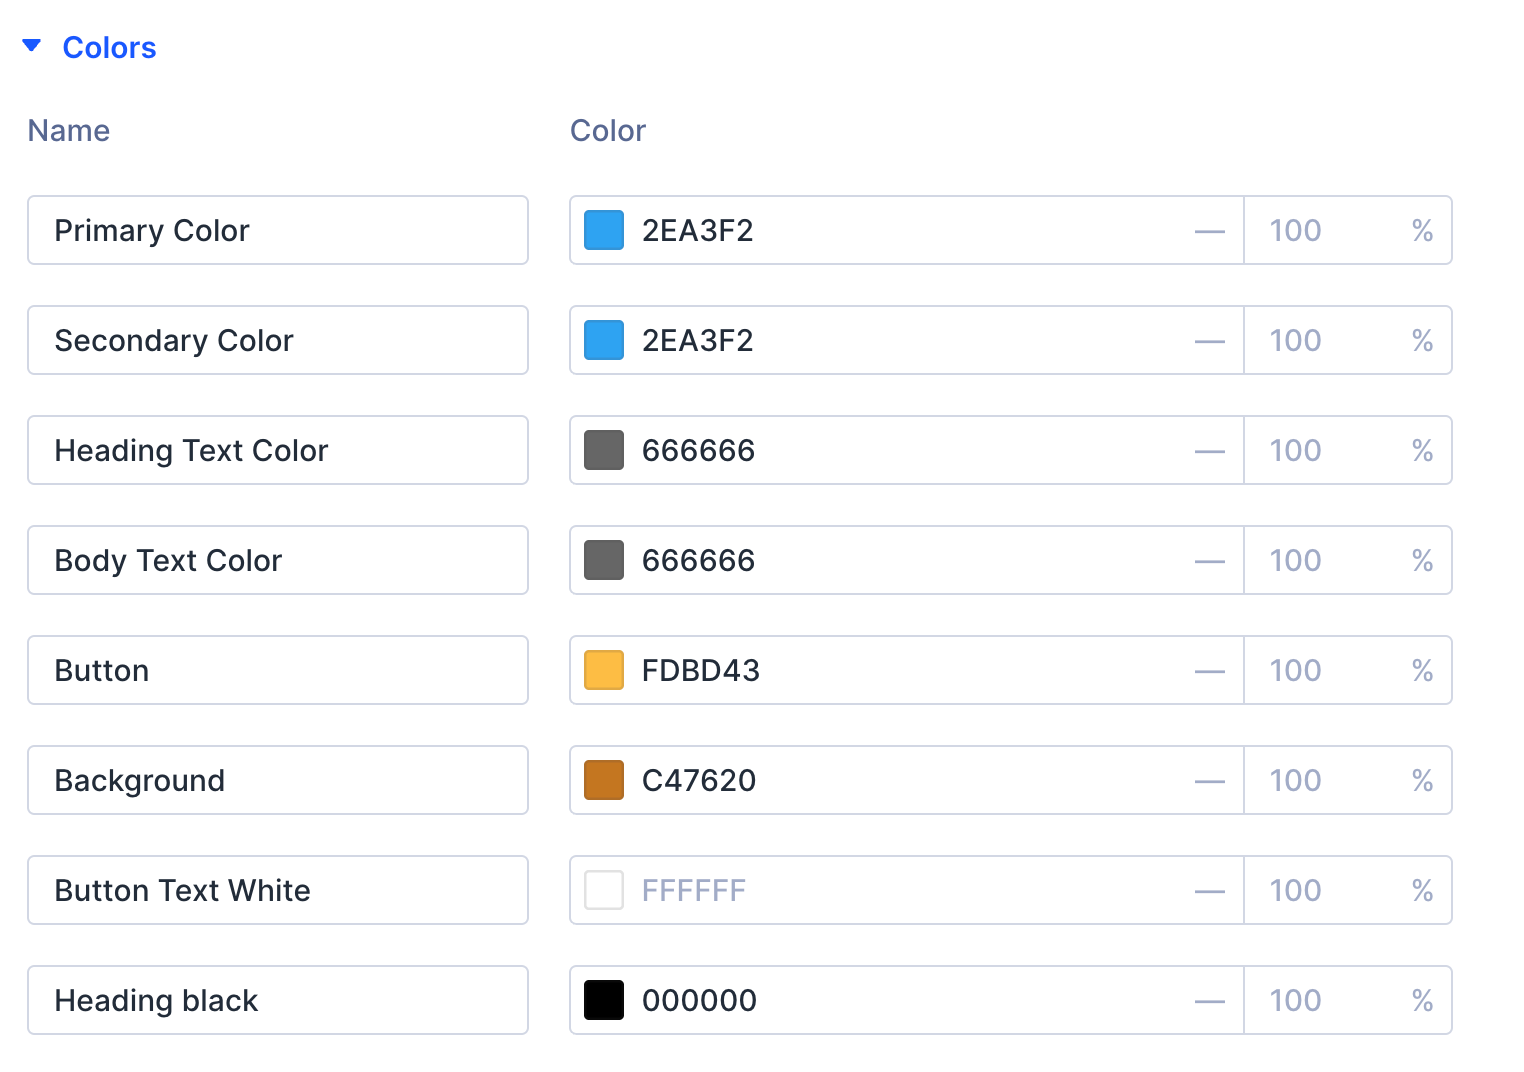
The Variable Manager is well built, but one limitation stands out: you cannot rename the default color variables. The first four global colors (Primary Color, Secondary Color, Heading Text Color, Body Text Color) have locked names. You can add custom colors and name them freely, which is great. But for the defaults, I would prefer to use project-specific names like “Brand Blue” or “CTA Background.”
It is a small thing, but when your color panel grows, generic labels slow you down. I hope Elegant Themes unlocks renaming for default variables in a future update.
The Preset Manager Needs a Filter
Another thing I noticed: the Preset Manager lists every single Divi module, whether you use it or not. On a site where I use maybe 10 to 15 modules, I still have to scroll through dozens of entries like Bar Counter, Filterable Portfolio, or Post Carousel to find the ones I actually work with.
I would like to see an option to hide unused modules or filter the list to show only modules that have active presets. Right now, the Preset Manager can feel overwhelming, especially for Divi users who are new to the design system. A simple toggle to show only modules in use would make a big difference.

One more small thing: the Variable Manager uses accordion behavior. Opening one section automatically closes the previous one. When I want to compare values across variable types, or simply take a screenshot showing two sections at once, this gets in the way. It would be nice to have the option to keep multiple sections open simultaneously.
Wrapping Up
Divi 5 design variables are one of the strongest additions to the builder. Combined with presets, they give you a real design system that keeps your website’s design polished and easy to maintain. Set up your variables first, build presets on top of them, and use CSS classes for one-off exceptions. The system adapts as your project grows and streamlines your entire web design process.
The system is not perfect yet. Default color naming is too rigid, the Preset Manager needs better filtering, and understanding how variables and presets interact takes some time. But once it clicks, your workflow speeds up significantly.
For my full take on everything Divi 5 offers, read my Divi 5 Review: Rebuilt from Scratch, Should You Upgrade or Switch?
I’d love to hear from you. Was this article helpful? Share your thoughts in the comments below. If you prefer, you can also reach me by email or connect with me on Reddit at Navigatetech.
About the author
Hi, I’m Edy Werder. I write hands-on guides about Proxmox, homelab servers, NAS, and WordPress, based on real setups I run and document.
No sponsors, no fluff—just real configs and results.
Enjoying the content?
